
SECDVR416 - Surveillance Camera KONIG - Free user manual and instructions
Find the device manual for free SECDVR416 KONIG in PDF.
| Product type | Digital Hard Disk Recorder (DVR) for surveillance |
| Brand | Konig |
| Model | SECDVR416 |
| Video input channels | 16 (BNC) |
| Video compression | H.264 |
| Maximum storage capacity | 4 TB (hard disks not included) |
| Display resolution | Up to 1440×900 (VGA, 16:10 format) |
| Video outputs | VGA, HDMI, BNC |
| Audio inputs | 16 (4 + 12 via BNC) |
| Audio output | 1 (RCA) |
| Power supply | 12 V DC / 5 A |
| Network connectivity | Ethernet (RJ-45) |
| Additional interfaces | RS485, sensor/alarm, 2 USB ports (mouse, storage) |
| Remote control | Included (infrared) |
| Remote access | Smartphone (Symbian, Windows Mobile, iPhone, Blackberry, Android) and web browser |
| Main functions | Manual recording, search, playback, PTZ, motion detection, email notification |
| Hard disk installation | Removable drawer and internal slot (mounting brackets included) |
| Maintenance and cleaning | Clean with a dry cloth; do not use solvents or abrasive products |
| Safety | Unplug before servicing; do not expose to water or humidity; disassembly reserved for qualified technician |
| Weight | Not specified |
| Dimensions | Not specified |
Frequently Asked Questions - SECDVR416 KONIG
User questions about SECDVR416 KONIG
0 question about this device. Answer the ones you know or ask your own.
Ask a new question about this device
Download the instructions for your Surveillance Camera in PDF format for free! Find your manual SECDVR416 - KONIG and take your electronic device back in hand. On this page are published all the documents necessary for the use of your device. SECDVR416 by KONIG.
USER MANUAL SECDVR416 KONIG
MANUAL DE USO (p. 29)
Disco Duro Grabador
This manual is a short descriptive guide for the digital hard disk recorder. For a complete explanation on how to use the digital hard disk recorder, refer to the full English manual supplied on the CD. The Konig Electronic network DVR400 series is ideal for surveillance applications, such as in shops, offices or at home. The wide range of features includes the latest H.264 video compression technology, up to 4 TB storage capacity (not included), remote viewing directly on Smartphone* or Internet browser and event notification by e-mail. With a user-friendly graphic interface providing graphic icons and visual indicators to control and configure the DVR. Supports 16:10 widenscreen VGA resolution of 1440x900.
- Supports Symbian, Windows® Mobile, iPhone, Blackberry & Android
Notes:
- The default on the screen display is set to the VGA output channel. To change this in the menu, please refer to the full English manual, Section 4.11 Main Menu Setup.
- If the on-screen display is not available, press the "0" button on the remote control or the "0" button on the front panel for 5 seconds. You will hear a beep sound as confirmation. This procedure can also be used to switch manually between VGA or BNC output.
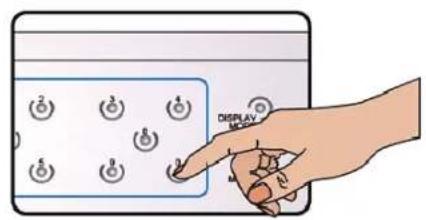
Description of front panel:
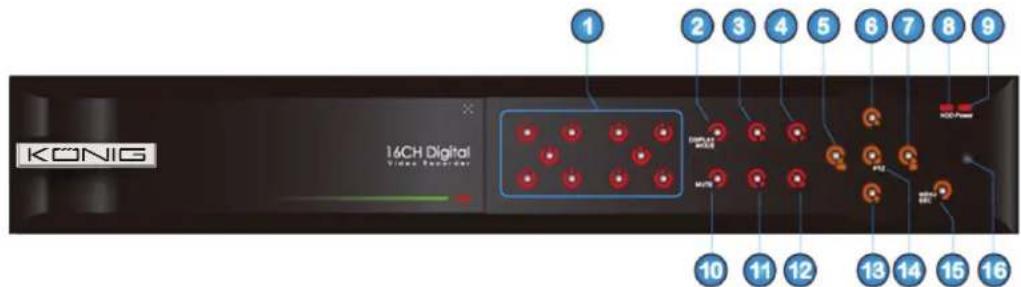
- Channel select and numeric input
- Preview (multiple CH display)
- Pause / play frame by frame
- Convert to play status
- Move left / RWD
- Move up
- Move right / FWD
-
HDD indicator
-
Power indicator
- Audio control (mute key)
- Manual recording
- Stop
- Move down
- Enter PTZ control, select (enter)/(edit) operation
- Enter main menu / exit
- IR receiver
Description of rear panel:
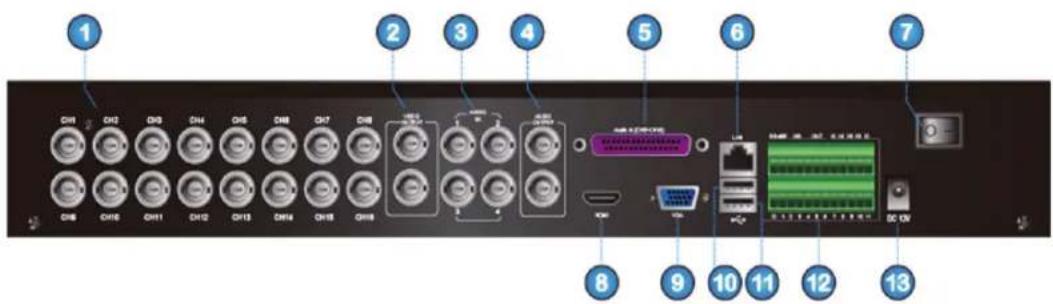
- Camera input channel 1 to 16
- Main video output / spot video output
- Audio input channel 1 to 4
- Audio output / spot and main audio output / audio sequence output
- Audio input channel 5 to 16
- LAN / Ethernet
- Main power switch
- HDMI output
- VGA output
- USB port for mouse
- USB port for flash drive, hard drive, etc.
- RS485 / sensor / alarm interface
- DC 12 V/5 A input
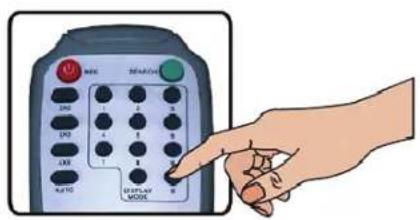
Description of remote control:

| Key Title Key Function | |
| REC Manual recording | |
| SEARCH Enter recording search menu | |
| 2×2 Quad display | |
| 3×3 9-CH display | |
| 4×4 16-CH display | |
| AUTO Countdown display | |
| 0~9 Channel select; numeric key | |
| DISPLAYMODE | Multiple CH display (Quad, 9CH, 16CH, single channel display) |
| ▲ UP | |
| ▼ DOWN | |
| / ▲ | Left/right key |
| ENTER Select / Edit key; Enter key | |
| Menu/ESC Enter main menu / Exit | |
| PIP PIP display mode | |
| MUTE Mute key | |
| FWD Forward (x2, x4, x8) | |
| REW | Rewind (x2, x4, x8) |
| PLAY | Enter recording search, play recording event |
| STOP Manual stopping of playback | |
| PAUSE/FRAME | Pause / play frame by frame |
| SLOW | (1/2, 1/4, 1/8) Slow play |
| Z+ | Zoom out video area |
| Z- Zoom in video area | |
| F+ | Extend focus |
| F- Extend focus | |
| I+ | Add PTZ brightness |
| I- | Decrease PTZ brightness |
| PTZ | Allows you set presetting bit and control PTZ |
| LOCK | Lock system |
Mouse operation:
| Left click In the OSD menu, click the left button to select & edit. | |
| Right click | In live display mode, clicking the right button will display the pop-up menu bar. |
| In Main menu or sub menu mode, clicking the right button will exit the current menu. | |
| Double-click left mouse button | Double-click the live image of any channel for full screen display; by double-clicking again, the display will return to the display of all cameras. |
| Use mouse to drag a line | In motion mode, this function will select the motion area; In [Colour Setup] menu mode, it will adjust the colour control bar and volume control bar. |
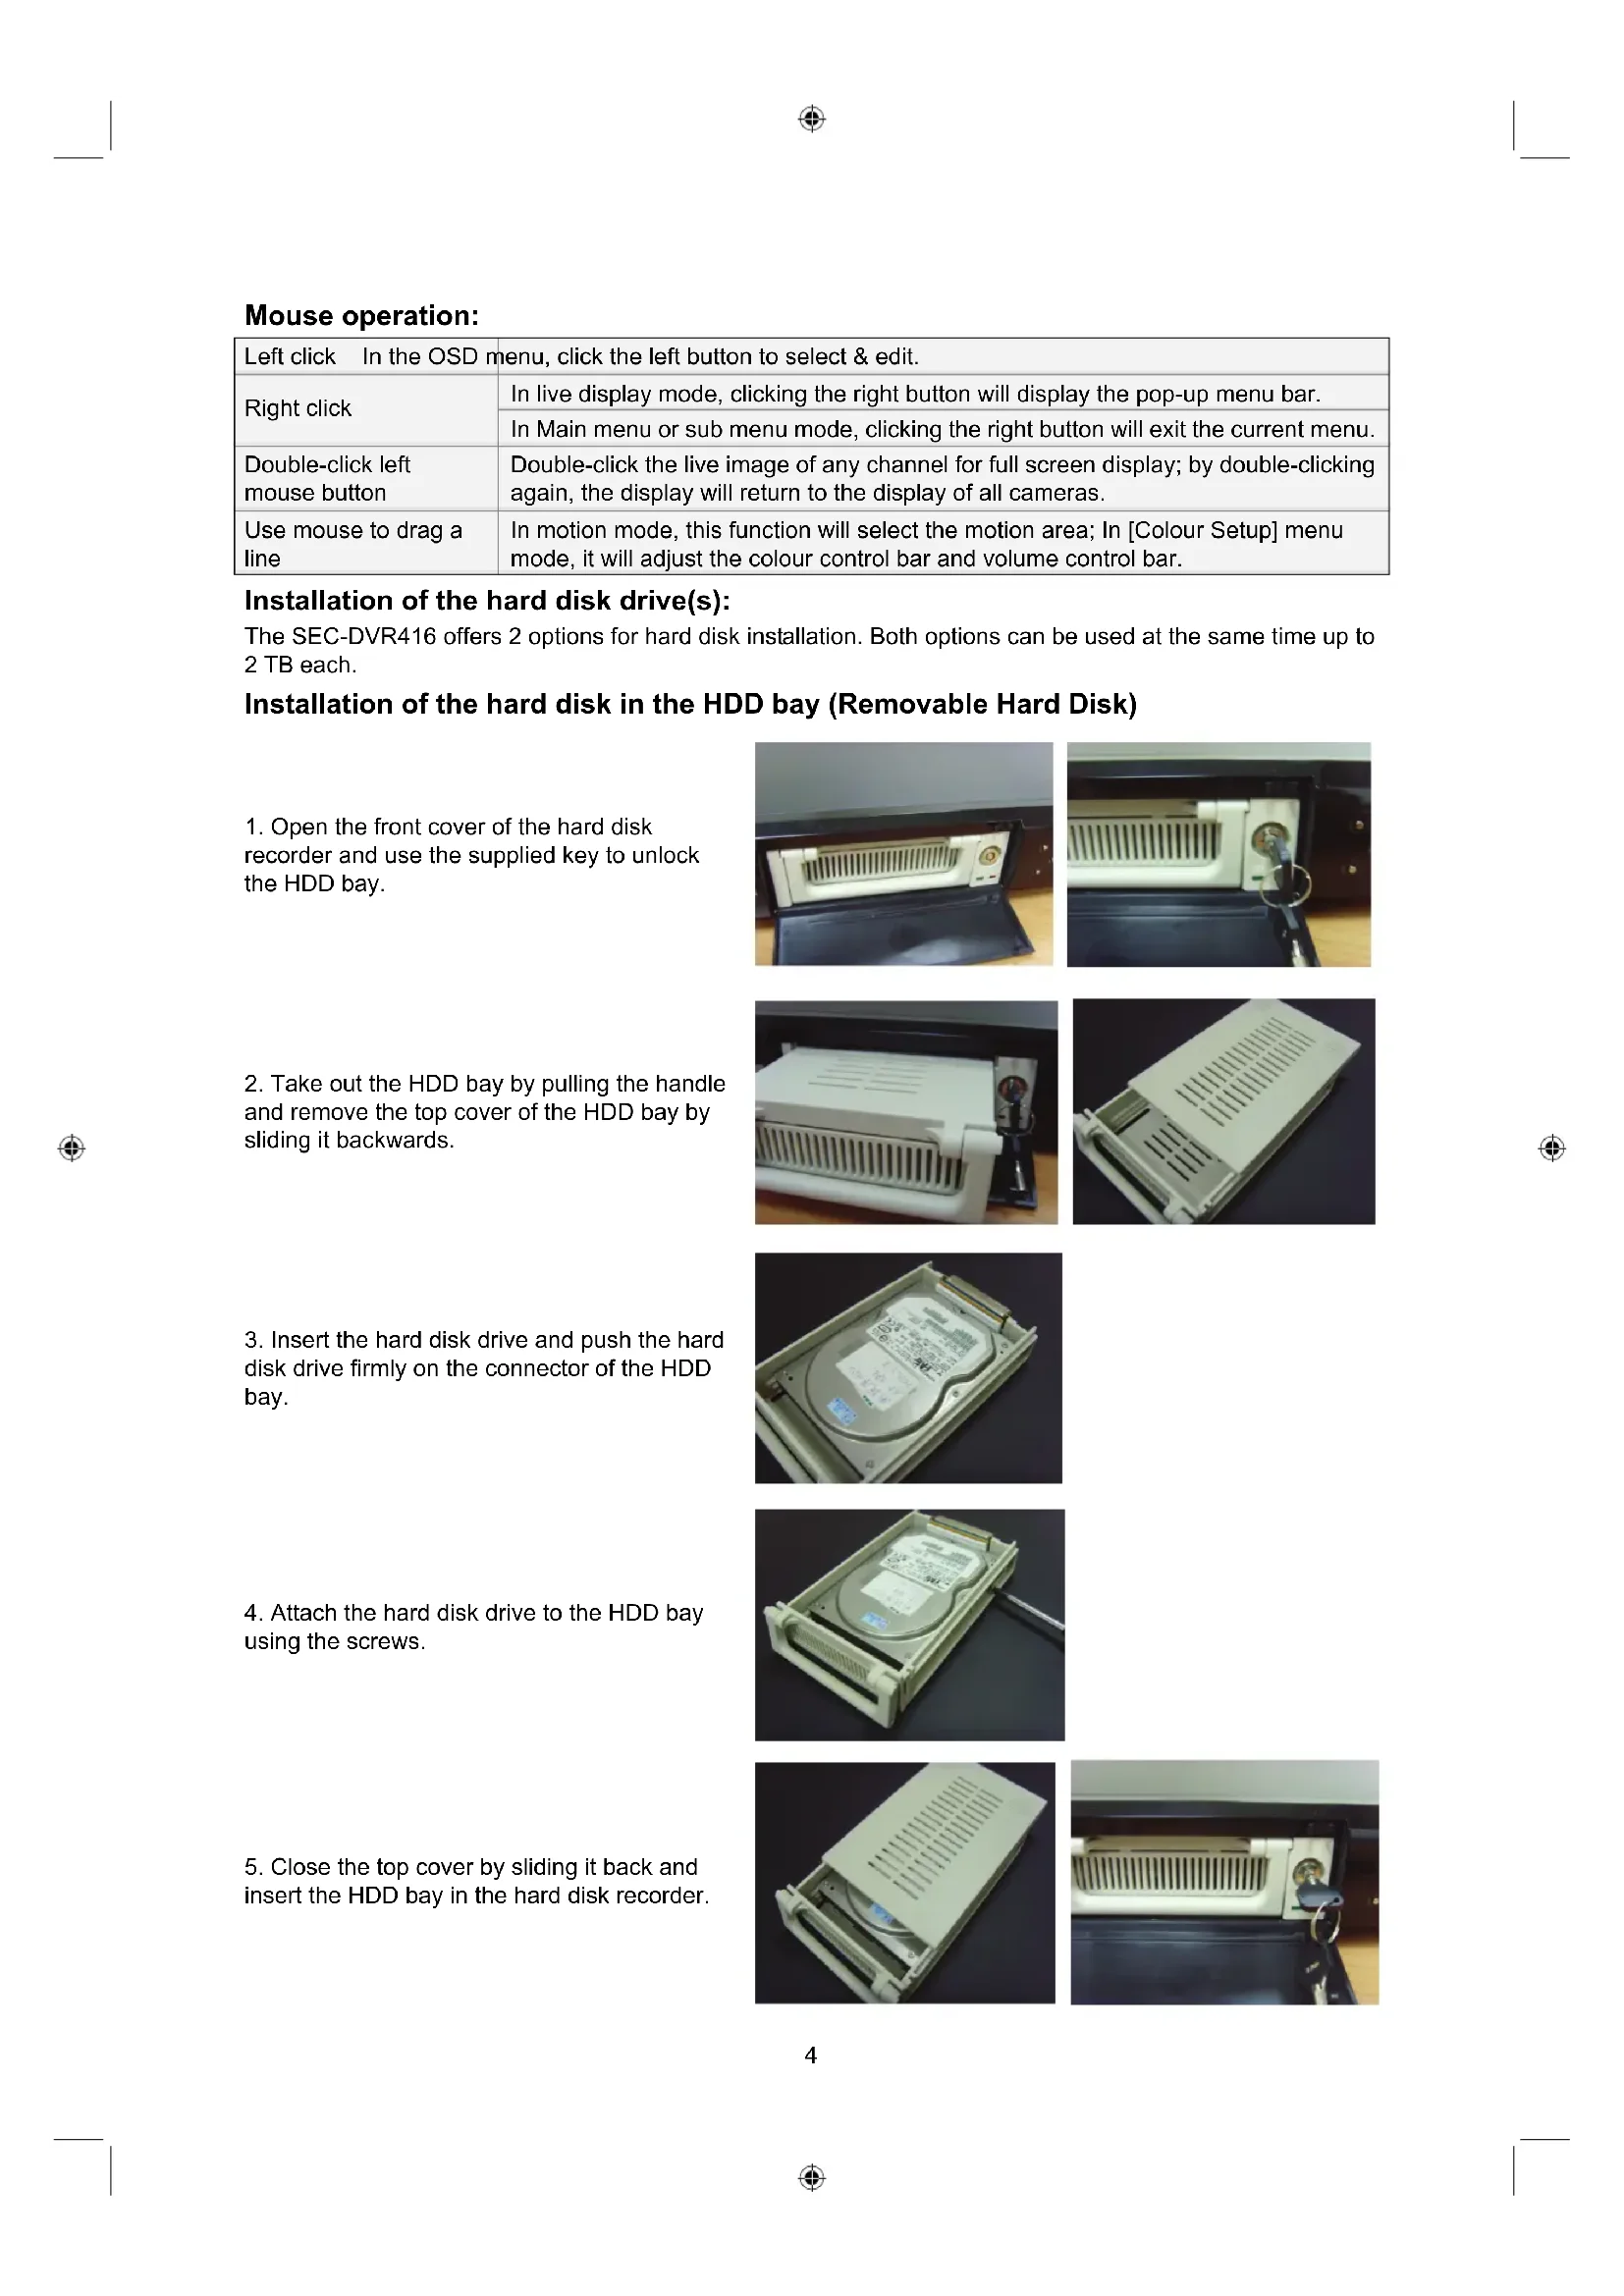
Installation of the hard disk drive(s):
The SEC-DVR416 offers 2 options for hard disk installation. Both options can be used at the same time up to 2 TB each.
Installation of the hard disk in the HDD bay (Removable Hard Disk)
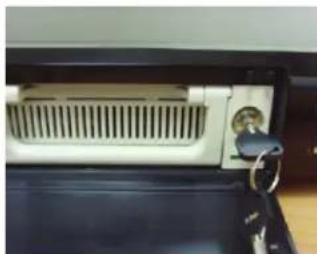
- Open the front cover of the hard disk recorder and use the supplied key to unlock the HDD bay.

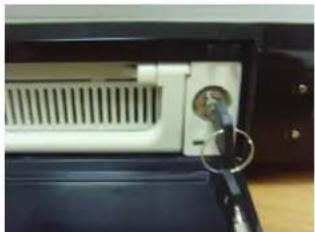
- Take out the HDD bay by pulling the handle and remove the top cover of the HDD bay by sliding it backwards.
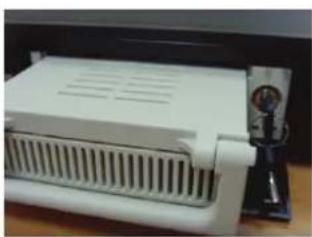

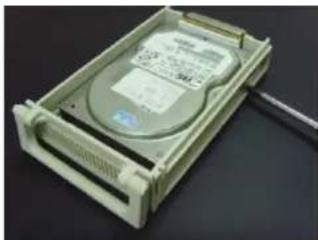
- Insert the hard disk drive and push the hard disk drive firmly on the connector of the HDD bay.

- Attach the hard disk drive to the HDD bay using the screws.
- Close the top cover by sliding it back and insert the HDD bay in the hard disk recorder.

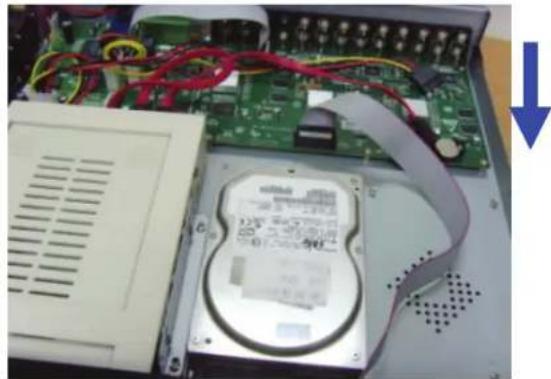
Installation of the hard disk inside the hard disk recorder:
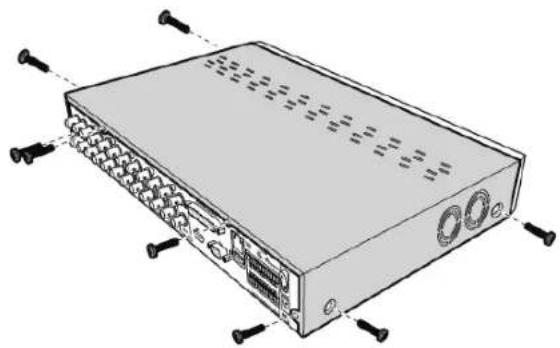
- Loosen the screws from the left, right and rear sides of the housing.
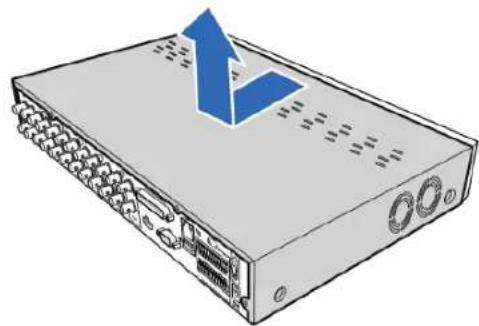
- Push back the cover and then lift it to remove the cover.
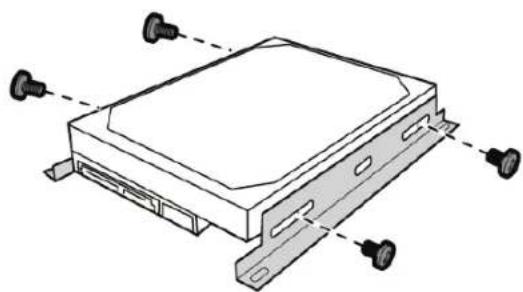
- Detach the screws to remove the hard disk brackets first.
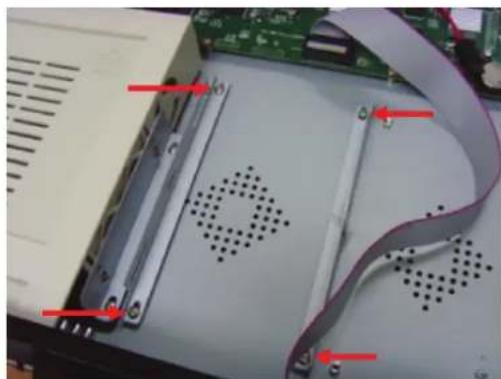
- Attach the brackets to the hard disk with the supplied screws.
-
Attach the bracket back to the compartment using 4 screws.
-
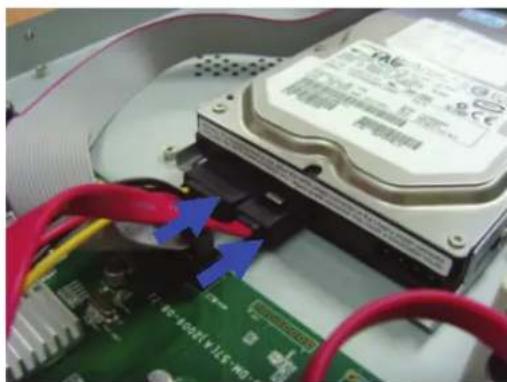
Connect the data and power cables to the hard disk drive (HDD) and the DVR.
-
Attach the cover and the screws back in place.

Operating the hard disk recorder:
When the hard disk drive is installed and all cables are connected, the hard disk recorder is ready for use. To configure the advanced settings of the hard disk recorder, you have to access the menu. For instructions on how to set the hard disk recorder with the menu, please refer to the full English manual supplied on the CD.
Safety precautions:
This product should ONLY be opened by an authorized technician when service is required. Disconnect the product from mains and other equipment if a problem should occur. Do not expose the product to water or moisture.
Maintenance:
Clean only with a dry cloth. Do not use cleaning solvents or abrasives.
Warranty:
No guarantee or liability can be accepted for any changes and modifications of the product or damage caused due to incorrect use of this product.
General:
- Designs and specifications are subject to change without notice.
- All logos brands and product names are trademarks or registered trademarks of their respective holders and are hereby recognized as such.
- This manual was produced with care. However, no rights can be derived. König Electronic can not accept liability for any errors in this manual or their consequences.
- Keep this manual and packaging for future reference.
Attention:

This product is marked with this symbol. It means that used electrical and electronic products should not be mixed with general household waste. There is a separate collections system for these products.
DEUTSCH
Einleitung:
Installation de disque(s) dur(s):
- Supporta Symbian, Windows Mobile, iPhone, Blackberry ed Android