
HR41120E - Electric heater HONEYWELL - Free user manual and instructions
Find the device manual for free HR41120E HONEYWELL in PDF.
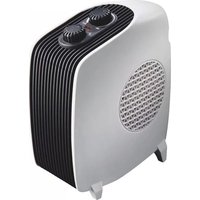
| Product Type | Oil-filled electric radiator |
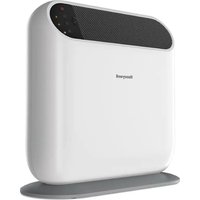
| Brand | Honeywell |
| Model | HR41120E |
| Power (3 levels) | 800 / 1200 / 2000 W |
| Power supply | 230 V ~ 50 Hz |
| Double insulation (class II) | Yes, no grounding required |
| Adjustable thermostat | Yes, with automatic shut-off |
| Overheat protection | Yes, automatic shut-off |
| Casters | Yes, mounted on support rails |
| Carrying handle | Yes |
| Usage | Indoor only, minimum surface area 4 m² |
| Safety distance | 100 cm from flammable materials |
| Do not cover | Mandatory, risk of overheating |
| Cleaning | Soft dry cloth, vacuum for grilles |
| Repairability | Do not open, contact an authorized service |
| Power cord | Unroll completely, do not use an extension cord |
| Warranty | See purchase conditions, do not open or warranty void |
Frequently Asked Questions - HR41120E HONEYWELL
User questions about HR41120E HONEYWELL
0 question about this device. Answer the ones you know or ask your own.
Ask a new question about this device
Download the instructions for your Electric heater in PDF format for free! Find your manual HR41120E - HONEYWELL and take your electronic device back in hand. On this page are published all the documents necessary for the use of your device. HR41120E by HONEYWELL.
USER MANUAL HR41120E HONEYWELL
natural_image
Line drawing of a multi-tiered air conditioner unit with wheels and control panel (no text or symbols)HR-40715E
HR-40920E
HR-40920FE
HR-40920TE
HR-41120E
HR-41125E
CONTENTS ENGLISH
INNEHÅLLSFÖRTECKNING SVENSKA
INNHOLDSFORTEGNELSE NOESK
INDHOLDSFORTEGNELSE DANSK
SISÄLLYSLUETTELO SUOMI
SPISTREŚCIPOLSKI
TARTALOMJEGYZÉK MAGYAR
OBSAH ČESKY
SADRŽAJ HRVATSKI
VSEBINA SLOVENSKO
SISUKORD EESTI
TURINYS 62 LIETUVIŲ
SATURA RĀDĪTĀJS LA6VIEŠU
FİHRİST TÜRKÇE
natural_image
Technical line drawing of a mechanical component with internal grid structure (no text or symbols)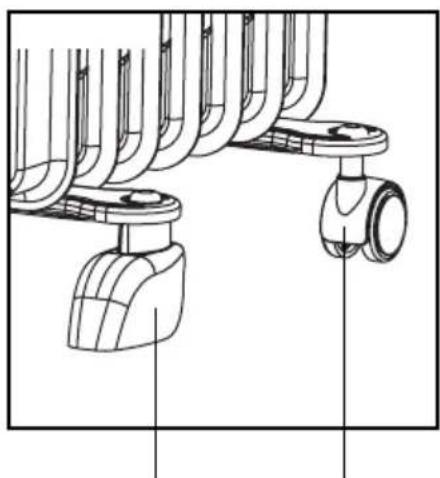
natural_image
Technical line drawing of mechanical components with no visible text or symbols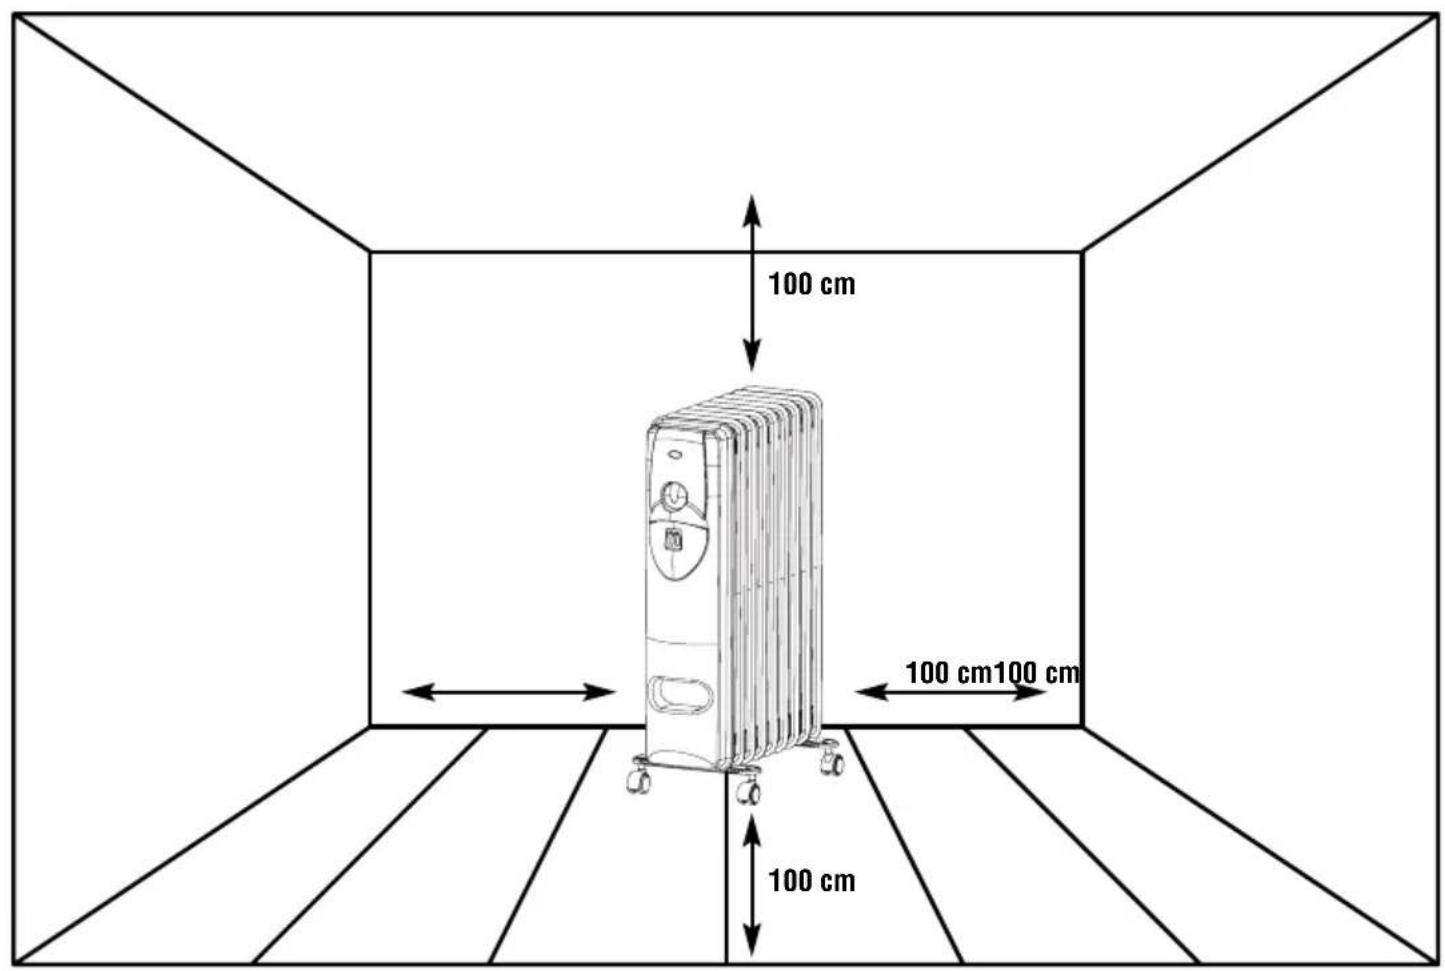
natural_image
Close-up of a metallic industrial device with multiple blades and a cylindrical top (no visible text or symbols)
Fig. 2 Fig. 1

natural_image
Completely black image with no visible content or text.IMPORTANT SAFETY INFORMATION
Before starting to use the heater, read through all the instructions and keep this user manual in a safe place for future reference.
- Extreme care is essential when the heater is used in the vicinity of children or frail persons and when the heater is running without supervision.
- Do not use the heater outdoors.
- Only operate the heater when it is standing upright and the castors and feet have been mounted completely. Model HR-40715E: Make sure that the feet always point to the front, so that the heater is standing securely and cannot tip over to the front.
- Unwind the power cord completely. An incompletely unwound power cord can lead to overheating and cause a fire. Do not touch the power cord with wet hands. Make sure that no objects are resting on the power cord or can come in contact with hot parts. Position the power cord so that nobody can trip over it and the power plug is easily accessible. Do not locate the power cord under carpets, rugs or similar fittings.
- Do not use an extension cord, a multi-way connector or a continuously variable speed controller. This can cause overheating, fire or electric shock.
- Connect the heater only to a single-phase power socket with the current as stated on the type plate of the appliance. The heater has double electric insulation (Class II) and does not therefore need to be earthed.
- Always switch the heater off and always pull the plug out of the power socket when the heater is not in use or before you move, handle or clean it. Do not tug at the power cord to pull the plug out. Only handle the heater with dry hands.
- Do not use the heater anywhere near easily inflammable gases or substances such as solvents, lacqueurs, glues, etc. Some of the parts inside the heater are hot and could melt or throw sparks.
- Do not install the heater immediately underneath a power socket. The heater must not be used in rooms smaller than 4 m^2 .
- Do not use the heater in the bathroom, laundry room or similar damp indoor rooms. Do not locate the heater where it could fall into a bathtub or other water container.
- Do not use the heater in any kind of vehicle (e.g. portacabins, lifts, caravans, cars, sheds) or similar enclosed spaces.
-
The use of a heater in small, enclosed spaces requires particular caution, especially if the heater does not have a thermostat. We recommend you to control the room temperature frequently.
-
Caution: The heater gets hot when it is running. Keep burnable materials such as cushions, bedding, furniture, paper, curtains and clothing at least 100 cm away from the heater. Use the transport handle to transport the appliance.
-
Do not cover the heater up (Symbol on the heater). This can lead to overheating, fire or electric shock. Do not use the heater on soft, elastic surfaces such as beds.
-
Do not plunge the heater into water or any other liquids and do not pour water or any other liquids over or into the appliance.
-
Clean the heater regularly by following the cleaning instructions.
-
The heater may only be used according to the instructions in this user manual. Non-observance of these instructions could result in injuries, a fire, an electric shock or faults in the appliance.
-
The appliance is intended only for private use indoors and not designed for commercial use.
-
If the power cord of the heater is damaged, it must be replaced by a manufacturer-approved service centre or by similarly qualified persons, so as to avoid damage.
-
Do not use this heater if it is damaged or shows signs of damage, if it has fallen over, or does not function properly. Pull the plug out of the power socket.
-
The heater is filled with an exact amount of special oil. Repairs which necessitate opening the oil container may only be carried out by the manufacturer or a manufacturer-approved service centre. Regulations regarding the disposal of oil must be observed when the appliance is scrapped.
CONSTRUCTION
- Control panel
- Toggle switch
- Power lamps
- Thermostat switch
- Cord compartment
- Power cord with power plug
- Mounting track
- U bracket
- Castors
- Feet (HR-40715E only)
- Turbo fan
- Turbo fan toggle switch
- Timer
- Timer keys
- Transport handle
ENGLISH
FIRST TIME OF USE
- Read through all the instructions before starting to use the heater.
- Unpack the heater, all the accessories and the power cord. Remove all the packaging materials and dispose of them for recycling.
- Mount the castors (9) and feet (10) according to "Mounting the castors and feet".
- To get rid of the smell that develops during the first time of use, allow the heater to operate with maximum output for 2 hours.
- It is normal for the heater to make noises during the first time of use.
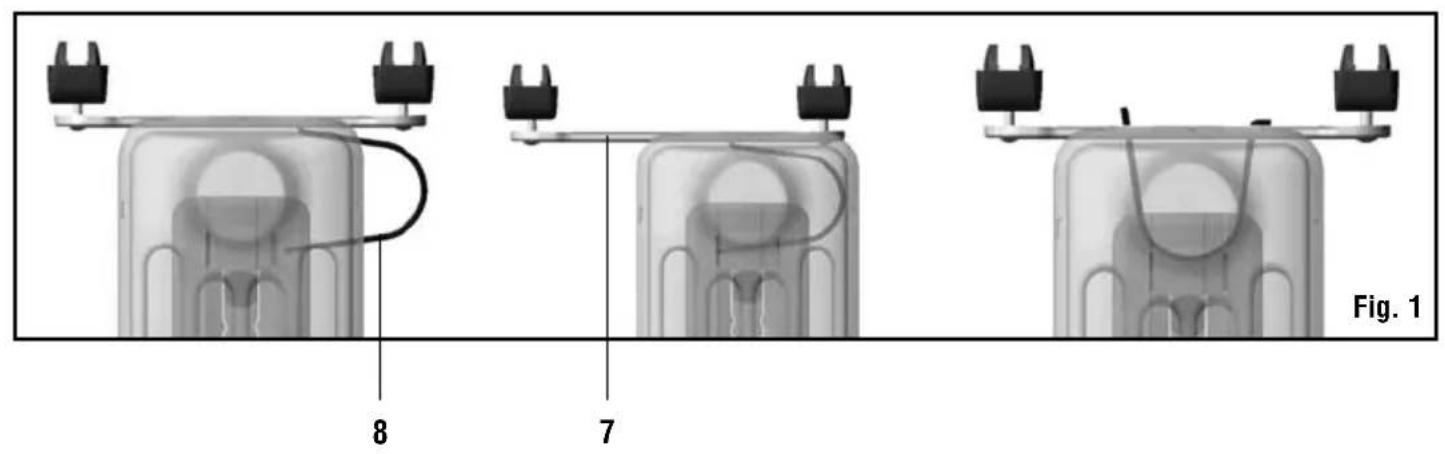
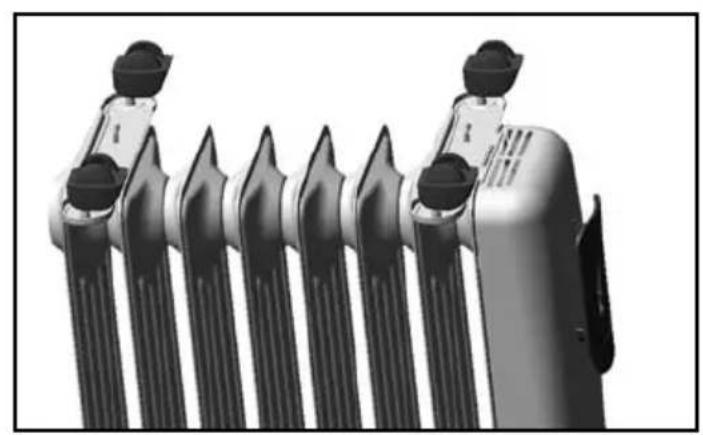
MOUNTING THE CASTORS AND FEET (Fig. 1)
- Stand the heater upside down. The appliance is standing upside down when the control panel (1) is at the bottom.
- Press the castors (9) firmly onto the pegs of the mounting tracks (7). You hear them "click".
- Fit the mounting tracks with the mounted castors on each side of both outer fins, Take the wing bolt of the U bracket (8) off. Hook the U bracket with the hook side onto the mounting track. Push the bracket with the thread side between the fins and push the thread side through the second opening in the mounting track. Using the wing bolt, fix the two mounting tracks firmly onto the heater.
- Check that the mounting tracks are firmly fixed to the heater and cannot become loose.
- Stand the heater upright on the castors.
Only HR-40715E (Fig. 2)
- This heater has two castors (9) and two feet (10). Press the castors firmly onto the pegs of one of the mounting tracks and the two feet on the other one.
- Fit the mounting track with the feet (10) at the front on the two outer fins and the mounting track with the castors (9) onto the two back fins. Make sure that the feet always point to the front, so that the heater is standing securely and cannot tip over to the front. Secure the mounting tracks as described under “mounting the castors and feet”, No. 3-5.
USER INSTRUCTIONS
-
Only locate the heater on a firm, even surface where the heater cannot fall over, fall down or be knocked over. For Model HZ-40715E make quite sure that the feet (10) are pointing forwards
-
Check that the toggle switch (2) is on 0, so that the heater is switched off. Do not touch the cord with wet hands.
- Make sure that the heater is not covered up.
- Using the toggle switches (2), set the heater to one of the three operating speeds:
Power setting in Watts:
| Model Setting I Setting II Setting I + II | |||
| HR-40715E 600 | 900 1500 | ||
| HR-40920E 800 | 1200 2000 | ||
| HR-40920TE 800 | 1200 2000 | ||
| HR-40920FE 800 | 1200 2000 | + 500 W turbo | |
| HR-41120E 800 | 1200 2000 | ||
| HR-41125E 1000 | 1500 2500 | ||
- Turn the thermostat switch (4) clockwise to the highest position. The power lamps (3) of the activated toggle switches light up.
- When the desired room temperature has been reached, turn the thermostat switch (4) anti-clockwise until you hear it "click". The heater is now switched off and the power lamps go off.
- Now turn the thermostat switch (4) slightly back. The heater will now switch on and off automatically and maintain the desired room temperature.
- The further clockwise you turn the thermostat switch, the higher the room temperature will be.
- Before you handle, move or clean the heater, switch it off with the toggle switches (2) and turn the thermostat switch (4) to the lowest position. Pull the power plug out of the power socket and allow the heater to cool for at least 20 minutes. Always use the transport handle (15) to transport the heater.
Timer (Model HR-40920TE only)
- Set the current time with the pointer on the clock.
- Preset the desired heating period of the radiator by pushing in the desired number of little grey keys (14) grouped round the centre plate of the timer. Each key corresponds to 15 minutes running time. Please note: All keys are pushed in ex factory.
- The heater switches on and off automatically at the times set by pushing the grey keys in. The selected switch on and off times can be changed by pushing the grey keys back into their original positions and setting new times.
- If you wish to use the heater manually without the timer, all the keys must be pushed in.
Turbo fan (only Model HR-40920FE)
You can use the turbo fan (11) on its own or with the heater. The turbo fan operates with 500 Watts. You can reach the desired room temperature faster by using the turbo fan.
Turbo fan only
- Press the toggle switch of the turbo fan (12) to Position I and set the toggle switches of the radiator (2) to 0.
- The turbo fan draws the cold air in at the front and emits hot air laterally into the room.
- Preset the desired room temperature with the thermostat switch (4) as described in the "user instructions". Warmth will now only be emitted by the turbo fan.
- Start using the heater as described in the user instructions.
- Press the toggle switch of the turbo fan (11) to Position I.
- Warmth will now be emitted by both the heater and the turbo fan.
- We recommend you to turn the turbo fan off as soon as the desired room temperature has been reached.
Please note: Make sure that the air intake and outlet vents of the turbo fan are not blocked, as this can lead to overheating, fire or electric shock.
Overheating shut-off for the heater
- The heater is equipped with overheating shut-off which automatically switches the heater off if the temperature in the appliance exceeds the normal operating temperature. This protective device applies only to the appliance itself and has no influence on room temperature regulation.
- If the overheating shut-off is activated, the heater will not function.
- Press all the toggle switches to 0, turn the thermostat switch (4) to the lowest position and pull the power plug out of the power socket.
- Allow the heater to cool for at least 20 minutes.
- Remove any objects or use a vacuum cleaner to clean the vents which have caused faulty running or overheating.
- Resume using the heater as described in the "user instructions".
CLEANING, MAINTENANCE, DISPOSAL
We recommend you to clean the heater regularly. Follow the instructions for cleaning and maintenance so as not to impair the functioning of the heater.
Cleaning
- Before you start with the cleaning, switch the heater off with all the toggle switches and pull the power plug out of the socket. Allow the heater to cool for at least 20 minutes.
- Clean the air intake and outlet vents of the turbo fan with a vacuum cleaner to remove the dust from the motor and heating element.
- Clean the outside of the appliance with a soft, dry cloth. Do not use water, wax, polish or any chemical cleaners.
- Resume using the heater as described in the "user instructions".
Disposal
This symbol on the product or its packaging indicates that the appliance cannot be treated as normal domestic trash, but must be handed in at a collection point for recycling electric and electronic appliances.
Your contribution to the correct disposal of this product protects the environment and the health of your fellow men. Health and the environment are endangered by incorrect disposal.
Further information about the recycling of this product can be obtained from your local town hall, your refuse collection service, or in the store at which you bought the product.
This regulation is valid only in EU member states.
CONDITION OF PURCHASE
As condition of purchase the purchaser assumes responsibility for the correct use and care of this KAZ product according to these user instructions. The purchaser or user must himself or herself decide when and for how long this KAZ product is in use.
WARNING: IF PROBLEMS ARISE WITH THIS KAZ PRODUCT, PLEASE OBSERVE THE INSTRUCTIONS IN THE GUARANTEE CONDITIONS. DO NOT ATTEMPT TO OPEN OR REPAIR THE KAZ PRODUCT YOURSELF, AS THIS COULD LEAD TO TERMINATION OF THE GUARANTEE AND CAUSE DAMAGE TO PERSONS AND PROPERTY.
Technical modifications reserved
MANUAL DE INSTRUÇÕES
PUHDISTUS, HUOLTO, JÄTEHUOLTO
OLULISED OHUTUSJUHISED
The Honeywell trademark is used by
Kaz, Inc. under licence from Honeywell
Intellectual Properties, Inc.
HR-40715E/09/11-OM//1//2006-06-28

- IMPORTANT SAFETY INFORMATION
- CONSTRUCTION
- ENGLISH
- FIRST TIME OF USE
- MOUNTING THE CASTORS AND FEET (Fig. 1)
- Only HR-40715E (Fig. 2)
- USER INSTRUCTIONS
- Timer (Model HR-40920TE only)
- Turbo fan (only Model HR-40920FE)
- Turbo fan only
- Overheating shut-off for the heater
- CLEANING, MAINTENANCE, DISPOSAL
- Cleaning
- Disposal
- CONDITION OF PURCHASE
- MANUAL DE INSTRUÇÕES
- PUHDISTUS, HUOLTO, JÄTEHUOLTO
- OLULISED OHUTUSJUHISED
Brand : HONEYWELL
Model : HR41120E
Category : Electric heater