SF2812 - Coffee machine ALPINA - Free user manual and instructions
Find the device manual for free SF2812 ALPINA in PDF.
User questions about SF2812 ALPINA
0 question about this device. Answer the ones you know or ask your own.
Ask a new question about this device
Download the instructions for your Coffee machine in PDF format for free! Find your manual SF2812 - ALPINA and take your electronic device back in hand. On this page are published all the documents necessary for the use of your device. SF2812 by ALPINA.
USER MANUAL SF2812 ALPINA
EN SF-2812 ESPRESSO COFFEE MAKER
Instruction for use
DE SF-2812 ESPRESSO-KAFFEEMASCHINE
Gebrauchsanweisung
FR SF-2812 PRODUCTEUR DE CAFÉ EXPRESS, EXPRESSO
Mode d'emploi
IT SF-2812 MACCHINA PER CAFFÉ ESPRESSO
Manuale d'uso
NL SF-2812 ESPRESSOKOFFIEMAKER
Gebruiksaanwijzing
ES SF-2812 CAFETERA EXPRÉS
natural_image
Exterior view of a modern coffee maker with two cups (no visible text or symbols)SF-2812
EN: For your own safety read these instructions carefully before using the appliances.
Thank you for choosing Alpina home appliance. You have chosen the best appliances that offer 2 years/24 months warranty and years of service. We stand for quality, dependability and friendship forever. We hope you will choose Alpina again and make ALPINA your first choice in home appliances.
IMPORTANT SAFEGUARDS
When using electrical appliances, basic safety precautions should always be followed, including the following:
- Read all instructions carefully.
- This appliance may only be connected to the same main voltage as shown on the rating plate.
- To protect against risk of electrical shock, do not immerse or rinse housing, cord or plug in water or other liquid.
- Close supervision is necessary when any appliance is used near children.
- Unplug from outlet when not in use, before putting on or taking off parts and before cleaning.
- Do not contact any moving parts while the appliance is operating.
- If the supply cord is damaged, it must be replaced by the manufacturer or its authorized service agent or a similarly qualified person in order to avoid hazard & damage to the unit.
- The use of attachment or accessories which are not supplied with the appliance are not recommended. This could result in electrical shock or injury or permanent damage to the appliance.
- Do not let cord hang over edge of table or counter or touch hot surface.
- Do not use the appliance for other than intended household use.
- Switch off the appliance before changing accessories or approaching parts, which move in use.
- The appliance is not intended for use by young children or infirm persons without supervision. Young children should be supervised to ensure that they do not play with the appliance.
This appliance is for household use and may be plugged into any AC electrical outlet (ordinary household current). Do not use any other electrical outlet.
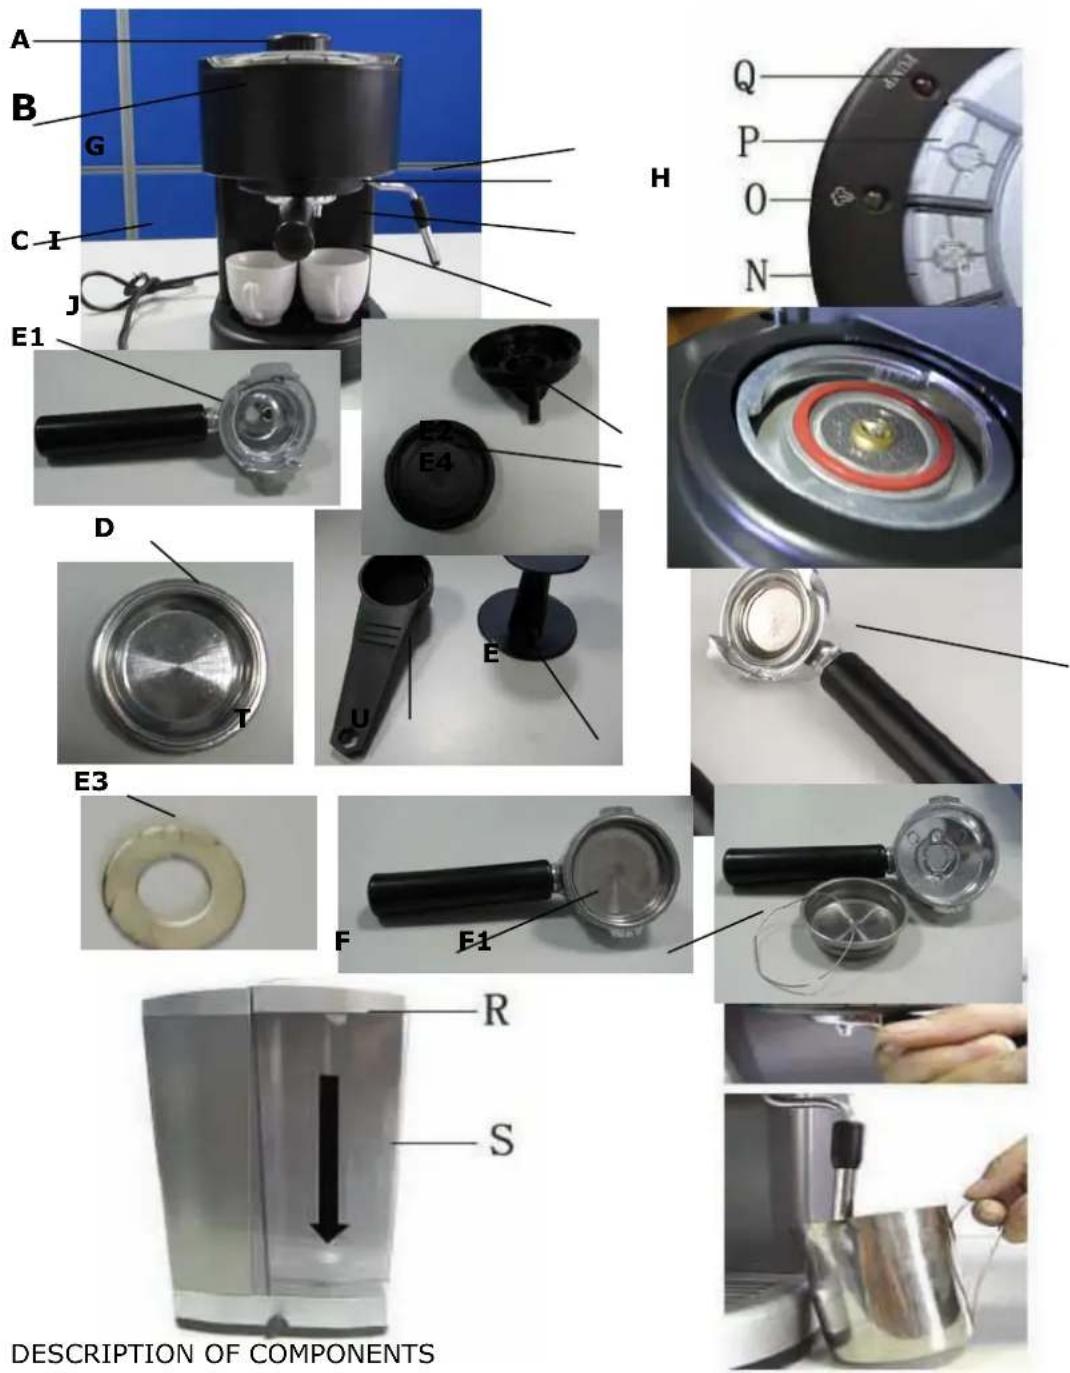
A. Steam control knob
B. Main body
C. Power cord & plug
D. . Filter disc
E. Filter holder for pod
F. Filter holder for ground coffee
G. Steam
H. Ceramic cups
I. Drip
J. Bottom
K. Power indicator
L. Power button
M. Espresso indicator
N. Steam supply switch
O. Indicator light for
P. Pump switch
Q. Pump indicator light
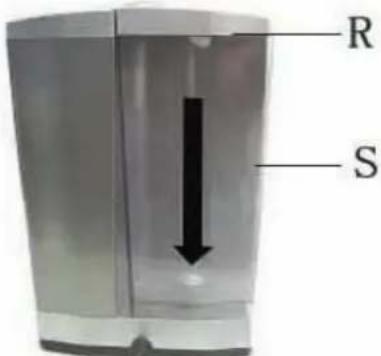
R. Water tank cover.
S. Water
T. Coffee spoon
U. Tamper
NOTE: E is composed by E1,E2,E3,E4&D F1 is exploded view of F part
ENGLISH
GETTING STARTED
Check that voltage of the appliance is the same as that indicated on the technical information plate of the appliance. Place the appliance on a flat surface, ensuring the rubber stick firmly to the surface. Fill the tank with cold water, taking care that it is correctly re-inserted in its housing. Insert the plug into the A/C outlet, which must be grounded. Press the switch to turn on the machine.(Note: Do not to turn on Steam supply switch & Pump switch) Power indicator lights ON, indicating that the internal boiler has begun to heat up. When the Espresso light ON, Press the pump button, pump indicator light ON, until water is seen coming from the filter basket.
If you are starting the machine for the first time or after a period of non-use, it is recommended that at least a cup of water be allowed to pass through the boiler's hydraulic circuit; this can be achieved by turning steam control knob in an anti-clockwise direction after placing a cup under the nozzle of the MAXI CAPPUCCINO attachment steam tube, turn ON pump switch till seeing the clean water out of cappuccino attachment steam tube and then switching off the pump switch and closing the steam control knob by turning it in a clockwise direction to stop water from being emitted.
THE MACHINE IS READY TO MAKE COFFEE WHEN THE INDICATOR LIGHT FOR STEAM GOES OUT
HOW TO MAKE COFFEE
-
WITH GROUND COFFEE: Measure out the coffee into the filter. For a double espresso shot, use two full measuring scoops and for a single espresso shot, use one scoop.
-
WITH COFFEE POD: Put one coffee pod 45mm in diameter on filter holder for pod for a single espresso shot.
Insert the filter basket into position. Turn the filter basket anticlockwise 40 to 45 degrees, or as far as it is possible without using excessive pressure. A preheating time of 8/10 minutes is recommended, with the filter basket inserted so this too can be preheated as to ensure a nice, hot first shot of espresso. For subsequent shots, this will not be necessary.
-
pushing power button, pump indicator light is on; heating up boiler;
-
Espresso indicator light on, water hot enough for espresso;
-
pushing down pump switch, pump indicator light on, espresso flewing out of filter holder;
We suggest that both the first and subsequent shots be made only when the Espresso indicator light on;
Note: as with commercial-grade coffee machines, do not remove the filter basket when the supply pump switch is turned on; after having made the espresso, push pump switch again, pump indicator light off, gradually loosen the filter basket by turning it in a clockwise direction in order to reduce the internal pressure. If you couldn't loosen the filter holder due to great pressure, you could succeed in it after releasing pressure by turn knob Steam control knob in anti-clockwise direction.
No special operation is necessary when the water in the tank runs out as the machine is equipped with a special self-priming device. Just unplug the machine, pull out the tank and fill it with water again.
HOW TO MAKE CAPPUCCINO
To prepare cappuccino, hot chocolate, or to heat other kinds of drinks, press Steam supply switch,; the Indicator light for steam OFF, indicating it is heating for steam.. When Indicator light for steam ON, the machine is ready to produce steam. Note: if small puffs of steam come out of the filter holder while you are waiting for the steam, this is to be considered absolutely normal.
At this point, place a cup or glass under the MAXI CAPPUCCINO attachment steam tube and turn the steam supply Steam control knob in an anti-clockwise direction. At first, a little water will come out, immediately followed by a strong jet of steam. Turn Steam control knob in a clockwise direction and place the container of milk to be frothed under the MAXI CAPPUCCINO attachment. Next, immerse the nozzle in the container of milk and turn the steam supply Steam control knob anti-clockwise once again until the desired volume of froth is achieved.
During this process, you may notice that the Indicator light for steam goes on and off from time to time. when the light is ON the boiler thermostat is keeping the water at the correct temperature for producing the supply of steam; it is recommended that the steam supply knob is only used when this light goes on.
MAKING FURTHER SHOTS OF ESPRESSO
Allow the boiler to cool by switching OFF (steam supply switch). If you want the boiler to cool down quicker, turn the Steam control knob in anti-clockwise direction and press pump switch to the ON position, pump indicator light ON, allowing water and steam to come out of the MAXI CAPPUCCINO attachment wait steam tube until the indicator Espresso indicator light ON, making anther espresso.
REGULAR CLEANING
CAUTION: all cleaning operations described below must be performed with the machine turned off.
Cleaning the filter: Throwing away the waste coffee pod or ground coffee, check that the internal holes are not clogged and, if so, clean them with a small brush.
Cleaning the filter holder seat.
With ground coffee: after using, you may notices a buildup of coffee grounds in the connection seat of the filter holder (the rubber O-ring where the filter basket fits into). These can be removed with a toothpick. Furthermore, periodically clean the perforated disk by letting water run through it, without putting the filter basket into its seat.
With coffee pod: after using, you may notices a buildup of espresso in the connection seat of the filter holder (the rubber O-ring where the filter basket fits into). These can be removed easily by running water. Furthermore, periodically clean the filter slice by letting water run through it, without putting the filter basket into its seat.
Cleaning the MAXI CAPPUCCINO device. Perform this operation when the chrome-plated pipe is cold, so as to prevent burns. Unscrew the device head from the small pipe and wash it with running water. The small pipe can be cleaned with a non-abrasive cloth. Screw the device head back on as far as it will go. If necessary, clean the outlet hole in the device head again with a pin.
Cleaning the water tank. Periodically clean the inside of the tank with a sponge or damp cloth.
TROUBLESHOOTING
A) The machine does not supply boiling water.
- Make sure that there is water in the tank.
• Air has probably entered into the circuit, deactivating the pump.
- Repeat the operations described in the section "GETTING STARTED".
- If the supply is not re-established after performing the abovementioned process, go to an Authorized Service Centre.
B) The machine does not supply steam.
- With a pin, remove any deposits which may have formed in the steam valve and rubber nozzle.
- Check that the water level in the tank is normal.
C) Coffee overflowing from the edges of the filter ring.
With ground coffee
- Probably an excessive amount of coffee grounds has been placed in the filter basket, preventing the filter basket from being properly tightened into its housing. Let the machine cool and remove the grounds, and try making another shot using the correct amount of grounds.
ENGLISH
- Residues of coffee grounds have remained on the O-ring seal of the filter ring's housing. Clean the seal with a toothpick. If the problem persists after performing the above operation, go to an Authorized Assistance Centre.
With coffee pod
- Probably the edge of coffee pods is beyond of the filter slice which may cause bad pressure-sealing. So, cut off the outside edge. Let the machine cool and remove the grounds, and try making another shot using a new coffee pod
- Residues of espresso have remained on the E2 or E4. Clean them with a cloth. If the problem persists after performing the above operation, go to an Authorised Assistance Centre.
D) The first shot is does not come out or flows too slowly
With ground coffee:
- Check the filter containing the ground coffee. If the holes are blocked, they should be cleaned using a small brush or, using a suitable tool, the filter should be held over a gas flame for a few seconds. Any residual coffee grounds will be burned off and the holes will be completely unclogged.
- It is also possible that a slow supply of coffee is caused by insufficient supply of water from the perforated disc in the filter ring housing. In fact, it is possible that after several months of use, grease or mineral deposits may be obstructing the perforated disc. In this case, the disc should be cleaned as previously described. Operate the machine without the filter basket in place, allowing the water to flow. If the water does not flow uniformly from all the holes it means that the disc is clogged. In this case, it is a good idea to take the machine to the closest Authorized Service Centre to have it cleaned.
- The tank is not inserted well. Fit the tank securely by pushing it as far as it will go.
• There is little water and the pump does not suck it up. Fill the tank.
With coffee pod.
- Check the coffee pod put on the filter. If the holes are blocked, they should be cleaned using a small brush or, using a soft cloth, the filter should be held over a gas flame for a few seconds. Any residual grounds will be burned off and the holes will be completely unclogged.
- It is also possible that a slow supply of coffee is caused by insufficient supply of water from the perforated disc in the filter ring housing. In fact, it is possible that after several months of use, grease or mineral deposits may be obstructing the perforated filter disc. In this case, the disc should be cleaned as previously described. Operate the machine without the filter basket in place, allowing the water to flow. If the water does not flow uniformly from all the holes it means that the disc is clogged. In this case, it is a good idea to take the machine to the closest Authorised Service Centre to have it cleaned.
- -The tank is not inserted well. Fit the tank securely by pushing it as far as it will go.
- There is little water and the pump does not suck it up. Fill the tank.
E) The coffee is too watery and cold.
- The blend has been ground too coarsely.
- To obtain a more concentrated and hotter shot, finer ground coffee must be used. In any case, this problem can be eliminated by using the Thermo cream Disc, which always ensures an extremely hot coffee and a rich cream even with coarsely ground coffee.
Specification:
Model No.: SF-2812
Voltage: AC 220-240V
Wattage: 800W
GUARANTEE
This product is guaranteed for a period of 2 years from the date of purchase against defects in materials and workmanship. Under this guarantee the manufacturer undertakes to repair or replace any parts found to be defective, providing the product is brought back to the purchase address. This guarantee is only valid if the appliance has been used in accordance with the instructions, and provided that it has not been modified, repaired or interfered with by any unauthorised person, or damaged through misuse.
This guarantee naturally does not cover wear and tear, nor breakables such as ceramic items, bulbs etc. If the product fails to operate and needs to be returned, pack it carefully, enclosing your name and address and the reason for return and bring it to the address of purchase. If within the guarantee period, please also provide the guarantee card and proof of purchase.
DEUTSCH
Lieber Kunde,
natural_image
Circular metallic object with a pointed tip and arrow pointing to it, labeled 'D' and 'T' (no text or symbols on the object itself)
natural_image
Close-up of two black plastic devices labeled U and E, with no visible text or symbols on the devices themselves.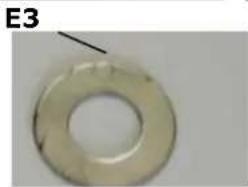
natural_image
Close-up of a translucent circular ring with a small arrow pointing to it, labeled 'E3' in the top-left corner (no other text or symbols)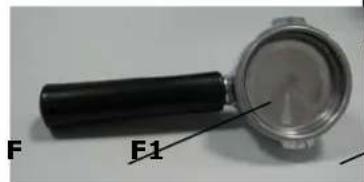
text_image
F F1H

text_image
Q P O N M
natural_image
Close-up of a metallic mechanical tool with a black handle, resting on a plain surface (no text or symbols visible)
natural_image
Close-up of a metallic tool with a coiled wire and a black handle, next to a metal bowl (no text or symbols visible)
text_image
R Snatural_image
Close-up of a hand pouring liquid into a stainless steel cup next to a toaster (no visible text or symbols)BELANGRIJKE VEILIGHEIDSWAARSCHUWINGEN
text_image
A B G C-I J E1 D T E3 F E1 R S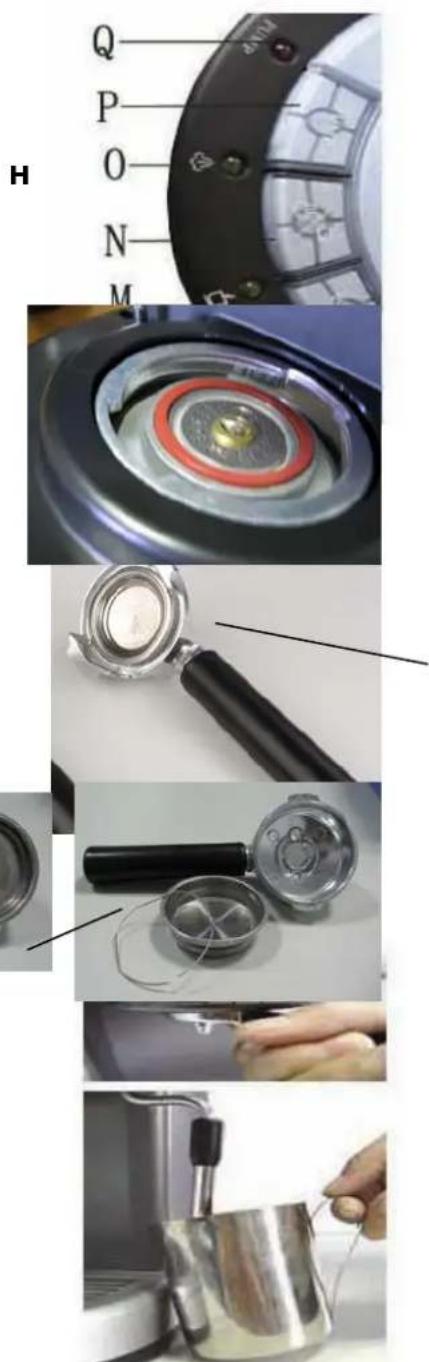
text_image
Q P O N H Mnatural_image
Close-up of a hand pouring liquid into a stainless steel coffee cup (no visible text or symbols)POPIS SÚČIASTOK
A. Ovládač pary
B. Teleso zariadenia
C. Napájací kábel a zástrčka
D. . Filter
E. Držiak filtra na sáčky
F. Držiak filtra na mletú kávu
G. Para
H. Keramické šálky
I. Odkvapkávač
J. Spodok
K. Kontrolka napájania
POZNÁMKA: E pozostáva E1,E2,E3,E4&D,
VAŽNE SIGURNOSNE UPUTE
natural_image
Circular metallic object with a pointed tip and arrow pointing to it, labeled 'D' and 'T' (no text or symbols on the object itself)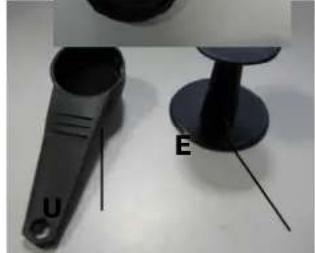
natural_image
Close-up of two black plastic devices labeled U and E, with no visible text or symbols on the devices themselves.
natural_image
Close-up of a translucent circular ring with a small protrusion and an arrow pointing to it (no text or symbols visible)
text_image
F F1H

text_image
Q P O N M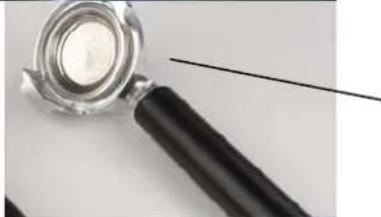
natural_image
Close-up of a metallic mechanical tool with a black handle, resting on a plain surface (no text or symbols visible)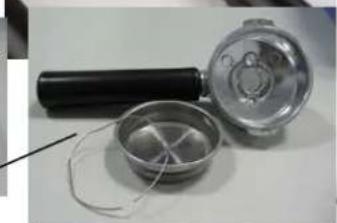
natural_image
Close-up of a metallic tool with a coiled wire and a black handle, next to a metal bowl (no text or symbols visible)

text_image
R S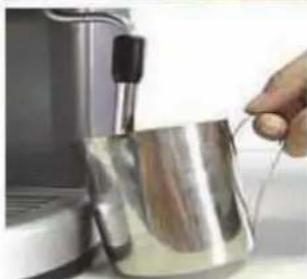
natural_image
Close-up of a hand pouring liquid into a metallic cup (no text or symbols visible)OPIS DIJELOVA
A. Tipka za reguliranje pare
B. Tijelo uređaja
C. Kabel napajanja i utikač
D. Disk filtera
E. Držač filtera za kavu u vrećicama
F. Držač filtera za mljevenu kavu
G. Para
H. Keramičke posude
I. Posuda za skupljanje prelivene tekućine
J. Dno
K. Indikator napona
L. Tipka uključivanja
M. Indikator za espresso
N. Prekidač puštanja pare
O. Kontrolna lampica za
P. Prekidač pumpe
Q. Kontrolni indikator pumpe
R. Poklopac spremnika za vodu.
S. Voda
T. Žlica za kavu
U. Potiskivač
NAPOMENA: E se sastoji od E1,E2,E3,E4&D F1, te nacrt sheme je prikazan u dijelu F
HRVATSKI
POČINJEMO
Provjerite, da li su električni parametri mreže isti kao tehnički parametri navedeni na pločici uređaja. Uređaj postaviti na ravnu površinu, tako da gumeno dno čvrsto prianja uz površinu na kojoj uređaj stoji. Napunite spremnik vodom, pazeći da ga vratite pravilno na njegovo kućište. Utikač kabela napajanja stavite u utičnicu, koja mora biti uzemljena. Pritiskanjem tipke uključenja uključite uređaj. (Napomena: Ne pritišćite tipku puštanja pare ili prekidač pumpe). Lampica indikatora napona svijetli, signalizira da unutarnji je grijač počeo sa radom. Kada se upali lampica indikatora espressa, pritisnite tipku pumpe, lampica indikatora pumpe se uključi i kroz filter počinje izlaziti voda.
Kada koristite vaš uređaj prvi put, ili nakon dužeg perioda nekorištenja, preporučamo da prolijete najmanje jednu šalicu vode koja je prošla kroz hidraulički krug; to možete postići okretanjem tipke za regulaciju pare u suprotno od smjera kazaljke na satu, poslije stavite ispod mlaznice za MAXI CAPPUCCINO nastavak cijevi za paru, uključite pumpu, sve dok kroz istu počne izlaziti čista voda; isključite pumpu i zatvorite tipku za regulaciju pare okretanjem u smjeru kazaljke na satu, nakon toga će prestati izlaziti iz nastavka cijevi voda. UREĐAJ JE SPREMAN ZA PRIPREMU KAVE, NAKON GAŠENJA KONTROLNE LAMPICE INDIKATORA PARE.
KAKO PRIPREMITI KAVU
- OD MLJEVENE KAVE: U filter stavite mjericom potrebnu količinu kave. Za dupli espresso stavite dvije mjerice, za obični jednu.
- OD KAVE U FILTER VREĆICAMA: Stavite kavu u filter vrećici (presjek 45 mm) u držač filter vrećica. Jedna vrećica je dovoljna za obični espresso.