
CB 179 - Coffee machine BOMANN - Free user manual and instructions
Find the device manual for free CB 179 BOMANN in PDF.
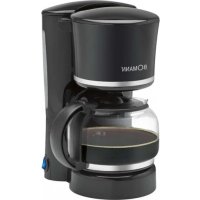
| Product type | Espresso machine with steam nozzle |
| Brand | Bomann |
| Model | CB 179 |
| Power supply voltage | 230 V, 50 Hz |
| Water tank capacity | Up to 4 cups |
| Main functions | Espresso preparation, cappuccino preparation, steam jet |
| Filter type | Portafilter with removable filter |
| Steam nozzle | Integrated, adjustable |
| Function selector | Off, heating, steam jet |
| Safety | Water tank cap, lockable portafilter; release pressure before opening |
| Materials | Plastic, metal (hot parts), glass (carafe) |
| Included accessories | Glass carafe with lid, portafilter, filter, drip tray |
| Maintenance | Clean removable parts with soapy water; do not wash in dishwasher; use a damp cloth for the base; descale regularly with citric acid |
| Descaling | Descaling product based on citric acid; run without coffee, then rinse with clear water 2-3 times |
| Warranty | 24 months from date of purchase |
| Use | Household use only |
Frequently Asked Questions - CB 179 BOMANN
User questions about CB 179 BOMANN
0 question about this device. Answer the ones you know or ask your own.
Ask a new question about this device
Download the instructions for your Coffee machine in PDF format for free! Find your manual CB 179 - BOMANN and take your electronic device back in hand. On this page are published all the documents necessary for the use of your device. CB 179 by BOMANN.
USER MANUAL CB 179 BOMANN
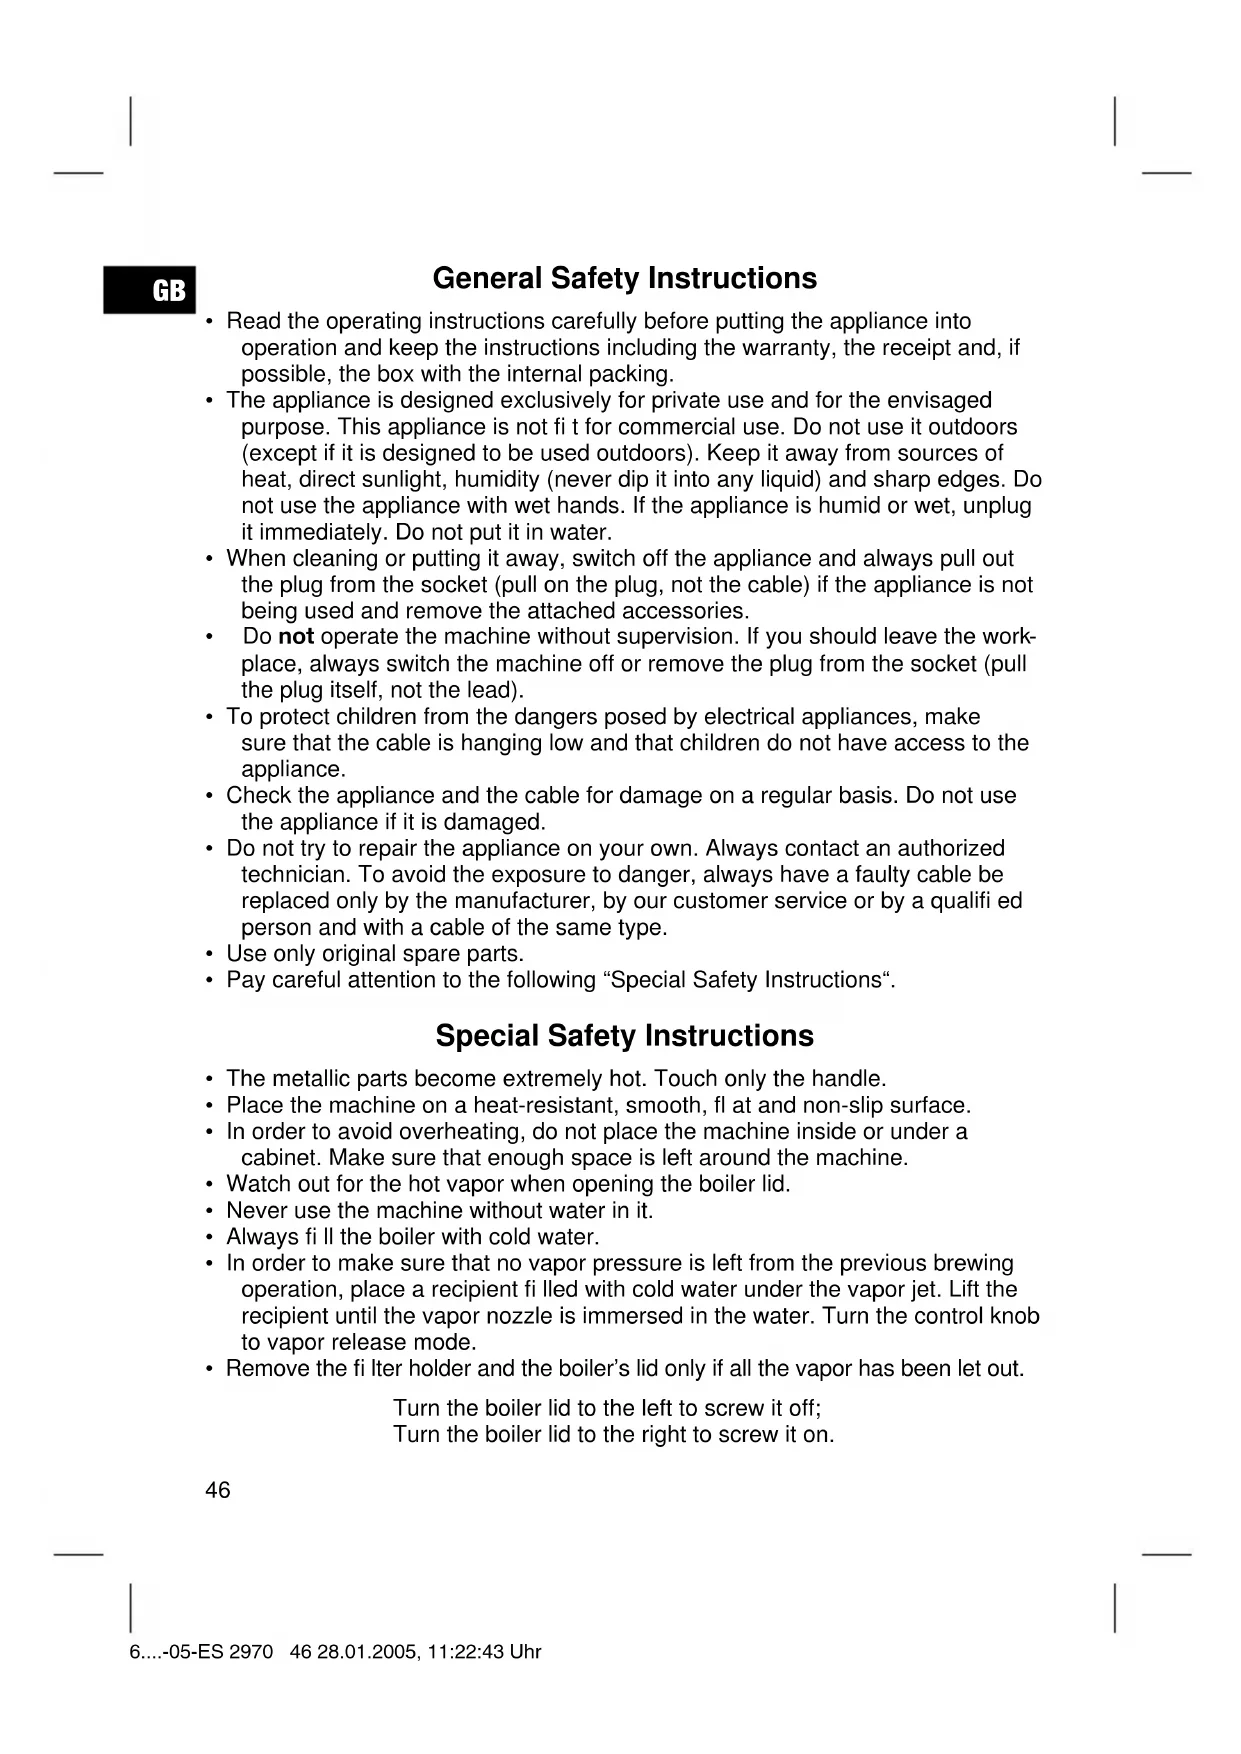
General Safety Instructions
- Read the operating instructions carefully before putting the appliance into operation and keep the instructions including the warranty, the receipt and, if possible, the box with the internal packing.
- The appliance is designed exclusively for private use and for the envisaged purpose. This appliance is not fit for commercial use. Do not use it outdoors (except if it is designed to be used outdoors). Keep it away from sources of heat, direct sunlight, humidity (never dip it into any liquid) and sharp edges. Do not use the appliance with wet hands. If the appliance is humid or wet, unplug it immediately. Do not put it in water.
- When cleaning or putting it away, switch off the appliance and always pull out the plug from the socket (pull on the plug, not the cable) if the appliance is not being used and remove the attached accessories.
- Do not operate the machine without supervision. If you should leave the workplace, always switch the machine off or remove the plug from the socket (pull the plug itself, not the lead).
- To protect children from the dangers posed by electrical appliances, make sure that the cable is hanging low and that children do not have access to the appliance.
- Check the appliance and the cable for damage on a regular basis. Do not use the appliance if it is damaged.
- Do not try to repair the appliance on your own. Always contact an authorized technician. To avoid the exposure to danger, always have a faulty cable be replaced only by the manufacturer, by our customer service or by a qualified person and with a cable of the same type.
- Use only original spare parts.
- Pay careful attention to the following "Special Safety Instructions".
Special Safety Instructions
- The metallic parts become extremely hot. Touch only the handle.
- Place the machine on a heat-resistant, smooth, fl at and non-slip surface.
- In order to avoid overheating, do not place the machine inside or under a cabinet. Make sure that enough space is left around the machine.
- Watch out for the hot vapor when opening the boiler lid.
- Never use the machine without water in it.
Always fi ll the boiler with cold water. - In order to make sure that no vapor pressure is left from the previous brewing operation, place a recipient flled with cold water under the vapor jet. Lift the recipient until the vapor nozzle is immersed in the water. Turn the control knob to vapor release mode.
- Remove the fiiter holder and the boiler's lid only if all the vapor has been let out.
Turn the boiler lid to the left to screw it off;
Turn the boiler lid to the right to screw it on.
- Make sure that the boiler lid and the fiiter holder are properly and securely closed while using the machine since this machine is pressurized when operating.
- Use only water to fi ll the boiler. Do not use any other liquid!
- If diffi culties are encountered when unscrewing the boiler lid, this may indicate that the machine is still pressurized. Let out the pressure with the procedure described above.
Overview of the Components
1 Boiler lid
2 Boiler tank opening
3 Control selector
4 Boiler
5 Display
6 Brewing head
7 Filter bowl
8 Filter holder
9 Filter catch
10 Filter handle
11 Filter spout
12 Drop grid
13 Base
14 Brew
15 Release vapor
16 Off
17 Vapor tube
18 Vapor jet
19 Open-Handle position for the insertion of the fiter unit
20 Closed- Handle position for the use of the fi lter unit
Before using for the first time
In order to remove all the dust that has deposited during the packing, wash the glass pot, the fi liter shell, the fi liter holder and the drip collection tray with warm soapy water. Do not use coarse or sharp cleansing agents. Wipe the base with a clean and humid towel.
Follow carefully the Safety Instructions!
It is highly recommended to carry out a complete brewing cycle as described in "Espresso Preparation" without any coffee powder before making your fi rst cup of espresso or cappuccino. By doing so, any residual dust left inside the espresso machine will be removed. The preparation of an espresso or cappuccino is different from that required for a normal cup of coffee. Both pressos and cappuccinos are made by pressing boiling water under pressure through finely ground coffee. Great attention is needed and it is highly recommended to read carefully all the instructions and safety indications provided herein, before brewing.
Tip: It is recommended to serve the espresso or cappuccino in pre-heated cups because the heat helps to retain the aroma!
GB
How to make an Espresso
- Follow carefully the safety indications!
- Place the control knob in Off position.
- Lay the drop grid on the round depression in the drop collector cover.
- Remove the boiler lid and the fiiter holder. Should there be water in the boiler, turn the machine upside down and drain the water.
- Insert the fi Iter bowl in the fi Iter holder. Swing the fi Iter protection to the back.
- Fill the fi liter bowl to the desired level (the inside of the fi liter bowl is marked with measure markings, 2 = 2 cups, 4 = 4 cups) with ground espresso coffee. Spread out the coffee evenly and press it down lightly with a spoon.
Important: The reason why the coffee is pressed in the fi iter bowl is to distribute evenly the coffee and not to compress it. If there is too much coffee, the flow of the water is blocked. This may cause damage to the machine or lead to injuries. Remove carefully any coffee from the rim of the fi iter.
- Insert the fi liter holder in the brewing head and turn the handle to the right (in direction) to position it correctly. Make sure that the fi liter holder is fastened properly to the brewing head to avoid the splashing of hot coffee.
- Fill the glass pot with enough cold water for the desired number of cups (do not exceed the 4 cup mark). Pour the water into the boiler.
- Put back into place the boiler lid and screw it on.
- Place the empty glass pot with the lid on at the center of the drip collection grid.
- Connect the appliance to a duly installed 230V/50Hz socket with earthing protection. Turn the control knob to brew position. The display lights up. After three minutes the espresso starts to flow into the glass pot.
- When the brewing is over, turn the control knob to the Off position. Remove the glass pot from the drip collection grid.
- Wait a few seconds before removing the fi liter holder. Remove the fi liter bowl with the fi liter protection. Remove the remaining coffee. Clean the machine as described in „Cleaning and Maintenance".
How to make a Cappuccino
To make a cup of cappuccino follow steps 1 to 12 described above for espresso coffee and continue as described below.
- Fill the hot espresso into (a) pre-heated cup/s.
- Fill the glass pot with fresh, cold milk without exceeding the 4-cup mark. To obtain a good foam, use a high-fat milk!
- Place the glass pot under the steam nozzle. Lift the recipient until the vapor jet is immersed 1/2 cm in the milk. Turn the control knob slowly to the vapor jet position. The vapor is ejected from the vapor jet to froth up the milk. As the volume of the foam rises, lift the glass pot slightly so that the tip of the nozzle is always immersed in the milk. Continue this operation for approximately 45
seconds according to your taste or until the milk's volume has doubled. Make sure that the milk does not get too hot or scalded to avoid ruining the froth. Never dip the tip more than a centimeter into the milk. For proper frothing a hissing sound must be heard. Once the frothing is over, turn the control knob to the Off position. When fi nished, half of the contents of the glass pot will be composed of hot milk and the other half of foam.
- Scoop out the foam from the glass pot into the cup/s with espresso coffee. Add some milk. A cappuccino is 1/3 coffee, 1/3 hot milk and 1/3 frothed milk.
- In order to make sure that no vapor is left in the machine, place a recipient with cold water under the vapor jet and dip the vapor jet into the water. Turn the control knob to the vapor jet position. The remaining vapor is released if the vapor jet starts to bubble.
Important: the pressure of the machine must be released each time before brewing. As soon as the bubbling stops, pressure has been completely reduced. Turn the control knob to the Off position. Wait a few seconds after the brewing before removing the fiiter holder. Remove the remaining ground coffee. Clean the machine as described in „Cleaning and Maintenance".
Useful Tips
- The use of filtered water or bottled water is highly recommended to enhance the taste of the espresso and to avoid the calcifi cation of the machine. Distilled water must not be used, as it is dull and tasteless.
- The secret for frothing the milk is the right technique, which can be acquired only with practice.
- If the brewing time of the coffee is longer than usual (i.e. if it takes too long for the coffee to flow out of the brewing head), then it is likely that the coffee is too fine, that too little coffee has been used or that the coffee was not pressed enough.
- If the preparation time for the coffee is shorter (i.e. if the coffee flows quickly out of the brewing head), then it is possible that either the coffee was too coarse after it had been ground, the amount of coffee used was too small or the coffee was not pressed down firmly enough.
- If you prefer to have thicker "foam" for your milk, allow the foamed milk to stand for 30 to 60 seconds before you put it in the espresso.
- If there is a signifi cant increase in the brewing time and/or frequent clogging of the vapor jet occurs, the machine is calcifi ed. Fill the boiler with a citric acid-based decalcifying agent (see dosing instructions provided by the manufacturer). Follow the instructions provided above in „How to make an espresso". Do not fi ll the fi lter bowl with coffee! After this operation carry out 2-3 brewing cycles with clear water.
GB
Cleaning and Maintenance
- Follow carefully the safety instructions before cleaning the machine.
- Remove the plug and let the machine cool.
- Use a citric acid-based decalcifying agent for decalcifying.
- Wipe the machine with a clean humid towel.
- Do not use detergents.
- Wash the fi lter shell, the fi lter holder, the glass pot, the pot lid, the boiler cap and the drip collection grid in a sink as usual.
- Do not wash any of the parts in the dishwasher.
- In order to clean the vapor jet let the vapor out for approximately three seconds after removing it from the milk. Turn the control knob to the Off position and wipe the vapor jet with a clean humid towel.
Attention: the metal vapor jet is hot!
- Lubricate the boiler opening and the fiiter holder with vegetable oil from time to time.
This device has been tested according to all relevant current CE guidelines, such as electromagnetic compatibility and low voltage directives, and has been constructed in accordance with the latest safety regulations.
Subject to technical changes without prior notice!
Guarantee
The device supplied by our Company is covered by a 24 month guarantee starting on the date of purchase (receipt).
During the life of the guarantee any fault of the device or its accessories *) ascribable to material or manufacturing defects will be eliminated free of charge by repairing or, at our discretion, by replacing it. The guarantee services do not entail an extension of the life of the guarantee nor do they give rise to any right to a new guarantee!
Proof of the guarantee is provided by the proof of purchase. Without proof of purchase no free replacement or repair will be carried out.
If you wish to make a claim under the guarantee please return the entire machine in the original packaging to your dealer together with the receipt.
^ ) Damage to accessories does not mean automatic free replacement of the whole machine. In such cases please contact our hotline. Broken glass or breakage of plastic parts are always subject to a charge.
Defects to consumables or parts subject to wearing (e.g. motor pistons, kneading blades, drive shafts, spare remote control, spare toothbrushes, saw blades, etc.) as well as cleaning, maintenance or the replacement of said parts are not covered by the guarantee and hence are to be paid!
The guarantee lapses in case of unauthorized tampering.
After the expiry of the guarantee
After the expiry of the guarantee repairs can be carried by the competent dealer or repair service against the payment of the ensuing costs.
PL
TapaHTHnHOe 6aTeJIbCTBO
IapaHTnHbI cPOK Ha TeppntOpN PoCCnCKo Φeepaun yCTaHaBnBaetc IIOJIHOMOHyIMN IpeDCTaBNTeJAMN.
KaccobbIyekABJIeTcrapaHTnHbIM TaHOHm.Be3 Hero HeBO3MOxKeH 6ecnIaTHbI peMOHTnn 3aMeHa n3dJIINr.
B clyae BO3HKnHOBxHn npnteH3n no rapaHTn, npeIbRbTe n3dene B NOJHOKOMNKeKtaun, C opuHaJIbHO ynaKOBKO IN KaccOBbIM YekOM TOPROBOI TOUKe, npoDaBwe 3TO n3dennie.
*) DepeKtI npHaJIeXHocTe He cnyKaI npuHoiJ dJa aBOMaTHueCKo 3aMeHb BCero n3dEINr. B 3Tom cIyuae No3BOHnte Ham, noxanycta, no ropye JInn! Pa3bTbIe CTeKJIHHbIe I NOLOMaHbIe INaCTMaCCOBbie DeTaJIb BO3MeaHTcra TOnbKO 3a DOnOJIHHTeJIbHyIO ONNATy!
DepeKtI 3HaWNBaEMbIX npHnADJIeKHOCTe NIN TpyuXcRA DeTalei (HaNPmep KOHTaKTbIe 5eTKN MOTOPOB, CMEcNTeBHBIE KpIOKN, PnIBoDhIe peMHNI, 3aNaChIe NylbTBI ynpabLeHnH, 3aNaChIbe 3y6HbIe 5eTKN, NIIbHbIe NOJOTHa I.T.D.), a TaKKe YnCTKa, TexO6CnyKbAHne NIN 3aMeHa TpyuXcRA DeTalei He NonaDAIoT NOI rapaHTHIO, IN OToTMy pnoBOdTcR 3a OTdeJIbHyO ONLaTy!
TapaHTn TepaETc npB BCKpbITn n3dEINN NOCTOPOHHMn IuaAMn.
Посné rapаHTиN
Pocne OKOHuaHnCpoka rapaHTnn, pemont n3denn npOn3BOoNTc 3a OnlaTy, COOTBETCTByUOuMMMaCTepCKMm nnnyHKtAmc cepBnCHOrO o6cnyKbAHn.
RUS
Technische Daten
Modell: ES 179 CB


- General Safety Instructions
- Special Safety Instructions
- Overview of the Components
- Before using for the first time
- Follow carefully the Safety Instructions!
- GB
- How to make an Espresso
- How to make a Cappuccino
- Useful Tips
- Cleaning and Maintenance
- Guarantee
- After the expiry of the guarantee
- PL
- TapaHTHnHOe 6aTeJIbCTBO
- Посné rapаHTиN
- Technische Daten
Brand : BOMANN
Model : CB 179
Category : Coffee machine