
ESTM 1100 - Mixer ELECTROLUX - Free user manual and instructions
Find the device manual for free ESTM 1100 ELECTROLUX in PDF.
| Product type | Immersion blender (hand blender) |
| Brand | Electrolux |
| Model | ESTM 1100 |
| Power supply | 230 V, 50 Hz |
| Power consumption | 400 W |
| Maximum operating time | 1 minute without interruption, then cooling for at least 1 minute |
| Chopper capacity (max) | 200 g of meat (cut into pieces of 10-15 mm) |
| Included accessories | Mixing tool, chopper (model ESTM 1155), egg beater (model ESTM 1155), wall hook |
| Blade material | Stainless steel |
| Speeds | 2 speeds (switch I and II) |
| Recommended use | Blending, mixing, grinding, emulsifying, preparing cocktails, soups, baby food |
| Care and cleaning | Unplug before cleaning. Wipe the motor unit with a damp cloth. Wash accessories in warm soapy water (not in dishwasher). Do not immerse the motor unit or the removable shaft. |
| Safety | Extremely sharp blades - handle with care. Do not put fingers in the knife area. Unplug before removing accessories. Do not use for crushing ice or hard dry foods. |
| Repairability | Have repairs carried out by an approved specialist or the manufacturer's after-sales service |
| Compliance | EC Directives 2006/95/EC (low voltage) and 89/336/EEC (EMC) |
| Environmental protection | Recyclable packaging. Do not dispose of the appliance with household waste - deposit it at a collection point for recycling. |
Frequently Asked Questions - ESTM 1100 ELECTROLUX
User questions about ESTM 1100 ELECTROLUX
0 question about this device. Answer the ones you know or ask your own.
Ask a new question about this device
Download the instructions for your Mixer in PDF format for free! Find your manual ESTM 1100 - ELECTROLUX and take your electronic device back in hand. On this page are published all the documents necessary for the use of your device. ESTM 1100 by ELECTROLUX.
USER MANUAL ESTM 1100 ELECTROLUX
natural_image
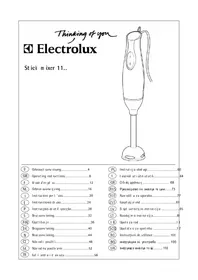
Line drawing of a handheld electric shaver with a bulb and handle (no text or symbols)GB Operating instructions....8
F Mode d'em pl oi....12
NL Gebruik saanw ij zing....16
natural_image
Line drawing of a handheld device with a handle and spout, showing internal components and arrows indicating motion (no text or symbols)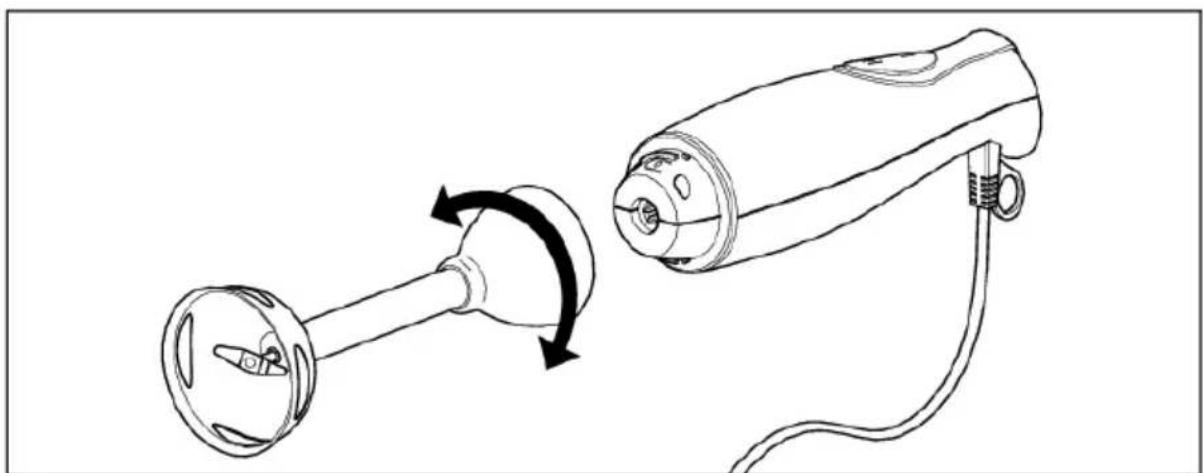
natural_image
Line drawing of a device being connected to a motor, showing shaft and cable assembly (no text or symbols)3

D
Seh r geeh rte Kundin, seh r geeh rter Kunde,
Please read these operating instructions through carefully.
Above all please follow the safety instructions on the first few pages of these operating instructions! Please keep the operating instructions for future reference. If applicable pass these instructions on to the next owner of the appliance.
!
With the warning triangle and/or by means of keywords (Danger!, Caution!, Attention!), information is emphasized which is important for your safety or the correct functioning of the appliance. It is essential that this information is observed.
I
This symbol guides you step by step through the operating procedure for your appliance.
i
After this symbol you receive supplementary information on the practical application and use of the appliance.
[Non-Text]
Tips and information about the economical and environmental friendly use of the appliance are marked with the clover.
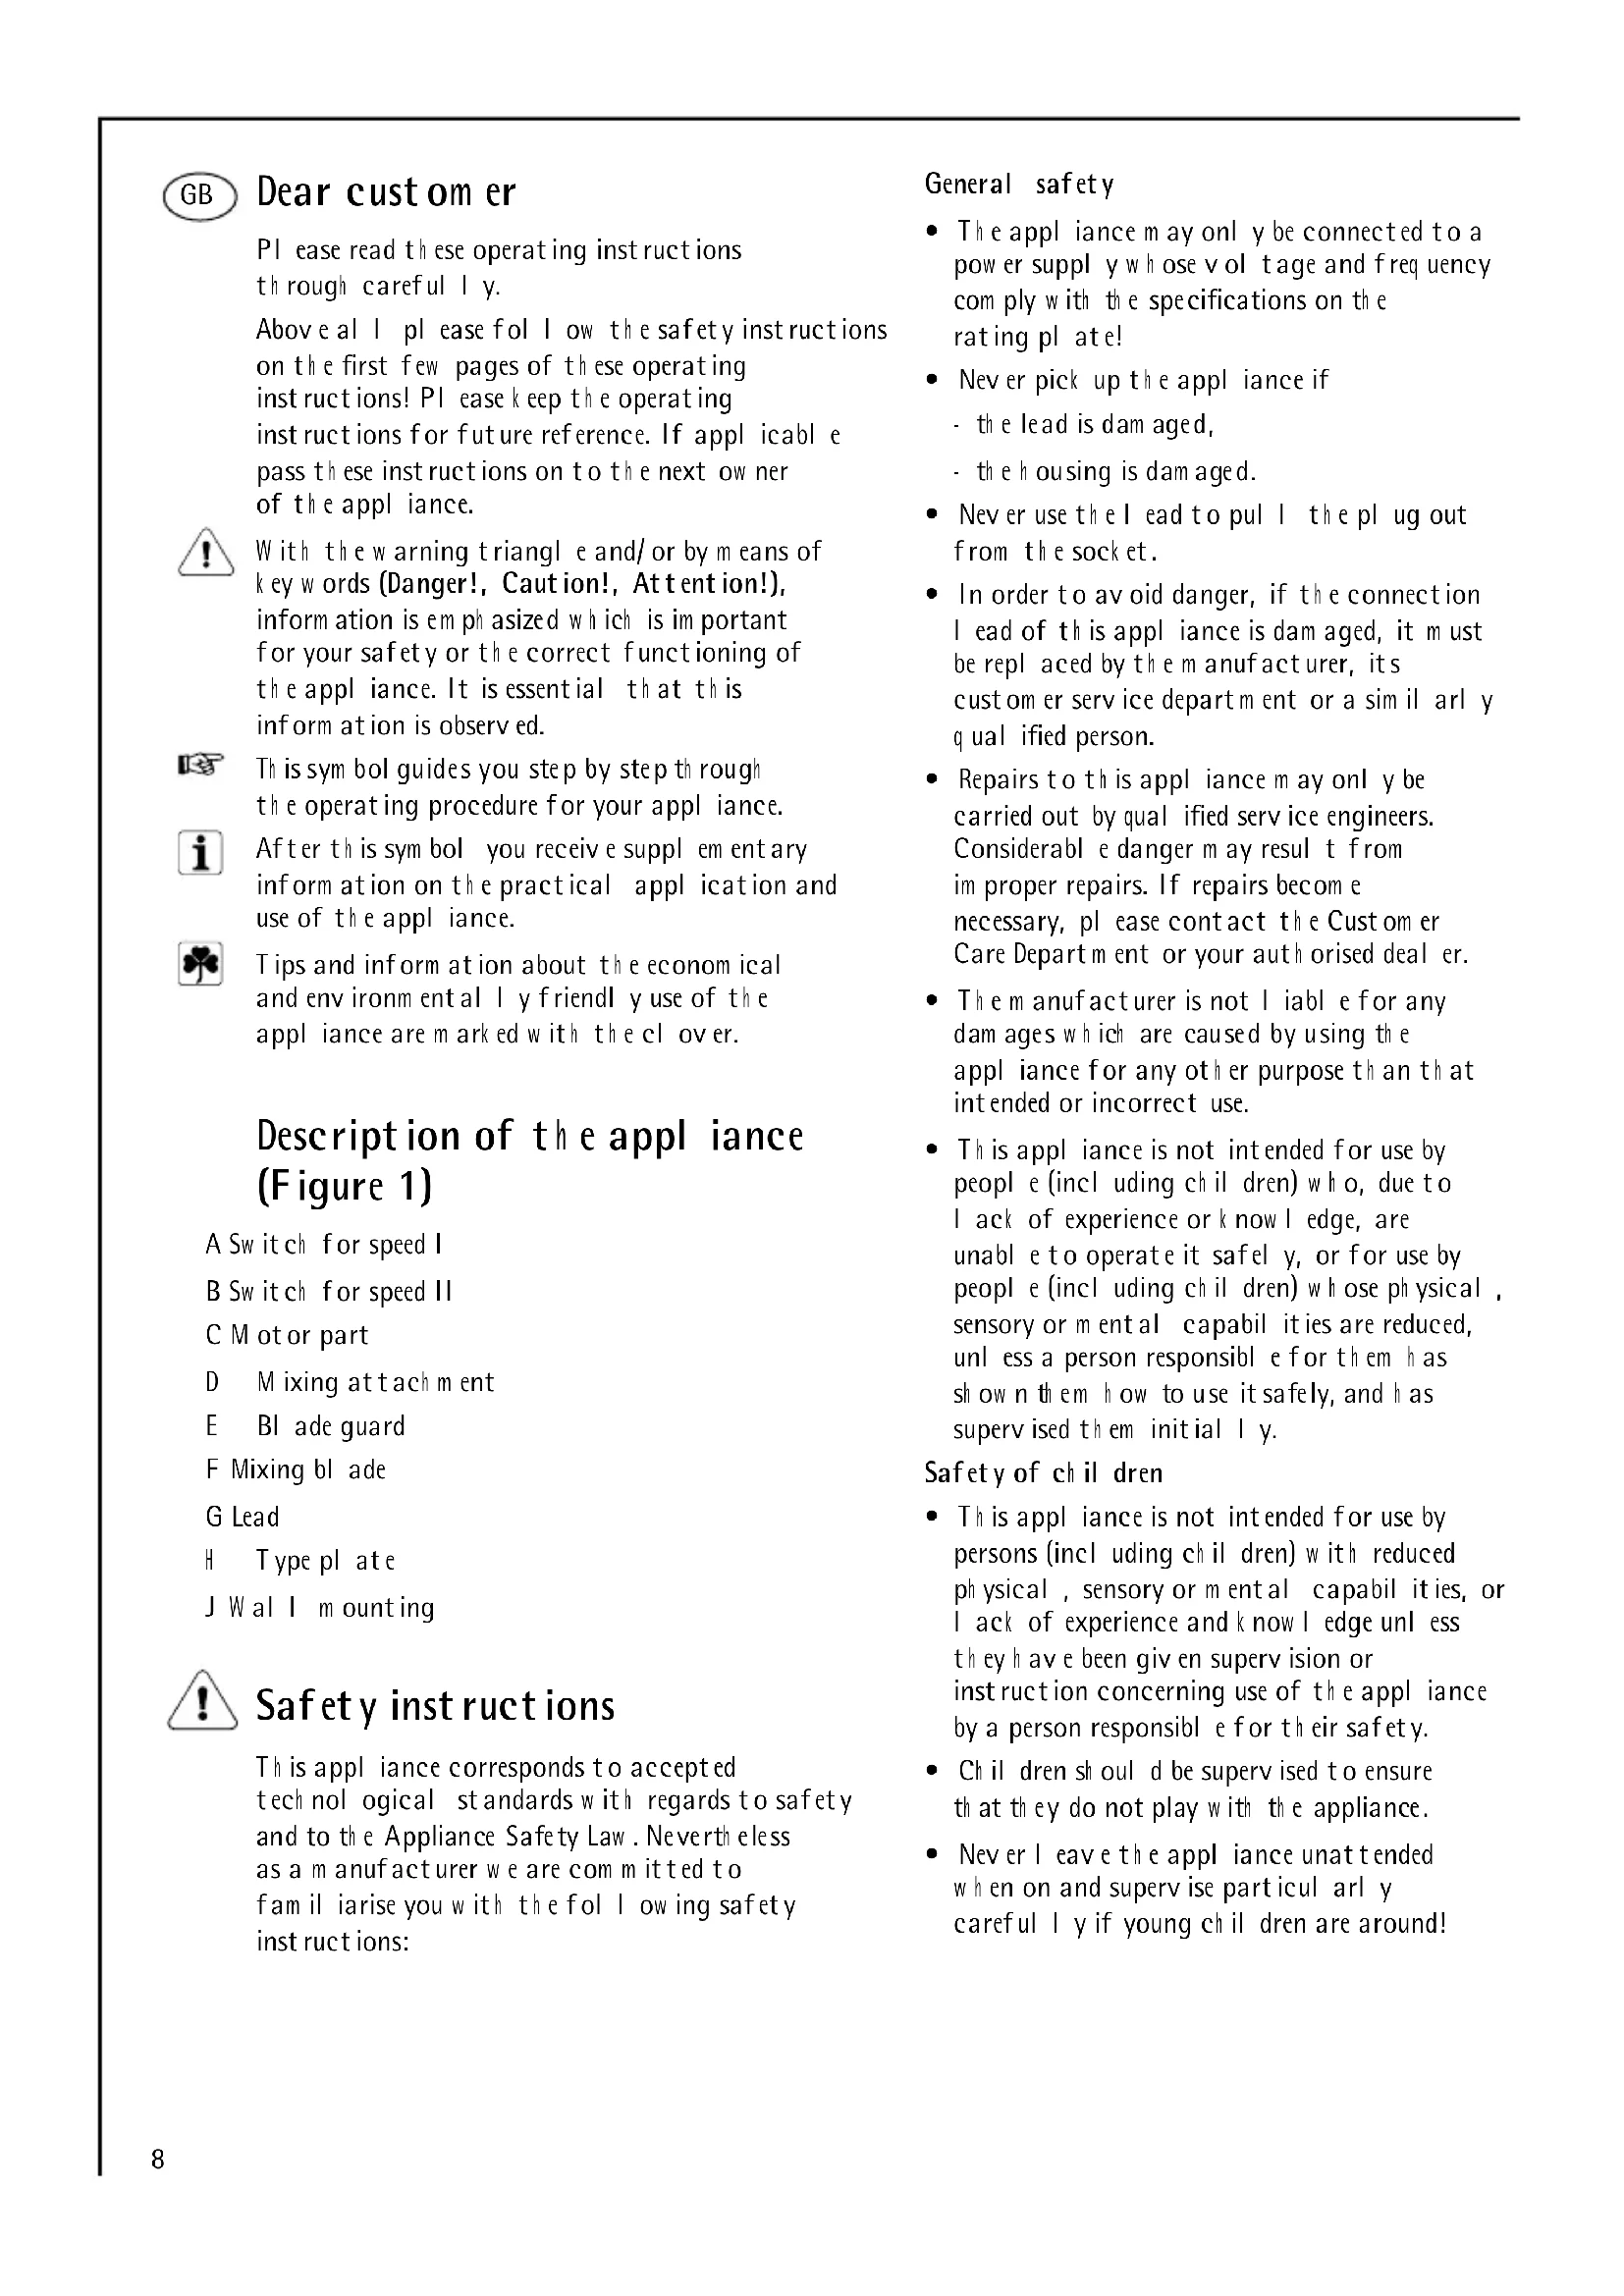
Description of the appliance (Figure 1)
A Switch for speed I
B Switch for speed II
C M ot or part
D Mixing attachment
E Bl ade guard
F Mixing bl ade
G Lead
H Type plate
J Wall I mounting
!
Safety instructions
This appliance corresponds to accepted technological standards with regards to safety and to the Appliance Safety Law. Nevertheless as a manufacturer we are committed to familiarise you with the following safety instructions:
General safety
- The appliance may only be connected to a power supply with voltage and frequency comply with the specifications on the rating plate!
- Never pick up the appliance if - the lead is damaged,
- the housing is damaged.
- Never use the lead to pull the plug out from the socket.
- In order to avoid danger, if the connection I ead of th is appl iance is dam aged, it must be repl aced by t h e m anufacturer, its custom er service depart ment or a sim il arl y qual ified person.
- Repairs to this appliance may only be carried out by qualified service engineers. Considerable danger may result from proper repairs. If repairs become necessary, please contact the Customer Care Department or your authorised dealer.
- The manufacturer is not liable for any damages which are caused by using the appliance for any other purpose than that intended or incorrect use.
- This appliance is not intended for use by people (including children) who, due to lack of experience or knowledge, are unable to operate it safely, or for use by people (including children) whose physical, sensory or mental capabilities are reduced, unless a person responsible for them has shown them how to use it safely, and has supervised them initially.
Safety of children
- This appliance is not intended for use by persons (including children) with reduced physical, sensory or mental capabilities, or lack of experience and know I edge unless they have been given supervision or instruction concerning use of the appliance by a person responsible for their safety.
- Children should be supervised to ensure that they do not play with the appliance.
- Never leave the appliance unattended when on and supervise particular arly careful if young children are around!
When using your appliance
- Ensure fingers are kept away from the moving mixing blade. This could result in injury!
- Keep hands and utensils out of container while e bl ending to reduce the risk of severe injury to persons or damage to the bl ender. A scraper may be used but must be used only when the bl ender is not running.
- Never use the mixer if you have with hands.
- Do not use this appliance to stir paints (I acquers, pol yesters etc.) This could result in an explosion!
- Never use the appliance in hot fat (there is a danger of spl ashes and you could burn yourself).
- The appliance should be switched off and unplugged before any cleaning or maintenance work is done on it.
- Never clean the motor part under running water or submerge it in washing up water.
- Avoid letting them mixing attachment runnig dry for more than max. 15 seconds.
- The mixing attachment is only to be inserted into or removed from the appliance when it is switched off.
- The blender can be used to mix food in any suitable bowl. Standard house of plastic mixing bowls are the ideal choice, if these are sufficient by deep, rounded and non-slip.
- To reduce the risk of injury, never pl ace cutting bl ade on base with out first putting bowl properly in pl ace.
- Be sure ch opper l id is securel y l ock ed in pl ace before operating appl iance.
- Never switch on the appliance until the working attachment is in the mixing bowl with the ingredients to be processed. Always wait until the attachment stops before you remove the bowl.
- Do not hold any hard objects (e.g. a spoon, knife or whisk) against them moving attachment and do not touch it with your hand. The appliance cannot be used for chopping ice or blending hard and dry substance, such as nut, candy. Otherwise the blade could be blunted.
- The use of accessory not recommended by the manufacturer may cause injuries to persons.
- Do not operate the appliance for other than its intended use.
- Do not stand the appliance upright for storage but I ay it down flat, oth erw ise there is a danger of an accident.
- When you have finished working with the appliance, switch it off and unplug it from the electricity supply.
Disposal
Pack aging material
The packaging materials are environmental friendly and can be recycled. The plastic components are identified by markings, e.g. >PE<, >PS<, etc. PI ease dispose of the packaging materials in the appropriate container at the community waste disposal facilities.


01 d appl iance
The symbol on the product or on its packaging indicates that this product may not be treated as house of waste. Instead it shall be handed over to the applicable collection point for the recycling of electrical and electronic equipment. By ensuring this product is disposed of correctly, you will help prevent potential negative consequences for the environment and human health, which could otherwise be caused by inappropriate waste handling of this product. For more detail ed information about recycling of this product, please contact your local city office, your house of waste disposal service or the shop where you purchase the product.
Operation
You can use the blender e.g. for
- produce mixed drinks,
- m ixing l iq uids,
- cutting up fruit and vegetable s very small
- producing em ul sions (e.g. m ayonnaise, sauces, crem es, toppings, and deserts based on dairy products),
- making pruée for vegetable soups or boiled baby-food,
- preparing coctail s and sh a k es.
Preparing for use

Before using for the first time, it is advisable for reasons or hygiene to clean the mixing attachment. Dry the mixing attachment well before using it.
Inserting/removing themixing attachment (Figure 3)

Before inserting or releasing the mixing attachment, switch off the blender and remove the plug from them mains socket!

Insert the mixing attachment to the motor part and lock it by turning clockwise.

Tor remove, unlock them mixing attachment by turning it anticlockwise.
Working with the blender

The appliance can be used for up to 1 minute with out stopping. It should be allowed to cool afterwards for at least 1 minute.
Im portant: Bl ades are very sh arp, h andl e with care. Ensure th at the h and- h eld blender is unpl ugged from the pow er outl et before assem bl ing or rem oving attach ments.

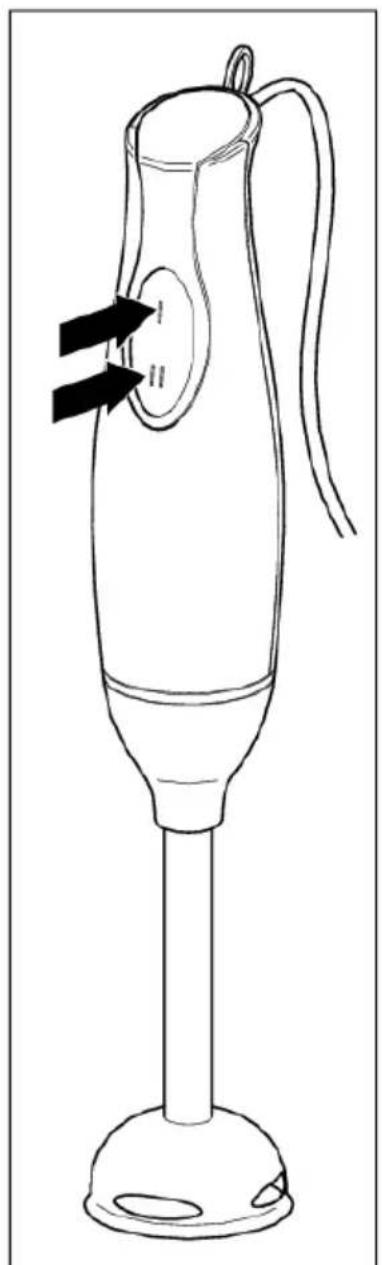
Insert the blender deep into the bow I, then press switch A (for speed I) or switch B (for speed II) (Figure 2).

Start all types of processing at speed I. This will avoid pow dery foods and liquids spraying out.
Light upward and downward movements of the blender permit them material being worked on to be handled in the best possible way. Please make sure that:
- the mixing attachment never has more than two-thirds of its length immersed in the material,
- the mixing bowl is never more than two-thirds full (to avoid the danger of splashes).
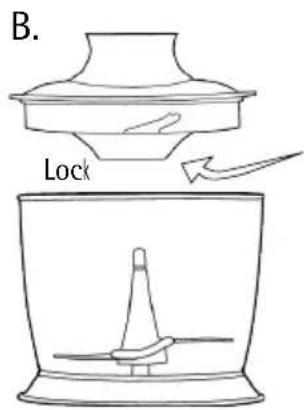
Working with the chopper (ESTM 1155) Figure 4.

Max operation duration under high speed per time cannot exceed 1 minute, and 1 minute rest time must be maintained at two consecutive cycles.

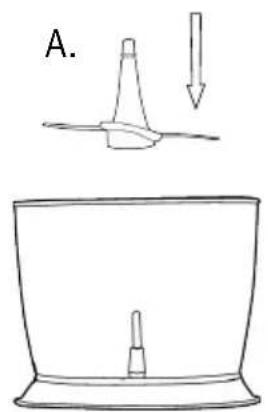
Place the chopper bowl on a clean, level surface.

Assem bl e the stainl ess steel bl ade into the ch opper bowl , as show n in position A.

Place food into the chopper bowl.
Note: remove the bone of the meat, cut small piece (approximately 10-15 mm), then place the meat into the bowl, the max quantity of meat can't exceed 200g in every bl ending.

Attach the lid onto the ch opper bowl and turn it in clockwise direction until it locks into position (see position B). To detach the lid, turn in adverse direction.

Insert the top part of the ch opper into the hole of the ch opper lid, and turn in clockwise direction to lock (see position C).

PI ug the appliance to power outlet and depress the switch to begin operation.

To stop the appliance, release the switch at the top of the motor unit.

Caution: To reduce the risk of injury, never place cutting blade on base with out first putting bowl properly in place.
Be sure ch opper l id is securel y lock ed in pl ace before operating appliance.
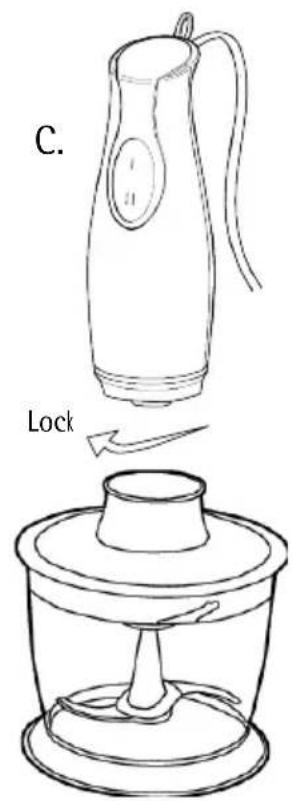
Working with the egg white beater (ESTM 1155) Figure 5.

Max operation duration under high speed per time cannot exceed 1 minute, and 1 minute rest time must be maintained at two consecutive cycles.

To assemble the egg white beater with the motor unit, turn the motor unit clockwise direction until tightened. To disassemble, turn in the adverse direction (see position A).

Plug the h and-h eld blender to power outlet.

Place egg white into the cup, general I y, put two egg white is enough (see position B).

Lower the hand-held blender into food and depress the switch at the top of the motor unit (see position C).

To stop the hand-held blender release the switch at the top of the motor unit.
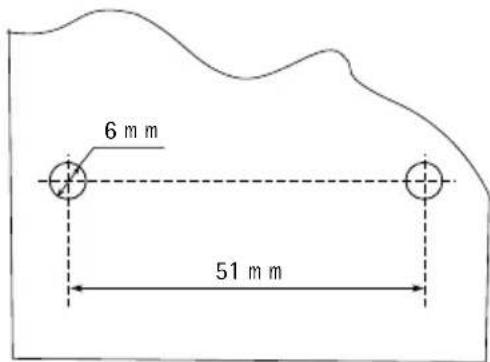
Fixing wall I bracket Figure 6.
Quick cleaning
You can fix the wall I bracket as following:
Between processing tasks, hold the h and-h eld blender in the cup half filled with water and turn on for a few seconds.

Drill two same holes in wall and strictly follow the dimension as indicated.

Knock two plastic tubes in them with hammer.

Secure the bracket on wall with another two screws.
Technical data
Mains voltage: 230 V, 50 Hz
Power consumption: 400 W
Maxim um continuous operating time: 1 minute
CI eaning and maintenance

Ensure that the hand-held blender is unplugged from the power outlet before assembling or removing attachments for cleaning or maintaining.
Note: Do not immerse the detachable stem of the blender in water because overtime the lubrication on the bearings may wash away.

W ash the detach able stem under running water, with out the use of abrasive cleaner or detergents. After finishing cleaning the detach able stem, place it upright so that at any water which may have got in, can drain out.

W ash the cup, bowl, beater and blade in warm soapy water.

The mixing attachment, the bowl and the beater are not recommended to place in dish washing machine as the plastic component deteriorate through prolonged use of dish washer cleaning.

Unplug the motor unit. Wipe the motor unit with a damp cloth. Never immerse it in water for cleaning as an electric shock may occur.

Dry thorough l y.

Caution: Blades are very sharp, handle with care.

Reassemble the blender shaft to motor unit then place it upright in wall I bracket (see Figure 6.) or hang it up for saving space.
CE; This appliance conforms with the following EC Directives:
• Low Voltage Directive 2006/9 5/EC
- EM C Directive 89/336/EEC with amendments 92/31/EEC and 93/68/EEC
F
Ch ère cl iente, Ch er cl ient,
F Cuch il I as bat idoras
Arbet a m ed h ack aren (EST M 1155)
Bild 4.

.Teh nilised andm ed
Vörgupinge:
230 V, 50 Hz
Võim sustarve:
400 W
Maksim aalne pideva kasutam ise aeg: 1 minut;
A I greič io jungik I is
B II greič io jungik I is
C Varik I io dal is
D Maišym o jt aisas
Spart usis v al ym as
- D
- Seh r geeh rte Kundin, seh r geeh rter Kunde,
- !
- I
- [Non-Text]
- Description of the appliance (Figure 1)
- Safety instructions
- General safety
- Safety of children
- Disposal
- Pack aging material
- d appl iance
- Operation
- Preparing for use
- Working with the blender
- Working with the chopper (ESTM 1155) Figure 4.
- Working with the egg white beater (ESTM 1155) Figure 5.
- Fixing wall I bracket Figure 6.
- Quick cleaning
- Technical data
- CI eaning and maintenance
- F
- Ch ère cl iente, Ch er cl ient,
- Arbet a m ed h ack aren (EST M 1155)
- Bild 4.
- .Teh nilised andm ed
- Spart usis v al ym as
Brand : ELECTROLUX
Model : ESTM 1100
Category : Mixer