4518 - Alarm clock radio ELTA - Free user manual and instructions
Find the device manual for free 4518 ELTA in PDF.
| Product type | Radio alarm clock with projector and thermometer |
| Brand | ELTA |
| Model | 4518 |
| Weight | 0.56 kg |
| Mains power | 230 V AC, 50 Hz, 5 W |
| Backup power | 3 flat lithium CR2025 batteries (3 V each, not included) |
| Radio frequency ranges | AM: 525 - 1615 kHz, FM: 87.5 - 108 MHz |
| Speaker impedance | 8 ohms |
| Display | LED digital display with projection |
| Projection | Time on ceiling or wall, distance 90 cm to 2.75 m |
| Infrared sensor | For snooze and sleep |
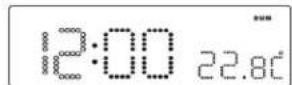
| Indoor thermometer | Range: 0 to 50 °C (32 to 122 °F) |
| Main functions | AM/FM radio, dual alarm (buzzer or radio), snooze (9 min), sleep (10-90 min), date display, DST |
| Alarm setting | 2 independent alarms with day selection (Mon-Fri, Mon-Sun, Mon-Sat) |
| Maintenance and cleaning | Soft damp cloth; do not use solvents, alcohol, benzene or abrasives |
| Safety | Do not expose to water or humidity; do not obstruct ventilation; do not place flame source on the device |
| Repairability | Refer all repairs to qualified personnel; do not open the casing |
| Reset button | Restores factory settings (located at the back) |
| Included accessories | Not specified (manual only) |
Frequently Asked Questions - 4518 ELTA
User questions about 4518 ELTA
0 question about this device. Answer the ones you know or ask your own.
Ask a new question about this device
Download the instructions for your Alarm clock radio in PDF format for free! Find your manual 4518 - ELTA and take your electronic device back in hand. On this page are published all the documents necessary for the use of your device. 4518 by ELTA.
USER MANUAL 4518 ELTA
text_image
Technical diagram of electronic device components with numbered labels for identificationBEDIENELEMENTE
Projection clock radio with thermometer and infrared sensor snooze
WARNING
TO PREVENT FIRE OR SHOCK HAZARD, DO NOT EXPOSE THIS APPLIANCE TO RAIN OR MOISTURE.

The triangular symbol with the lightning Bolt warns the user to the presence of dangerous non-isolated voltage on the inside of this device which may cause an electric sh
WARNING
DANGER OF A HAZARDOUS ELECTRIC SHOCK. DO NOT OPEN
WARNING: TO REDUCE THE RISK OF AN ELECTRIC SHOCK, DO NOT REMOVE THE FRONT OR BACK COVER. INSIDE THE UNIT, THERE ARE NO PARTS THAT CAN BE REPAIRED OR ADJUSTED BY THE USER. PLEASE REFER TO QUALIFIED TECHNICIANS.

The triangular symbol with the exclamation highlights important points of which the user should refer to the manual regarding maintenance and repair.
SAFETY INSTRUCTIONS
- READ INSTRUCTIONS - All the safety and operating instructions should be read before the appliance is operated.
- RETAIL INSTRUCTIONS: The safety and operating instructions should be retained for future reference.
- HEED WARNINGS – All warnings on the appliance and in the operating instructions should be adhered to.
- FOLLOW INSTRUCTIONS - All operating instructions should be followed.
- WATER AND MOISTURE - The appliance should not be used near water, for example, near a bathtub, washbowl, kitchen sink, laundrytub, swimming pool or in a wet basement.
- VENTILATION - The appliance should be situated so that its location or position does not interfere with its proper ventilation. Do not place on bed, sofa, rug or similar surface that may block the ventilation openings, in a built-in installation, such as a bookcase or cabinet that may impede the flow of air through the ventilation openings.
- HEAT - The appliance should be situated away from heat sources such as radiators, stoves, or other appliances (including amplifiers) that produce heat.
- POWER SOURCE - The appliance should be connected to power supply only of the type described in the operating instructions or as marked on the appliance.
- GROUNDING - Precautions should be taken to ensure that the grounding means of an appliance is not defeated.
- POWER CORD PROTECTION - Power supply cords should be routed so that they are not likely to be walked on or pinched by items placed upon or against them.
- POWER LINES - An outdoor antenna should be located away from power lines.
- OBJECT and LIQUID ENTRY - Care should be taken so that objects do not fall and liquids are not spilled into the enclosure through openings.
- DAMAGE REQUIRING SERVICE - The appliance should be serviced by qualified service personnel when:
a. The power-supply cord or plug has been damaged.
b. Objects have fallen into, or liquid has been spilled into the appliance enclosure.
c. The appliance has been exposed to rain.
d. The appliance has been dropped, or the enclosure damaged.
e. The appliance does not appear to operate normally. - SERVICING - The user should not attempt to service the appliance beyond that described in the user operating instructions. All other servicing should be referred to qualified service personnel.
Notes:
a. Dirty or scratched CD may cause a skipping problem. Clean or replace the CD.
b. If an error display or malfunction occurs, disconnect the AC cord and remove all the batteries. Then turn the power back on.
text_image
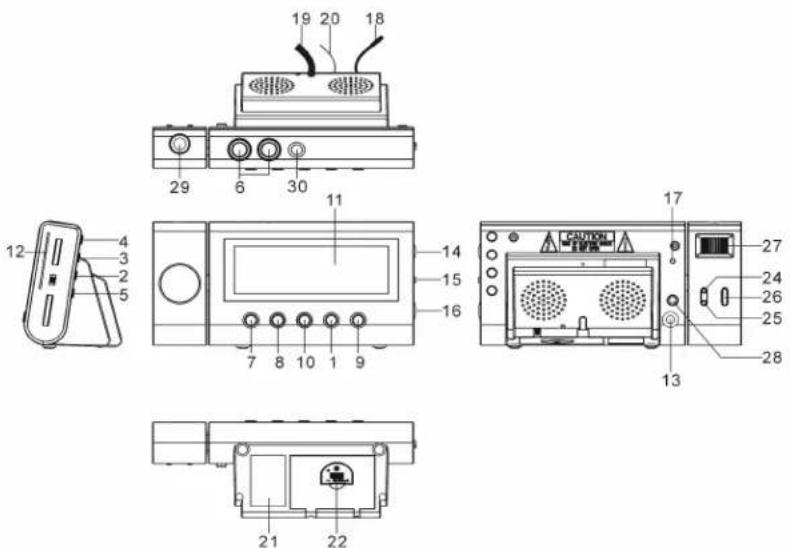
Technical diagram of electronic device components with numbered labels for identificationCONTROLS
- MODE SET BUTTON
- ALARM SET BUTTON
- ALARM 1 BUZZER / RADIO SELECT BUTTON
- ALARM 2 BUZZER / RADIO SELECT BUTTON
- C° / F° BUTTON
- INFRARED SENSOR
- SET BUTTON
- SET BUTTON
- POWER ON/OFF (ALARM OFF) BUTTON
- SNOOZE / SLEEP BUTTON
- LED DISPLAY
- DIAL SCALE AND POINTER
- AUDIO IN JACK
- VOLUME CONTROL
-
WAVE BAND
-
TUNING CONTROL
- RESET BUTTON
- TEMPERATURE SENSOR (IN DOOR)
- AC POWER CORD
20.FM ANTENNA WIRE - RATING LABEL
22.BATTERY COMPARTMENT
23.SPEAKER - MINUTE BUTTON FOR PROJECTION UNIT
25.HOUR BUTTON FOR PROJECTION UNIT
26.TIME SET BUTTON FOR PROJECTION UNIT - FOCUS ADJUSTMENT FOR PROJECTION UNIT
28.PROJECTION ON/OFF BUTTON
29.PROJECTION UNIT - AUTO DIMMER SENSOR
POWER CONNECTION
Plug the AC power cord to a household outlet AC source. This unit is equipped with a battery back up system, it requires a 3 x 3V CR2025 Flat Lithium battery (Not included). Insert the battery in the battery compartment, making certain that the positive and negative (+ and -) battery terminals are attached to the corresponding terminals on the plate in the battery compartment. If an AC power failure occurs, the clock automatically switches to the battery power supply, the clock and timer memory continue running. When the AC power resumes, the clock switches back to AC again.
GETTING STARTED
Press the reset button (17) locates on the back of unit after AC plug in.
- The unit will display full segment for 2 seconds, then it will enter the normal mode.
- Display will lighten up.
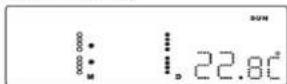
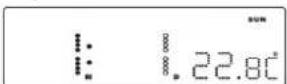
1. TIME AND CALENDAR SETTING
A. Setting Time and Calendar - Press Mode Set button (1) in normal mode and keep depress over 2 second to enter Time Set mode, after enter the setting mode, press Mode Set button (1) to change the mode cycle as follows :
Normal - Year - Month - Day - 12/24H - RTC Hour - RTC Min - Normal
Action (during data adjustment):
- Press button (7) to adjust data forward.
- Press button (8) to adjust data backward.
- Keep depress or button for 2 second to enable auto forward.
a. Year Set Mode
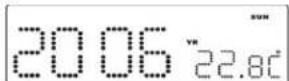
Initial Value : 2006
Year Range : 2000 to 2099
Display Show Year Set Mode
b. Month Set Mode
Display Show Month Set Mode
c. Day Set Mode
Display Show Day Set Mode
Remark: Weekday will recalculate when year, month or day is adjusted.
d. 12/24H Set Mode
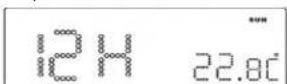
Display Show 12/24H Set Mode (Select 12H)
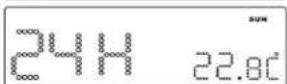
Display Show 12/24H Set Mode (Select 24H)
e. RTC Hour Set Mode
Display Show Hour Set Mode
f. RTC Min Set Mode

Display Show Min Set Mode
Remark: Second will reset for every minute adjustment.
B. Setting Alarm 1 and Alarm 2 - Press Alarm set button (2) during normal mode and keep depress over 2 second to enter alarm set mode, after enter the setting mode, press Alarm set button (2) to change the mode cycle as follows:
Normal - AL1 Hour - AL1 Min - AL1 Weekend Alarm - AL2 Hour - AL2 Min - AL2 Weekend Alarm - Normal
Action (during data adjustment):
- Press button (7) to adjust data forward.
- Press button ▶▶1 (8) to adjust data backward.
- Keep depress or button for 2 second to enable auto forward.
Display Show Setting Alarm 1 Hour

Display Show Setting Alarm 1 Min

Display Show Setting Alarm 1 Weekend Alarm - Mon to Fri

Display Show Setting Alarm 1 Weekend Alarm - Mon to Sun
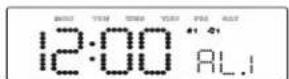
Display Show Setting Alarm 1 Weekend Alarm - Mon to Sat
Display Show Setting Alarm 2 Hour

Display Show Setting Alarm 2 Min
Display Show Setting Alarm 2 Weekend Alarm - Mon to Fri
text_image
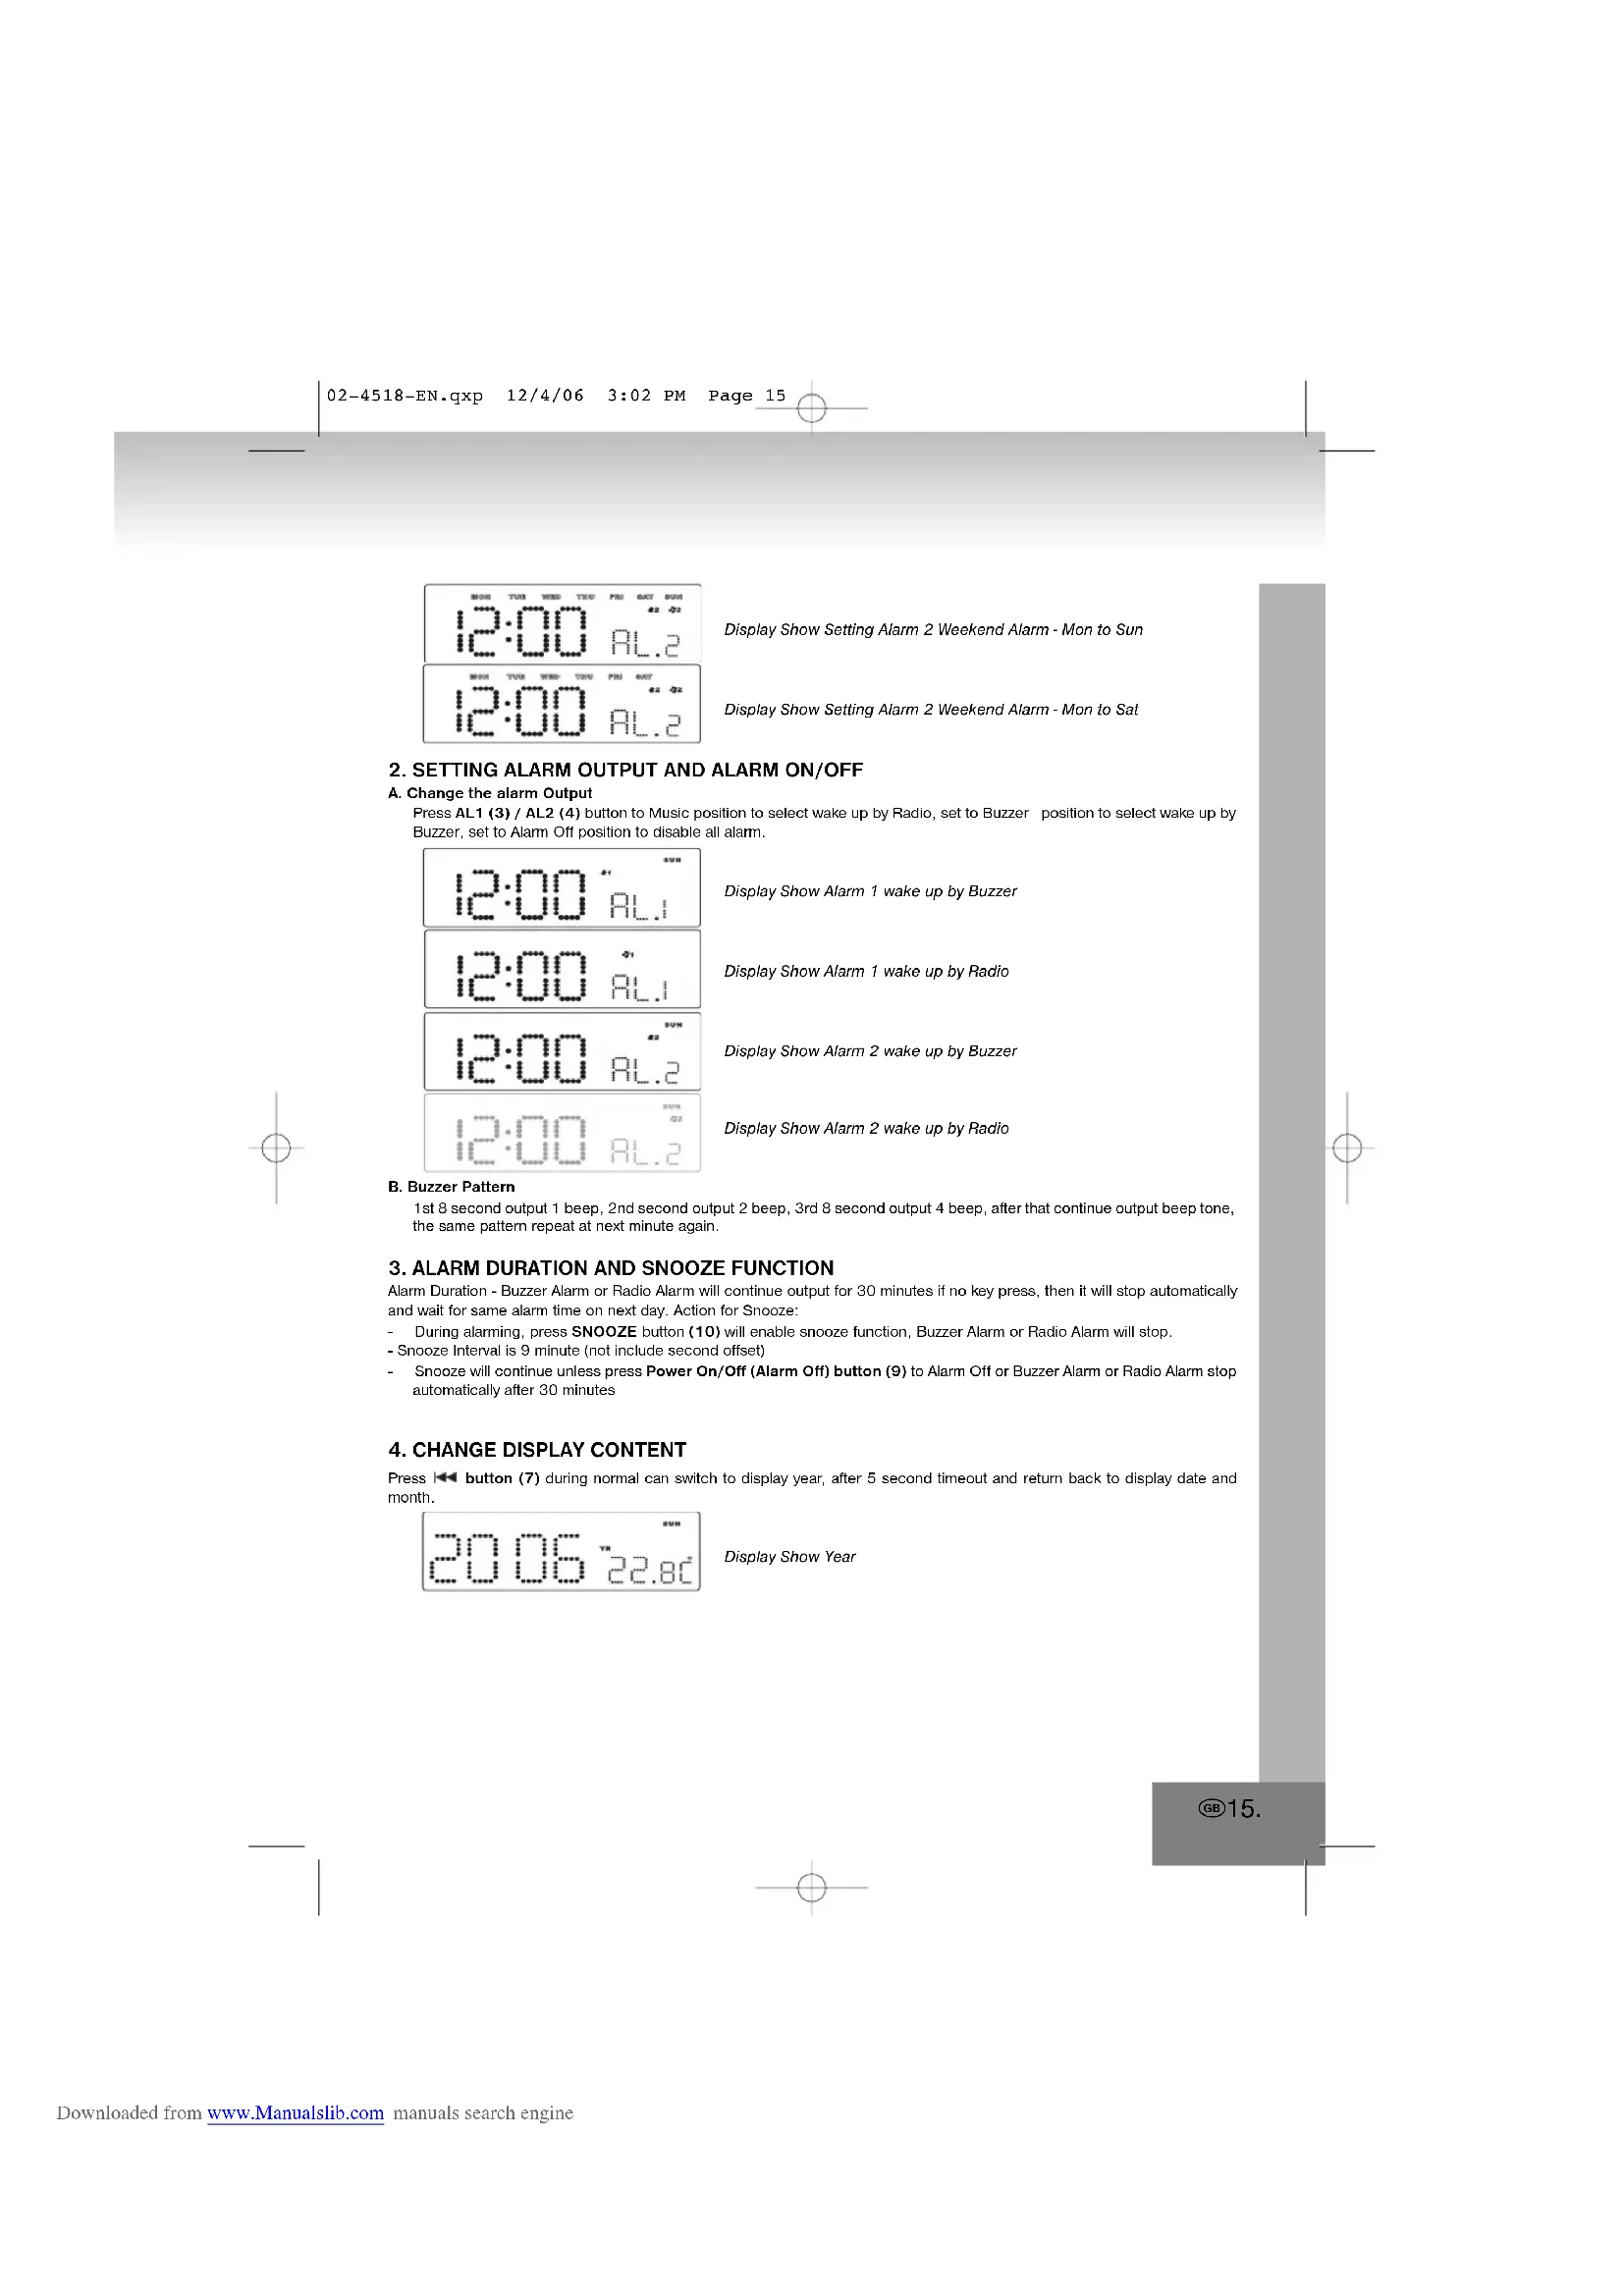
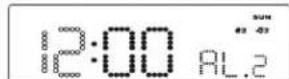
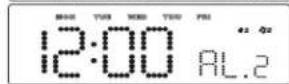
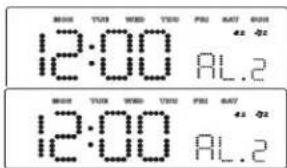
12:00 AL.2 12:00 AL.2Display Show Setting Alarm 2 Weekend Alarm - Mon to Sun
Display Show Setting Alarm 2 Weekend Alarm - Mon to Sat
2. SETTING ALARM OUTPUT AND ALARM ON/OFF
A. Change the alarm Output
Press AL1 (3) / AL2 (4) button to Music position to select wake up by Radio, set to Buzzer position to select wake up by Buzzer, set to Alarm Off position to disable all alarm.
text_image
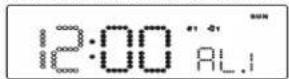
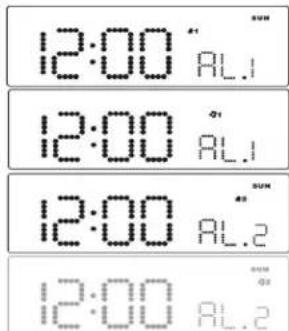
12:00 AL.1 12:00 AL.1 12:00 AL.2 12:00 AL.2Display Show Alarm 1 wake up by Buzzer
Display Show Alarm 1 wake up by Radio
Display Show Alarm 2 wake up by Buzzer
Display Show Alarm 2 wake up by Radio
B. Buzzer Pattern
1st 8 second output 1 beep, 2nd second output 2 beep, 3rd 8 second output 4 beep, after that continue output beep tone, the same pattern repeat at next minute again.
3. ALARM DURATION AND SNOOZE FUNCTION
Alarm Duration - Buzzer Alarm or Radio Alarm will continue output for 30 minutes if no key press, then it will stop automatically and wait for same alarm time on next day. Action for Snooze:
- During alarming, press SNOOZE button (10) will enable snooze function, Buzzer Alarm or Radio Alarm will stop.
- Snooze Interval is 9 minute (not include second offset)
- Snooze will continue unless press Power On/Off (Alarm Off) button (9) to Alarm Off or Buzzer Alarm or Radio Alarm stop automatically after 30 minutes
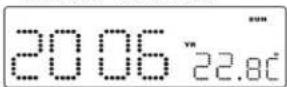
4. CHANGE DISPLAY CONTENT
Press button (7) during normal can switch to display year, after 5 second timeout and return back to display date and month.
Display Show Year
5. CHANGE DISPLAY CONTENT
Press button (8) during normal can switch to display Month and day, after 5 second timeout and return back to display time.
Display Show Month and Day
6. SLEEP FUNCTION
During Radio on mode, press Snooze/Sleep button (10) to turn on Sleep mode, the Sleep time will keep flashing by 5 second, within 5 second and press Sleep button can change the duration from 90 min - 10 min. Press Power button (9) to cancel sleep function.
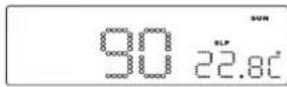
Display Show Setting Sleep Duration

Display Show Under Sleep Mode (Radio Now Turn On)
DST - Daylight Saving Time
Press ▶▶ button (8) and hold for 5 seconds to toggle on and off DST Function.
Display Show turn DST icon On
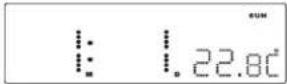
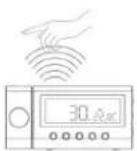
7. THERMOMETER FUNCTION
Remark:
Temperature Range for Indoor: 0 to +50°C or 32 to 122°F.
RADIO OPERATION
- Press the Power on/off button (9) to turn radio on
- Select AM or FM band using the wave band switch (15)
- Select the Station using the tuning control (16)
- Turn the volume control (14) to adjust volume as required
- Press the power on/off button (9) to turn radio off.
- The AM band use an internal directional aerial. Rotate the radio for best reception.
- Ensure that the FM cord antenna (20) is completely unrolled and extended for best FM reception.
Note:
RESET
- The reset button (17) is located on the back of unit. Use a ballpoint pen to press it whenever you change the batteries, or unit is not performing as expected. This will return all settings to default value, and you will lose any stored data (alarm and clock settings).
CAUTION
- No naked flame sources, such as lighted candles, should be placed on the apparatus.
- Do not place the unit in closed bookcases or racks without proper ventilation.
- To prevent fire or shock hazard, do not expose unit to rain or any type of moisture.
- The unit should not be exposed to direct sunlight, very high or low temperature, moisture, vibrations or placed in a dusty environment.
- Do not use abrasive, benzene, thinner or other solvents to clean the surfaces of the unit. To clean, wipe it will mild non-abrasive detergent solution and clean soft cloth.
- Never attempt to insert wires, pins or other such objects into the vents or opening of the unit.
- Do not place the unit near the light on table lamp. The light will affect the reception of the infrared sensor function.
SPECIFICATIONS
Frequency range : AM 525 - 1610 kHz
FM 87.5 - 108 MHz
Speaker impedance : 8 Ohm
Battery backup : 3V (3 x 3V CR2025 Flat Lithium battery)
(Not included)
Power source : AC 230V - 50 Hz, 5 Watt
Weight: 0,560 kg
WARNING
To reduce the risk of fire or electric shock do not expose this appliance to rain or moisture.
NOTE
Do not connect FM antenna to outside antenna.
Dripping warning:
The product shall not be exposed to dripping or splashing and that no objects filled with liquids, such as vases, shall be placed on the product.
Ventilation warning:
The normal ventilation of the product shall not be impeded for intended use.
Disconnect device warning:
Main plug is used as the connection, so is should always remain ready operate.
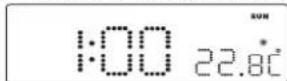
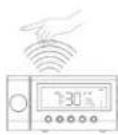
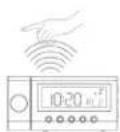
INFRARED SENSOR FUNCTION
- The radio Off mode, infrared display alarm 1 and alarm 2 time
-
Hand on top of sensor (6) within - Hand on top of sensor (6) within
1 second to show the alarm 1 time 1 second to show the alarm 2 time -
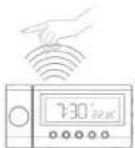
The radio On mode, use the infrared sensor to turn sleep function on.
- Hand on top of sensor (6) within 2 seconds to turn the sleep on, the word "Slp" showing on the LED display. Sleep time from 10-90 minutes. (Refer to "Sleep function" for require sleep time adjustment). Press (9) to cancel sleep function.
- The alarm on mode, use the infrared sensor to turn snooze function on.
- Hand on top of sensor (6) within 1 second snooze off for 9 minlues.
THE LED DIGITAL CLOCK AND THE PROJECTION CLOCK MUST BE SET SEPARATELY.
TIME SETTING FOR PROJECTION UNIT
To preset the HOURS, press simultaneously the HOUR Button (25) an the TIME button (26). Keep them pressed until the hour digits to be preset are displayed. To preset the MINUTES, press simultaneously the MINUTE button (24) and TIME button (26). Keep them pressed until the minute digits to be preset are displayed. Focus setting: Ajust the projection clock brightness/focus by turning the brightness/focus adjustment wheel (27) until the projected time is clearly shown on the ceiling or wall.
NOTE:
PROJECTS TIME IMAGE ON THE CEILING OR WALL OF A DARKENED ROOM. MAXIMUN PROJECTION DISTANCE IS 3-9 FEET.
FURTHER INFORMATION
Beware of small pieces and batteries, do not swallow them. It may be hazardous to your health and lead into suffocation. Please, Make sure to keep small devices and batteries out of the reach of children.

Important advice regarding hearing protection

Caution:
You care for your hearing, and so do we.
Therefore, use caution while using this appliance.
Our recommendation: Avoid high volumes.
Children should be supervised while using headphones; make sure that the appliance is not set to high volume.
Caution!
High volumes may cause irreparable damage to children's ears.

NEVER let allow anyone, especially children, to put objects into the holes, slots or openings on this devise. This may lead into death due to electric shock. The device must only be opened by a qualified assistant.

Only use the appliance for its intended purpose.
This device may only be used in housings and business premises.

Please keep this instruction manual for further reference.

Instructions on environment protection
Do not dispose of this product in the usual household garbage at the end of its life cycle; hand it over at a collection point for the recycling of electrical and electronic appliances. The symbol on the product, the instructions for use or the packing will inform about the methods for disposal.
The materials are recyclable as mentioned in its marking. By recycling, material recycling or other forms of re-utilization of old appliances, you are making an important contribution to protect our environment.
Please inquire at the community administration for the authorized disposal location.

Do not obstruct the ventilation of the device. Make sure, that no curtains, newspapers, furniture or any other type of object are blocking the ventilation system of the apparatus. The ventilation system must be clear of objects at all times! Overheating may lead into serious damage of the device and reduce its performance and lifespan.

Heat and warmth
Do not expose the appliance to direct sunlight. Make sure that the appliance is not subject to direct heat sources such as heaters or open fire. Make sure that the ventilation slots of the appliance are not covered.

Moisture and cleaning
This appliance is not waterproof! Do not immerse player in water. Do not allow player to come in contact with water. If water gets inside the player it may cause serious damage. Do not use cleaning agents that contain alcohol, ammoniac, benzene or abrasives as these could damage the player. For cleaning, use a soft, moistened cloth.

Professional recycling
Batteries and packaging should not be disposed of in the trash. Batteries must be handed over to a collection centre for used batteries. Separating disposable packaging materials is ecologically friendly.
MODELE 4518
text_image
Technical diagram of electronic device components with numbered labels for identificationPOSITION DES COMMANDES
- BOUTON DE SELECTION DU MODE
- BOUTON DE RÉGLAGE DU RÉVEIL
- ALARME 1 BOUTON DE SELECTION SONNERIE / RADIO
- ALARME 2 BOUTON DE SELECTION SONNERIE / RADIO
- BOUTON C° / F°
- CAPTEUR INFRAROUGE
- BOUTON DE REGLAGE
- BOUTON DE REGLAGE
- BOUTON ON/OFF(ALARME OFF)
- BOUTON REPOS/SOMMEIL
- AFFICHAGE LED
- CADRAN DE L'ECHELLE AVEC AIGUILLE
- PRISE D'ENTREE AUDIO
- CONTROLE DU VOLUME
-
BANDE DE FREQUENCE
-
MOLETTE DE RÉGLAGE
- BOUTON RESET
- SONDE THERMIQUE (EN INTERIEUR)
- ANTENNE FM
20.ANTENNE FM - ETIQUETTE DE CLASSEMENT
22.BOÎTIER DES PILES
23.ENCEINTE - BOUTON DES MINUTES POUR L'UNITE DE PROJECTION
25.BOUTON DES HEURES POUR L'UNITE DE PROJECTION
26.BOUTON DE REGLAGE DE L'HEURE POUR L'UNITE DE PROJECTION - MISE AU POINT DE L'UNITE DE PROJECTION
28.BOUTON ON/OFF DE LA PROJECTION - UNITE DE PROJECTION
30.CAPTEUR DE VARIATIONS AUTOMATIQUE
ALIMENTATION
Notre recommandations: Evitez les volumes forts.
text_image
Technical diagram of electronic device components with numbered labels for identificationA KEZELÖELEMEK ELHELYEZKEDÉSE
- MODE FUNKCIÓVÁLASZTÓ GOMB
- ALARM SET ÉBRESZTÖBEÁLLÍTÓGOMB
- ALARM 1 BUZZER / RADIO
ÉBRESZTÓMÓDVÁLASZTÓ GOMB - ALARM 2 BUZZER / RADIO
ÉBRESZTÓMÓDVÁLASZTÓ GOMB - C° / F° GOMB
- INFRAVOROS ÉRZEKELO
- SEM(ÀLLÍTÓ) GOMB
- SETI(ÁLLÍTÓ) GOMB
- ON/OFF - KI/BE KAPCSOLÓ GOMB (ÉBRESZTÉS
KI) - SZUNDI GOMB
- DIGITALIS KIJELZÖ
- SKÁLA MUTATÓVAL
- AUDIÓ BE JACK DUGALJZAT
- HANGERÖSZABÁLYZÓ
-
HULLÁMSÁVÁLLÍTÓ
-
RÁDIÓ BEHANGOLÓ
- RESET GOMB
- HÖMÉRSÉKLETÉRZÉKELŐ (BELTÉRI)
- AC ELEKTROMOS VEZETÉK
20.FM ANTENNAHUZAL - ÉRTÉKISMERTETÖ CÍMKE
22.ELEMTARTO
23.HANGFAL - A KIVETÍTÓ MINUTE (PERC) BEÁLLÍTÓGOMBJA
25.A KIVETITO HOUR (ORA) BEALLITOGOMBJA
26.A KIVETÍTÓ TIME SET IDÖBEÁLLÍTÓGOMBJA - A KIVETÍTŐ FÓKUSZÁLLÍTÓJA
28.KIVETITÉS KI/BE
29.KIVETÍTÓ
30.AUTOMATA FÉNYERÖSZABÁLYOZÓ ÉRZÉKELŐ
ELEKTROMOS CSATLAKOZÁS
6. SLEEP ELALVÁSKAPCSOLÓ
text_image
Technical diagram of electronic device components with numbered labels for identificationCONTROLLI
- TASTO MODE SET
- TASTO SET BUTTON
- TASTO ALARM 1 BUZZER / RADIO SELECT
- TASTO ALARM 2 BUZZER / RADIO SELECT
- TASTO C° / F°
- INFRAROSSO SENSORE
- TASTO SET
- TABTO SET
- TASTO POWER ON/OFF (ALARM OFF)
- TASTO SNOOZE / SLEEP
- LED DISPLAY
- DIAL SCALE AND POINTER
- ENTRATA AUDIO JACK
- CONTROLLO VOLUME
- LEVA BANDA AM FM
-
CONTROLLO RADIO
-
TASTO RESET
- SENSORE DELLA TEMPERATURA (INTERNA)
- CAVO ALIMENTAZIONE
20.CAVO ANTENNA FM - ETICHETTA RATING
22.COMPARTIMENTO BATTERIE
23.ALTOPARLANTE - TASTO MINUTE PER IL DISPOSITIVO DI PROIEZIONE
25.TASTO HOUR PER IL DISPOSITIVO DI PROIEZIONE - TASTO TIME SET PER IL DISPOSITIVO DI PROIEZIONE
- REGOLAZIONE DEL FOCUS PER IL DISPOSITIVO DI PROIEZIONE
28.TASTO PROIEZIONE ON/OFF
29.DISPOSITIVO DI PROIEZIONE
30.SENSORE DI AUTOOFFUSCAMENTO
CONNESSIONE
text_image
Technical diagram of electronic device components with numbered labels for identificationCONTROLES
text_image
Technical diagram of electronic device components with numbered labels for identificationtext_image
Technical diagram of electronic device components with numbered labels for identificationBUDOWA
- PRZYCISK MODE
- PRZYCISK USTAWIENIA ALARMU
- ALARM 1 BUZZER / WYBOR TRYBU RADIA
- ALARM 2 BUZZER / WYBOR TRYBU RADIA
- PRZYCISK C° / F°
- CZUJNIK PODCZERWIENI
- PRZYCISK
- PRZYCISK
- PRZYCISK ON/OFF (ALARM OFF)
- PRZYCISK SNOOZE / SLEEP
- WYSWIETLACZ LCD
- POKRETŁO RADIA
- WEJŚCIE SŁUCHAWKOWE JACK
- KONTOLA POZIOMU GŁOŚNOŚCI
-
WYBOR ZAKRESU FAL
-
DOSTRAJANIE RADIA
- PRZYCISK RESET
- CZUJNIK TEMPERATURY (WEWNATRZ)
- KABEL ZASILANIA AC
20.PRZEWODOWA ANTENA FM - ETYKIETA
22.PRZEGORDA NA BATERIE
23.GŁOŚNIK - PRZYCISK USTAWIENIA MINUTY DLA PROJEKTORA
25.PRZYCISK USTAWIENIA GODZINY DLA
PROJEKTORA
26.PRZYCISK USTAWENIA ZEGARA DLA PROJEKTORA
27. USTAWIENIE OSTROŚCI DLA PROJEKTORA
28.PRZYCISK ON/OFF PROJEKTORA
29.PROJEKTOR
30.CZUJNIK ŚWIATŁA
PODŁACZENIE
text_image
Technical diagram of electronic device components with numbered labels for identificationBEDIENINGSTOETSEN
- MODE-INSTELTOETS
- TOETS VOOR DE ALARMINSTELLING
- ALARM 1 BUZZER /RADIOSELECTIETOETS
- ALARM 2 BUZZER /RADIOSELECTIETOETS
- °C/°F-TOETS
- INFRAROODSENSOR
- INSTELTOETS
- INSTELTOETS
- STROOM AAN/UIT-TOETS (ALARM UIT)-TOETS
- SNOOZE /SLEEP-TOETS (sluimer/slaap)
- LED-SCHERM
- WIJZERSCHAAL EN WIJZER
- AANSLUITING AUDIO-INGANG
- VOLUMEREGELING
-
BANDKEUZESCHAKELAAR
-
TUNINGREGELING
- RESET-TOETS
- TEMPERATUURSENSOR (IN DEUR)
- AC-STROOMSNOER
20.FM-ANTENNEDRAAD - VERMOGENSLABEL
22.BATTERIJVAK
23.LUIDSPREKER - MINUUTTOETS VOOR PROJECTIE-EENHEID
25.UURTOETS VOOR PROJECTIE-EENHEID
26.INSTELTOETS TIJD VOOR PROJECTIE-EENHEID - BRANDPUNTREGELING VOOR PROJECTIE-
EENHEID
28.PROJECTIE AAN/UIT-TOETS
29.PROJECTIE-EENHEID
30.AUTOMATISCHE DIMMERSENSOR
STROOMAANSLUITING
7. THERMOMETERFUNCTIE
text_image
Technical diagram of electronic device components with numbered labels for identificationUMÍSTĚNÍ OVLADAČŮ
- TLAČÍTKO NASTAVENÍ REŽIMU
- TLAČITKO NASTAVENİ BUDİKU
- TLAČÍTKO BUDÍK 1 / NASTAVENÍ RÁDIA
- TLAČÍTKO BUDÍK 2 / NASTAVENÍ RÁDIA
- TLAČÍTKO C° / F°
- INRAČERVENÝ SENZOR
- TLACÍTKO NASTAVENÍ
- TEACÍTKO NASTAVENÍ
- TLAČÍTKO VYP/ZAP (BUDÍK VYPNOUT)
- TLAČÍTKO OPAKOVAT ZVONĚNÍ / AUTOMATICKÉ VYPNUTÍ
- LED DISPLEJ
- ČÍSELNÁ STUPNICE A UKAZOVÁTKO
- AUDIO VSTUP
- OVLÁDÁNÍ HLASITOSTI
-
OVLADAČ RÁDIOVÝCH VLN
-
OVLADAČ LADĚNÍ
- TLAČÍTKO VYMAZAT
- SENZOR TEPLOTY (VNITRNI)
- AC ELEKTRICKÝ KABEL
20.FM ANTÉNA - ETIKETA S OZNAČENÍM
22.ČÁST PRO BATERIE
23.REPRODUKTOR - TLAČÍTKO MINUT PRO PROMÍTÁNÍ
25.TLAČÍTKO HODIN PRO PROMÍTÁNÍ
26.TLAČÍTKO NASTAVENÍ ČASU PRO PROMÍTÁNÍ - NASTAVENÍ OSTROSTI PROMÍTÁNÍ
28.PROMÍTÁNÍ ZAP/VYP TLAČÍTKO
29.PROMÍTACÍ JEDNOTKA
30.AUTOMATICKY SENZOR SVĚTLA
ZAPOJENÍ DO ZDROJE ENERGIE
DOPLŇUJÍCÍ INFORMACE

text_image
Technical diagram of electronic device components with numbered labels for identificationTUSLAR VE KONTROLLER
-
MOD AYARLAMA DÜĞMESİ
-
ALARM AYARLAMA DÜĞMESİ
-
ALARM 1 ZİL/RADYO AYARLAMASI
-
ALARM 2 ZİL/RADYO AYARLAMASI
-
C°/ F° DÜĞMESİ
-
KIZILÖTESİ (ALICISI) SANSÖRÜ
-
AMAR DÜGMESİ
-
ARAR DÜĞMESİ
-
POWER ON/OFF (AÇ/KAPA) DÜĞMESİ
10.TEKRARLAMA / UYKU DÜĞMESİ
11.GÖRÜNTÜLÜ EKRAN
FM 87.5 MHz - 108 MHz
Mikrofon : 8 Ohm
Yedek Pil : 9V (3 x 3V CR2025 Lityum batari)
(dahil değildir)
Güç Kaynağı : WS 230V AC 50 Hz, 5 Watt
Ağırlık: 0,560 kg