
MRC 4140 I - Radio AEG - Free user manual and instructions
Find the device manual for free MRC 4140 I AEG in PDF.
| Product type | Alarm clock radio with induction speaker |
| Brand | AEG |
| Model | MRC 4140 I |
| Net weight | 325 g |
| Mains power supply | External adapter: AC input 100-240 V, 50/60 Hz, DC output 5 V / 1 A |
| Battery power supply | 3 AA batteries (1.5 V, not included) or 2 AG13 batteries (1.5 V, included) |
| Radio frequency range | FM 87.5 – 108 MHz |
| Number of radio presets | Up to 6 stations |
| Alarm functions | Alarm 1 (nature sounds or beep), Alarm 2 (radio), snooze adjustable from 5 to 60 minutes |
| Nature sounds | 5 different sounds + a potpourri |
| Induction function | Wireless audio transmission via magnetic induction, compatible with built-in speakers of smartphones |
| Display | Screen with backlight, display of time, temperature (°C/°F) and alarms |
| Ambient temperature | Display in °C or °F (switchable) |
| Permanent backlight | Yes (in mains mode), can be deactivated via button M |
| Maintenance and cleaning | Clean with a slightly damp cloth, without detergent. Never immerse in water. |
| Safety | Do not expose to water, do not open the housing, do not cover ventilation openings |
| Protection rating | Protection class II (double insulation) |
| Supplied accessories | Mains adapter, AG13 button batteries (×2) for backup |
| Repairability | Repair only by qualified technician; no spare parts available commercially |
Frequently Asked Questions - MRC 4140 I AEG
User questions about MRC 4140 I AEG
0 question about this device. Answer the ones you know or ask your own.
Ask a new question about this device
Download the instructions for your Radio in PDF format for free! Find your manual MRC 4140 I - AEG and take your electronic device back in hand. On this page are published all the documents necessary for the use of your device. MRC 4140 I by AEG.
USER MANUAL MRC 4140 I AEG
GB Clock radio with induction speaker
Overview of the Components....Page 3
Instruction Manual......Page 86
Technical Data.. Page 99
Disposal. Page 100
Język polski
Spis tresci
OrIaIeIemEHTiB UypaBnHna...CTOp. 3
IHCtpyKuia 3 ekcnlyataa..CTop.132
TexhihnapaMeTp..ctop.147
Pycckn
CopepkHne
Ob3opJeTalei npnbopa. cTp. 3
PykoBoDCTBO no 3KcNJaTaUu..CTp.148
Texnueckne daHhble... cTp. 163
OPMERKING: Wekker 1 ( )
Reservebattery: 2x1,5V, AG13
Interruptor SPK-FM (altavoz - radio)
Toma+DC-5V/1A
Antena FM
Altavoz
Parte inferior (no在哪)
Compartimento de la bateria
Fig. 2
Thank you for choosing our product. We hope you will enjoy using the appliance.
Symbols in these Instructions for Use
Important information for your safety is specially marked. It is essential to comply with these instructions in order to avoid accidents and prevent damage to the machine:

WARNING:
Wards of dangers for your health and indicates potential risks of injury.

CAUTION:
Indicates potential dangers for the device or other objects.

NOTE: Highlights tips and information for you.
General Safety Guidelines
Before using this device, carefully read this user manual and keep it together with the Warranty Certificate, cashier receipt and if possible, the original package inclusive its interior packing. If you hand on the device to any third person, include the user manual as well.
- To avoid the risk of fire or electric shock, you should not expose the device to rain or humidity. Do not use the device near water (e.g. bathroom, swimming pool, humid cellars).
- Do not use the unit in extremely hot, cold, dusty, or damp places.
- The unit is designed solely for private use and its intended purpose. This unit is not designed for commercial use.
- Make sure that the power cable is not bent, pinched, or comes into contact with heat sources.
- Make sure that the power cable is not a tripping hazard.
English
- The power supply unit is only suitable for use in dry rooms.
- Never touch the power supply unit or the cable with wet hands.
- Only connect the power supply unit to a properly installed wall outlet. Ensure that the listed voltage matches the voltage of the wall outlet. Also ensure that the output current, voltage and the polarity of the power supply unit match the information on the connected device.
Always install batteries in the correct direction. - Avoid covering the device's vent openings.
- Never cover the vent holes with objects, such as magazines, tablecloths, curtains etc.
- This appliance shall not be exposed to dripping or splashing water and that no object filled with liquids such as vases shall be placed on apparatus.
- Open sources of fire, such as e.g. burning candles may not be placed onto the unit.
- Never open the device's case. Improper repairs can cause severe danger to the user. If the device or particularly the power cord is damaged, don't use the device any further and have it repaired by a qualified specialist. Check the power cord regularly for damage.
- If you do not use the device for a long period of time, pull the power supply unit from the wall socket and/or remove the batteries.
These symbols may be found on the device and shall indicate the following:

The lightning symbol warns the user of dangerously high voltages inside the case.
The exclamation mark symbol points to important instruction or maintenance remarks in the accompanying guidelines.
88
English
Children and disabled persons
- For the safety of your children, keep any packing parts (plastic bags, cartilage, Styrofoam etc.) out of their reach.

WARNING!
Don't let small children play with foils for danger of suffocation!
- This device is not intended for use by persons (including children) with reduced physical, sensory or mental capabilities, or lack of experience and/or knowledge unless they have been given supervision or instructions concerning the use of the device by a person responsible for their safety.
Supervise children to ensure they do not play with the device.
Special Safety Instructions

CAUTION:
Do not touch the speaker diaphragm on the back of the device with hands or objects, as this would damage the diaphragm.
Overview of the Components
Fig. 1
1 "M" button (mode)
2 SET button (setting)
3 buttons (volume)
4 Indicator lamp for activated induction function
5 Approximate speaker position of the audio source
6 Induction function on/off
7 CHN button (store radio stations / recall stored radio stations)
8 CH-/CH+ buttons (scan radio stations)
9 RD button (radio on/off)
Back of unit (not shown)
SPK-FM switch (speaker - radio)
DC 5V/1 A jack
FM aerial
Speaker
Bottom (not shown)
Battery compartment
Fig. 2
Normal Display mode
Fig. 3
Showing all display segments
First Use of the Device/Introduction
- Select a proper place for the device such as a dry, and even non slip area where you can easily operate the device.
Make sure the device is vented sufficiently!
If still in place, remove the protection foil from the display.
Inserting the batteries (Backup)
(Batteries included in delivery scope)

NOTE:
The alkaline button cells located in the small compartment inside the battery compartment have been secured with a foil for transport, therefor prolonging the life span of the batteries. Open the battery compartment on the bottom and pull the foil from the slot in the small compartment.
In case of a power cut or if the device is unplugged, with batteries inserted, the settings will be kept. Once exhausted, insert new batteries as follows:
- Open the battery compartment at the bottom. There you will find another small compartment secured with a screw.
- Insert 2 AG13 batteries 1.5V . Mind the correct polarity (indicated on the bottom of the battery case)!
90
English
- Close the battery case. Secure the small battery compartment by reattaching the screw.

WARNING:
- Do not expose the batteries to intense heat such as sunlight, fire or similar. There is a risk of explosion!
- Keep batteries away from children! They are not a toy.
- Do not open batteries with force.
- Avoid contact with metallic objects (rings, nails, screws, etc.). There is a risk of short circuit!
- Batteries may heat up considerably through a short circuit or may even ignite. It could result in burns.
- The battery terminals should be covered with adhesive tape during transport for your safety.
- Batteries can leak out and can lose battery acid. If the device is not used for a longer period of time, remove the battery from the remote control.
- If a battery does leak out, do not rub the liquid into your eyes or the mucous membranes. In case of contact, wash your hands, rinse your eyes with clear water, and if the symptoms persist, consult a doctor.

CAUTION:
- Different battery types or new and used batteries may not be used together.
- Batteries must not be disposed of in the garbage. Please bring used batteries to competent collection centers or back to the dealer.
Power supply (Adaptor)
- Make sure the grid voltage corresponds to the figures on the rating plate.
- Insert the grid plug into a properly installed three prong socket. Connect the device with the plug connector by inserting its plug into the DC 5 V jack of the device.
English
If no backup battery is inserted, time and station settings will be deleted during a power failure or when disconnecting from mains power supply.

CAUTION:
- Only use the supplied power adaptor for this device. Do not use for other devices.
- Only use power adaptor with 5V( -) , other adaptors may cause damage to the device.

NOTE:
Disconnect from mains power supply during longer periods of non-use.
Battery Operation
You also have the option of operating the unit with 3 Type R6 "AA" batteries. (Batteries not included in delivery scope.)
- Open the battery compartment at the bottom.
- Insert 3 R6 "AA" batteries 1.5 V. Mind the correct polarity (indicated on the bottom of the battery case)!
- Close the battery case.

WARNING:
Do not expose the batteries to intense heat, such as sunlight, fire or similar. Danger of explosion!

CAUTION
- Batteries can leak battery acid. When not using the device for a longer period of time, remove the batteries.
- Different battery types or new and used batteries may not be used together.
- Batteries must not be disposed of in the garbage. Please bring used batteries to competent collection centers or back to the dealer.
92
English
Volume
The volume can be adjusted using the buttons.
Temperature display (with the radio switched off)
The unit detects the current ambient temperature and it is shown in the display.
- In normal display mode (Fig. 2) you can alternate the temperature display between ^ C (degrees Celsius) and ^ F (degrees Fahrenheit) with the button. When pressing the button again, the display will show the set alarm time.
Display backlight
- Operation via mains adapter: The display will be lit permanently. In order to switch off the continuous backlight, press and hold the "M" button for approx. 2 seconds. To switch the display backlight on again, press and hold the "M" button again for approx. 2 seconds.
- Battery operation: Press the CHN button to light up the display for 5 seconds.
Switch-off
Set the switch on the back to the "FM" position and switch off the device using the RD button. The unit is switched off when the display shows normal mode (see Fig. 2).

NOTE:
The volume icon (m) does not appear during normal display mode.
Set time
- Press the SET button when the radio is switched off.
- You may then adjust the hours, minutes and 12-/24-hour format in sequence using the buttons.
Confirm your entry each time with the SET button. The current item to be set flashes in the display.
i NOTE:
- If no button is pressed for approx. 20 seconds, all settings will be saved.
In the 12 hour display appears the following: PM = afternoon
Radio operation
Setting and storing stations
- Set the SPK-FM switch to the "FM" position.
- Press the RD button, to switch the unit to radio mode. The radio symbol and the current frequency appear in the display.
- Press the CH+ button or CH- button, to set a station. The corresponding frequency is shown in the display.
- Press and hold the CHN button to save the radio station found. The display will show the respective preset number.
i NOTE:
- Radio stations can only be stored one after another. The device will automatically select the next available preset.
- A maximum of 6 stations can be stored. Adjusting the sequence afterwards is not possible.
- When storing an additional or another station, the device will overwrite the last preset accordingly.
-
All stored radio stations can be deleted by pressing the buttons CH+ and at the same time.
-
If reception is too weak, change the position of the dipole antenna in order to improve the reception.
Select stored stations
To select the stored radio station, press the CHN button repeatedly.
94 English
Alarm function
You can choose to wake up to nature sounds, an alarm signal, or a radio station.
Demonstration of nature sounds
- Set the SPK-FM switch to the "FM" position and leave the radio switched off.
- Press the "M" button to start playing the first nature sound.
- Press the SET button to stop the sound.
- Press SET again to start playing the next sound. There are 5 different nature sounds available. Setting "6" is a potpourri.
- After you have chosen your desired sound, use the buttons to adjust the volume.
NOTE: If not pressing the SET button, the sound will play for 5 minutes and then stop.
- Press the "M" button to stop the sound demonstration.
Setting the alarm times
- Set the SPK-FM switch to the "FM" position and leave the radio switched off.
- Press the "M" button twice. The currently set alarm time appears and the "icon starts flashing.
- Press the button to select the first alarm time (alarm 1) or the second alarm time (alarm 2).
iNOTE:
- Alarm 1: The first alarm time allows you to wake up to nature sounds or an alarm signal.
-
Alarm 2: The second alarm time only supports waking up to radio stations.
-
Press the SET button.
- Use the buttons to adjust the following settings one after another:
English
i NOTE:
- The respective setting to be adjusted will be flashing in the display.
- Confirm each setting by pressing the SET button.
Alarm 1: Hours → minutes → repeat alarm → alarm sound
Alarm 2: Hours -minutes playback time
i NOTE: Alarm 1 ( )
- "Repeat alarm z "(snoopze) is the pause between alarm sounds. You can adjust that time choosing a setting between 5 and 60 minutes.
- Alarm sound: You can choose nature sounds or an alarm signal (buzzer).
- When the alarm sounds at the preset time and no button is pressed, the alarm will stop automatically after one minute.
NOTE: Alarm 2 (1)
- Playback time: Adjust for how long the radio shall play after the alarm turns on at the preset time. Choose a setting between 5 and 60 minutes.
- The device activates the alarm with the radio station and volume setting used last. It is not possible to adjust the volume during the alarm.
The repeat alarm function is not available.
i NOTE:
If setting the same alarm time for both alarms ( and FN), the device will wake you to radio only. The repeat alarm function is not available.
Activating alarm time and alarm interval
(during normal display mode (Fig. 2))
- Set the SPK-FM switch to the "FM" position and leave the radio switched off.
96
English
-
Press the button repeatedly to select between the following options:
-
= First alarm time activated. At the preset alarm time, the chosen nature sound or alarm signal (buzzer) turns on.
- + = First alarm time and alarm interval activated. The selected alarm tone sounds when the set time is reached. The alarm is switched off by pressing the RD button. The con starts flashing in the display. After the set Snooze time ends, the set alarm tone sounds again.
NOTE:
Note that the repeated alarm is automatically deactivated after being used twice.
- = Second alarm time activated. The radio station tuned in last will be played at the volume setting used last and for the previously set playback time.
Turning off the Alarm
| Symbol Functions |
| Press any button. The alarm function will be turned off until the next day. |
| Pressing any button except for the SET button will activate the repeat alarm function (snoopze). The icon will flash if the repeat alarm function has been activated. |
| Press the SET button to switch off the alarm until the following day. |
Deactivate Wake-Up Time
Press the button repeatedly until the symbol o "or" and "z disappears from the display.
Induction function
Playing music made very easy. No cables or complicated setup required. The audio signal is transferred via electromagnetic induction. This function is compatible with smartphones and audio devices featuring built-in speakers.
- Set the SPK-FM switch to "SPK" position.
- If the indicator lamp (4) does not light up, press the button (6).
- Start music playback on your audio device.
- Place, for example, your smartphone on the device. Make sure the built-in speaker of your smartphone is aligned with the position (5) on the device.
i NOTE:
Since each smartphone or audio device integrates its speakers at a different position, we cannot provide you with a specific description of the perfect position.
- If necessary, change the position of your smartphone until the sound output is good. If necessary, turn the audio device.
- Adjust the volume on the audio device.
i NOTE:
- Smartphones and audio devices with metal housings can cause interfering noise.
- Do not set the volume on your audio device too high, as this could cause distortion.
Cleaning
CAUTION: Do not dip the appliance in water.
- Remove the plug before cleaning.
- Clean the appliance with a slightly humid cloth without any additives.
English
Troubleshooting
| Problem Possible cause Solution | ||
| Device cannot be operated. | Device blocked or "frozen". | Disconnect the mains adapter from the wall socket for approx. 5 seconds. Then switch the device on again. |
| Alarm sound not audible. | Switch on the back is set to the "SPK" position. | Set the switch to the "FM" position. |
| No audio signal during playback via induction function. | Switch on the back is set to the "FM" position. | Set the switch to the "SPK" position. |
| Audio source is not aligned with the correct position on the device. | Change the position of the audio source. Make sure to place the built-in speaker of your audio source on position (5) of the device. | |
| Induction function switched off. | Press the button (6) until the indicator lamp (4) lights up. | |
| Interfering noise during music playback via induction function. | Battery voltage too low. | Insert new batteries or use the mains adapter provided. |
| Audio source features a metal housing. | Use an audio source without metal housing. | |
Technical Data
Model: MRC 4140 I
Backup battery: 2x 1.5 V, AG13
Net weight: 325 g
Power Consumption: 5 W
External power adaptor
Input: AC 100-240 V, 50/60 Hz
Output: DC5V/1A
Polarity:
Protection Class:
Radio
Frequency Range: FM 87.5 ~ 108 MHz
The right to make technical and design modifications in the course of continuous product development remains reserved.
This device has been tested according to all relevant current CE guidelines, such as electromagnetic compatibility and low voltage directives, and has been constructed in accordance with the latest safety regulations.
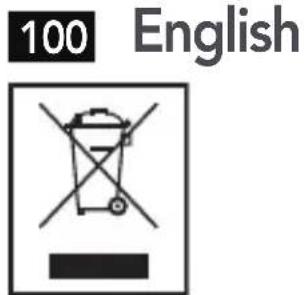
Disposal
Meaning of the "Wheelie Bin" Symbol
Take care of our environment, do not dispose of electrical appliances via the household waste.
Dispose of obsolete or defective electrical appliances via municipal collection points.
Please help to avoid potential environmental and health impacts through improper waste disposal.
You contribute to recycling and other forms of utilization of old electric and electronic appliances.
Your municipality provides you with information about collecting points.
NOTE: Highlights tips and information for you.
CTC Clatronic Sp. z o.o
YHnKaITe BnJIbBy BnCOkX TempeAtyp, HApnKJaI npAmOro COHrHOrO npOMiHHa, BOrHIO ToUo, Ha 6aTapei. IChyE He6e3neKa Bn6yxy!
YBAGA.
36aTapeM MoKe nOteKtn aKymyIaTOPHa KncIoTa. KaUo npIcTpIi He 6yIe BnKOpNCTOByBaTncB IpOTrOM TpNBaIOro TepMHy, BnIMtB 3 HbOro 6aTapei.
He KopnctyItecHIMTNOMbTapea aOHOBNM Ta CTapMNbTaapeaMOdHOaCHO.
He ytni3ynte 6atapei pa3om i3 nobytobm cmiTAM. BnKopnstahi 6atapei 3daBaTe y BiINOBIHN nyHKT npniomy abo nOBepTaIte ix y nyHKT npnd6aHHA.
Cnla 3ByKy
HanaTByBAtn rYHiCt b MoXHa 3a DonOMoROIO KHOIOK A V.
Biodo6paXeHHa TemnepaTypr (KoJI paIIO BIMKHeHe)
Bnpi6 Bn3NaHae nOTOnHy TempeaTy HABKOLHbOro cepedobuia i BiO6paKae ii Ha dinCnIe.i.
- Y 3BnauHomy peKmBiDobpaXeHHa (MaI.2) 3a DonomoroIO KHOKN MOnHa Bn6paTu BiOobpaXeHHa y fOpMaTI ^ C (Tempepatya 3a LcIbciem) a6o (Tempepatya 3a ApenreTOM). RaIoo 3HOBy HATNCHTN KHOKNy, Ha DnCnJIeBI DObpa3ntbcra BCTaHOBHeHn Yac 6yDnIbHnka.
Писвікі діспій.
KnBJIeHbIaIaIepa: nCpIeN noCTiHcBITNTIMetb. Lio6 BmKHyTn noCTiHy niDCBITKy, HATNCHTb Ta yTpmyTe np6I3HO npotrrom 2 cekynd KhoNky "M". Lio6 3HOBy YBMKHytN iDCBITKy dncIeR, 3HOBy HATNCHTb Ta yTpmyTe np6I3HO npotrrom 2 cekynd KhoNky "M".
KnBHeHbIb6aTapei:HaTNCHTb KHOkCy CHN dny yBIMKHeHHPiDCBITKn Ha 5 cekyHd.
BnKlIOueHn npuJaDy
BcTaHOBIb nepemikau, lo Ha 3aHni naHei npncTroIO, B noIooXeHHa "FM" i BmKHiTb npncTi, HATNCHyBShn KhoNky RD. Y3BnuaHOMy peXUMi BiO6paXeHHa Bnpio BmKHeHo (INB. MaI. 2).

PIMITKA.
Iiktorpama ruyHOCTi BIDobpaXaETbC8B 3BnauHOMy pexmBiDobpaXeHHa.
BctaHOBJIeHHaYcY
- Kolni paio BIMKHeHe, HATNCiTb KHOnKy SET.
- Todi 3a donomoroKHOJOK MOxHa nociIOBHO HanaTsyBatn rOHH, XBJIHH i 12/24 roHHHm fOpMaT BiO6paXeHHa.
140 YkpaIHcbka
ПИТВЕРДЖУITE ВBEDEHE KOKHORO pa3y 3a ДОПOMORЮ KHONKI SET.Знейня,Якслд ВСТАНовNTN,MNГOTNTb.
i IPNMITKA.
- RaKUo npOraGM npBn3Ho 20 cekyHHe HaTnCHyTu XoDHOI KhoNKn, BcI HalaStyBaHHa Byde 36epeXeHo.
- Y 12-ローネルハOMу peхиMi BiIDobpaXeHHa 3'ЯВлЯOTbCЯ Taki no3haeHHa: PM = nicla noIyDHa.
BukopncTaHHpaio
HanautybaHH i 36epexeHH cTaHci
- BctaHOBiB nepemkauch SPK-FM B noJoxeHHra "FM".
- Lio6 nepemKHyTN Bnpi6 y pexim paio, HATNCHITb KONKY RD. Ha dinpnei BiO6pa3ntbcn no3HaUka peximmy paio Ta noTOuHa YaCTota.
- Lio6 hanaTbyBAtn cTaHcIIO, HATNCHTb KNONky CH+ a6o KNONKY CH-. Ha dinCnIe i BiO6pa3ntbcra BIDNOBIDHa YaCTota.
- Lio6 3bepeTn 3naJeHi cTaHci, HATNCiB Ta yTPMMyIte KhoNky CHN. Ha dinCnIe BiO6pa3ntbCra BIDNOBIDHn HOMep, NiJAKIM 6yJe 3bepeXeHO cTaHciO.
i IPNMITKA.
- PádioctaHüi MóxHa 36ePeTn IuIe no nopAky. PnICTpii aBTOMaTHUHO BnEpe HaCTyInHe DoCTyInHe MicCe DIA 3aAnM'ATOBYBaHHa.
Moxha 36epeTTMaKcImaJIbHO 6 cTAnui. IicJra zuoro HanaHTyBaTI NocIIOBHiCTb He BdaCTbcra.
YBnpaKy 36epexeHnIdoaTkoBoi nnIHsoi cTaHci npictpiB iDIOBIDHO nepenIwe OCTAHNO 36epexeHy CTaHcIO.
Lio6 BnIaHTN Bci 3bepeXeHi paIOCTaHcii, noTpi6HO oHocHo HATNCHyTN KhONKn CH+ iA.
5.Якwo npinom 3aHaTo cna6kn,3MiHItb noJoxeHHaHTeHN Ha Take,de npinom 6yde KpaumM.
Bn6ip 36epexeHx cTaHci
Lio6 Bn6paTn 36epeXeHy paiaocTaHcIO, KJIbKa pa3iB HATnCKaITe KhoNky CHN.
Функця 6удильнka
3a donomoroio uei cyHKu moxHa Bn6paTn, iD kU MeIoIO npOKuaTncb - nI3ByKn npnpOu, cnHany 6yUnbHnka a6o paiaocTaHci.
ДемонстрацяЗвкIB пиродн
- BctaHOBITb nepemkauch SPK-FM y noJoxeHn“FM” i 3aJIu-We pao BmKHeHIM.
- Hataichitb kHonky "M", 106 po3noatn BiTbopeHHn nepoTo 3aIncy 3BykIB npnpOni.
- Lio6 3ynnHnTn 3aInc, HATNCHITb KhoNky SET.
- Lio6 po3noaTu BIDTBOpEHnHaCTynHOro 3aNcCy, 3HOBy HATNCiTb KhoNkY SET. IocTyHHi 5 pi3Hnx 3aNNCIB 3ByKIB npi- pOi. HalaWtYuBaHHra "6" ue nonypi.
5.Письиборуnotpi6HOrO3aIncy3aДОПOMOrOIOKHOJOK


JanaTnyTe rYHicTb.

ПРИМITKA.
Якwo He haTnCKaTN KHONky SET, 3Byk lyHaTmE npOTrOM 5xbuINi i 3aTnxHe.
- Lio6 3ynHnTn demOHcTaIIO 3Byky, HATNCITb KhoNkY "M".
HanaHTyBaHHa cacy 6ydnbHnka
- BctaHOBiB nepemkauch SPK-FM y noJoxeHHa "FM" i 3aJIu-We pao BmKHeHM.
- Двічі habисіть кнініку "M". BiДобразиьсяnotочни На-laштованій уасьдпьніka, i noчne 6лIMatn nikToRpaMa
- HatackaiTe KhoNky 6o6 Bn6paTn Yac nepIoro 6yDnBnHnKa (6yDnBnK 1) a6o Yac npYrOro 6yDnBnHnKa (6yDnBnK 2).
142 YkpaIHcbka
i PnMITKA.
-Будуньнк 1:чac nepшою 6удильнkaДОЗВОЛЯпркадаTиСь пд 3ВуКПрирODи abO cnHаN 6удильнka.
-Будуньнк2:часdpyrOTo6dynIbHnKaPiITpIMYe MOxJINBICTb npOKndaHHЯLlSepi3BykpaiaocTaHci.
I I P N M I T K A. Bydunb HnK 2 (
- Yac BiДТВОЕнг: Bn3HaueHnTpyBaJIOCTi 3ByaHnCnHany paIOMOBJIeHnIicIyBIMKHeHn6yDInbHnKaY BCTaHOBJIeHn Yac. Bn6epitb HanaStyBaHHn B npoMIXkky BiI 5do 60xbuINH.
I IPNMITKA. BydunbHnK 2 (D)
I P E D U N P E X K D E H N E:
IpeDynpexkdaet o6 onaCHOCTn IJRA 3DOPOBbI N BO3MOXHOM pICKe POnyuHnra TpaBMbl.
BHIMAHHE:
Yka3bIbaeHa BO3MOXHyIO ONaCHOCTb,IJIa N3JeJIyN,IpyrNX OKpyxAIOxNpeDMeTOB.
I IPNMEUAHNA: Daet coBeTbI INHOpMaUIO.
06uhe yka3aHnno TexHnke 6e3oNaChOCTn
Ipeed nauaIom 3KcnpyaTaunn npnbopa BnImaTeIbHNo npouHTaI Te npnilaraemyu INCTpyKUIO NO 3KcnpyaTaunn I COxpaHnte ee B HndexKHOM MeCTe, BmecTe C rapaHTnHBIM TaHOHOM, KACCOBbIM YekOM N, IO BO3MOXHOCTN, KAPTOHHO KOpOBKO C yNAKOBOUHbIM MaTePnaIOM. Ecn n daete KOMylno nonolb3OBaTbcn npnbopom, Oba3aTeJIbHO daITe BnPnDaCy DaHHyIO INCTpyKUIO NO 3KcnpyaTaunn.
Дя устараеня риcka BO3rogаня пи удра щл ekтпуескIM TOKOM He NOДВергайte yCTpoIcTBO BO3deIcTBIOdoждИ BlaRn. He npimehaTe yCTpoIcTBO B6JIINBODbl (HaPpIMep, B BaHNo KOMHaTe, baccseHne, MOKpOM noDbaJe).
He npimehaTe yCTpoiCTBO B 3KCTpeMaJIbHO ropauHx, XoIoI-HbIX, 3aIbJIeHHbIX INIIN BIAJXHbIX MeCTax.
- ПользуйТecь пибором Только чаСныIM оБраЗOM И пО
НаЗнayehик. Пибор He п徳нaЗнayeh Дя КOMМерчecКOrO
ИспOLь3OBaHЯ.
- Y6eIntecb, yTO Ka6eJIb NITaHnIe He NpeRHyT, He NOBpeKJdeH nnHe KOHTaKTiPyEt C NCTOCHNkAmN TeIIa.
- Ybeintecb, yTO Ka6eIb nITaHnHaTeXHo nOdkJIIOueH.
- Блok Источника петаши рпедна3нayeh Ддя Исторьаня ТолбкВ Сухи XIIIOMeшених.
He npikacaiTecb BnaXhbIMn pykamN K 6IOKy nCTOuHnKa nITaHn IJI KabeIIO.
- Поdkлюаite 6лok Истоник рптаня только К праBNь-HO установленног Настенгий злелктуческог розетke. YбeДNTecь,чTO HOMINHalbHoe HaPRAJKeHne COBпадаet C HanpRAJKeHnEM HacTeHNO розETK.Тakxe npOBepbTe,чTO BbIXODHO TOK,HaPRAJKeHne I NOJIrpHOCTb 6lOKaИстониka PHTAHNЯ COOTBETCTBYET INФОрmaцIN Ha ПОДКЛIOЧаEMOM K Hemy ySTpoICTBE.
- Pn yctaHOBKe 6aTaapeek co6JIoudaIte nOJaRHOcTb.
He donyckaTe nepeKpbITne BeHTnlaOnHbIX OTBepCTn yctpoiCTBa.
He nepekepbBaIte BeHTnlaUHOHbIe OTBepCTnI NOCTOPOHIMn IpeDMeTAMN, HApPImep Ra3eToI, CKaTePbIO, UTOPOIN T.D.
He donyckaIte Bo3deiCTBnHa ycTpoiCTBO npoINTOn nIpaCpbJIaHEMOI BObl, He CTaBbTe Ha ycTPOiCTBO COcyDbICBOIO, HApPIMep Ba3bl.
- ICTOCHNI OTKpbIToro ORH, HApnpMeR TOpAune CBeu, He DOJXHbI paCnOJaTaBcRa Ha yCTpOYCTBe.
He otkpbBaIte Kopnyc yctpoiCtBa. HnpaBnIbHbI pemOH TMOKET npIBeCTN K cepbe3HOJ ONACHOCTN NOJIb3OBaTeJIIO. Ppi NOBpeXdEHHy UcTPOIcTBa IJIe ERO shHypa 3JIeKtpo- nITAHN (B YAcTHOCTN) PpeKpaTIte NCNoJIb3OBaHne yCTPOI CTBa I NpeDaIte erO dIra peMOHTa KBaINΦnIupoBAHHomy
150 Pycckn
cneuaiaiCy. PergyIepno npOBepaTe Ha nobpeXdHnA shHyp 3JIeKTPoNTaHnA.
- EcIyycTpoiCTBO He npIMeHReTcA dIITeJIbHOe BpeM, I3BLeKInTe 6JOK nCTOuHnKa pITaHnI N3 HaCTeHHoJ 3JIeKTpUHeCKoI p03eTKN W/INI IN3BLeKInTe 6aTapeiKN.
I P E D U N P E X K D E H N E!
He no3BOLIyTe DeTm IrgaTb C NOIN3TNJIeHOBOI PJIeHKoI.
Onachoctb ydyubja!
- 3TOT npi6op He npeHa3Hauen IJn POJIb3OBAHnI LIuAMN (BkIIOyA JeTei) C OrpaHnueHHbIMN fU3NUeCKUMN, CeHCOPHBIMN IJIN YMCTBEHHbIMN CNOcO6HOCTaM NIJ NLIuAMN, He IMeIOUIMN ONbITa N/IIIN Heo6XODMbIX 3HaHn. NckJIIOUeHne COCTaBIAOT clyuaN, KOrDa OHI HaxOJaTcN IOJ pIncMOTpOM IInca, OTBETCTBEHHOTo 3a INx 6e3ONaCHOCTb, IJIN KOrDa OT 3TOFO IInca NOJUYeHbI Yka3AHnI PO NOLb3OBAHnIO npi6Opom.
Heo6xoJIMO npncMaTpnaTb 3a JeTbMn, yTo6bl y6eIITbcB TOM, yTO OHI He nIgpaIOT C npI6Opom.
CneuaJIbHbIe yka3aHnI NO TexHnke 6e3- ONaCHOCTN

BHIMAHME:
3aPpeUaETc npKacatbca pykamn nn KaKIMN-NIO ppeMeTAMK Mem6paHe rPOMKOROBOpNTeHa 3aHNe CTOPOHe yCTPOINCTBa, T.K. 3TO MOKeT NOBpeDnTb Mem6paHy.
063op detalei np6opa
Pnc.1
1 Khonka "M" (pexim)
2 KhoIIka SET (HacIpoIIka)
3 KhoNKn (rpoMkoCTb)
4 LaMa-IMnKaTOp aKTbBnPoBaHHoJ 3JeKtpomarHHTHOJ yHKUIN
5ПримерhoeположенгромкоговорпетяayдноИсточни Ka
6 ΘleKtpomarHHTHa yHKUBAKJI./BbIKJ.
7 KhoNka CHN (coxpaHHe paIOCTaHcN / BbI3OB coXpaHHo PAIOCTaHcN)
8 Khonkn CH-/CH+ (nonck paiaoctaun)
9 Khonka RD (paio Bk./BbIKI.)
3aHnra naneIb yctpoiCTBa (He noka3aHa)
IpeekJIouateJIb SPK-FM (rpomkoorOBopuTeJIb - paJIO) FHe3do DC 5 V/1 A
FM aHTeHHa
rpoMkoROBOpnteJIb
Huxnayactb (he npedctabneHa)
Батарейнь OTceK
152 Pycckn
Pnc.2
OchOBHOpeKIM
Pnc.3
PpeTabeHbI BCE CeMeHTbI DnCnJIe
Пер boe nCnoIb3OBAHne yCTpoIcTba / BBe-DeHne
- BbIbePte IyCTPOiCTBa NOxOJaUe MeCTO; NOBepXHOCTb, Tpe 6yTe OHO 6yTe CToTb, DOLKHa 6bITb cyXoH, POBHO HcKoJIb3KOJ.
- YbEITecb, yTO 3TO MeCTO XopoIo npOBeTpBaETcA!
- EcIn Ha dinCnIe yCTpOInCTBa BCE eUe HaxOInTCa 3aUInTHa nIeHka, CHIMITE ee.
BcTaBka 6aTapeek (dIa coxpaHnHaCTpoeK)
(BaTapeiKa BkIIOUeHbIB NOCTaBky C npio6Opom)
I INPIMEYAHNA:
KpyrIbIe 7eJIOUHbIe 6aTapeiKn, paCnoJIOXeHHbIe B MaJIeHbKOM OTcKe BHyTpN 6aTapeiHoro OTcKa N Ha BpeM TpaHCnOpTINpOBKn IpoJIOXeHbI fOJbRoI, TeM CaMbIM IpoDJIeBaR cPOK INx ClyX6bl. OTKpOIte 6aTapeiHbI 0TcK Ha HIXHeJ YactN pNIb6opa N BbITaUHTe fOJbry n3 OTBepCTnR B MaJOM OTcKe.
B cnlyaee npoanaHna 3JeKTPo3Heprn, nIe eCNI yCTPOINCTBO OTcoEHNHTb OT pO3ETKn, BCE HAcTPOiKN bdyT COxpaHEnbl, eCNI B yCTPOINCTBe ecTb 6aTaapeiKn. Nocne toro kak 6aTaapeiKn cndyT, BCTaBIAIte HOBbie 6aTaapeiKn cIeDyIOUIM o6pa3OM:
- OTKpoIte 6aTapeHbI OTceK, HaxOJaUcNcB HnXHeJ YactN UcTpoIcTba. TaM Bbl yBnIte eIe OIN MJIbI OTceK, 3aKpe- PJIeHHbI BnHTOM.
-
BcTaBbTe DBe 6aTapeiKn Tnna AG13, 1,5 B. BcTaBnJa 6aTapeiKn, coJIIOaIe IIOJrPHoCTb (yKa3aHa Ha dHe 6aTapeiHo- ro oTceKa)!
-
3akpoIte baTapeHbI OTeK. 3aKepeHte MaIbI OTeK, npN KpyTNB BnHT Ha MeCTO.

PPEyPExKDEHNE:
He noDBepraTe 6aTapeN BO3DeIcTBIO CINbHOJ Xapbl, HApnMep, npAmbix COJIHeuHbIX Lyuei, noXapa N T.D. CyueCTByET pNCK B3pBa!
- Bepernte 6atapen ot deten! 3to He irpyka.
He otkpblBaIte 6aTapei, npnilaray ycJIne.
- I36eRanTe KOHTaKTa C MeTaNJUeCKNIM NpeDMeTAMN (KoJIbua, TBO3dN, BnHTbI N T.D.) CyueCTByeT pNCK KOpOTKOro 3aMbikaHnI!
Bcnyae kopoTKoro 3aMbKaHna6aTapeu MOrY cInbHo Ha- rpeTbcra nn daKe BocnJaMaHeHTbcra. 3To MoXe TnpVBecTu K OxKOram.
Дя Baшев Бezонахости BO Врема Трансоптувки поюca batapeи Должныбыть пokpbttb ИЗOLЯЦИОНов Ленто.
Batapeu Moryt npoteKaTb N BbIeJIaTb aKKyMylrTopHyIO KNCJOTy. Ecnn yCTpOcTBo He IcNoJIb3yETcB TteHne IINTeJIbHO rnpnoa BpemEn, ydaJInte batapeu n3 pYbTa IInCTaHIOHHoro ynpabNeHnA.
- EcII 6aTapeI npoteKJIa, He BtnpaIte XnIkoCTb B rla3a IIN CIn3NCTbie oboIoOuKn. B clyuae KOHTaKTa NOMoITe pyKn, IpONOLockaIte rla3a YnCToB BODOn I, ecII CNMPTOMbl COxpaHIOrTa, O6paTIteCb K BpaUy.

BHIMAHHE:
Hikorda He nCnoB3yIe BmecTe 6aTapeKn pa3HbIX TINOB HIN HOBbie 6aTapeKn BmecTe CO CTapbIMN.
-БатAPEин He cIeIyET BbIbpaBbBaTb BMeCTe C OCTaJIbHbIMN 6bITOBbIMN OTXODAMN.CaIte INX B cIeIaJIbHbIe IyHKTbI yTIN3aUIN NII O6paTHO CBOeMy npOdaBcy.
154 Pycckn
3JeKtpoNTaHne (AanTep)
- Y6eIITecb, yTo HnpaJxHne B Cetn 3JIekTpOnItaHnra COOTBeTCTByeT npamEtpaM, yKa3aHHbIM Ha Ta6NIuKe.
- BCTaBbTe BnIky shHypa aanTepa B COOTBeTcTByIOu np03eTKy C TpeMra3amN.ДpyroKoHeu shHypa BCTaBbTe B COOTBeTcTByIOuee rHe3do yCTpOuCTBa, DC 5 V.
Ecnn 6batapeiKa He BCTaBHeHa, To npn nponaan HneKtpOnntaHn Hn OTCoeDInHeHn YCTPOIcTBA OT cETN, Bpemn HacTpOKn npneMnka 6ydyT c6poWeHbl.

BHIMAHHE:
- Историяд дя устория Толбко ТOTаадаNTер, КOTOPын 6ьл сни вkomплесе. He ИсторияаадаNTерддуг nx ySTPOICTB.
- Историяаадапетер только CBbIXODOM 5В, посториянапражени (+-),дугneаадапетерblMoryT nobpeДИТБ yCTPOICTBO.

ПРИМЕЧАНЯ:
OTCOeINHnIte yCTPOcTBO OT cETn 3JIeKTPoNTaHn, eCNI OHO DOJIO He IcNoJIb3yETcR.
Pa6ota yctpoiCTBa ot 6aTaapeek
YCTPOIcTBo TaKxe MoXeT pa6oTaTb OT Tpex BaTaapeek Tnna R6 "AA". (BaTapeiKn He BxOJaT B NoCTaBky.)
- OTKpoIte 6aTapeHbI OTCeK, HaxOJaIuNcB HIXKeI yactn UCTPOIcTBA.
- BctabbTe Tpex 6atapeek Tuna R6 "AA", 1,5 B. BcTabnra 6atapekn, coBnOaIte nOJrpHocTb (yKa3aHa Ha dHe 6atapeHoro oTceka)!
- 3akpoTe 6aTaapeHbI OTCeK.

PPEyIpeXKeHHe
He noDBepraTe 6aTapeKn BO3DeIcTBIO MOUHOro NCTOCHKa TeNla, HApPIMep nprMOro cJHeuHOro CBeta, ORHЯ IJIa aHaIoRrHuHO. OnachocTb B3pBa!

BHIMAHHE:
- Ⅰ3 batapeek MOKET BblNBaTbca KNCJota. EcIn yCTpOncBO DOJIRO He IcNoIb3YeTCA, BblTACKNBAITe batapeiKN.
Hikorda He nCnoB3yIe BmecTe 6aTapeKn pa3HbIX TINOB HIN HOBbie 6aTapeKn BmecTe CO CTapbIMN. - BaTapeiKHe CJIeIyET BbIbpaCbIBaTb BMeCTe C OCTaJIbHbIMN 6bITOBbIMN OTXODAMN.CdaiTe INX B CPeUaJIbHbIE PYNKTbl YTNIN3aUN NII NOBpATHO CBOEMy IPODaBcY.
PergunpoBka rponkoCTN
POMKOCTb MOXHO peYJINPOBaTb C NOMOJIbIO KHOJOKA V.
Ioka3 temnepaTypbI (paIO BbIKIOyeHO)
YcIpoNCTBO ONpeJeT OKpyKaIOUyIO TempeaTyPy I NOKa3bI BaET ee Ha DnCnlee.
B OCHOBHOM pexnme (pnc. 2) noka3aHnT TemnepaTypbI MOxHo nepeKJIouaTb co ukaJIb LcJIbCSnA CHa ukaJy DapeHReiTa , n HAO6OpOT, c NOMoU bIO KHOKN. Haxmam KHOKNy eue pa3, Ha dncnlee bYdET noka3aHO hAcTpoEHHO BPEMa 6yDnJIbHnKa.
POncBETKa DnCpIeA
Pa6ota yctpoiCTBa OT 3neKtpoHtAnHnYepe3 aanTep: IncnneB 6ydt ropeB noCToRHHo. Ira TOrO yTObI OT-KJIOHTb IOcCBETKy, HaxMnte N ydepxNBAaTe KHOkky "M" npIMepHo 2 cekyHdbI. YTObI BKIOHTb NOcCBETKy CHOba, eue pa3 haxMnte N ydepxNBAaTe KHOkky "M" npIMepHo 2 cekyHdbI.
Pa6ota ot 6atapeek: Haxmnte KhoNky CHN nnoCBeTKN DnCnIeB TeueHne 5 MNHyT.
BbIKJIIOueHne
YcTaHOBInTe NepeKJIIOuHaTeIb Ha 3aHne Yactn npio6opBa NnoJoxHeNe "FM" IN BbIKIOUHTe yCTpOINCTBO C NOMIoBIO KHOJKN RD.
Pycckn
YCTPOICTBO BbIKJIIOUeHO, KOrda IINcPJIeB BbICBeuINBaET OCHOBHOn peXIM (cm. pnc. 2).

ПРИМЕЧАЦ:
3HaOK rpoMKoCTn 111111111111111111111111111111111111111111
YcTaHOBka BpeMeHn
- Haxmite KhoNky SET, kOrda paIIO oTKJIouHeNo.
- BbIMoXeTe HAcTpoNTb Yacbl, MInHyTbI N UcTaHOBnTb φOpMaT BpemeH 12-/24-aca, NocJeIOBaTeNb Ho HaKIma KhoNKn
EcnHHe HaxaTb KhoNky SET, 3Byk 6yJeT BOCnpon3BODNTbc 5 MInHyT, a 3aTeM OCTaHOBNTc.
- Дя OCTановки BOCпpon3ВeДeHЯ 3Byka HaЖмITE KHOнКу "M".
Hactpoika BpeMeHn 6ydnIbHnka
- YctaHOBInTe nepeKJIIOuAteIb SPK-FM B noIoXeHne "FM", paIIO OCTaETcBbIKJIIOUeHHbIM.
2.ДвждынжмITEКHONKу"М".HaДиспlee NOЯВлЯETcTeKy-шаяНастpoиka6уДильнikaИнЧИнhaeT MURAТb 3HaYOK - 3ДЯ Bыбopa Врemeи первого 6удильнka (6удильнк 1) ИИВрemeи BTOPOGO 6удильнka (6удильнк 2) HaxmITE KHONKy
i INPIMEYAHNA:
-Будуньнк1:BpeMa nepBOrO 6yДильнka no3BOJa-ET Bam npocHytbcra NOd 3BykN pnpOdbI nII IN CnHaN 6yDInbHnKa.
-Будиьнк2:BpeMa BTOPOTo 6yДиьнka NOДeрЖnBaET TOJbKO BO3MOxHOCt b ПОБУжDEHnЯ NOД,3ByKn paIIOCTaHcN.
- HaxmTe KhoNky SET.
- Дя рулровс сдуошин Habtroek OdHoi 3a pyroH INcnoIb3yIte KHOPIKU
i INPIMEYAHNIA:
Ha nucnlee 6ydt Mrratb COOTBeTCTByIOUaHactpoKa, KOTOpYHO HADO OTpeRyIInpOBA Tb.
- Повпевждайт e кадую HabТpoИКу, НжIMан KHONKY SET.
Будильнк 1: Yacbl MmHyTbI -IOBTOp 6yДильнka z→ cnHan 6yДильнka
Будильнк 2: Yacbl → MInHyTbI -BpeMBAOCnpon3BeDeneHna
I I P N M E Y A H N I: B y d n l b h n k 1 ()
"IOBTO6yDnIbHnka (npemota)-3TO nay3a MeKdy cnHaJAMN 6yDnIbHnka. Bbl MoXeTe HacTpOuTb 3To BpemaOT5do60MnHyT.
CunHaI 6yDnIbHnka: Bbl MoKeTe Bbl6paTb 3ByKn npNpoDbI INI CNHaI 6yDnIbHnka (3ymMep).
Korda cnHaJIbI bUdINbHnKa yCTaHOBHeHbI Ha npEiBa-puTeJIbHo HAcTPOeHHoe BpEmr Hn OJHa N3 KHOJOK He HaxaTa, bUdINbHnK BblIOHTcA ABTOMaTNUeCKN Ype3 OdHy MInHy.
I I PIMEYAHNA: BydunbHnK 2 (1)
BpeMa BocnpOn3BeJeHnA: HacTpaNBAIte BpeMa, KaK DOnIgO 6yIeT nIgPaTb paIIO nOcNe BKJIoueHnA 6yDInlb- Hnka. Bbl6npaIte HAcTpoIky O T 5 Do 60 MInHyT.
- YcTpoIcTBo aKTHBnpyeT 6yDnJIbHnK C BkJIIOueHnEM paAnOCTaHcN, HAcTpoIka rPOMKOCTn COOTBeTCTByET nocJeHne npImeHaEmoB BeJIuHHe. Het BO3MOxHOCTn OTpeYJInpOBaTb rPOMKOCTb BO BpeMpa60TbI 6yDnJIbHnKa.
- FyHKzIa IOBtopa 6yDnIbHnka Z He DoCTynHa.
I I PIMEYAHNA:
HactpoINB OJHO BpemI DnO bOuX 6yDnJIbHnKOB (N yCTPOIcTB0 6yIDET 6yDITb Bac TOnbKO C BKIOueHnEM paIIO. FyHKzIa IOBTOpa 6yDnJIbHnKa z He DOCTyIHa.
AKTINBaCnB BpeMeHn 6yDnIbHNka N NHTepBaJa BKNIOUeHnA 6yDnIbHNka
(BO BpemHa HOpMaJIbHOro peXIMa pa6ToI dncnpei (Pnc. 2))
- YctaHOBInTe nepeKJIIOuAteIb SPK-FM B noIoXeHne "FM", paIIO OCTaETcBbIKJIIOUeHHbIM.
- HaximaiTe KhoNky YTO6bI BbI6paTb Ondy n3 CJeDyIOxOnu:
160
Pycckn
- AktinbipyetcBpeMa nepBoro 6yDnIbHnKa. B npEaPnteJbHO yCTaHOBJIeHHoe BpeMa BbIbpaHbI 3ByK npuPoIbI nnCnHaI 6yDnIbHnKa (3ymMe) 6yJeT BKIOUeH.
+Z=AKTINBnPOBaHO BpeMa nepBOrO 6yDnJIbHnKa INHTepBaI BKIOUeHnA 6yDnJIbHnKa. BbIbpaHnaMeIoJnHauchET nIpaTb, KOrDa 6yIeT IOCTnIHyTO yCTaHOBJIeHNOE BpeMa. ByDnJIbHnK MoXHo BbIKJIOuHTb, HaxaB KHOJKy RD. Ha IINCJIee HaunHaet MInraTb 3NaOcK Z PocJe NCTeueHnA yCTaHOBJIeHHoB BpeMeHn 3aIepxKn CnHaJI 6yDnJIbHnKa HaChET NOBOTOpRA Tbc CHOBa.
I INPUMEYAHNA:
YUHTTE, YTO NOBTOPHbI CNrHaJI 6yDINbHnKa aBTOMaTtueCKN DeakTNBnpyETcI NocJe BTOPOrO pa3a.
=AKTINBnpyetcBpeMa BTOPOO6yDnIbHnKa.BKIOuHaETcpaAnocTaN,HaCTpoEHNaB NOCLeHN pa3,Ha rPOMKO-CTN,NCIOJIb3OBaHHoB NOCLeHN pa3,B TeueHne IpeDbapITeJbHO HaCTpoEHHO BpeMeHN BOCpON3BeDeHn.
OTmeHa cHnHa 6yDnIbHnka
HaximaiTe KhoNkyV, Noka CnMBOJ "IIN" "In CNOBO" Z He nCye3HyT cDnCnJIe.
3neKtpomarHHTha yHKcna
Mycbka Bocnpo3BODITc8 ouehb IeKo.ДЯ 3TOrO He Tpe6yETc KaBeIe NII KAKIX-TO CLOXHbIX HAcTpoE.K.AydIO CnIHaJI nepeJaETcI NOpeIcTBOM 3JIeKTPOMaHHTHOIN HNDyKUIN.3TaФyHKUIN COBMecTIma CO CMapTfoHaMn I ayDIO yCTPOJCTBaMn,IMeIOUIMN BCTPOEHHbIE rPOMKOROBOpITeJI.
- YctaHOBInTe nepeKJIIOuATEIb SPK-FM B noLoXeHne "SPK".
2.Есилamпа-индikatop(4)He 3aropaetc,нжмITE KhoNky (6). - HauHnTe BocnpOn3BeJeHne My3bIKn Ha BaUeM ayDIO yCTpOInCTBE.
- ПоложиTe, habример, вш смартфон на устpoистBo. YбeДИТecь, уTO BCTpoEHнгрOMKOrOBOPHTeь на вшem смартфОHe yctahOBJIeH NO ueHTpy положеня (5) на устpoистBe.
I INPIMEYAHNA:
Tak KaK KaXdbIcMapTOOHnIaYdIO yCTPOINCTBO BCTpaNBAe TpOMKOrOBOpNTeINBpa3HbIX MeCTax,TOMbI HeMOxem DaTb Bam BoJee ToUHoe OINCAHne HauNyUHeIPOJoxEHNIA.
- Прн Heo6xOДIMOCTN n3MeHnTe nOLOXeHne BaUeRo cMapT-ФОHa, TaK yTO6bI BbIXODaIg 3ByK 6bl Na XOpOWeM yPoBHe. Прн Heo6xOДIMOCTN NOBepHnTe ayDnO yCTpOJCTBO.
- Otpereynilpyte rpoMKocTb Ha aydno yctpOCTBe.
i IPNIMEAHNIA:
- CmapToHbI aYdNo yCTpoiCTBa B MetaJIInueCKNX KOpnycax MOrYT CO3JaBaTb NOMEXN.
He yctaHaBJIbBaIte rPOMKOcTb Ha OueHb BbICOKOM yPOBHe, T.K. 3TO MOKeT pINBeCTn K NCKaXeHNrM 3ByKa.
Ynctka
BHIMAHHE: HnB Koem clyuae He norgykaIte 3JIeKtpoPnp6OpbIB B Ody.
162 Pycckn
- Pered uNCTKO BbIHbTe BNkU3 pO3eTKN.
- Претпеше щелковорслегка Влжно Травков 6e3 KaKnx-JIN60 MOUOxxCpeDCTB.
Понь и устараенье несправност
| ПюбLEMа Возможнaya р�чина Peшениe | ||
| Устroduстvo He paBOTaET. | Устroduстvo 3abLOKIN-ROBaHо Или НaxODITcR B ФИКСИРОВAHOM NOLOXжЕни. | БыдернITE сеТВОй adanTep оЛeКТрОПИТА-НЯ ИЗ рОЗЕТК ПпIMeрно на 5 ceKунД. 3aTeM ВКЛЮЧITE Uстroduстvo ChOBa. |
| He сblшен сигнал Будnilь-NИкA. | Пereekлочател Na 3aДнeI CTOPOHe yCTa-HOBJIEN B NOLOXжЕни "SPK". | UstahOBITE nepeKlIO-QuTeJIb B NOLOXжЕни "FM". |
| Het aydno сигнал BA BO BPERMa BOC-ПюИЗVEДЕнЯ MY3bIKI YepeZФунКцИю АLEK-TPOMaГнIHToHOn IHNДуКцИ. | Пereeklочател Na 3aД-нeI CTOPOHe yCTaHOBJIEN B NOLOXжЕни "FM" | UstahOBITE nepeKlIO-QuTeJIb B NOLOXжЕни "SPK". |
| Aydino IVSTOCHNk He yCTaHOBJIEN B IIpaBIVlb- Hoe NOLOXжЕни Na USTPOJCTBE. | ИзмeHITE NOLOXжЕни aydno IVSTOCHNka. YбeДИТeСь, YTOБы BCTPoeHnI B rPOMKO-ROBOPTEJIb Baшero aydno IVSTOCHTBA 6bl NcTahOBJIen B NO-LOXжЕни (5) Na BaшeM USTPOJCTBE. | |
| OTKIJOUeHaФунKцИЯ эЛeКТРOMaГнIHToHOn IHNДуКцИ. | Hajimaite KhoNky (6), noka He 3aTogPITcY nHДИKaTOp (4). | |
| ПюбLEMа Возможная ручина Peшениe | ||
| ШуMbI BO Время BOC- пpon3ve徳ни Музыкий чере3 функцию олес- ТromагнITHов Инданци. | Слишkom НИЗКИ 3a- разд батарек. | Вставытей Новbie батарейки яли BOC- пользuyITEсь сеТБым адаNTером. |
| На удино устroduстve metаллічесné КорпUC. | Истουльский удино Источник бeЗ метал- Линецко КорпUCa. | |
TexHnueckne daHHbIe
MoeIb: MRC 4140 I
Батарейки: 2x1,5B,AG13
Bec HeTTO: 325
IopTe6JIeMaM MoUHocTb: 5BT
BheuHn aanTep nntaHn
Bxod: 100-240 B, 50/60 T
BbIXoI: 5 B/1 A, noctoHHoe HapJxKeHne
Poiarphoctb:
Klacc 3aunTbI:
Papino
YactOTnbl dnaana3OH: FM 87,5 ~ 108 M
CoxpaheNo npaBO Ha TexHnueckne I KOHCTpyKUHOHHbIe N3MeHeHnB pamkax npoJolkaIOuSeiCra pa3pa6OTKn npOdyKTa.
3TO n3dJIeHHe npOJIO BCE Heo6xOIMbIe I aKTyaJIbHbIe npOBepKn, npEiINscaHbIe dIpeKTHBOI CE, K npIM. Ha 3JIeKTPOMaHTHyIO COBMeCTUMOCTb I COOTBeTCTBVE Tpe6OBAHnM K Hn3KOBoJbTHoI TexHnke, OHO 6blIO TaKKe cKOHCTpyuPObaHO INocTpOeHO C UyeTOM NocJeDnIX Tpe6OBAHn I IO TexHnke 6e3-ONaCHOCTN.
GARANTIEKARTE
warranty card - garantiekaart - carte de garantie - scheda di garanzia - tarjeta de garantia - cartao de garantia - garantikort - karta gwarancyjna - zaručni list - kartica jamstva - carte de garantie - rapaunnoHa Kapta - zaručny list - garancijski list - garanciajegy - rapaHTIHHHΦopMynp - rapaHTIHHBtanOH
MRC 4140 I
24 Monate Garantie gemäß Garantieerkränung - 24 months warranty according to warranty declaration - 24 meänden garantie volgens garantieveränderung - 24 mois de garantie sehen la déclaration de garantie - 24 mois de garantia seconde la dichiarazione di garantia - 24 mois de garantia de acuero con la déclaración de garantia - 24 mends de garantia de acero con la déclaration de garantia - 24 meenders garanti I henvol si garantibeseignelseve - 24 miesyce gwaranqi na podstawne odwalczenta gwarancynego - ziruka 24 misiou podle proliänen o zirune - 24 misebnoe jamsto u skladniu jamsjtenov delaracijom - 24 luni garantie conformd deciarjel de garantie - 24 Mecua rapaapanj a cnoctctnre c rapaapanoiaegekraaepn - 24 mesa nzna ziruka podfa vhylsienio o zirune - 24 mezene garancja, skladna z garancjice triavo - 24 hensap garancia a garancifalehtelekben leirtak xerint - rapaanis 24 mecnai signanehao npo rapaetie - Rapaeta 24 meca cerlaco anenemam rapaarnnnnnpaernn - anni anni Cab 26 nian
Kauf/latum, Kunde/steppel, Unterschicht - date of purchase, daler stemp, signature - karkopadutum, drealersteppel, handlichemierung - date d'chat, tempor en convesssionaire, signature - data d'acquisition, dider du rivendre, Iema - feche de compris, selel del distribuition, fimra - data de compris, castine - de distribuition, assimilator - kgpdata, herdandentemporale, signature - data nikipco, ploscr sprouwneau, pedio - darum nikipco, radnico, pedio - datum lepunoque, big trovica, populo - da de schorpe, pampia fumiculur, remittunt - Jara a igreca, fluvir na Ipaesana, nane - dilum nikipco, pedica ecbedichmeda, pedupoi - darun nukupa, big ngvica, pedua - klaeida distura, kensaid 5b-phygiscia, aldria - gira smpiejenea, hina rapogasan, napce - jara npereptepenes, danan npocasa, nate

www.etrv.de


- Język polski
- Spis tresci
- Pycckn
- CopepkHne
- OPMERKING: Wekker 1 ( )
- Parte inferior (no在哪)
- Fig. 2
- Symbols in these Instructions for Use
- WARNING:
- CAUTION:
- General Safety Guidelines
- English
- 88
- Children and disabled persons
- WARNING!
- Special Safety Instructions
- Overview of the Components
- Fig. 1
- Back of unit (not shown)
- Bottom (not shown)
- Fig. 3
- First Use of the Device/Introduction
- Inserting the batteries (Backup)
- NOTE:
- 90
- Power supply (Adaptor)
- Battery Operation
- CAUTION
- 92
- Volume
- Temperature display (with the radio switched off)
- Display backlight
- Switch-off
- Set time
- i NOTE:
- Radio operation
- Setting and storing stations
- Select stored stations
- English
- Alarm function
- Demonstration of nature sounds
- Setting the alarm times
- iNOTE:
- i NOTE: Alarm 1 ( )
- NOTE: Alarm 2 (1)
- Activating alarm time and alarm interval
- 96
- Turning off the Alarm
- Deactivate Wake-Up Time
- Induction function
- Cleaning
- CAUTION: Do not dip the appliance in water.
- Troubleshooting
- Technical Data
- External power adaptor
- Radio
- Disposal
- Meaning of the "Wheelie Bin" Symbol
- YBAGA.
- Cnla 3ByKy
- Biodo6paXeHHa TemnepaTypr (KoJI paIIO BIMKHeHe)
- Писвікі діспій.
- BnKlIOueHn npuJaDy
- PIMITKA.
- BctaHOBJIeHHaYcY
- YkpaIHcbka
- i IPNMITKA.
- BukopncTaHHpaio
- HanautybaHH i 36epexeHH cTaHci
- Bn6ip 36epexeHx cTaHci
- Функця 6удильнka
- ДемонстрацяЗвкIB пиродн
- ПРИМITKA.
- HanaHTyBaHHa cacy 6ydnbHnka
- YkpaIHcbka
- i PnMITKA.
- I I P N M I T K A. Bydunb HnK 2 (
- I IPNMITKA. BydunbHnK 2 (D)
- I P E D U N P E X K D E H N E:
- BHIMAHHE:
- 06uhe yka3aHnno TexHnke 6e3oNaChOCTn
- Pycckn
- I P E D U N P E X K D E H N E!
- Onachoctb ydyubja!
- CneuaJIbHbIe yka3aHnI NO TexHnke 6e3- ONaCHOCTN
- BHIMAHME:
- 063op detalei np6opa
- Pnc.1
- 3aHnra naneIb yctpoiCTBa (He noka3aHa)
- Huxnayactb (he npedctabneHa)
- Pycckn
- Пер boe nCnoIb3OBAHne yCTpoIcTba / BBe-DeHne
- BcTaBka 6aTapeek (dIa coxpaHnHaCTpoeK)
- I INPIMEYAHNA:
- PPEyPExKDEHNE:
- Pycckn
- 3JeKtpoNTaHne (AanTep)
- ПРИМЕЧАНЯ:
- Pa6ota yctpoiCTBa ot 6aTaapeek
- PPEyIpeXKeHHe
- PergunpoBka rponkoCTN
- Ioka3 temnepaTypbI (paIO BbIKIOyeHO)
- POncBETKa DnCpIeA
- BbIKJIIOueHne
- ПРИМЕЧАЦ:
- YcTaHOBka BpeMeHn
- Hactpoika BpeMeHn 6ydnIbHnka
- i INPIMEYAHNIA:
- I I P N M E Y A H N I: B y d n l b h n k 1 ()
- I I PIMEYAHNA: BydunbHnK 2 (1)
- I I PIMEYAHNA:
- AKTINBaCnB BpeMeHn 6yDnIbHNka N NHTepBaJa BKNIOUeHnA 6yDnIbHNka
- 160
- I INPUMEYAHNA:
- OTmeHa cHnHa 6yDnIbHnka
- 3neKtpomarHHTha yHKcna
- i IPNIMEAHNIA:
- Ynctka
- Pycckn
- TexHnueckne daHHbIe
- BheuHn aanTep nntaHn
- Papino
- GARANTIEKARTE
- MRC 4140 I
Brand : AEG
Model : MRC 4140 I
Category : Radio