
MR 4104 - Radio AEG - Free user manual and instructions
Find the device manual for free MR 4104 AEG in PDF.


| Product type | Clock radio |
| Brand | AEG |
| Model | MR 4104 |
| Mains power supply | 230 V, 50 Hz |
| Backup power supply (clock) | 2 AA 1.5 V batteries (R6 Mignon) |
| Output power | 20 W PMPO |
| Radio frequency bands | FM 88 – 108 MHz, AM 540 – 1600 kHz |
| FM antenna | Telescopic antenna |
| AM antenna | Built-in antenna |
| Display | LCD screen with backlight (LIGHT button) |
| Alarm function | Wake up to melody or radio |
| Snooze function | Yes, duration approx. 6 minutes |
| Sleep function | Adjustable timer from 10 to 60 minutes |
| AUX input | 3.5 mm stereo jack socket |
| Temperature display | Yes, in °C or °F (C/F button) |
| Time format | 12 or 24 hours |
| Protection class | II |
| Cleaning | Soft dry cloth, unplug before cleaning |
| Warranty | 24 months |
| Safety tips | Do not expose to moisture, do not block openings |
Frequently Asked Questions - MR 4104 AEG
User questions about MR 4104 AEG
0 question about this device. Answer the ones you know or ask your own.
Ask a new question about this device
Download the instructions for your Radio in PDF format for free! Find your manual MR 4104 - AEG and take your electronic device back in hand. On this page are published all the documents necessary for the use of your device. MR 4104 by AEG.
USER MANUAL MR 4104 AEG
Overview of the Components ...... Page 3
8 Instruction Manual......Page 31
Technical Data Page 33
11 Guarantee Page 34
FRANÇAIS
JE, ZYK POLSKI
Sommaire
UKW = FM, middengolf = AM.
$$ \begin{array}{c} \text {MO = Lunes, TU = Martes, WE = Miércoles,} \ \text {TH = Jueves, FR = Viernes, SA = Sábado, SU = Domingo.} \end{array} $$
Escuchar la radio
Confi gurar as horas de despertar
MW / AM 540 \~ 1600 kHz
Knapp for LIGHT (lys) (15)
Når du trykker på LIGHT-knappen, slås displaylyset på i ca. 10 sekunder.
Stille inn vekketid
General Safety Instructions
Read the operating instructions carefully before putting the appliance into operation and keep the instructions including the warranty, the receipt and, if possible, the box with the internal packing.
- To avoid the risk of fire or an electric shock, you should not expose the device to rain or moisture. Consequently, do not use the device in the immediate vicinity of water - for example near a bath tub, a swimming pool or in a damp cellar.
- Use the device only for the intended purpose.
- Only connect the device at a properly installed plug socket. Pay attention that the specified voltage corresponds to the voltage of the plug socket.
- Assemble the device in such a way that the available ventilation openings are not covered.
- Never open the housing of the device. Incorrect repairs can constitute a considerable risk for the user. Should the device become damaged, in particular the mains supply cable, do not operate the device any longer, but rather have it repaired by an expert. Check the mains supply cable regularly for damage.
- For safety reasons a broken or damaged mains lead may only be replaced by an equivalent lead from the manufacturer, our customer service department or a similar qualified person.
- If the device is not used for a longer period, remove the plug connector from the plug socket or take out the batteries.
These symbols may be found on the machine and are intended to indicate the following:

The lightning symbol should advise the user of parts in the inside of the device which carry dangerously high voltage levels.

The symbol with an exclamation mark should advise the user of important operation or maintenance instructions in the accompanying documentation.
Children
- In order to ensure your children's safety, please keep all packaging (plastic bags, boxes, polystyrene etc.) out of their reach.
Caution! Do not allow small children to play with the foil as there is a danger of suffocation!
- To protect children from the dangers posed by electrical appliances, make sure that the cable is hanging low and that children do not have access to the appliance.
Special Safety Instructions
- Do not use the device in locations that are extremely hot, cold, dusty or moist.
- Do not cover any ventilation slits with objects such as magazines, tablecloths, curtains etc.
- Never touch the mains plug or lead with wet hands.
- Keep the mains lead away from heaters.
-
Never put a heavy object on the electric lead.
-
Keep the device away from vases, baths, wash basins etc. If liquid enters the device this may cause serious damage.
- Open sources of fi re, such as burning candles, must not be placed on the device.
Overview of the Components
| 1 Function selector switch (ON / OFF/AL / AUTO) | ||
| 2 | Station | scale |
| 3 | TUNING | control |
| 4 | VOLUME | |
| 5 | Loudspeakers | |
| 6 | Aerial | |
| 7 | LCD | display |
8 AUX/RADIO function selector switch
| 9 | SET | button |
| 10 | MODE | button |
11 C/F (Celsius/Fahrenheit) button
| 12 ▼ (down) button | ||
| 13 ▲ (up) button | ||
| 14 | Battery | compartment |
| 15 | LIGHT | button |
| 16 | SNOOZE | button |
17 AUX IN socket
18 Band selection switch
Initial Use of the Radio Recorder/Introduction
- Please read the operating instructions carefully before using the radio recorder for the first time!
- Select a suitable location for the radio recorder, such as a dry, flat, non-slip surface on which it is easy to operate the machine.
- Ensure that the radio recorder is sufficiently ventilated!
Inserting the batteries (Batteries not supplied)
Please note:
The clock only works when batteries are inserted!
- Open the battery compartment (14) on the back.
- Insert two Mignon batteries of type R6 „AA“ 1.5V. Please ensure that the polarity is correct (see the floor of the battery compartment)!
- Close the battery compartment again.
- If the device is not used for a prolonged period of time, please take the batteries out in order to prevent leakage of battery acid.
- Different battery types or new and used batteries must not be used together.
Warning: batteries are not to be disposed of together with domestic wastes. Dispose of the used batteries at the relevant collection bin or at your dealer's.
Never throw batteries into the fire.
Power supply
Insert the plug into a properly installed 230 V, 50 Hz power socket. Ensure that the voltage is the same as that indicated on the model identification plate.
Setting the Time / Date
- Press the button (12) to switch between the 24 hour and 12 hour display. If you have selected the 24 hour display, "24HR" appears in the display (7).
Note: In the case of the 12 hour display the letters „PM“ (post meridiem) appear in the display after 12 noon (12 noon - 11 p.m.).
- Press the SET button (9). The hours display begins to flash.
- When the button (13) or the ▼ button (12) is pressed briefly the display jumps forwards or backwards by one hour. If the respective button is held down the fast mode begins. Keep the button pressed down until the desired hour is reached.
- Press the SET button (9) in order to set the minutes. The minutes begin to flash.
- To set the minutes, proceed in the same way as when setting the hours.
- Press the SET button (9) again. The year begins to flash.
- When the button (13) or the ▼ button (12) is pressed briefly the display jumps forwards or backwards by one year. If the respective button is held down the fast mode begins. Keep the button pressed down until the desired year is reached.
- Press the SET button (9) to set the month. The word „MONTH“ fl ashes in the display.
- To set the month, proceed in the same way as when setting the year.
- Press the SET button (9) again. The word „DATE“ fl ashes in the display.
- When the ▲ button (13) or the ▼ button (12) is pressed briefly the display jumps forwards or backwards by one date. If the respective button is held down the fast mode begins. Keep the button pressed down until the desired date is reached.
- Press the SET button (9) again to return to the normal display.
Note:
The weekday display (WEEK) automatically sets itself to the correct day of the week.
$$ \begin{array}{c} \text {MO = Monday, TU = Tuesday, WE = Wednesday,} \ \text {TH = Thursday, FR = Friday, SA = Saturday, SU = Sunday.} \end{array} $$
Listening to the Radio
- Turn the function selector switch (1) to the ON position. The illumination of the VOLUME/TUNING control lights up.
- Turn the AUX/RADIO function selector switch (8) to the RADIO position.
- Turn the band selector switch (18) to the FM or AM position, depending on which frequency band you wish to hear.
VHF = FM, Medium Wave = AM.
- Tune into the desired station using the TUNING regulator (3).
- For VHF/FM mode pull out the telescopic antenna and turn it to improve reception. An aerial is integrated into the device for the reception of AM stations. The device can be turned to line it up with the transmitter.
Volume (4)
The desired volume can be sent using the VOLUME regulator.
Switch-off
Turn the function selector switch (1) to the OFF/AL position.
The illumination of the VOLUME/TUNING control goes off.
LIGHT Button (15)
After the LIGHT button has been pressed, the illumination of the display is switched on for approximately 10 seconds.
Setting the Alarm Time
- Press the MODE button (10). The symbol, "appears in the display.
- Press the SET button (9). The hours display begins to flash.
- When the ▲ button (13) or the ▼ button (12) is pressed briefly the display jumps forwards or backwards by one hour. If the respective button is held down the fast mode begins. Keep the button pressed down until the desired hour is reached.
- Press the SET button (9) in order to set the minutes. The minutes begin to flash.
- To set the minutes, proceed in the same way as when setting the hours.
- Press the SET button (9) to set the tune.
- When the button (13) or the ▼ button (12) is pressed briefly the display (7) jumps forwards or backwards by one tune. If the respective button is held down the fast mode begins. Keep the button pressed until the desired tune is reached.
- Press the SET button (9) again to return to the normal display.
- Turn the function selector switch (1) to the OFF/AL position. As soon as the alarm time that has been set is reached the selected tune is heard for approximately 1 minute.
To turn off the alarm please press the SNOOZE button (16).
Automatic Alarm Interval
- In order to activate the snooze function press the ▼ button (12) while the alarm time is displayed. The symbol „Zz“ appears in the display.
- The automatically set alarm function can be shut off for approximately 6 minutes with the SNOOZE button (16).
- If you would like to turn off the snooze function completely, press the ▲ button (13) or the ▼ button (12).
Radio alarm
- Once the alarm times are set and a radio station has been selected, shift the function selector (1) to „AUTO“. The word „AUTO“ appears in the display.
- Press the MODE button (10) twice. The number „:10“ appears in the display.
- Press the ▲ button (13). The symbol „▶“ appears in the display.
-
Press the MODE button (10) again to return to the normal display.
-
As soon as the alarm time is reached, the radio is switched on. The selected radio station plays at the set volume.
In order to turn the radio off, push the function selector switch (1) to the OFF/AL position.
Note: If the snooze function is activated the waking alarm that has been set is heard after approximately 6 minutes.
Deactivating the Alarm Time
- Press the MODE button (10).
- Press the button (13). The "or" symbol goes off.
- Press the 2x MODE button (10) twice to return to the normal display.
Delayed Switch-off
- Turn the function selector switch (1) to the AUTO position.
- Press the MODE button (10) twice. The number „:10“ appears in the display.
- Press the button (12). The word „SLEEP“ appears in the display and the radio switches itself on.
- Press the SET button (9). The number „:10“ begins to fl ash.
- When the button (13) or the ▼ button (12) is pressed briefly the display jumps forwards or backwards by 10 minutes. If the respective button is held down the fast mode begins. Keep the button pressed down until the desired time is reached (10 - 60 minutes).
- Press the MODE button (10) to return to the normal display. In order to turn the radio off, push the function selector switch (1) to the OFF/AL position.
Note: If the function selector switch (1) is in the „AUTO“ position it is not possible to use the alarm function.
Temperature Display
The device has a temperature display which you can change between °C (Celsius) and °F (Fahrenheit).
- Switch between °C and °F by repeatedly pressing the C/F button (11).
Note: Due to the heat produced by the device itself in radio mode, the measured temperature is approximately 3 °C above the actual temperature.
AUX IN socket
To connect analogue replay devices. Using this socket it is possible to hear the sound of other playback devices such as MP3 players, CD players etc. through the loudspeaker.
- Please connect the external device with a 3.5 mm stereo jack plug to the AUX IN socket (17).
- Turn the AUX/RADIO function selector switch (8) to the AUX position.
- Through the loudspeakers you will now hear the sound from the external device. You can adjust the volume with the VOLUME control (4).
- For the remaining procedure please see the operating instructions of the external sound source.
Note:
Turn the volume of the external device to maximum.
Cleaning and care
- Before cleaning remove the mains lead from the socket.
- Clean the housing with a soft, dry cloth without additives.
Technical Data
Model: MR 4104
Power supply: 230 V, 50 Hz
Battery operation (Clock): 2 x 1,5 V, (R6) Mignon
Protection class:....II
Output rating:....20 W PMPO
Radio section:
Frequency ranges: VHF / FM 88 \~ 108 MHz
MW / AM 540 \~ 1600 kHz
This device has been tested according to all relevant current CE guidelines, such as electromagnetic compatibility and low voltage directives, and has been constructed in accordance with the latest safety regulations.
Subject to technical changes without prior notice!
Guarantee
The device supplied by our Company is covered by a 24 month guarantee starting on the date of purchase (receipt).
During the life of the guarantee any fault of the device or its accessories *) ascribable to material or manufacturing defects will be eliminated free of charge by repairing or, at our discretion, by replacing it. The guarantee services do not entail an extension of the life of the guarantee nor do they give rise to any right to a new guarantee!
Proof of the guarantee is provided by the proof of purchase. Without proof of purchase no free replacement or repair will be carried out.
If you wish to make a claim under the guarantee please return the entire machine in the original packaging to your dealer together with the receipt.
*) Damage to accessories does not mean automatic free replacement of the whole machine. In such cases please contact our hotline. Broken glass or breakage of plastic parts are always subject to a charge.
Defects to consumables or parts subject to wearing (e.g. motor pistons, kneading blades, drive shafts, spare remote control, spare toothbrushes, saw blades, etc.) as well as cleaning, maintenance or the replacement of said parts are not covered by the guarantee and hence are to be paid!
The guarantee lapses in case of unauthorized tampering.
After the expiry of the guarantee
After the expiry of the guarantee repairs can be carried by the competent dealer or repair service against the payment of the ensuing costs.
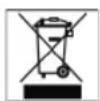
Meaning of the "Dustbin" Symbol
Protect our environment: do not dispose of electrical equipment in the domestic waste.
Please return any electrical equipment that you will no longer use to the collection points provided for their disposal.
This helps avoid the potential effects of incorrect disposal on the environment and human health.
This will contribute to the recycling and other forms of reutilisation of electrical and electronic equipment.
Information concerning where the equipment can be disposed of can be obtained from your local authority.
In many EU countries the disposal of electrical and electronic equipment in the domestic waste has been prohibited since August 13, 2005.
UKF = FM, Fale średnie = AM.



- FRANÇAIS
- JE, ZYK POLSKI
- Sommaire
- UKW = FM, middengolf = AM.
- Escuchar la radio
- Confi gurar as horas de despertar
- Knapp for LIGHT (lys) (15)
- Stille inn vekketid
- General Safety Instructions
- Children
- Special Safety Instructions
- Initial Use of the Radio Recorder/Introduction
- Please note:
- The clock only works when batteries are inserted!
- Power supply
- Setting the Time / Date
- Note:
- Listening to the Radio
- VHF = FM, Medium Wave = AM.
- Volume (4)
- Switch-off
- LIGHT Button (15)
- Setting the Alarm Time
- Automatic Alarm Interval
- Radio alarm
- Deactivating the Alarm Time
- Delayed Switch-off
- Temperature Display
- AUX IN socket
- Cleaning and care
- Technical Data
- Guarantee
- After the expiry of the guarantee
- Meaning of the "Dustbin" Symbol
Brand : AEG
Model : MR 4104
Category : Radio