
MRC 4122 F - Radio AEG - Free user manual and instructions
Find the device manual for free MRC 4122 F AEG in PDF.


| Product Type | Portable FM/AM Radio |
| Brand | AEG |
| Model | MRC 4122 F |
| Dimensions (L x H x D) | 20 x 12 x 6 cm |
| Weight | 0.5 kg |
| Power Supply | 4 LR6 (AA) batteries or 6V DC mains adapter (not included) |
| Frequency Ranges | FM 87.5 – 108 MHz / AM 522 – 1620 kHz |
| Main Functions | FM/AM radio, alarm clock, night light, built-in 3 W speaker |
| Display | Backlit LED display |
| Connectivity | Headphone jack (3.5 mm) |
| Battery Life | Approximately 20 hours of moderate listening |
| Maintenance and Cleaning | Unplug before cleaning. Wipe with a dry, soft cloth. Do not use abrasive products. |
| Safety | Do not expose to moisture, heat sources, or water. Use only recommended accessories. |
| Spare Parts and Repairability | Batteries, mains adapter, and FM antenna available as spare parts. Repair by authorized center. |
| General Information | 2-year warranty. CE compliant. Made in China. |
Frequently Asked Questions - MRC 4122 F AEG
User questions about MRC 4122 F AEG
0 question about this device. Answer the ones you know or ask your own.
Ask a new question about this device
Download the instructions for your Radio in PDF format for free! Find your manual MRC 4122 F - AEG and take your electronic device back in hand. On this page are published all the documents necessary for the use of your device. MRC 4122 F by AEG.
USER MANUAL MRC 4122 F AEG
GB Radio-controlled projection clock radio
Overview of the Components ..... Page 3
Instruction Manual...... Page 61
Technical Data Page 70
Disposal Page 71
Język polski
Spis treści
Antenne extensible (FM)
Bas (sans illustration)
Thank you for choosing our product. We hope you will enjoy using the appliance.
General Safety Instructions
Read the operating instructions carefully before putting the appliance into operation and keep the instructions including the warranty, the receipt and, if possible, the box with the internal packing. If you give this device to other people, please also pass on the operating instructions.
- To avoid the risk of fire or an electric shock, you should not expose the device to rain or moisture. Consequently, do not use the device in the immediate vicinity of water – for example near a bath tub, a swimming pool or in a damp cellar.
- The appliance is designed exclusively for private use and for the envisaged purpose. This appliance is not fit for commercial use.
- Only connect the device at a properly installed plug socket. Pay attention that the specified voltage corresponds to the voltage of the plug socket.
- When using external mains supply, pay attention to the correct polarity and voltage. Always place the batteries in the correct direction.
- Assemble the device in such a way that the available ventilation openings are not covered.
- Never open the housing of the device. Incorrect repairs can constitute a considerable risk for the user. Should the device become damaged, in particular the mains supply cable, do not operate the device any longer, but rather have it repaired by an expert. Check the mains supply cable regularly for damage.
- For safety reasons a broken or damaged mains lead may only be replaced by an equivalent lead from the manufacturer, our customer service department or a similar qualified person.
- If the device is not used for a longer period, remove the plug connector from the plug socket or take out the batteries.
These symbols may be found on the machine and are intended to indicate the following:

The lightning symbol should advise the user of parts in the inside of the device which carry dangerously high voltage levels.

The symbol with an exclamation mark should advise the user of important operation or maintenance instructions in the accompanying documentation.
62
English
Symbols in these Instructions for Use
Important information for your safety is specially marked. It is essential to comply with these instructions in order to avoid accidents and prevent damage to the machine:

WARNING:
This warns you of dangers to your health and indicates possible injury risks.

CAUTION:
This refers to possible hazards to the machine or other objects.

NOTE:
This highlights tips and information.
Children and Frail Individuals
- In order to ensure your children's safety, please keep all packaging (plastic bags, boxes, polystyrene etc.) out of their reach.

WARNING!
Caution! Do not allow small children to play with the foil as there is a danger of suffocation!
- This device is not intended to be used by individuals (including children) who have restricted physical, sensory or mental abilities and/or insufficient knowledge and/or experience, unless they are supervised by an individual who is responsible for their safety or have received instructions on how to use the device.
- Children should be supervised at all times in order to ensure that they do not play with the device.
Special Safety Instructions
- Do not use the device in locations that are extremely hot, cold, dusty or moist.
- Ensure that the radio recorder is sufficiently ventilated!
- Do not cover any ventilation slits with objects such as magazines, tablecloths, curtains etc.
- Never touch the mains plug or lead with wet hands.
- Keep the mains lead away from heaters.
- Never put a heavy object on the electric lead.
- Keep the device away from vases, baths, wash basins etc. If liquid enters the device this may cause serious damage.
Overview of the Components
1 BAND button
2 SNOOZE/SLEEP button
3 button (On/Off)
4 DIMMER LOW/HIGH/AUTO OFF switch
5 Volume control (VOLUME)
6 Speaker
7 Control (TUNING)
8 MODE button
9 button
10 button
11 AL.SET button (alarm time)
12 LCD display
13 Rotatable projector
14 Lens
15 FOCUS control
180° FLIP button
ON/OFF PROJECTION button
Rear (without illustration)
AL.1 button
AL.2 button
RESET button
LINE IN jack
Receiver for the time signal station
Throw-out aerial (FM)
Mains lead
Bottom (without illustration)
Battery compartment (clock backup)
Putting into function
- Select a proper place for the device such as a dry, and even non slip area where you can easily operate the device.
- If still in place, remove the protection foil from the display.
64
English
Inserting the Battery (Backup)
(Battery is not included with the device)
In case of a power cut or if the device is unplugged, with backup battery inserted, the settings will be kept.
- Open the battery compartment at the bottom. Remove for this the screw of the battery compartment lid with a Phillips screwdriver.
- Insert one battery of the type CR2032, 3 V. Mind the correct polarity (indicated on the bottom of the battery case)!
- Close the battery case. Secure the battery compartment lid again with the screw.
- If the device is not used for an extended period of time, remove the Battery from the device to avoid any leaking of battery acid.

CAUTION:
Batteries are not to be disposed of together with domestic wastes. Dispose of the used batteries at the relevant collection bin or at your dealer's.

WARNING:
Do not expose the batteries to high temperatures or direct sunlight. Never throw batteries into the fire. There is a danger of explosion!
Power supply
- Insert the grid plug into a properly installed three prong socket with 230 V, 50 Hz.
- Make sure the grid voltage corresponds to the figures on the rating plate.
- If you have not inserted a backup battery, the stored clock time will be lost as soon as the power supply is interrupted.
Switching the Unit On/Off
Press the ⬇ button (3) to switch the unit on or off.
Radio station tuning
- Use the BAND button (1) to select FM or AM, depending on the frequency band you want to listen to.
VHF = FM, medium wave = AM
- Turn the tuning control in order to tune in to a station. The display shows the tuned frequency.
-
If reception is too weak, change the position of the dipole antenna in order to improve the reception.
-
The antenna for reception of AM stations is integrated in the unit. The unit can be tuned to a station by changing the position of the unit.
Volume
The desired volume can be sent using the VOLUME regulator (5).
Display Brightness
The brightness of the display can be adjusted with the DIMMER switch (4). Select between LOW, HIGH, and AUTO OFF.

NOTE:
- With the switch set to AUTO OFF, the display illumination and, when activated, the projection of the time is switched off after 15 seconds in standby.
- Press any button to switch on the brightness again for 15 seconds.
Any malfunctions during operation can be rectified by pressing the Reset button.
- Push the (RESET) button with the help of a wire or a similar item to reset the electronics.
Setting the Clock
Automatic (in Standby only)
- After plugging the mains plug into the socket, the time data from the DCF77 station is automatically transferred after a few minutes. If the lines in the “” symbol flash, the unit looks for the radio signal. If a radio signal has been found, the “” symbol lights up. The correct time appears on the display.
- The time is automatically adjusted on the hour by the station signal.

NOTE:
The signal can be received without problems within a radius of ca. 2000 km around Frankfurt / Main, but interference may occur, depending on local conditions. This may occur especially in buildings containing a high percentage of metal, as well as in proximity to TV sets, PCs, mobile phones etc. which are switched on! If the reception cannot be automatically adjusted after 10 minutes in spite of the alignment of the integrated antenna, the reception in the respective location is too weak. In this case, set the time manually or change location.
66
English
Manual
While the unit searches for a signal, the time can be set manually only while the unit is in operation.
- Hold the MODE button (8) depressed until the year indication (YR) on the display flashes.
- Now you can set the year (YR), the month (M), the day (D), the time display format (12 H/24 H), the hours, and the minutes with the buttons ▶ and (10)
- In each case, confirm the input with the MODE button. The current indication to be set flashes on the display.

NOTE:
- The input is stored automatically within approximately 30 seconds when no button is pressed.
- With a 12 hour display the following is displayed: PM = Afternoon
- Setting of the weekday is done automatically.
Display Date and Year
While the unit searches for a signal, this function can only be used when the unit is in operation.
- Press the <button (10), to display the date for a short time.
- Press the ▶button (9), to display the year for a short time.
Switching to Summer Time
While the unit searches for a signal, this function can only be used when the unit is in operation.
- Keep the ▶button (9) depressed to switch between summer time and normal time. When summer time has been selected, the symbol "DST ⚙" is shown on the display.
Alarm function

NOTE: Important!
- While the unit searches for a signal, the alarm time can only be activated or deactivated if the unit is in operation.
- No alarm buzzer can be heard if a cable is connected to the LINE IN jack!
Setting of the Alarm
You can set two alarm times. Proceed as follows:
- Press the AL.SET button (11) for approximately 3 seconds. The display shows "ALARM 1 ➡" and the number of the actually set alarm time starts to flash.
- Use the buttons (9) and (10) for setting.
- Press the AL.SET button for confirmation. The minutes start to flash.
- Use the buttons and for setting.
-
Now select the days you want the alarm to sound. The following selections can be made:
-
Monday to Friday
- Monday – Saturday
-
Monday – Sunday
-
Press the AL.SET button to set the second alarm time. Proceed as described above for the setting.
i NOTE:
- If you want to set only the first alarm time, press the AL.SET button until the time is displayed again.
- Press the AL.SET button to display the set alarm times for a short time.
Radio alarm
After you have set the alarm time and a radio station, press the AL.1 button or the AL.2 button (back of the unit). Press the button until the symbol "ALARM 1" or "ALARM 2" is shown.
i NOTE:
As soon as the alarm time is reached, the radio is switched on. The selected radio station plays at the set volume.
Buzzer alarm
If you do not want to be wakened with a radio station, press the AL.1 🎨 button or the AL.2 ⏰ button (back of the unit) until the symbol "ALARM 1 🔊" or "ALARM 2 🔊" is shown on the display.
i NOTE:
• Instead of the radio, the buzzer goes off when the alarm time is reached.
- The volume of the signal tone cannot be changed.
English
Turning off the Alarm
Press the ⬇button (3) to stop the alarm.
Automatic Alarm Interval
The automatically set alarm function can be shut off for approximately 9 minutes with the SNOOZE/SLEEP button (2).
Deactivate the Alarm Function
To deactivate the alarm function, press the AL.1 button or the AL.2 button (back of the unit) until no alarm symbol is shown on the display.
Delayed Shut-Off
You can use the function for delayed power-off with radio operation. The unit is switched off automatically when the selected time is reached.
- Select the time after which the unit is switched off by repeatedly pressing the SNOOZE/SLEEP button (2). The following selections can be made: SLEEP 90, 60, 30 and 15 minutes.
- This function can be cancelled with the button (3).
Projection

NOTE: Important!
- While the unit searches for a signal, the projecting display can only be rotated or turned on/off if the unit is in operation.
- The display can only be seen in a darkened room.
With this unit, you can project the time onto a wall or the ceiling.
- You can switch this function on and off with the ON/OFF / PROJECTION button (15).
- Rotate the projector (13) to the desired position.
- The rear of the projector has a setting wheel (15), with which you can adjust the sharpness of the projection.
- You can use the 180° FLIP button (15) to flip the projection by 180 degrees.
LINE IN jack (back of the unit)
For connecting analogue playback units. You can also use this jack to listen to audio output from other playback units such as an MP3 player, a CD player etc. via a speaker.
- Connect an external unit to the LINE IN jack using a 3.5 mm stereo cinch connector.
- The unit switches automatically to LINE IN mode. The radio sound is switched off.
- Listen to the audio playback from an external device via the speaker. Use the VOLUME control (5) to adjust the volume.
- For further instructions, please refer to the user manual of the external audio source.

NOTE:
- Set the volume of the external device to a reasonable level.
- No alarm buzzer can be heard if a cable is connected to the LINE IN jack!
Cleaning

CAUTION:
Do not dip the appliance in water.
- Remove the plug before cleaning.
- Clean the appliance with a slightly humid cloth without any additives.
Trouble-shooting
| Problem Cause Solution | ||
| The unit cannot be operated | The unit is blocked and “hangs” | Pull the mains plug for approximately 5 seconds. Then connect the unit again |
| No alarm buzzer can be heard | A cable is connected to the LINE IN jack | Disconnect the cable from the LINE IN jack |
| Time/alarm time cannot be set | The unit is searching for a radio signal (the lines on the “× symbol flash) | Set the time/alarm time whilst the unit is switched on |
| Alarm time/Projection cannot be switched on/off | The unit is searching for a radio signal (the lines on the “× symbol flash) | Switch the alarm time/projection on or off whilst the unit is switched on |
70
English
| Problem Cause Solution | ||
| The date and year cannot be displayed. Cannot switch between daylight saving and normal time | The unit is searching for a radio signal (the lines on the “× symbol flash) | In this case, the functions can only be carried out whilst the unit is in operation. |
Technical Data
Model: MRC 4122 F
Power supply:....230 V\~ 50 Hz
Power consumption: 5 W
Battery power reserve: 3 V, CR2032
Protection class:....II
Net weight: 0.59 kg
Radio section:
Frequency ranges: VHF/FM 87.5 \~ 108.0 MHz
MW/AM 531 \~ 1620 kHz
Subject to technical changes without prior notice!
This device has been tested according to all relevant current CE guidelines, such as electromagnetic compatibility and low voltage directives, and has been constructed in accordance with the latest safety regulations.
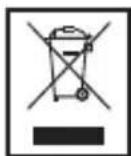
Disposal
Meaning of the "Dustbin" Symbol
Protect our environment: do not dispose of electrical equipment in the domestic waste.
Please return any electrical equipment that you will no longer use to the collection points provided for their disposal.
This helps avoid the potential effects of incorrect disposal on the environment and human health.
This will contribute to the recycling and other forms of reutilisation of electrical and electronic equipment.
Information concerning where the equipment can be disposed of can be obtained from your local authority.
Display Date and Year



- Język polski
- Spis treści
- Bas (sans illustration)
- General Safety Instructions
- 62
- English
- Symbols in these Instructions for Use
- WARNING:
- CAUTION:
- NOTE:
- Children and Frail Individuals
- WARNING!
- Special Safety Instructions
- Overview of the Components
- Rear (without illustration)
- Bottom (without illustration)
- Putting into function
- 64
- Inserting the Battery (Backup)
- Power supply
- Switching the Unit On/Off
- Radio station tuning
- Volume
- Display Brightness
- Setting the Clock
- Automatic (in Standby only)
- 66
- Manual
- Display Date and Year
- Switching to Summer Time
- Alarm function
- NOTE: Important!
- Setting of the Alarm
- i NOTE:
- Radio alarm
- Buzzer alarm
- Turning off the Alarm
- Automatic Alarm Interval
- Deactivate the Alarm Function
- Delayed Shut-Off
- Projection
- LINE IN jack (back of the unit)
- Cleaning
- 70
- Technical Data
- Disposal
- Meaning of the "Dustbin" Symbol
Brand : AEG
Model : MRC 4122 F
Category : Radio