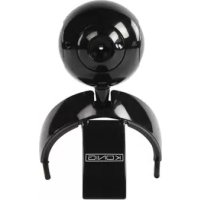
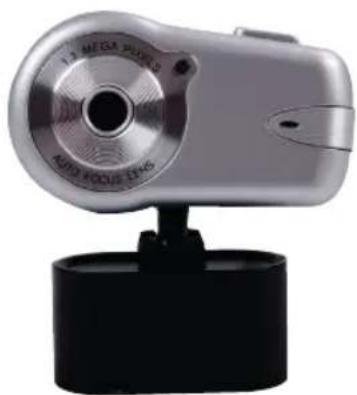
CMPWEBCAM40 - Webcam KONIG - Free user manual and instructions
Find the device manual for free CMPWEBCAM40 KONIG in PDF.

| Product type | Webcam |
| Brand | Konig |
| Model | CMPWEBCAM40 |
| Maximum resolution | 1280 x 1024 pixels (1.3 megapixels) |
| Interface | USB |
| Built-in microphone | Yes |
| Autofocus | Yes, with control panel (ON/OFF/FOCUS) |
| Digital zoom | 4x (10 steps) |
| Main functions | Video capture, photo, brightness, contrast, saturation, white balance, exposure, mirror image, flip, black area |
| Power supply | Via USB port |
| Compatible operating systems | Windows (driver provided on CD-ROM) |
| Package contents | Webcam, user manual, CD-ROM with driver |
| Included software | AmCap (video capture), EZMedia Box, EZLive Monitor, DirectX 9.0 |
| Safety | Do not open the device; disconnect in case of problem; reserved for a qualified technician |
| Maintenance and cleaning | Clean with a soft, dry cloth |
| Warranty | Warranty void if modified or used incorrectly |
| General information | Design and technical specifications subject to change without notice |
Frequently Asked Questions - CMPWEBCAM40 KONIG
User questions about CMPWEBCAM40 KONIG
0 question about this device. Answer the ones you know or ask your own.
Ask a new question about this device
Download the instructions for your Webcam in PDF format for free! Find your manual CMPWEBCAM40 - KONIG and take your electronic device back in hand. On this page are published all the documents necessary for the use of your device. CMPWEBCAM40 by KONIG.
USER MANUAL CMPWEBCAM40 KONIG
Do not connect the webcam to the computer before fi nishing the driver installation. Otherwise, the camera may not function properly.
Insert the attached CD-ROM into the CD-ROM drive. Click Software Overview for the application software introduction. Click Install Software to begin the driver and software installation.
Select the driver, all software and the installation language, then click "Instal". The InstallShield Wizard will walk you through the rest of the installation procedure. Follow the instructions and click "Next" and "Finish" to complete the driver installation.
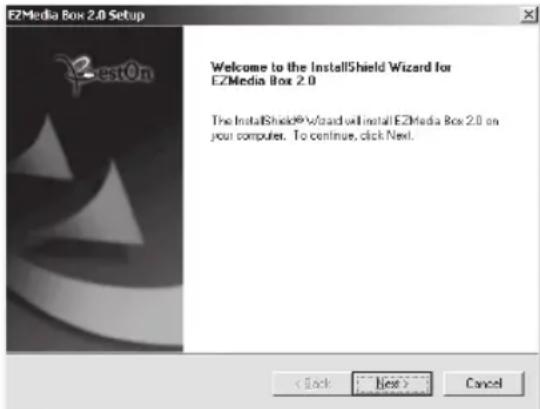
The fi gure below shows the EZMedia Box & EZLive Monitor Installation Screen. Click "Next" to continue.
Please type User Name, Company Name, etc. in the blanks, then click "Next". Follow the same procedure to install EZLive Monitor.
To avoid any problems with the webcam, please install DirectX 9.0 from the supplied CD. Please select "I accept the agreement", then click "Next" to finish the installation. Please follow the installation instructions to finish the installation of DirectX 9.0. Click "Finish" to restart your computer. After restarting the computer, please plug our PC Camera into the computer's USB port. The computer should automatically detect the webcam.
3. Using the webcam
If you want to use the webcam with "AmCap" (capture software), please follow the above driver installation procedure and plug our webcam into your computer. Click Start > Programs and find the KONIG webcam folder which contains the AmCap software.
3.1 Video Capturing
Click Capture/Start Capture:
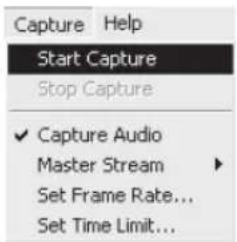
Click OK to start video recording.

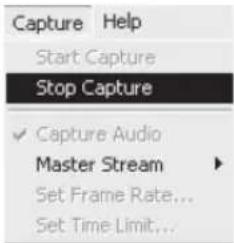
To stop capture, click Capture/Stop Capture.
Capture Time Limit
To set a limit on the video capture time, click Options/Set Time Limit.
Set Frame Rate
To set the frame rate of the video, click Options/Set Frame Rate. Please select "Use frame Rate", then set frame rate you want.
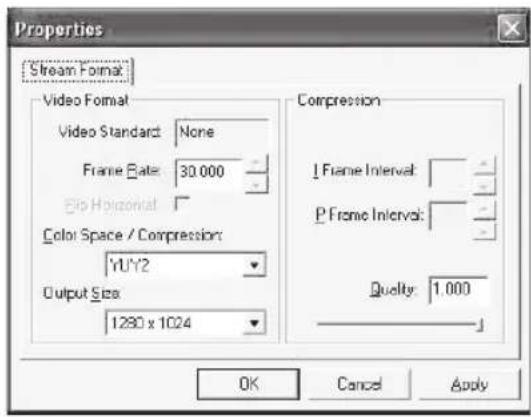
Video Capture Pin
Click Options/Video Capture Pin. Then you can modify video capture settings, such as Color format/Compression, Output Size and Quality, etc. Click Apply and OK.
Note: Before choosing the output size of 1280x1024 (1.3 Mega Pixels), please select YUY2 on Color Space/Compression fi rst.
4. Camera Control
Click the Camera Control Page. The webcam is capable of 10 steps (4 times) digital zoom. Please pull the slide bar to adjust, and then click OK.
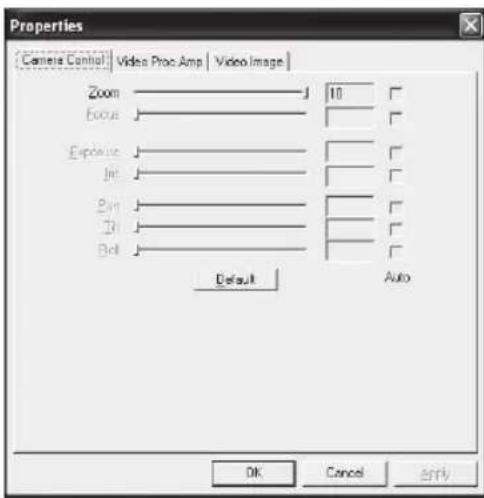
Adjust Video Properties
To adjust video capture properties, click Options/Video Capture Filter. Click Video Proc Amp Page. Here you can adjust setting values such as Brightness, Contrast, Saturation, etc. as you need. Then click OK.
*Note: click Default to return to the original default settings.
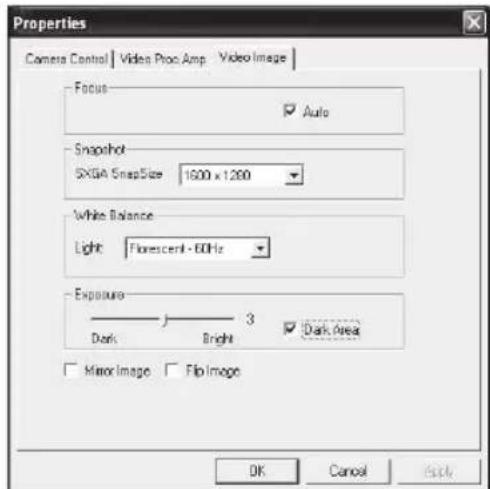
Video Image
Click the Video Image Page. Here, you can disable/enable Auto Focus, set White Balance, set the auto exposure level, enable the Dark Area function and mirror image/ flip image. Click OK after fi nishing your selection.
Snapshot: Please select the resolution that you want to capture.
White Balance: Please select the right light source (Hz) to avoid any image noise caused.
Dark Area: Please select Dark Area to enhance exposure value when using PC camera on dark place.
5. Using Auto Focus
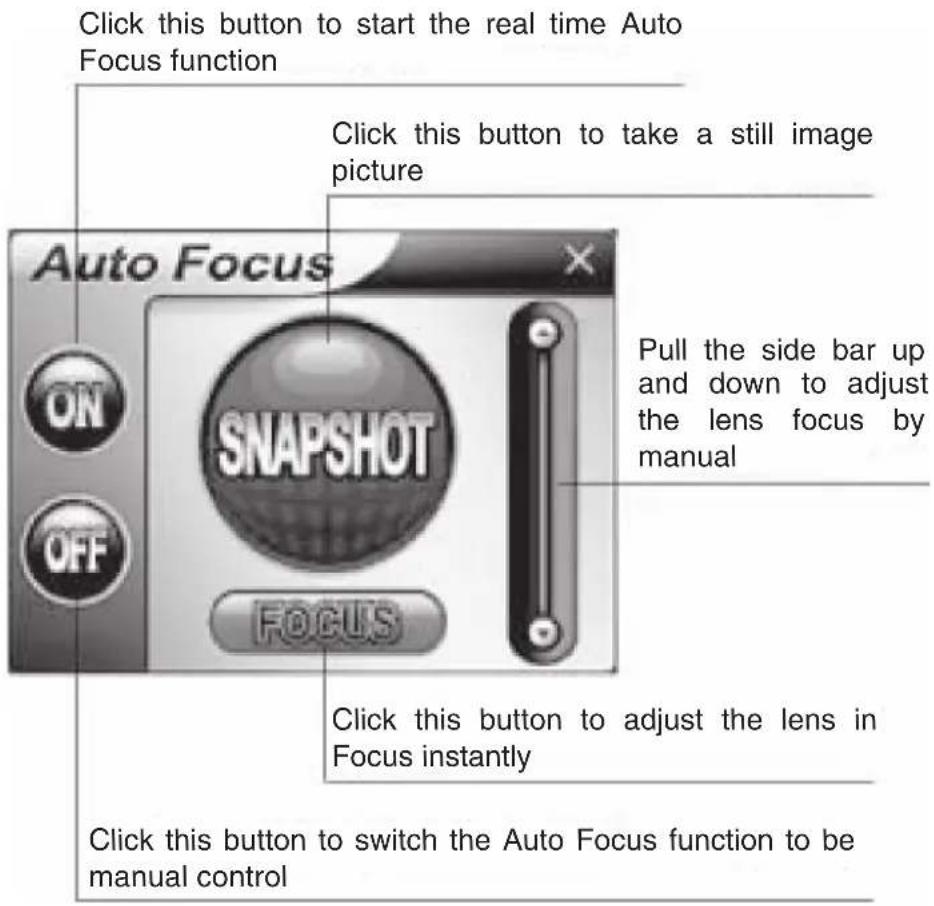
Auto Focus Control Panel
Click the icon on the Windows tool bar to open Auto Focus Control Panel.
The Functions of Auto Focus Control Panel
ON: Click this button to start the real-time Auto Focus function
OFF: Click this button to switch from Auto Focus function to manual control
FOCUS: Click this button to adjust the lens in focus instantly
SNAPSHOT: Click this button to take a still image picture
SLIDE BAR: Pull the slide bar up and down to adjust the lens focus manually
See the next figure for an example of the Auto Focus Control Panel.
6. Audio settings
If your camera has a built-in microphone, please follow the below procedure to set up audio.
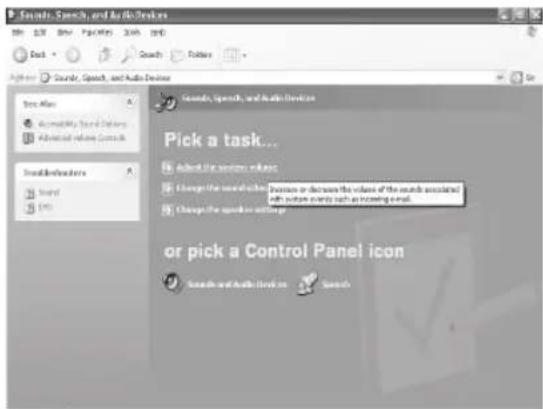
Click Start/Control Panel, then click Switch to Category View. Select "Sounds, Speech, and Audio Devices".
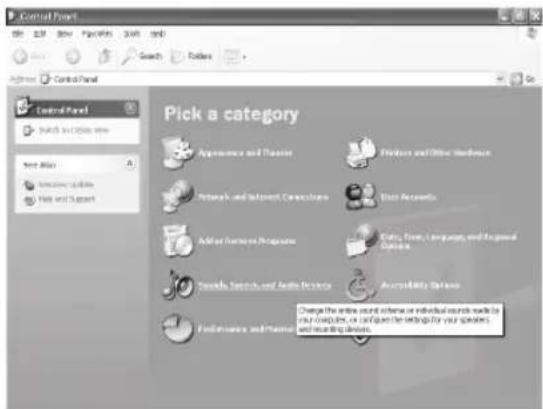
Click "Adjust the system volume" or "Sounds and Audio Devices".
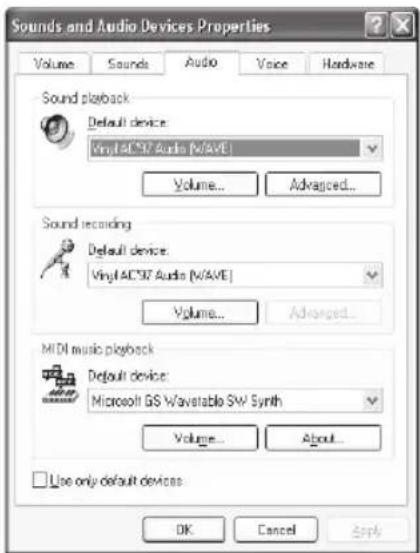
Select Audio, then click Volume under Sound Recording.
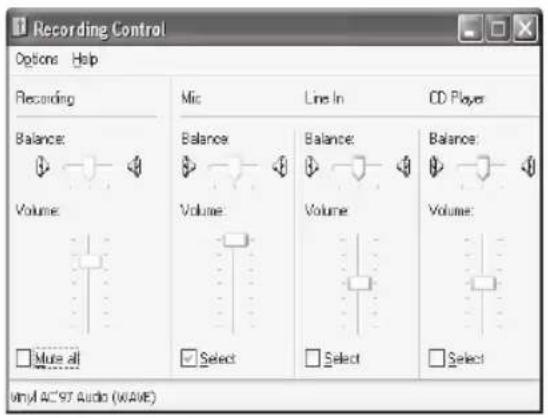
You can drag the slide bar of the Microphone to adjust the volume.
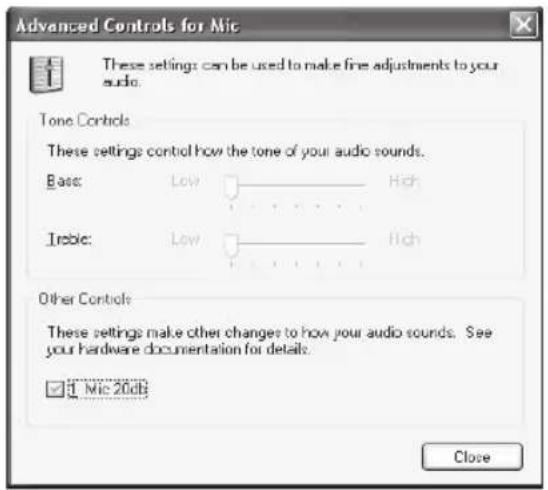
Click Options/Advanced Controls, then click Advanced under Microphone.
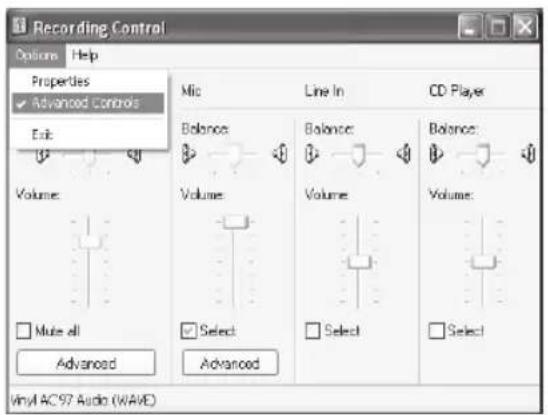
To enable audio, please select the check box "1 Mic 20db" (The text may be different according to your computer system).
Safety precautions:
To reduce risk of electric shock, this product should ONLY be opened by an authorized technician when service is required. Disconnect the product from mains and other equipment if a problem should occur.
Warranty:
No guarantee or liability can be accepted for any changes and modifi cations of the product or damage caused due to incorrect use of this product.
General:
Designs and specific cations are subject to change without notice.
Copyright ©


KONIG
COMPUTER
CMP-WEBCAM40/41
Webcam 1,3 MP mit
Autofokus-System

ANLEITUNG