
ESP 20101 - Coffee machine ECG - Free user manual and instructions
Find the device manual for free ESP 20101 ECG in PDF.
| Product type | Espresso coffee machine |
| Brand | ECG |
| Model | ESP 20101 |
| Rated voltage | 220-240 V ~ 50 Hz |
| Rated power | 960-1140 W |
| Maximum pressure | 20 bar |
| Coffee type | Ground coffee (single or double dose) |
| Number of simultaneous cups | 1 or 2 (depending on basket used) |
| Main functions | Espresso, cappuccino, steam for heating liquids |
| Water tank | Removable with handle and lid |
| Drip tray | With grid, removable |
| Control panel | Rotary knob (coffee/steam/off) and coffee/steam selector |
| Operation indicator | Red light (lit when operating) |
| Preheating indicator | White light (operating temperature reached) |
| Steam wand | With milk frother adapter |
| Included accessories | Metal pitcher, dosing spoon with tamper, baskets (1 and 2 dose), milk frother adapter |
| Cup warming surface | Yes, on top of the appliance |
| Cleaning | Removable parts washable with soapy water, body wiped with a damp cloth |
| Descaling | Recommended every 2 to 3 months |
| Reparability | Do not disassemble yourself, contact a professional service |
| Safety instructions | Mandatory reading before use |
Frequently Asked Questions - ESP 20101 ECG
User questions about ESP 20101 ECG
0 question about this device. Answer the ones you know or ask your own.
Ask a new question about this device
Download the instructions for your Coffee machine in PDF format for free! Find your manual ESP 20101 - ECG and take your electronic device back in hand. On this page are published all the documents necessary for the use of your device. ESP 20101 by ECG.
USER MANUAL ESP 20101 ECG
- ON/OFF button
- Water tank with handle and lid
- Area for storing and preheating cups
- Control panel
- Steam head
- Lever with thermally insulated handle
a) metal holder
b) filter lock
- Coffee filters (one shot/two shots)
- Scoop with tamper
- Removable drip tray with grid
- Hot water nozzle with milk frothing attachment
HR/BIH
- Rotating control-coffee selection ,steam 已 neutral position
- Button-coffee selection steam
- Operation signal - (steady red light after turning on)
- Preheat signal - (steady white light when the correct
operational temperature is reached)
HR/BIH
Do not immerse in water! – Neponořovat do vody!
UPOZORNÉNÍ
- Coffee powder shall not exceed the MAX scale of the filter cup.
- The filter holder must be fully locked from the left to the right to be seated securely in the bracket and point forwards at a 90^ angle.
- Do not remove the filter holder when brewing coffee.
- Do not brew coffee in steam mode.
- Do not brew coffee immediately after steam. Need to boil a small cup of water to cool down.
- After boiling coffee, boil a cup of water to clean the remaining coffee powder at the coffee outlet.
CZ
UZITEČNÉ TIPY
Do not immerse in water! – Neponárat do vody!
UPOZORNENIE
- Coffee powder shall not exceed the MAX scale of the filter cup.
- The filter holder must be fully locked from the left to the right to be seated securely in the bracket and point forwards at a 90^ angle.
- Do not remove the filter holder when brewing coffee.
- Do not brew coffee in steam mode.
- Do not brew coffee immediately after steam. Need to boil a small cup of water to cool down.
- After boiling coffee, boil a cup of water to clean the remaining coffee powder at the coffee outlet.
UZITOÇNÉ TIPY
- Coffee powder shall not exceed the MAX scale of the filter cup.
- The filter holder must be fully locked from the left to the right to be seated securely in the bracket and point forwards at a 90^ angle.
- Do not remove the filter holder when brewing coffee.
- Do not brew coffee in steam mode.
- Do not brew coffee immediately after steam. Need to boil a small cup of water to cool down.
- After boiling coffee, boil a cup of water to clean the remaining coffee powder at the coffee outlet.
PRZYDATNE WSKAZÓWKI
- Coffee powder shall not exceed the MAX scale of the filter cup.
- The filter holder must be fully locked from the left to the right to be seated securely in the bracket and point forwards at a 90^ angle.
- Do not remove the filter holder when brewing coffee.
- Do not brew coffee in steam mode.
- Do not brew coffee immediately after steam. Need to boil a small cup of water to cool down.
- After boiling coffee, boil a cup of water to clean the remaining coffee powder at the coffee outlet.
HASZNOS TIPPEK
- Coffee powder shall not exceed the MAX scale of the filter cup.
- The filter holder must be fully locked from the left to the right to be seated securely in the bracket and point forwards at a 90^ angle.
- Do not remove the filter holder when brewing coffee.
- Do not brew coffee in steam mode.
- Do not brew coffee immediately after steam. Need to boil a small cup of water to cool down.
- After boiling coffee, boil a cup of water to clean the remaining coffee powder at the coffee outlet.
NUTZLICHE TIPPS
Read carefully and keep for future use!
Warning: The safety measures and instructions contained in this manual do not include all conditions and potential situations. The user must be aware that common sense, caution, and care are factors that cannot be integrated into a product. These factors must be therefore secured by the user/users using and operating this device. We are not liable for damages caused during shipping, by incorrect use, or the modification or adjustment of any part of the appliance.
Fundamental precautions shall be observed when using the product, including the following:
- Make sure that the voltage and frequency in your outlet corresponds to the voltage, frequency and the required capacity shown on the device label, and that the outlet is properly grounded. The outlet must be installed in accordance with applicable electrical codes according to EN.
- Never use the appliance if the power cord or plug is damaged if a fall or any other damage occurred or the device is not working properly. All repairs, including cord replacements, must be carried out at a professional service centre! Do not remove the protective covers from the appliance; there is a risk of electric shock!
- Do not immerse the appliance and the power cord in liquids, do not expose to rain or humidity and use water only for cooking in accordance with this operating manual.
- The appliance must not be used close to water, in bathrooms, showers or close to pools, where it might fall in water or water may splash the product.
- Do not bend the power cord over the edge of a table or other sharp edges, do not twist it or leave it in the vicinity of hot surfaces.
-
Always use the appliance on a level, stable surface to prevent it from tipping over and to prevent spillage of hot liquids. Do not use the product in sinks, dripping off areas and other places with uneven surface.
-
Do not put the appliance in places where it could be exposed to high temperatures from stoves, radiators, gas appliances, etc.
- Do not place the appliance on top of electrical or gas stoves and ovens.
- When not in use, turn all controls to the "off" position and unplug the appliance. Disconnect the power cord by pulling the plug – never by pulling the power cord.
- Unplug the appliance and allow it to cool before servicing or attaching accessories.
- Never connect or switch on the appliance without the water container properly inserted in the machine.
- Do not operate the appliance with an empty water tank.
- Do not immerse the device in water.
- Do not touch the hot surfaces of the appliance. The steam nozzle, stainless steel filter or metal cup becomes hot when in use.
- Be careful, the steam escaping from the nozzle is very hot.
- Do not remove the metal filter cup or water tank while the appliance is operating, or if steam or hot water is leaking from the nozzle or funnel. There is a risk of scalding.
- Use only the handle to release the coffee container. Release the container carefully, it is under pressure.
- Check the power cord, the plug and whole appliance regularly for any damage. If you find any damage stop using the appliance immediately and contact the service centre.
- Do not use the appliance for any other purpose than it is designed for.
- Do not use the machine outdoor.
- The appliance should not be left unattended when in operation.
- Store the appliance inside in a dry place.
- Do not try to repair or modify the appliance or change its parts. There are no parts inside repairable by the user.
- Do not place other objects on the appliance, do not insert foreign objects in the openings and do not use it close to walls, drapes, etc.
GB
GB
- The appliance warms up during operation. Do not cover any openings.
- Do not switch the appliance on if it lies on the side or is upside down.
- Using accessories and attachments not recommended by the manufacturer may endanger persons and property.
-
This appliance is intended for use in the home and similar areas such as: kitchenettes in shops, offices and other workplaces
-
appliances used in the agricultural industry
- by guests in hotels, motels, and other residential areas
-
in bed and breakfast establishments
-
This appliance may not be plugged in an outlet controlled by a timer or controlled remotely.
- ECG is not liable for damage or injury caused by negligence or improper use. Prior to use do not forget to read carefully all instructions and information. The external surface of this device heats up and may cause burns. Do not leave unattended when children are present.
- This appliance should not be used by children. Keep the appliance and its power supply out of reach of children. The appliance may be used by persons with reduced physical, sensory or mental capacities or lack of experience and knowledge, if they are supervised or if they were instructed how to use the appliance safely and understand potential dangers. Children may not play with the appliance.
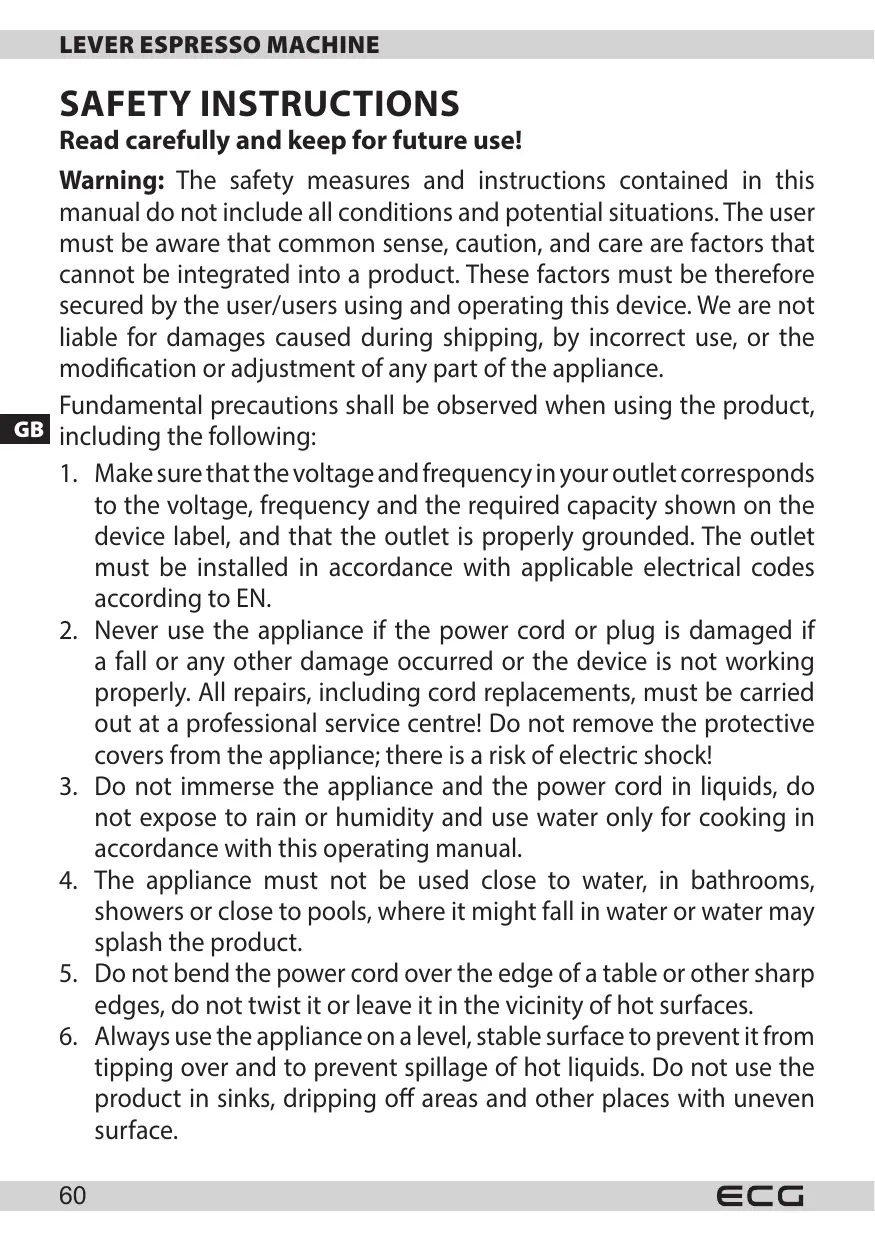
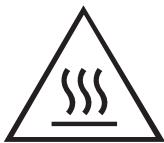
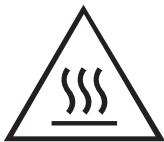
Do not immerse in water!
WARNING
The surfaces marked in this way become hot during use.
DANGER FOR CHILDREN: Children may not play with the packaging material. Do not let children play with the plastic bags. Risk of suffocation.
HELPFUL TIPS
- Coffee powder shall not exceed the MAX scale of the filter cup.
- The filter holder must be fully locked from the left to the right to be seated securely in the bracket and point forwards at a 90^ angle.
- Do not remove the filter holder when brewing coffee.
- Do not brew coffee in steam mode.
- Do not brew coffee immediately after steam. Need to boil a small cup of water to cool down.
- After boiling coffee, boil a cup of water to clean the remaining coffee powder at the coffee outlet.
GB
BEFORE FIRST USE
Remove all packaging material from the appliance and dispose of it properly. Make sure the delivery is complete.
Wash the water tank, lever, filters, scoop, drip tray and milk frothing attachment in warm water with a little dishwashing detergent, rinse thoroughly and dry.
Wipe the appliance body, nozzle and drip tray with a damp cloth or a soft sponge with a little ordinary dishwashing liquid and dry thoroughly with a towel or paper towel. Do not use aggressive abrasive cleaners or scourers.
Do not immerse the device in water.
USING THE MACHINE
Fill the water tank. The amount of water must not exceed the "MAX" mark, but make sure that the level exceeds the "MIN" mark. Make sure that the tank lid is closed.
Note: The water tank is removable. You can remove it from the appliance, fill it with water directly from the tap and put it back. Make sure the container is properly seated in the machine.
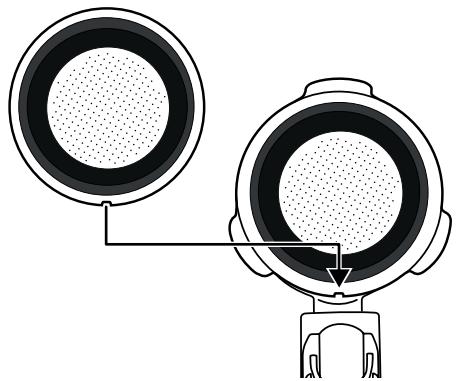
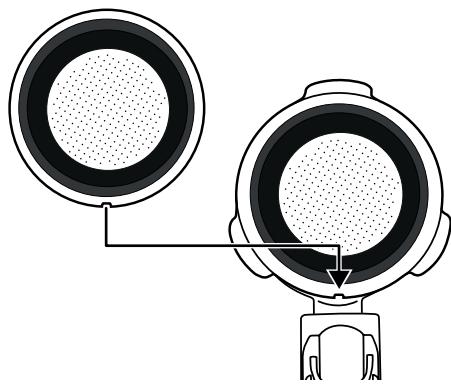
Insert the small or large filter in the filter cup. Make sure that the small tab in the filter fits in the notch of the filter cup. When you turn the filter in the filter cup you make sure that the filter would not fall out.
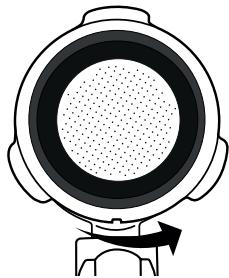
NOTICE: The lever with the metal cup must be properly fastened in the steam head. Turn the lever anticlockwise so that it faces the front of the machine at 90^ angle.
1) Before first time use.
- Put the lever with filter WITHOUT COFFEE in the machine under the symbol „INSERT“ so that the tabs on the metal cup fit in the steam head. Secure everything by turning the lever counterclockwise in the „LOCK“ position.
- Place a cup on the grid under the metal cup. Make sure that the knob control is in neutral position and the button in the "coffee" position.
- Plug the appliance in the power outlet and turn it on using the ON/OFF switch. The red operation indicator lights up.
- Turn the knob control in the position , which will pump water into the system. When the water starts pouring out, turn the knob immediately back to neutral position .
- Wait until the white preheat indicator lights up. Then switch the knob again into position . Allow hot water to flow from the nozzle until the white preheat indicator goes off (approx. 1 minute). Then return the knob in the neutral position .
Note: Use the same procedure for preheating the coffee.
Cleaning the nozzle.
- Press the ON/OFF switch, the operation indicator lights up (red).
- Place a suitable deep container with water under the nozzle to capture the steam. The nozzle should be sufficiently immersed in the container. Carefully, the steam is hot.
- Leave the button in the position 12 (coffee) and switch the knob control in the position 12 (coffee). When the water starts streaming from the steam head, turn the knob to neutral position.
- Press the steam button in position (steam) and wait, until the white preheat indicator lights up. Turn the knob control in the position (steam). Allow water to flow from the nozzle until the white preheat indicator goes off (approx. 1 minute). Then return the knob in the neutral position.
The coffee machine is now ready to use.
2) NORMAL USE PROCEDURE.
Make sure there is enough water in the water tank before each use. Do not exceed the "MAX" line.
Preheat
To prepare a good cup of hot Espresso coffee, we recommend preheating the machine, including the metal cup, filter and cup, so that the taste of the coffee is not affected by the cold parts.
-
Place the lever with filter into the machine under the "INSERT" mark so that the tabs on the metal cup fit into the brewing head. Secure everything by turning the lever counterclockwise in the „LOCK“ position.
-
Place a cup on the grid under the metal cup. Make sure that the knob control is in neutral position and the button in the "coffee" position.
- Plug the appliance in the power outlet and turn it on using the ON/OFF switch. The red operation indicator lights up.
- Turn the knob control in the position , which will pump water into the system. When the water starts pouring out, turn the knob immediately back to neutral position .
- Wait until the white preheat indicator lights up. Then switch the knob again into position . Allow hot water to flow from the nozzle until the white preheat indicator goes off (approx. 1 minute). Then return the knob in the neutral position .
Brewing Espresso
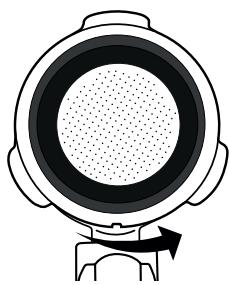
- Remove the preheated metal cup from the brew head by turning it clockwise. Leave the preheated filter in the metal cup. Use one or two coffee scoops depending on the size of the filter. Use a tamper to tamp down the coffee. The ideal amount of coffee after tamping is that which reaches the "MAX" mark on the inside of the filter. Make sure that the edges of the metal cup that fit into the brewing head are clean.
- Then put the lever with the filter into the machine under the "INSERT" symbol so that the tabs on the metal cup fit into the brewing head. Secure everything by turning the lever counterclockwise in the "LOCK" position.
- Once the white preheat indicator lights up turn the knob in the position and wait a while. Coffee starts to flow.
Note: In case of prolonged continuous operation, the preheating indicator may turn off due to insufficient water temperature in the boiler, but this does not mean that the unit has stopped functioning. Regardless, you can continue to make coffee. If you are planning to brew more coffee, we recommend that you wait until the white light comes on again.
4. Once the required amount of coffee is ready (about 60 ml for 2 cups) or the color of the flowing coffee becomes lighter, turn the knob in the position , your coffee is ready.
WARNING: Do not leave the machine unattended during brewing of the coffee, because at some times you have to change controls manually!
- After brewing, remove the lever with metal cup by turning it clockwise and empty the ground coffee from the filter. The filter can be held in the metal cup using the tilting lock for easier coffee grounds removal.
Attention: The filter and the metal cup are hot when in use. Allow them to cool first, then rinse under running water and dry.
- If you are not going to use the coffee machine again, turn the knob to the neutral position, turn it off with the ON / OFF button and unplug it.
- Allow the removed parts to cool completely and then rinse them under running water.
Milk frothing /brewing cappuccino
Cappuccino is made by adding frothed milk to the finished espresso.
Steps:
- Prepare a large espresso in a cup as described in the section "Preparing Espresso". Make sure that the control knob is in position.
- Press the steam button to position and wait until the preheat indicator (white) lights up.
Note: In case of prolonged continuous operation, the preheating indicator may turn off due to insufficient water temperature in the boiler, but this does not mean that the unit has stopped functioning. Regardless, you can continue to make cappuccino.
3. Fill the kettle with about 150 grams of milk for each cappuccino to be prepared. We recommend using cold whole milk directly from the refrigerator (not hot!).
Note: When selecting the kettle size, it is recommended that the diameter be no less than 70 ± 5 ~mm . Keep in mind that the volume of milk will approximately double. Make sure that the height of the kettle is sufficient.
- Insert the steam nozzle (with frothing wand) into the milk about 2 centimeters under the surface then turn the knob in the position , steam nozzle starts to emit steam. Froth the milk by moving the kettle around and up/down.
- When done turn the knob in the position .
Note: When the steaming stops, carefully clean the nozzle using a wet cloth or a sponge. Be careful, do not damage the nozzle! Be careful, the nozzle is hot.
- Pour frothed milk into the prepared espresso, now the cappuccino is ready. Enjoy your coffee! For diversity, you can sprinkle the foam with a small amount of cocoa.
- Press to turn off the machine's power switch.
NOTICE:
The water temperature in the boiler is too high after using the "steam" function for making coffee. If you wish to brew coffee, it is recommended that you first drain the superheated water from the boiler (let one cycle run in the "coffee" just with water).
Make sure that the button is in position (coffee) and turn the knob control in the position (coffee). Allow one portion of coffee-free water to be pumped into the cup until the preheating light goes out.
After the heating light comes on again, you can start brewing coffee as described in the chapter "Espresso preparation".
Note: Use the same procedure when you use the steam for heating liquids.
Production of steam for heating liquids
Steam nozzle (without milk frothing attachment) can be used to heat beverages such as hot chocolate or water by steam.
Note: To heat liquids, remove the milk frothing attachment from the nozzle.
Steps:
- Press the ON/OFF switch, the operation indicator lights up (red).
- Place a suitable deep container with water under the nozzle to capture the steam. The nozzle should be sufficiently immersed in the container. Carefully, the steam is hot.
- Leave the button in the position (coffee) and switch the knob control in the position (coffee). When the water starts streaming from the steam head, turn the knob to neutral position.
- Press the steam button in position (steam) and wait, until the white preheat indicator lights up. Turn the knob control in the position (steam). Allow water to flow from the nozzle until the desired temperature is reached. Then return the knob in the neutral position.
If you are not going to use the machine, turn it off with the main switch and unplug it.
Tips for making good coffee
The following factors may affect the final quality and taste of the coffee:
Temperature
Cold lever with metal cup, filter and cup have a negative effect on the result.
Preheat the filter and the lever with metal cup in warm water and dry thoroughly.
Pour hot water in the cup and let it heat through. You can use the hot steam from the nozzle to heat the water in the cup.
Amount of coffee
Too little - coffee will be weak.
Too much coffee - the taste of coffee will strong, bitter, even astringent
Coarseness of coffee and tamping
Care should be taken to ensure that the coffee is finely ground, but not too fine, and properly tamped. The degree of fineness of the coffee and tamping will affect the flow rate of the water that will flow through the ground coffee through the filter and hence the resulting taste.
Too tamped or finely ground coffee (looks like a powder and resembles smooth flour when rubbed between your fingers) will cause water to be unable to flow through the coffee, even under pressure. The resulting coffee will be dark and bitter.
On the other hand, the result of a coarsely ground or under-tamped coffee will be a sour, odorless coffee.
You can tamp coarse coffee with more force, tamp more gently the fine ground coffee.

CLEANING AND MAINTENANCE
- Before cleaning, unplug the power cord and let the coffee machine cool down completely.
- Clean the surface of the coffee machine regularly with a damp sponge, as well as clean the water tank, drip tray and removable shelf. Then dry everything.
Note: Do not use alcohol or cleaners for cleaning. Never immerse the body of the appliance in water or any other liquid.
- Remove the lever with metal cup by turning it clockwise, empty out the coffee grounds. These parts can then be cleaned with a detergent and then rinsed with clean water.
- Wash all attachments in water and dry them thoroughly.
Cleaning of mineral deposits
- We recommend that you remove mineral deposits every 2-3 months for your coffee machine to work efficiently and to enjoy the best coffee flavor.
- Fill the tank with water and descaler to MAX level (water to descaler ratio should be 4:1, for details see the instruction for the descaler) Use a "household descaler". You can also use citric acid instead of a descaler (it can be purchased in a drugstore or in chemical supplies). In this case, use a ratio of one hundred parts of water to three parts of citric acid.
- Use the procedure to preheat the machine, insert the lever with metal cup (without coffee), and place the water tank in the machine. Start preheating.
- Press the ON/OFF switch to turn on the preheating indicator (red). Turn the knob control in the position , make sure that the steam button is in higher position . When the water starts to flow, turn the knob in the position , the machine starts to warm up.
- When the operation indicator (white) lights up, preheating is complete. Turn the knob in the position and fill two coffee cups (about 60ml ) Then switch off the pump and wait about 5 s.
- Push the steam button in the lower position and wait until the operation indicator lights up (white). Keep the steam emitting for about 2 minutes and then turn the knob in the position . Then turn the machine off using the ON/OFF switch and allow the descaler to work for at least 15 minutes.
- Turn on the unit again and repeat steps 4-6 at least three times.
- Then switch the steam selection button to higher position , white indicator lights up. Turn the knob in the position and keep the appliance brewing until all descaler flows out.
- Then proceed as for brewing coffee (but without ground coffee) only with tap water always at MAX level. Repeat steps 4-6 three times (it is not necessary to wait 15 minutes at step 6). Then let the water boil until there is no water in the tank.
- Repeat step 9 at least 3 times to ensure that all tubes are clean.
TROUBLESHOOTING
| Problem | Cause | Correction |
| Water leak from the bottom of the machine. | There is too much water in the drip tray. | Clean the drip tray. |
| The machine does not work. | Please, contact an authorized service center. | |
| Water leak from the side of the filter. | There are remains of coffee grounds on the edge of the filter. | Remove the coffee remains. |
| The espresso tastes sour (vinegary). | The descaling agent has not been entirely removed after cleaning of the mineral deposits. | Repeat the procedure described in “First time use” several times. |
| The ground coffee was stored for a long time in a warm and humid environment. Ground coffee has spoiled. | Use fresh ground coffee and store unused coffee in a dry, cool place. After opening the ground coffee package, close it tightly and store it in the refrigerator to keep the coffee fresh. | |
| The coffee machine does not work. | The power cable is not plugged correctly. | Plug in the power cable correctly. If the appliance still does not work, please contact an authorized service center. |
| Steam frothing is failing. | The operation indicator (white) does not light up. | The steam is ready for frothing only when the operation indicator (white) lights up. |
| The kettle used is too large or its shape does not fit. | Use a tall, narrow kettle. | |
| You used skimmed milk. | Use whole or half-skimmed milk. |
Do not disassemble the machine! If you do not find the cause of the problem, contact the service center
TECHNICAL SPECIFICATIONS
Water container capacity: 1.25 l
Nominal voltage: 220-240 V~ 50 Hz
Nominal input power: 960-1140 W
Max. pressure: 20 bar
USE AND DISPOSAL OF WASTE
Wrapping paper and corrugated paperboard - deliver to scrapyard. Packing foil, PE bags, plastic elements - throw into plastic recycling containers.
DISPOSAL OF PRODUCTS AT THE END OF LIFETIME
Disposal of electric and electronic equipment (valid in EU member countries and other European countries with an implemented recycling system)
The represented symbol on the product or package means the product shall not be treated as domestic waste. Hand over the product to the specified location for recycling electric and electronic equipment. Prevent negative impacts on human health and the environment by properly recycling your product. Recycling contributes to preserving natural resources. For more information on the recycling of this product, refer to your local authority, domestic waste processing organization or store, where you purchased the product.
This product complies with EU directive requirements on electromagnetic compatibility and electrical safety.
The instruction manual is available at website www.ecg-electro.eu. Changes in text and technical parameters reserved.

SIGURNOSNEUPUTE
- Coffee powder shall not exceed the MAX scale of the filter cup.
- The filter holder must be fully locked from the left to the right to be seated securely in the bracket and point forwards at a 90^ angle.
- Do not remove the filter holder when brewing coffee.
- Do not brew coffee in steam mode.
- Do not brew coffee immediately after steam. Need to boil a small cup of water to cool down.
- After boiling coffee, boil a cup of water to clean the remaining coffee powder at the coffee outlet.
KORISNI SAVJETI
- Coffee powder shall not exceed the MAX scale of the filter cup.
- The filter holder must be fully locked from the left to the right to be seated securely in the bracket and point forwards at a 90^ angle.
- Do not remove the filter holder when brewing coffee.
- Do not brew coffee in steam mode.
- Do not brew coffee immediately after steam. Need to boil a small cup of water to cool down.
- After boiling coffee, boil a cup of water to clean the remaining coffee powder at the coffee outlet.
KORISTNI NASVETI
- Coffee powder shall not exceed the MAX scale of the filter cup.
- The filter holder must be fully locked from the left to the right to be seated securely in the bracket and point forwards at a 90^ angle.
- Do not remove the filter holder when brewing coffee.
- Do not brew coffee in steam mode.
- Do not brew coffee immediately after steam. Need to boil a small cup of water to cool down.
- After boiling coffee, boil a cup of water to clean the remaining coffee powder at the coffee outlet.
KORISNI SAVETI
- Mlevenu kafu stavite u filter do oznake MAX, nikako više.
- Ručica levka mora biti pravilno fiksirana u glavi isparivača. Okrenite ručicu u smeru suprotnom od kazaljke na satu dok u odnosu na prednji deo urežaja ne bude pod ugloom od 90^ .
- Nikada ne uklanjajte filter dok pripretate kafu.
- Ne kuvajte kafu u režimu parenja.
- Kafu ne kuvajte odmah nakan završetka postupka pripreme pene. Da bi se aparat ohladio, ispustite jegnu malu šoljicu kipuce vode.
- Nakon što napravite kafu, pustite neka isteče Jedna mala šoljica kipuce vode kako biste iz levka isprali ostatke mlevene kafe.
PRE PRVOG KORIŠÇENJA
Odstranite sav ambalazni materijal iz uredaja i propisno ga odlozite. Proverite da li je uredaj isporučen sa svim predvižem delovima isporuke.
Operite rezervaar za vodu, ručicu, filter, mericu, kadicu i dodatak za penjenje mleka u topoj vodi s malo deterdženta, a zatim temeljno isperite i osusite.
Obrišite telo uredaja, mlaznicu i rešetku vlžnom krpom ili mekim sunderom s malo obične tecnosti za pranje sudova i temeljno osušite krpom ili papirnim ubrusom. Nemojte koristiti agresivna sredstva za cisćenje s abrazivnim delovanjem ni Četke.
Urejne potapajte u vodu.
SR/MNE
UPOTREBA UREDAJA
Napunite rezervoar za vodu. Količina vode ne sme da prelazi oznaku „MAX“ i ne sme da bude ispod oznake „MIN“. Proverite da li jePoklopac rezerovoara za vodu zatvoren.
Napomena: Rezervoor za vodu se moze odvojiti od uredaja. Mozte ga uzeti iz uredaja, napuniti ga vodom direktno iz slavine i vratiti ga natrag. Proverite da li je rezervoor sigurno postavljen u uredaj.
U levak stavite mali ili veliki filter. Osigurajte da jezičak na filteru updne u urez u levku. Okrecite filter u levku kako biste proverili da nece da ispadne.
UPOZORENJE: Rucica levka mora da bude pravilno fiksirana u glavi isparivača. Okrenite ručicu u smeru suprotnom od kazaljke na satu dok u odnosu na prednji deo uredaja ne bude pod ugrom od 90^ .
- Coffee powder shall not exceed the MAX scale of the filter cup.
- The filter holder must be fully locked from the left to the right to be seated securely in the bracket and point forwards at a 90^ angle.
- Do not remove the filter holder when brewing coffee.
- Do not brew coffee in steam mode.
- Do not brew coffee immediately after steam. Need to boil a small cup of water to cool down.
- After boiling coffee, boil a cup of water to clean the remaining coffee powder at the coffee outlet.
FR
ASTUCES UTILES
- Coffee powder shall not exceed the MAX scale of the filter cup.
- The filter holder must be fully locked from the left to the right to be seated securely in the bracket and point forwards at a 90^ angle.
- Do not remove the filter holder when brewing coffee.
- Do not brew coffee in steam mode.
- Do not brew coffee immediately after steam. Need to boil a small cup of water to cool down.
- After boiling coffee, boil a cup of water to clean the remaining coffee powder at the coffee outlet.
SUGGERIMENTI UTILI
- Coffee powder shall not exceed the MAX scale of the filter cup.
- The filter holder must be fully locked from the left to the right to be seated securely in the bracket and point forwards at a 90^ angle.
- Do not remove the filter holder when brewing coffee.
- Do not brew coffee in steam mode.
- Do not brew coffee immediately after steam. Need to boil a small cup of water to cool down.
- After boiling coffee, boil a cup of water to clean the remaining coffee powder at the coffee outlet.
CONSEJOS UTILES
- Coffee powder shall not exceed the MAX scale of the filter cup.
- The filter holder must be fully locked from the left to the right to be seated securely in the bracket and point forwards at a 90^ angle.
- Do not remove the filter holder when brewing coffee.
- Do not brew coffee in steam mode.
- Do not brew coffee immediately after steam. Need to boil a small cup of water to cool down.
- After boiling coffee, boil a cup of water to clean the remaining coffee powder at the coffee outlet.
KASULIKUD NÜUANDED
Veenahuti maht: 1,25 I
Nimipinge: 220 - 240V 50Hz
Nimivoimsus: 960-1140 W
- Coffee powder shall not exceed the MAX scale of the filter cup.
- The filter holder must be fully locked from the left to the right to be seated securely in the bracket and point forwards at a 90^ angle.
- Do not remove the filter holder when brewing coffee.
- Do not brew coffee in steam mode.
- Do not brew coffee immediately after steam. Need to boil a small cup of water to cool down.
- After boiling coffee, boil a cup of water to clean the remaining coffee powder at the coffee outlet.
NAUDINGI PATARIMAI
- Coffee powder shall not exceed the MAX scale of the filter cup.
- The filter holder must be fully locked from the left to the right to be seated securely in the bracket and point forwards at a 90^ angle.
- Do not remove the filter holder when brewing coffee.
- Do not brew coffee in steam mode.
- Do not brew coffee immediately after steam. Need to boil a small cup of water to cool down.
- After boiling coffee, boil a cup of water to clean the remaining coffee powder at the coffee outlet.
NODERIGI PADOMI
- Coffee powder shall not exceed the MAX scale of the filter cup.
- The filter holder must be fully locked from the left to the right to be seated securely in the bracket and point forwards at a 90^ angle.
- Do not remove the filter holder when brewing coffee.
- Do not brew coffee in steam mode.
- Do not brew coffee immediately after steam. Need to boil a small cup of water to cool down.
- After boiling coffee, boil a cup of water to clean the remaining coffee powder at the coffee outlet.
XPHESIMEZYMBOYAEZ
PIN ANO THN INPOTH XPHSH
Apaipote ola ta uliká oukeuaiaac ano tn oukeun kai anoppiye ta owotá. Bebaiwte otni npadoon eivai ookanpwevn.
250 69 Klicany, Czech Rep.
tel.: +420 272 122 111
e-mail: ECG@kbexpert.cz

K+B Progres, a.s.
U Expertu 91
250 69 Klicany, Czech Rep.
tel.: +420 272 122 111
e-mail: ECG@kbexpert.cz

Distributor fur DE:K+B E-Tech GmbH & Co.KG
Barbaraweg 2, DE-93413 Cham
250 69 Klicany, Czech Rep.
tel.: +420 272 122 111
e-mail: informacije@kbprogres.cz

K+B Progres, a.s.
U Expertu 91
250 69 Klicany, Czech Rep.
tel.: +420 272 122 111
e-mail: informacije@kbprogres.cz

K+B Progres, a.s.
U Expertu 91
250 69 Klicany, Czech Rep.
tel.: +420 272 122 111
e-posta: informacije@kbprogres.cz

K+B Progres, a.s.
U Expertu 91
250 69 Klicany, Czech Rep.
tel: +44 776 128 6651 (English)
e-mail: ECG@kbexpert.cz

K+B Progres, a.s.
U Expertu 91
250 69 Klicany, Czech Rep.
tel.: +44 776 128 6651 (English)
e-mail: ECG@kbexpert.cz

K+B Progres, a.s.
U Expertu 91
250 69 Klicany, Czech Rep.
tel.: +44 776 128 6651 (English)
e-mail: ECG@kbexpert.cz

K+B Progres, a.s.
U Expertu 91
250 69 Klicany, Czech Rep.
tel.: +420 272 122 111
e-post: ECG@kbexpert.cz

K+B Progres, a.s.
U Expertu 91
250 69 Klicany, Czech Rep.
tel.: +420 272 122 111
el.pastas:ECG@kbexpert.cz

K+B Progres, a.s.
U Expertu 91
250 69 Klicany, Czech Rep.
tel.: +420 272 122 111
e-pasts: ECG@kbexpert.cz

K+B Progres, a.s.
U Expertu 91
250 69 Klicany, Toexiaic
_· + 420272122111
e-mail: ECG@kbexpert.cz