
WIRELESS OPTICAL LAPTOP MOUSE - Wireless Mouse TARGUS - Free user manual and instructions
Find the device manual for free WIRELESS OPTICAL LAPTOP MOUSE TARGUS in PDF.
| Brand | TARGUS |
| Model | WIRELESS OPTICAL LAPTOP MOUSE |
| Product Type | Wireless optical mouse for laptop |
| Interface | USB (micro USB receiver) |
| Detection Technology | Optical |
| Power Source | 2 AA batteries (included) |
| Battery Life | Several months depending on usage; automatic power-saving mode |
| Wireless Range | Approximately 10 meters (estimated) |
| Dimensions (L x W x H) | Approximately 100 x 60 x 30 mm (estimated) |
| Weight (with batteries) | Approximately 80 g (estimated) |
| Compatible Operating Systems | Windows 2000, XP, Vista, 7; Mac OS X 10.4 or later |
| Installation | Plug & Play, no driver required |
| Buttons | Left button, right button, scroll wheel |
| Indicator Light | Status LED and battery level indicator |
| Power Switch | Yes, on the underside of the mouse |
| Receiver Storage | Integrated compartment in the mouse |
| Box Contents | Mouse, micro USB receiver, 2 AA batteries, user manual |
| Care and Cleaning | Clean with a soft, dry cloth; avoid liquids |
| Safety Precautions | Do not expose to water or extreme temperatures; remove batteries during prolonged non-use |
| Spare Parts and Repairability | Rechargeable batteries recommended; no user-serviceable parts |
| Warranty | According to applicable legislation (generally 2 years) |
Frequently Asked Questions - WIRELESS OPTICAL LAPTOP MOUSE TARGUS
User questions about WIRELESS OPTICAL LAPTOP MOUSE TARGUS
0 question about this device. Answer the ones you know or ask your own.
Ask a new question about this device
Download the instructions for your Wireless Mouse in PDF format for free! Find your manual WIRELESS OPTICAL LAPTOP MOUSE - TARGUS and take your electronic device back in hand. On this page are published all the documents necessary for the use of your device. WIRELESS OPTICAL LAPTOP MOUSE by TARGUS.
USER MANUAL WIRELESS OPTICAL LAPTOP MOUSE TARGUS
©2010 Manufacture or imported by Targus Europe Ltd., Hounslow, Middlesex, TW4 5DZ, UK. All rights reserved. Targus is either a registered trademark or trademark of Targus Group International, Inc. in the United States and/or other countries. Features and specifications are subject to change without notice. All trademarks and registered trademarks are the property of their respective owners.

N2953


C
User Guide
Table of Contents
GB - English
Targus Wireless Optical Laptop Mouse 6
BG-BbIrpckn (e3nk)
Be3KnHa onTnHa Mmka 3a npehocmN KOMnIoptn Targus 12
CZ-Cestina
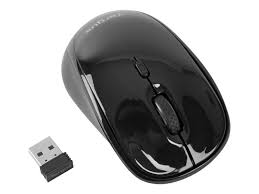
Thank you for your purchase of the Targus Wireless Optical Laptop Mouse. The accompanying micro USB receiver is small enough to leave plugged into your computer or simply store it inside the mouse when travelling. This is a plug and play device so no additional software is required.
Contents
Targus Wireless Optical Laptop Mouse
-2 x AA Energizer® MAX® Batteries
- Micro USB Receiver
-User Guide
System Requirements
Hardware
-USBport
Operating System
Microsoft Windows® 2000
- Microsoft Windows® XP
Microsoft Windows Vista®
- Microsoft Windows® 7
MacOSX10.4orlater
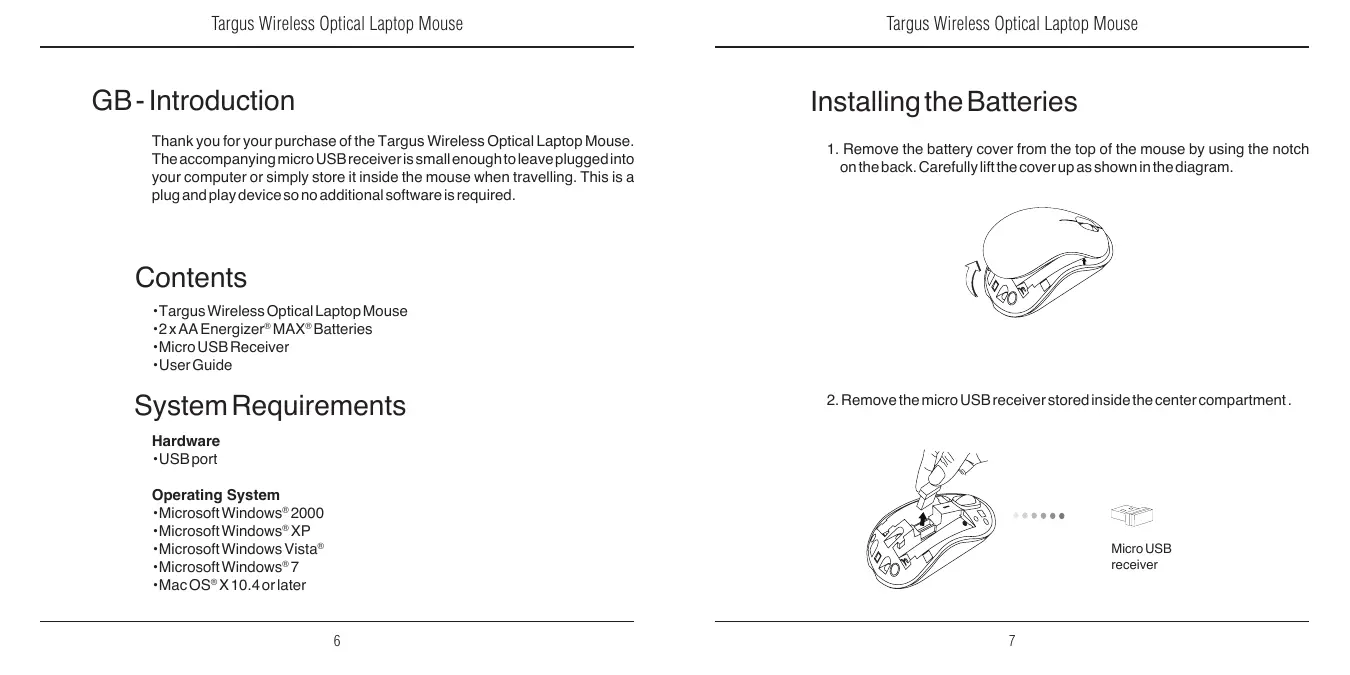
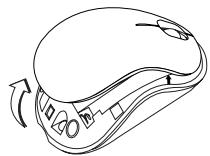
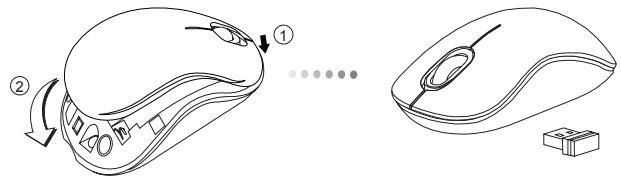
Installing the Batteries
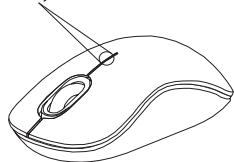
- Remove the battery cover from the top of the mouse by using the notch on the back. Carefully lift the cover up as shown in the diagram.
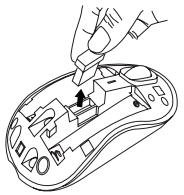
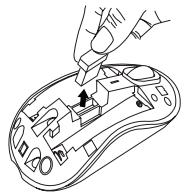
- Remove the micro USB receiver stored inside the center compartment.


Micro USB
receiver
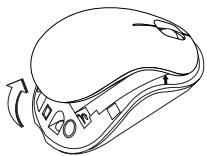
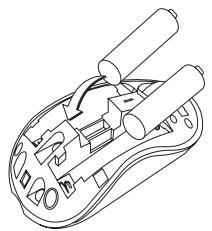
- Insert the two AA batteries, making sure that the positive (+) and negative (-) ends of each battery match the polarity indicators inside the battery compartment.

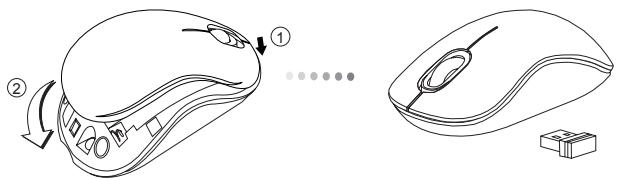
- Replace the battery cover.


NOTE: THE FRONT OF THE LID SHOULD BE INSERTED FIRST BEFORE SNAPPING THE BACK OF THE LID DOWN.
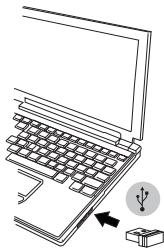
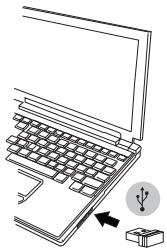
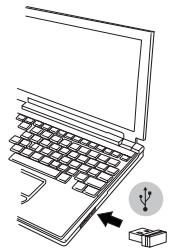
Establishing the Connection
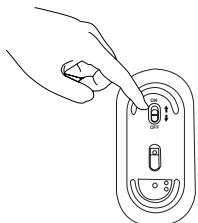
(A) Plug the USB receiver into an available USB port on your computer.
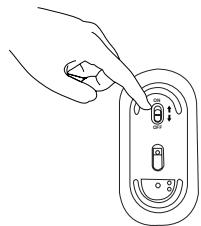
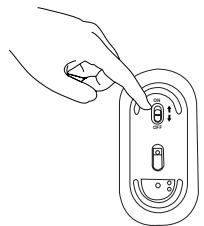
(B) Turn on the mouse by sliding the power switch to the ON position, located on the bottom of the mouse.
This mouse is a plug and play device. It will automatically operate when the USB receiver is connected to the computer.
Power On:
Slide the power switch to the ON position.
Power Off:
Slide the power switch to the OFF position.
Power Saving mode:
After an extended period of time, if the mouse is not used, it will automatically enter power saving mode to conserve power and increase battery life. Click on any mouse button or simply move the mouse to resume the normal operation. The mouse may take a few seconds to reconnect with your computer.
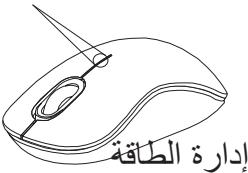
Battery Life Indicator
- When the mouse is turned on, the LED illuminates for 3 seconds and then fades out
- The low power light will start flashing every 3 seconds when less than 5% of the battery power remains. Replace the batteries as soon as possible
Battery Life Indicator
Power Management
- To extend the life of your battery, turn off the mouse while travelling or when you're not using it.
BG - Въевке.
Блардама покпа на BeaZprzewodowa mysz optyczna do laptopsa. Пидужавшия Мнро USB npneMHн e дctbHNo MmHaTOpEn, 3a da ro octabte BkIHyeH KBM KOMNIObpa. МИшka t a e ycToPoiCTBO ot Bnda 'plug-n-play'и He ce hyKdae ot DoMbHnITeNeH coFtyep.
CbDbPjKaHne
YnpabJIeHHe Ha MOUcHOCTTa
- 3a ДулблжктЕ ХьOTа Нбалерпг,在ЗЛЮчВайтЕ МИШКАТа,KORATo ПытУВATE ИЛN KORATO HeЯИЗПОЛЗВATE.
CZ - Üvod
Installing the Batteries
- Retiree receptor Micro USB.

Microreceptor
USB
- KpbliKy akkymyIaTopa yCTaHOBiNb Ha MeCTo.

YCTaHOBKa COeDInHeHnA
(A)Подклioчite USB-PECиВер к ДocтунHomу USB-NopTu KOMьЮтepa.
(B) Bключт bMbIb, BыCTaВиТ bKнОКу ynpabNeHЯ nTаHЯ m, paCNoJoxKeHHyO Ha TbJIbHоY acTn MblSi, B nIoJoxKeHe "Bkn".
ususususususususususususususususususususususususususususususususususususususususususususususususususususususususususususususususususususususususususususususus
#
Targus jUgall aIaIy Iy y s Jx AA 2 yJy Jy Jy USB Jy Jy
pIi Ii
J 1
Microsoft Windows® 2000
Microsoft Windows® XP
Microsoft Windows Vista
Microsoft Windows® 7
Mac OS® X 10.4
山
a 1
jusall USB jzuee 2.2

gssssssssssssssssssssssssssssssssssssssssssssssssssssssssssssssssssssssssssssssss
g j ()lll a 0e +) g a a e j sll AA a a a b
AaBaaBaaBaaBaaBaaBaaBaaBaaBaa
Aaiaea aie bll clic 4

jia# 10aill jao jia Jia Jia Jia Jia Jia Jia Jia
jL = jL( 1 - x)
UB USB USB (1)
Jg 1000
usu 1
- 1234567890
A
...
:
Ile blll aillb lissi y la lalil sall Jusuul jall puiy pl n i ciall n y aabj saiy
Jn jol jall qjiri u .sall lglll clllly jj y il gail aylll jayll y aial ll
gUJU
ealllll plalll lssjll sll (LED) 3 3 3 3 3 3 3 3 3 3 3 3 3 3 3 3 3 3 3 3 3 3 3 3 3 3 3 3 3 3 3 3 3 3 3 3 3 3 3 3 3 3 3 3 3 3 3 3 3 3 45000000000000000000000000000000000000000000000000000000000000000000000

Brand : TARGUS
Model : WIRELESS OPTICAL LAPTOP MOUSE
Category : Wireless Mouse