
144 AS - Cordless drill KRESS - Free user manual and instructions
Find the device manual for free 144 AS KRESS in PDF.
| Product Type | Cordless Drill |
| Brand | KRESS |
| Model | 144 AS |
| Power Supply | Lithium-ion battery (10.8 V / 14.4 V / 18 V depending on version) |
| No-load speed | 0-400 rpm (1st gear) / 0-1500 rpm (2nd gear) |
| Max torque | Approx. 30 Nm |
| Chuck | Automatic, clamping range 1-10 mm |
| Drilling capacity wood | Up to 20 mm |
| Drilling capacity metal | Up to 10 mm |
| Weight | Approx. 1.5 kg |
| Main functions | Drilling, screwing, tapping |
| Safety | Slowdown brake, spindle lock, overload protection |
| Maintenance and cleaning | Clean the ventilation slots with a damp cloth; keep the adapter clean |
| Included accessories | Charger, battery, bits (depending on packaging) |
| Spare parts and repairability | Available at spareparts.kress-elektrik.de; repair by authorized service |
| Warranty | 24 months |
| General information | Manual available in several languages; follow safety instructions |
Frequently Asked Questions - 144 AS KRESS
User questions about 144 AS KRESS
0 question about this device. Answer the ones you know or ask your own.
Ask a new question about this device
Download the instructions for your Cordless drill in PDF format for free! Find your manual 144 AS - KRESS and take your electronic device back in hand. On this page are published all the documents necessary for the use of your device. 144 AS by KRESS.
USER MANUAL 144 AS KRESS
Bohren in Aluminium - max. in mm

FC-HT 08/12, FC-HT 08/18

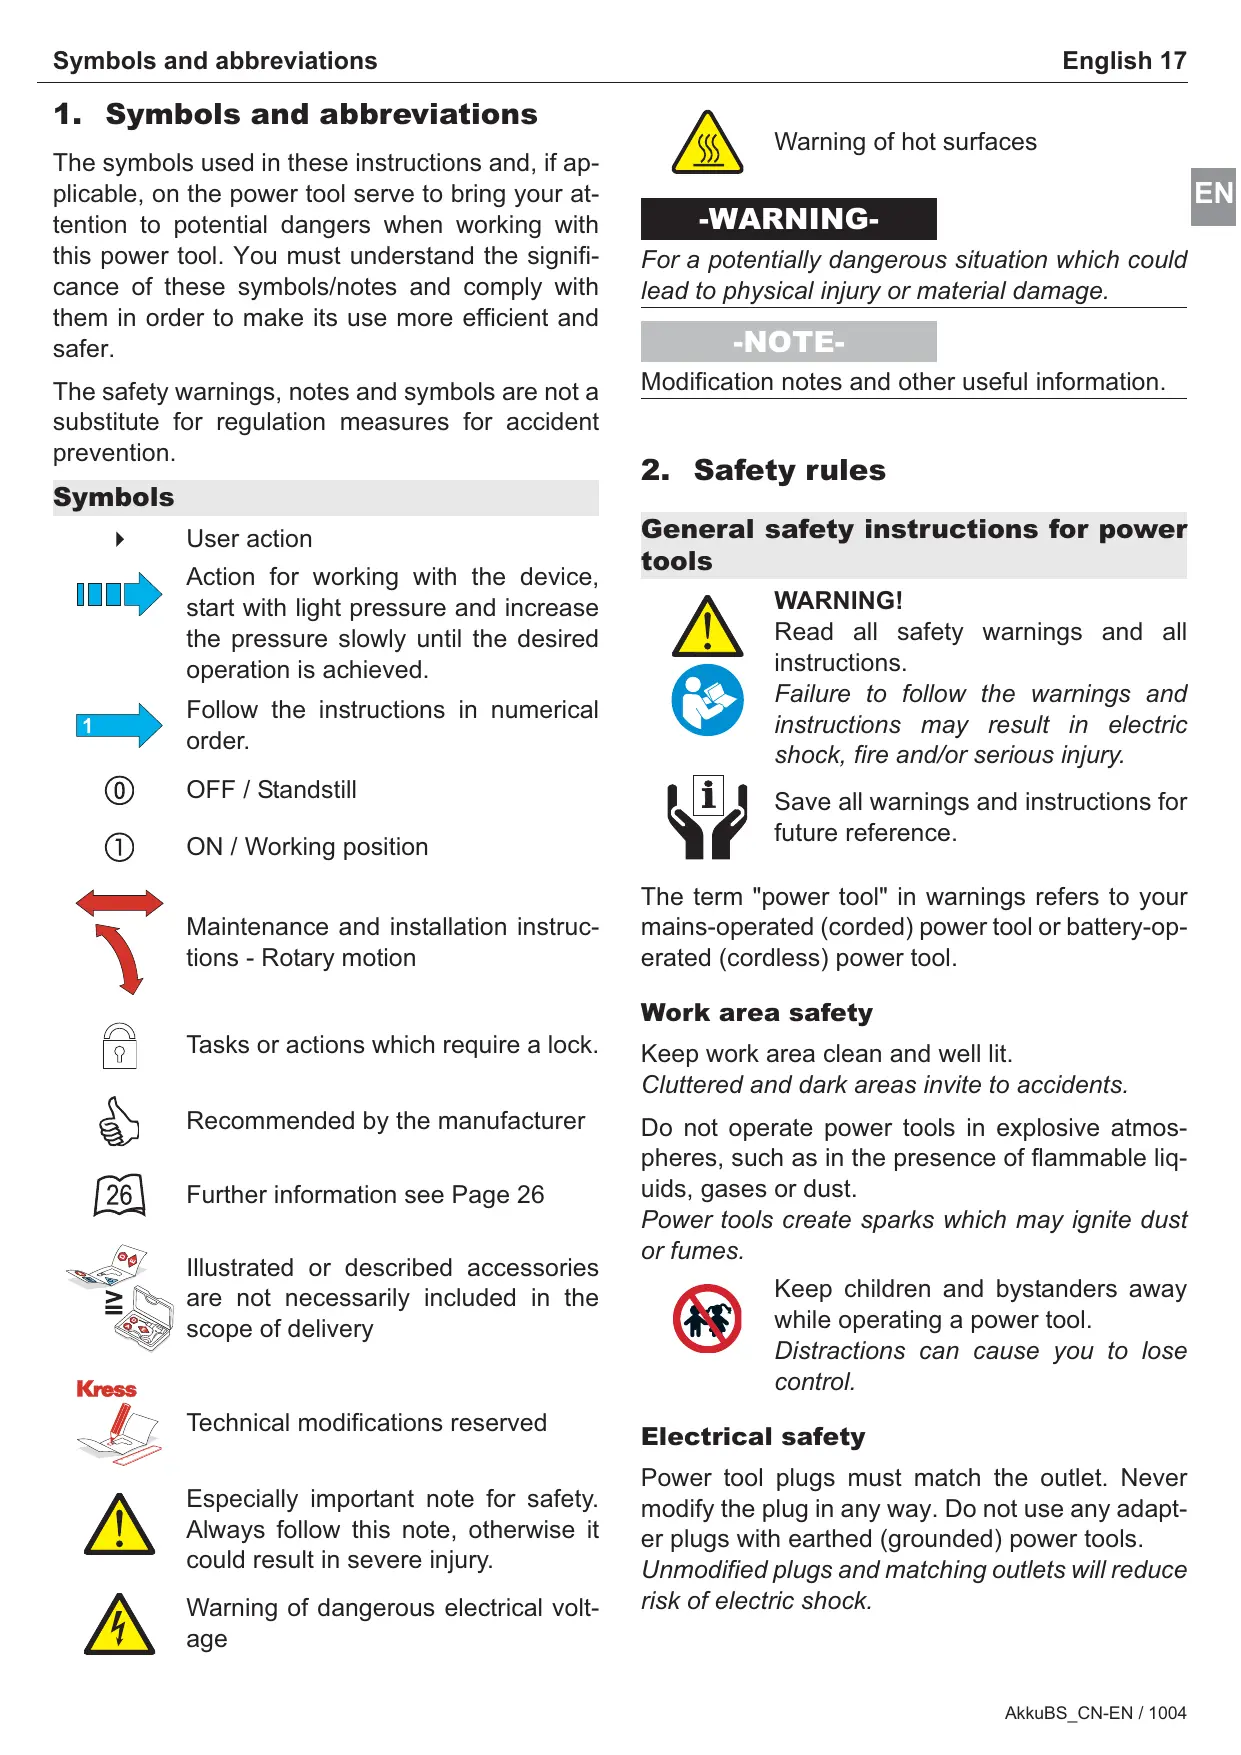
1. Symbols and abbreviations
The symbols used in these instructions and, if applicable, on the power tool serve to bring your attention to potential dangers when working with this power tool. You must understand the significance of these symbols/notes and comply with them in order to make its use more efficient and safer.
The safety warnings, notes and symbols are not a substitute for regulation measures for accident prevention.
Symbols
User action

Action for working with the device, start with light pressure and increase the pressure slowly until the desired operation is achieved.

Follow the instructions in numerical order.
OFF / Standstill
(1) ON / Working position

Maintenance and installation instructions - Rotary motion

Tasks or actions which require a lock.

Recommended by the manufacturer

Further information see Page 26

Illustrated or described accessories are not necessarily included in the scope of delivery
Kress

Technical modifications reserved

Especially important note for safety. Always follow this note, otherwise it could result in severe injury.

Warning of dangerous electrical voltage

Warning of hot surfaces
-WARNING-
For a potentially dangerous situation which could lead to physical injury or material damage.
-NOTE-
Modification notes and other useful information.
2. Safety rules
General safety instructions for power tools

WARNING!
Read all safety warnings and all instructions.
Failure to follow the warnings and instructions may result in electric shock, fire and/or serious injury.

Save all warnings and instructions for future reference.
The term "power tool" in warnings refers to your mains-operated (corded) power tool or battery-operated (cordless) power tool.
Work area safety
Keep work area clean and well lit.
Cluttered and dark areas invite to accidents.
Do not operate power tools in explosive atmospheres, such as in the presence of flammable liquids, gases or dust.
Power tools create sparks which may ignite dust or fumes.

Keep children and bystanders away while operating a power tool.
Distractions can cause you to lose control.
Electrical safety
Power tool plugs must match the outlet. Never modify the plug in any way. Do not use any adapter plugs with earthed (grounded) power tools.
Unmodified plugs and matching outlets will reduce risk of electric shock.

Avoid body contact with grounded surfaces such as pipes, radiators, ranges and refrigerators.
There is an increased risk of electric shock if your body is grounded.

Do not expose power tools to rain or wet conditions.
Water entering a power tool will increase the risk of electric shock.
Do not abuse the cord. Never use the cord for carrying, pulling or unplugging the power tool. Keep cord away from heat, oil, sharp edges or moving parts.
Damaged or entangled cords increase the risk of electric shock.
When operating a power tool outdoors, use an extension cord suitable for outdoor use.
Use of a cord suitable for outdoor use reduces the risk of electric shock.
If operating a power tool in a damp location is unavoidable, use a residual current device (RCD) protected supply.
Use of an RCD reduces the risk of electric shock.
Personal safety
Stay alert, watch what you are doing and use common sense when operating a power tool. Do not use a power tool while you are tired or under the influence of drugs, alcohol or medication.
A moment of inattention while operating power tools may result in serious personal injury.

Use safety equipment. Always wear eye protection.
Safety equipment such as dust mask, non-skid safety shoes, hard hat, or hearing protection used for appropriate conditions will reduce personal injuries.

Prevent unintentional starting. Ensure the switch is in the off-position before connecting to power source and/or battery pack, picking up or carrying the tool.
Carrying power tools with your finger on the switch or energising power tools that have the switch on invites accidents.
Remove any adjusting key or wrench before turning the power tool on.
A wrench or a key left attached to a rotating part of the power tool may result in personal injury.
Do not overreach. Keep proper footing and balance at all times.
This enables better control of the power tool in unexpected situations.
Dress properly. Do not wear loose clothing or jewellery. Keep your hair, clothing and gloves away from moving parts.
Loose clothes, jewellery or long hair can be caught in moving parts.
If devices are provided for connecting dust extraction and collection facilities, ensure these are connected and properly used.
Use of these devices can reduce dust related hazards.
Power tool use and care
Do not force the power tool. Use the correct power tool for your application.
The correct power tool will do the job better and safer at the rate for which it was designed.
Do not use the power tool if the switch does not turn on and off.
Any power tool that cannot be controlled with the switch is dangerous and must be repaired.

Disconnect the plug from the power source and/or the battery pack from the power tool before making any adjustments, changing accessories, or storing power tools.
Such preventive safety measures reduce the risk of starting the power tool accidentally.
Store idle power tools out of the reach of children and do not allow persons unfamiliar with the power tool or these instructions to operate the power tool.
Power tools are dangerous in the hands of untrained users.
Maintain power tools. Check for misalignment or binding of moving parts, breakage of parts and any other condition that may affect the power tools operation. If damaged, have the power tool repaired before use.
Many accidents are caused by poorly maintained power tools.
Keep cutting tools sharp and clean.
Properly maintained cutting tools with sharp cutting edges are less likely to bind and are easier to control.
Use the power tool, accessories and tool bits etc. in accordance with these instructions and in the manner intended for the particular type of power tool, taking into account the working conditions and the work to be performed.
Use of the power tool for operations different from those intended could result in a hazardous situation.
Careful handling and use of cordless devices
Recharge only using the charger recommended by the manufacturer.
A charger that is suitable for one type of battery pack may result in risk of fire when used with another battery pack.
Use power tools only with specifically designated battery packs.
Use of any other battery packs may create risk of injury and fire.
When battery pack is not in use, keep it away from other metal objects like paper clips, coins, keys, nails, screws or other small metal objects that can cause a bridging of contacts.
Short-circuit between the battery terminals may cause burns or a fire.

On inappropriate use, liquid may be leak from the battery; avoid contact. If contact occurs accidentally, flush with water. If liquid comes into contact with the eyes, seek medical help.
Liquid leaking from the battery may cause irritation or burns.
Service


Have your power tool serviced by a qualified repair person using only original spare parts.
This will ensure that the safety of the power tool is maintained.
Machine-specific SafetyWarnings

Wear hearing protection.
The effects of noise can cause loss of hearing capacity.

Wear safety gloves.
Hold the machine with a firm grip.
High reaction torque can briefly occur while driving in and loosening screws.
Always assume a safe standing position and hold the power tool securely in both hands.
When the drill unexpectedly jams, the machine kicks back.

Use appropriate detectors to determine if utility lines are hidden in the work area or call the local utility company for assistance.
Contact with electric lines can lead to fire and electric shock. Damaging a gas line can lead to explosion. Penetrating a water line causes damage to property or electric shock.
Hold power tool by insulated gripping surfaces, when performing an operation where the cutting accessory or fastener may contact hidden wiring.
Cutting accessory and fasteners contacting a "live" wire may make exposed metal parts of the power tool "live" and could give the operator an electric shock.

Secure the workpiece.
A workpiece clamped with clamping devices or in a vice is held more secure than by hand.

Do not work on stone containing crystalline silica (SiO2).
This will produce dust which is dangerous to your health.

Do not work on materials containing asbestos.
Asbestos is considered carcinogenic!
Take protective measures if there is danger of formation of combustible or explosive dust during operation that can be hazardous to health.
Example: Some dusts can be carcinogenic. Wear a dust mask and work with a dust/chip extraction unit, if possible to connect.
Always wait until the machine has come to a complete stop before placing it down.
The tool insert can jam and lead to loss of control over the power tool.

Tools not in use must be locked away safely in a dry place out of the reach of children.

Switch the power tool off immediately if the tool insert gets jammed. Be prepared for high torque levels if the tool kicks back.
The tool insert jams if:
- the power tool becomes overloaded or
the tool tilts in the workpiece
Residual risk. Although this information sheet and the operating manuals for our electrical tools contain extensive instructions on safe working with electrical tools, every electrical tool involves certain residual risks that cannot be completely prevented through safety mechanisms. Therefore, electrical tools must always be operated with the necessary caution.
Battery safety instructions
Do not use faulty or deformed batteries.
There is a risk of explosion.
Do not open the battery.
Danger of shortcircuting.
Never short-circuit the battery.
There is a risk of explosion.

Protect the battery against heat or temperatures over 50^ C , e. g., also against continuous sun irradiation and fire.
There is a risk of explosion.
In case of damage and improper use of the battery, vapours may be emitted. Provide for fresh air and seek medical help in case of complaints.
The vapours can irritate the respiratory system.
When the battery is defective, liquid can escape and come into contact with adjacent components. Check any parts concerned.
Clean such parts or replace them, if required.
Cover the battery terminals when storing outside the charger.
There is danger of fire and explosion through short circuits caused by metal objects.
Charger safety instructions

Never use the electric device with a damaged cable. Do not touch the damaged cable and pull the mains plug when the cable gets damaged during operation.
Damaged cables increase the risk of electric shock.
Do not operate the unit on easily inflammable surfaces (e. g. paper, textiles, etc.) or in inflammable environments.
Fire hazard due to occurring heat build-up.

Protect the electrical device from rain and moisture.
The penetration of water in a battery charger increases the risk of electric shock.
Do not cover the ventilation slots during the charging process.
They preserve the battery and the battery charger from overheating.
Do not charge the batteries of other manufacturers.
The device is only suitable for the charging of KRESS batteries. There is otherwise a risk of fire and explosion.
Keep the battery charger clean.
Contamination may result in danger of electric shock.
Check the electrical device, cable and plug each time before using. Do not use the electrical device when defects are detected. Do not open the electrical device yourself and have it repaired only by qualified personnel using original spare parts.
Damaged electrical devices, cables and plugs increase the risk of electric shock.
-WARNING-
Do not open the charger! Caution high voltage! There is a risk of electric shock.
Ensure that the connection between the charger and the battery is correctly positioned and is not impeded by foreign bodies.
There is a risk of fire and explosion through short circuits caused by metal objects.
Ensure that the battery charging compartment does not have any foreign objects and protect
from dirt and humidity. The storage location must be dry and frost-free.
There is a risk of fire and explosion in the case of a short-circuit.
A charger which is connected to the mains must always be attended.
There is a risk of fire.
3. Device description

Read all the warnings and instructions before using the equipment.
Failure to follow the warnings and instructions may result in electric shock, fire and/or serious injury.
For a clearer understanding, please consult the enclosed illustrations showing the device. Have these illustrations to hand and open while reading the operating instructions.
Operating elements
I Quick-action chuck
II Clamping sleeve
III Torque selection collet
IV Gear selector switch (Option)
V Rotational direction switch
VI On/Off control switch
VII Unlocking ring / retaining ring (Option)
VIII Battery release button
IX Bit
X Bit extension
XI Angle adapter (Accessories)
XII On/Off rocker switch battery lamp (Accessories)
Device components
1 Drill spindle
2 Hexagon-shaped socket
3 Gearing cap (Option)
4 Ventilation slots
5 Battery
6 Battery contacts
7 Lighting (Option)
8 Bit holder (Option)
Battery charger
9 Battery charger
10 LED charge level indicator
11 Battery charging compartment
Contents
See packaging
Specified conditions of use

The machine is intended for driving in and loosening screws as well as for drilling wood, metal, ceramics and plastic.
Requirements for the user
The tool must only be operated, maintained and serviced by authorised trained personnel. The personnel must be made aware of the relevant dangers.
Technical data

Rated voltage of battery in V DC Capacity in Ah

-
n_0 = No-load speed (1st gear)
-
n_0 = No-load speed (2nd gear)
-
n_1 = Rated speed (1st gear)
- n_1 = Rated speed (2nd gear) in rpm

max. torque hard joint

max. torque soft joint


Noise levels
L_pA = A-rated sound pressure level
L_wA = A -rated sound power level
K = Measurement uncertainty value The noise level can exceed 85 dB(A) during operation.
Wear hearing protection!


Triaxial vibration emission level determined in accordance with EN 60745.
K = Measurement uncertainty value

Triaxial vibration emission value in m/s²: Screws

Triaxial vibration emission value in m/s²: Drilling metal

The vibration emission level given in this information sheet has been measured in accordance with a standardised test given in EN 60745 and may be used to compare one tool with another.
The vibration emission level will vary because of the ways in which a power tool can be used and may increase above the level given in this information sheet. This could lead to underestimation of vibration when the tool is used regularly in such a manner.
Note: To be accurate, an estimation of the level of exposure to vibration experienced during a given period of work should also take into account the times when the tool is switched off and when it is running but not actually when doing the job.
This may significantly reduce the exposure level over the total working period.
Identify additional safety measures to protect the operator from the effects of vibration such as: maintain the tool and accessories, keep the hands warm, organisation of work patterns.

Corner dimension in mm

Chuck opening range in mm

Drilling in steel - max. in mm

Drilling in aluminium - max. in mm

Fitting screws in wood - max. Ø in mm

Drilling in wood - max. 0 in mm

Drilling in wood with auger - max. in mm

Weight in kg
Battery

Rated voltage of battery in V DC Capacity in Ah

NiCd
Nickel-cadmium battery

NiMh
Nickel-metallic hydride battery

Li-Ion
Battery with lithium-ion technology
Battery charger

Mains voltage in V~ / Frequency in Hz

Charging voltage in V DC. Charging current in A

Trickle charge in mA

Operating temperature range in ^ C

Battery charging time in min.

Your battery charger is double-insulated in accordance with EN 60335. For this reason an earth wire is not required.
The device is suppressed against radio and TV broadcasts, in accordance with EN 55014-1 and is immune to disturbances in accordance with EN 55014-2.
4. Operation

Remove the battery from the device before undertaking any work on the device.
This safety measure prevents accidental starting of the power tool.
Start-up
Charge battery
Insert battery
-WARNING
Use only original KRESS batteries with the voltage given on the type plate of your machine.
Use of any other batteries may lead to the risk of injury or fire.
Use only the battery chargers and batteries listed in the illustrated instructions.
Only these battery chargers and batteries are tailored specifically to your power tool.
Additional functions
Sliding clutch
Always assume a safe standing position and hold the power tool securely in both hands.
If the drill becomes wedged unexpectedly, the power tool will suddenly jerk.

If the tool insert becomes caught or is jammed, the drive to the drill spindle is interrupted.
Remove the load from the machine immediately by retracting the drill bit

Switch off the power tool and loosen the drilling tool if the power tool has jammed.
If the machine is switched on while the drilling tool is jammed, high reaction moments can occur.
ASL Auto-Spindle Lock (Option)

If the On/Off switch VI is not pressed, the drill spindle and thus the tool holding fixture are locked.
This enables screws to be driven in even when the battery is flat and allows you to use the power tool as a screwdriver.
Run-on brake


When the On/Off switch VI is released, the chuck is braked, preventing the inserted tool from running on.
When driving in screws, do not release the On/Off switch VI until the screw has been driven in flush with the surface material. This prevents the head of the screw penetrating into the material.
QuixS quick change system (Option)

For quick chuck changing, when using a QuiXS adapter or for driving in screws without a chuck.
The bit can be inserted directly into the hexagon-shaped socket 2 of the drill spindle 1, making the machine shorter and lighter.
Battery
-NOTE-
The battery is supplied partially charged. Completely charge the battery before using your power tool for the first time.
Battery with lithium-ion technology
Total discharge protection
The "Electronic discharge protection function" protects the LI battery against total discharge. Should the battery discharge, the power tool is switched off by a protective circuit. The power tool stops operating.
-WARNING-
Do not continue to press the On/Off switch after an automatic shutdown of the power tool.
The battery could be damaged.
Temperature-dependent overload protection
The LI battery is equipped with NTC temperature monitoring which only permits charging within a temperature range of 5^ - 45^ . This ensures long battery service life.
Special notes on batteries with NiMH cells
The power of NiMH batteries drops noticeably at ambient temperatures below 0^ C or over 45^ C .
Even when not in use, NiMH batteries should be recharged roughly every 4 months to ensure that they continue to work at full capacity.
After each tenth charging operation, NiMH batteries should be left in the charger for an extra hour to balance out differences in the capacities of the individual cells.
Because of the danger of self-discharging, NiMH batteries should be stored at ambient temperatures of between 0^ and 25^ where possible.
Battery care
Never charge batteries at temperatures lower than 5^ or higher than 45^ .
Never charge batteries in an environment with high air humidity or a high ambient temperature.
If the batteries are not used for a prolonged period, store them partially charged in a cool place.
IMPORTANT! Batteries will also self-discharge while the equipment is not in use. Charge the batteries regularly to prevent this.
Or even better: Insert the battery into the charger while it is plugged into the mains and ready for operation, as the charger switches to trickle charge when the charging process is completed. This is the best course of action with regard to the service life of the battery and in order to keep it fully operational.
Do not leave the battery in the charger when the charger is not ready for operation.
Charge the battery regularly to ensure maximum service life. This is especially important if you notice that the device is no longer functioning at full power.
To ensure maximum service life, do not recharge the battery immediately when it has only been in use for a short period. If possible, wait until it has reached its lower capacity limit before recharging it.
Try to avoid causing the machine to jam. When this happens, it requires an excessive amount of energy, which means that the battery becomes discharged sooner and is subject to higher wear.
If you notice that you have to charge the battery more and more frequently, it is spent and must be replaced.
Observe the instructions for disposal.
Workplace lighting (optional)
The lamp 7 allows you to cast more light on your working area where lighting conditions are unfavourable.
The lighting switches on automatically when you press the On/Off switch VI.
If the rotational direction switch V is in centre position, the lamp can be used without rotational movement of the driver.
Battery charger

Observe correct mains voltage!
Before putting the tool into operation, check that the mains voltage and frequency on the type plate match the details of your mains supply.
Mains cable charger
Fixed power supply

Fixed power supply
Damaged mains cables must not be used. They must be replaced immediately by an expert technician.
Specified conditions of use for the charger
The charger is intended solely for charging Kress batteries.
Ensure that you use the right batteries for the charger, see "Appropriate batteries".
Symbols

Battery fully charged

Battery is charging

Battery is flat

Use KRESS batteries!
EN
Operation IFC-HT14V…

Batteries used IFC-HT14V-10.8A
Li ion battery with a rated voltage of 10.8V d.c.

Batteries used IFC-HT14V-14.4
Li ion battery with a rated voltage of 14.4V d.c.

Batteries used IFC-HT14V-18
Li ion battery with a rated voltage of 18V d.c.
Charging the battery

Only put original batteries into the battery charger!
Plug the charger into the mains. The LED lights up green.

The LED lights up green. Charger ready for operation.
Push the battery into the charger as far as the stop.

Red and green LEDs light up - charging in process.
During the charging process, both the battery and the charger heat up.

Red - green flashing light - battery is charged, charger has switched to trickle charge.

Unplug the charger from the mains if the charger is unattended.
Charging not possible

LEDs flash red and green.
Battery is too hot or too cold.
The charging process begins automatically as soon as the battery reaches a temperature within the permissible range.
Short-circuiting between the charging contacts.
Remove the battery from the charger.
Pull the mains plug!
- Check that there are no foreign bodies in the charging compartment. Reinsert the battery.
Battery is faulty.
Use a new battery.
Operation FC-HT 08/12, FC-HT 08/18

Batteries used FC-HT 08/12
NiCd battery with a rated voltage of 12V d.c.

Batteries used FC-HT 08/18
NiCd battery with a rated voltage of 14.4 - 18 V d.c.
Charging the battery

Only put original batteries into the battery charger!
Plug the charger into the mains.
Push the battery into the charger as far as the stop. The LED lights up green.

Charger ready for operation.

Start the charging process by pressing the Set button. The LED lights up red
During the charging process, both the battery and the charger heat up.

Charging process completed. The LED lights up green.

Unplug the charger from the mains if the charger is unattended.
Charging not possible

LEDs do not light up.
Battery is too hot or too cold.
The charging process begins automatically as soon as the battery reaches a temperature within the permissible range.
Short-circuiting between the charging contacts.
Remove the battery from the charger.
Pull the mains plug!
Check that there are no foreign bodies in the
charging compartment. Reinsert the battery. Battery is faulty.
Use a new battery.
Operating the power tool
Removing the battery
To remove the battery 5, press the release button(s) VIII and pull the battery out of the power tool.
Inserting the battery
Use only original KRESS batteries with the voltage given on the type plate of your machine.
The use of other batteries can lead to injuries and danger of fire.
- Set the rotational direction switch V to the middle position to prevent it being switched on accidentally.
Insert the charged battery 5 into the handle until you feel it click into place.
On/Off
Press or release the On/Off switch VI.
Changing the speed
The On/Off switch VI can be used for infinitely variable speed control. Light pressure on the On/Off switch VI causes the machine to rotate slowly; with increased pressure, the speed increases.
Selecting the rotary direction
Only operate the rotational direction switch V when the machine is at a standstill!
Grip the rotational direction switch V on both sides and set the required rotary direction.

Clockwise rotation:
For drilling and fixing screws.

Anticlockwise rotation:
For loosening and removing screws and nuts.
Important! Always press the rotational direction switch V up to the stop on the housing, i. e. until you feel it engage.
When the rotational direction switch V is in its middle position, the machine cannot be switched on.
Setting the torque
You can set the desired torque in several steps using the torque selection collet III. With the correct setting, the insert tool is stopped as soon as the screw is flush with the material or when the set torque is reached.
When backing off screws, it may be necessary to select a higher setting or to set the collet to the "Drill" or "max" symbol.
Mechanical gear selection (Option)
With the gear selector switch IV, you can preselect two speed ranges.
1 Low speed range, high torque; for drilling, fixing screws and thread cutting.
2 High speed range; for drilling with small diameters
-NOTE-
The changeover must not be done at full load or maximum speed.
In this way, you can increase the service life of your machine.
Changing the tool

Remove the battery from the device before undertaking any work on the device.
This safety measure prevents accidental starting of the power tool.

Wear safety gloves when changing the tool.
The tool insert can become very hot after working for long periods and/or the cutting edges of the tool insert are sharp.
Tool holding fixture in the drill spindle (Option)
Bits IX can be inserted directly into the hexagon-shaped socket 2 in the drill spindle 1, making the machine shorter and lighter.
Quick-action chuck with ASL

If the On/Off switch VI is not pressed, the drill spindle and thus the tool holding fixture are locked.
Inserting the tool
Turn the clamping sleeve II anticlockwise to open the clamping jaws.
Insert the tool into the chuck.
- Clamp the tool in position by turning the clamping sleeve clockwise.
- Tighten the sleeve of the quick-action chuck firmly by hand until it no longer "clicks".
Always pay attention that the tool is properly centred in the chuck.
Removing the tool
- Open the clamping sleeve in anticlockwise direction until the tool is released and can be removed.
Quick-action chuck without ASL
Inserting the tool
Grip the retaining ring VII tightly.
Turn the clamping sleeve II anticlockwise to open the clamping jaws.
Insert the tool into the chuck.
- Clamp the tool in position by gripping the retaining ring tightly and firmly tightening the clamping sleeve II by turning it clockwise.
Always pay attention that the tool is properly centred in the chuck.
Removing the tool
Grip the retaining ring VII tightly.
- Turn the clamping sleeve II anticlockwise to open the clamping jaws. Turn until the tool can be removed.
Operating tips
Apply the power tool to the screw only when it is switched off.
Rotating tool inserts may slip.
After working for a long time at low speed, you should run the power tool for approx. 3 minutes at maximum speed in idle to allow it to cool.
Drilling
Always select the speed to suit the material in question and the drill bit diameter.
Fixing screws
Before screwing larger, long screws into hard materials, it is advisable to predrill a pilot hole with the core diameter of the thread to approx. 2/3 of the screw length.
Thread cutting
We recommend the use of machine thread taps.
Lightly oil the thread tap.
Select low speed and 1st gear.
- Cut in clockwise direction, stop, remove in anticlockwise direction.
-NOTE-
Always work at low speed when thread cutting. This prevents the thread tap breaking off.
5. Tools and accessories
When drilling metal, use only sharpened HSS drill tips (HSS=High-Speed Steel) which are in perfect condition.
Changing the tool holding fixture

Remove the battery from the device before undertaking any work on the device.
This safety measure prevents accidental starting of the power tool.
Observe the notes in the illustrated instructions.
Devices with QuiXS holder (Option)

GuiXS quick change system
Fitting the QuiXS chuck (Accessories)
Pull the unlocking ring VII back.
Fit the QuiXS chuck I onto the drill spindle up to the stop 1 and release the unlocking ring VII.
-NOTE-
The bit IX in the hexagon-shaped socket 2 can remain in the drill spindle 1 while fitting the chuck.
Removing the QuiXS chuck
Pull the unlocking ring VII back and remove the QuiXS chuck I.
Fitting the QuiXS angle adapter (Accessories)
Remove the bit IX from the hexagon-shaped socket 2.
Fit the angle adapter XI onto the drill spindle 1 and twist it until it engages in the desired position.
-NOTE-
The angle adapter can be engaged in various angle positions.
Lock the angle adapter XI in position by tightening the unlocking ring VII.
Removing the QuiXS angle adapter
- Loosen the unlocking ring VII as far as the stop.
Take off the angle adapter XI.
Devices without QuiXS holder
On devices not equipped with a QuiXS holder, have the chuck replaced by an authorised customer service station.
Battery lamp (Special accessories)
The battery operated lamp generates a beam of light.
Inserting the battery
Use only original KRESS batteries with the voltage shown on the rating plate of your lamp.
Use of any other batteries may lead to the risk of injury or fire.
Insert the charged battery 5 into the handle until you feel it click into place.
On/Off
To start up the battery lamp, press the On/Off switch XII.
To switch the battery lamp off, press the On/Off switch XII again.
Special accessories
Do not use accessories made by other manufacturers, as these are not tested by KRESS.
It can be dangerous to use such accessories.
To avoid injury and damage, use only accessories recommended by KRESS.
6. Maintenance and service
Maintenance and cleaning

Remove the battery from the device before undertaking any work on the device.
This safety measure prevents accidental starting of the power tool.
Always keep the machine and ventilation slots clean.
Regularly wipe off the plastic parts which are accessible from the outside using a cloth without cleaning agent.
Always keep the tool holding fixture clean.
Service

After heavy use over a long period, the machine should be taken to a Kress service location for inspection and thorough cleaning.
The relevant service centres are listed in the enclosed appendix "SERVICE" or on the website www.kress-elektrik.de.
Spare parts / exploded view
Exploded views and spare parts lists are available on our home-page
http://spareparts.kress-elektrik.de
Environmental Protection

Recycle raw materials instead of disposing them as waste. The machine, accessories and packaging should be sorted for environmental-friendly recycling.
The plastic components are labelled for categorised recycling.

Only for EC countries.
Do not dispose of electric tools together with household waste material!
In observance of the European Directive 2002/96/EC for waste electrical and electronic equipment and its implementation in accordance with national law, electric tools that have reached the end of their life must be collected separately and returned to an environmentally compatible recycling facility.
Do not dispose of battery packs/batteries into household waste, fire or water. Battery packs/bat
teries should be collected, recycled or disposed of in an environmental-friendly manner.
Only for EC countries:
Defective or dead out battery packs/batteries must be recycled according the guideline 2006/ 66/EC.
Rechargeable batteries / Batteries

Lithium ion battery technology

Nickel-cadmium battery
Caution! These batteries contain cadmium, a highly toxic heavy metal

Nickel-metallic hydride battery
Before disposing of batteries, cover the battery contacts with the battery cap.
Return used or faulty battery packs via your specialist dealer or the KRESS Customer Service department or dispose of them in the prescribed manner in public waste disposal facilities. This ensures that the battery packs are recycled as prescribed.
Transport instructions
The battery has been tested in accordance with UN manual ST/SG/AC.10/27/Add.2. It has effective protection against internal overpressure and short circuiting as well as devices for the prevention of violent rupture and dangerous reverse current flow. The lithium-equivalent content in the battery is below applicable limit values. Therefore, the battery is not subject to national or international regulations pertaining to dangerous mediums, neither as an individual component nor when inserted into a machine. However, the regulations governing dangerous goods may be relevant when transporting several batteries. In this case, it can be necessary to comply with special conditions (e.g., concerning the packaging).
For further information please contact the manufacturer.
Warranty
- This power tool has been carefully tested and has been subjected to a strict quality control process.
- We guarantee the free-of-charge repair of faults in the power tool that arise within 24 months from the date of purchase at the end user's premises and which can be attributed to a material or manufacturing defect. In certain countries there are special regulations concerning the warranty terms. We reserve the right to repair faulty components or to replace them. Replaced items become our property.
- Inappropriate use or handling and opening up the device by unauthorised repair centres leads to the warranty becoming void. The warranty does not cover: mechanical damage due to falls etc., damage caused by penetration of water or other fluids, cut and damaged cables, motor damage and mechanical damage caused by inappropriate overloading, wear parts e.g. carbon brushes, drill chucks, chuck keys, worn drilling spindles, motors, mains cables, batteries, saw blades, grinding discs, dust bags, accessories in general (drill bits, chisels etc.). Details of the various toll wear parts can be obtained from http:// spareparts.kress-elektrik.de or from one of our service centres.
- The warranty may only be enforced when defects are reported without undue delay (including shipping damage). Warranty implementation does not extend the warranty period.
- If you need to apply the warranty, send the original purchase receipt together with the device to us or to the relevant service centre.
- The warranty obligations assumed by us shall exclude any further claims on the part of the buyer, in particular the right to cancellation of a sale, reduction and the assertion of damage claims.
- However, the buyer shall have the right to either a reduction (in the purchase price) or the cancellation of the sales agreement should we fail to eliminate any defects within a reasonable period of time.
- This does not exclude compensation claims in accordance with §§ 463, 480 Para. 2, 635 BGB caused by the failure of assured properties.
The provisions defined in Items 7 and 8 only apply to the Federal Republic of Germany.
FC-HT 08/12, FC-HT 08/18

FC-HT 08/12, FC-HT 08/18

FC-HT 08/12, FC-HT 08/18

Con el interruptor de conexión/defconexión VISEOSEOSEOSEOSEOSEOSEOSEOSEOSEOSEOSEOSEOSEOSEOSEOSEOSEOSEOSEOSEOSEOSEOSEOSEOSEOSEOSEOSEOSEOSEOSEOSEOSEOSEOSEOSEOSEOSEOSEOSEOSEOSEOSEOSEOSEOSEOSEOSEOSEOSEOSEOSEOSEOSEOSEOSEOSEOSEOSEOSEOSEOSEOSEOSEOSEOSEOSEOSEOSEOSEOSEOSEOSEOSEOSEOSEOSEOSEOSEOSEOSEOSEOSEOSEOSEOSEOSEOSEOSEOSEOSEOSEOSEOSEOSEOSEOSEOSEOSEO SEOV.
- FC-HT 08/12, FC-HT 08/18
- Symbols and abbreviations
- Symbols
- Kress
- -WARNING-
- -NOTE-
- Safety rules
- General safety instructions for power tools
- WARNING!
- Work area safety
- Electrical safety
- Personal safety
- Power tool use and care
- Careful handling and use of cordless devices
- Service
- Machine-specific SafetyWarnings
- Battery safety instructions
- Charger safety instructions
- Device description
- Operating elements
- Device components
- Battery charger
- Contents
- Specified conditions of use
- Requirements for the user
- Technical data
- Operation
- Start-up
- -WARNING
- Additional functions
- Sliding clutch
- ASL Auto-Spindle Lock (Option)
- Run-on brake
- QuixS quick change system (Option)
- Battery
- Battery with lithium-ion technology
- Total discharge protection
- Temperature-dependent overload protection
- Special notes on batteries with NiMH cells
- Battery care
- Workplace lighting (optional)
- Mains cable charger
- Fixed power supply
- Specified conditions of use for the charger
- Operation IFC-HT14V…
- Batteries used IFC-HT14V-10.8A
- Batteries used IFC-HT14V-14.4
- Batteries used IFC-HT14V-18
- Charging the battery
- Charging not possible
- Operation FC-HT 08/12, FC-HT 08/18
- Batteries used FC-HT 08/12
- Batteries used FC-HT 08/18
- Operating the power tool
- Removing the battery
- Inserting the battery
- On/Off
- Changing the speed
- Selecting the rotary direction
- Clockwise rotation:
- Anticlockwise rotation:
- Setting the torque
- Mechanical gear selection (Option)
- Changing the tool
- Tool holding fixture in the drill spindle (Option)
- Quick-action chuck with ASL
- Inserting the tool
- Removing the tool
- Quick-action chuck without ASL
- Operating tips
- Drilling
- Fixing screws
- Thread cutting
- Tools and accessories
- Changing the tool holding fixture
- Devices with QuiXS holder (Option)
- Fitting the QuiXS chuck (Accessories)
- Removing the QuiXS chuck
- Removing the QuiXS angle adapter
- Devices without QuiXS holder
- Battery lamp (Special accessories)
- Special accessories
- Maintenance and service
- Maintenance and cleaning
- Spare parts / exploded view
- Environmental Protection
- Only for EC countries:
- Rechargeable batteries / Batteries
- Transport instructions
- Warranty
Brand : KRESS
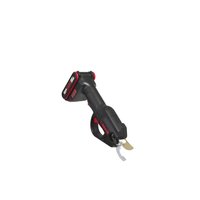
Model : 144 AS
Category : Cordless drill