
EW1614 - Interdental brush PANASONIC - Free user manual and instructions
Find the device manual for free EW1614 PANASONIC in PDF.


| Product Type | Electric interdental brush |
| Brand | Panasonic |
| Model | EW1614 |
| Power supply | Rechargeable lithium-ion battery 3.7V |
| Battery life | Approximately 3 weeks (2 min/day) |
| Charging time | 8 hours |
| Charge indicator | Yes, LED indicator |
| Cleaning modes | Normal and gentle |
| Brush head | Interdental, replaceable |
| Head material | Soft nylon |
| Water resistance | IPX7 (waterproof up to 1 meter) |
| Dimensions (L x W x H) | 2 x 2 x 15 cm |
| Weight | 50 g |
| Package contents | 1 brush, 3 replacement heads, 1 USB charger |
| Maintenance | Rinse the head after each use |
| Safety | Automatic shut-off after 2 minutes |
| Warranty | 2 years |
| Spare parts | Replacement heads available (model EW1614H) |
| Repairability | Integrated battery not user-replaceable |
Frequently Asked Questions - EW1614 PANASONIC
User questions about EW1614 PANASONIC
0 question about this device. Answer the ones you know or ask your own.
Ask a new question about this device
Download the instructions for your Interdental brush in PDF format for free! Find your manual EW1614 - PANASONIC and take your electronic device back in hand. On this page are published all the documents necessary for the use of your device. EW1614 by PANASONIC.
USER MANUAL EW1614 PANASONIC
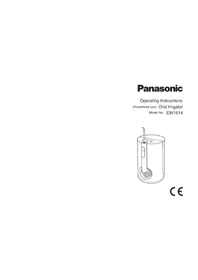
Operating Instructions
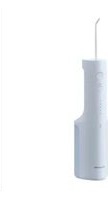
(Household use) Oral Irrigator
Model No. EW1614

CE
| English 5 | Português 101 | Česky 197 |
| Deutsch 21 | Svenska 117 | Slovensky 213 |
| Français 37 | Dansk 133 | Magyar 229 |
| Italiano 53 | Norsk 149 | Română 245 |
| Español 69 | Suomi 165 | Türkçe 261 |
| Nederlands 85 | Polski 181 |
1
2


Panasonic
Operating Instructions
(Household use) Oral Irrigator
Model No. EW1614
Contents
Safety precautions...... 7
Important information ....10
Parts identification .....10
How to use ....11
Points of care ....13
After use ....14
Specifications ......16
Troubleshooting .....17
Changing the nozzle
(Sold separately)....18
Thank you for purchasing this Panasonic product.
Before operating this unit, please read these instructions completely and save them for future use.
WARNING
- Do not immerse the appliance in water or wash it with water. Doing so may cause electric shock or fire due to a short circuit.
- Always unplug the power plug from a household outlet when cleaning the power plug.
Failure to do so may cause electric shock or injury.
- The supply cord cannot be replaced. If the cord is damaged, the appliance should be scrapped.
Failure to do so may cause an accident or injury.
- Oral irrigators can be used by children aged from 8 years and above and persons with reduced physical, sensory or mental capabilities or lack of experience and knowledge under supervision.
- Oral irrigators shall be used only with cold or warm water, or specific solutions as defined in the manufacturer's instructions. Children shall not play with the appliance.
Safety precautions
To reduce the risk of injury, loss of life, electric shock, fire, and damage to property, always observe the following safety precautions.
Explanation of symbols
The following symbols are used to classify and describe the level of hazard, injury, and property damage caused when the denotation is disregarded and improper use is performed.
| WARNING | Denotes a potential hazard that could result in serious injury or death. |
| CAUTION | Denotes a hazard that could result in minor injury or property damage. |
The following symbols are used to classify and describe the type of instructions to be observed.
| No | This symbol is used to alert users to a specific operating procedure that must not be performed. |
| ! | This symbol is used to alert users to a specific operating procedure that must be followed in order to operate the unit safely. |
! WARNING
▶ Preventing accidents
Do not store within the reach of children under 8 years old or infants. Do not let them use it.
- Doing so may cause an accident or injury due to accidental ingestion of removable parts.
▶ Power supply
Do not connect or disconnect the power plug to a household outlet with a wet hand. - Doing so may cause electric shock or injury.
Do not use the appliance near a bath tub or inside a shower room.
Do not use when the cord or the power plug is damaged or when the fitting into the household outlet is loose.
Do not damage the power plug.
Do not damage, modify, forcefully bend, pull, twist, or bundle the cord.
Also, do not place anything heavy on or pinch the cord.
Do not allow pins or trash to adhere to the power plug.
- Doing so may cause electric shock or fire due to a short circuit.

WARNING

Do not use in a way exceeding the rating of the household outlet or the wiring.
- Exceeding the rating by connecting too many power plugs to one household outlet may cause fire due to overheating.

Always ensure the appliance is operated on an electric power source matched to the rated voltage indicated on the appliance. Fully insert the power plug.
- Failure to do so may cause fire, electric shock.
▶ In case of an abnormality or malfunction Immediately stop using and remove the power plug if there is an abnormality or malfunction.
- Failure to do so may cause fire, electric shock, or injury.
- The main unit is deformed or abnormally hot.
• The main unit smells of burning.
- There is an abnormal sound during use of the main unit.
→Immediately request inspection or repair at an authorized service centre.
This product
Do not modify, disassemble or repair.
- Doing so may cause injury due to fire or malfunction.
→ Contact an authorized service centre for repair.

Do not drop or subject to shock.
- Doing so may cause electric shock or fire.
▶ Cleaning
Before using the appliance again, wipe off any moisture from the power plug.
- Failure to do so may cause electric shock or injury.

Regularly clean the power plug to prevent dust from accumulating.
- Failure to do so may cause fire due to insulation failure caused by humidity.
→ Disconnect the power plug and wipe with a dry cloth.

CAUTION
▶ Preventing damage to teeth and gums People who are unable to operate should not use this appliance.

People with weak oral senses should not use this appliance.
- Doing so may cause injury or harm your teeth, gums or tongue.

People who are suspected of having periodontal disease or have discomfortable symptoms in their teeth or oral cavity should consult a dentist before use.
- Doing so may cause injury or harm your teeth, gums or tongue.

CAUTION
Observe the following precautions when using the tongue care nozzle.
- Do not allow children to use it.
- Do not brush forcefully.
- Do not insert too deep (approx. 3/4 of the visible range).
- If tongue inflammation occurs, stop using the device and consult a doctor if the inflammation persists after 3 days.
- Doing so may cause injury or harm your teeth, gums or tongue.
▶ This product
Never use for a purpose other than oral cleaning.

- Doing so may cause an accident or injury when the stream of water is pointed toward the eyes, nose, ears, or throat.

Do not fill the tank with water warmer than 40 °C.
- Doing so may cause burns.

Do not share nozzle with your family or other people.
- Doing so may cause infection or inflammation.
▶ Note the following precautions: Do not wrap the cord around the appliance when storing.

- Doing so may cause the wire in the cord to break with the load, and may cause fire due to a short circuit.

Disconnect the power plug from the household outlet when not using for extended period of time.
- Failure to do so may cause electric shock or fire due to electrical leakage resulting from insulation deterioration.

Disconnect the power plug by holding onto it instead of the cord.
- Failure to do so may cause burns, electric shock, or fire due to a short circuit since a wire break may occur if too much load is applied to the power cord.

Clean and dry the water tank and nozzle after each use.
- Failure to do so may cause damage to your health if used without keeping it sanitized due to propagation of mold and bacteria.
Important information
▶ Notice
- Do not put salt, mouthwash or other chemicals into the water tank. Doing so may cause malfunction.
- Do not dry the main unit with a dryer or a fan heater. Doing so may cause malfunction or deformation of the parts.
- Store the appliance in a place with low humidity after use. Failure to do so may cause malfunction.
- About tooth tartar
Please use together with a toothbrush. It is hard to remove tooth tartar or dental calculus attached to the tooth surface just by a water jet, so a toothbrush is required to brush the teeth. It is recommended to clean inside your mouth with the water jet after brushing your teeth.
- About bleeding gums
Initially bleeding may occur even with healthy gums. This is caused because the gums are not used to such stimulation. The bleeding will normally stop within 1 or 2 weeks of use. There may be a problem with the gums (periodontal disease, etc.) if the bleeding continues for over 2 weeks. In such cases, stop using the appliance and consult a dentist.
Parts identification
A Handle
① Stop/Jet switch ② Jet mode " " ③ Stop mode " " ④ Nozzle release button ⑤ Nozzle
B Main unit
⑥ Cord ⑦ Power plug ⑧ Suction hose
C Water tank
⑨ Upper water level limit ⑩ Water tank cap
Operation panel
⑪ Water pressure level LED indicator (1~10 levels) (Level 1 is also the Child mode " ".)
⑫ Power switch "①"
⑬ Water pressure regulator switch
E Ultrasonic nozzle (x2)
⑭ Nozzle ⑮ Nozzle insertion port
Orthodontic nozzle
⑭ Nozzle ⑮ Nozzle insertion port ⑯ Identification ring ⑰ Nozzle Handle
© Tongue care nozzle
⑭ Nozzle ⑮ Nozzle insertion port ⑯ Identification ring ⑱ Cloth
All of the nozzles are consumables.
Accessory
H Nozzle stand
There may be moisture inside the main unit (water tank and suction hose) left from the distilled water used for product testing.
If the identification ring comes off (for orthodontic nozzle and tongue care nozzle only): Align the identification ring (in any direction) with the nozzle, and attach them without any inclination. Even if the identification ring is not attached, it does not affect the performance of the nozzle.

How to use
Prepare
Place the main unit on a flat and stable surface.
1. Insert the power plug into a household outlet, and fill the water tank with water.
① Insert the power plug into a household outlet.
• The cord can be pulled out from either the right or the left.
② Open the water tank cap.
③ Remove the water tank, and fill it with water.
- When filling water, be sure not to exceed the upper water level limit.
④ Set the tank to the main unit firmly.
⑤ Attach the water tank cap.

Upper water level limit
2 Install the nozzle, and turn on the power.
① Install the nozzle.
- Choose a nozzle for your purpose. (See pages 13 and 14.)
② Ensure the Stop/Jet switch is set to “Π” (stop mode).
③ Press the power switch “①” to turn on the power.
• The water pressure level LED indicator lights on.
• The power will be cut off after about 10 minutes to avoid forgetting to turn off. (The function for avoiding forgetting to turn off.)
3 Press the water pressure regulator switch to select the water pressure level.
① With the nozzle facing the basin, set the Stop/Jet switch to “” (jet mode) to jet water.


Stop/Jet switch
② Press “+” or “-” on the water pressure regulator switch until the desired flow intensity is reached.
- Keep pressing “+” or “-” will continuously change the water pressure.
![graph TD A["Child mode “●”"] --> B["Level 1"] B --> C["Weak Strong"] C --> D["Level 10"]](/content/2026/06/1397443/images/008cba7ee43720a2b7515f4d22ac5869d5da7710dd095da658ef45234d6b67b8.jpg)
③ Set the Stop/Jet switch to “Π” (stop mode) to stop jetting temporarily.
■ Water pressure level memory function The last selected water pressure level will be remembered from the second time onward.
4 Clean inside your mouth with water jet.
① Place the nozzle in your mouth. ② Close your mouth gently. ③ Set the Stop/Jet switch to “☐” (jet mode).
- If you want to pause the water jet, set the Stop/Jet switch to “Π” (stop mode).
- You can switch the water pressure level by pressing the water pressure regulator switch even while using the appliance.

▶ Operation time with full water: approx. 180 seconds (When the ultrasonic nozzle is used and the water pressure level is set to 10)
▶ To adjust the orientation of the nozzle (For orthodontic nozzle only) You can adjust the direction of water jet by rotating the nozzle handle.

Notes
• Always use new tap water or lukewarm water. - If water is cold, use lukewarm water with temperature 40°C or below. - Do not turn on the power switch “①” when the water tank is empty (except discharging the water inside the main unit). (Doing so may cause malfunction.) - The recommended operating temperature of the appliance is 5 °C - 40 °C. If the indoor temperature is over or lower than the recommended temperature, the appliance may stop operating. - When the Stop/Jet switch is set to “Π” (stop mode) for more than 1 minute, turn off the power switch “①”. (Doing so may cause malfunction.) - When you use the appliance for the first time, please start with water pressure level 1 (Child mode “💡”). - Do not push the tip of the nozzle too hard against the teeth or gums. (Excluding the orthodontic nozzle.) - When you feel that the irritation is strong, set the Stop/Jet switch to “Π” (stop mode) and use the appliance from the water pressure level 1 (Child mode “💡”).
Points of care
If you are concerned about sensitive gums, stimulate with a gentle water jet setting.
With the water jet and orthodontic nozzle, clean every nook and cranny of areas that are hard to reach by the toothbrush.
Change the way you use and move the unit depending on the purpose and the area you want to clean.

Ultrasonic nozzle
To clean with the water jet.
▶ Interdental cleaning
- Direct the water jet onto the space between the teeth.
- Direct from the front and rear sides of the teeth.
▶ Periodontal pocket cleaning
- Aim the water jet at the space between teeth and gums.
- Slowly shift the water jet along the gums.
- Clean the front and back of the teeth and behind the molars as well.
▶ Gums care
• Stimulate the gums.


Orthodontic nozzle
When cleaning crooked teeth and orthodontic bracket area with the brush and water flow.
Lightly place the brush tip on the teeth and wiggle the brush.
▶ For crooked teeth
- Place the brush tip on the area that is difficult for a toothbrush to reach and tends to remain unpolished.
- Wiggle the brush mainly in interdental spaces.

For orthodontic bracket area

Ultrasonic nozzle
- Direct the water jet around orthodontic brackets and bridges.


Orthodontic nozzle
- Insert the brush to the gap between the teeth and the orthodontic bracket. - Wiggle the brush tip.


Tongue care nozzle
To clean the tongue surface with the cloth and water flow.
▶ Tongue cleaning
- Set the water pressure level to 10. (To rinse the tongue clean.)
- While jetting water, apply the tongue care nozzle lightly to the tongue and move it slowly from the back to the front repeatedly.

- Tongue cleaning is allowed at most once a day.
- Excessive strength may hurt the surface of the tongue.
- Do not go deep into your tongue.
- When you stick your tongue forward while cleaning, the vomiting reflex* will be less likely to occur.
* Refers to the state of nausea.

Cleaning range (approx. 3/4 of the visible range)
■ To clean the tongue surface with the cloth. Occasionally, the cloth may be stuck in the tongue surface.
→ Please move the cloth slightly back to remove it.
- After use, water may drip from the nozzle since some water may remain in the cloth of the nozzle. Please remove it after drainage. (See page 15.)
After use
Please clean the appliance after each use.
- The main unit cannot be washed with water.
1 To prevent the water from splashing about, stop the water jet while keeping the nozzle in your mouth.
① Stop the water jet by setting the Stop/Jet switch to “□” (stop mode). ② Press the power switch “①” to turn off the power.
- The water pressure level LED indicator keeps flashing for 30 seconds and then goes off.

2 Throw away the remaining water.
① Remove the water tank, and throw away the remaining water.
- While removing the water tank, press the main unit by hand.
- Change the water every time when you use the appliance.
② Wash the water tank.

3 Remove the remaining water from the main unit.
① Install the water tank, and turn on the power switch “①”. ② With the nozzle facing the basin, set the Stop/Jet switch to “☐” (jet mode) to remove the remaining water from the main unit. ③ When there is no water coming out, set the Stop/Jet switch to “ ” (stop mode), and turn off the power switch “①”.

② Stop/Jet switch
4 Disconnect the power plug from the household outlet.

5 Clean the handle.

- Rinse the cloth of the tongue care nozzle with running water.
- Do not bump it on the washbasin when swinging it dry.
6 Store it after it is dry.
① Wipe off any moisture with a towel and dry in a well-ventilated shade. ② Store the appliance.
- Mount the handle and water tank to the main unit, and place the nozzle on the nozzle stand.
- When two or more nozzles are placed on the nozzle stand, make sure that they do not come in contact with each other.


Notes
- Remove the dirt inside the water tank with a long handled sponge bottle brush. (Do not use lukewarm water exceeding 80 °C.)
- Only the water tank can be washed in a dish washer. The nozzle, the nozzle stand, and the water tank cap cannot be cleaned in a dish washer.
- Do not wipe with thinners, benzine, alcohol etc. (Doing so may cause malfunction, cracking or discoloration of the parts.)
- Use neutral kitchen detergent and rinse well with water to ensure no detergent remains after cleaning.
- Do not use lukewarm water exceeding 50 °C to wash the nozzle, the nozzle stand, the water tank cap, and the handle.
- Do not rub the cloth of the tongue care nozzle with sharp-pointed objects or finger nails.
Clean the dirt on the main unit
When wiping stains away from the main unit with a cloth that has been soaked in soap water and then wrung out.
(Do not wash the main unit with water.)
- Use cotton swabs to clean any part that is inaccessible to the cloth.

Specifications
| Power Source | See the name plate on the product (Automatic voltage conversion) |
| Power consumption | 18 W |
| Water tank volume | Approx. 600 mL(For approx. 180 seconds of operation when the ultrasonic nozzle is used and the water pressure level is set to 10)(For approx. 130 seconds of operation when the orthodontic nozzle is used and the water pressure level is set to 10)(For approx. 75 seconds of operation when the tongue care nozzle is used and the water pressure level is set to 10) |
| Dimensions | Main unit:300 (H) × 125 (W) × 140 (D) mm(Including nozzle)200 (H) × 125 (W) × 140 (D) mm(Not including nozzle) |
| Suction hose length | Approx. 1100 mm |
| Mass | Main unit: Approx. 995 g(Including nozzle) |
| Airborne Acoustical Noise | 83 (dB (A) re 1 pW) |
This product is intended for household use only.
Troubleshooting
| Problem Possible cause Action | |||
| While using | No water comes out, or the water jet power is weak. | The Stop/Jet switch is left in “ Π” (stop mode) while the power is on.→Take the following steps:1 Fill the water tank with water halfway.2 Press the power switch “10 to turn on the power and press “+” to set the water pressure level 10.3 Set the Stop/Jet switch to “ ”(jet mode).4 Insert and remove the water tank for several times.5 Install the water tank and wait for a few seconds until the water pressure is restored.* Repeat Steps 4 and 5 if the water pressure is not restored.• Once the water pressure is restored, you can use the appliance as usual. |   |
| The nozzle comes off during use. | The nozzle is clogged. | Replace the nozzle.The outlet of nozzle | |
| Fail to remember the water pressure level. | The power plug is pulled out from the household outlet before the power switch “ 1” is turned off. | Before pulling out the power plug from the household outlet, turn off the power switch “ 1”. | |
| Motor sound changes after the Stop/ Jet switch is set to “ Π” (stop mode). | This is not an abnormality. →Please use the appliance as usual.* It may occur particularly in a low-temperature environment. | ||
| The power is cut off automatically. | The function for avoiding forgetting to turn off is activated. | This is not an abnormality.(See page 11.) | |
| The self-protection function is activated due to a thunderstorm etc. | Turn on the power switch “ 1 again. | ||
| The water pressure level LED indicator still flashes after the power switch “ 1” is turned off. | This is not an abnormality.→The indicator will go off after 30 seconds. (See page 14.) | ||
| The nozzle is hard to install. | →Apply water to the nozzle insertion port. | ||
If the problems still cannot be solved, contact the store where you purchased the unit or a service centre authorized by Panasonic for repair.
Changing the nozzle (Sold separately)
▶ Ultrasonic nozzle
- If the tip of the nozzle gets deformed, please replace the nozzle with a new one.
- The nozzle should be replaced once every 6 months or so due to hygiene reasons, even if it is not deformed.


New nozzle (tip) Deformed (worn) nozzle (tip)
▶ Orthodontic nozzle
- Replace the orthodontic nozzle in approx. 3 months. If the brush bristles are bent out, replace it even within 3 months.


New nozzle (tip) Nozzle with bent out bristles
▶ Tongue care nozzle
- Replace the tongue care nozzle in approx. 6 months. If the brush cloth is discoloured, replace it even within 6 months.


New nozzle (tip) Discoloured nozzle (tip)
| Part number Replacement Nozzle for EW1614 | ||
| WEW0986 | Ultrasonic nozzle |  |
| WEW0984 | Orthodontic nozzle |  |
| WEW0985 | Tongue care nozzle |  |
Authorized Representative in EU:
Panasonic Marketing Europe GmbH
Panasonic Testing Centre
Winsbergring 15, 22525 Hamburg, Germany
Importer:
Panasonic Marketing Europe GmbH
Hagenauer Strasse 43, 65203 Wiesbaden, Germany
Manufactured by:
Panasonic Corporation
1006, Oaza Kadoma, Kadoma City, Osaka, Japan
Disposal of Old Equipment
Only for European Union and countries with recycling systems


This symbol on the products, packaging, and/or accompanying documents means that used electrical and electronic products must not be mixed with general household waste.
For proper treatment, recovery and recycling of old products, please take them to applicable collection points in accordance with your national legislation.
By disposing of them correctly, you will help to save valuable resources and prevent any potential negative effects on human health and the environment.
For more information about collection and recycling, please contact your local authority. Penalties may be applicable for incorrect disposal of this waste, in accordance with national legislation.
Panasonic
Operating Instructions
Specifications
Panasonic Testing Centre
Accident prevention
Specifications
Panasonic Testing Centre
Note
Panasonic Testing Centre
Winsbergring 15, 22525 Hamburg, Germany
Importer:
Panasonic Marketing Europe GmbH
Hagenauer Strasse 43, 65203 Wiesbaden, Germany
Manufactured by:
Panasonic Corporation
5 Clean the handle.

Specifications
Panasonic Testing Centre
Specifications....96
Troubleshooting .....97
5 Clean the handle.

Specifications
Panasonic Testing Centre
5 Clean the handle.

Specifications
Panasonic Testing Centre
5 Clean the handle.

Specifications
Panasonic Testing Centre
Winsbergring 15, 22525 Hamburg, Germany
Importer:
Panasonic Marketing Europe GmbH
Hagenauer Strasse 43, 65203 Wiesbaden, Germany
Manufactured by:
Panasonic Corporation
1006, Oaza Kadoma, Kadoma, Osaka, Japan
5 Clean the handle.

Specifications
Panasonic Testing Centre
Winsbergring 15, 22525 Hamburg, Germany
Importer:
Panasonic Marketing Europe GmbH
Hagenauer Strasse 43, 65203 Wiesbaden, Germany
Manufactured by:
Panasonic Corporation
1006, Oaza Kadoma, Kadoma, Osaka, Japan
Nozzle insertion port
Orthopedic nozzle
Nozzle
Nozzle insertion port
Nozzle insertion port
2 Throw away the remaining water.
Specifications
| Strømkilde | Se navneplaten på produktet(Automatisk spenningsomformer) |
| Strømforbruk 1 | 8 W |
| Volumvannbeholder | Omtrent 600 mL(Ca. 180 sekunder bruk når ultralyddysen er i bruk og vannstrålenivået er 10)(Ca. 130 sekunder bruk når den ortopediske dysen er i bruk og vannstrålenivået er 10)(Ca. 75 sekunder bruk når dyse for tungepleie er i bruk og vannstrålenivået er 10) |
| Mål | Hoveddel:300 (H) × 125 (B) × 140 (D) mm(Inkludert dyse)200 (H) × 125 (B) × 140 (D) mm(Ikke inkludert dyse) |
| Sugeslangelengde | Omtrent 1100 mm |
| Vekt | Hoveddel: Omtrent 995 g(Inkludert dyse) |
| Luftbårenakustisk støy | 83 (dB (A) re 1 pW) |
This product is intended for household use only.
Troubleshooting
Panasonic Testing Centre
Winsbergring 15, 22525 Hamburg, Germany
Importer:
Panasonic Marketing Europe GmbH
Hagenauer Strasse 43, 65203 Wiesbaden, Germany
Produced by:
Panasonic Corporation
1006, Oaza Kadoma, Kadoma, Osaka, Japan
5 Clean the handle.

Technical specifications
Panasonic Testing Centre
Winsbergring 15, 22525 Hamburg, Germany
Importer:
Panasonic Marketing Europe GmbH
Hagenauer Strasse 43, 65203 Wiesbaden, Germany
Manufacturer:
Panasonic Corporation
1006, Oaza Kadoma, Kadoma City, Osaka, Japan
5 Clean the handle.

▶ Notes
Technical specifications
Panasonic Testing Centre
5 Clean the handle.

Specifications
Panasonic Testing Centre
2 Install the nozzle and turn on the power.
① Install the nozzle.
5 Clean the handle.

Panasonic Testing Centre
Winsbergring 15, 22525 Hamburg, Germany
Importer:
Panasonic Marketing Europe GmbH
Hagenauer Strasse 43, 65203 Wiesbaden, Germany
Manufacturer:
Panasonic Corporation
1006, Oaza Kadoma, Kadoma City, Osaka, Japan
Technical specifications
Panasonic Testing Centre
5 Clean the handle.

Specifications
Panasonic Testing Centre
Winsbergring 15, 22525 Hamburg, Germany
Importer:
Panasonic Marketing Europe GmbH
Hagenauer Strasse 43, 65203 Wiesbaden, Germany
Manufactured by:
Panasonic Corporation
1006, Oaza Kadoma, Kadoma City, Osaka, Japan
2 Discard the remaining water.
Technical specifications
Panasonic Testing Centre
Winsbergring 15, 22525 Hamburg, Germany
Importer:
Panasonic Marketing Europe GmbH
Hagenauer Strasse 43, 65203 Wiesbaden, Germany
33, Wanbao North Street, Wanbao Industry Zone, Zhongcun, Panyu District, Guangzhou City, Guangdong Province, China
AUTHORIZED REPRESENTATIVE
Importing Company:
Tesan İletişim A.Ş.
© Panasonic Corporation 2023
⑧ EN, DE, FR, IT, SP, NL, PT, SV, DA, NB, FI, PL, CS, SK, HU, RO, TR
Printed in China
EW970016141503 S0323-0
- PANASONIC
- CONTENTS
- WARNING
- SAFETY PRECAUTIONS
- EXPLANATION OF SYMBOLS
- PREVENTING ACCIDENTS
- POWER SUPPLY
- CAUTION
- THIS PRODUCT
- NOTE THE FOLLOWING PRECAUTIONS: DO NOT WRAP THE CORD AROUND THE APPLIANCE WHEN STORING
- IMPORTANT INFORMATION
- NOTICE
- ABOUT TOOTH TARTAR
- ABOUT BLEEDING GUMS
- PARTS IDENTIFICATION
- A HANDLE
- B MAIN UNIT
- C WATER TANK
- OPERATION PANEL
- E ULTRASONIC NOZZLE (X2)
- ORTHODONTIC NOZZLE
- © TONGUE CARE NOZZLE
- ACCESSORY
- H NOZZLE STAND
- HOW TO USE
- PREPARE
- NOTES
- POINTS OF CARE
- ULTRASONIC NOZZLE
- INTERDENTAL CLEANING
- PERIODONTAL POCKET CLEANING
- GUMS CARE
- FOR CROOKED TEETH
- FOR ORTHODONTIC BRACKET AREA
- TONGUE CARE NOZZLE
- TONGUE CLEANING
- AFTER USE
- PLEASE CLEAN THE APPLIANCE AFTER EACH USE
- THROW AWAY THE REMAINING WATER
- REMOVE THE REMAINING WATER FROM THE MAIN UNIT
- DISCONNECT THE POWER PLUG FROM THE HOUSEHOLD OUTLET
- CLEAN THE HANDLE
- STORE IT AFTER IT IS DRY
- CLEAN THE DIRT ON THE MAIN UNIT
- TROUBLESHOOTING
- CHANGING THE NOZZLE (SOLD SEPARATELY)
- AUTHORIZED REPRESENTATIVE IN EU
- IMPORTER
- MANUFACTURED BY
- DISPOSAL OF OLD EQUIPMENT
- ONLY FOR EUROPEAN UNION AND COUNTRIES WITH RECYCLING SYSTEMS
- OPERATING INSTRUCTIONS
- ACCIDENT PREVENTION
- NOTE
- ORTHOPEDIC NOZZLE
- PRODUCED BY
- MANUFACTURER
- INSTALL THE NOZZLE AND TURN ON THE POWER
- DISCARD THE REMAINING WATER
- AUTHORIZED REPRESENTATIVE
- IMPORTING COMPANY
- TESAN İLETIŞIM A.Ş
Brand : PANASONIC
Model : EW1614
Category : Interdental brush