
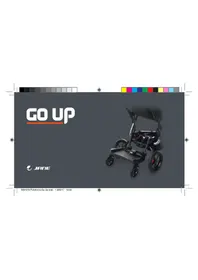
UNLIMIT - Stroller JANE - Free user manual and instructions
Find the device manual for free UNLIMIT JANE in PDF.
| Brand | JANE |
| Model | UNLIMIT |
| Product type | Stroller |
| Recommended age | From 6 months (with approved accessories from birth) |
| Maximum child weight | 15 kg |
| Stroller weight (approx.) | Approx. 10-12 kg |
| Maximum basket load | 4 kg |
| Reversible seat | Forward-facing or parent-facing |
| Backrest positions | 3 recline positions + 1 fold position |
| Adjustable leg rest | Yes, continuously adjustable |
| Canopy | Removable and adjustable via hoops |
| Swivel front wheels | Yes, with directional lock |
| Rear suspension | 2 positions (soft and firm) |
| Brake | Parking brake on rear wheels |
| Safety harness | Adjustable 5-point harness |
| PRO-FIX system | Allows installation of compatible car seats (Transporter, Matrix Light, Strata) |
| Fold | Compact fold with seat in place (forward-facing or parent-facing) |
| Maintenance | Clean metal parts, lubricate with silicone spray, washable cover |
| Included accessories | Safety bar, rain cover |
Frequently Asked Questions - UNLIMIT JANE
User questions about UNLIMIT JANE
0 question about this device. Answer the ones you know or ask your own.
Ask a new question about this device
Download the instructions for your Stroller in PDF format for free! Find your manual UNLIMIT - JANE and take your electronic device back in hand. On this page are published all the documents necessary for the use of your device. UNLIMIT by JANE.
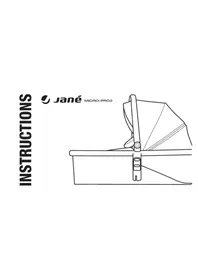
USER MANUAL UNLIMIT JANE
Read these instructions carefully before use and keep them for future reference. Your child's safety may be affected if you do not follow these instructions.
This vehicle is intended for children from 6 months and up to 15kg
Suitable for children under 6 months old only with accessories approved by JANÉ.
Keep this instruction book for future reference.
WARNING: It may be dangerous to leave your child unattended.
WARNING: Ensure that all the locking devices are engaged before use.
WARNING: Use a harness as soon as your child can sit unaided.
WARNING: This seat is not suitable for children under 6 months.
WARNING: Any load hanging from the handlebar will affect the stability of the pushchair.
WARNING: Always use the crotch strap in combination with the waist belt.
WARNING: Check that the pram body or seat unit attachment devices are correctly engaged before use.
WARNING: This seat is not suitable for running or skating.
The maximum amount carried in the basket must never exceed the weight indicated on the basket (4 kg).
This pushchair may only be used by a child.
Never use accessories that have not been approved by JANÉ, S.A.
The two side fastening points of the seat can be used to fasten a supplementary harness (see section (27).
WARNING: The child should be kept away from the mobile parts when the responsible adult is handling these. The appearance of cutting, compression and pinch points are inevitable during these operations.
WARNING: It is important to make sure that the child is kept away from the pushchair while it is being folded or unfolded. The appearance of cutting, compression and pinch points are inevitable during these operations.
WARNING: Never leave the child in the pushchair when going up or down stairs or when travelling in any mode of transport.
WARNING: Never allow the child to stand up on the footrest or footboard.
WARNING: Do not put weight on top of the hood.
WARNING: When the brake is on make sure that the pushchair has braked correctly. It may be necessary to push the pushchair slightly for the brake to be fully activated.
1.- UNFOLDING AND INITIAL ASSEMBLY
Release the folding catch and open the chassis 1 and 2 until the main locks click into place. Fit the 2 rear wheels onto the chassis, pressing the central button on the wheel.
Insert the front wheel pressing the button 5
Push the backrest until it is in the vertical position 6
Adjust the handles to the required height 7
WARNING: It is important to make sure that the child is kept away from the pushchair while it is being folded or unfolded.
WARNING: The appearance of cutting, compression and pinch points are inevitable during these operations.
2.- REVERSIBLE HAMMOCK FUNCTIONING
Your pushchair has a reversible hammock so your child can sit facing forwards or facing you. When the child is small he will want to face you, and as he grows he will become more curious and want to face forwards.
3.-HOW TO REMOVE THE HAMMOCK
Press the 2 grey buttons simultaneously and lift the hammock up using the side wings. 8 and 8a When it is loose, pull the handle on the backrest upwards to release the front part. 9
4.-HOW TO FIT THE HAMMOCK FACING FORWARDS
Simultaneously fit the openings on both sides of the hammock into the front fasteners A1 10 and 10a Supporting the hammock in A1 lower the rear part of the hammock until it fits into the two rear fasteners A2 11 and 11b Make sure that the hammock is securely fastened to the chassis by gently pulling it upwards.
WARNING: Make sure that the hammock footrest is in the horizontal / parallel to the seat position, if not it gets caught between the tubes of the front legs and prevents the hammock from being correctly fastened to the chassis.
5.-HOW TO FIT THE HAMMOCK FACING BACKWARDS
Simultaneously fit the openings on both sides of the hammock into the rear fasteners A2 12 and 12a
Supporting the hammock in A2 lower the rear part of the hammock until it fits into the two front fasteners A1 13 and 13a
Make sure that the hammock is securely fastened to the chassis by gently pulling it upwards.
6.- BRAKES
Your pushchair has a brake system that works simultaneously on both rear wheels. Use it as a parking brake whenever possible, it is an important safety element. 14
Press the brake lever to put the brake on. 14a
Push the brake lever upwards to release the brake. 14b
To adjust the brake:
If a more precise adjustment is necessary follow the instructions shown in figure 14.c
WARNING: When the rear brake is on make sure that the pushchair has braked correctly, the word STOP should be completely visible. 14 It may be necessary to gently push the pushchair for the brake to be fully activated.
7.- ADJUSTING THE SUSPENSION
The rear suspension has 2 settings, use a coin to adjust the positions. 15
soft position .15a
hard position 15b
8.- SWIVEL
Your pushchair has front swivel wheels that can be steered, or the steering can be locked if required.
To lock the steering press the button and when the wheels are aligned with the longitudinal axle of the pushchair, they will automatically lock. 16 Press the button in the opposite direction to unlock the steering. 16a
9.- REMOVING THE REAR WHEELS
To take the rear wheels off keep the button on the axle pressed down and pull the wheel. 17
10. - PROTECTOR
The protector is fitted onto the hammock, as shown in figure 18. To take the protector off, pull it while pressing the two buttons simultaneously 19 and 19a. It is possible to release only one of the two ends of the protector in order to place the child in the hammock with just one hand.
WARNING: The child should be kept away from the mobile parts when the responsible adult is handling these. The appearance of cutting, compression and pinch points are inevitable during these operations.
11.- PRO-FIX SYSTEM
The chassis of your pushchair includes the PRO-FIX system, ready for fitting any of the following baby carriers: Transporter, Matrix Light, Strata. 20
The PRO FIX system makes it easy to fasten and remove these accessories onto and off the chassis, in a quick, simple and safe way, with them securely fastened onto the chassis. To do this, follow the instructions for these accessories carefully. To access the PRO-FIX system zone raise the two covers that cover it.
WARNING: It is necessary to take the hammock off the buggy In order to connect any auto accessories.
12.- FITTING THE HOOD
Place the hood between the handlebar tubes and the sides of the backrest underneath the side handles. 21
Slide the connecting piece of the hood into the guide on the side of the backrest until it clicks into place. 21a and 21b
Once the hood is attached the position can be adjusted by moving the hoops to suit the position of the backrest.
The backrest can be reclined to make the child more comfortable. It has 3 positions.
To lower the backrest pull the rear lever upwards while lowering the backrest to the required position.
To raise the backrest you don't need to use the lever, simply push the backrest to the required position. 23
The backrest has an extra 4th position that should only be used for folding the pushchair when the hammock is in place facing forwards. To put the backrest in this position pull the rear lever upwards and push the backrest forwards, until it is securely in place.5
The position of the footrest can also be adjusted to suit the child's posture at all times.
Press button A situated on the frame, on both sides of the pushchair, while moving the footrest downwards. 7
To move it upwards you don't need to press the button, simply push the footrest.
15.- FOLDING THE PUSHCHAIR
The optimal folding position is with the hammock facing forwards.
Recline the hammock, using the lever, until it is in the folding position.5
Remove any object from the basket that may prevent the pushchair from folding correctly.
Release the front wheel steering lock 16
Release the main locks on both sides of the handles, starting the folding movement. 24
Close the chassis until the safety catch locks, push the frame of the hammock until it is in the vertical position and finally, turn the handlebar. 25
It is also possible to fold the pushchair with the hammock fitted facing backwards. 26
NOTE: To fold the pushchair with the hammock facing backwards the hood should be taken off and the backrest should not be put into the folding position.
WARNING: Some of the parts may break if your try to fold the pushchair without releasing the front wheel steering lock.
16.- SEAT BELT
Your pushchair is fitted with a safety harness so your child is secure at all times. Fit the belt to the child whenever the pushchair is in use.[27]
The crotch strap and the shoulder straps can be adjusted to 2 positions. 28
17.- MAINTENANCE
Keep the metal parts clean and dry to prevent rusting.
Regularly grease the mobile parts and mechanisms with a silicone-based spray. Do not use oil or grease.
To clean the plastic parts only use mild detergent and warm water
Do not expose the upholstery to the sun for prolonged periods of time. The upholstery can be taken off for washing.
18.-RAIN COVER
The rain cover of your UNLIMIT is very easy to fit, simply cover the hammock and fit the hooks onto the chassis to fasten it. It has a small window that can be rolled up and fastened with Velcro so the child can investigate his surroundings freely. 29
INDEX
AVERTISSEMENTS
1.- DÉPLIAGE ET MONTAGE INITIAL 38
2.- FONCTIONNEMENT HAMAC RÉVERSIBLE 38
3.- COMMENT LIBERER LE HAMAC 38
4.- COMMENT INSTALLER LE HAMAC FACE A LA ROUTE 38
5.-COMMENT INSTALLER LE HAMAC DOS À LA ROUTE 39
6.- FREINS 39
7.- RÉGLAGE SUSPENSION 39
8.- ROUES AVANT PIVOTANTES 39
9.- DEMONTAGE ROUE ARRIÈRE 39
10.- HABILLAGE PLUIE 40
11.- SYSTÉME PRO-FIX 40
12.- MONTAGE CAPOTE 40
13.- RÉGLAGE DOSSIER 40
14.- RÉGLAGE REPOSE-PIEDS HAMAC 41
15.- PLIAGEPOUSSETTE 41
16.- CEINTURE DE SECURITE 41
17.-ENTRETIEN 42
18.- HABILLAGE PLUIE 42
AVERTISSEMENT
Lage for hard fjdring.15b
8.-ROTERANDEHJUL
TOKpoIe 3aMOK CLOKHeHHO KoJIaCKn n pacKaIaBaiTe wACCn1 n2 NOKA He ycIbIwnte ueNOK OCHOBHbIX fMKcATOpOB. 3 YcTaHOBnTE 2 3aDnHex KOleca Ha WACCn 4 Haxkab CEHTpaIbHyo KHONK Ha KOJecax.
Bctabte nepeedhe KOleco, Haxkma JhONky 5 TOnkaTe CnNHy, Noka OHa He npMert BeptKaIbHoe nOJoxeHne 3 OTPeynpyute HaKIOH pyuKn KOLaCKn Ha JeJaemOy BcICote 7
PNEUYPENKDEHNE: Heo6xOIMO y6eDnTbC, cyo pe6eHka HET pAOm C KOJIACKO, KOrDa CKJaDbIbAeTcN IIN PaCKNaIbIbAeTcK KOJIACKa.
IOBauHHe NTOEOK CxATN I 3axBaTaN HeN36Exhbl BO Bpem TaKnx Opeaun.
2.-DByCTOPOHHI IAMAK
BaIIa KONJCKA NmEeT DByCTOPOHHn Iramak, B KOTOPOM peBEOHK MOeET CNDtB NIOUM, KAK NO XOy, TAK IN PNOHB DNIXEHN. MaIeHbKN peBEOK 3axooy CTMOPTeB Ha Bac, HO KOrdA OH NpOpaTeT, EMy 6yDcT INTEpeChE CMOTpeB BnpePe.
3.-KAKCHrTbΓAMAK
HaJxMnTe OJHOBpEmHo DBe KHONKc ceporo Zbeta nNoDHmNTE rAMak pRn NOMOOn bOKOBbXkPbIbEB 8n 8a CChra3aJHOU qACTB rAMaka,NOTHIne BvEx 3a pyuKy CnINKn, YTO6bl CHrTb PepeDHOU qACTb 9
4.- KAK YCTAHOBNTb RAMAK NO HAPPABJIEHNIO DBNXEHNIA
Hacadnte OJHOBpeMeHNOOTBepCTn,HaOJaImeecHa oBeHX cToPOhAXramaKa Ha nepeNHe KpeJIeNHe A1 10 n10a
UyepKXBraIgramak B A1,Oonyckte3aJHOuCtBramaka,
noka He HacaDITE Ha DaBa 3aJHxKpeJIeNHe A2 11n11a
Y6eHNTecb, YTOramak XopoWo 3aKpENnHe Ha waccn, cIerKa
notAHyb erO bBExp.
PENEDYIPENEXHE:YbEaNTecb,yTO NDHOKKa rAMaka HAnOHTBc8rBNOP3HO7aIbHMoNLOXeHN/npAanJIbHbKOJLAKCe BnPTOBMHCmNyaeOHApACNOONtCzMeJyTrp6AmHnepeDNHX HOKek,PNepTCTByrnpabINbHOyCTaONBeRAMaka HAwaccn.
5.-KAKYCTAHOBNTBΓAMAKIPOTNBIBNXEHNIA
Hacadinite OndobpeMeHO OTBepTNO 06EIM CTOPOHAMAKA HA3aHNHE KPNENHNA A2 12 H12a
UydepKbBAramBakA2,OnyckaTe3aHIOOuctbramaka, noka H hacaIITHeBaIpeNEXKpEINeHnA1 1813a
Y6ebntecb, cT0 ramaK xopoOo 3akpennen Ha waccn, cnerka notHByEro BBePx.
6.-TOPMO3A
Baua koIaCKA ochaueHa TopMo3HbIM MExaHn3MOM, KOTOpB JIeCTbyET
OIOBPEMENHO HA 06a 3aHINKoNEca. IcNoJIb-3yTe erO KaK CTOrA HOHNb TROP03
BCERda, KOrDa KOJIcRA COTn HA MecTe. Topo3 BJIaTcBAKbHIM 2NEMeHTo6EzONACHOCTN.14
YTo6bI 3aDeiCTBOBaTb TopMO3,HaXMMTe Ha pbyar TopMO3a. 14a
Дага ТОТУ 6TOBС CHTВ 6IOKINPOBYK 3aДИХ KONEC, TOLKNITE bYHAR TOPMO3A BBEpx.14b
YTo6bI OTepyJInpoBaTaT TopMo3:
Пгн БОНбОДМСТС 6ОБЕТ OTOHОД PEGYIMPOBOKI DEERTBYTE, KAK yka33AO HAN PCNYCHK.14.c
PINEVYTPEJKENHE:PNBVEBAI BIECTBEA3JHNI TOPMO3, y6eJIteCb, YTOKOLKA BCA CTOH HA TOPMO3 HADEJHO, CNOBO STOP DQNHXO 6bITB BVNDIO NONHOCTb 10 MOKHO NOKATAb CnEka KOLKAyDIAI TORO, TTO6bI 3y6CbI TOPMO3a BOUINI B CIENNEHNE HAnLIYIMM 6OB43OM.
7-PEYUNPOBAHNE NOBBECKN
3aHnra nOBecka mMeet 2ypoBnJxKecTkoCTn. YTo6bl
OTpeRyInpoBaTb XeCTKocTb NOBBeCKN Bbl DOnJXHbI
NCNIOJIb3OBAbMoHETy 15
MЯrkyn ypoBemb 15a
XeCTKn ypoBemb 15b
8.- NOBOPOTHbIE
IpegeHne Koneca Bauei KONRA MORYf yHKnIOHPOBAtb B DByX pExKImAX: C Bo3MOKHOCTbIO NOBOPaN C Bo3MOKHOCTbHO fIKCauHn HapraBHeN.
YTo6bla3aKnCnpoBaTb NobOpOTbHe Koneca,HaKmTe HaKHONky HcKa DaKoneca 6ydt CToRb Ha OJHOI JINHc C npOIOBHOcBO HcKAncy,Ha3aONOKpyTOCTA BtOMaTHueCKn.16 YTo6blpa3bNOkOPaBb NOBOPOTbHe KONEca,HaKmTe Ha KHONky B IpOToBONIOJXHOM HanpAbneHm.16a
9.- DEMOHTAX 3AДнИX KOJIEC
Дя CBNTR 3aDnHx KOLEC HxKMITE KONIKY Ha OCU NOTAHITE KONECO.17
10.-NOPUeyHb-AMnEP
Bamnep yctahablnBaTcHa rAmake TaK, kak Yka3aHo Ha pucyHke 18 TcBb DEMOHHTNPOBaTb Bamnp, nOTHNTE 3a Hero, HAKIMAR OHOBNPemEHNO h o6e KhoNkIN 1919a NMeETCBO 80MOnKHOCTb CnHb B amnp ToIbKO C oNDH cTOPOHb IJr TORo, TcBb NocadInb pe6eHeka Bramak ONDH pyKoi.
PTEVYPTPEKJDEHEV:Pe6eHOK He JIOLJHK HAXOJNTCB 803JI NOBdNnKbXb YAcTeKoJIKcK, KOraD Ba3pocJIb npOBOJNT C HMMK KaKeNt6o DeCTBn. POnBNeHMe ToeK Cxatm N 3axbata HeM36eKbHb BO BpeTAKx Onepaun.inevitables durante estas operaciones.


- 1.- UNFOLDING AND INITIAL ASSEMBLY
- 2.- REVERSIBLE HAMMOCK FUNCTIONING
- 3.-HOW TO REMOVE THE HAMMOCK
- 4.-HOW TO FIT THE HAMMOCK FACING FORWARDS
- 5.-HOW TO FIT THE HAMMOCK FACING BACKWARDS
- 6.- BRAKES
- 7.- ADJUSTING THE SUSPENSION
- 8.- SWIVEL
- 9.- REMOVING THE REAR WHEELS
- - PROTECTOR
- 11.- PRO-FIX SYSTEM
- 12.- FITTING THE HOOD
- 15.- FOLDING THE PUSHCHAIR
- 16.- SEAT BELT
- 17.- MAINTENANCE
- 18.-RAIN COVER
- INDEX
- AVERTISSEMENTS
- AVERTISSEMENT
- 8.-ROTERANDEHJUL
- 2.-DByCTOPOHHI IAMAK
- 3.-KAKCHrTbΓAMAK
- 4.- KAK YCTAHOBNTb RAMAK NO HAPPABJIEHNIO DBNXEHNIA
- 5.-KAKYCTAHOBNTBΓAMAKIPOTNBIBNXEHNIA
- 6.-TOPMO3A
- 7-PEYUNPOBAHNE NOBBECKN
- 8.- NOBOPOTHbIE
- 9.- DEMOHTAX 3AДнИX KOJIEC
- 10.-NOPUeyHb-AMnEP
Brand : JANE
Model : UNLIMIT
Category : Stroller