SDFR 1500 A1 - Steam cleaner SILVERCREST - Free user manual and instructions
Find the device manual for free SDFR 1500 A1 SILVERCREST in PDF.

User questions about SDFR 1500 A1 SILVERCREST
0 question about this device. Answer the ones you know or ask your own.
Ask a new question about this device
Download the instructions for your Steam cleaner in PDF format for free! Find your manual SDFR 1500 A1 - SILVERCREST and take your electronic device back in hand. On this page are published all the documents necessary for the use of your device. SDFR 1500 A1 by SILVERCREST.
USER MANUAL SDFR 1500 A1 SILVERCREST
List of pictograms used 18
Introduction 19
Intended use. 19
Scope of delivery. 19
Parts list 19
Technical data 19
General safety instructions. 20
Before first use. 22
Accessories 22
Operation. 23
Filling the water Tank. 23
Connection to Mains Supply. 24
Using the Steam Cleaner. Page 24
Topping Up With Water. Page 24
Ending Operation and Storage.. 25
Cleaning and Care 25
Cleaning the main unit. Page 25
Cleaning the accessories.. 25
Cleaning the fiber cloths and fiber cover. 25
Removing limescale 25
Replacement parts / Accessories 25
Storage 25
Disposal 26
Warranty 26
Warranty claim procedure.. 27
Service . 27
| List of pictograms used The following warnings are used in this user manual and on the packaging: | |||
| DANGER! This symbol in combination with the signal word "Danger" marks a high-risk hazard that if not prevented could result in death or serious injury. | ~ | Alternating current/voltage | |
| Hz | Hertz (supply frequency) | ||
| W | Watts | ||
| WARNING! This symbol in combination with the signal word "Warning" marks a medium-risk hazard that if not prevented could result in death or serious injury. | IPX4 | Protected against splashing water from all directions | |
| CAUTION! This symbol in combination with the signal word "Caution" marks a low-risk hazard that if not prevented could result in minor or moderate injury. | i | NOTE: This symbol in combination with "Note" provides additional useful information. | |
| 4 | Danger - risk of electric shock! | ||
| Warning - danger of scalding! | 40 | Washable at 40 °C | |
| Do not use bleach Do not tumble dry | |||
| Do not iron Do not dry clean | |||
| Safety information Instructions for use | CE | CE mark indicates conformity with relevant EU directives applicable for this product. | |
| CAUTION - Hot surface! | |||
STEAM CLEANER
Introduction
We congratulate you on the purchase of your new product. You have chosen a high quality product. The instructions for use are part of the product. They contain important information concerning safety, use and disposal. Before using the product, please familiarise yourself with all of the safety information and instructions for use. Only use the product as described and for the specified applications. If you pass the product on to anyone else, please ensure that you also pass on all the documentation with it.
Intended use
This product is designed for cleaning indoor surfaces. Do not use it for any other purpose.
This product is only intended for private household use, not for commercial purposes.
The manufacturer accepts no liability for damages caused by improper use.
Scope of delivery
After unpacking the product, check if the delivery is complete and if all parts are in good condition. Remove all packing materials before use.
1x Steam Cleaner
2x Extension tubes
1xFloor nozzle
1xAccessoryadapter
1xUpholstery nozzle
1x Angle nozzle
1xSmall round brush
1xLarge round brush
1x Window squeegee
1x Small cleaning cloth
1x Floor cleaning cloth
1x Funnel
1x Measuring jug
Parts list
Funnel
2 Measuring jug
3Accessory adapter
4 Angle nozzle
Large round brush
6 Small round brush
7Upholstery nozzle
8 Small cleaning cloth
9 Window squeegee
10 Floor nozzle
Floor cleaning cloth
12 2 Extension tubes
13 Steam cleaner
14 On/Off switch
15Tank cap
16 Steam gun
17 Steam outlet
18 Steam trigger
19 Steam setting switch
20 Power plug and power cord
21 Hanging hooks for power cord
22Water tank
23 Power indicator (Red)
24 Steam indicator (Green)
Technical data
Input voltage: 220-240 V\~, 50 Hz
Power consumption: 1500 W
Off mode power
consumption: 0.0 W
Water tank capacity: 800ml
Protection class: I
Ingress protection class: IPX4 (splash proof)

General safety instructions
BEFORE USING THE PRODUCT,
PLEASE FAMILIARISE YOURSELF
WITH ALL OF THE SAFETY
INFORMATION AND
INSTRUCTIONS FOR USE! WHEN
PASSING THIS PRODUCT ON TO
OTHERS, PLEASE ALSO INCLUDE
ALL THE DOCUMENTS!
In the case of damage resulting from non-compliance with these operating instructions the warranty claim becomes invalid! No liability is accepted for consequential damage! In the case of material damage or personal injury caused by incorrect handling or non-compliance with the safety instructions, no liability is accepted!
Children and persons with disabilities
WARNING! RISK OF LOSS OF LIFE OR ACCIDENT TO INFANTS AND CHILDREN!
Never leave children
unsupervised with the packaging material. The packaging material represents a danger of suffocation. Children frequently underestimate the dangers. Always keep children away from the packaging material.
This product can be used by persons with reduced physical, sensory or mental capabilities or lack of experience and knowledge if they have been given supervision or instruction concerning use of the appliance in a safe way and understand the hazards involved.
Children shall not play with the product.
-
Cleaning and user maintenance shall not be made by children without supervision.
-
Keep the product and its cord out of reach of children when it is energized or cooling down.
Intended use
WARNING! Misuse may lead to injury. Use this product solely in accordance with these instructions. Do not attempt to modify the product in any way.
Use the product only on floors that have been well sealed and treated and are impervious to water.
-With any steam power setting: on marble, stone, tile flooring
- With lowest steam power setting and with damp fiber cloth: on laminate, parquet or hardwood flooring
Never use the product
-on untreated or permeable floors,
-on wax polished furniture or floors,
-on carpets with wool content,
-on the frozen windows,
-on leather, synthetic fabrics, velvet or other delicate,
-on steam sensitive materials.
Be careful when using the product on glass under cold environment, as the glass may break.
Use on waxed or some unwaxed floors may result in diminished glossiness.
It can only be used on glass panes that are at least room temperature. Not use on exterior panes/windows in sub-zero temperatures.
Before use: We recommended to perform a material test on an isolated area of the working surface.
Electrical safety
DANGER! Risk of electric shock! Never attempt to repair the product yourself.
In case of malfunction, repairs are to be conducted by qualified personnel only.
WARNING! Risk of electric shock! Do not immerse the product's electrical components in water or other liquids. Never hold the product under running water.
WARNING! Risk of electric shock! Never use a damaged product. Disconnect the product from the power supply and contact your retailer if it is damaged.
WARNING! Risk of injury!
The product has to be unplugged after use and before cleaning or maintaining the product.
Connect the product only to an earthed wall socket.
Always make sure that the power plug is correctly inserted into the wall socket.
The product is not to be used if it has been dropped, if there are visible signs of damage or if it is leaking.
Before connecting the product to the power supply, check that the voltage and current rating corresponds with the power supply details shown on the product's rating label.
Regularly check the power plug and the supply cord for damages. If the supply cord is damaged, it must be replaced by the manufacturer, its service agent or similarly qualified persons in order to avoid a hazard.
Protect the power cord against damages. Do not let it hang over sharp edges, do not squeeze or bend it. Keep the power cord away from hot surfaces and open flames and ensure that nobody can pull on or trip over it unintentionally.
The product must not be left unattended while it is connected to the supply mains.
The liquid or steam must not be directed towards equipment containing electrical components, such as the interior of ovens.
The filling aperture must not be open during use.
Burn hazards
DANGER! Risk of burns!
Do not touch hot surfaces and.
beware of escaping steam.Hold
the product by its handle only.
Steam is very hot. Never put you hands in front of the steam jet.
Before first use
Remove all packaging materials. Check if all parts are complete.
- Accessories
Extension Tubes 12
Assemble the extension hoses if the steam cleaner is to be used to clean floors or difficult to reach areas. To do this, push the open end of a tube into the steam gun until the release button of the steam gun clicks into place (Fig. B). Add one, or two extension tubes if required.
Press in the appropriate release button and pull the tubes apart with a downward movement to take the extension tube off again (Fig. D).
Floor Nozzle 10
- Attach the floor nozzle to the end of the extension tube. Ensure that the nozzle clicks into place on assembly. The floor nozzle is ideal for cleaning washable wall and floor coverings. It may be used with or without the cleaning cloth [11]. However, we recommend using the cloth to protect coverings in the case of sensitive surfaces such as wood or linoleum. Place the floor nozzle on the cleaning cloth and secure the overhanging material under the cleaning cloth clips on the left and right. The cleaning cloth can be secured in place (Fig .E).
① NOTE:
The floor nozzle is delivered with a separate connector for packaging reasons. Assemble the connector as illustrated.
Accessory Adaptor 3
The steam cleaner has a range of very varied attachment nozzles to enable the most effective and thorough cleaning of different surfaces. First assemble the accessory adaptor so that these attachments can be attached to the steam cleaner hose. The accessory adaptor can be attached directly to both the steam gun and the end of one or two extension tubes.
Ensure that the adaptor is firmly pushed on until it clicks into place. Press in the appropriate release button and pull apart with a downward movement to take the adapter off again.
The accessory adaptor may be used on its own for cleaning or may also be fitted with angle nozzle 4 large round brush 5 small round brush 6, upholstery nozzle 7. This accessory adaptor is attached using the bayonet principle. Push the nozzle into the accessory adaptor and give it a firm quarter turn in the direction of the arrow stamped on the nozzle.
Reverse the sequence to take the accessory adaptor off again: twist the nozzle a quarter of a turn in the opposite direction to the arrow and pull it off with a downward movement.
Angle nozzle 4
Simply push the jet nozzle firmly into the accessory adaptor to attach it. This nozzle makes it possible to clean hard to reach places such as corners, joints and toilets with ease. The jet nozzle may be removed by pulling it off with a downward movement.
Large / Small Round Brush 5 6
The two brush attachments are pushed firmly onto the accessory adaptor in the same way as the jet nozzle.
Even the most stubborn dirt can be removed, e.g. from blinds, central heating radiators, valves, etc, using the small nylon brush. The larger nylon brush is suitable for heavy staining on less sensitive materials such as stainless steel or stone. The brush nozzles are removed by simply pulling them off with a downward movement.
Upholstery nozzle / Window squeezegee 9
The Upholstery nozzle consists of a right-angled steam attachment onto which the window squeezegee can be attached. Push the right-angled steam attachment firmly onto the accessory adaptor. Pull the cotton cover over the nozzle for more thorough cleaning and to protect the work surface. Fix the window cleaner with the rubber blade to the right-angled steam attachment if windows, mirrors or tiles are to be cleaned.
Caution:
Glass may crack if subjected to thermal shock! Pre-heat areas of glass prior to steam cleaning by spraying steam in a wider arc from a distance of 20 - 25cm . Slowly reduce the distance to 10 - 15cm to heat the glass up further.
Operation
The product enters off mode when on/off switch [14] in position.
Filling the water Tank
DANGER! Risk of electric shock!
Before filling the water tank: Disconnected the power plug from mains socket.
Caution:
Always test the steam cleaner first on inconspicuous or invisible areas of the surfaces or fabrics to be cleaned to check their tolerance to hot steam.
- Steam may result in bleaching of painted/ varnished wood.
- Steam may discolour shiny plastics.
- Acrylic, velvet and linen react very sensitively to the temperature of steam.
- Do not use the steam cleaner on Dralon fibres without first having carried out a suitability test on a concealed area. For understandable reasons, the manufacturer cannot be held responsible for damage to objects, materials, people, animals or plants that occurs due to unsuitable use of hot steam or due to improper use of the appliance.
Only fill with tap water or distilled water without additives of any kind, e.g. perfume, cleaning agents alcohol, as they could damage the machine and make it dangerous to use. It is advisable to use distilled water to prevent limescale deposits if your water is very hard (over 2.5 mmol/l or 21 dH). Otherwise boil the water first to extend the appliance's service life.
Caution:
Do not exceed the maximum quantity of 0.8 litres when filling the tank!
Screw the tank cap firmly back on by turning it clockwise under pressure.
Tip:
The heating up time will be shortened if warm water is used when filling.
- Connection to Mains Supply
Plug the steam cleaner's mains plug into a proper installed socket (Fig. J).
Switch on the O/I switch 14 on the back of the machine in position I (Fig F).
The Power indicc23 lights up as soon as the product has been plugged in and switched on. The operating temperature is reached after approx. 6.5 minutes and the Steam indicator 24 lights up (Fig. K). The appliance is now ready for use.
Using the Steam Cleaner
Warning:
Never aim the steam outlet of the steam gun at people, animals, plants or electrical systems (e.g. oven or electric shock)!
Release the locking device (child-proof device) by pushing the pin from the right side towards middle side or left side (Fig. A). Hot steam now escapes if the steam button is operated. First of all, hold the steam gun over an old cloth to absorb any initial spray water. Press the steam trigger until the steam is emitted evenly. Cleaning can begin now.
① NOTE:
Residual steam continues to escape for a few seconds after switching off the steam function.
Do not aim the steam outlet at one point too long. Loosen the dirt by moving the steam jet backwards and forwards. The flow rate of the steam emitted can be regulated by turning the steam controller and can be adjusted to the level of dirtiness. Push the pin to middle for more steam and left for less steam. (Fig. A)
① NOTE:
The product is fitted with an overheating cut-out, to prevent overheating. Disconnect from the mains immediately by removing the plug. The appliance may be operated again after a 30-minute cooling period.
Do not tip or tilt the appliance by more than 45^ during use and ensure that the appliance always stands on a firm base. Do not leave the machine unsupervised while switched on and if necessary use the childproof lock to secure the steam switch. To do this, press the steam button on the steam gun, push the pin towards the right. (Fig. A)
Warning:
The housing and accessories become hot during operation! Allow the appliance to cool down before changing the accessories. Never open the tank cap while the steam cleaner is switched on as the tank is under pressure!
- Topping Up With Water
The tank must be topped up if the steam flow emitted star to decrease. Remove the main plug from the socket. The green operating pilot lamp goes off. Press the steam button on the steam gun to release the remaining pressure and then lock the gun. Allow the appliance to cool down. Then by turning the tank cap anti-clockwise, you can put water inside.
Warning:
Hot steam may escape on opening!
There is a risk of burns from the cap thread and the tank!
Top up with water using the measuring jug and funnel (see Filling the Water Tank), then carefully close the tank cap again. The steam cleaner can now be plugged in again and switched on. The product is ready for use as soon as the heating pilot lamp goes off.
Ending Operation and Storage
Remove the main plug from the socket. The power indicator 23 goes off. Press the steam button on the steam gun (Fig. L) to release the remaining pressure.
Secure the steam gun by pushing the locking pin towards the right side and allow the appliance to cool down.
Empty the water tank so that no deposits can settle.
Do not close the water tank until it has dried out completely. The steam cleaner must have cooled down completely before being put away. Store the appliance so that it is out of the reach of children. The extension tube with assembled floor nozzle may be inserted in the parking holder on the back of appliance for storage purposes or for short breaks whilst working.
- Cleaning and Care
- Cleaning the main unit
DANGER! Risk of electric shock!
Disconnect the power plug 20 from the wall socket before cleaning the product.
WARNING! Do not immerse the product's electrical components in water or other liquids.
Never hold the product under running water.
Wipe down the product with a slightly damp cloth.
Do not let any water or other liquids enter the product interior.
- Do not use any abrasive, aggressive cleaners or hard brushes to clean the product.
After cleaning: Let all parts dry completely.
- Cleaning the accessories
Clean the accessories in warm, soapy water.
After cleaning: Let all accessories dry completely.
- Cleaning the fiber cloths and fiber cover
The small cleaning cl 8 and the floor cleaning cloth 11 can be hand-washed in water with temperature up to 40^
After cleaning: Let the small cleaning cloth and the floor cleaning cloth dry completely.
- Removing limescale
If the steam power reduces drastically, it may be needed to remove the limescale from the product/accessories:
Switch off the product. Fill the water t 22 with a mixture of tap water and vinegar (ratio of 2:1).
Install the accessory you wish to remove the limescale from (if any).
- Secure the position of the product to ensure that the steam is aimed away from the surrounding objects and surfaces.
Turn on the product. Operate the product until all the mixture is used up.
Replacement parts / Accessories
Customers can obtain compatible replacement parts and accessories via www.optimex-shop.com.
Orders can only be placed and processed online.
- Contact the Lidl service hotline (see "Service") for further information.
8 Small cleaning cloth
Floor cleaning cloth
Storage
Store the product in the original packaging when it is not in use.
Store the product at a dry location out of the reach of children.
Store the product with an emptied water t[22] only.
Evenly roll up the power c20 on the hanging hooks 21.
Disposal
The packaging is made of environmentally friendly materials, which may be disposed of through your local recycling facilities.

Observe the marking of the packaging materials for waste separation, which are marked with abbreviations (a) and numbers (b) with following meaning: 1-7: plastics/20-22: paper and fibreboard/80-98: composite materials.
Product:
The product incl. accessories, manual and packaging materials are recyclable and are subject to extended producer responsibility.
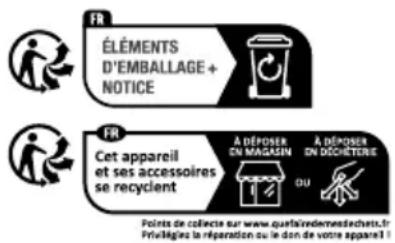
Dispose them separately, following the illustrated Info-tri (sorting information), for better waste treatment. The Triman logo is valid in France only.

Contact your local refuse disposal authority for more details of how to dispose of your wornout product.

To help protect the environment, please dispose of the product properly when it has reached the end of its useful life and not in the household waste. Information on collection points and their opening hours can be obtained from your local authority.
Warranty
The product has been manufactured to strict quality guidelines and meticulously examined before delivery. In the event of material or manufacturing defects you have legal rights against the retailer of this product. Your legal rights are not limited in any way by our warranty detailed below.
The warranty for this product is 3 years from the date of purchase. The warranty period begins on the date of purchase. Keep the original sales receipt in a safe location as this document is required as proof of purchase.
Any damage or defects already present at the time of purchase must be reported without delay after unpacking the product.
Should the product show any fault in materials or manufacture within 3 years from the date of purchase, we will repair or replace it - at our choice - free of charge to you. The warranty period is not extended as a result of a claim being granted. This also applies to replaced and repaired parts.
This warranty becomes void if the product has been damaged, or used or maintained improperly.
The warranty covers material or manufacturing defects. This warranty does not cover product parts subject to normal wear and tear, thus considered consumables (e.g. batteries, rechargeable batteries, tubes, cartridges), nor damage to fragile parts, e.g. switches or glass parts.
Warranty claim procedure
To ensure quick processing of your claim, observe the following instructions:
Make sure to have the original sales receipt and the item number (IAN 467373_2404) available as proof of purchase.
You can find the item number on the rating plate, an engraving on the product, on the front page of the instruction manual (bottom left), or as a sticker on the rear or bottom of the product.
If functional or other defects occur, contact the service department listed below either by telephone or by e-mail.
Once the product has been recorded as defective you can return it free of charge to the service address that will be provided to you. Ensure to enclose the proof of purchase (sales receipt) and a short, written description outlining the details of the defect and when it occurred.
Service
GB Service Great Britain
Tel.:08000569216
E-Mail: owim@lidl.co.uk
IE Service Ireland
Tel.:1800200736
E-Mail: owim@lidl.ie
C∈IPX4
Consummation electrique