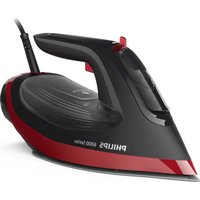
DST6130 - Iron PHILIPS - Free user manual and instructions
Find the device manual for free DST6130 PHILIPS in PDF.

 FR
FR
 AZ
AZ
 BG
BG
 CS
CS
 DA
DA
 DE
DE
 EL
EL
 EN
EN
 ES
ES
 ET
ET
 FI
FI
 HU
HU
 HY
HY
 ID
ID
 IT
IT
 KA
KA
 KK
KK
 KO
KO
 KY
KY
 LT
LT
 LV
LV
 MK
MK
 NL
NL
 NO
NO
 PL
PL
 PT
PT
 RO
RO
 RU
RU
 SK
SK
 SL
SL
 SQ
SQ
 SV
SV
 TG
TG
 TH
TH
 TK
TK
 TR
TR
 UK
UK
 UZ
UZ
 VI
VI
 ZH
ZH
| Product type | Steam iron |
| Brand | Philips |
| Model | DST6130 |
| Ironing technology | OptimalTEMP (automatic temperature adjustment) |
| Water tank | Capacity up to MAX mark |
| Steam functions | ECO, 2 clouds, 3 clouds, pressing effect |
| Automatic shut-off | Yes, after 2 minutes of inactivity on the soleplate or heel |
| Anti-calc function | Calc-Clean |
| Soleplate type | Precision soleplate |
| Power cord | With cord rewind |
| Dry ironing | Yes, steam-free selector |
| Steam ironing | Yes, adjustable |
| Vertical use | Yes, for steaming hanging clothes |
| Indicator light | Indicates heating and automatic shut-off |
| Cleaning | Damp cloth, avoid abrasive products |
| Recommended descaling | Once a month with Calc-Clean function |
| Safety | Automatic shut-off, do not use additives in water |
| Power supply | Grounded mains socket |
Frequently Asked Questions - DST6130 PHILIPS
User questions about DST6130 PHILIPS
0 question about this device. Answer the ones you know or ask your own.
Ask a new question about this device
Download the instructions for your Iron in PDF format for free! Find your manual DST6130 - PHILIPS and take your electronic device back in hand. On this page are published all the documents necessary for the use of your device. DST6130 by PHILIPS.
USER MANUAL DST6130 PHILIPS
Using the appliance 5
Type of water to use 5
OptimalTemp technology 5
Filling the water tank 6
Preparing for use ____ 7
No steam/Dry ironing 8
ECO setting 8
Two steam clouds setting 8
Three steam clouds setting 9
Steam boost 9
Auto shut off 9
Cleaning and maintenance 11
Calc-Clean 12
Storage 14
Trouble shooting 16
Introduction
Congratulations on your purchase and welcome to Philips! To fully benefit from the support that Philips offers, register your product at www.philips.com/welcome.
Product overview
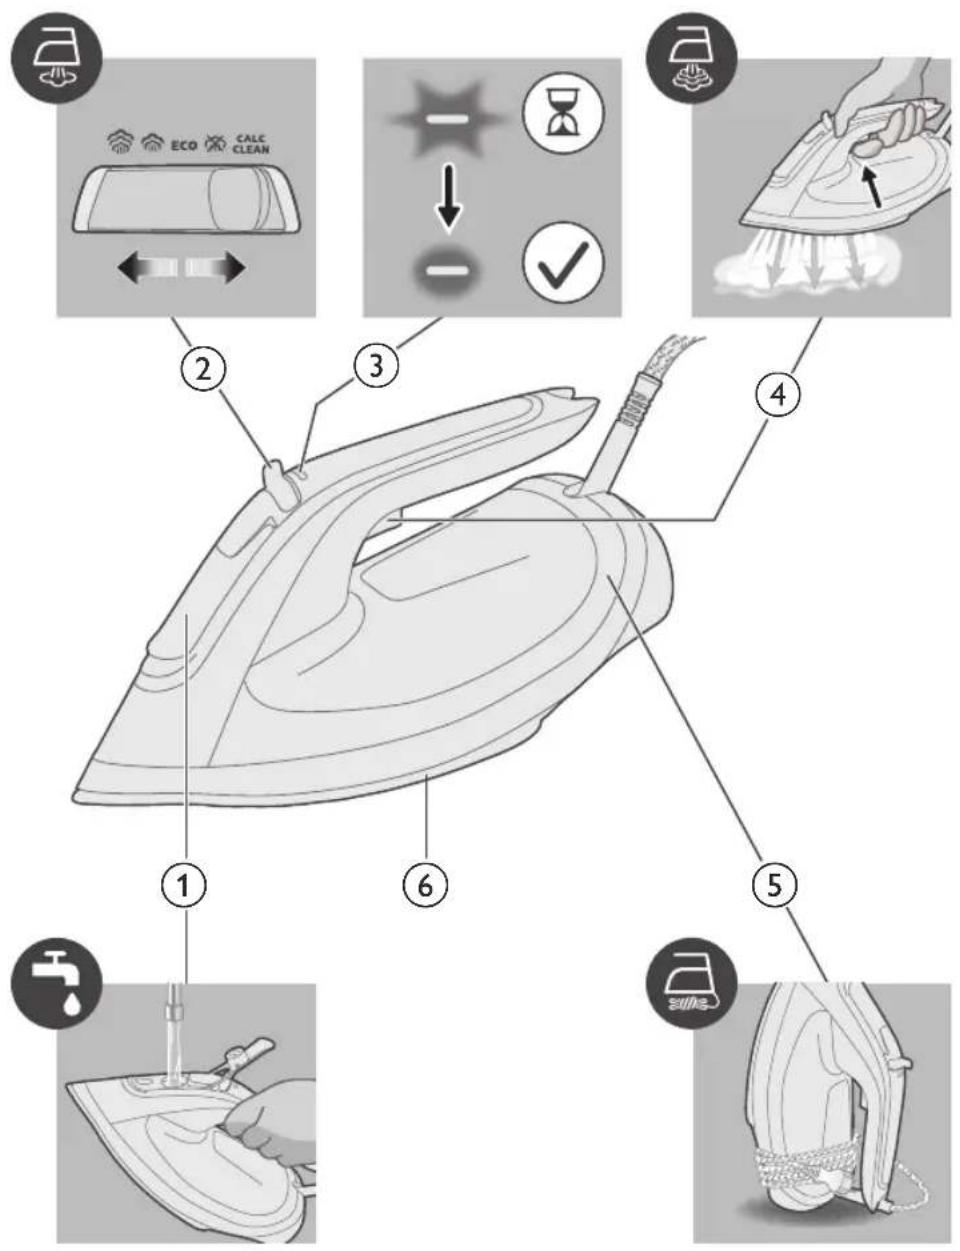
1 Water tank lid
2 Steam selector
3 Indicator light
4 Steam boost trigger
5 Cord winding
6 Soleplate
Using the appliance
Type of water to use
Note: The iron may give off some steam when you use it for the first time. This stops after a short while.
The appliance is suitable to be used with tap water. However, if you live in an area with hard water, we recommend that you mix an equal amount of tap water with distilled or demineralized water. This will prevent fast scale build up and prolong the lifetime of the appliance.
Do not add perfume, water from the tumble dryer, vinegar, starch, descaling agents, ironing aids, chemically descaled water or other chemicals, as they may cause water spitting, brown staining or damage to your appliance.
OptimalTemp technology
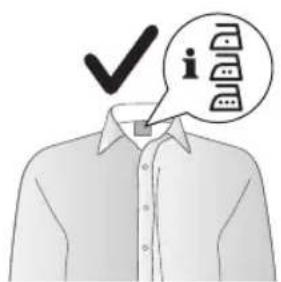
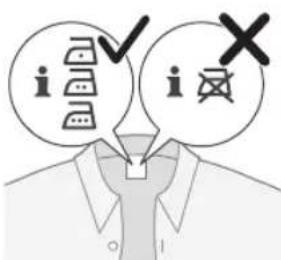
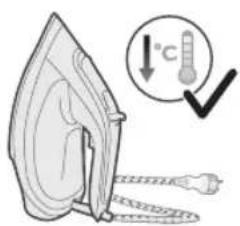
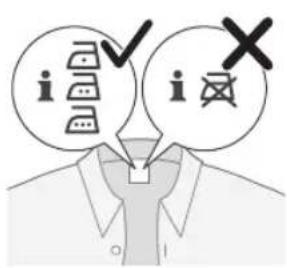
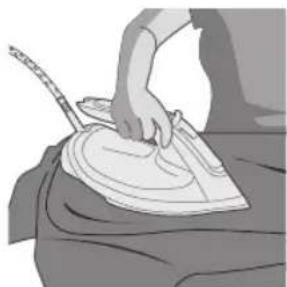
The OptimalTemp technology enables you to iron all types of ironable fabrics, in any order, without adjusting the iron temperature setting.
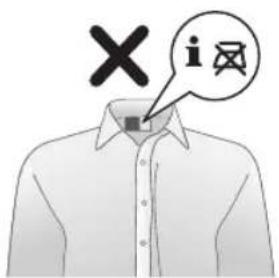
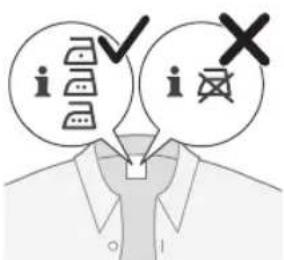
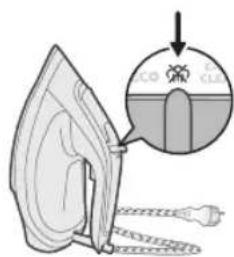
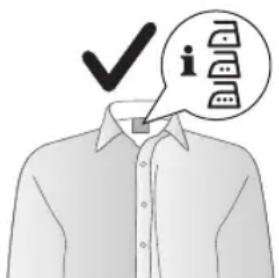
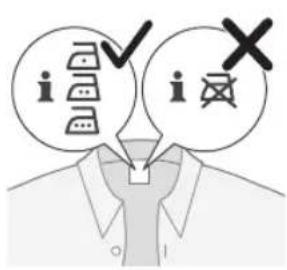
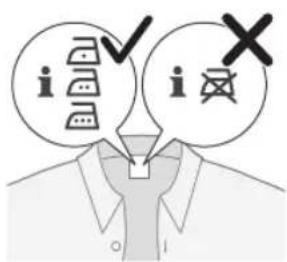
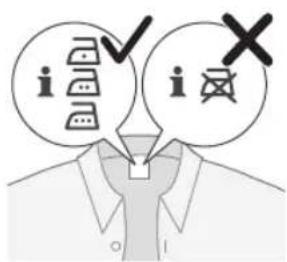
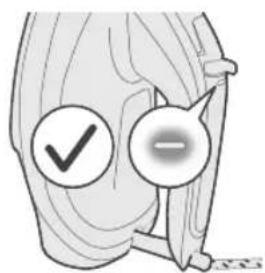
Fabrics with these symbols are ironable, for example linen, cotton, polyester, silk, wool, viscose and rayon.
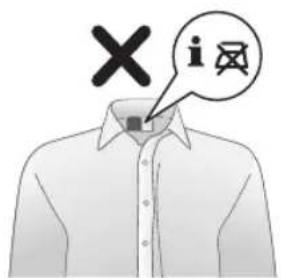
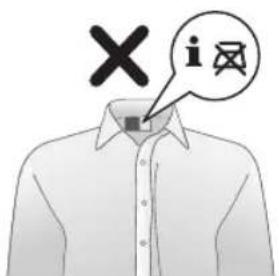
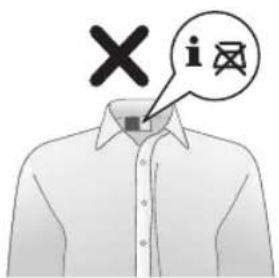
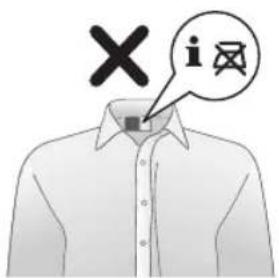
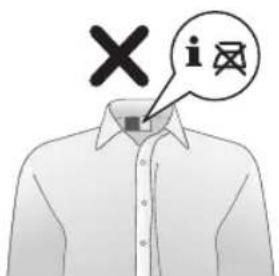
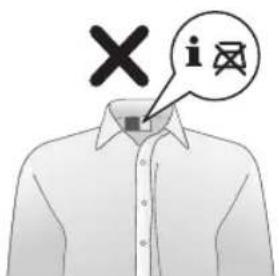
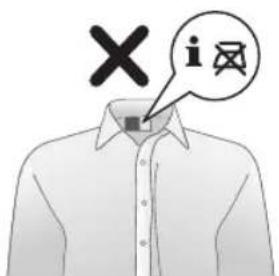
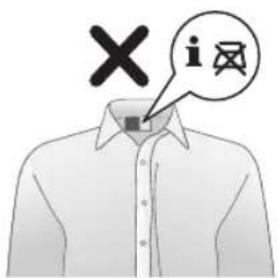
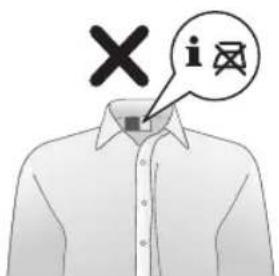
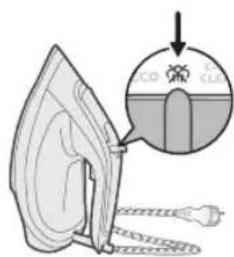
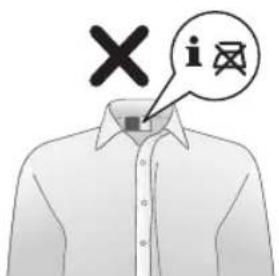
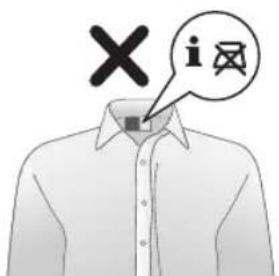
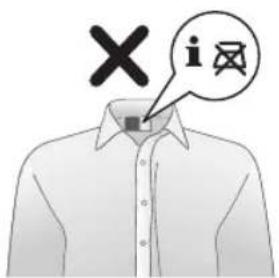
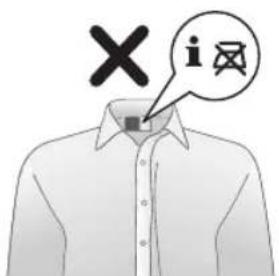
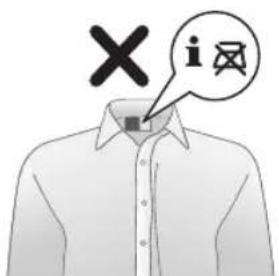
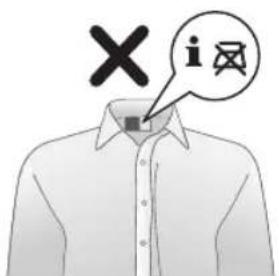
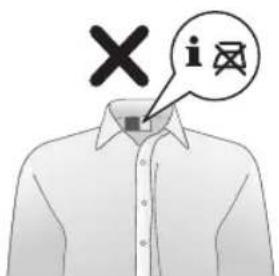
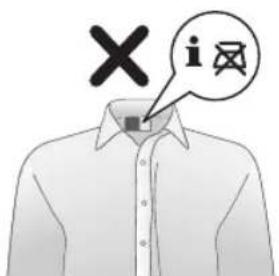
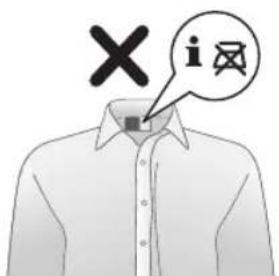
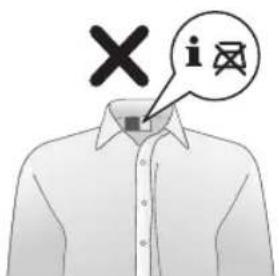
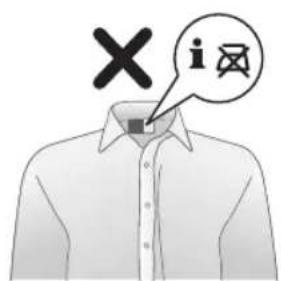
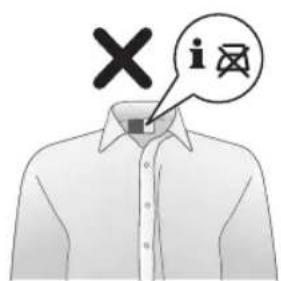
Fabrics with this symbol are not ironable. These fabrics include synthetic fabrics such as Spandex or elastane, Spandex-mixed fabrics and polyolefins (e.g. polypropylene), but also prints on garments.
6 English
Filling the water tank
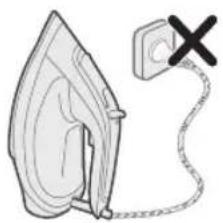
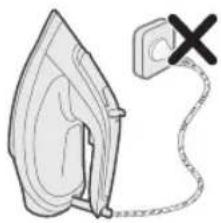
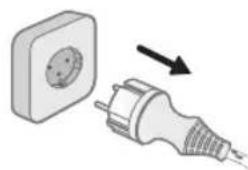
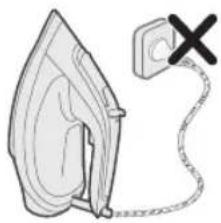
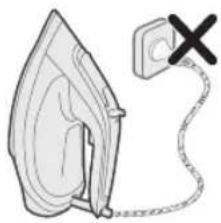
1 Do not plug in the iron.
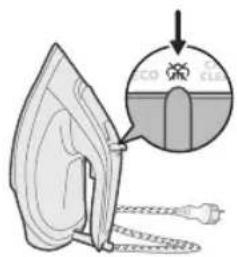
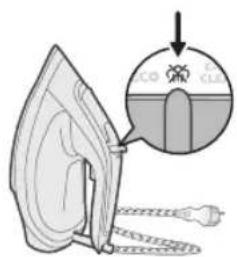
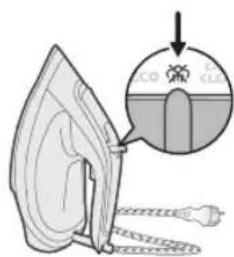
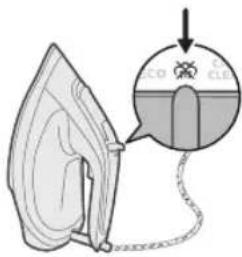
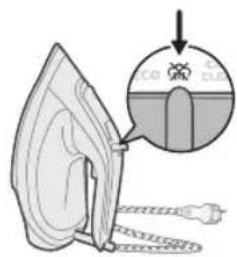
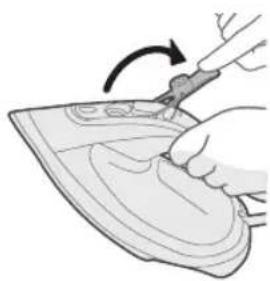
2 Slide the steam selector to the right to select no steam mode (dry ironing)
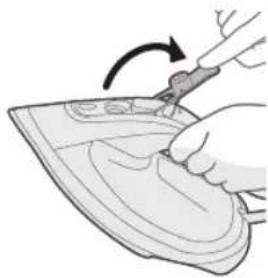
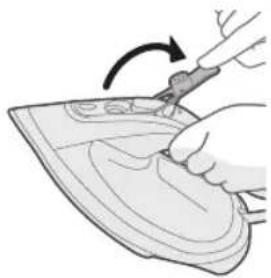
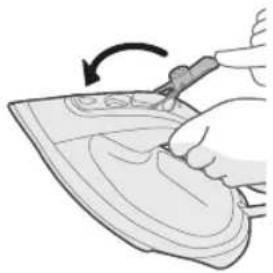
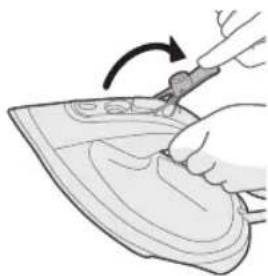
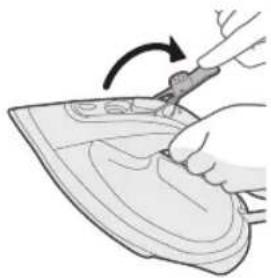
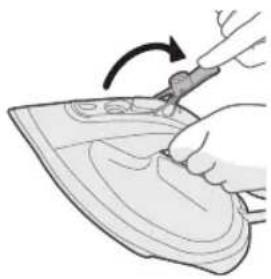
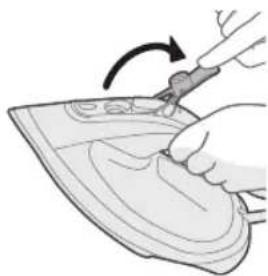
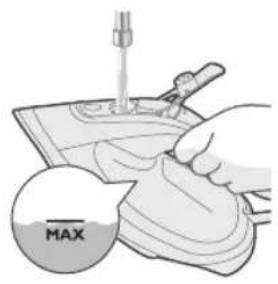
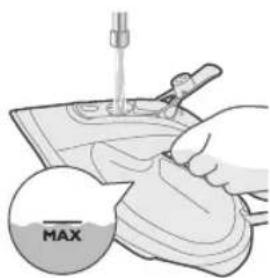
3 Flip open the water tank lid.
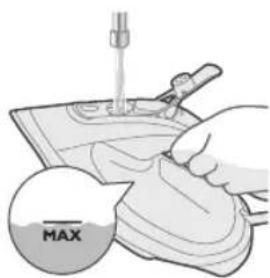
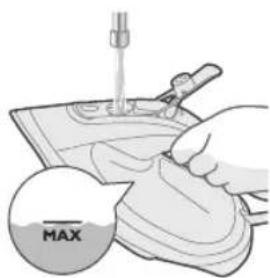
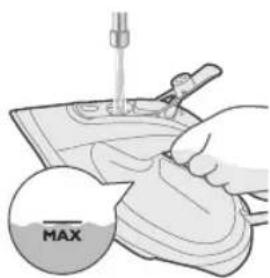
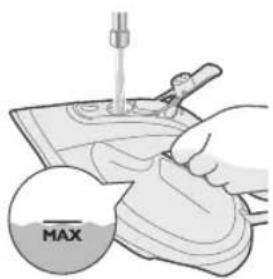
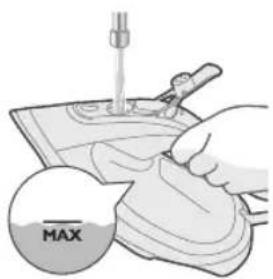
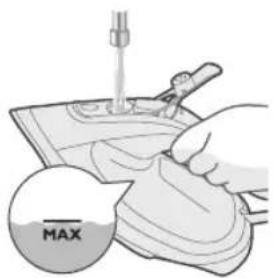
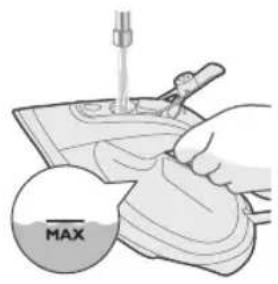
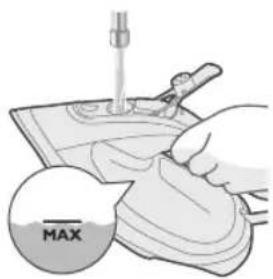
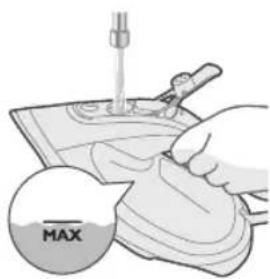
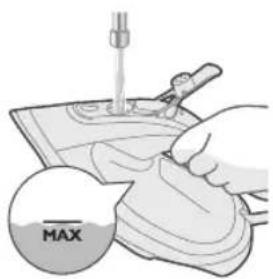
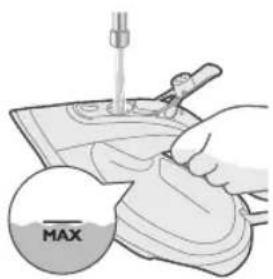
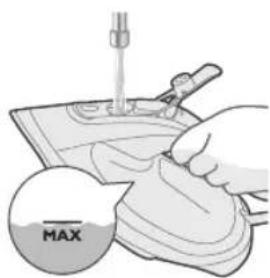
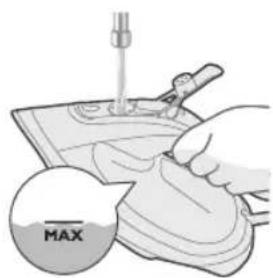
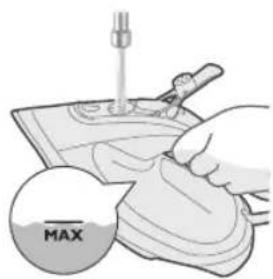
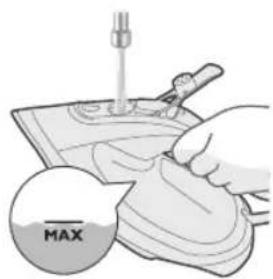
4 Fill water tank up to the MAX indication mark. Do not add any additives like perfume, fragrances, soap or vinegar.
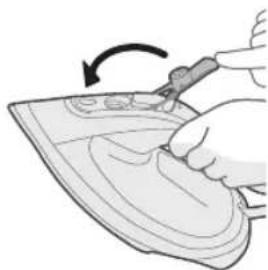
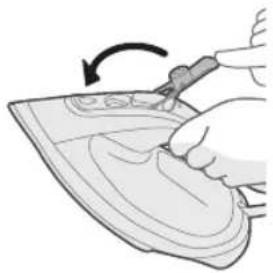
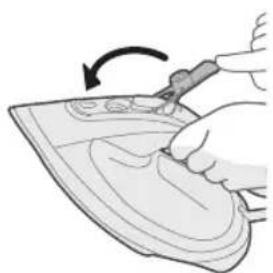
5 Close the water tank lid firmly.
Preparing for use
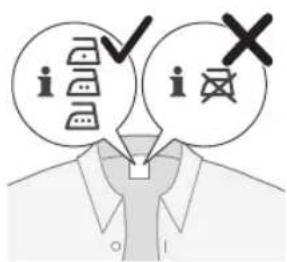
Smoke can be visible during the first use, and it is normal. This ceases after a short while.
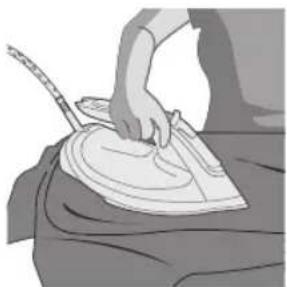
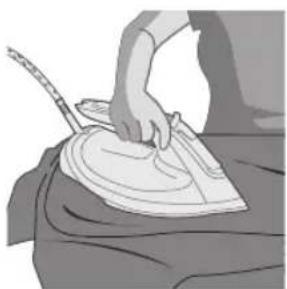
1 Check the garment label to ensure that the fabric is ironable.
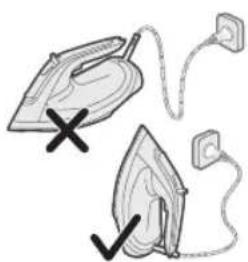
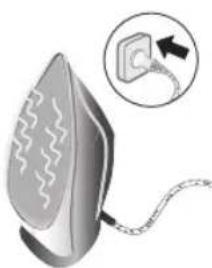
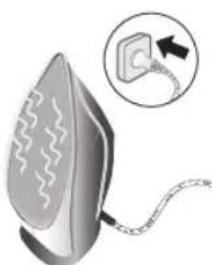
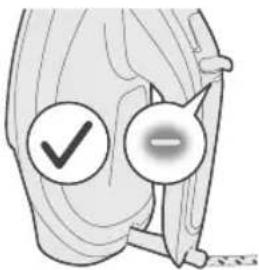
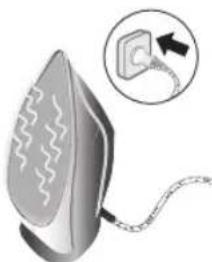
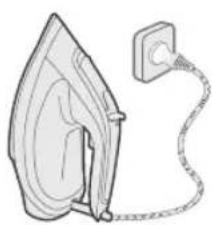
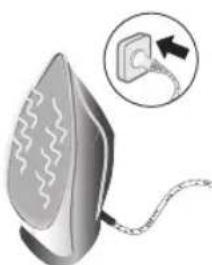
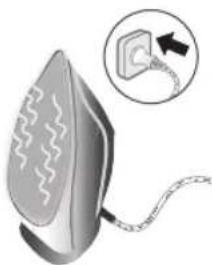
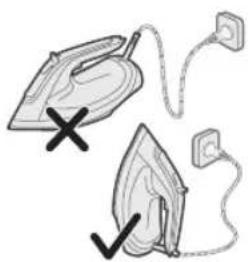
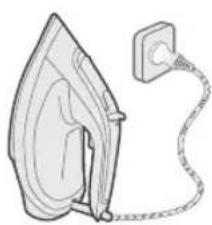
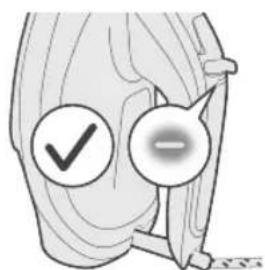
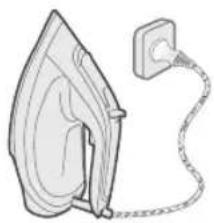
2 Insert the plug into an earthed socket and allow the iron rest on its heel. If using an extension plug, ensure that the power rating of the extension plug is suitable for the iron.
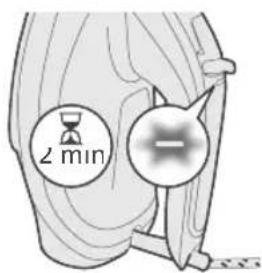
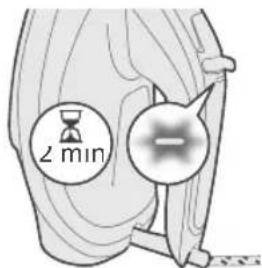
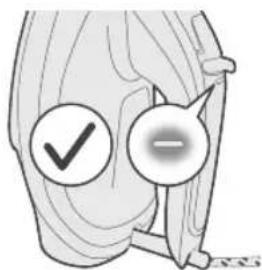
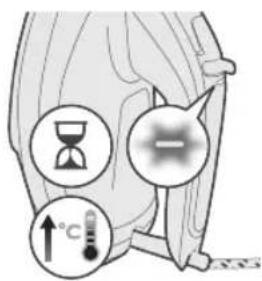
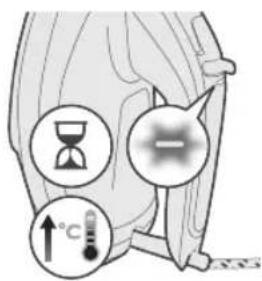
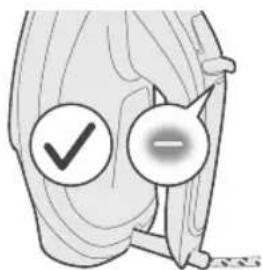
3 Wait for the iron to heat up. The indicator light will breathe/blink slowly while it is heating up.
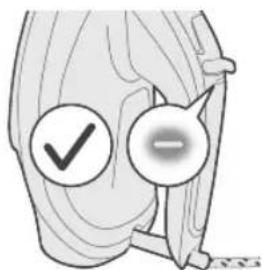
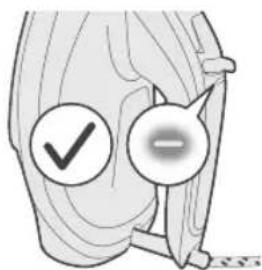
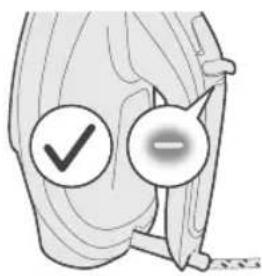
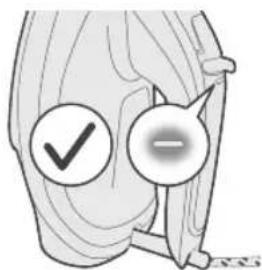
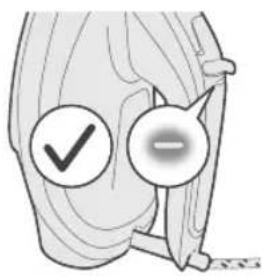
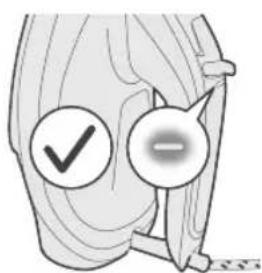
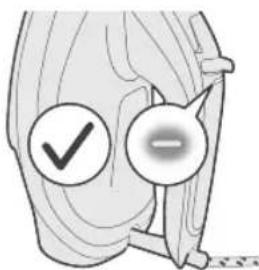
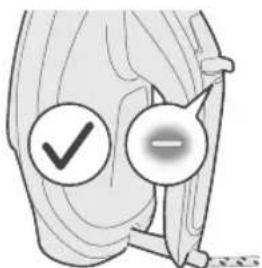
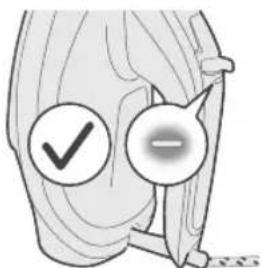
4 Once the iron is ready to be used, the indicator light will remain steadily lit.
8 English
No steam/Dry ironing
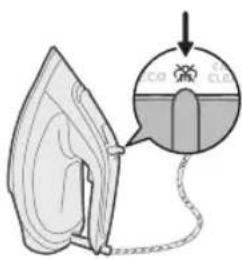
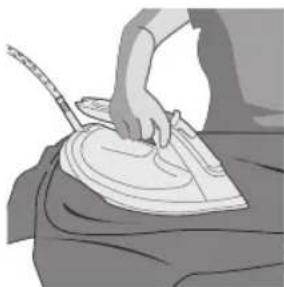
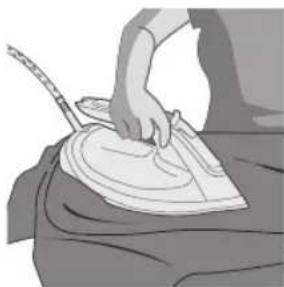
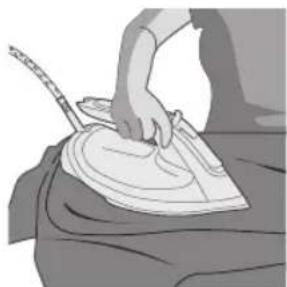
1 Set the steam setting to no steam mode
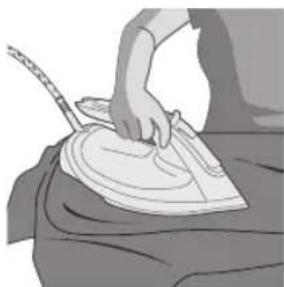
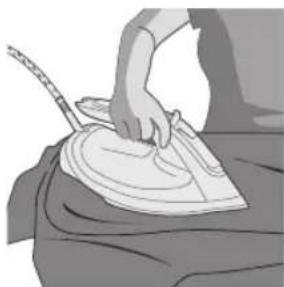
2 After a short while, steam will cease during ironing.
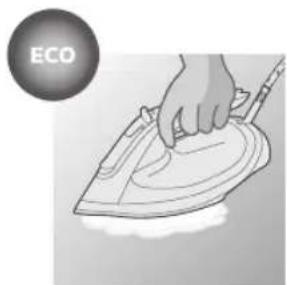
ECO setting
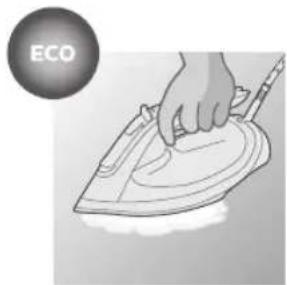
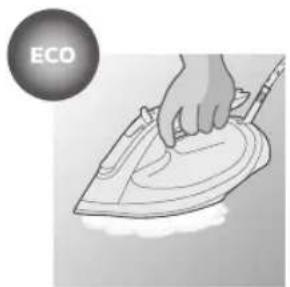
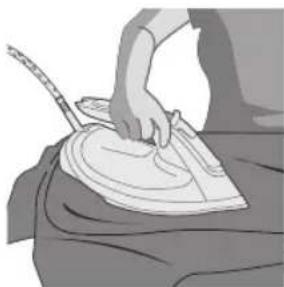
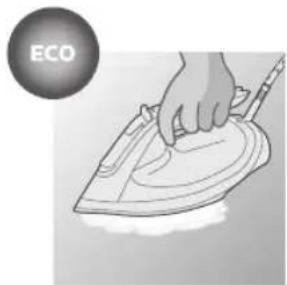
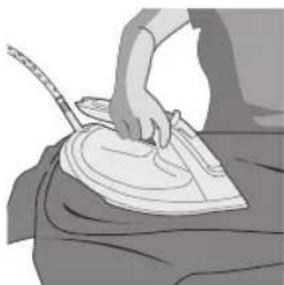
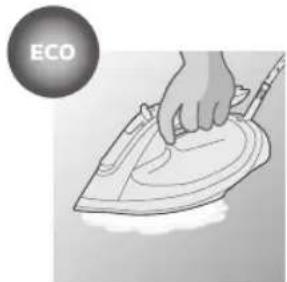
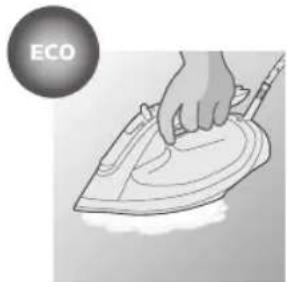
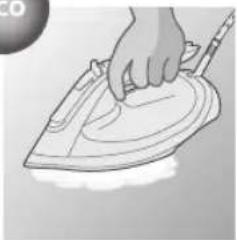
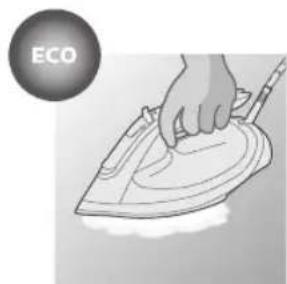
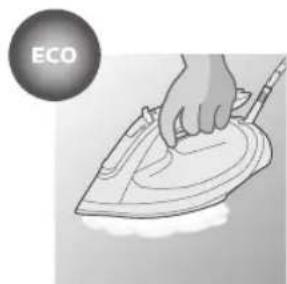
ECO: Minimum steam is delivered continuously and is suitable for garments with less creases. This setting also saves energy.
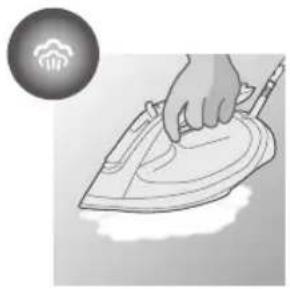
Two steam clouds setting
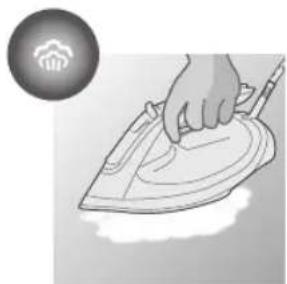
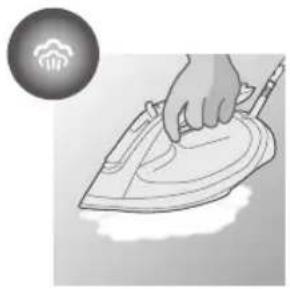
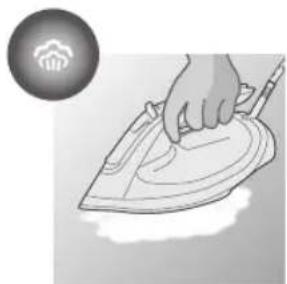
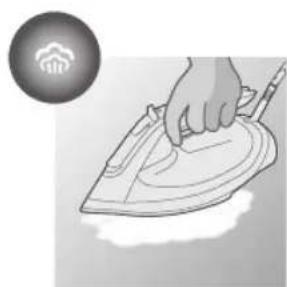
: More steam is delivered continuously for garments with tougher creases.
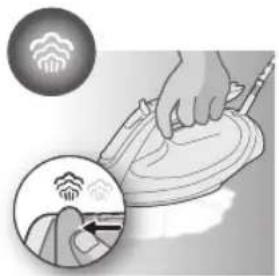
Three steam clouds setting
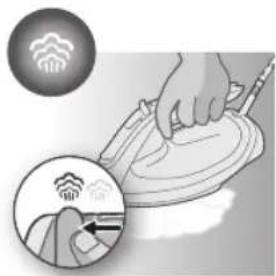
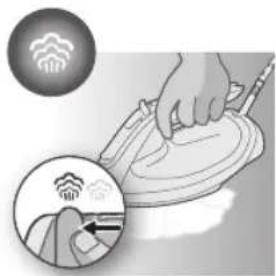
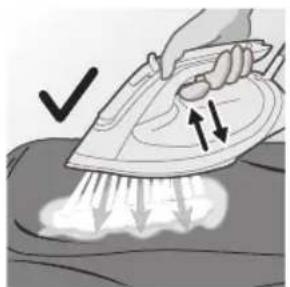
: Push and hold the steam selector for maximum steam that is delivered continuously to tackle stubborn creases.
Steam boost
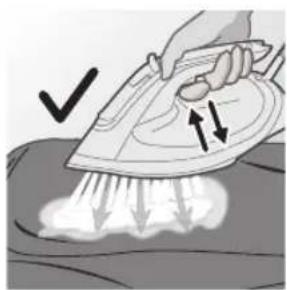
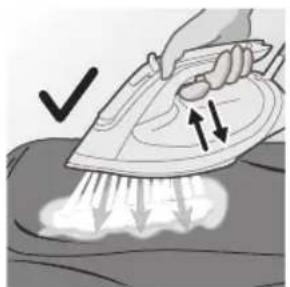
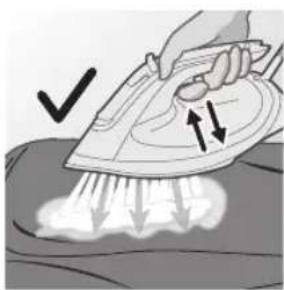
1 Press and release the steam boost trigger for a powerful shot of steam to remove stubborn creases.
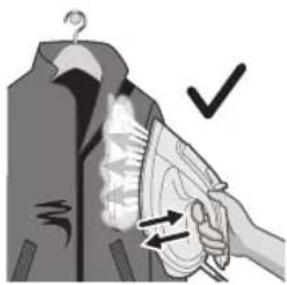
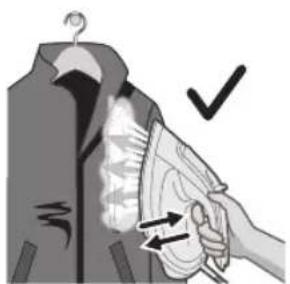
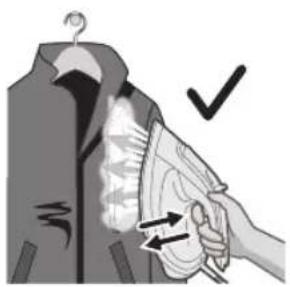
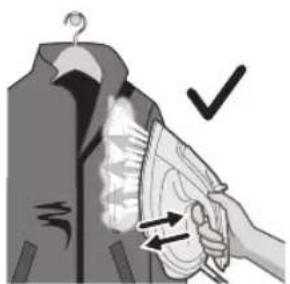
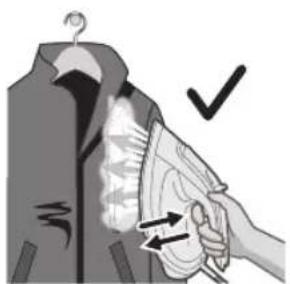
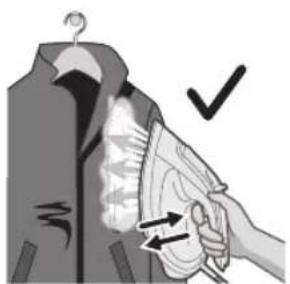
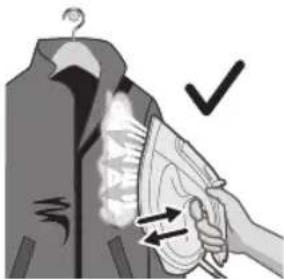
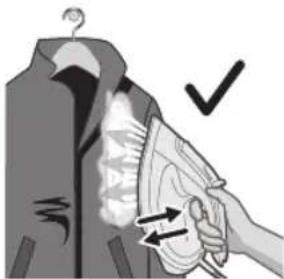
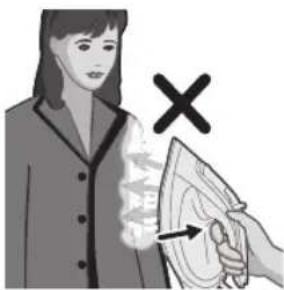
2 Press and release the steam boost trigger in the vertical position to remove creases from hanging garments using the steam boost. Holding down the steam boost trigger in the vertical position will not deliver constant steam.
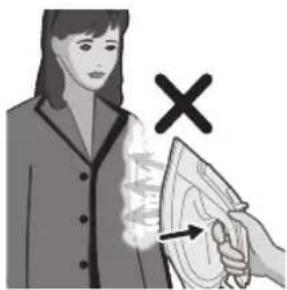
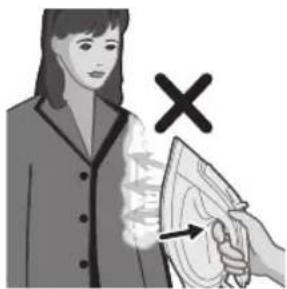
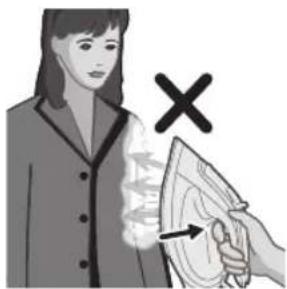
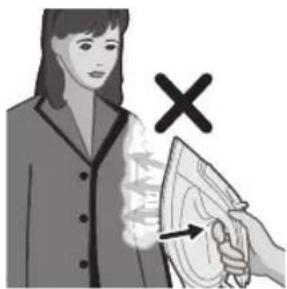
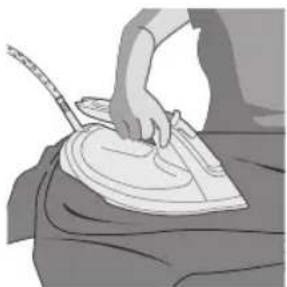
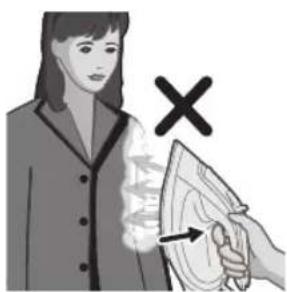
3 Do not position the iron towards yourself or others.
Auto shut off
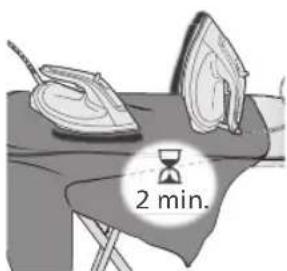
1 To give you a peace of mind, the iron is able to cool down on its own if it is left unattended for a period of time.
English
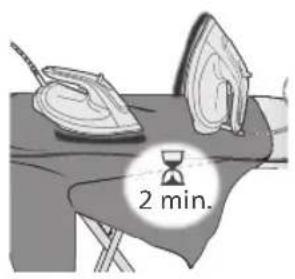
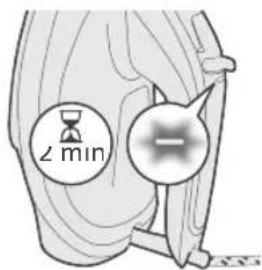
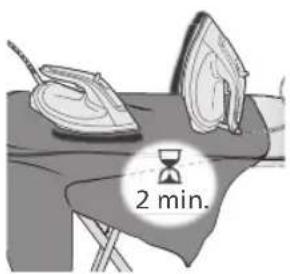
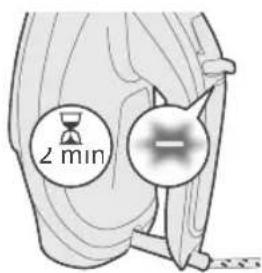
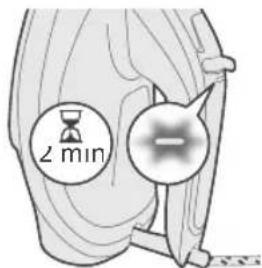
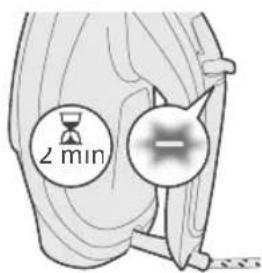
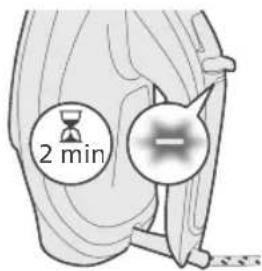
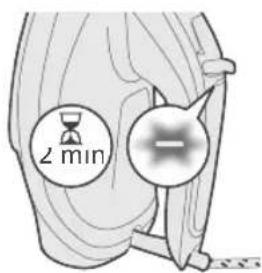
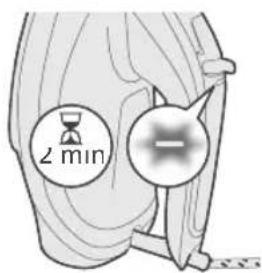
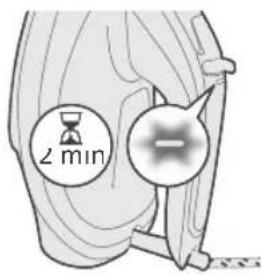
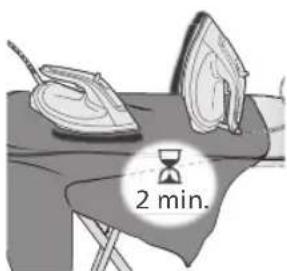
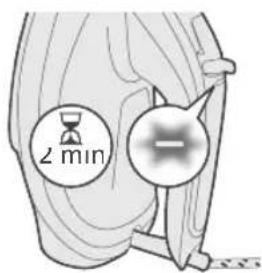
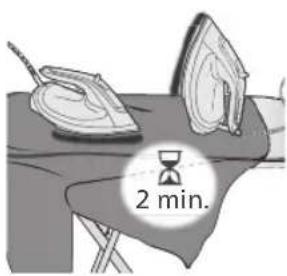
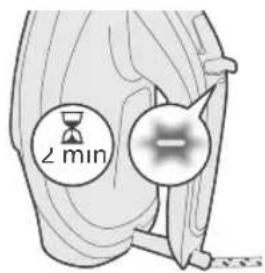
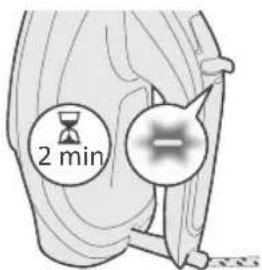
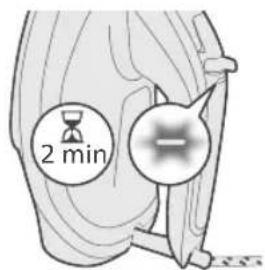
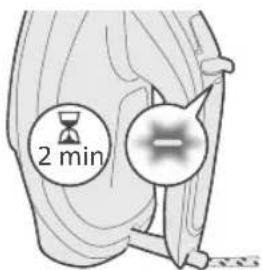
2 When the iron is not in use for more than 2 minutes resting on its soleplate or 2 minutes resting on its heel/ base, the iron will enter auto shut off mode.
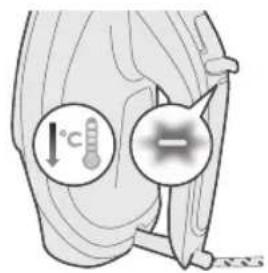
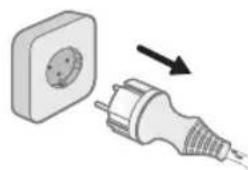
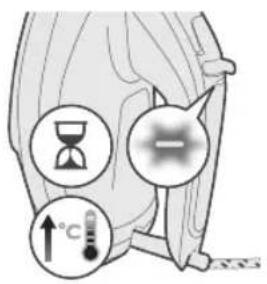
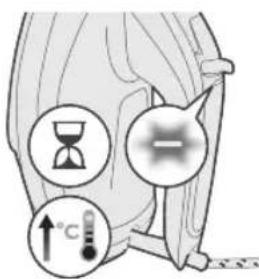
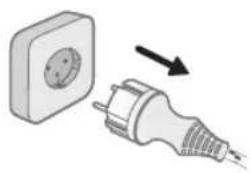
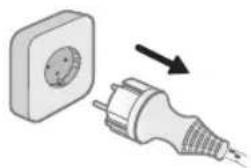
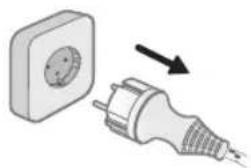
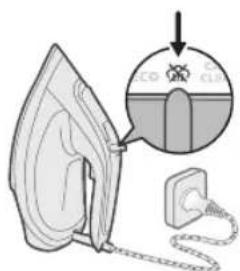
3 The temperature of the iron will decrease in auto shut off mode. The indicator light will also blink quickly to indicate the iron is at auto-off status. To completely switch off the iron, plug out the iron/ switch off the mains plug.
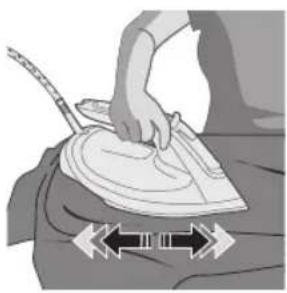
4 Picking up or moving the iron will reactivate it.
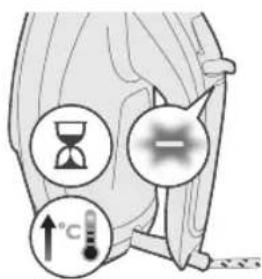
5 The indicator light will start to breathe/blink slowly, indicating that the iron is heating up again.
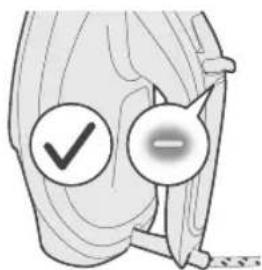
6 Once the indicator light remains steadily lit, the iron is ready for use.
Cleaning and maintenance
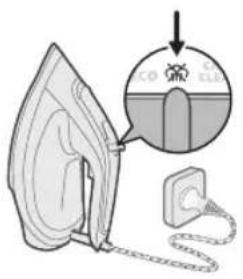
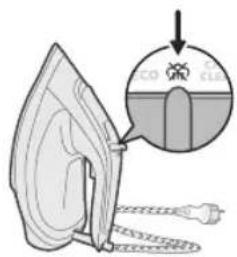
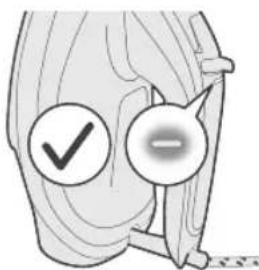
1 Switch the steam setting to no steam mode (dry ironing) on the steam selector.
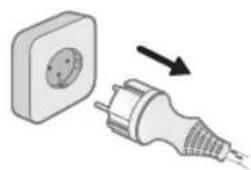
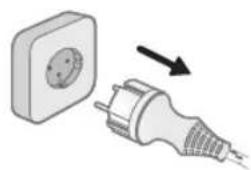
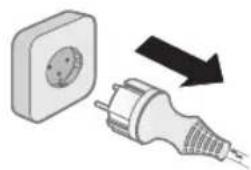
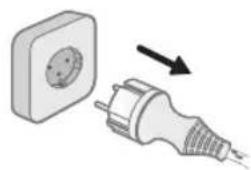
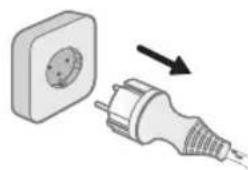
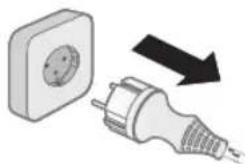
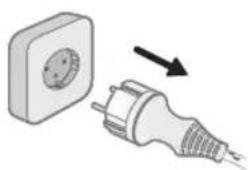
2 Ensure the iron is not plugged in.
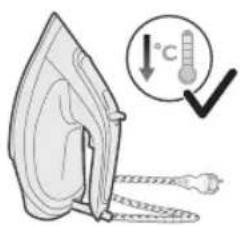
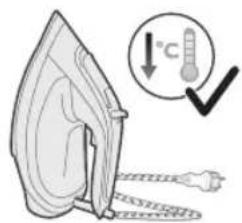
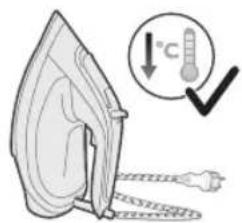
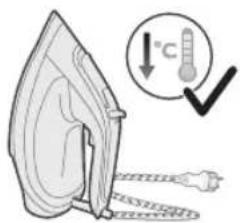
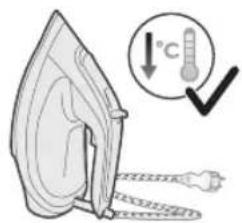
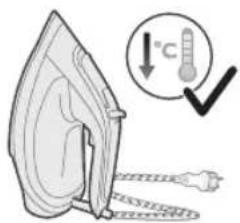
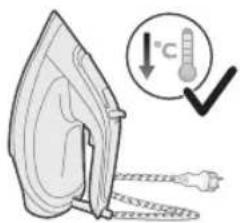
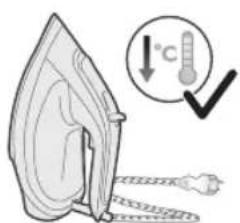
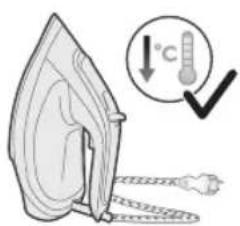
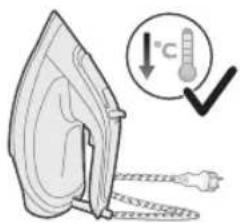
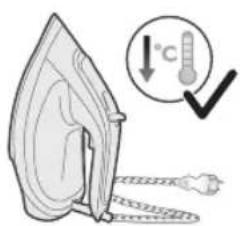
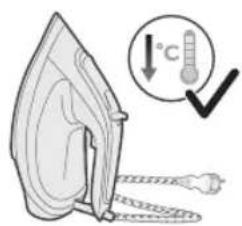
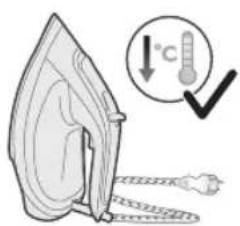
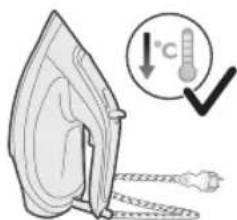
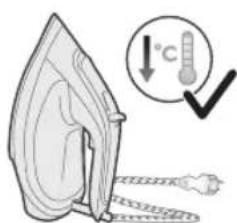
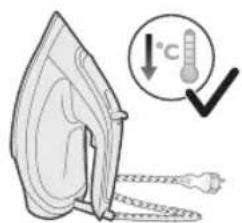
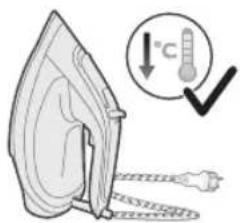
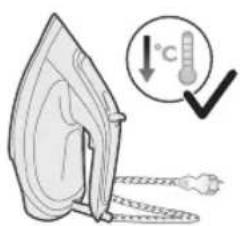
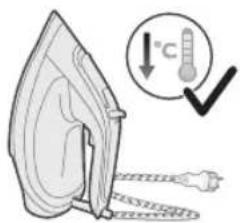
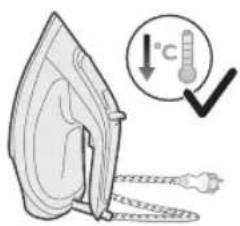
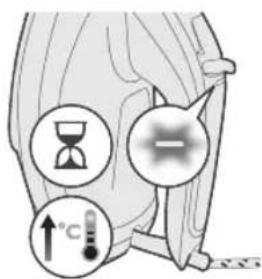
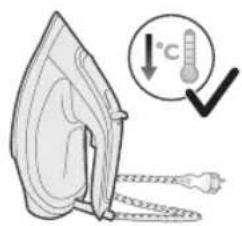
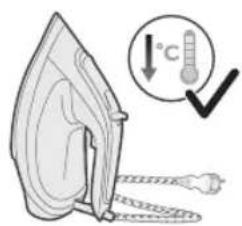
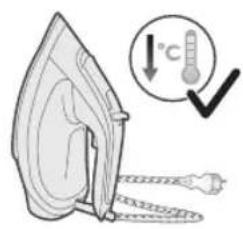
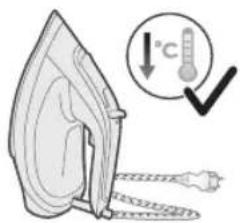
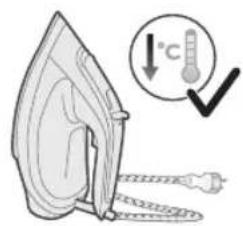
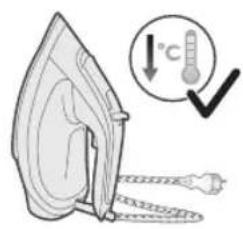
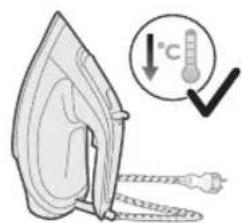
3 Ensure the iron has cooled down.
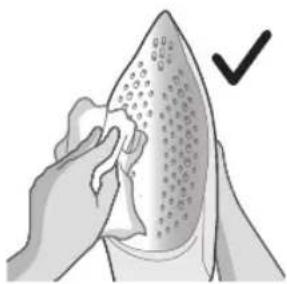
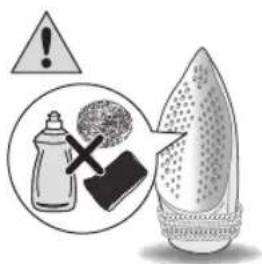
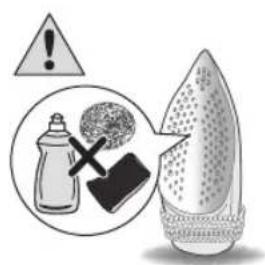
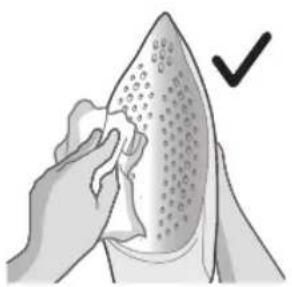
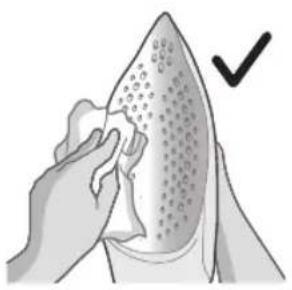
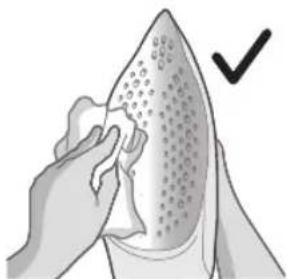
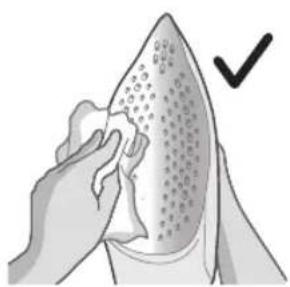
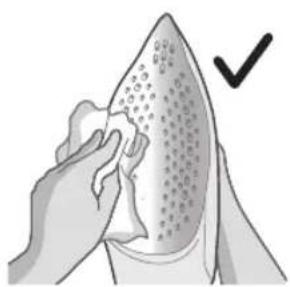
4 Wipe the soleplate with a damp cloth.
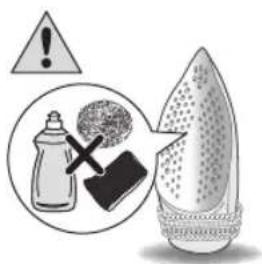
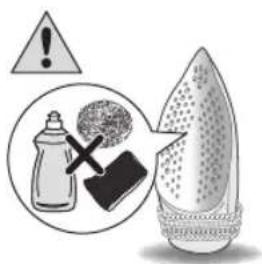
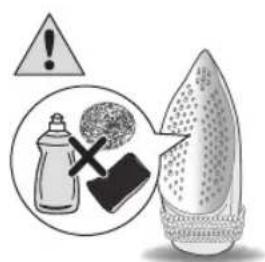
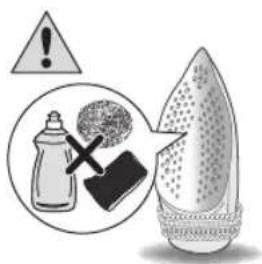
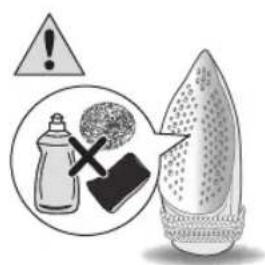
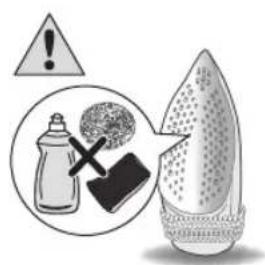
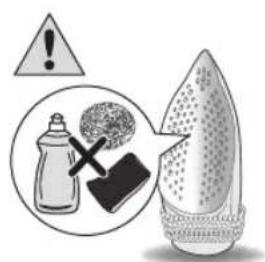
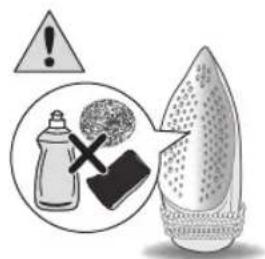
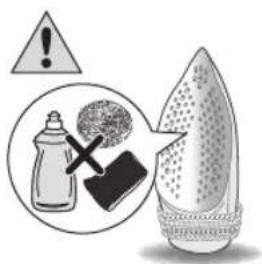
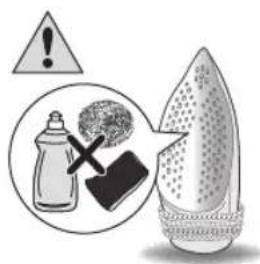
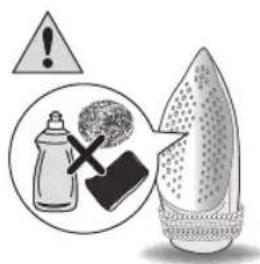
Note: To keep the soleplate smooth, avoid hard contact with metal objects. Never use a scouring pad, vinegar or other chemicals to clean the soleplate.
12 English
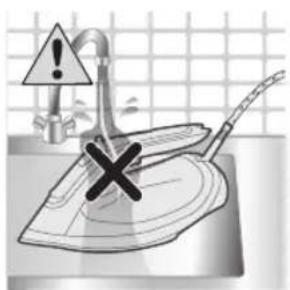
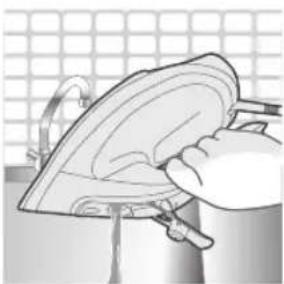
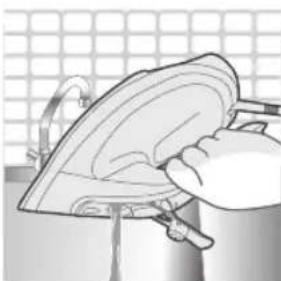
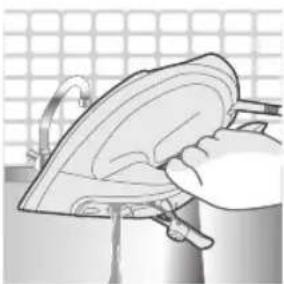
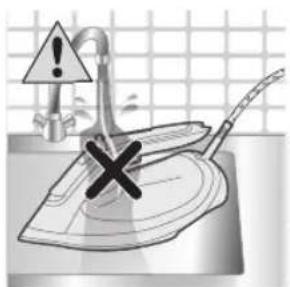
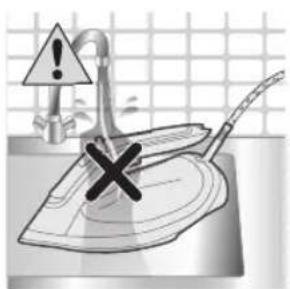
5 Do not wash/ clean the iron under running water as it may damage the electrical components within.
Calc-Clean
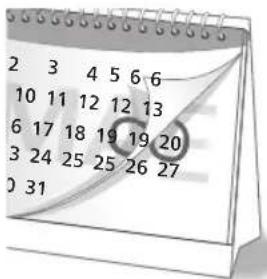
Tip: The Calc Clean function can be used at any time. If you live in an area with hard water, use the function more frequently.
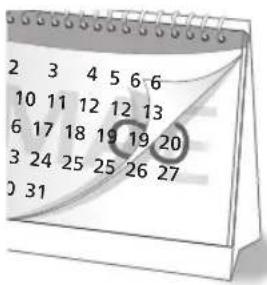
1 It is recommended to descale your iron after every month of use to prolong its lifetime, or when brown stains/water is observed.
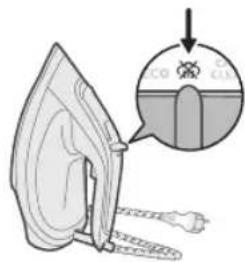
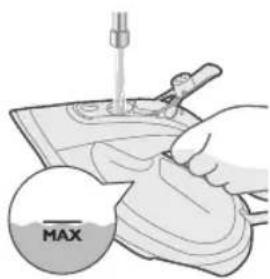
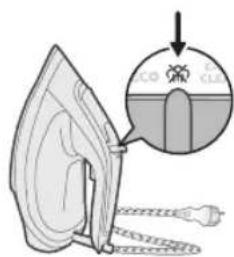
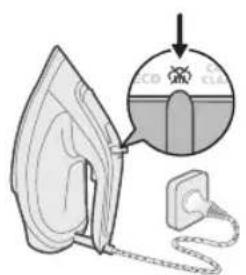
2 Make sure the iron is unplugged and the steam setting is set to no steam mode (dry ironing)
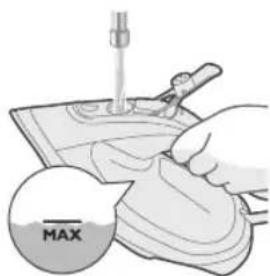
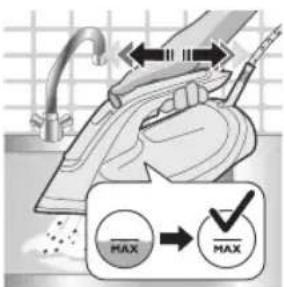
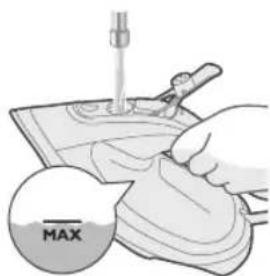
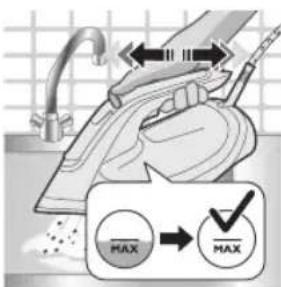
3 Fill the water tank to the MAX indication.
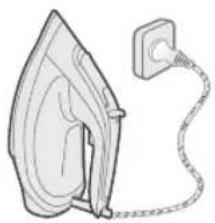
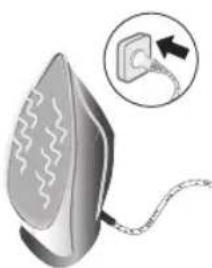
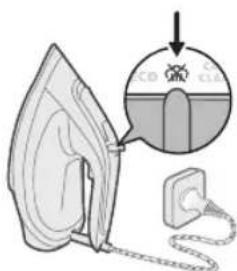
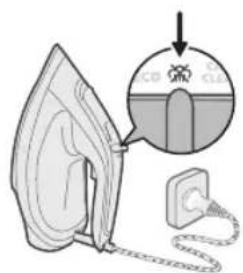
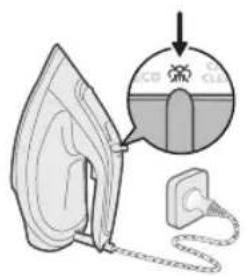
4 Plug the iron into the mains and switch on the mains if necessary.
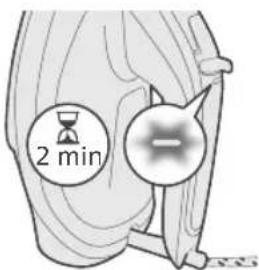
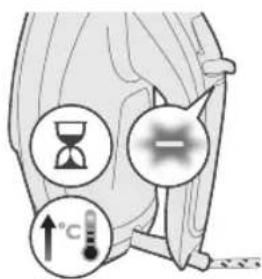
5 The indicator light will blink, indicating that the iron is heating up.
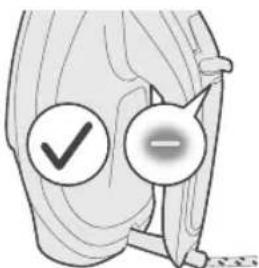
6 When the indicator light remains steadily lit, the iron is ready.
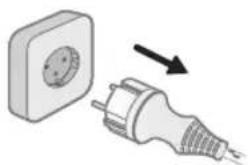
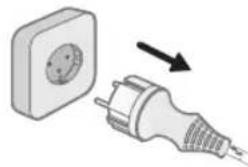
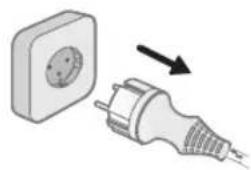
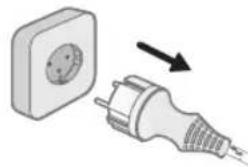
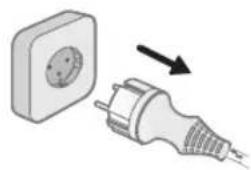
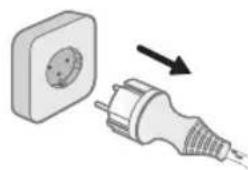
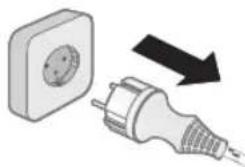
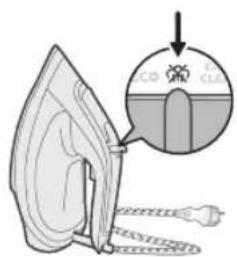
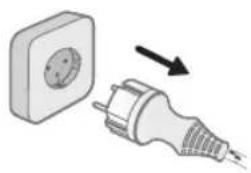
7 Unplug the iron.
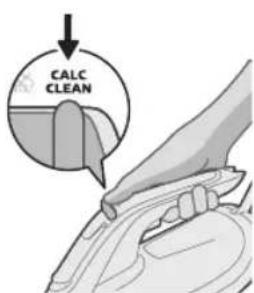
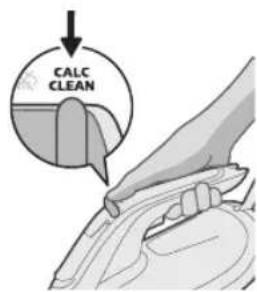
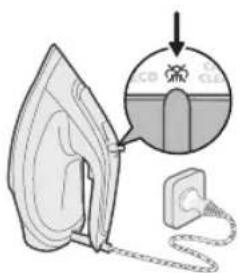
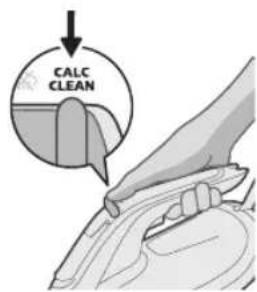
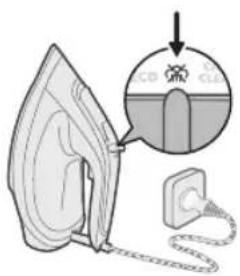
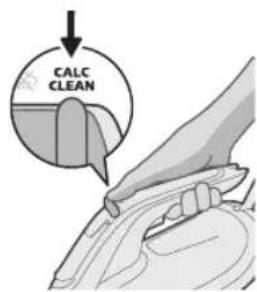
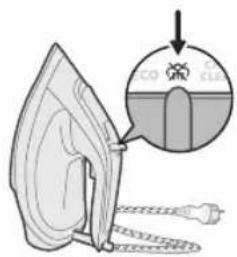
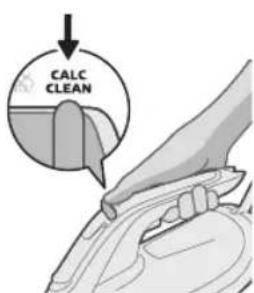
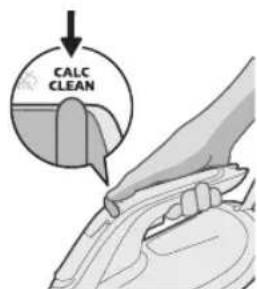
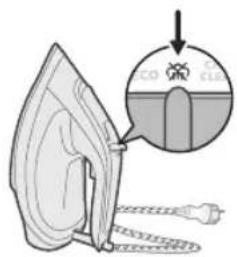
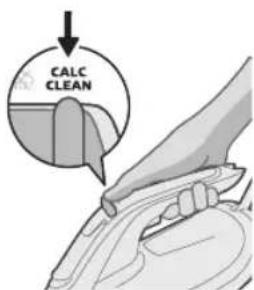
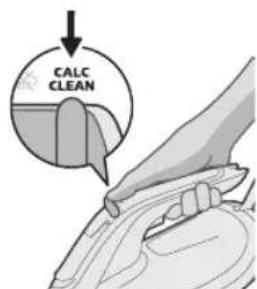
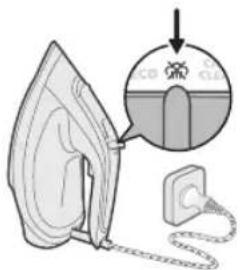
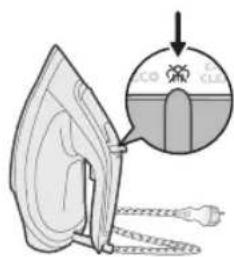
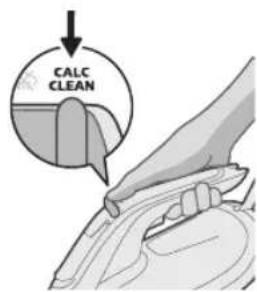
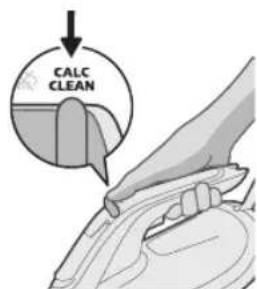
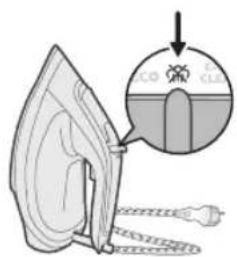
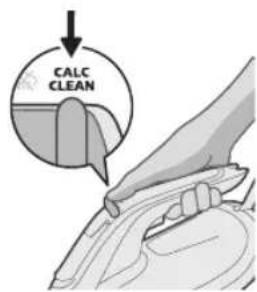
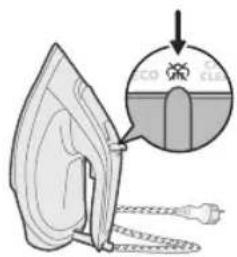
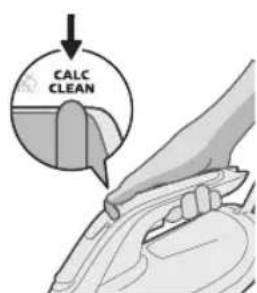
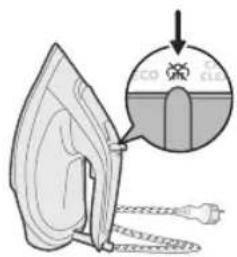
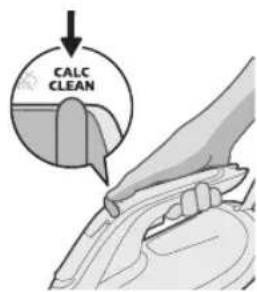
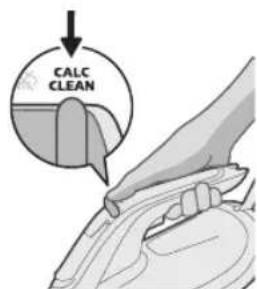
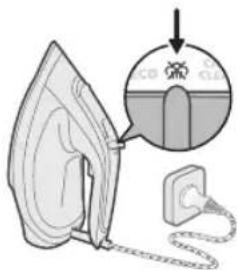
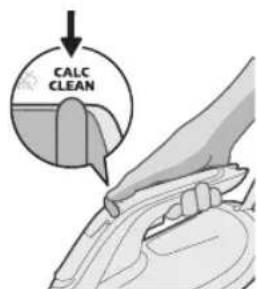
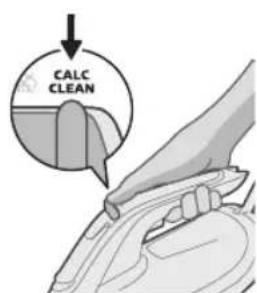
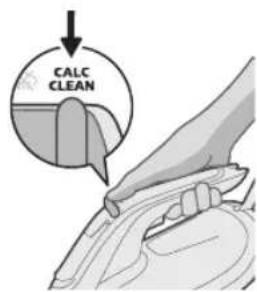
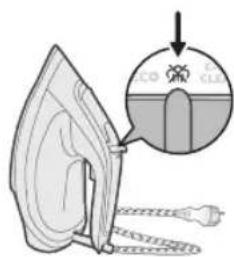
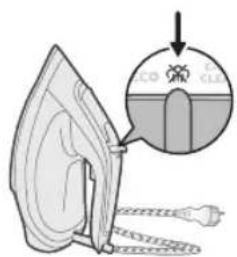
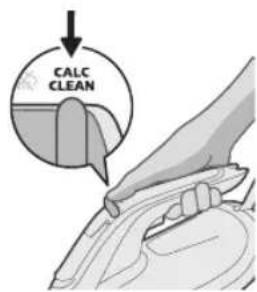
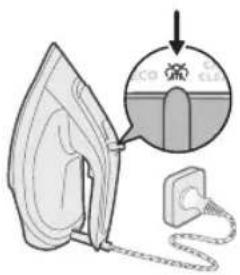
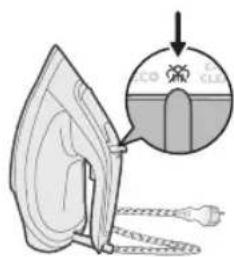
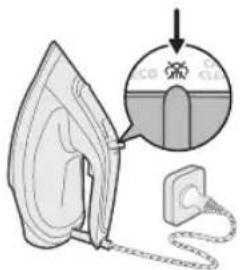
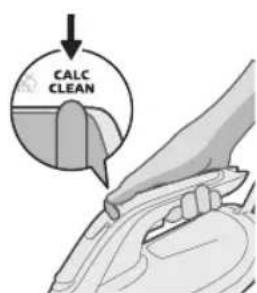
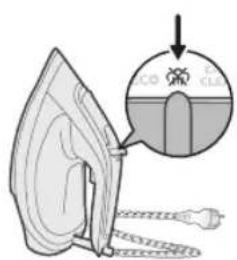
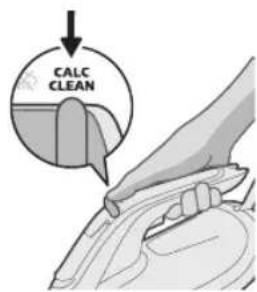
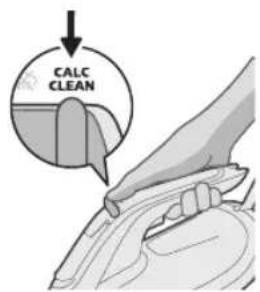
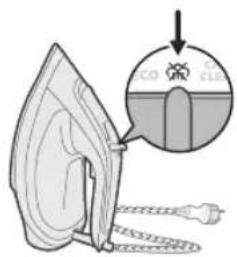
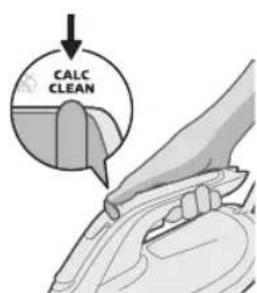
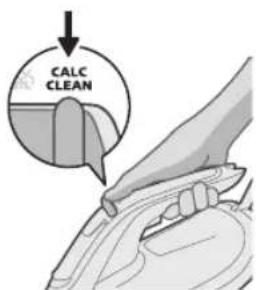
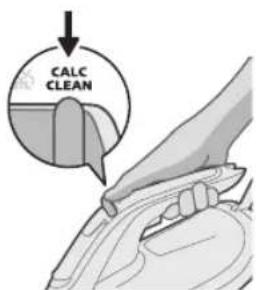
8 Slide the steam selector to the Calc-Clean position and hold it.
14
English
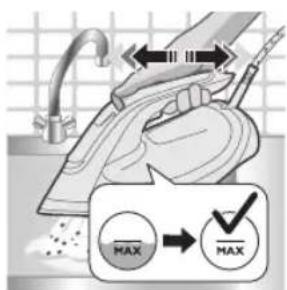
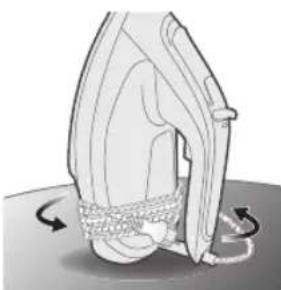
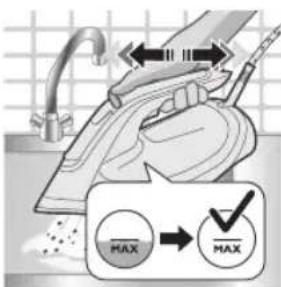
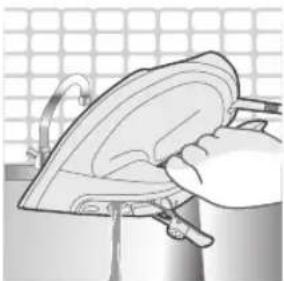
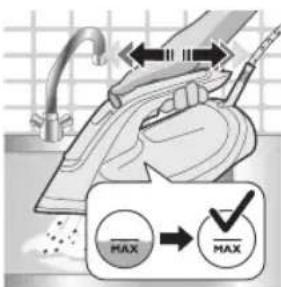
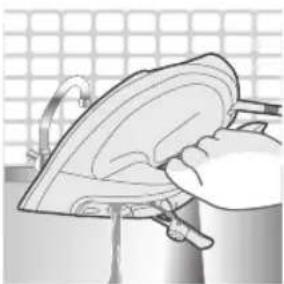
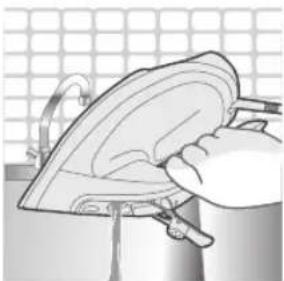
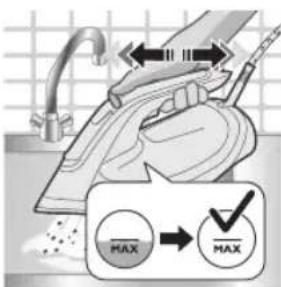
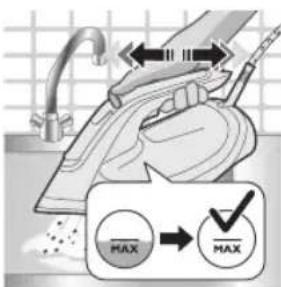
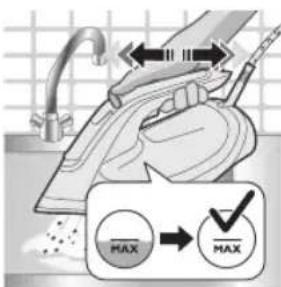
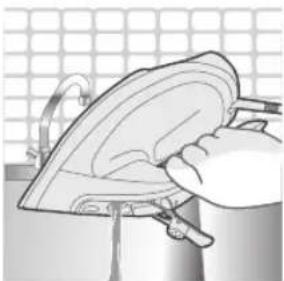
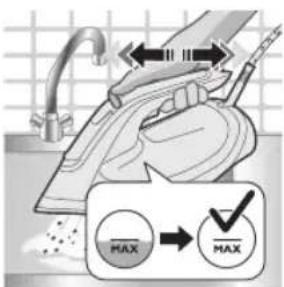
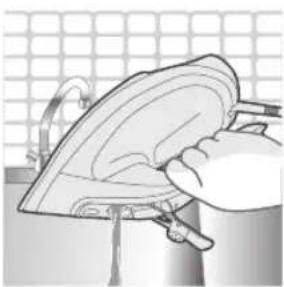
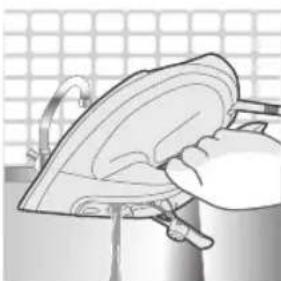
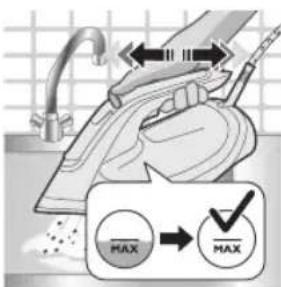
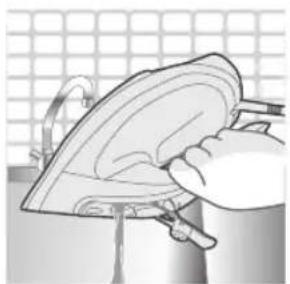
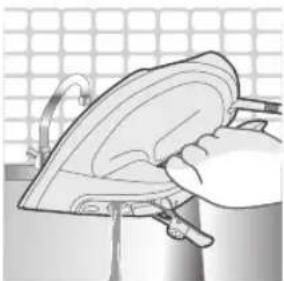
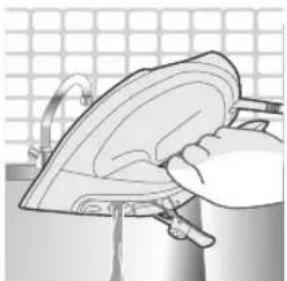
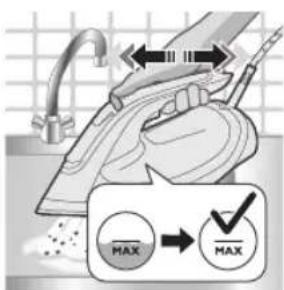
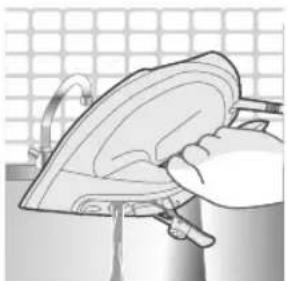
9 Hold the iron over the sink in the horizontal position and shake the iron. Steam, hot water and calc particles will be released from the soleplate. Continue to shake the iron until all the water has been emptied from the water tank.
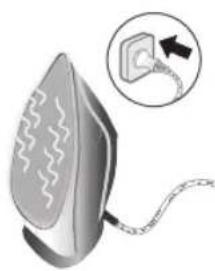
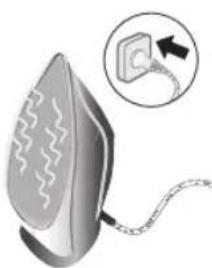
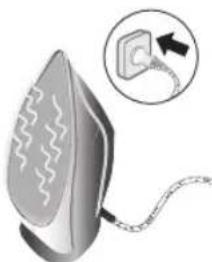
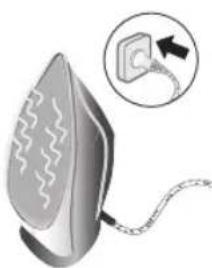
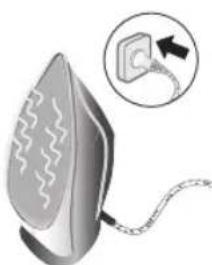
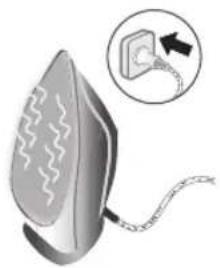
10 Plug in the iron again and let it heat up to dry the soleplate.
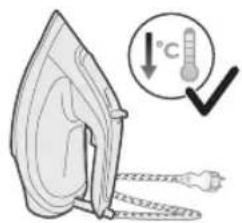
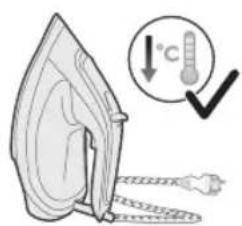
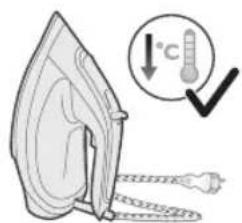
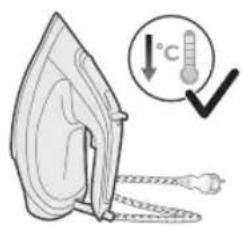
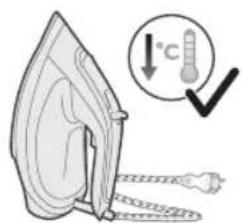
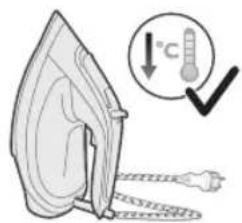
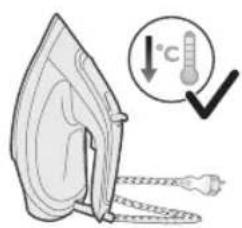
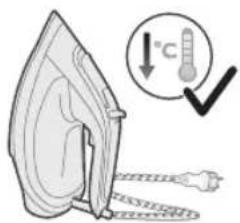
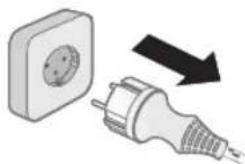
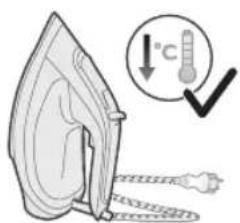
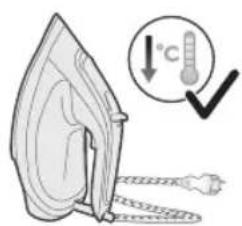
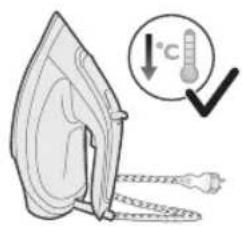
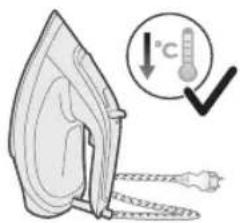
11 Unplug and let the iron cool down before storage.
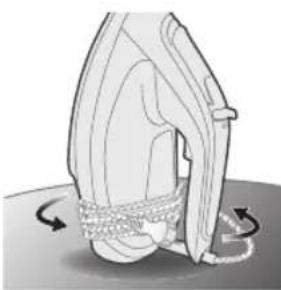
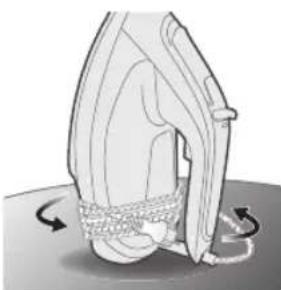
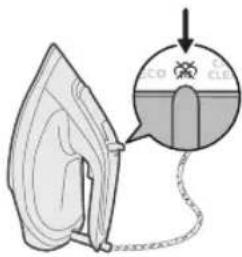
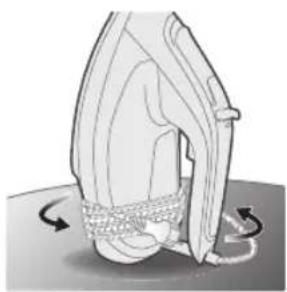
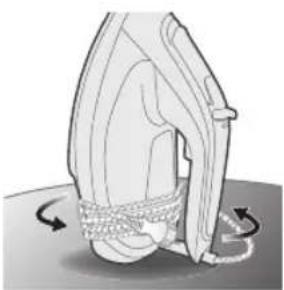
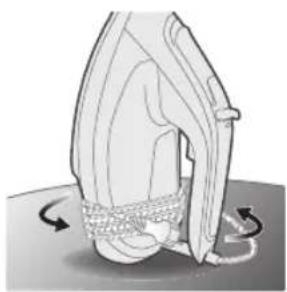
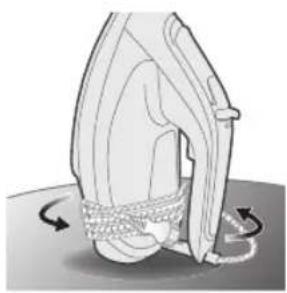
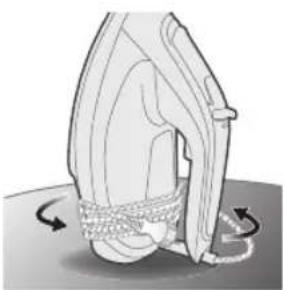
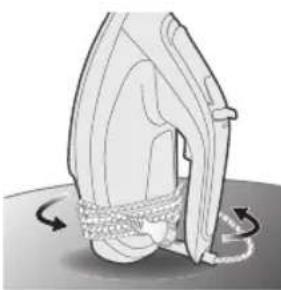
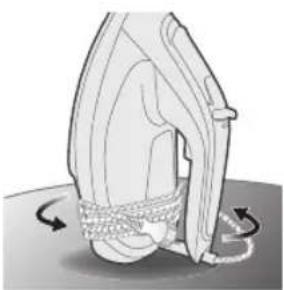
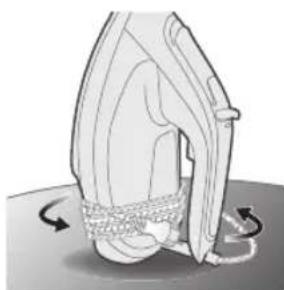
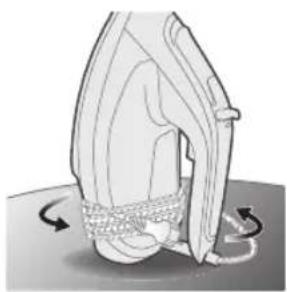
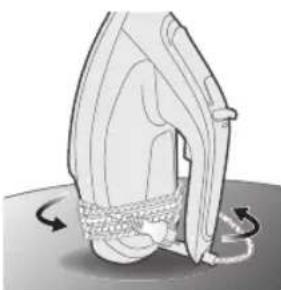
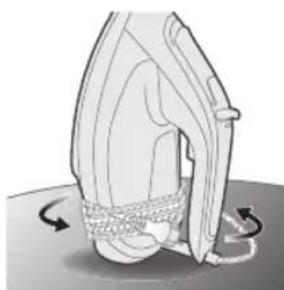
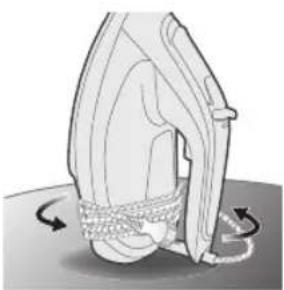
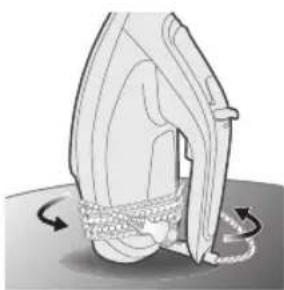
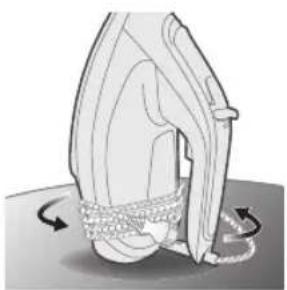
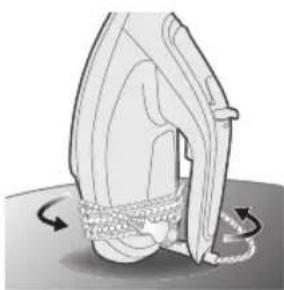
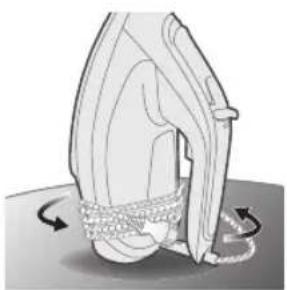
12 Wind the cord around the heel of the iron.
Storage
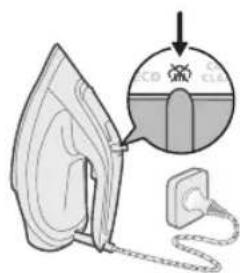
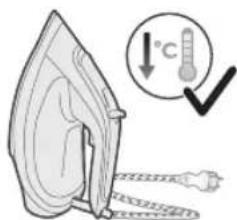
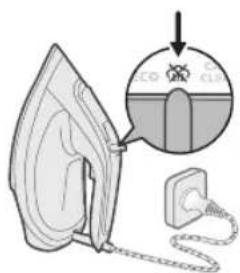
1 Slide the steam selector to select no steam mode (dry ironing)
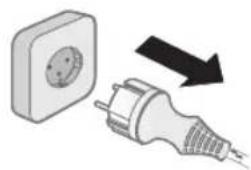
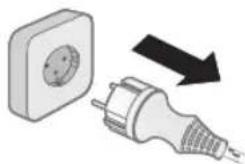
2 Unplug the iron.
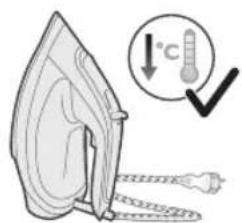
3 Let the iron cool down.
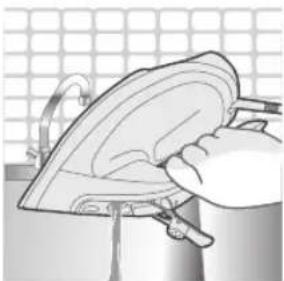
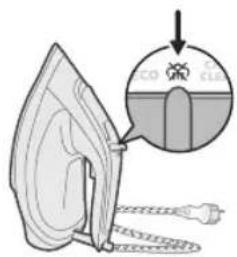
4 Pour any remaining water out of the water tank.
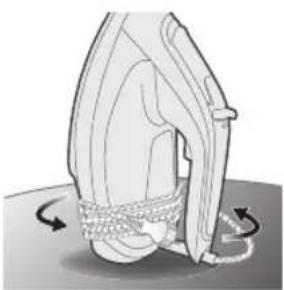
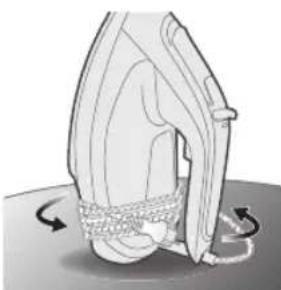
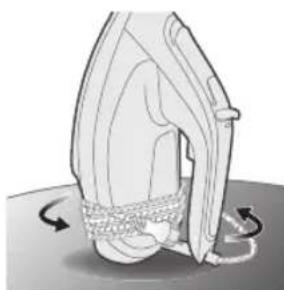
5 Wind the power cord around the main body of the iron.
Trouble shooting
This chapter summarizes the most common problems you could encounter with the appliance. If you are unable to solve the problem with the information below, visit www.philips.com/support for a list of frequently asked questions or contact the Consumer Care Center in your country.
Problem Possible cause Solution
| My Philips Steam Iron produces smoke when heating up. | First usage During production, some parts of the iron have been slightly greased. As a result of this, your iron may produce some smoke when it is switched on for the first few times, this is normal and should dissipate shortly. | |
| There is water in the soleplate. | Sometimes, there might still be some remaining water in your iron's soleplate after the last usage. This water will evaporate when your iron's soleplate heats up, and the steam generated may look like smoke. This is normal and should dissipate shortly. | |
| My iron is still producing smoke even after checking the above. | There could be an issue with the iron, we recommend you to contact us. | |
| My Philips Steam Iron does not remove creases. | Steam is not used. Set the steam setting to , 2 cloud ECO 3 clouds (strongest steam setting).You can get more steam by changing to a stronger steam setting, or using the steam boost function to help remove tough wrinkles. Press the steam boost trigger or button to increase the steam rate. Note that repeated usage of the steam boost in a short period of time may cause spitting or a reduction in the amount of steam produced. If this happens, wait for a short while before using the steam boost function again. | |
| My Philips Steam Iron does not produce steam. | There is no water/not enough water in the tank. | If there is no water in the water tank of your Philips Steam Iron, your iron is not able to generate steam. Please refill the water tank with water. After this, your iron should produce steam again. |
| The steam slider is set to no steam mode/dry ironing | Set the steam setting to ECO clouds or 3clouds (strongest steam setting). | |
| The iron is not ready to steam. | Your iron is ready to produce steam when the indicator light remains steadily lit. | |
| The steam boost in my Philips Steam Iron is not working | The steam boost trigger has not been pressed and released. | To activate the steam boost in your Philips Steam Iron, press the steam boost button/trigger, and release fully. Holding down the steam boost button/trigger does not produce continuous steam boost. |
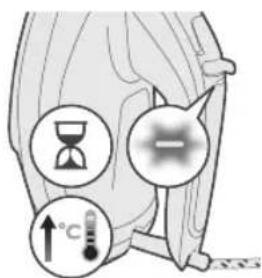
| The steam boost function was used too often within a short period of time. | When you use the steam boost function of your Philips Steam Iron too often within a short period, the steam boost function will stop working for a while.In this case, please wait a couple of minutes until you use the steam boost again. | |
| The iron is not ready to steam. | The indicator light will remain steadily lit when the iron is ready. The indicator light will breathe/blink slowly when it is not ready. | |
| There are water droplets/leaking on my garment during ironing. | First time usage. If you experience leaking/spitting during your first usage, perform the Calc Clean function once. If this does not resolve the leaking on your next use, we recommend you to contact us. | |
| The steam boost function was used too often within a short period of time. | Continue ironing in horizontal position and wait a while before you use the steam boost function again. | |
| There is a build up of scale/calcification in the iron. | If there is brown water or white flakes coming out of the iron, this may indicate a build up of calcification in the iron. Perform the Calc Clean function to clear this. If you live in an area with hard water, we recommend to use distilled water (or 50% distilled and 50% tap water) and perform the calc clean function once a month to prolong the lifetime of the iron.Note: the presence of white flakes on the very first use of the iron is normal. | |
| You have added other chemicals or additives into the water tank. | Fragrances/oils/chemicals/additives/descaling solutions should not be added into the water tank as they are damaging to the device. Please rinse the water tank, fill it up with water and descale your iron. | |
| You have not closed the water tank lid properly. | Close the lid firmly after filling. | |
| Steam has condensed onto the ironing board. | Steam may condense on the board cover, particularly when using irons that produce powerful levels of steam for a prolonged period of time. This can look like your iron is leaking from the soleplate. To prevent this, you can do the following:1 Select a lower steam setting than the setting you have been using or use steam during the first ironing strokes and then finish up with the dry-ironing strokes.2 You can also put an extra layer of cloth between the ironing board and the ironing board cover to minimize condensation.3 Replace the ironing board cover if the sponge material has worn out. | |
| The iron leaks after ironing. | Set the steam selector to no steam/dry ironing before unplugging. Empty the water tank and place the iron in the vertical position when cooling down/for storage. | |
| The iron leaves a shine or an imprint on the garment. | The surface to be ironed was uneven. | The iron is safe to use on all ironable garments. The shine or imprint is not permanent and disappears when you wash the garment. Avoid ironing over seams or folds. You can also place a cotton cloth over the area to be ironed to avoid imprints. |
| The indicator light on the iron is blinking/breathing. | The iron is heating up. The indicator light will breathe/blink slowly when the iron is heating up. It will turn steady to indicate that the iron is ready for use. | |
| Auto Shut-off has been activated. | The indicator light will start to blink quickly when the iron remains stationary for 2 minutes in either horizontal or vertical positions. This indicates that the iron has entered the Auto Shut-off (ASO) state. While in ASO state, the iron will stop heating up and start to cool down. When the iron is moved, the indicator light will start to breathe/blink slowly, indicating that it is heating up again. Once the indicator light stops blinking and remains steadily lit, the soleplate is heated, and the iron is ready to be used. | |
| The iron has stopped heating up. | There is a power connection problem. | Please check the mains cord, the plug and the wall socket. Ensure that everything is properly connected. If you are using an extension plug, please ensure that power rating is suitable for the iron. |
English
| Auto Shut-off has been activated. | The indicator light will start to blink quickly when the iron remains stationary for 2 minutes in either horizontal or vertical positions. This indicates that the iron has entered the Auto Shut-off (ASO) state. While in ASO state, the iron will stop heating up and start to cool down. When the iron is moved, the indicator light will start to breathe/blink slowly, indicating that it is heating up again. Once the indicator light stops blinking and remains steadily lit, the soleplate is heated, and the iron is ready to be used. | |
| The iron does not switch on anymore (I have tried the above but my iron still does not heat up). | If this is the case, there might be a problem with your iron. We recommend you to contact us. |
Mündəricat
Giriş 21
Məhsul icmali 21
Cihazdan istifada 22
22 Azərbaycanca
1 Buxar rejimi parametrini buxarsız rejima dayişin.
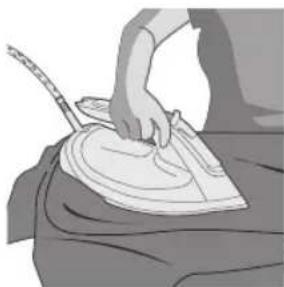
1 Jangan colokkan steker setrika ke stopkontak.
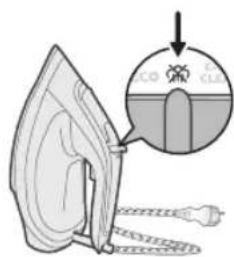
1 Atur pengaturan uap ke mode tanpa uap .
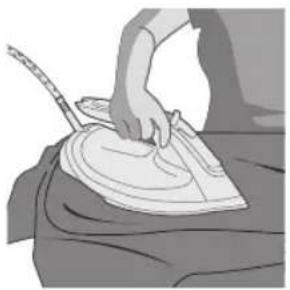
3 Jangan arahkan setrika menghadap Anda atau orang lain.
Mati otomatis
4 Colokkan steker setrika ke stopkontak dan pastikan setrika teraliri listrik.

12 Gulung kabel di sekeliling kaki setrika.
Penyimpanan
3 Biarkan setrika mendingin.
5 Gulung kabel listrik di sekeliling bodi setrika.
Pemecahan masalah
1 Penutup tangki air
2 Pemilih stim
3 Lampu penanda
4 Picu pancutan stim
5 Menggulung kord
6 Tapak
2 Selepas seketika, stim akan berhenti semasa proses penyeterikaan.
Tetapan ECO
12 Lilitkan kord kuasa di sekeliling tumit seterika.
Penyimpanan
3 Odklopte víčko nádržky na vodu.
2 Žehličku odpojte.

3 Åbn läget til vandtanken.
10 Sæt stikket i stikkontakten, og lad det varme op igen for at tørre strygesålen.
2 Libistage auruvalijat paremale, et valida aururežiim (kuiv triikimine)
3 Keerake veepaagi kaas lahti.
3 Laske seadmel jahtuda.
7 Desenchufe la plancha
2 Desenchufe la plancha
1 Poklopac spremnika za vodu
2 Gumb za odabir pare
3 Indikator
4 Okidač za dodatnu količinu pare
5 Namotavanje kabela
6 Grijaća ploča
Uporaba aparata
Vrsta vode koju treba upotrebljavati
Napomena: Prilikom prve uporabe glačala možda ćete primijetiti malo pare. To će ubrzo prestati.
3 Otvorite poklopac spremnika za vodu.
4 Napunite spremnik za vodu do oznake MAX. Nemojte dodavati parfeme, mirise, sapun ni ocat.
5 Čvrsto zatvorite poklopac spremnika za vodu.
Priprema za uporabu
2 Utikač umetnite u uzemljenu utičnicu i postavite glačalo u uspravan položaj. Ako upotrebljavate produžni kabel, provjerite odgovaraju li njegove specifikacije glačalu.

3 Pričekajte da se glačalo zagrije. Indikator će sporo pulsirati/bljeskati dok se zagrijava.
4 Kada glačalo bude spremno za uporabu, indikator će početi svijetliti.
Bez pare / suho glačanje
1 Postavite postavku pare na glačanje bez pare
ECO: kontinuirano se ispušta minimalna količina pare koja je prikladna za odjevne predmete s manje nabora. Osim toga, ova postavka štedi energiju.
Postavka za dva oblaka pare
: kontinuirano se ispušta veća količina pare koja je prikladna za odjevne predmete s više nabora.
Postavka za tri oblaka pare

: Pritisnite i držite gumb za odabir pare za kontinuirano ispuštanje maksimalne količine pare koja je prikladna za tvrdokorne nabore.
1 Pritisnite i otpustite okidač za dodatnu količinu pare kako biste dobili snažan mlaz pare za uklanjanje tvrdokornih nabora.
2 Pritisnite i otpustite okidač za dodatnu količinu pare dok je glačalo u uspravnom položaju kako biste dodatnom količinom pare uklonili nabore s odjeće koja visi. Ako stalno držite okidač za dodatnu količinu pare dok je glačalo u uspravnom položaju, konstantna para neće se ispuštati.
5 Indikator će početi sporo pulsirati/bljeskati, naznačujući da se glačalo ponovo zagrijava.
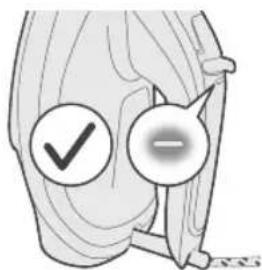
6 Kada indikator počne svijetliti, glačalo je spremno za uporabu.
1 Gumb za odabir pare postavite na način rada bez pare (suho glačanje).
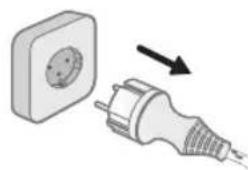
3 Provjerite je li se glačalo ohladilo.
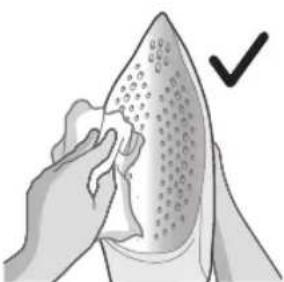
5 Glačalo nemojte prati/čistiti pod mlazom vode iz slavine jer se time mogu oštetiti električne komponente u njemu.
Calc-Clean

2 Provjerite je li aparat iskopčan i je li postavka pare postavljena na način rada bez pare (suho glačanje)
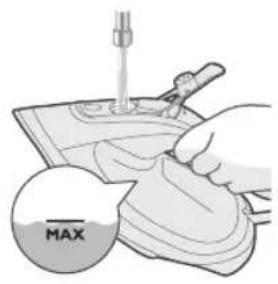
3 Napunite spremnik za vodu do oznake MAX.
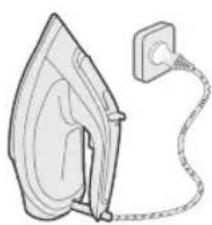
4 Ukopčajte glačalo u napajanje i uključite napajanje ako je potrebno.
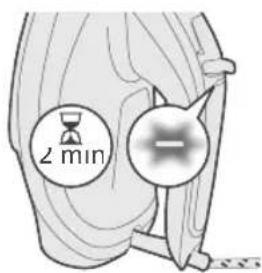
6 Kada indikator počne svijetliti, glačalo je spremno.
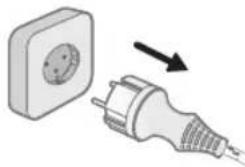
8 Pomaknite gumb za odabir pare na položaj Calc-Clean i zadržite.
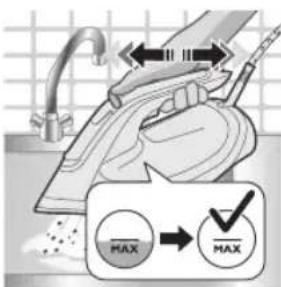
9 Držite glačalo iznad sudopera u vodoravnom položaju i protresite ga. Iz grijaće ploče izaći će para, vruća voda i komadići kamenca. Nastavite tresti glačalo dok ne iscuri sva voda iz spremnika.
11 Iskopčajte glačalo i ostavite ga da se ohladi prije spremanja.
190
Hrvatski
3 Pustite glačalo da se ohladi.
4 Ispraznite ostatak vode iz spremnika za vodu.
2 Pärliecinieties, ka gludeklis nav pievienots elektrotiklam.
7 Atvienojiet gludekla kontaktdakšu.
2 Atvienojiet gludekla kontaktdakšu.
3 Laujiet gludeklim atdzist.
4 Izlejiet no ūdens tvertnes atlikušo ūdeni.
234 Lietuviškai
3 Atidarykite vandens bakelio dangtj.
252 Magyar
To dampskyer-innstilling 289
Tre dampskyer-innstilling 290
Dampstøt 290
2 Etter en liten stund stopper dampen mens du stryker.
ECO-innstilling
To dampskyer-innstilling
Tre dampskyer-innstilling
1 Suv baki qopqog'i
2 Bug' tanlagich
3 Indikator chirog'i
4 Bug' kuchaytirgich triggeri
5 Shnurni o'rash
6 Asos plita
Jihozdan foydalanish
Ishlatiladigan suv turi
OptimalTemp texnologiyasi dazmol qilinadigan barcha mato turlarini har qanday tartibda, dazmol haroratini sozlamay turib ham dazmollashga imkon beradi. Shunday belgili matolarni, masalan zig'ir, paxta, poliester, ipak, jun, viskoza va rayonni dazmollash mumkin.
Bu belgili matolarni dazmollab bo'lmaydi. Bunday matolar spandeks yoki elastan, spandeks aralashgan matolar va poliolefin kabi matolarni (masalan, poliolefin), shuningdek kiyimlardagi bosmalarni ham o'z ichiga oladi.
Suv bakini to'Idirish
1 Dazmolni ulamang.
2 Bug'siz rejimini (quruq dazmollash) tanlash uchun bug' tanlagichni o'ngga suring
3 Suv baki qopqog'ini chertib oching.
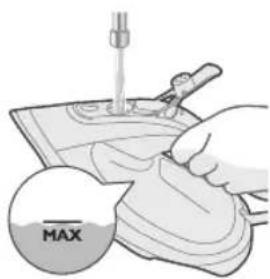
4 Suv bakini MAX belgisigacha to'ldiring. Atir, hid taratuvchi vosita, sovun yoki sirkaga o'xshash qo'shimchalarni qo'shmang.
304 O'zbek

5 Suv baki qopqog'ini mahkam yoping.
2 Shtekerni yerlantirilgan rozetkaga kiriting va dazmolni o'z tirgagiga qo'yib turing. Agar siz uzaytirgichdan foydalanayotgan bo'lsangiz, uning elektr tok ko'rsatkichi dazmolga mos kelishiga amin bo'ling.
1 Bug' sozlamasini bug'siz rejimga o'rnating
: Juda qattiq burmalarni tekislash uchun barqaror ravishda maksimal bug' ajratib berib turilishi uchun bug' tanlagichini bosib, ushlab turing.
Bug'li zarba
1 Qattiq burmalarni ketkazish uchun kuchli bug' chiqaradigan bug'ni kuchaytirish ilgagini bosing va qo'yib yuboring.
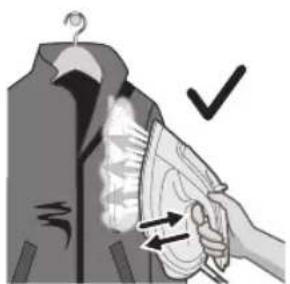
2 Osiq turgan kiyim-kechakdagi burmalarni kuchli bug' oqimi bilan bartaraf qilish uchun bug' chiqarish ilgagini vertikal holatda bosing va qo'yib yuboring. Vertikal holatda bug' chiqarish ilgagini bosib turish doimiy bug' chiqarilishini ta'minlamaydi.
5 Indikator chirog'i dazmol yana isiy boshlaganini bildirib, sekin miltillashni boshlaydi.
1 Bug' sozlamasini tanlagichdan "bug'siz" (quruq dazmollash) rejimga o'tkazing.
2 Dazmol tarmoqqa ulanmaganiga amin bo'ling.
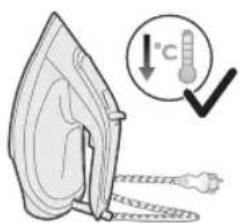
3 Dazmol soviganiga amin bo'ling.
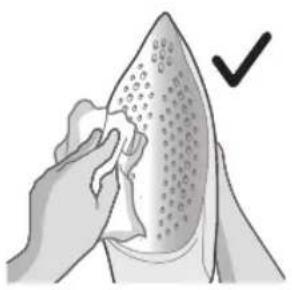
4 Asos plitasini nam mato bilan arting.
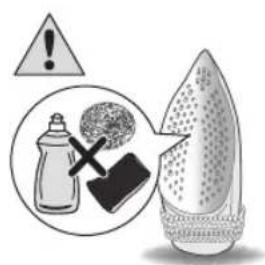
Eslatma: Dazmol plitasi silliq bo'lishini ta'minlash uchun metall obyektlarga tekkizmang. Idish yuvish matosi, sirka yoki boshqa kimyoviy moddalardan dazmol plitasini tozalash uchun foydalanmang.
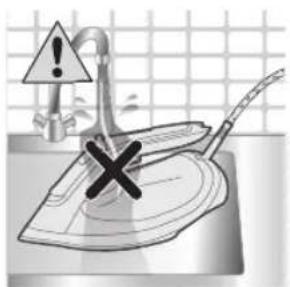
5 Dazmolni oqib turgan suv ostida ushlab yuvmang/tozalamang, chunki bu uning ichidagi elektrik qismlarni shikastlashi mumkin.
Cho'kmadan tozalash
2 Dazmol tarmoqdan uzilgani va bug' sozlamasi bug'siz rejimiga (quruq dazmollash) qo'yilganiga amin bo'ling
3 Suv bakini MAX belgisigacha to'ldiring.
4 Dazmolni elektr tarmog'iga ulang va, agar zarur bo'lsa, tarmoqni yoqing.
5 Indikator chirog'i miltillab, dazmol isiyotganligini ko'rsatib turadi.
6 Indikator chirog'ining barqaror yoniq turishi dazmol tayyorligini bildiradi.
7 Dazmolni rozetkadan uzing.
8 Bug' tanlagichni Cho'kmani tozalash holatiga qo'yib, ushlab turing.
9 Dazmolni rakovina ustida horizontal ushlang va uni silkiting. Bug', issiq suv va cho'kma zarralari dazmol ostidan chiqib ketadi. Suv butunlay dazmolning suv sig'imidan chiqib ketgunicha uni silkitavering.
10 Dazmolni taroran rozetkaga ulang va uning osti qurishi uchun dazmolning isishini kuting.
11 Uni rozetkadan uzing va dazmolni saranjom qilib, olib qo'yishdan oldin uning sovishini kuting.
312 O'zbek
12 Dazmolning tayanchi atrofiga shnurini o'rang.
Saqlash
1 Bug'siz rejimni (quruq dazmollashni) tanlash uchun bug' tanlagichni suring
2 Dazmolni rozetkadan uzing.
3 Dazmol sovishini kuting.
5 Quvvat shnurini dazmolning asosiy korpusi atrofiga o'rang.
Nosozliklarni aniqlash
Bu bobda jihozda uchraydigan eng keng tarqalgan muammolar umumlashtirilgan. Agar quyidagi ma'lumotga asoslanib muammoni hal qila olmasangiz, savol-javoblar ro'yxati uchun www.philips.com/support manziliga kiring yoki mamlakatingizdagi mijozlarga xizmat ko'rsatish markazi bilan bog'laning.
Muammo Ehtimoliy sabab Yechim
| Mening Filips bug’li dazmolim isiyotgan vaqtda tutun chiqaradi. | Birinchi qo’llanilish Dazmolning ba’zi qismlari ishlab chiqarish jarayonida biroz moylangan. Buning natijasida dazmolingiz birinchi martalarda, yoqilgan paytida biroz tutun chiqarishi mumkin, bu normal holat va u qisqa vaqt ichida tarqalib ketishi lozim. | |
| Asos ichida suv bor. Ba’zan dazmolingizning asosida oxirgi marta ishlatilgandan keyin suv qolib ketgan bo’ladi. Bu suv dazmolingiz asosi isiganida bug’lanib o‘z-o‘zidan yo‘qoladi va bunda hosil bo’lgan bug’ tutunga o‘xshashi mumkin. Bu normal holat va u qisqa vaqt ichida tarqalib ketishi lozim. | ||
| Yuqoridagilarni tekshirganimdan keyin ham dazmol baribir tutun chiqarmoqda. | Dazmolda biror muammo bo’lishi mumkin, bizga murojaat qilishingizni tavsiya qilamiz. | |
| Mening Filips bug’li dazmolim burmalarni ketkazmaydi. | Bug’ qo’llanilmayapti. Bug’ sozlamalarini ga, 2000am yoki 3 qatlamga (eng kuchli bug’ sozlamasi) o’rnating. Kuchliroq bug’ sozlamasiga o’tish orqali yoki bug’ni kuchaytirish funksiyasidan foydalanib, siz ko‘proq bug’ chiqartirasiz va bu qattiq burmalarni bartaraf qilishda yordam beradi. Bug’lantirish tezligini oshirish uchun bug’ni kuchaytirish ilgagini yoki tugmasini bosing. Shuni yodda tuting-ki, bug’li zarbani qisqa muddat ichida qayta-qayta ishlatish namlikning otilib chiqishiga yoki ajratib beriladigan bug’ miqdorining kamayishiga sabab bo’lishi mumkin. Agar bunday vaziyat yuzaga kelsa, bug’li zarba funksiyasidan qayta foydalanish uchun biroz vaqt kutib turing. | |
| Mening Filips bug’li dazmolim bug’ chiqarmaydi. | Suv bakida umuman/yetarlicha suv yo’q.Bug' slayderi bug'siz/quruq dazmollash molatiga qo'yilgan. | Agar Filips bug’li dazmolingiz suv bakida umuman suv bo’lmasa, dazmolingiz bug’ chiqara olmaydi. Suv bakini suvga to’ldiring. Shundan so’ng dazmolingiz yana bug’ chiqarishi lozim.Bug' sozlamalarini qatlam yok qatlamga teng kuchli bug' sozlamasi) o'rnating. |
| Dazmol bug'lantirishga tayyor emas. | Dazmolingiz indikator chirog'i barqaror yoniq bo'lgandagina bug' chiqarishga tayyor bo'ladi. | |
| Mening Filips bug'li dazmolimning bug'li zarbasi ishlamayapti | Bug' kuchaytirgich ilgagi bosilmadi va qo'yib yuborilmadi. | Filips Bug'li dazmolingizda bug'li zarbani faollashtirish uchun bug'ni zarba tugmasini/ilgagini bosing va so'ng uni to'liq qo'yib yuboring. Bug'li zarba tugmasini/ilgagini bosib turish davomiy bug' zarbasini ta'minlamaydi. |
| Bug'li zarba funksiyasi qisqa muddat ichida qayta-qayta ishlatilgan. | Qisqa muddat ichida Filips bug'li dazmolingizning bug' zarbasi funksiyasini ko'p marta ishlatsangiz, bu funksiya biroz vaqt ishlamay qoladi.Bunday vaziyatda bug'li zarbadan takroran foydalanish uchun bir necha daqiqa kutib turing. | |
| Dazmol bug'lantirishga tayyor emas. | Dazmol tayyor bo'lganida indikator chirog'i barqaror ravishda yoniq qoladi. U tayyor bo'Imaganida esa indikator chirog'i sekin miltilladi. | |
| Dazmollash vaqtida kiyimlarimda suv tomchilari/suv sizilmalari qolib ketyapti. | Birinchi bor qo'llanilish. Agar siz dazmolni birinchi bor qo'llayotgan vaqtingizda sizilish/namlikning otilib chiqishiga guvoh bo'lsangiz, cho'kmadan tozalash funksiyasini sinab ko'ring. Agar bu keyingi bor ishlatganingizda sizilishni bartaraf qilmasa, bizga murojaat qilishingizni tavsiya etamiz. | |
| Bug'li zarba funksiyasi qisqa muddat ichida qayta-qayta ishlatilgan. | Ghorizontal holatda dazmollashni davom ettiring va bug'ni kuchaytirish funksiyasini qayta ishlatish uchun biroz kuting. | |
| Dazmolda qasmoqlar/kalsiy toshlari yuzaga kelgan.Suv bakiga kimyoviy va qo’shimcha vositalar quygansiz. | Agar dazmoldan jigar rang suv chiqsa yoki oq parchalar ajralsa, bu dazmolda tosh qatlami yuzaga kelganini bildiradi. Uni tozalash uchun cho'kmadan tozalash funksiyasini ishga tushiring. Agar siz suvi qattiq bo'lgan hududda yashasangiz, dazmolning yaroqlilik muddatini uzaytirish uchun distillangan suvdan (yoki 50% distillangan suv va 50% vodoprovod suvi) foydalanishni va cho'kmalardan tozalash funksiyasini oyiga bir marta ishlatishni tavsiya qilamiz.Eslatma: dazmolning birinchi qo'llanilishida oq parchalar yuzaga kelishi - normal holat.Yoqimli hid taratuvchi vositalar/moylar/kimyoviy qo’shimchalar/qo’shimcha vositalar/qasmoqni ketkazuvchi eritmalar suv bakiga qo’shilmasligi kerak, chunki ular jihozni shikastlashi mumkin. Iltimos, suv bakini chaying, uni suvga to’ldiring va dazmolni qasmoqlardan tozalang. | |
| Suv baki qopqog’ini yaxshi yopmagansiz. | Suvga to’ldirgach qopqoqni mahkam yoping. | |
| Bug’ suvga aylanib, dazmollash doskasiga tushgan. | Bug’ suvga aylanib, doska qoplamasiga tushishi mumkin. Bunday vaziyat asosan uzoq vaqt davomida kuchli darajadagi bug’ ajratuvchi dazmollardan foydalanishda kuzatiladi. Bunda dazmolingiz asosidan suv sizilib chiqayotgandek ko‘rinadi. Buning oldini olish uchun quyidagilarni amalga oshirish lozim:1 Foydalanayotgan bug’ sozlamangizdan pastrog’ini tanlang yoki dazmol bilan birinchi yurishlarda bug’dan foydalanib, keyin quruq dazmollash bilan yakunlang.2 Siz shuningdek dazmollash doskasi va dazmollash doskasi qoplamasi orasiga qo’shimcha mato qatlamini qo’yib, kondensatsiyani minimallashtirishingiz mumkin.3 Agar shimgich material yeyilsa, dazmollash doskasi qoplamasini almashtiring. | |
| Jihoz kiyim dazmollagandan keyin siziladi. | Dazmolni rozetkadan uzishdan oldin bug’ tanlagichini bug‘siz/quruq dazmollash ‘rejimiga o’tkazing. Suv bakini bo‘shating va dazmolni sovutish yoki saranjom qilib olib qo’yish uchun uni vertikal holatga qo’yib qo’ying. | |
| Dazmol kiyimda yaltirash yoki iz qoldiradi. | Dazmollanishi kerak bo’lgan yuza notekis edi. | Dazmolni barcha dazmol qilinadigan kiyimlarda ishlatish xavfsiz. Yaltirash yoki iz doimiy emas va kiyim yuvilganida yo’qoladi. Chok yoki burmalarning ustida dazmollamang. Izlardan saqlanish uchun dazmol qilinadigan joyga paxta mato qo’yishingiz mumkin. |
| Dazmolning indikator chirog’i miltillamoqda. | Dazmol isib ketyapti. Indikator chirog’i sekin miltillab, dazmol isiyotganligini ko‘rsatib turadi. Bu chiroq barqaror yonib turib, dazmol qo’llashga tayyor ekanligini bildiradi. | |
| Avtomatik o’chirish faollashtirildi. | Dazmol horizontal yoki vertikal holatda 2 daqiga davomida statsionar holatda qolib ketsa, indikator chirog’i tez-tez miltillashni boshlaydi. Bu esa dazmol avtomatik o’chirish (AO’) holatiga o’tganligini bildiradi.AO’ holatidaligida dazmol isishdan to’xtaydi va sovushni boshlaydi. Dazmol harakatlantirilganda indikator chirog’i sekin miltillashni boshlaydi va bu dazmol yana isishni boshlaganini bildiradi. Indikator chirog’i miltillashdan to’xtab, barqaror qolsa, dazmol asosi isigan bo’ladi va dazmol ishlatishga tayyor bo’ladi. | |
| Dazmol isishdan to’xtadi. Elektr tarmog’iga ulanishda muammo bor. | Iltimos, tarmoq shnurini, shtekerni va devordagi rozetkani tekshiring. Hamma narsa to’g’ri ulanganligiga amin bo’ling. Agar siz uzaytirgichdan foydalayotgan bo’lsangiz, quvvat darajasi dazmolga mos kelishiga amin bo’ling. | |
| Avtomatik o’chirish faollashtirildi. | Dazmol horizontal yoki vertikal holatda 2 daqiga davomida statsionar holatda qolib ketsa, indikator chirog’i tez-tez miltillashni boshlaydi. Bu esa dazmol avtomatik o’chirish (AO’) holatiga o’tganligini bildIRadi.AO’ holatidaligida dazmol isishdan to’xtaydi va sovushni boshlaydi. Dazmol harakatlantirilganda indikator chirog’i sekin miltillashni boshlaydi va bu dazmol yana isishni boshlaganini bildiradi. Indikator chirog’i miltillashdan to’xtab, barqAROR qolsa, dazmol asosi isigan bo’ladi va dazmol ishlatishga tayyor bo’ladi. | |
| Dazmolni yoqilmayapti (men yuqoridagilarni sinab ko’rdim, ammo dazmolim baribir isimayapti). | Agar bunday vaziyat kuzatilsa, dazmolingizda muammo bo’lishi mumkin. Sizga bizga murojaat qilishni tavsiya etamiz. | |
Spis treści
Wstep 319
Opis produktu 319
2 Odłącz żelazko.
: mantenha o seletor de vapor pressionado para liberar vapor máximo de forma contínua, ideal para desfazer vincos persistentes.
Sistema de vapor
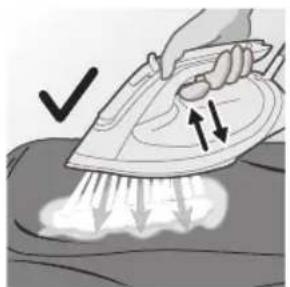
1 Pressione e solte o acionador de vapor extra para disparar um poderoso jato de vapor para remover os vincos persistentes.
1 Altere o ajuste de vapor para o modo sem vapor (passar a seco) no seletor de vapor.
4 Conecte o ferro à tomada e ligue a energia, se necessário.
2 Desconecte o ferro.
4 Marrja ose lëvizja e hekurit do ta riaktivizojë.
7 Hiqni hekurin nga priza.
2 Hiqni hekurin nga priza.
4 Derdheni ujin e mbetur nga depozita e ujit.
1 Likalnika ne priključujte v električno omrežje.
2 Potisnite izbirnik za nastavitev pare v desno, da izberete način brez pare (suho likanje)
5 Trdno zaprite pokrov posode za vodo.
2 Priključite vtič v ozemljeno vtičnico in likalnik postavite na njegovo peto. Če uporabljate podaljšek, se prepričajte, da je njegova nazivna moč primerna za likalnik.
3 Počakajte, da se likalnik segreje. Med segrevanjem bo počasi utripal indikator.
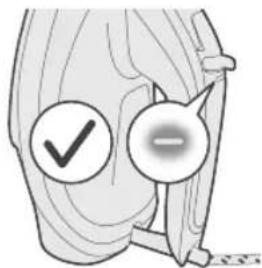
2 Kmalu se bo med uporabo nehala sproščati para.
Nastavitev ECO
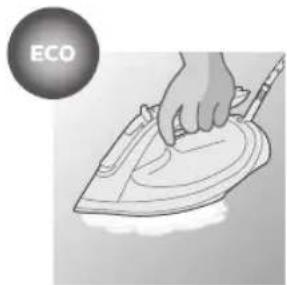
3 Likalnika ne usmerjajte vase ali v druge osebe.
Samodejni izklop
4 Če likalnik dvignete ali premaknete, se bo ponovno vklopil.
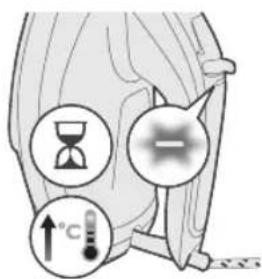
5 Indikator bo začel počasi utripati, kar pomeni, da se likalnik ponovno segreva.
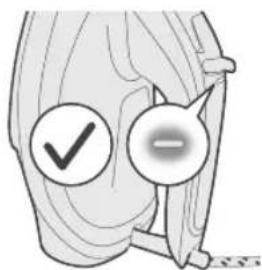
1 Z izbirnikom za nastavitev pare preklopite na način brez pare (suho likanje).
2 Prepričajte se, da likalnik ni priključen v električno omrežje.
4 Likalno ploščo obrišite z vlažno krpo.
2 Prepričajte se, da je likalnik izključen iz električnega omrežja in nastavitev pare nastavljena na način brez pare (suho likanje)
3 Posodo za vodo napolnite do oznake MAX.
Slovenščina
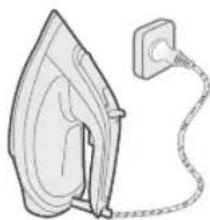
4 Likalnik priključite v električno omrežje in po potrebi vklopite električno omrežje.
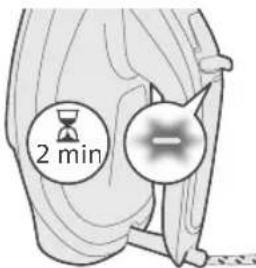
5 Indikator bo začel utripati, kar pomeni, da se likalnik segreva.
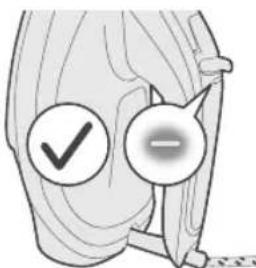
6 Likalnik je pripravljen, ko indikator sveti neprekinjeno.
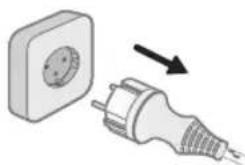
8 Izbirnik za nastavitev pare potisnite v položaj za odstranjevanje vodnega kamna in ga pridržite.
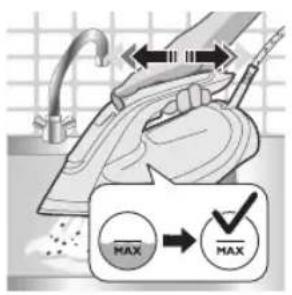
10 Likalnik ponovno priključite v električno omrežje in počakajte, da se segreje in s tem posuši likalno ploščo.
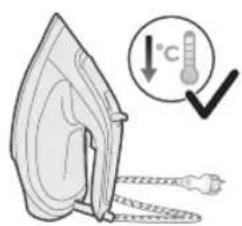
11 Pred shranjevanjem izključite likalnik iz električnega omrežja in ga pustite, da se ohladi.
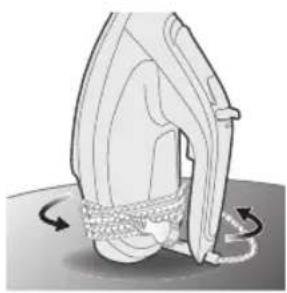
12 Kabel navijte okoli pete likalnika.
Shranjevanje
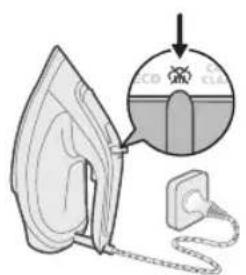
1 Potisnite izbirnik za nastavitev pare tako, da izberete način brez pare (suho likanje)
Slovenščina
3 Pustite likalnik, da se ohladi.
4 Iz posode za vodo izlijte preostalo vodo.
Slovensky
5 Veko zásobníka na vodu pevne zatvorte.
1 Naparovanie nastavte na režim žehlenia bez naparovania.
: Nepretržite sa produkuje viac pary pre viac pokrčené odevy.
1 Prepnite nastavenie naparovania do režimu bez naparovania (suché žehlenie) na regulátore pary.
4 Žehliacu plochu utrite navlhčenou handričkou.
2 Uistite sa, že je žehlička odpojená zo siete a naparovanie je nastavené na režim bez naparovania (suché žehlenie)
6 Ked'svetelný indikátor zostane trvalo svietit, žehlička je pripravená.
434 Slovensky
7 Žehličku odpojte zo siete.
8 Posuňte regulátor pary do polohy Calc-Clean a podržte ho.
10 Žehličku pripojte do siete a nechajte ju zahriat, aby sa vysušila žehliaca plocha.
2 Žehličku odpojte zo siete.
1 Poklopac posude za vodu
2 Birač postavke pare
3 Indikator
4 Okidač za dodatnu količinu pare
5 Namotavanje kabla
6 Grejna ploča
Upotreba aparata
Tip vode koji bi trebalo koristiti
Napomena: Pri prvoj upotrebi, pegla može da izbaci malo pare. To će ubrzo prestati.
Tehnologija OptimalTemp omogućava peglanje svih vrsta tkanina koje mogu da se peglaju, bilo kojim redosledom, bez podešavanja temperature pegle.
Tkanine sa ovim simbolima se mogu peglati, na primer lan, pamuk, poliester, svila, vuna, viskoza i veštačka svila.
444 Srpski
Tkanine sa ovim simbolom se ne mogu peglati. U te tkanine spadaju sintetičke tkanine, kao što je spandeks ili elastin, tkanine sa sadržajem spandeksa i poliolefina (npr. polipropilen), ali i odštampani motivi na odevnim predmetima.
Punjenje rezervoara za vodu
2 Pomerite birač postavke pare udesno da biste izabrali režim bez pare (suvo peglanje)
5 Čvrsto zatvorite poklopac rezervoara za vodu.
Pre upotrebe
Tokom prve upotrebe možda ćete videti dim, to je normalna pojava. To će ubrzo nestati.
2 Uključite utikač u uzemljenu utičnicu i ostavite peglu da stoji na postolju. Ako koristite produžni kabl, postarajte se da nominalna snaga produžnog kabla odgovara pegli.
3 Sačekajte da se pegla zagreje. Indikator će sporo pulsirati/treperiti dok se zagreva.
446 Srpski
1 Podesite regulator pare na režim bez pare
2 Nakon kratkog vremena para će prestati da izlazi tokom peglanja.
Postavka ECO
: Pritisnite i držite birač postavke pare za uzastopno primenjivanje maksimalne količine pare radi savladavanja upornih nabora.
1 Pritisnite i otpustite okidač za dodatnu količinu pare da biste dobili snažan mlaz pare i uklonili uporne nabore.
2 Pritisnite i otpustite okidač za dodatnu količinu pare dok je pegla u vertikalnom položaju da biste uklonili nabore sa odeće koja visi koristeći dodatnu količinu pare. Držanje okidača za dodatnu količinu pare dok je pegla u vertikalnom položaju neće ispuštati neprekidnu paru.
5 Indikator će početi sporo da treperi, što ukazuje na to da se pegla ponovo zagreva.
6 Kada indikator počne stalno da svetli, pegla je spremna za upotrebu.
1 Podesite regulator pare na režim bez pare (suvo peglanje).
3 Uverite se da se pegla ohladila.
4 Očistite grejnu ploču vlažnom krpom.
4 Uključite peglu na električnu mrežu i uključite napajanje ako je potrebno.
6 Kada indikator počne stalno da svetli, pegla je spremna.
Srpski
7 Isključite peglu iz zidne utičnice.
9 Držite peglu iznad sudopere u horizontalnom položaju i protresite je. Para, vruća voda i čestice kamenca će izlaziti iz grejne ploče. Nastavite da tresete peglu dok ne izađe sva voda iz rezervoara.
12 Namotajte kabl oko donjeg dela pegle.
Odlaganje
1 Pomerite regulator pare da biste izabrali režim bez pare (suvo peglanje).

2 Isključite peglu iz zidne utičnice.
3 Ostavite peglu da se ohladi.
4 Prospite preostalu vodu iz rezervoara za vodu.
454 Srpski
5 Namotajte kabl za napajanje oko glavnog kućišta pegle.
Rešavanje problema
U ovom poglavlju ukratko su navedeni najčešći problemi do kojih može da dode sa aparatom. Ako ne uspete da rešite problem pomoću informacija navedenih u nastavku, posetite www.philips.com/support da biste pronašli listu najčešćih pitanja ili se obratite centru za korisničku podršku u svojoj zemlji.
7 Irrota silitysraudan pistoke pistorasiasta.
2 Irrota silitysraudan pistoke pistorasiasta.
7 Koppla ur strykjärnet.
2 Koppla ur strykjärnet.
3 Dế bàn ủi nguội.
1 Ütügi toga dakmaň.
4 Ütük ulanmak üçin taýyar bolanda, görkezijiniň çyrasy yzygiderli yanyp durar.
1 Bug sazlamasyny bugsuz tertibe düzün
2 Biraz wagtdan soň ütüklenýärkä bug çykmasy kesiler.
ECO sazlamasy
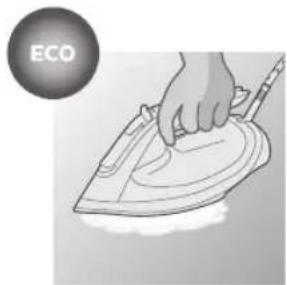
ECO: Az yygyrtly geyimler üçin iň pes möçberde bug üznüksiz berilýär. Bu sazlamada energiya hem tygşıtlanýar.
Iki bug buludy sazlamasy
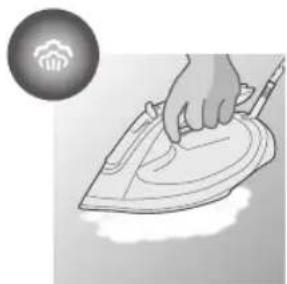
: Az yygyrtly geyimler üçin iň pes möçberde bug üznüksiz berilýär.
1 Aýrylmasy kyn ýygyrtlary aýrmak maksady bilen güýçli bug bermek üçin güýçli bug beriş düwmesine basyp goýberiň.
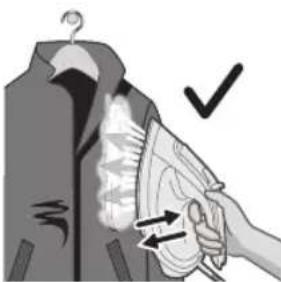
3 Enjamy özüñize yá-da başga birine yakyn yerleşdirmän.
Awto öçürmek
6 Görkeziji çyra öçeninde ütük ulanya taýyar bolýar.
Arassalamak we abatlamak
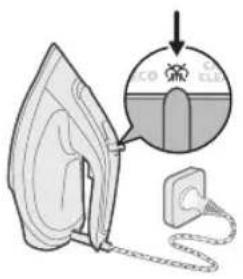
4 Ütügiň dabanyny çygly mata bilen arassalaň.
2 Ütügiğ tokdan ayırylandygyna we bug sazlamasynyň bugsuz (gurulygyna ütüklemek) ürtibine sazlanandygyna göz yetiriň.
6 Görkeziji cyrasy durnukly yagtylanda, ütük taýyn bolýar.
9 Ütügi nowajygyň üstünde keseligine saklaň we ütügi silkeläň. Dabanyndan bug, gyzgyn suw we çökündi bölejikleri çykar. Suw gabyndaky suwuň hemmesi gutaríança ütügi silkelemäge dowam ediň.
10 Ütügi gaytadan rozetka dakyň we dabanyny guratmak üçin onuň gyzmagyna rugsat beriň.
11 Saklamazdan ön, ütügi rozetkadan çykaryň we onuň sowamagyna garaşyň.
12 Elektrik kabelini ütügiğ dabanynyğ daşyna sarağ.
Ammarda saklamak
3 Ütügiň sowamagyna maý beriň.
4 Suw gabynda galan suwy dökün.
5 Elektrik kabelini ütügiğ esasy korpusynyğ daşyna sarağ.
Näsazlyklary anyklaýyş
1 Утукту розеткага сайтаңыз.
4 Утуктун бетин ным чупурек менен тазалаңыз.
7 Утукту розеткадан суурунуз.
3 Утукту толук муздатыңыз.
604 Македонски
622 Русский
Матоъхо бо ин рамз дарзмолнашавандаанд. Ба ин матоъхо матоъхои синтетики ба монанди Спандекс ё эластан, Матоъхои омехтаи Спандекс ва полиолефинхо (масалан, полипропилен), балки инчунин навиштачот дар либос дохил мешаванд.
1 Танзимоти буфро ба танзимоти бе буғ муқаррар кунед
3 Дарзмолро ба худ ё шахси дигар равона накунед.
Хомўшкунии худкор
1 Барои оромии шумо, агар дарзмол ба муддати тўлонй бехаракат нигох дошта шавад, он ба таври худкор хунук мешавад.
4 Бардоштан ё харакат додани дарзмол онро дубора фаьол мекунад.
5 Чарofi нишондиханда охиста мича мезанад/медирахшад, ки нишон медихад дарзмол боз гарм мешавад.
6 Вакте нишондихандаи чарофак устувор фурузон шуд, дарзмол барои истифода омода аст.
Тозакунй ва нигохдорй
Шарх: Барои хамвор нигох доштани сатхи поёни тахта, нагузоред, ки он бо ашёхои металли тамос гирад. Барои тоза кардани зери поя исфанчхои абразивй, сирко ва дигар маводи кимиёвиро истифода набаред.
4 Дарзмолро ба шабака пайваст кунед ва агар лозим бошад, кувваи баркро фурузон кунед.
6 Вакте нишондихандаи чарофак устувор фурузон шуд, дарзмол омода аст.
8 Интихобкунандаи бу́ро ба мавке́ви Calc-Clean ла́жонед ва онро нигох, доред.
1 Калиди буғро лағжонед, то холати буғро хомуш кунед (дарзмолкунии хушк)
4 Оби бокимондаро аз зарфи об резед.
650 Точикй
5 Сими баркро дар атрофи корпуси асосии дарзмол тоб дихед.
1 2nh unwnwjh ywhwnh
2 9n1nn2ni úwùnwlywnwnúwù ntādhúh pùunnipajwù lynǎwù
3 8nighsh inyu
4 9n1nn2ni nidtn uŋuwu lynawly
5 Lwnh hughy
6 Swyh hwnu#w#
Uwnph oqunwqnpnniún
hùz untuwlyh gniŋ wtaup 5 oqunwqnndti
L2niú. Upnniú uwnghù wùquú oqnuwqnǎtǐhu hùwnwǔnn ṭ yhnpn pwiùwlniŋajwúp qninnzh wnàwlyqh: Ywná dwuúwǔwú wǔg wju útnwǔnuú ṭ:
Uwnpn hwnúwn 5 δnpwlyh gnnu oqnwqnndúwù hwnúwn: Uwlywju, tja t npip wwnniú típ wjúwuh unwnwópniu, nnuntin znh lynzunnijwù wunhǎwùn pwnàn 5, hunphnnn. túp unwju δnpwlyh gnnn hwnzutl pannwò ywu nhtúhútnwihqwglwò znh htun hwnlwwn pwtuwlniŋjwúp: Tu hywùh uwnylwóph lynunwlynuiñ u lytnywnwgùh uwnph yjwùpn:
Uh wultlwqntp odwùtihp, znpwùngh gniŋ, pwgwuħ, oulw, uwnułwóph úwpnúwù, wnnniłyúwù odwùnwly úhōngùtn, phúhwlywù úhōngùtnŋu úwpnúwò gniŋ lhyú phúhwlywù wjl üjniątn, pwùh nn ηnpwùp lhyunn tǔ wnwwgugūtī qnh gwjuntn, 2wqwùwlywqnju pòtn lhyú yìuwutl àtn uwnpn:
OptimalTEMP unthuunnqhwh
OptimalTemp unthùnǐnghù hùwùwǔnniǎniù ʒ unwìhu wùnníyī pìn n unbuwùh wùnníyùnn qnnòuówòpùtn gùwùwgwò hūnwùwùnīpāwúp` wùnwùg wùnníh gūnúwùnhǎwùh lwwqwùnnúwù:
Uju u2wùnú qnnóu wǒpùtn yuŋtǐ h ʒ wnnnǐyī, onhǔwǔ yúnìzī qnnóu wǎpn, pūwúpwǔ, wùnhtúpātn, útūnwup, pniŋn, yjhulnq n u wnhtuunwlywù útūnwup:
Uju u2wùnu qnnδuωδρύτην ṣ hyuntjīh wnnnlyti: Ujuuntīn u̥tnwnu̥wō tǔ u̥hu̥pātunhī yqnnδuωδρύτην, onhūwḥy' uwwu̥ntɪpūn, t̥huwūnwūn, u̥wwu̥ntāpu ywú wŋlnhtšhūwjhǔ u̥wūnwρātīn wqnniūwlnn qnnδuωδρύτην (on. 'wni̥hwnnwhlū), hǔzwtu āwū huāqnuiunh y̥nwjīh ǔhywnμ̥tην:
Ωnh hughyh lgùnùn
1 Uh uhwqntp wnnniyn:
2 Unwug qinnp2ni wnnnlyuwu ntchuh puunntini hwuwn (snn wnnnlynu) qinnp2ni uwunwlywnwnuwu ntchuh puunnijewu lynawlyn petrip ntwih wg
3 Cngblnu pwgtp qnh hughyh ywwhwnhyn:
4 ənh hughun igntp uhusu MAX u2wahon: Uh wultiugntp nnut hwultiwuŋnja, huzwuhp ti oowutihpn, pninwultunhʒutnp, oawwn yuw pugwuhn:
696 Ruijtntu
5 Uünin yhuyltp qnh unwnwjh ywhwnhyn:
Luwwwwnnwnnnl
Unwghù hú y oqunwqnδúwù dwiúwùwly ywnn l δnihu wizwguìw], u ηw ünnúw] l: ywná dwiúwùwly wùg ηw wiǔgùniú l:
1 Unniqtp hwqniunh ynwjh whuwuh` hwünqutini hwüwn, nn qnpduwopn ywntih 5 wnnnityi:
2 Uhwqntp hunngn hnnuuguwd qwnnwlyhg l wnpniyn nptp hn nnutuwlyh ynu: tnlywnwguwu iwn oqnwwqnndtju, hwünqultp, nn tnlywnwguwu iwnh hqnnpnjniun hwüwwwwnnwuhuwuh wnnpniyh:
3 Uwutip, uhuu wunniln unwpuu: Snighsh injun nuutwn hpauneh unwpuguiu npapwgpni:
4 Enp wnnniyn wwnnnwun jhuh oqnwnqnδύωι, gnighsh lnjyn lqwnzuh lqwniú:
Unwug qnlnn2ni/Σην υηηιληνις
1 qnlnn2nl ywnqwulnnwuh nntp wnwug qnlnn2nl ntchuh ynw
2 4wnǎ dwiúwùwù wùg' wpnnnlǚtǐhu qnlnnzhù lhnwnwnh:
ECO n'tdhu
ECO. 9ninn2ni uulwqwqnju puuwlh wunünutg uwnwlywnwnni, hwniwn t phz dwiptn niutgnn hwqniunu wnynilytjni hwniwn: Uju ntchún uwu huuwjniú t htywnwtutnqhwi:
9n1nn2ni tnlni wúwujhù ywnqwulnniu
. Uultih 2win qinn2ni wupunutg uwinwlywnwniu' wultih lyn2n dwiptin niutgnh hwqnwnu' wnnnlvtini hwuwn:
9n1nn2ni tntp wuwwjhù ywnqwulnniú
. Utnúbp u wuhtp qinnn2ni ùwwnwlywnwnúwù ntchúh nùnnnjujwù lynǎwln` wnwultiwqnijù puìwlyh qinnn2h wnàwyltǐni hwiúwn, nnù wùpnùnhwn ùwwnwlywnwnlniú ʒ wútàwpwnn ǒwiptŋn hwnjætgǔtǐni hwiúwn:
9n1nn2ni nidttnwgniu
1 Nidtn qinn2hnu wutuwpwnn dwiptnn hwnatgutni hwuwn utnutp lu pwg panntip qinn2ni uŋuwi lynawwn:
2 Utnútp lu puq pæntip nɪdtɪn qnɪnn2ni únúwù lynǎwʊŋ nɪnnwhuwjwg nhnpniú' nɪdtɪn qnɪnn2hnu lywhujuð hwaqnuiuh ðwiptɪŋ hwnpətigǔtɪni hwuːwn: Nɪdtɪn qnɪnn2ni únúwù lynǎwʊŋ nɪnnwhuwjwg nhnpnu wjuhtɪŋ qnɪnn2ni wuŋúnhwun úwunwʊwnwnniú zh wwwwhnjuːi:
3 Uh wuhtp wnnnlnp atn yuuu wjl uwnnywug ynw:
hùpùw2huàn wùgùnnu
4 Unnniun qiangutini lwwi untnwnhuhutini ntwpniu wju unyhü ywlyunhylwuw:
700 Ruijtntu
5 Snighsh injun lyuh nuwunwn pewneti gnyg unwinu, nn wnnniyn unwpwunui t ylnyhu:
6 Unnnlnp wwnnpwnn 5 oqnwnqnnduwi, bnp gnighsh iniyun ywjnni 5 ywnzlnni:
Uwpnniú u unthuúhlywlywi uwwuuwnyniu

1 qnnn2ni uwunwlywnwnuwu nbdhuh pùunnqajwu lynawuh ynw qnnn2ni nbdhūn ntpp «wwuwug qnnn2ni» (znn wnnnilynui) gnighzh ynw:
2 3wúnqultp, nn wnnnilyn úhwgulwð yjhùh ülwnnwlyhg:
3 Rwúnqutp, nn wnnnityn uwnzgl:
4 Unnnlhy unwlyh hwnuwwon unptip hunuwul2nnnu:
L2niú. Unnniynn úwlytntbun hwnjø wjuhtini hwiúwn hunphnnn t unnuñu huniuuwhtl útunwnwlywù wunwplywutnh htun lyn2un 2yhnu̱hg: Unnniuh unwlḥ hwnylwoh úwpnúwù hwiúwn tnptp úh oqnwaqnòtp útunwnwlywù wwunnynnú uwntiǔq, pwgwhu lywú wjl phúhwlywù ujnipatn:
5 Uh lüwgtp/üwpntp wnnnilyn hnunn qnh unwly. nww lwwnnn t d'uwutl übnphu titywnnwlywù pwnwnnghzutqn:
Calc-Clean ̈üün̈üẅd̂ph ̈üẅp̈nn̈ï
funphnnn. Calc Clean uwnlwwph uwpnuwu qnndwnnyan lwnnn 5 oqnuwqnndutg wulwugwud wuhh: bpti wwnniu tip wjuwuh unwnwopnu, npuntn qnh lynunnipjwu wunhawun pwnan 5, wju qnndwnnyan wultih hwawhu oqnuwqnndup:
1 bunnhninn t unpniw wnnnilyn tuunlwaoputnhg uwpntjjnnpwugynin wuhu oqnwnqnndniuhg htunn' npw ljuwupn tnlywnwgutini hwiwn ywu 2wqwuwlywqniju potnh/zh wnwzwguwu dwuwuwu:
702 Ruijtntu

2 3wúnqutp, nn wnnniyù wúguinlquò jhù h qunnwlyhg, l qnnn2ni ywnqwulnpnniún nnuwò jhù h wnwùg qnnn2ni wnnniyúwù ntdhúh (znn wnnniyniú) ynw
3 2nh hughyn ignup shuLu MAX u2wqhón:
4 Unnniyn uhwgntp hblwnnwuwunwlywnwnuwu gwughu u, wuhnwdt2unnipjwu ntwpniu, uhwgntp gwugn:
5 8nighzh inyun hyawnph' gnug unwlnl, nn wnnniyn unwpwùnui t:
6 Unnnlnp wwnnpwnn t, tnpe gnighsh inyun ywjniu t qwnlniu:
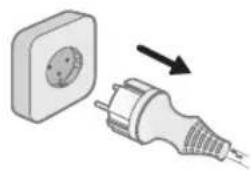
7 Unnnilyu wugwuntp:
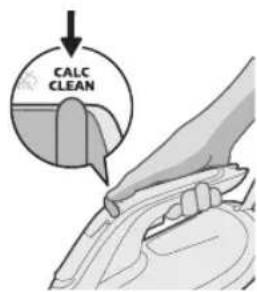
8 9n1nn2nl ywnqwylnnh2n nntip Calc-Clean nhnph ynw u wjnwtu wwhtip:
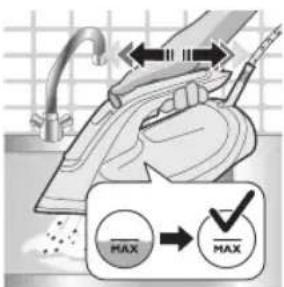
9 Unnnln ywhtp luygwwnwuh ynw u qaniznntü pewwhwhuntp wjü: Swap gninn u tuunluwoph uuwuhyluttn yewhultü wnnnlyh uwltyntuhg: Cwnniuwltp wnnnlyn pewwhwhunti, uhüsl hughyhg wúpnng gninn nuunwnyuh:
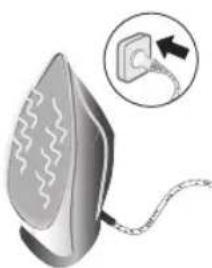
10 Uhwqntp wnyniyn uwnnwlyhù l janntp wjù unwpwùw, nnwbtuqh wnyniylh unwqh hwnnluòn znnwùw:
11 Uguwutp uwnnwlyhg, uwwutp wnnnlyn hnuwuw, wjunihtunlu wwhtp:
704 Ruijtntu
12 Lwnp chwepatp wwnnlyh nunuwlyh 2ninqn:
اللهمنيُمْ
1 «Unwùg qnnn2ni wpnnlúwù» ntdhū pùunptīni hwuún (znn wpnnlýnu) uuhtgntip qnnn2ni uwinwlywnpwnúwù ntdhūh pùunnημjwi ylnǎwylq
2 Unnnilyu wugwuntp:
4 2nh hughyhg powhtp uuwgwδ gninn:
5 3nuwuph lwnp chwpeaptp wwnnlyh 2nin2n:
Utuwnpniŋniùtph niŋnniú
Uju qjfunui utnlywjwgluw tii wutuwnwnnwduw duhnhnuttn, nnpup lwwnn tii hwunhwti uwnph oqnuwqnnduiwi dwuwuiw: trat stip lwwnnwuni huunhnp iniotl uunnpl ptnluw udntlywnunlnyajwui oqunipuwup, wjgtiup www.philips.com/support hwawhuwlyh unnlnn hwngtph hwuwn lwwi nhutip dtin tnlynniui qnpdnn 3wduwhnnnutph uwwuwnplyuwi lytuunnni:
| huàn hī huàn huàn | wùnǎuìn | Lnìðniú |
| hú Philips2nàtiwnnniúhg ðnihu ʒnniņu qwiņuunwpwùwļnì āwúwùwǔl: | Unwghù wùqwúoqunwqnnòniú | Ununwnnniājwù nùpawgpnú wunnliyh nnn2 úwutnúh yhnpn jnnnnuļtǐ bù: hùzh wnnjniūpniú wnnniúhg lqwnnn ʒ úh phz ðnihu ηnniņu qwi, tnp wju úhwugļnú5 wnwghù úh puìh wùqwú, ηw ünpúwì ʒ u lqwnádwiúwùwúhg lqgnúh: |
| Unnniúh unwúhhwnulwǒniú gṇin lyu: | tnpbùu, ðtn útnzhù oqunwqnòniúhg htún, hùwnwulnn ʒ úh phz gṇin útwugwó jhùh wnnniúh unwúh hwnulwǒniú: Uju gṇinn lqnninn2hwùw, tnp wnnniúh unwúh hwnulwǒn unwpwùw, uwnwqwgwó qninn2hù lqwnnn ʒ ðnihu pujwù: ʔw‘ünnuwì ʒ, wju lqwná dwiúwùwúhg lqgnúh: | |
| Ujùniwútìuwjùhu, húwnnniúhg ðnihu ʒ ηniņuqwiņu, ‘unijùhulytinnù2wì lytuntpnunniqtīnig htún: | Rüwnwulnn ʒ, hùnhn lyu wnnniúh htún, hunnhnnntùp unwíhu lqwwyltǐ útaq htún: | |
| hú Philips 2nàtiwnnniúŋsh wnnniúlnuú ðwijptān: | 9ninn2hù zhoqunwqnnòulniú: | 9ninn2ni lqwnqwulnnniún ηntp ECO wúwihyuú 3 wúwuh ̈chnw (wútiùwnidtín qninn2ni lqwnqwulnnniún):4wnnn tþ nidtnwguṭl qninn2hù ̅hnhtinú l wultíhnidtín qninn2ni lqwnqwulnnuúwù lyuíoqunwqnnòtīnú l qninn2ni nidtnwguúwù niúlghwù’wultíh hunnp ðwijptnù wnnniútīni hwiúwn: Utnútpqninn2ni nidtnwguúwù ðqwiùn lyuú lynówyún’qninn2ni úwwnwlywnwnúwù wnnwqniəjnítùwwultiugútīni hwiúwn: Ujwnh niútgtp, nn lqwnádwiúwùwluñú qninn2ni nidtnwguúwù2wnniúwlywluwù oqunwqnòniún lqwnnn ʒ ʒnhgwjungutn wnwguğutl lyuú ̅uqwqtgutl qninn2nipuìwulp: Ujn ηtówpniú úh yhnpn uwwutp,wjùnihtinlu lynjhù oqunwqnòtap qninn2ni nidtnwguúwùniúlghwù: |
| hú Philips 2nqtiwnnniúŋqninnzh sh wnàwylniú: | ∅nh hughlyh útεpwulwnwnpwüwyniəjwiúp gninξlyw/πünhwünwuwbu gnin ξlyw: | θραt Philips 2nqtiwnnniúŋ gnh hughlyh útε gninξyhùh, wnnniún sh lqwnnnwùw qnnn2h wnàwylti:∅nin lgntip znh hughlyh útε: ηnwùhg htunn wnnniún lnylhù qnnn2h lwnàwylh: |
| ∅nnnn2ni ntcdhúhuwhhΣηnuìwò Τ«wnwùg qnnnn2ni» ntcdhúh/Σnn wnnniúyúwù ✉ ynw: | ∅nnnn2ni lqwnqwulnnniún ηntp ECO wúuh lywú 3 wúujh 🔒nw (wútbùwnidtin qnnnn2ni lqwnqwulnnniún): | |
| Unnnniún wwwnpwwun ξtqninn2h wnàwyltiniú: | Unnnniún wwwnpwwun Τ hwiúwnuǐniú qnnnn2h wnàwyltiniú, tnp gnighsh inyún lqwnuǐniú Τ lywjniú: | |
| hú Philips 2nqtiwnnniúhqnnnn2ni nidtnwgnuiún sh w2hwwunniu: | ∅nnnn2ni nidtnwgúwùðquùn Σtþ utnúbí ni puig jænnti: | Philips 2nqtiwnnniúŋ qnnnn2ni nidtnwgnuiúwlnhúwgúbīni hwiúwn utnúbp qnnnn2ni nidtnwgúwù lynǎwulp/ðquùn l jnhú puig jænntp:∅nnnn2ni nidtnwgúwù lynǎwulp/ðquùn utnúwó wjuhtjni ntawpniú 2wnniúwylwylwù qnnnn2h sh wnàwyltiniú: |
| ∅nnnn2ni nidtnwgúwù§niúlghwù szwihghwǒuhu tpoqunwqqnδniú lywnádwüwùwylwhwnuǐwòhpñpawgpniú: | tnp lywná dwüwüwylwhwnuǐwòh núpawgpniúszwihg hwiǎuhu tþ oqunwqqnδniú Philips2nqtiwnnniúŋ qnnnn2ni nidtnwgúwù §niúlghwù, wju nnn2 dwüwüwylnú wjluu zh w2hwwinh:Uju ntawpniú uwwutp úh puǔh nnuǐt’ úhùsú lqwnnnwùwp ñnphg oqunwqqnδtią qnnnn2ni nidtnwgúwù §niúlghwù: | |
| Unnnniún wwwnpwwun ξtqninn2h wnàwyltiniú: | Snighsh inyún lqwnuǐh lywjniú, tnp wnnniún wwwnpwwun ξhù: Snighsh inyún nwaùwn lqwnpah, tnp wju ηtrz wwwnpwwun ξt: | |
| Unnniútytini núpawgpniúzgn hluwahíutn lywù/gnínξ hnuniú hwqnwnuhu ynw: | Oqunwqqnδniú wnwghùwùquwú: | θραt gnin Τ hnuniú/gwjunniú wnwghùoqunwqqnδúwù núpawgpniú, úthy wúquwú lqwnuwtp Calc Clean §niúlghwù: θραt niw γmniòh zgn hwnunwhnuph hùnhnp hwgnnn oqunwqqnδúwùnúpawgpniú, hnphnnnn túp unwlhu lqwwuǐti útbq htún: |
| ∅nnnn2ni nidtnwgúwù§niúlghwù szwihghwǒuhu tpoqunwqqnδniú lywnádwüwüwylwhwnuǐwòhpñpawgpniú: | Čwnniúwyltp wpnniútyi hnnhqnúwylwù nħnpnuì lu ûh uhnpn uwwutp, úhùsú ñnphg lqwnnnwùwp oqunwqqnδtią qnnnn2ni únúwù §niúlghwù: |
| Unnniuh útgüwnuwrp/ywghhlwghw t wnwgwgti: | bpt wpnniuhg wnpsuuqnju gnin lywi uwhunwly pcthnilutn bù nninu qwihu, nw lwwnn t'uzuwutl, np wnnnih útg ywighhlwghwjh'wnuwrp t wnwgwgti: Ujú úwpntini hwúwn lwwunwtp Calc Clean niulghwu: bpt átn unwnwðw2ngwuh gninn lyn2n gnin t, hnnhnnn btp unwihu oqunwqnδtj panwud gnin (lywi 50% panwud u 50% ónnwuh gnin) u lwwunwti calc cleanniulghwu wúhun úty wuqwú, nwwtuqh wnnniyn tnlywn ðwnwjh:Uwwuh niutgtp. uwhunwyl pcthnilutnh wnlywnijajniutu wnnniyl uwnwghu wuqwú oqunwqnδtjni dwnuwwl ünnui wt: |
| Tnip phühluwnutn lywihwultiwijnpatn bpwultiwgnti gnh hughyh útg: | Unnuwnhqwnnnutn/jnntn/phühluwnutn/hwultiwijnpatn/uuunlwophg úwpnnn inönyjutn szutnp t wultiwgultu gnh hughyh útg, puuh np nnwup lwwuni tu uwnpn: Nnnntp znh hughyn úwpnin qnnl, igntp qnnl u wnnniyn úwpntp tvwnlwophg: |
| Tnip lwwqhù stp uhwltygnh hughyh lwwwnhsp: | Lgútlnig htunn wúnin yhwytap lwwwnhsp: |
| 9nnn2húlnuntiuwwgulti twnnniyluw unwhunwuh upw: | 9nnn2hù lwwnn t lynuntiuwwgulti unwhunwuh ðwdyngh upw, hwnlywwtu, bnp oqunwqnδtjnuí bù wjuwuh wnnniylutn, nnnup tnlywn dwuwuwynl nidtn qnnn2h tǔ wnawlynu: 4wnnn t peuw, np átn wnnnih unwuh hwnulwohg gnin t wpunwhnuni: Uw lwwutjni hwnwlp lwwnn tip lwwunwnti htnluyw lqnönnniəjniuttn.1 Cunntp qnnn2ni wultih gwón lwwquwnnnu, puù uwfulhuni, lywi oqunwqnδtap qnnn2h wnwghù wnnniyluw duwuwly, wjunihtuni wjupunntp znn wnnniyluw ntdhúnl:2 4wnnn tb'awu jnwgnighs 2tnn lynn nuti wnnniuh unwhunwuh l wwnnluh unwhunwuh ðwdyngh úhglì lynuntiuwwgnwin ðwquwnjuh hwugutni hwnwn:3 Φnhutp wnnniuh unwhunwuh ðwdyngn, bpt uwniuqwutuwu wnnniun ðwzulti t: |
| Unnniutjning htunnwnnniyhg gnin t hnuni: | Uhislu hnuwuphg wügwuntin qnnn2ni ðwwuwrwnwniuwu ntdhuh guunnipjuw lwnawlyn nntp «wnwug qnnn2ni» ntdhuh/znn wnnniyluwu ynw: 7wnwnltp znh hughyn l wwnnilp nntp nnnwhwjwg nhnpnu' hnuwuwni/wuhtini dwuwuwly: |
| Unnniun oqnwnqnptinig htunn lynnph yhu whwj lyu wwnniuh htunp t uuni: | Unnniun uwwtnunjeh hwnje sh tnti: | Unnniun wuwuua t oqwnqnpti wnnniun pinn qnnduwptinh hwuun: Fwjjn lyu wwnniuh htunptnn u2nwulwi stu lu whtunwunu ti huqnwnn lyuwning htunn: Uh wnnnlytp lwnh lyu hwqniunh dwuudph uhwjnu: 3wqnwnh lnu htunptnhg hnuwwhtini hwuun lwnn tpr wnnniun hwnlwh dnu puupwjuw lwnn nuti: |
| Unnniuh gnighsh inyun pwnnniu t: | Unnniun unpwuniu t: Snighsh inyun nuun lwnpgh gnuq unjn, nn wnnniun unpwuniu t: tnp wnnniun wwnnwun jhuh, wju lyuwnh lwnniu inyun: | |
| Uuunniuun wugwnniu niughwu wunhlwgti t: | Snighsh inyun lyuuh wnuq pwnrati, tn p wnnniun 2 nnwtu wu2wnd uuu hnhnqnuwlu wu nnnwhwjwg nhpnu: Uu gnyg t unjhu, nn wnnniun uunti t Uuunniuun wugwniu (ASO) yhawy: ASO yhawniu wnnniui wjluu sh unpwuw, wjl yuluh hnuwui: tn p wnnniun untnwunduh, gnighsh inyun lyuuh nuunwn pwnrati gnyg unjn, nn wnnniun lnuh unpwuniu t: tn p gnighsh inyun nuunwnh pwnrati lu uuu lwnniu lwnlwh, unjuh hwnlwh lpwnpwuw, lu wnnniun wwnnwun lhhuh oqwnqnnduw: | |
| Unnniuh wjluu sh unpwuniu: | 3nuwuph uhuguwu hun lwwylw duynh lyu: | Unniqtp hnuwuph lwnp, hnngwuh lu wwnh lwnwnl: 3wunqtrp, nn wutu hus tnnpwuh uhuguw t: tpat tnlpwnwuguw iwn tpr oqwnqnndniu, hwnqtrp, nn wutwuwuw hqnniajniun hwnwwwnuwuwuniu t wnnnih: |
| Uuunniuun wugwnniuniughwu wunhlwgti t: | Snighsh inyun lyuuh wnuq pwnrati, tn p wnnniun 2 nnwtu wu2wnd uuu hnhnqnuwlu wu nnnwhwjwg nhpnu: Uu gnyg t unjhu, nn wnnniun uunti t Ujunniuun wugwniu (ASO) yhawy: ASO yhawniu wnnniui wjluu sh unpwuw, wjl yuluh hnuwui: tn p wnnniun untnwunduh, gnighsh inyun lyuuh nuunwn pwnrati gnyg unjn, nn wnnniun lnuh unpwuniu t: tn p gnighsh injun nuunwnh pwnrati lu uuu lwnniu lwnlwh, unjuh hwnlwh lpwnpwuw, lu wnnniun wwnnwun lhhuh oqwnqnnduw: | |
| Unnniuh wjluu sh uhwniu (tu hnptbi tu qtnnuwr unnptnwlttn, pwjg wnnniuj wjunwutwuh sh unpwuniu): | Uu ntwpniu, hwnwnl n t, hunhn lyu dtp wnnniuh htan: hnhnnnt tup unjhu lwwutl utq htan: | |
สารบัญ
3 robotic behavior training software/privacy/privacy/privacy/privacy/privacy/privacy/privacy/privacy/privacy/privacy/privacy/privacy/privacy/privacy/privacy/privacy/privacy/privacy/privacy/privacy/privacy/privacy/privacy/privacy/privacy/privacy/privacy/privacy/privacy/privacy/privacy/privacy/privacy/privacy/privacy/privacy/privacy/privacy/privacy/privacy/privacy/privacy/privacy/privacy/privacy/privacy/privacy/privacy/privacy/privacy/Privacy/privacy/privacy/privacy/privacy/privacy/privacy/privacy/privacy/privacy/privacy/privacy/privacy/privacy/privacy/privacy/privacy/privacy/privacy/privacy/privacy/privacy/privacy/privacy/privacy/privacy/privacy/privacy/privacy/privacy/privacy/privacy/privacy/privacy/privacy/privacy/privacy/privacy/privacy/privacy/privacy/privacy/privacy/privacy/privacy/privacy/privacy/privacy/privacy/privacy/ privacy, privacy, privacy, privacy, privacy, privacy, privacy, privacy, privacy, privacy, privacy, privacy, privacy, privacy, privacy, privacy, privacy, privacy, privacy, privacy, privacy, privacy, privacy, privacy, privacy, privacy, privacy, privacy, privacy, privacy, privacy, privacy, privacy, privacy, privacy, privacy, privacy, privacy, privacy, privacy, privacy, privacy, privacy, privacy, privacy, privacy, privacy, privacy, privacy, privacy, privacy
:
:
7 ถอดปลักเตาร็ด
2 ถอดปลักเตาร็ด
sā lūndāmmmbl dʒm6ʒ glumznmgànb yosyomgòs syfmdsmgmns. glu glumznmgòn dmnys3b lunbongfuzym glumznmgòb, mnmgmnnyss luzs6qgdbn sb gmsubghbn, luzs6qgdbnss6 bsfmgzn glumznmgòn qas 3mnmnmgmgn6gòn (dʒs., 3mnm3fm3nmg6n), slg3g 3fm6ghòn fshbushdgm8j.
3 6yqnnb fng8gfnzynmbl ong2sbyfmn zgbu6non.
4 Finland, 2013, 2014, 2015, 2016, 2017, 2018, 2019, 2020, 2021, 2022, 2023, 2024, 2025, 2026, 2027, 2028, 2029, 2030, 2031, 2032, 2033, 2034, 2035, 2036, 2037, 2038, 2039, 2040, 2041, 2042, 2043, 2044, 2045, 2046, 2047, 2048, 2049, 2050, 2051, 2052, 2053, 2054, 2055, 2056, 2057, 2058, 2059, 2060, 2061, 2062, 2063, 2064, 2065, 2066, 2067, 2068, 2069, 2070, 2071, 2072, 2073, 2074, 2075, 2076, 2077, 2078, 2079, 2080, 2081, 2082, 2083, 2084, 2085, 2086, 2087, 2088, 2089, 2090, 2091, 2092, 2093, 2094, 2095, 2096, 2097, 2098, 2099, 2100
ECO: mānqīmnl dānδασμημπ nāmφγδmònl yβy3ψφ φdānθφγδs gādmnygδjδs dīzīng bāzīgδjndl gāuδιδmφγδmφ. γι μγγαν δmασι βαμγφφmγgδmσι.
1 dbjmmg gububmfgdgm buzggtdnl dmnjfm mmonjmnom dmusdmfgdmsq, qssgnfgm qss ygdznm mnmonjmnbl buzgptnl mnmszlu.
4 yonml bgtmdn sngdnl s6 gudmdns3gdnl dgdmb3g3sdn, nl bgtmsbqms hsnfmzgds.
738
Jahmugun g63
4 dnmn 2sslygonszgn 130mn 6ugfmn.
10 33753 32567690000000000000000000000000000000000000000000000000000
12 30000000000000000000000000000000000000
g63b3s
1 确保熨斗电源插头已拔下。
3 翻开水箱盖。
5 盖紧水箱盖。
使用准备
1 将蒸汽设置调至无蒸汽模式
2 片刻过后,熨烫过程中蒸汽将会消失。
节能模式
3 切勿将熨斗朝向自己或他人。
自动关熄功能
4 拿起或移动熨斗会使其重新启动。
2 确保熨斗电源插头没有插上。
3 确保熨斗已冷却。
简体中文
4 用湿布擦拭熨斗底板。
7 拔下熨斗插头。
11 存放前拔掉插头并让熨斗自然冷却。

12 将电线缠绕在熨斗的底部。
存储
2 拔下熨斗插头。
3 让熨斗自然冷却。
4 将水箱中剩余的水倒出。
762 简体中文
5 将电源线缠绕在熨斗机身上。
故障排除
1 請勿將熨斗插上電源。
3 掀開水箱蓋。
5 確實蓋好水箱蓋。
使用前準備
1 將蒸氣設定調整為蒸氣模式

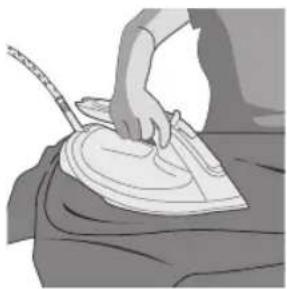
2 一段時間後,蒸氣會在熨燙期間停止。
節能模式

3 請勿將熨斗朝向自己或他人。
自動斷電
4 拿起或移動熨斗會重新啟動熨斗。
2 請確認熨斗未插電。
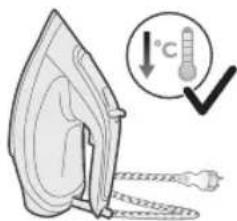
3 請確認熨斗已經冷卻。
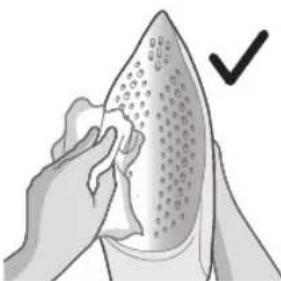
4 請用濕布擦拭底盤。
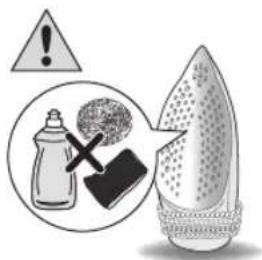
6 當指示燈恆亮時,即可開始使用熨斗。
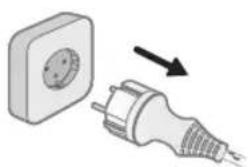
7 拔下熨斗插頭。
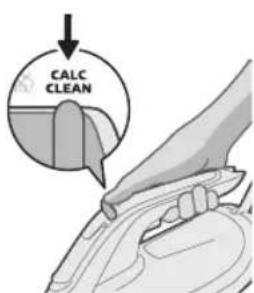
12 將電線纏繞在熨斗底部。
收納
3 讓熨斗冷卻。
4 將水箱中剩餘的水倒空。
5 將電線纏繞在熨斗主體。
疑難排解
3 물탱크 뚜껑을 젖혀서 엽니다.
5 물탱크 뚜껑을 꼭 단으십시오.
사용 준비
3 다리미가 식었는지 확인합니다.
7 다리미의 전원을 뽑으십시오.
3 다리미를 식혀주십시오.
문제 해결
طاء خزان المياه 1
محمد البخار 2
ضوء المؤشر
فتل تعزيز البخار 4
تحزين السلك 5
[NO TEXT]
- (الكي الجاف)
لاء خزان المياه.
لا بخار/الكي الجاف
[NO TEXT]
تعزيز البخار
ص من التجاعيد
الصعبة.
شخاص آخرین 3.
مَيْعِيد تنشيطها 4.
Liberia مرة أخرى.
غزة للاستخدام.
العربية 807
التنظيف والصيانة
لَة بمصدر|^ر.2.
مكواة قد بردت.
eta قماش رطبة. 4.
کهربائية بداخلها.5.
تنظيف الكلىس

2(الكي الجاف) نار"
- (الحد الأقص) 3.
العربية 809
WOA QYID AECO 5.
الأُمكواة جاهزة.
دَع المكواة تبرد.3.
أي مياه متبقية. 4.
لرئيسي للمكواة.5.
مخزن آب با درب 1
لليد انت Beach بخار 2
چ Eraغ نشانگر 3
اشه تقویت بخار4
سیم جمع کن 5
کف اتو6
استفاده از دستگاه
نوع آب مورد استفاده
گیرد. در صورت 2

اتوى خشک/بدون بخار
茶
خار قرار دهید.
- تمام مى شود
ECO تنظيم
تقویت بخار
ی سخت برطرف 1
شوند.
روشن می شود.

که اتو دوباره در5
CALL داغ شدن است.
، استفاده است.
۴۲۱۶۵ 823
و در پریز نباشد.
نک شده است.3.
طوب تميز كنید.4.
سیب وارد شود.5.
رسوب زدایی
وی خشک) قرار 2
داشته باشد.
- پر کنید MAX
۸۱۲۵ فارسی
ن را روشن کنید.
داغ شدن است.5.
، استفاده است.
را از برق بکشید.
شید و نگهدارید. 8
826 قارسی
د اتو خنک شود.
ب بيرون بريزید.
٥ اتو جمع کنید.
عيب يابى
PHILIPS and the Philips Shield Emblem are registered trademarks of Koninklijke Philips N.V. and are used under license.
This product has been manufactured by and is sold under the responsibility of Versuni Holding B.V., and Versuni Holding B.V. is the warrantor in relation to this product.
2025 © Versuni Holding B.V.
642001024872 (05/2025)



- INTRODUCTION
- PRODUCT OVERVIEW
- USING THE APPLIANCE
- TYPE OF WATER TO USE
- OPTIMALTEMP TECHNOLOGY
- 6 ENGLISH
- FILLING THE WATER TANK
- PREPARING FOR USE
- 8 ENGLISH
- NO STEAM/DRY IRONING
- ECO SETTING
- TWO STEAM CLOUDS SETTING
- THREE STEAM CLOUDS SETTING
- STEAM BOOST
- AUTO SHUT OFF
- ENGLISH
- CLEANING AND MAINTENANCE
- 12 ENGLISH
- CALC-CLEAN
- STORAGE
- TROUBLE SHOOTING
- MÜNDƏRICAT
- 22 AZƏRBAYCANCA
- MATI OTOMATIS
- PENYIMPANAN
- PEMECAHAN MASALAH
- TETAPAN ECO
- UPORABA APARATA
- VRSTA VODE KOJU TREBA UPOTREBLJAVATI
- PRIPREMA ZA UPORABU
- BEZ PARE / SUHO GLAČANJE
- POSTAVKA ZA DVA OBLAKA PARE
- POSTAVKA ZA TRI OBLAKA PARE
- HRVATSKI
- 234 LIETUVIŠKAI
- 252 MAGYAR
- ECO-INNSTILLING
- TO DAMPSKYER-INNSTILLING
- TRE DAMPSKYER-INNSTILLING
- JIHOZDAN FOYDALANISH
- ISHLATILADIGAN SUV TURI
- SUV BAKINI TO'IDIRISH
- 304 O'ZBEK
- BUG'LI ZARBA
- CHO'KMADAN TOZALASH
- 312 O'ZBEK
- SAQLASH
- NOSOZLIKLARNI ANIQLASH
- SPIS TREŚCI
- SISTEMA DE VAPOR
- NASTAVITEV ECO
- SAMODEJNI IZKLOP
- SLOVENŠČINA
- SHRANJEVANJE
- SLOVENSKY
- 434 SLOVENSKY
- UPOTREBA APARATA
- TIP VODE KOJI BI TREBALO KORISTITI
- 444 SRPSKI
- PUNJENJE REZERVOARA ZA VODU
- PRE UPOTREBE
- 446 SRPSKI
- POSTAVKA ECO
- SRPSKI
- ODLAGANJE
- REŠAVANJE PROBLEMA
- ECO SAZLAMASY
- IKI BUG BULUDY SAZLAMASY
- AWTO ÖÇÜRMEK
- ARASSALAMAK WE ABATLAMAK
- AMMARDA SAKLAMAK
- NÄSAZLYKLARY ANYKLAÝYŞ
- 604 МАКЕДОНСКИ
- 622 РУССКИЙ
- ХОМЎШКУНИИ ХУДКОР
- ТОЗАКУНЙ ВА НИГОХДОРЙ
- 650 ТОЧИКЙ
- UWNPH OQUNWQNPNNIÚN
- HÙZ UNTUWLYH GNIŊ WTAUP 5 OQUNWQNNDTI
- OPTIMALTEMP UNTHUUNNQHWH
- ΩNH HUGHYH LGÙNÙN
- 696 RUIJTNTU
- LUWWWWNNWNNNL
- UNWUG QNLNN2NI/ΣΗΝ ΥΗΗΙΛΗΝΙΣ
- ECO N'TDHU
- 9N1NN2NI TNLNI WÚWUJHÙ YWNQWULNNIU
- 9N1NN2NI TNTP WUWWJHÙ YWNQWULNNIÚ
- 9N1NN2NI NIDTTNWGNIU
- HÙPÙW2HUÀN WÙGÙNNU
- 700 RUIJTNTU
- UWPNNIÚ U UNTHUÚHLYWLYWI UWWUUWNYNIU
- CALC-CLEAN ̈ÜÜN̈ÜẄD̂PH ̈ÜẄP̈NN̈Ï
- 702 RUIJTNTU
- 704 RUIJTNTU
- اللهمنيُمْ
- UTUWNPNIŊNIÙTPH NIŊNNIÚ
- สารบัญ
- JAHMUGUN G63
- G63B3S
- 使用准备
- 节能模式
- 自动关熄功能
- 简体中文
- 存储
- 762 简体中文
- 故障排除
- 使用前準備
- 節能模式
- 自動斷電
- 收納
- 疑難排解
- 사용 준비
- تعزيز البخار
- التنظيف والصيانة
- تنظيف الكلىس
- استفاده از دستگاه
- نوع آب مورد استفاده
- تقویت بخار
- رسوب زدایی
- عيب يابى
Brand : PHILIPS
Model : DST6130
Category : Iron