
Bolero GrandSommelier 1255 CoolCrystal - Wine cellar CECOTEC - Free user manual and instructions
Find the device manual for free Bolero GrandSommelier 1255 CoolCrystal CECOTEC in PDF.

| Product type | Wine cooler |
| Brand | Cecotec |
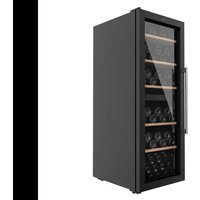
| Model | Bolero GrandSommelier 1255 CoolCrystal |
| Storage capacity | 12 bottles (standard 750 ml) |
| Cooling system | Thermoelectric |
| Adjustable temperature range | 8 °C to 18 °C |
| Temperature display | Digital |
| Interior lighting | Yes, button controlled |
| Shelves | Removable (number not specified) |
| Water collection tray | Yes |
| Adjustable feet | Yes (front) |
| Power supply | 220-240 V ~ 50/60 Hz |
| Installation type | Freestanding |
| Exterior finish | CoolCrystal |
| Insulation | Insulating foam |
| Recommended temperatures | Red wine 14-18 °C, white/dry 9-14 °C, rosé 10-11 °C, sparkling 5-9 °C |
| Cleaning | Soft cloth and warm water, without solvents or abrasive detergents |
| Safety | Unplug before cleaning |
| Package contents | Wine cooler, shelves, water collection tray, instruction manual |
| After-sales service | Official Cecotec technical service |
Frequently Asked Questions - Bolero GrandSommelier 1255 CoolCrystal CECOTEC
User questions about Bolero GrandSommelier 1255 CoolCrystal CECOTEC
0 question about this device. Answer the ones you know or ask your own.
Ask a new question about this device
Download the instructions for your Wine cellar in PDF format for free! Find your manual Bolero GrandSommelier 1255 CoolCrystal - CECOTEC and take your electronic device back in hand. On this page are published all the documents necessary for the use of your device. Bolero GrandSommelier 1255 CoolCrystal by CECOTEC.
USER MANUAL Bolero GrandSommelier 1255 CoolCrystal CECOTEC
natural_image
Three black Cecuolec oven units with digital display and control buttons, displayed against a teal background (no visible text or symbols on the devices themselves)ÍNDICE
- Parts and components 14
- Before use 15
- Installation 15
- Operation 16
- Cleaning and maintenance 19
- Troubleshooting 20
- Copyright 22
- Simplified EU Declaration of Conformity 22
SOMMAIRE
EN · The coding in this manual is generic and applies to all code variants of the appliance.
The graphics in this manual are schematic representations and may not exactly match the product.
2. BEFORE USE
- This appliance comes in a packaging designed to protect it during transport. Take the appliance out of its box and remove all packaging materials. You can keep the original box and other packaging materials in a safe place to prevent damage to the appliance if you need to transport it in the future. If you wish to dispose of the original packaging, make sure all items are recycled properly.
- Check that all parts and components are included and in good condition. If any of them are missing or damaged, please contact Cecotec's Official Technical Support Service immediately.
Box content
- Thermoelectric wine cooler
- Shelves
- Water tray (depending on model)
- Instruction manual
- Assembly kit and handle (EU01_109980 model only)
- Do not remove the product's serial number in order to keep proper traceability if technical assistance is required.
3. INSTALLATION
- Remove all internal and external packaging components.
- The chosen location to place the appliance must be well ventilated.
- It is not recommended to place the appliance in a humid location (basements, cellars, storage rooms, etc.), as this could cause rusting and electrical leakage.
- During operation, the appliance releases heat into the environment. Therefore, you must leave at least 100 mm of clearance at the rear and sides of the appliance.
- Place the appliance on a solid, flat surface, otherwise vibrations and noises will occur. Make sure the appliance is level by adjusting the height of the front feet (this may vary depending on the model).
- Ensure the appliance rests stably on its feet.
- Clean the interior with a soft cloth and lukewarm water, then dry thoroughly. Check that the water drainage tray is properly positioned.
- Before connecting the appliance to the power supply, leave it in an upright position for
ENGLISH
about 2 hours. This reduces the risk of cooling system malfunction due to handling during transport.
- If there is a power failure, wait at least 4 hours before reconnecting it.
-
If you wish to move the appliance in the future, follow these steps:
-
Remove all bottles and disconnect it from the power supply.
- Use adhesive tape to prevent the tray, shelves or door from coming loose or opening during transport.
- Adjust the feet (depending on model) to their minimum height to prevent damage during transport.
Handle installation (only on model EU01\_109980 Bolero GrandSommelier 1255 CoolWood)
Fig. 5
- Door seal/gasket
- Flat washer
- Lock washer
- Screw/Bolt
- Handle
- Door frame
- Gently remove the door seal/gasket.
Position the handle over the holes that will be visible after removing the seal and screw in the screw/bolt with the lock washer and flat washer in each hole as shown in Figure 5.
Caution
The door seal must not be removed or modified, as this could affect cooling performance.
4. OPERATION
This appliance has the temperature control on its front panel. The temperature can be adjusted between 8 and 18 °C.
IMPORTANT: The internal temperature can be affected by multiple factors, such as the appliance location, ambient temperature, ventilation, frequency of door opening, number of bottles inside, etc.
NOTE: When connecting the appliance to the mains power supply, the interior will begin to cool. It may take several hours to become completely cold.
Control panel
Fig. 6
- Light on/off button
- Temperature unit change button (°C/°F)
- Temperature display
- Temperature increase button
- Temperature decrease button
IMPORTANT: Figure 6 corresponds to the following models:
EU01_109603 Bolero GrandSommelier 600 CoolCrystal
EU01_109604 Bolero GrandSommelier 800H CoolCrystal
EU01_109603 Bolero GrandSommelier 1255 CoolCrystal
Connecting the appliance
Plug the appliance into the mains power supply.
Set the desired temperature using the temperature increase or decrease buttons.
IMPORTANT: After adjusting the temperature, the display will show the internal temperature of the appliance, which will gradually change until reaching the set temperature.
Temperature unit change button
Press this button to switch between Fahrenheit and Celsius degrees.
Operating the light
Press the interior light on/off button to turn it on or off.
Fig. 7
- Temperature display
- Light on/off button
- Temperature increase button
- Temperature decrease button
IMPORTANT: Figure 7 corresponds to the following model:
EU01_109980 Bolero GrandSommelier 1255 CoolWood
Connecting the appliance
Plug the appliance into the mains power supply.
Set the desired temperature using the temperature increase or decrease buttons.
IMPORTANT: After adjusting the temperature, the display will show the internal temperature of the appliance, which will gradually change until reaching the set temperature.
ENGLISH
Temperature unit change button
Press and hold both the temperature increase and decrease buttons to switch between Fahrenheit and Celsius degrees.
Operating the light
Press the interior light on/off button to turn it on or off.
Wine storage
- This appliance is intended exclusively for wine storage.
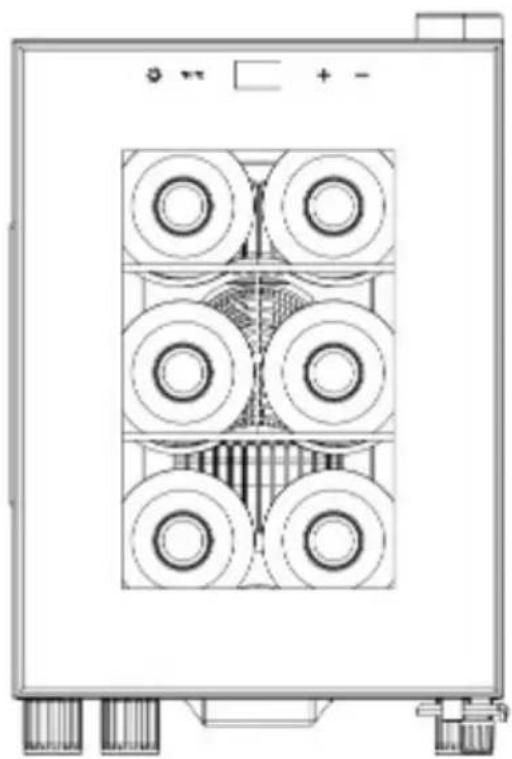
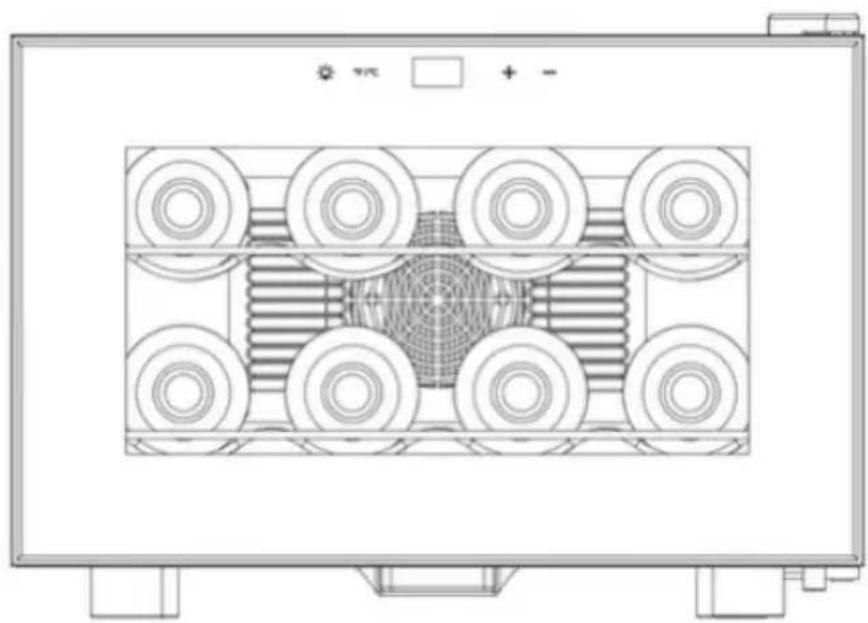
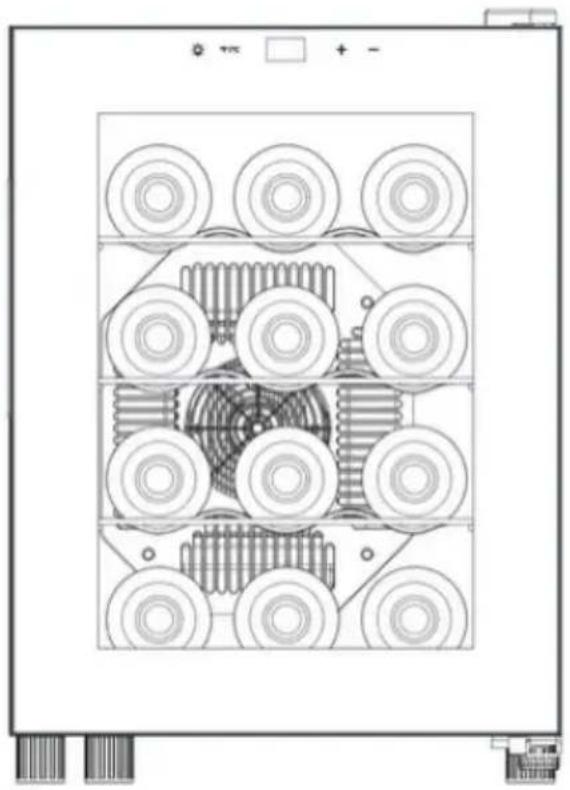
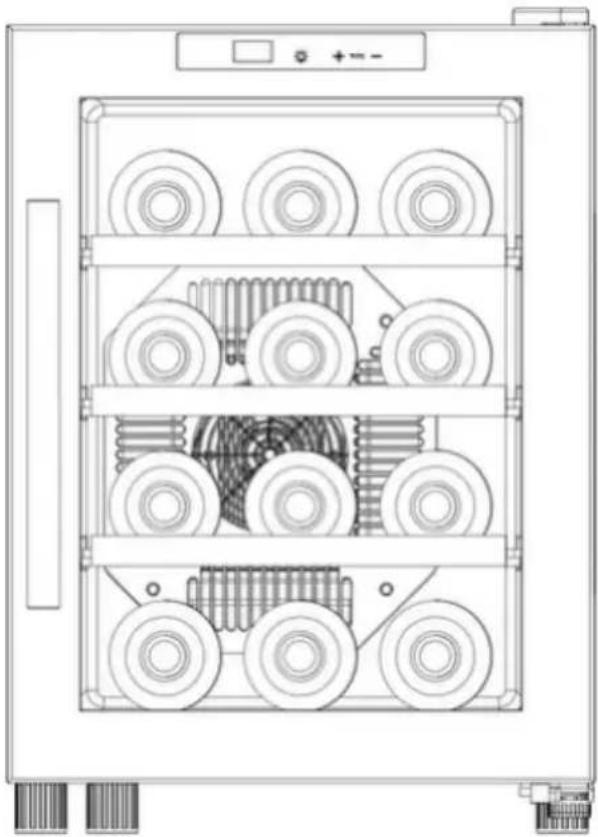
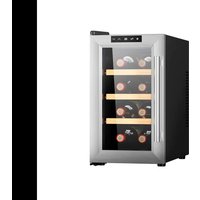
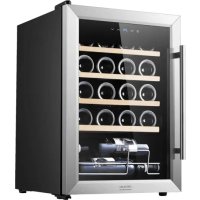
- It is designed to store the following maximum number of bottles: EU01_109603 Bolero GrandSommelier 600 CoolCrystal > 6 bottles EU01_109604 Bolero GrandSommelier 800H CoolCrystal > 8 bottles EU01_109605 Bolero GrandSommelier 1255 CoolCrystal > 12 bottles EU01_109980 Bolero GrandSommelier 1255 CoolWood > 12 bottles
Figure 8 > EU01_109603 Bolero GrandSommelier 600 CoolCrystal > 6 bottles Figure 9 > EU01_109604 Bolero GrandSommelier 800H CoolCrystal > 8 bottles Figure 10 > EU01_109605 Bolero GrandSommelier 1255 CoolCrystal > 12 bottles Figure 11 > EU01_109980 Bolero GrandSommelier 1255 CoolWood > 12 bottles
NOTE: Standard "Bordeaux" type bottle of 750 ml capacity, following the distribution shown in the figures.
- You can store larger bottles. However, you must ensure beforehand that they do not prevent the door from closing properly.
- Capacity will vary depending on the arrangement of bottles or their size.
- The shelves can be partially removed for easy wine bottle placement (depending on model).
- If removing any shelf, open the door fully (depending on model).
- If the appliance will be empty for an extended period, disconnect it from the mains power supply, clean it, and leave the door open for ventilation.
- The table below shows the recommended storage temperature for each type of beverage:
| Temperature (°C) Temperature (°F) | |
| Red wine 14-18 57-64 | |
| White/dry wine 9-14 48-57 | |
| Rosé wine 10-11 50-52 | |
| Sparkling wine 5-9 41-48 |
NOTE:
These temperatures are indicative as they depend on many factors; always follow the wine producer's guidelines.
- Exposure to light, vibrations, or fluctuations in temperature and humidity can cause the wine to spoil. When properly stored, wines not only maintain their quality, but many improve in aroma, flavour and complexity as they mature.
- Wines stored at higher temperatures age faster. Wines exposed to temperatures above 18 °C (64 °F) will lose flavour and aroma.
- If wine is kept at too low a temperature, it can lead to the appearance of damaging deposits. A humidity of 60%\~70% is ideal to prevent corks from shrinking.
- After opening a wine bottle, the wine comes into contact with air. Therefore, it is better to store the rest of the bottle in an upright position to minimise the wine surface that comes into contact with air.
- Once opened, wine will be drinkable for two days in the case of whites or three days in the case of reds, provided the bottle has been resealed. Make sure the seal is tight by checking the stopper.
- Special stoppers that keep sparkling wine and champagne bubbling for one or two days after opening can be purchased at most wine shops.
- When purchasing a bottle of wine, it is recommended to store it immediately in the wine cooler.
- To maximise wine aroma and flavour, never fill more than half a glass at a time. It will also help if the glass shape is appropriate for the wine. The size and shape of the wine glass will determine the aroma's intensity and complexity. The stem should be long enough to avoid hand contact with the bowl of the glass and should be tulip-shaped or tapered at the top.
5. CLEANING AND MAINTENANCE
- Unplug the appliance from the mains power supply before cleaning it.
- Remove all bottles from the interior.
- Clean the interior and exterior with a soft cloth or sponge dampened with lukewarm water.
- Do not use organic solvents, alkaline detergents, boiling water, powder detergents, abrasive products, etc.
- Do not pour water inside the appliance.
- Regularly clean surfaces that come into contact with accessible drainage systems.
- Remove the water tray, empty it if necessary and wash it.
NOTE: Depending on the model, the water tray may be located at the rear or at the bottom of the unit.
The following products may damage the appliance's finish: alkaline detergents, organic solvents, brushes and boiling water.
ENGLISH
Power cut
Most power cuts last only a short time. To prevent drinks from spoiling during this time, avoid opening the door as much as possible. If the power cut lasts for a long time, take the necessary measures to ensure that the drinks do not spoil.
If not using the appliance for an extended period
- If the appliance will not be used or will be empty for an extended period, switch it off, clean it, dry it and leave the door open to prevent mould from developing.
6. TROUBLESHOOTING
The appliance may experience some faults during operation. Check this list before contacting Cecotec's Official Technical Support Service.
| The appliance makes too much noise. | Adjust the feet for proper levelling (depending on model). |
| Move it slightly away from the walls. | |
| It does not turn on. Make | sure it is properly connected to the mains power supply. |
| Check the control and protection devices in the household's electrical panel, as well as the power socket. | |
| The door does not close properly. | Over time, the door seal may harden and become deformed. |
| The appliance is not properly levelled. | |
| Shelves or bottles are incorrectly positioned. | |
| It does not cool enough. | Adjust the temperature. A high room temperature may require setting a colder temperature. |
| Keep the appliance away from any heat source or from direct sunlight. | |
| Do not open the door too often.The door is not completely closed or properly positioned.The door seal is not maintaining airtightness. | |
| There is not enough ventilation space around the appliance. | |
| The room temperature is above the maximum supported temperature. | |
| There are too many bottles inside. | |
| Bad odours are present. | The first few times it is used, it may give off a slight plastic smell. This is normal. |
| Clean the inside and allow it to ventilate. | |
| There is water condensation on the door. | Do not open the door frequently or leave it open longer than necessary. |
| Do not select too low a temperature. | |
| If the room temperature is very high and there is humidity, condensation will occur. | |
| The light does not work C | Check the power socket.Check that you have pressed the correct button.If the light does not work, contact Cecotec's Official Technical Support Service. |
| There is water under the appliance | Water is not collecting in the tray.Check that the tray is properly positioned.The tray is full of water, empty it. |
Note:
If none of these situations match your problem, do not attempt to disassemble or repair the device by yourself. Repairs carried out by unqualified people may result in injury or serious malfunctions. Contact Cecotec's Official Technical Support Service. Repairs must be carried out by an authorised technician using only original spare parts.
Error codes
| Code shown on the display | Possible cause Solution | |
| EH | - Thermistor connection malfunction.- The thermistor connection is loose or making poor contact (power board, hinge cover and heating element connection point). | - Contact Cecotec's Official Technical Support Service. |
| EL | - Thermistor disconnected.- The thermistor connection is incorrect or reverse (power board, hinge cover and heating element connection point). | Contact Cecotec's Official Technical Support Service. |
ENGLISH
7. COPYRIGHT
The intellectual property rights over the texts in this manual belong to CECOTEC INNOVACIONES, S.L. All rights reserved. The contents of this publication may not, in whole or in part, be reproduced, stored in a retrieval system, transmitted, or distributed by any means (electronic, mechanical, photocopying, recording or similar) without the prior authorization of CECOTEC INNOVACIONES, S.L.
8. SIMPLIFIED EU DECLARATION OF CONFORMITY
CE Cecotec Innovaciones hereby declares that this appliance complies with the essential requirements and other relevant provisions of the regulations applicable in the European Union. This appliance has been designed, manufactured and tested in compliance with required safety and quality standards. The full text of the EU Declaration of Conformity can be found on the following website: https://cecotec.es/es/information/declaration-of-conformity
1. PIÈCES ET COMPOSANTS
Image 1 (EU01_109603 Bolero GrandSommelier 600 CoolCrystal)
6. PROBLEEMOPLOSSING
Fig./Img./Abb./Afb./Rys.1

Fig./Img./Abb./Afb./Rys.2
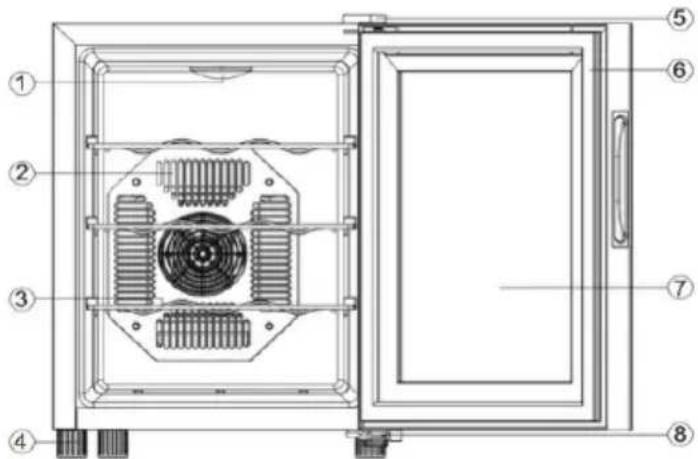
Fig./Img./Abb./Afb./Rys. 3
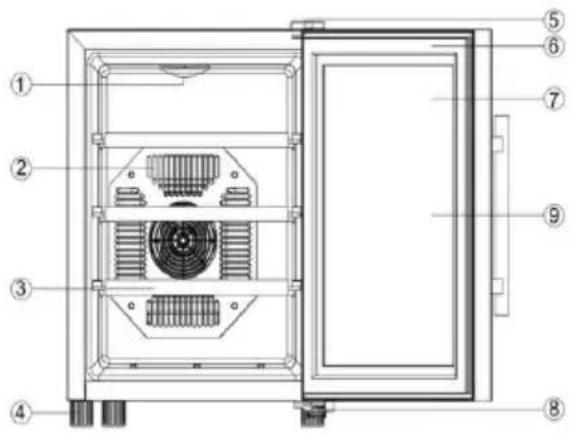
Fig./Img./Abb./Afb./Rys. 4
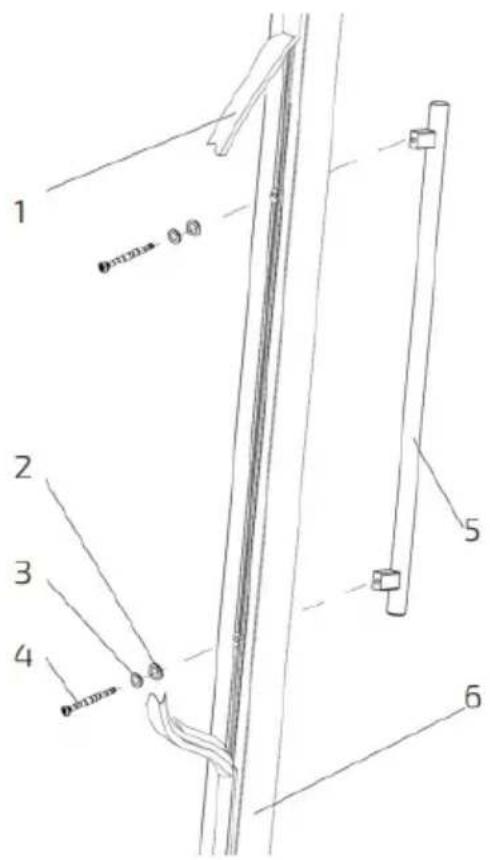
Fig./Img./Abb./Afb./Rys. 5

°F | °C
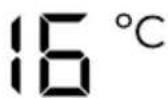


Fig./Img./Abb./Afb./Rys. 6


^ F ^

Fig./Img./Abb./Afb./Rys. 7
natural_image
Technical line drawing of a mechanical device with four circular components arranged in a grid pattern (no text or symbols)Fig./Img./Abb./Afb./Rys. 8
natural_image
Top-down schematic of a mechanical or electrical component with circular components and a central mesh structure (no text or symbols)Fig./Img./Abb./Afb./Rys. 9
natural_image
Technical line drawing of a multi-tiered mechanical assembly with circular components and mounting holes (no text or symbols)Fig./Img./Abb./Afb./Rys. 10
natural_image
Technical line drawing of a multi-tiered industrial machine with visible gears and shafts (no text or symbols)Fig./Img./Abb./Afb./Rys. 11
www.cecotec.es

- ÍNDICE
- SOMMAIRE
- BEFORE USE
- Box content
- INSTALLATION
- ENGLISH
- Handle installation (only on model EU01\_109980 Bolero GrandSommelier 1255 CoolWood)
- Fig. 5
- Caution
- OPERATION
- Control panel
- Connecting the appliance
- Temperature unit change button
- Operating the light
- Wine storage
- NOTE:
- CLEANING AND MAINTENANCE
- Power cut
- If not using the appliance for an extended period
- TROUBLESHOOTING
- COPYRIGHT
- SIMPLIFIED EU DECLARATION OF CONFORMITY
- PIÈCES ET COMPOSANTS
- PROBLEEMOPLOSSING
Brand : CECOTEC
Model : Bolero GrandSommelier 1255 CoolCrystal
Category : Wine cellar