Zonder Wash - Vacuum Cleaner Zeegma - Free user manual and instructions
Find the device manual for free Zonder Wash Zeegma in PDF.


User questions about Zonder Wash Zeegma
0 question about this device. Answer the ones you know or ask your own.
Ask a new question about this device
Download the instructions for your Vacuum Cleaner in PDF format for free! Find your manual Zonder Wash - Zeegma and take your electronic device back in hand. On this page are published all the documents necessary for the use of your device. Zonder Wash by Zeegma.
USER MANUAL Zonder Wash Zeegma
natural_image
Modern vacuum cleaner with a black handle and orange filter in a minimalist living room setting (no text or symbols visible)EN | DE | PL | IT | FR | ES | NL | LT |
HR | CS | SK
User Manual | Bedienungsanleitung | Instrukcja obstugi | Manuale d'uso | Manuel de l'Utilisateur | Manual de usuario | Handleiding | Vartotojo vadovas | Korisnički priručnik | Uživatelská příručka | Návod na použitie
A
text_image
1 2 3 4 5 6 7 8 9 10 11 12 13 14B
natural_image
Diagram of a coiled cable or hose with connectors and a clip, no text or symbols present1
2
3
4

5
6
7
8
natural_image
Diagram of a coiled cable or hose with two connectors (no text or symbols)9
10
1
natural_image
Technical line drawing of a mechanical component with concentric rings and mounting holes (no text or symbols)2
natural_image
Technical line drawing of a mechanical component with a blue arrow pointing to a pipe fitting (no text or symbols present)3
flowchart
graph LR
    A["Raw Air Inlet"] --> B["Add Air Filter"]
    B --> C["Add Air Turbine"]
    C --> D["Add Air Sweater"]
    D --> E["Final Exhaust Air"]
4
natural_image
Technical line drawing of a mechanical assembly with a cylindrical component and internal shaft (no text or symbols)5
natural_image
Line drawing of hands using a tool to adjust or install a component, with no visible text or symbols6
natural_image
Line drawing of a car interior showing a hand pressing down on the nose area with a blue arrow indicating the pressure point (no text or symbols present)7
text_image
a b8
text_image
a9
text_image
Technical diagram showing three stages of a mechanical component with directional arrows and label 'a'10
natural_image
Line drawing of a robotic arm with a curved handle and a blue arrow indicating motion direction (no text or symbols)11
natural_image
Diagram of a robotic arm joint with labeled component 'a' and directional arrow (no text or symbols beyond label)Introduction
Dear Customer!
Thank you for choosing the Zeegma brand. We appreciate your trust in our products. The item you have purchased is perfect for everyday use thanks to high-quality materials and advanced technical solutions. We are confident that its meticulous workmanship will provide you with a superior product experience.
Before using the product, please read the user manual below.
If you have any comments or questions about the product you have purchased, feel free to contact us by email at: support@zeegma.com
IMPORTANT INFORMATION
Before using the appliance, please take the time to read this user manual to familiarise yourself with the functions of the appliance and ensure that you use it as intended. Failure to follow the safety instructions or use of the appliance contrary to the user manual may result in damage to the appliance, property, and injury to persons.
IMPORTANT! KEEP THIS USER MANUAL FOR FUTURE REFERENCE!
-
This appliance may be used by children aged 8 and older, and persons with reduced physical, sensory or mental abilities, as well as by persons without relevant knowledge and experience in the use of the appliance, provided that they are supervised or have been previously instructed in the safe use of the appliance and understand the hazards involved.
-
Children must not play with the appliance.
-
Cleaning and maintenance must not be carried out by children unless they are supervised by an adult.
-
Disconnect the appliance from the power supply after each use and before cleaning and maintenance. When disconnecting the appliance from the power socket, always hold the plug and never pull on the cord.
-
Do not attempt to repair or modify the appliance in any way. These actions may only be undertaken by an authorised service centre.
-
Do not operate the appliance if you have noticed any damage.
-
Do not use the appliance if it malfunctions, has been dropped or exposed to water, becomes excessively hot, shows discolouration or bulges, emits unusual sounds or smells, or exhibits any other abnormal behaviour. In such cases, contact the manufacturer's authorised service centre immediately.
-
Check the power cord regularly for damage. Do not use the appliance if the power cord is damaged.
-
The appliance is designed exclusively for non-professional use, specifically for cleaning up dust and spills, as well as washing upholstery, carpets, or rugs. The vacuum cleaner is not suitable for cleaning industrial facilities.
-
Always use the appliance at room temperature. Do not operate the appliance at low temperatures. The appliance should be left at room temperature for at least 30 minutes before starting up.
-
Do not immerse the appliance in water or store it in damp place.
- Always place the appliance on flat horizontal surface and avoid tilting it. Do not place the appliance on very soft surfaces.
- Use the appliance away from heat sources, high temperatures, hot surfaces, direct sunlight, sources of sparks, open flames, oils, and sharp edges.
- Avoid using the appliance in an environment that contains flammable, explosive, or toxic substances.
- Do not use chemical agents to clean the appliance.
- Do not use the appliance for purposes other than those for which it was designed.
- Use the vacuum cleaner attachments provided in the kit only for their intended purposes.
- Verify that the local power source matches the vacuum cleaner's power supply requirements.
- Do not bend, stretch or pull on the flexible hose. Do not use the vacuum cleaner if the hose is damaged.
- Avoid using the vacuum cleaner to clean up mud, paste-like substances, or sharp objects. This can cause damage to the dust container, filter, and motor.
- Avoid using the vacuum cleaner to pick up large paper items or plastic bags, as they can block the suction pathway.
- Avoid using the vacuum cleaner to pull in flammable or explosive materials, such as lit cigarettes, petrol, etc.
- Do not block the air outlet at the back of the vacuum cleaner. This can cause overheating and damage the appliance.
- Do not pull or carry the appliance by its power cord. Do not place any objects on it. When handling the power cord, do not drag it over sharp edges of walls and furniture, and do not coil it too tightly after use.
Important! Do not lift the tank by the clamps.
Technical specifications
Voltage: 220-240V \~ 50/60Hz
Capacity: 20 l
Power output: 1400W
Power cord length: 7 m
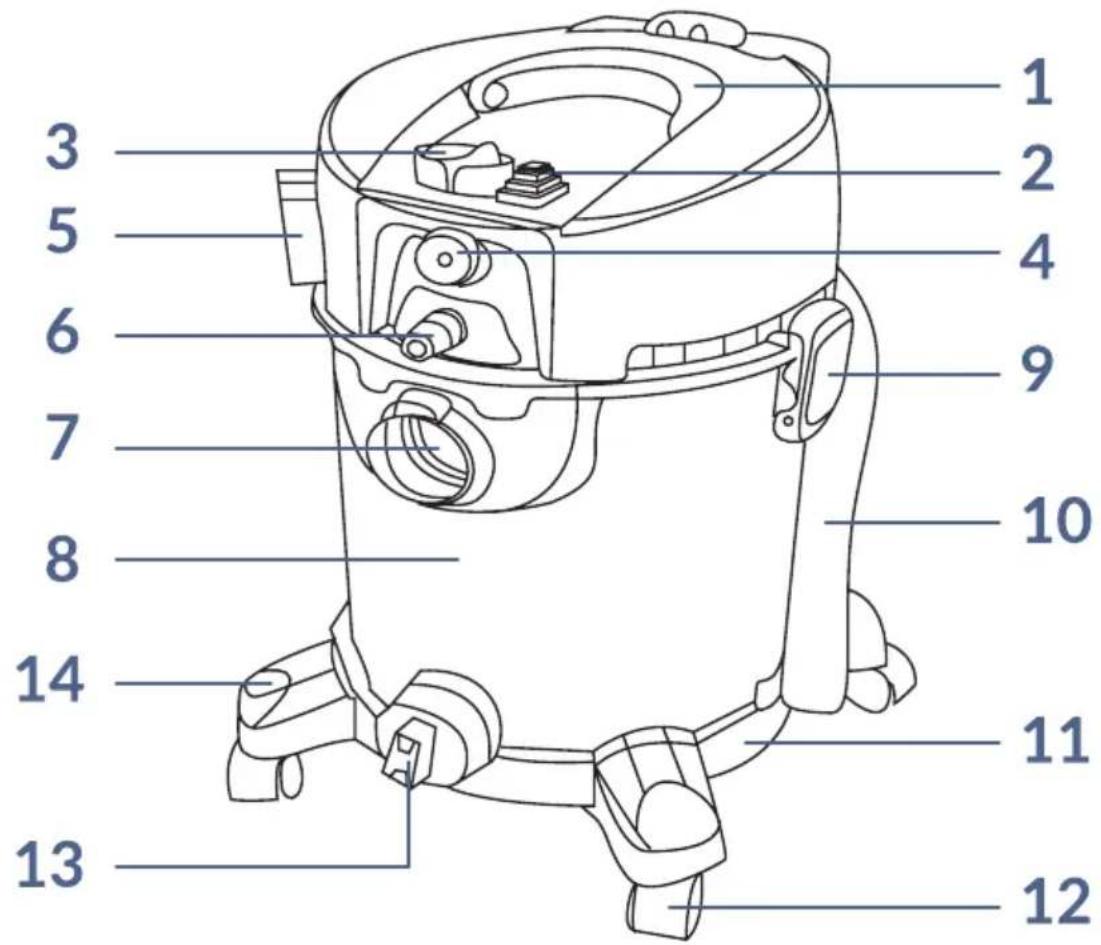
DESCRIPTION OF PARTS (FIG. A)
- Carrying handle
- Pump on/off switch
- Vacuum cleaner on/off switch
- Force control knob
- Inlet opening
- Spray tube connection
-
Outlet opening
-
Dirt tank
- Plastic clamp
- Clean water tank
- Body base
- Casters
- Drain
- Accessory holders
DESCRIPTION OF PARTS (FIG. B)
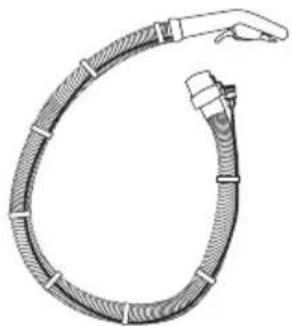
- Flexible suction hose with spray tube
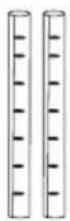
- Suction tubes
- Carpet and rug cleaning nozzle
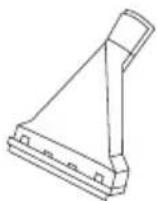
- Upholstery cleaning nozzle
-
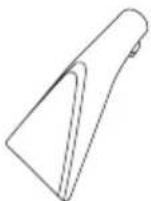
Crevice nozzle
-
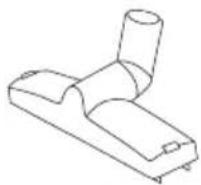
Universal nozzle
- Dry vacuum cleaning bag
- Sponge filter
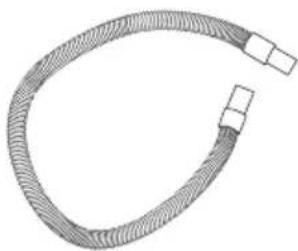
- Extension hose
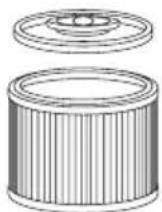
- HEPA filter
ASSEMBLY
- Open the top of the dirt tank, take out all components, and place the tank upside down on flat surface.
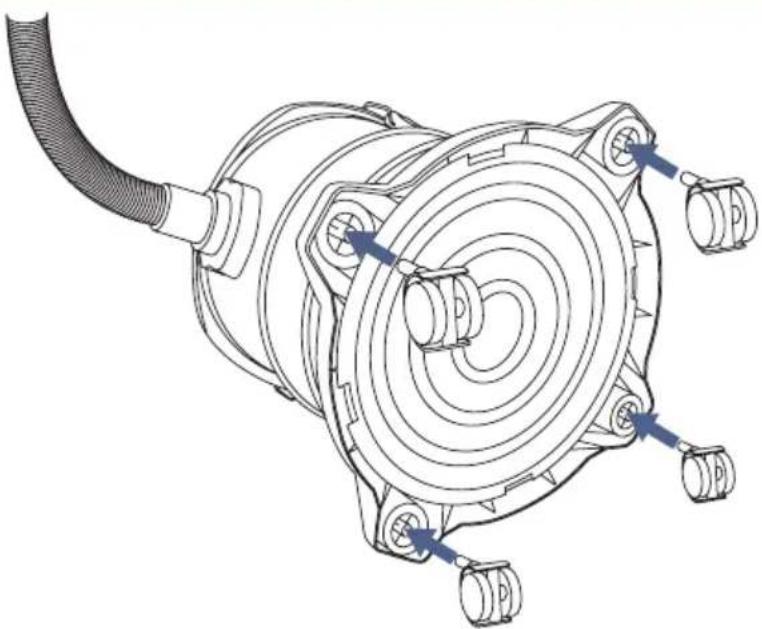
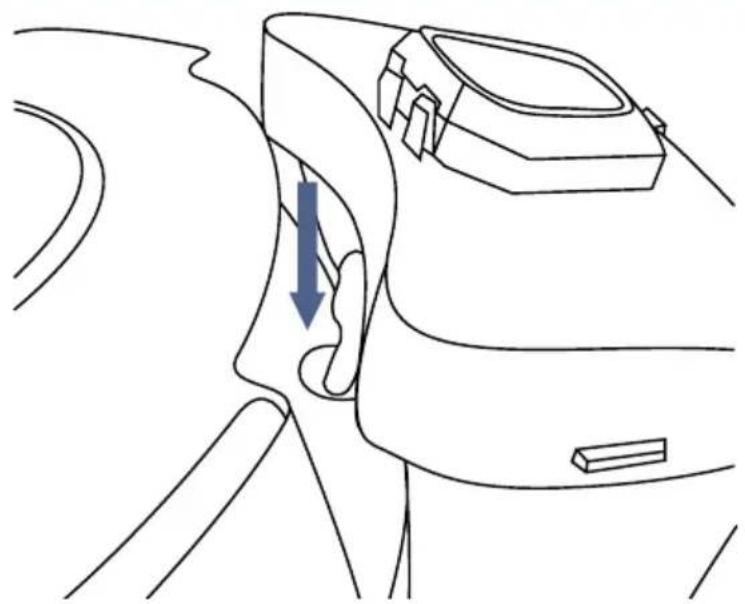
- To properly assemble the caster, insert the metal pin into the designated spot on the base of the body (Fig. 1). Press the caster until you feel resistance.
- Fasten the top cover by closing the plastic clamp (9, Fig. A).
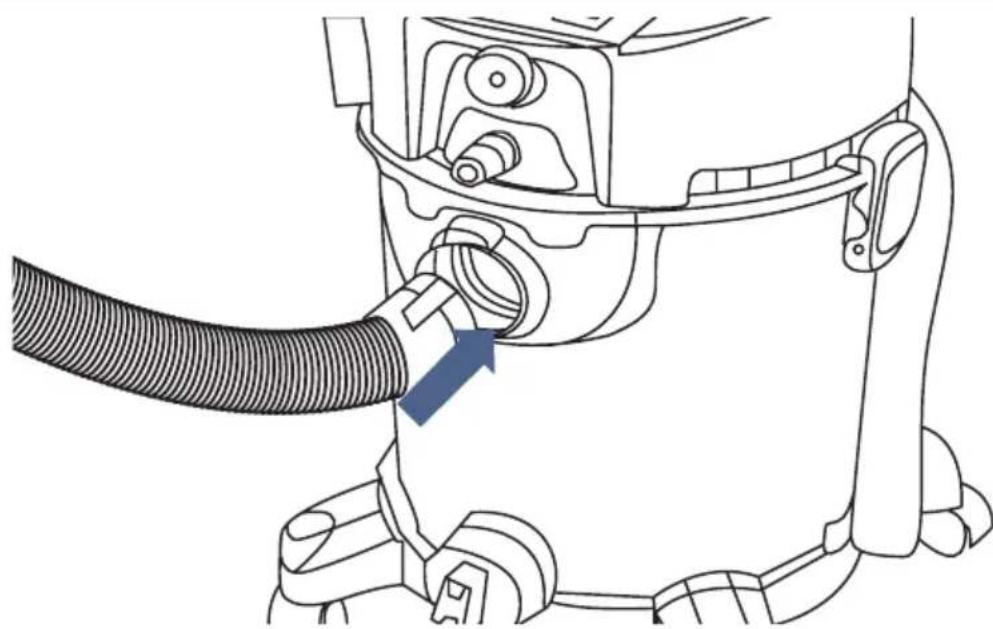
- Insert the flexible suction hose with spray tube into the inlet opening (Fig. 2).
REMOVAL OF DRY DIRT AND DEBRIS
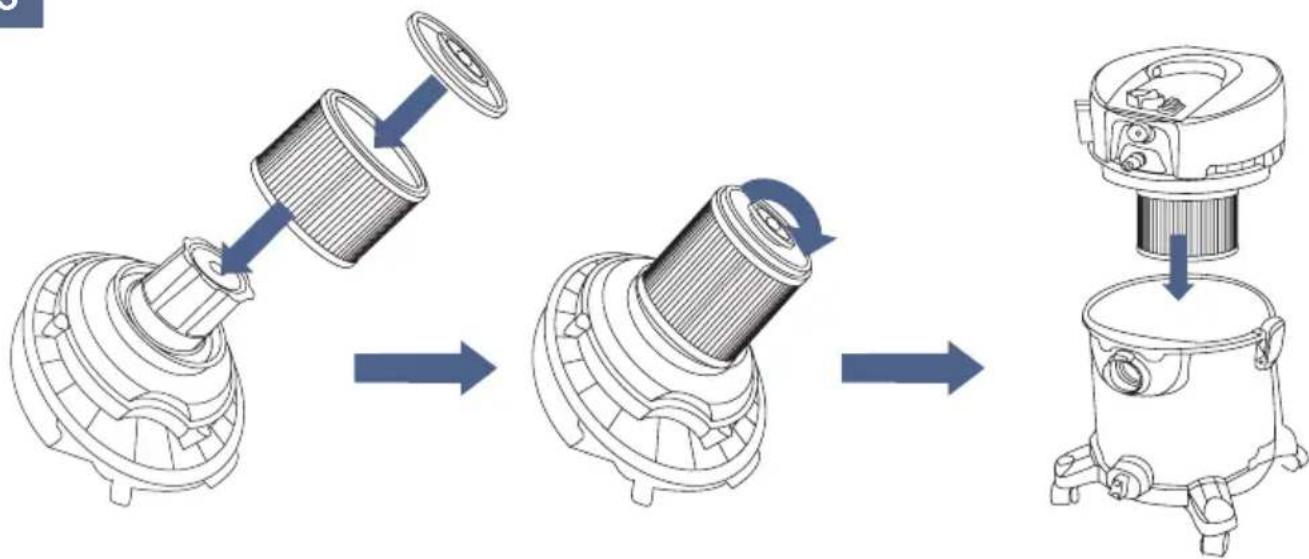
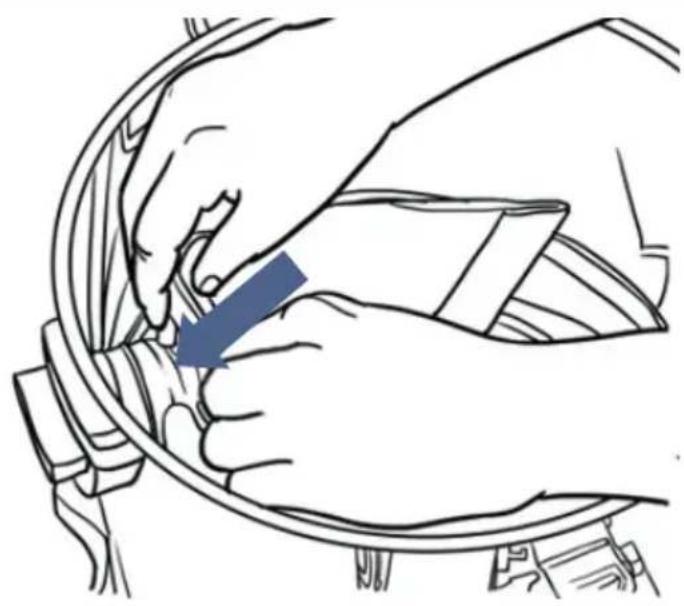
- To use the vacuum cleaner for removing dust and other dry debris, first place the HEPA filter on the filter support, fasten the filter cover (Fig. 3), and then insert bag into the vacuum cleaner at the inlet opening (Fig. 5).
- Fasten the top cover by closing the plastic clamp (9, Fig. A).
- Attach the flexible suction hose to the inlet opening (Fig. 2) and affix an appropriate attachment. Make sure it is tightly fitted.
- To remove the attachment, just pull it off.
- Connect the power cord to the power source, and then turn on the vacuum cleaner by pressing the switch (3, Fig. A).
- To regulate the air flow, turn the force control knob (4, Fig. A).
- To remove the HEPA filter, open the plastic clamps (9, Fig. A) and take off the top cover. Next unfasten the filter cover, take out the HEPA filter from the filter support and remove the bag from the inlet opening inside the vacuum cleaner.
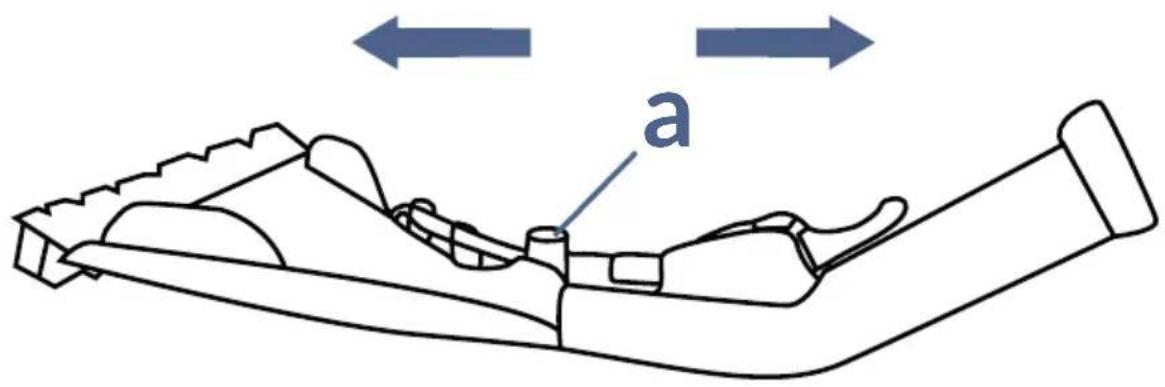
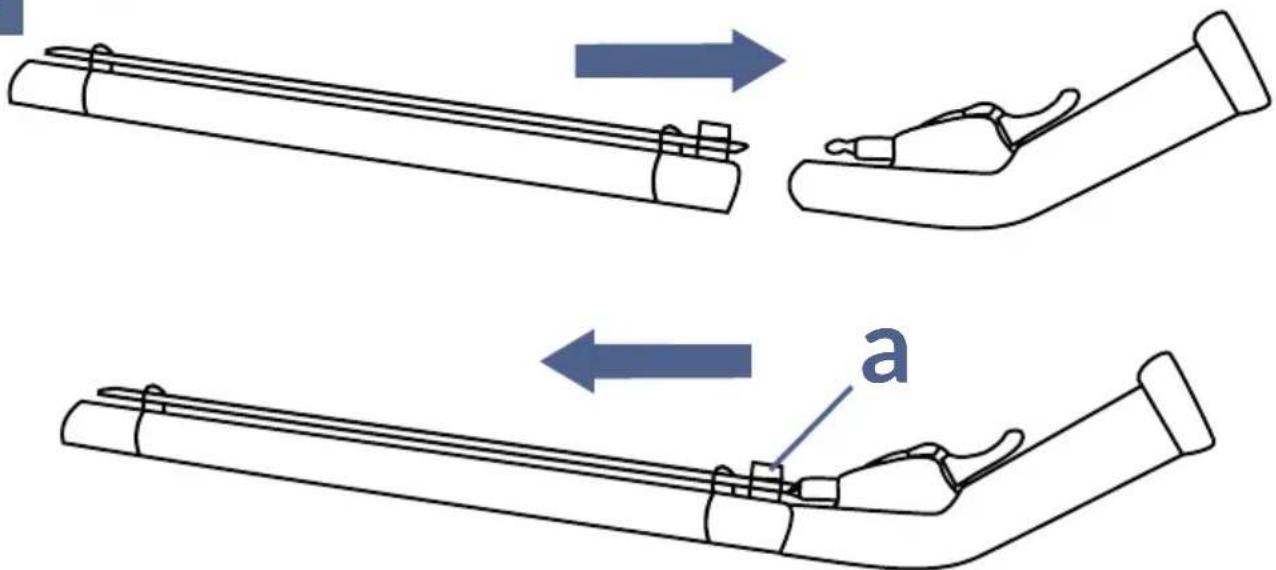
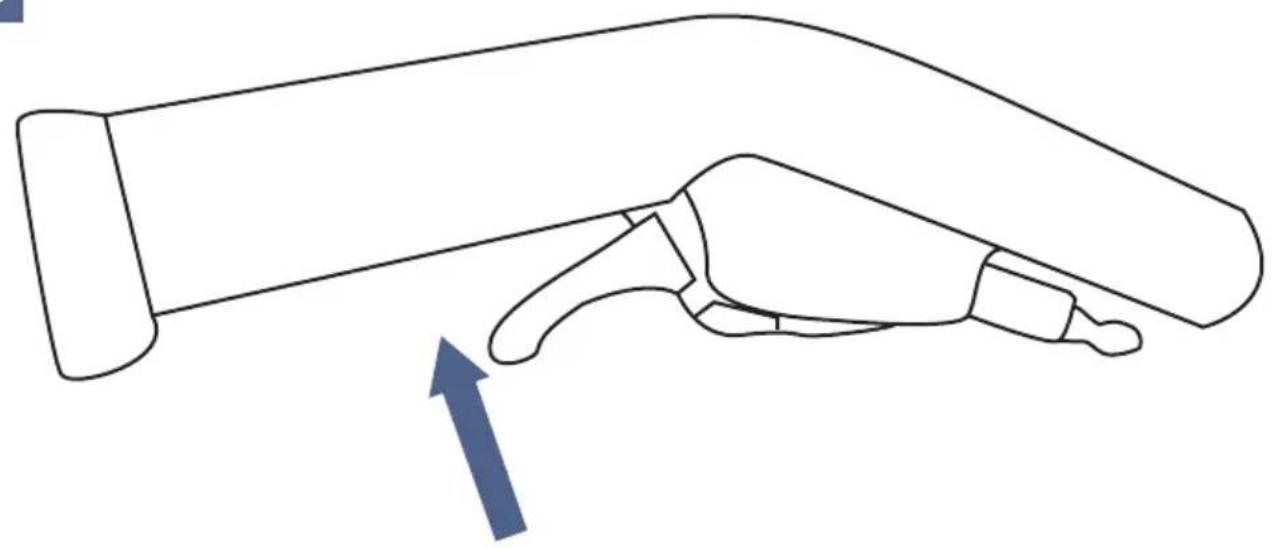
- To connect the suction tubes, attach them to the flexible suction hose with spray tube (Fig. 10). Ensure that they are firmly secured. To remove the suction tubes, press the release button (a, Fig. 9) and pull.
- To attach the extension hose (9, Fig. B), secure it to the flexible suction hose with spray tube (1, Fig. A). Ensure that it is firmly secured. To remove the extension hose, pull it out.
BLOWER FUNCTION
- To use the blower function place the HEPA filter on the filter support, fasten the filter cover (Fig. 3), and then insert bag into the vacuum cleaner at the inlet opening (Fig. 5).
- Fasten the top cover by closing the plastic clamp (9, Fig. A).
- Attach the flexible suction hose to the outlet opening (5, Fig. A) and affix an appropriate attachment. Make sure it is tightly fitted.
- To remove the attachment, just pull it off.
- Connect the power cord to the power source, and then turn on the vacuum cleaner by pressing the switch (3, Fig. A).
-
To regulate the air flow, turn the force control knob (4, Fig. A).
-
To attach the extension hose (9, Fig. A), secure it to the flexible suction hose with spray tube (1, Fig. A). Ensure that it is firmly secured. To remove the extension hose, pull it out.
CLEANING OF UPHOLSTERY AND CARPETS
Important! After each use of the appliance, make sure to rinse both the clean and dirty water tanks, along with the suction hose and the spray tube with nozzles.
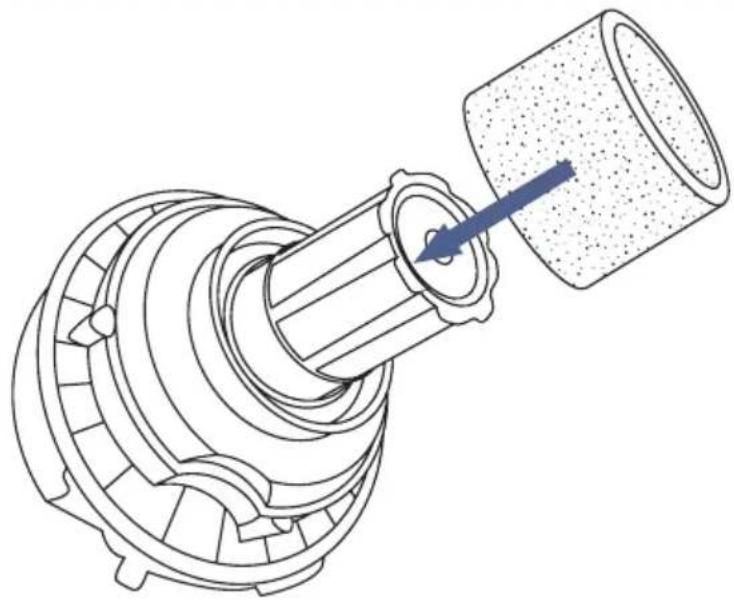
- To use the vacuum cleaner for cleaning upholstery and carpets, place the sponge filter on the filter support (Fig. 4). Remove the HEPA filter before use (see: REMOVAL OF DRY DIRT AND DEBRIS, step 7).
Important! When wet cleaning, always use sponge filter.
- Fill the clean water tank (10, Fig. A) with the prepared water and detergent solution, then attach it to the back of the appliance (Fig. 6). Ensure that it is securely connected.
Important! The amount of clean water in the tank should not exceed 4 litres. For better cleaning efficiency, it is recommended to use warm water up to 40^ C.
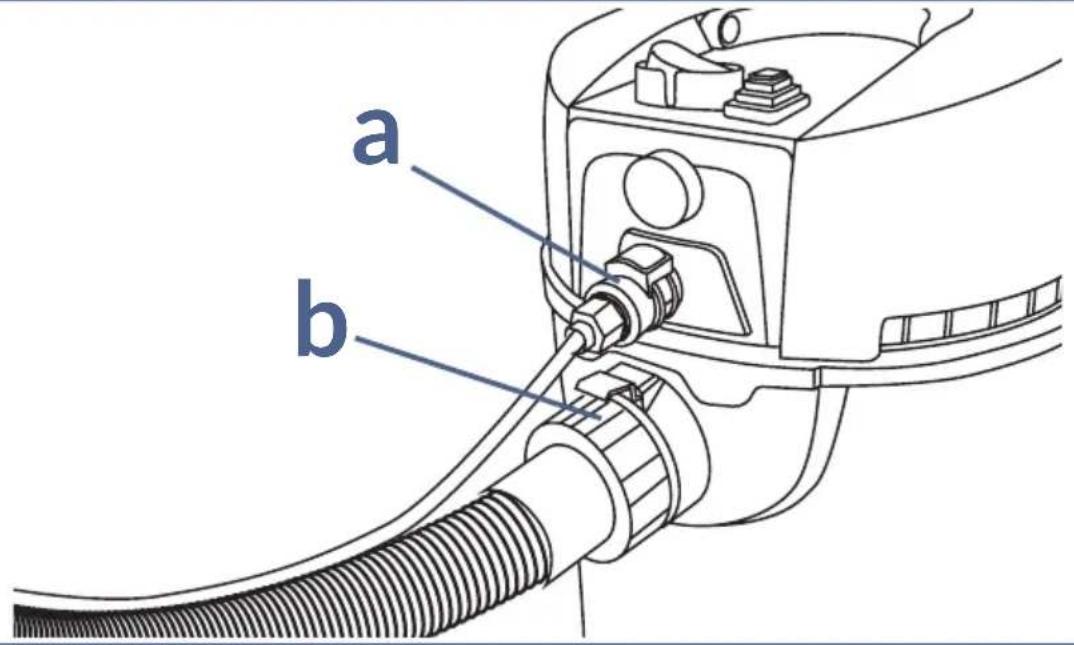
- Connect the flexible suction hose to the outlet opening (7, Fig. A) and the spray tube to the spray tube connection (6, Fig. A). Affix an appropriate attachment (Fig. 9). Ensure it has been installed correctly. To remove the attachment, press the release button (a, Fig. 8) and pull.
REMOVAL OF WET DIRT
-
Connect the power cord to the power source and switch on the appliance using the main switch (3, Fig. A).
-
Use the vacuum cleaner to remove wet dirt from the surfaces to be cleaned. Repeat, if necessary.
SURFACE SPRAYING
-
Connect the power cord to the power source.
-
To distribute the cleaning solution, press the pump switch (2, Fig. A) and the trigger on the handle of the flexible suction hose with spray tube (Fig. 10).
SIMULTANEOUS SPRAYING AND VACUUM CLEANING
-
Connect the power cord to the power source.
-
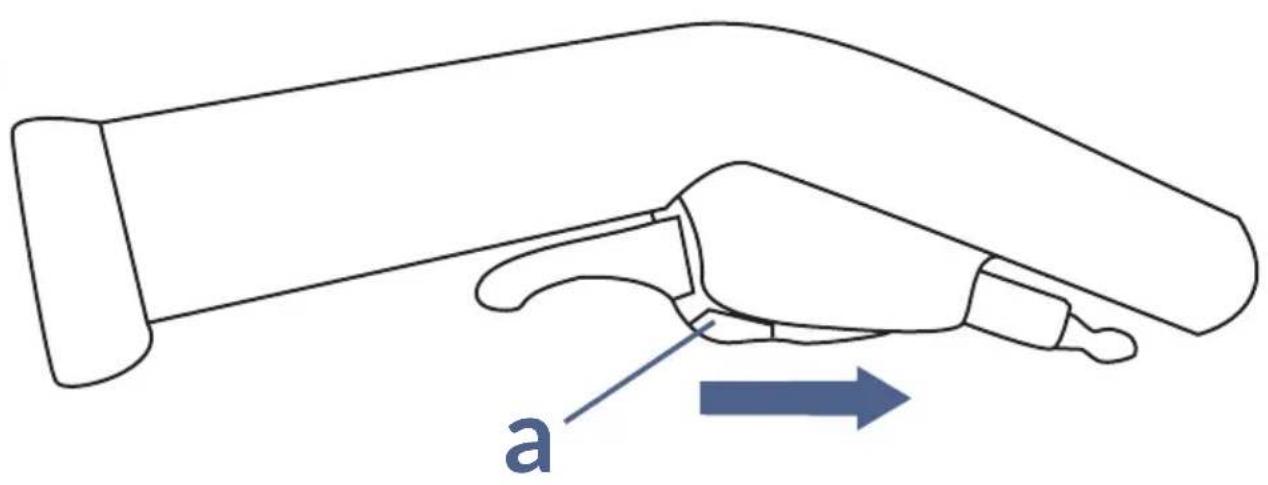
Start the appliance with the main switch and press the pump switch. Then press the trigger on the handle of the flexible suction hose with spray tube and secure it in position using the locking mechanism (Fig. 11).
Important! Use suitable detergents according to the manufacturer's recommendations for the surface being cleaned.
Important! Always move the cleaning nozzle towards yourself along the surface being cleaned.
Important! If the tank overflows, the float obstructs the suction opening, resulting in an increased speed of the suction turbine. Immediately switch off the appliance, disconnect it from the power source, and empty the tank. Switch off the appliance by pressing the switch (3, Fig. A) and the pump switch (2, Fig. A). To remove the clean water tank, simply pull it out. If the appliance tips over with water inside, switch it off immediately and disconnect it from the power source to prevent motor damage.
TROUBLESHOOTING
| Problem Cause | Solution | |
| An unpleasant odour is coming from the vacuum cleaner. | The appliance has not been sufficiently cleaned.The filter has been used beyond its recommended service life. | Clean the dirt tank and the suction tube.Inspect the condition of the sponge filter.Stop using the vacuum cleaner temporarily. |
| The pump is not supplying water with detergent. | The accessories are not fitted correctly.The spray nozzle is clogged. | Check to make sure that the spray nozzle and the strainer at the beginning of the detergent supply line in the clean water tank are free from dirt and blockages.Clean the spray nozzle. |
| The vacuum cleaner has insufficient suction power. | The appliance has not been sufficiently cleaned.The filter has been used beyond its recommended service life. | Inspect the condition of the dry vacuum cleaning bag.Unblock the flexible hose/suction tube.Clean the sponge filter. |
| The pump makes noise. | There is no water in the clean water tank. | Check the level of clean water in the tank and top up if there is not enough. |
| The vacuum cleaner is not working. | There is no power supply. | Check to ensure that the appliance is properly connected to the power source. |
CLEANING AND MAINTENANCE
Important! When cleaning fabrics or handling wet surfaces, the vacuum cleaner takes in very little air, which reduces its cooling performance. Monitor the temperature of the appliance and take regular breaks.
- After using the appliance, make sure to rinse both the suction hose and the water and detergent dispensing hose.
- To do this, start by emptying and rinsing the tank for clean water and detergent. Next, pour 0.5 litre of clean water into the tank, attach it to the vacuum cleaner, switch on the pump, and allow clean water to flow through the hose. It is important to do this with the suction nozzle installed and the tubes previously used to rinse the spray nozzle.
- To rinse the suction hose, pour 2 litres of clean water into clean bucket, turn on the vacuum cleaner and suck it in using the tube with the previously used suction nozzle and tubes to rinse them out.
- Switch off and disconnect the appliance from the power supply.
- Detach the clamps to remove the clean water tank.
- Remove and rinse the sponge filter. Allow it to dry completely. The sponge filter is reusable.
- Wipe the inside of the tank with damp cloth and let it dry completely.
The photos are for reference only; the actual appearance of products may differ from the photos.
Einführung
ABSAUGEN VON TROCKENEM SCHMUTZ
EN: The product complies with the requirements of European Union directives.
In accordance with Directive 2012/19/EU, this product is subject to separate collection. The product should not be disposed of with municipal waste, as it may pose a threat to the environment and human health. Return the used product to a recycling center for electrical and electronic equipment.
Detailed warranty conditions are available on the website:
Thank you for purchasing our product!