
Robo Next - Vacuum Cleaner Zeegma - Free user manual and instructions
Find the device manual for free Robo Next Zeegma in PDF.
| Product Type | Robot Vacuum |
| Brand | Zeegma |
| Model | Robo Next |
| Power Supply | Built-in rechargeable battery, mains adapter |
| Charging Time | Approximately 4 hours |
| Dustbin Capacity | Approximately 300 ml (estimated) |
| Water Tank Capacity (optional) | Approximately 200 ml (estimated) |
| Cleaning Modes | Automatic, spot, edge, manual control |
| Special Features | Auto-return to dock, adjustable suction, mopping (with cloth), Smart Life app |
| Filter Type | HEPA filter, pre-filter, sponge filter |
| Cleaning and Maintenance | Empty bin and wash pre-filter every 15-30 days, replace HEPA every 3 months |
| Safety | Auto shut-off on overheating, obstacle sensors, do not use on wet or industrial surfaces |
| Spare Parts | Side brushes, main brush, HEPA filter, mopping cloth, water tank (optional) |
| Repairability | Contact an authorized service center for any repairs |
| General Information | Estimated weight 2.5 kg, dimensions 33x33x8 cm (estimated), compatible with short-pile carpets, minimum age 8 years with supervision |
Frequently Asked Questions - Robo Next Zeegma
User questions about Robo Next Zeegma
0 question about this device. Answer the ones you know or ask your own.
Ask a new question about this device
Download the instructions for your Vacuum Cleaner in PDF format for free! Find your manual Robo Next - Zeegma and take your electronic device back in hand. On this page are published all the documents necessary for the use of your device. Robo Next by Zeegma.
USER MANUAL Robo Next Zeegma
natural_image
Simple line drawing of a circular device with a central button and two side connectors (no text or symbols)1
natural_image
Line drawing of a mechanical component with mounting brackets and a rounded top (no text or symbols)2
natural_image
Line drawing of a small electrical component with a coiled cable and terminal ports (no text or symbols)3

natural_image
Line drawing of a remote control with playback buttons and playhead (no text or symbols)4

natural_image
Technical line drawing of a mechanical component with no visible text or symbols5

6

7

natural_image
Pure mechanical diagram showing two symmetrical arms with radial rods and a central hub (no text or symbols)8
natural_image
Isometric view of a rectangular block with horizontal grooves (no text or symbols)9
1
2
3


natural_image
Line drawing of a circular device with a handle and small components, labeled '9' at the bottom (no text or symbols on the device itself)
natural_image
Line drawing of a robotic vacuum cleaner with a control panel and power button, labeled '10' (no text or symbols on the device itself)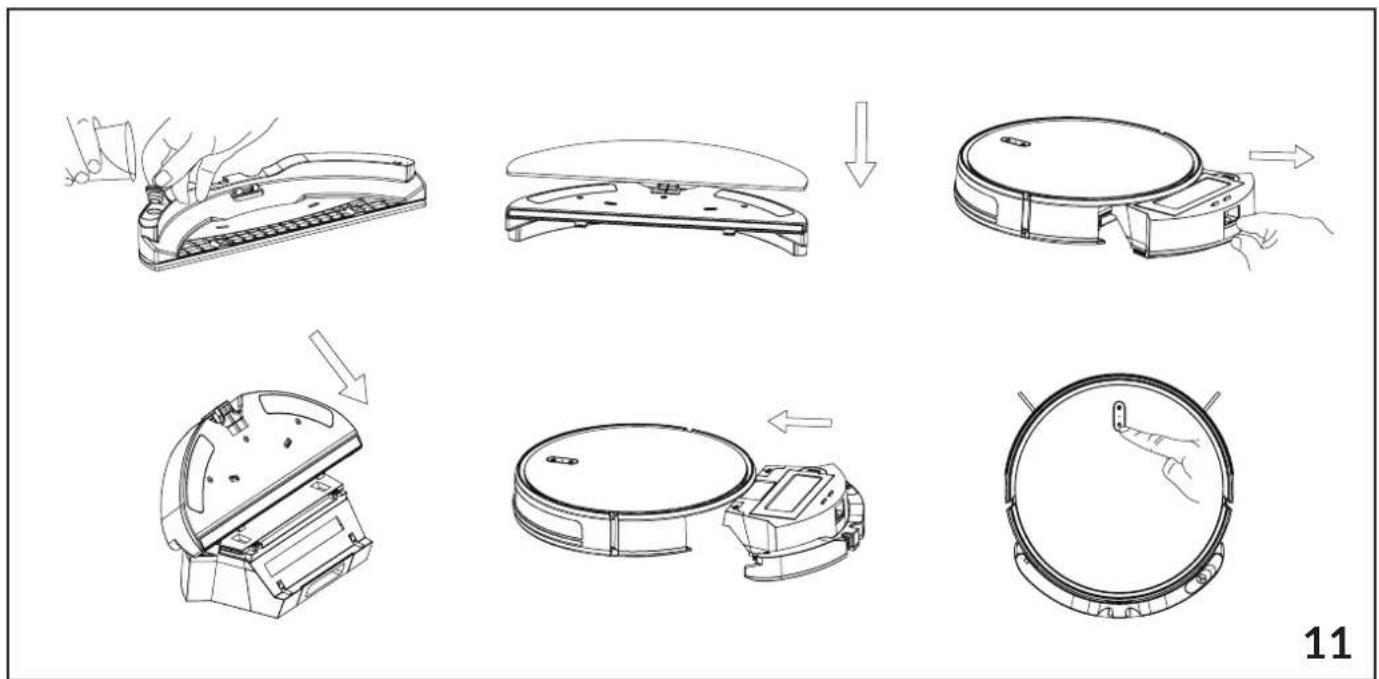

flowchart
graph TD
    A["Water Washing Machine"] --> B["Receiving Top Cover"]
    B --> C["Receiving Bottom Cover"]
    C --> D["Receiving Top Cover with Down Arrow"]
    D --> E["Receiving Bottom Cover with Up Arrow"]
    E --> F["Receiving Top Cover with Down Arrow"]
    F --> G["Receiving Bottom Cover with Down Arrow"]
    G --> H["Receiving Top Cover with Up Arrow"]
    H --> I["Receiving Bottom Cover with Down Arrow"]
    I --> J["Sunlight"]
    J --> K["Receiving Top Cover with Down Arrow"]
    K --> L["Receiving Bottom Cover with Down Arrow"]

flowchart
graph TD
    A["Raw Air Scrubber"] --> B["Add Air Scrubber"]
    B --> C["Transfer to Air Fan"]
    C --> D["Adjust Air Scrubber"]
    D --> E["Solar Heating System"]
    E --> F["Final Inspection & Control Panel"]
    F --> G["After Sun/Wind"]

natural_image
Four-step diagram showing a device's internal components and tool path, no text or symbols present.
natural_image
Four-step diagram showing a device being adjusted, with views of internal components (no text or symbols)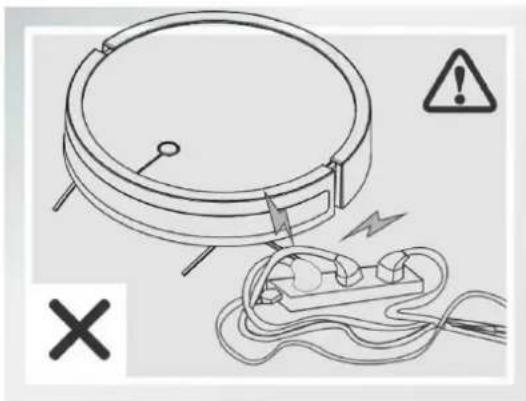
natural_image
Diagram of a circular device with wires and a plug, accompanied by warning symbols (no text or labels)16
natural_image
Simple line drawing of a circular object with a handle and a warning symbol (no text or labels)17

natural_image
Line drawing of a sofa with a pillow placed on the back, connected to a circular base with a hand near the floor (no text or symbols)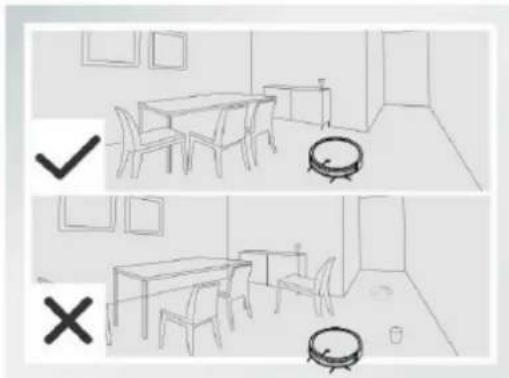
natural_image
Two-panel sketch of a dining room with furniture and a vacuum cleaner (no text or symbols)18

natural_image
Isometric line drawing of a staircase with railings and a circular component on top (no text or symbols)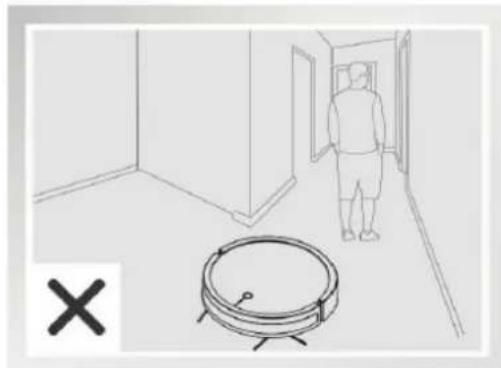
natural_image
Line drawing of a hallway with a person walking and a circular object nearby (no text or symbols)19
INTRODUCTION
Dear customer!
Thank you for placing trust in us and choosing Zeegma.
We provide you with a product perfect for everyday use thanks to the use of high-quality materials and modern solutions.
We are sure that the product will satisfy your requirements as it has been designed with utmost care. Before you use the product, please read this manual carefully.
Should you have any remarks or questions concerning the product,
please contact us: support@zeegma.com
IMPORTANT
Please read this manual before you start using the device to get familiar with its functions and use them in accordance with intended use. A failure to follow the safety guidelines and use at variance with the manual may lead to electric shock, fire and serious injuries.
IMPORTANT! KEEP THIS MANUAL FOR FUTURE REFERENCE!
-
Do not repair or modify the device. Only an authorized service technician is allowed to perform these operations.
-
Do not start the device if you have noticed any damage. This applies to the docking station and power supply.
-
Do not use the device when it starts acting up, has been dropped or wetted, overhead extensively, is discolored or deformed, emits abnormal sounds, odors and when other atypical circumstances occur. In such cases please contact the authorized service center.
-
If you do not use the device for a long time, turn off the cleaning robot using the main switch and unplug the docking station.
-
The device is not intended for vacuuming industrial surfaces.
-
The device is not intended for vacuuming wet surfaces. It may damage the product.
-
This device is not a toy. Do not let children play with it.
-
The device should operate at the room temperature. Do not switch the device on at low temperatures. Before you start it, the device should be left at the room temperature for at least 30 minutes.
-
The device is not waterproof, do not immerse it in water or store in humid area.
-
Place the device on a flat and horizontal surface, and avoid slopes. Do not place it on very soft surfaces.
-
Use the device away from sources of heat, high temperatures, hot surfaces, direct sunlight, sources of ignition, naked flame, oils and sharp edges.
-
Do not use chemicals to clean the device.
-
Before you start cleaning, switch the device off and disconnect the power supply.
-
Do not use the device for other purposes than designed.
-
Do not suck mud, paste-like elements, ash, plaster and sharp items. It may lead to damage to dustbin, filter and motor.
-
Do not suck hair, large paper elements, plastic bags which may cause the suction tube to clog. Remove them from the floor before you start vacuuming.
-
Do not obstruct the air inlet at the back of the vacuum cleaner. It may lead to overheating and damage the product.
-
Do not place any items on the vacuum cleaner.
- WARNING: To charge the battery, use only the original power adapter or charging station.
- Do not use the vacuum cleaner without filters and dustbin.
- The vacuum cleaner is intended for vacuuming short-hair floors and carpets.
- Do not drag the power supply cable through sharp edges of walls and furniture, do not trap it in doors and do not wrap too tight after use.
- The manufacturer shall not be held responsible for all damage arising from misuse and use at variance with the device manual.
- This appliance can be used by children aged from 8 years and above and persons with reduced physical, sensory or mental capabilities or lack of experience and knowledge if they have been given supervision or instruction concerning use of the appliance in a safe way and understand the hazards involved.
- Cleaning and user maintenance shall not be made by children without supervision.
- Note: do not lift or move the machine while it is operating. It may disturb cleaning and lead to problems with finding the docking station or cause the apartment map to reset.
- The device and all its parts must be cleaned regularly according to the information in this instruction manual.

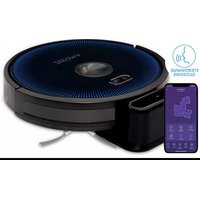
The device can also be operated via the Smart Life app.
-
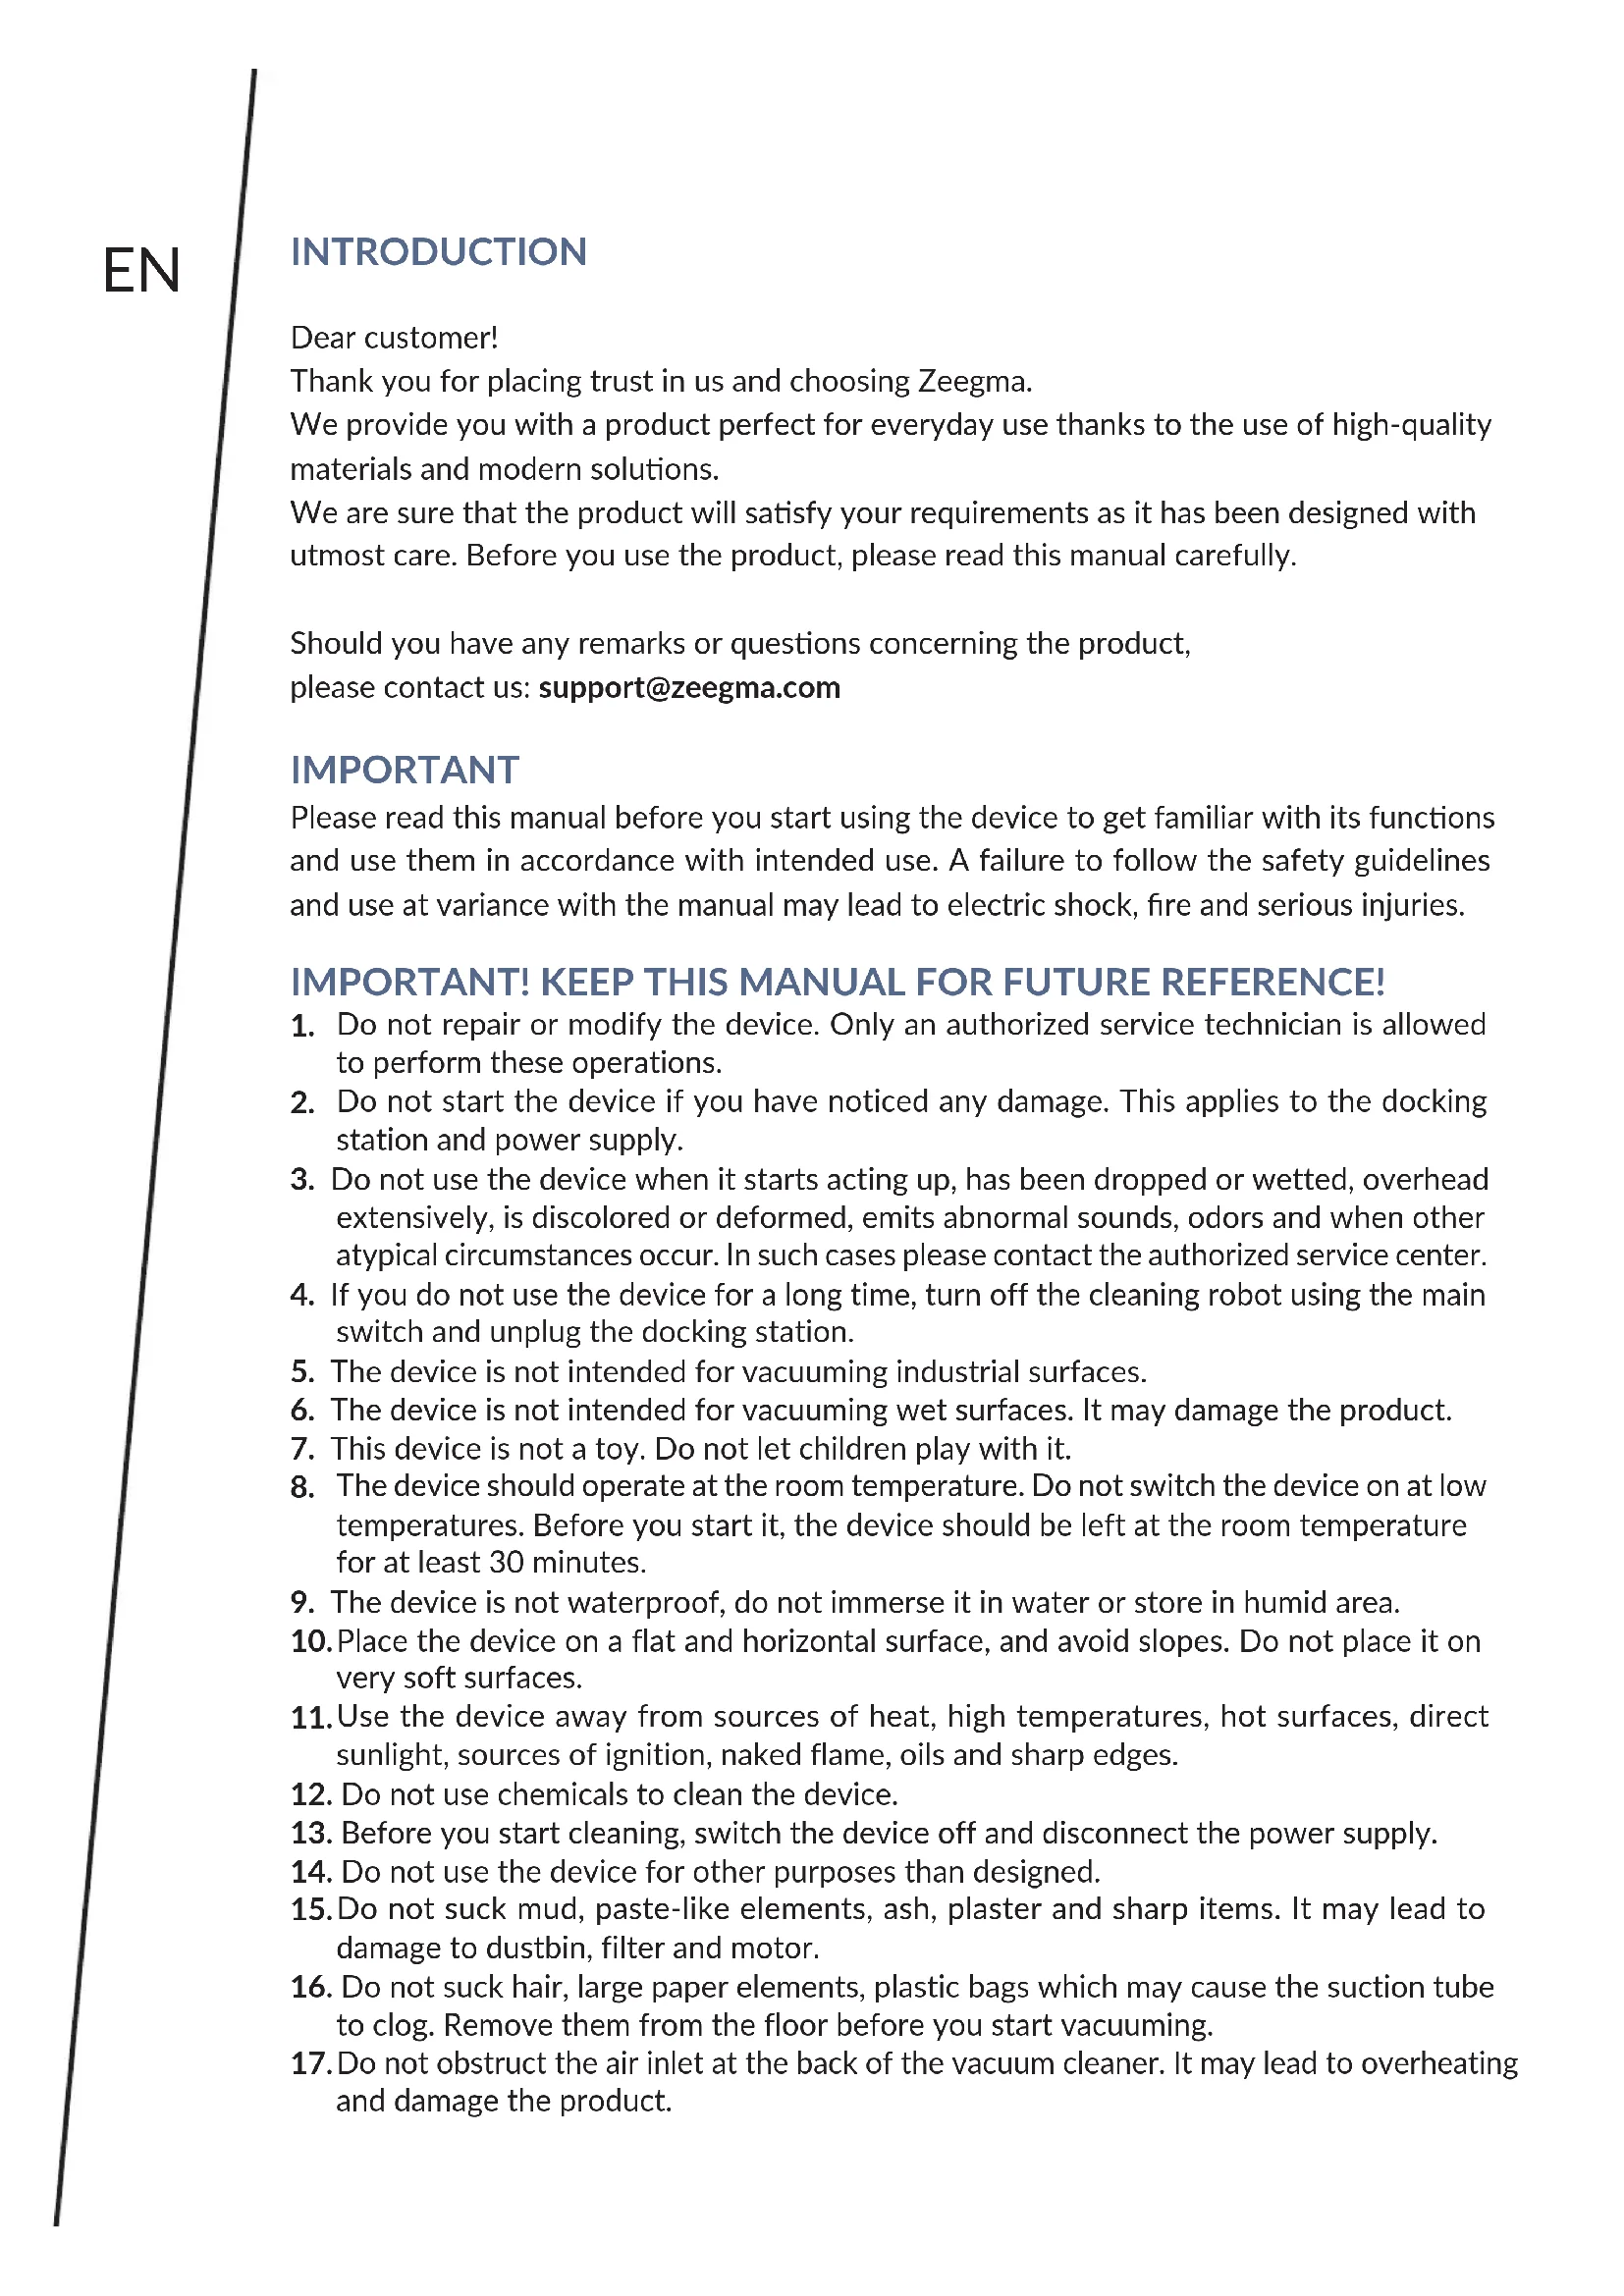
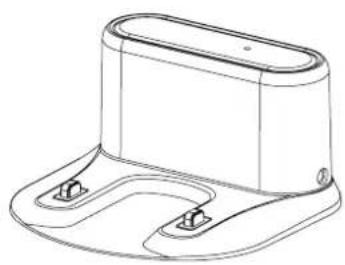
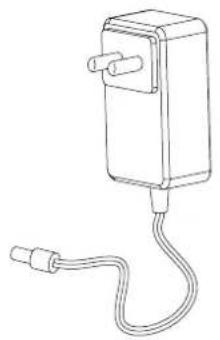
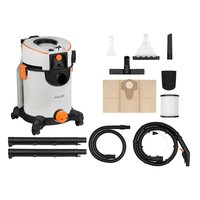
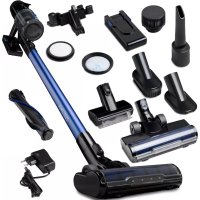
Description of parts in the box (see fig. 1):
-
Vacuum cleaner
-
Mop (optional)
-
Docking station
-
Cleaning brush
-
Power supply
-
Side brushes
-
Remote control
-
HEPA filter
-
Water tank (optional)
-
Descriptions:
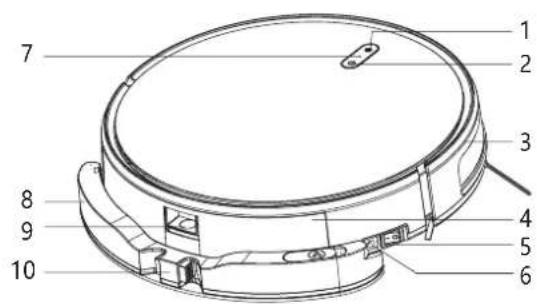
External part of the vacuum cleaner (see fig. 2):
-
Return to docking station
-
Charging port
-
Start/Pause
-
Wi-Fi light
-
Side cover
-
Water tank
-
Dustbin
-
Dustbin release key
-
Main switch
-
Water tank release key
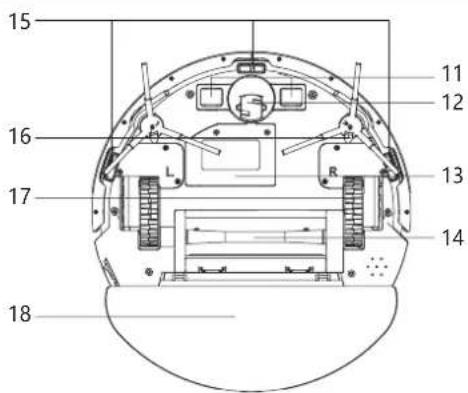
Internal part of the vacuum cleaner (see fig. 3):
-
Charging port (charging in docking station)
-
Floor sensors
-
Central front wheel
-
Side brush
-
Battery
-
Side wheel
-
Central brush
-
Water tank
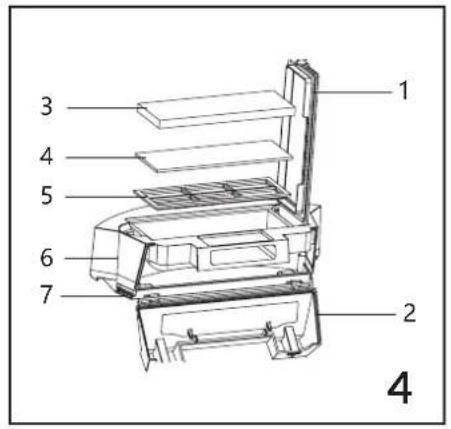
Dustbin (see fig. 4):
- Main cover of dustbin
- Side cover of dustbin
- HEPA filter
-
Sponge filter
-
Preliminary filter
- Upper part of dustbin
- Lower part of dustbin
Water tank (see fig. 5):
- Water inlet hole
-
Water tank
-
Mop
- Tank release key
Remote control (see fig. 6):
- Return to docking station
- Go forward
- Turn right
- Suction power adjustment
- Edge vacuuming
-
On/off
-
Pause/Start
- Turn left
- Reverse key
- Suction power adjustment
- Spot vacuuming
3. How to assemble (see fig. 7):
- Press the water tank release key, and then remove the tank.
- Fix side brushes, left and right (L / R).
- Before you use the device, remove the protective strip.
4. How to use:
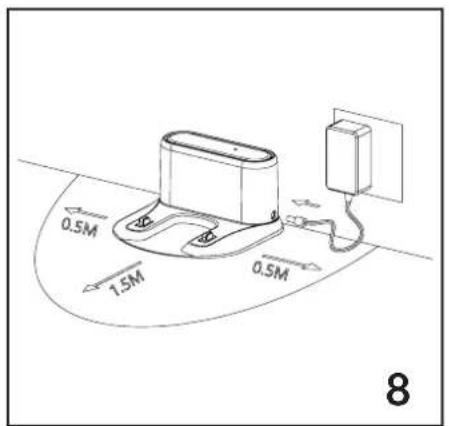
How to store and charge:
- Place the docking station by the wall, on a flat surface. Leave some free space around the station, that is 0,5m to the left and right, and 1,5m before the station (see fig. 8).
• Supply power to the docking station and plug in (see fig. 8). - Place the device on the floor. Turn on the main switch (see fig. 9).
Caution! Any interference with the operation of the device (lifting, moving, remote control of the device, etc.) may disrupt the cleaning process and cause errors in the positioning of the device in the room.
If the device needs to be stopped, press the pause button (2, fig. 2). Do not change the position of the device.
Two ways of charging (see fig. 10):
-
Place the product on the docking station.
-
For charging, use the power supply (when charging, the signaling light flashes, when charging is over, it turns green
- When the battery goes flat during cleaning, the product automatically switches into charging mode and goes to the docking station to initiate charging.
- Activate the charging mode with the return-to-docking-station key on the remote control or via the application.
Charging notes:
- The docking station must not be used in a direct sunlight.
- Before you start using the product, remember to fully charge it. Charging takes 4 hours.
- When charging, do not fix the water tank in the product to make sure the charging is safe.
- The device contains batteries that should only be replaced by a qualified person. In case of problems with the battery, contact an authorized service center.
Description of vacuuming modes and functions:
-
- Automatic vacuuming: activate the main switch of the product. When the control light goes on, the product is active. Press start/pause key on the cleaner or remote control and the cleaner will start vacuuming automatically.
-
Spot vacuuming: press the spot vacuuming on the remote control to start cleaning.
-
Edge vacuuming: press the edge vacuuming key on the remote control to start cleaning.
-
Manual control: use remote control keys to choose direction of cleaner's movements (forward, backward, left and right).
-
Suction power adjustment" in automatic vacuuming mode, press suction power adjustment key on the remote control or in the application to adjust the suction power. Suction power adjustment works only in the automatic vacuuming mode.
Options:
- Pause: when the cleaner operates, press start/pause key on the cleaner, remote control or in the application to stop its operation.
- „Wake up”: The cleaner will go to sleep if it remains inactive for 10 minutes. To „wake it up”, press any key on the cleaner, remote control or in the application.
- Deactivation: to switch the cleaner off, press start/pause key and hold for a couple of seconds or deactivate the main switch on the product.
- When the work is done, direct the vacuum cleaner into the docking station to charge it.
4a. How to install the water tank:
Description of parts (see fig. 5)
How to use the water tank (see fig. 11)
- Open the tank and pour water into the water inlet hole.
- Close the water tank and fix the mop on the dedicated external surface.
- Fix the water tank and dustbin and install in the cleaner.
- Press the start/pause key to make the cleaner start wet-cleaning.
How to clean and empty the water tank and mop (see fig. 12):
- Remove the water tank.
- Pour water out of the tank.
- Remove the mop.
- Clean the water tank.
- Clean and dry the mop.
- Dry the water tank.
5. How to clean the dustbin and filters (see fig. 13):
- Press the dustbin open key to remove the bin.
- Remove the bin and open the side cover for emptying the dustbin.
- Empty the dustbin, dispose of rubbish into a rubbish bin.
- Open the cover and remove HEPA filter and preliminary filter.
- It is not advisable to wash HEPA filter under running water, gently remove dust.
- Wash the preliminary filter under running water.
- Next you can clean the interior with a wet cloth.
- Do not wash the entire dustbin under running water.
- Dry the bin and filter before another use. Do not expose filters to direct sunlight.
- Wash the preliminary filter every 15-30 days, the life of HEPA filter is about 3 months. Make sure the filters are dry before you reinstall them.
6. How to clean side brushes and central brush (see fig. 14):
- To remove the central brush, remove the cover and brush.
- Use the cleaning brush to remove remains on the brush.
- Detach side brushes and wipe with a dry cloth.
7. How to clean sensors and wheels (see fig. 15):
- Clean a charging port of the docking station, all sensors, central wheel and side wheels with a dry cloth.
8. How to store:
- If you do not use the vacuum cleaner for a long time, fully charge it before storing. Charge the device every 3 months to prevent extensive deterioration of battery life.
| PROBLEM POTENTIAL CAUSE SOLUTION | ||
| The vacuum cleaner does not charge. | No connection with the docking station. | Make sure charging ports of the vacuum cleaner and docking station are properly connected. Try to place the product on the docking station manually. |
| The battery does not charge. | Make sure the docking station is plugged in. If you have not used the vacuum cleaner for a long time and battery does not charge, place the cleaner on the docking station and charge for 3 minutes, then stop charging. Repeat 3 times and then start charging the vacuum cleaner normally. | |
| The vacuum cleaner has difficulties in vacuuming. | The vacuum cleaner wraps in elements of the room (cables, drapes, etc.). | The vacuum cleaner tries to steer clear of obstacles. If it is impossible, remove obstacles before you start another vacuuming. |
| The vacuum cleaner returns to the docking station automatically. | Low battery. This operation is normal. | |
| End of work time. This operation is normal. | ||
| The vacuum cleaner does not activate during scheduled vacuuming. | Vacuum cleaner is off Switch the vacuum cleaner on. | |
| Low battery Charge the battery. | ||
| Dustbin is clogged or other elements are obstructed. | Switch the device off and clean the dustbin and filters. | |
| Remote control does not work | Batteries in remote control are flat. | Replace batteries in the remote control. |
| The vacuum cleaner is off or battery is low. | Switch the device on and/or charge the battery. | |
| Infrared signal is not received by the device. | Clean the infrared sensor on the device and remote control. Check the space between the remote control and device for any obstacles blocking the signal and other items emitting infrared signal (e.g. TV remote control). | |
9. How to prepare rooms for vacuuming
- Remove cables and other items which may get tangled in the vacuum cleaner from the floor (fig. 16).
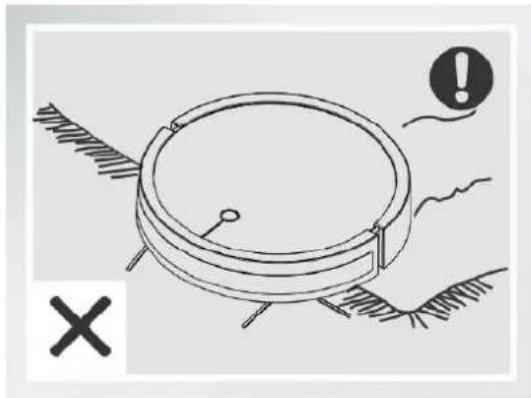
- The vacuum cleaner is intended to clean floors and thin short-hair carpets. Do not use the cleaner on long-hair carpets (fig. 17).
- Position the furniture in a way that the vacuum cleaner cannot get stuck (fig. 18).
- Remove all obstacles from narrow areas (fig. 19).
The pictures are for reference only. The real design of the products may differ from the pictures presented.
EINFÜHRUNG
EN: The product complies with requirements of EU directives.
Pursuant to the Directive 2012/19/EU, this product is subject to selective collection. The product must not be disposed of along with domestic waste as it may pose a threat to the environment and human health. The worn-out product must be handed over to the electrics and electronics recycling center.
BrandLine Group Service – Support
List of Authorized Service Centers:
www.zeegma.com/en/service
Detailed warranty conditions are available on the website:
Thank you for purchasing our product!

- INTRODUCTION
- IMPORTANT
- IMPORTANT! KEEP THIS MANUAL FOR FUTURE REFERENCE!
- Dustbin (see fig. 4):
- Water tank (see fig. 5):
- Remote control (see fig. 6):
- How to assemble (see fig. 7):
- How to use:
- How to store and charge:
- Two ways of charging (see fig. 10):
- Charging notes:
- Description of vacuuming modes and functions:
- Options:
- 4a. How to install the water tank:
- How to use the water tank (see fig. 11)
- How to clean and empty the water tank and mop (see fig. 12):
- How to clean the dustbin and filters (see fig. 13):
- How to clean side brushes and central brush (see fig. 14):
- How to clean sensors and wheels (see fig. 15):
- How to store:
- How to prepare rooms for vacuuming
- EINFÜHRUNG
- BrandLine Group Service – Support
- www.zeegma.com/en/service
Brand : Zeegma
Model : Robo Next
Category : Vacuum Cleaner