BC-HCS165-X - Saw SCHEPPACH - Free user manual and instructions
Find the device manual for free BC-HCS165-X SCHEPPACH in PDF.


User questions about BC-HCS165-X SCHEPPACH
0 question about this device. Answer the ones you know or ask your own.
Ask a new question about this device
Download the instructions for your Saw in PDF format for free! Find your manual BC-HCS165-X - SCHEPPACH and take your electronic device back in hand. On this page are published all the documents necessary for the use of your device. BC-HCS165-X by SCHEPPACH.
USER MANUAL BC-HCS165-X SCHEPPACH
natural_image
Blue and black Schneppsch electric saw with visible blade and cutting edge (no text or symbols on the saw itself)
text_image
https://www.scheppach.com/de/service scheppachBC-HCS165-X
GB Cordless hand-held circular saw | Translation of the original operating instructions.... 18
text_image
7 26d 26 26b26c 17Inhaltsverzeichnis
Günzburger Straße 69
D-89335 Ichenhausen
Verehrter Kunde
https://www.scheppach.com/de/service
Günzburger Straße 69
D-89335 Ichenhausen
Division Manager Product Center
Andreas Pecher
Head of Project Management
Table of contents
1 Introduction ...... 18
2 Product description (Fig. 1).... 18
3 Scope of delivery (Fig. 1) 19
4 Proper use.... 19
5 Safety instructions.... 19
6 Technical data.... 23
7 Unpacking 24
8 Before commissioning.... 24
9 Operation 25
10 Cleaning and maintenance 26
11 Storage.... 26
12 Repair and ordering spare parts 26
13 Disposal and recycling 27
14 Troubleshooting 27
15 Warranty conditions - Scheppach 20V IXES series 28
16 EU Declaration of Conformity.... 29
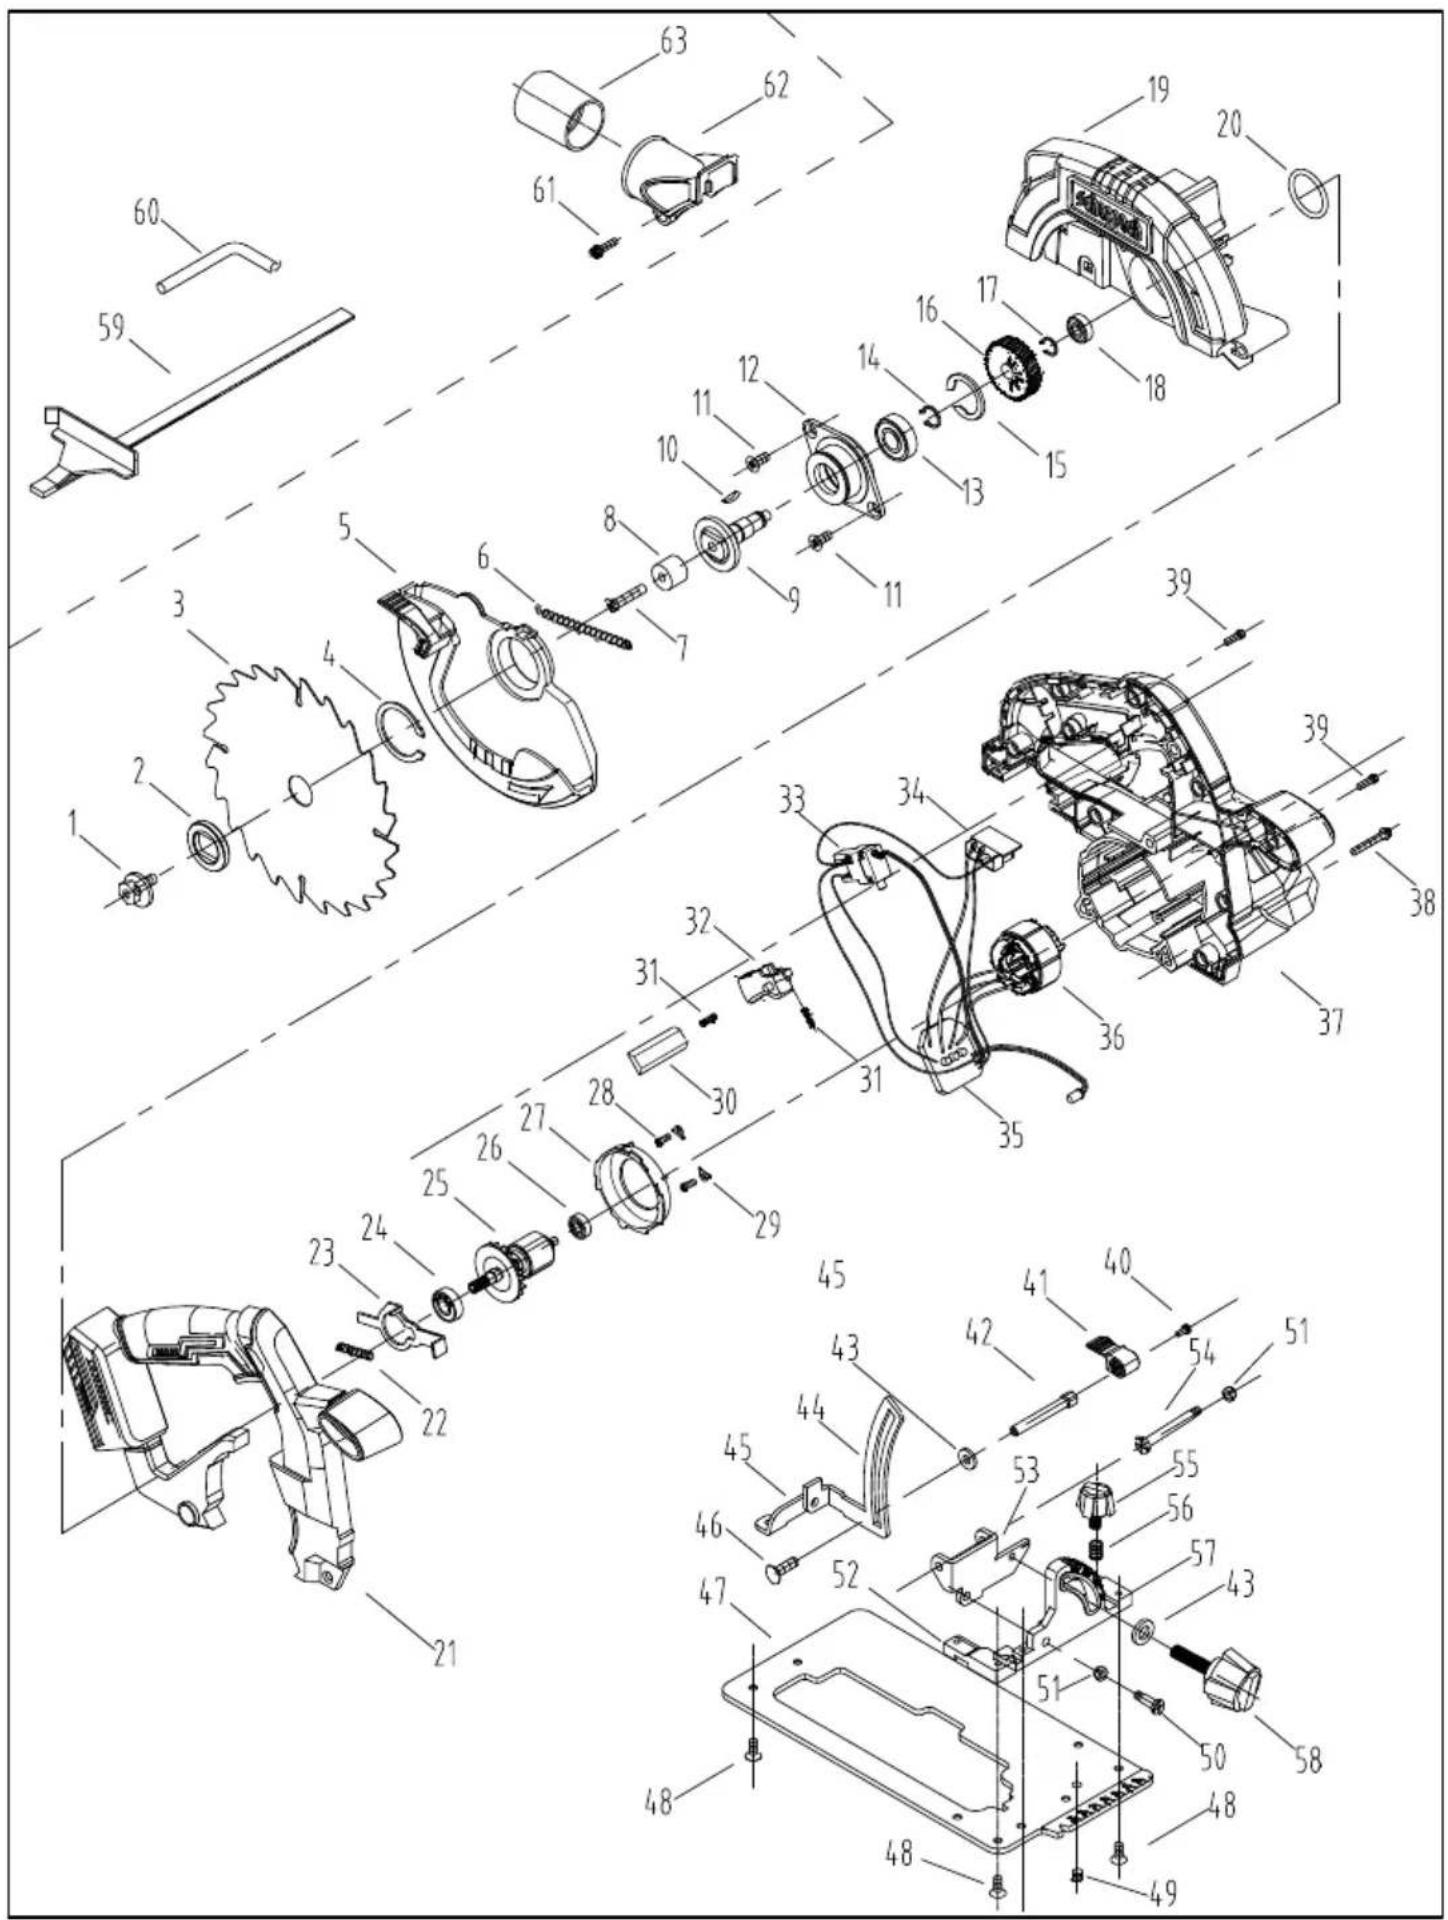
17 Exploded view.... 321
Explanation of the symbols on the product
Symbols are used in this manual to draw your attention to potential hazards. The safety symbols and the accompanying explanations must be fully understood. The warnings themselves will not rectify a hazard and cannot replace proper accident prevention measures.
 | Attention! Failure to observe the safety signs and warning information affixed to the product and failure to observe the safety and operating manual can result in serious injury or even death. |
 | Before commissioning, read and observe the operating manual and safety instructions! |
 | Wear safety goggles. |
 | Wear hearing protection. |
 | If dust builds up, wear respiratory protection! |
 | Wear protective gloves! |
 | Attention! Danger of injury! Do not reach into saw blade while it is running! |
| Lithium | Lithium-ion battery |
| CE | The product complies with the applicable European directives. |
 | The product complies with the applicable Serbian directives. |
1 Introduction
Manufacturer:
Scheppach GmbH
Günzburger Straße 69
D-89335 Ichenhausen
Dear Customer
We hope your new product brings you much enjoyment and success.
Note:
In accordance with the applicable product liability laws, the manufacturer of this product assumes no liability for damage to the product or caused by the product arising from:
- Improper handling
• Non-compliance with the operating manual
• Repairs carried out by third parties, unauthorised specialists - Installing and replacing non-original spare parts
- Improper use
Note:
The operating manual is part of this product.
It includes important instructions for the safe, proper and economic operation of the product, for avoiding danger, for minimising repair costs and downtimes and for increasing the reliability and extending the service life of the product. In addition to the safety instructions in this operating manual, you must also observe the regulations applicable to the operation of the product in your country.
Familiarise yourself with all operating and safety instructions before using the product. Only operate the product as described and for the specified areas of application. Keep the operating manual in a good place and hand over all documents when passing the product on to third parties.
2 Product description (Fig. 1)
- Handle
- On/off switch
- Switch lock
- Additional handle
- Spindle locking
- Wing screw (parallel stop)
- Cutting angle scale
- Wing screw (cutting angle scale)
- LED work lamp
- Fixed protective cover
- Saw blade
- Allen screw
12a. Washer - Flange
-
Protective cover
-
Retracting lever (protective cover)
-
Base plate
-
Sawdust ejection port
-
Battery mount
-
Allen key storage
-
Cutting depth scale
-
Lever
-
Parallel stop mount
-
Parallel stop
-
Scale (parallel stop)
-
Allen key
-
Suction adapter
26a. Phillips screw
26b. Spring washer
26c. Washer
26d. Reduction piece
-
Release button (battery)
-
Battery*
* = not included in the scope of delivery!
3 Scope of delivery (Fig. 1)
Item QuantityDesignation
-
1 x Saw blade
-
1 x Parallel stop
-
1 x Allen key
-
1 x Suction adapter
26a. 1 x Phillips screw
26b. 1 x Spring washer
26c. 1 x Washer
26d. 1 x Reduction piece
1 x Cordless hand-held circular saw
1 x Operating manual
4 Proper use
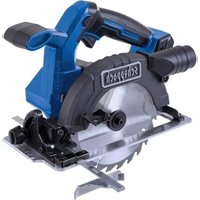
The cordless hand-held circular saw is suitable for sawing in wood, plastic or light building materials (e.g. plasterboard). Sawing metal is not permitted.
The product may only be used in the intended manner. Any use beyond this is improper. The user, not the manufacturer, is responsible for damages or injuries of any type resulting from this.
An element of the intended use is also the observance of the safety instructions, as well as the assembly instructions and operating information in the operating manual.
Persons who operate and maintain the product must be familiar with the manual and must be informed about potential dangers.
The liability of the manufacturer and resulting damages are excluded in the event of modifications of the product.
The product may only be operated with original parts and original accessories from the manufacturer.
The safety, operating and maintenance specifications of the manufacturer, as well as the dimensions specified in the technical data, must be observed.
Please note that our products were not designed with the intention of use for commercial or industrial purposes. We assume no guarantee if the product is used in commercial or industrial applications, or for equivalent work.
Explanation of the signal words in the operating manual

DANGER
Signal word to indicate an imminently hazardous situation which, if not avoided, will result in death or serious injury.

WARNING
Signal word to indicate a potentially hazardous situation which, if not avoided, could result in death or serious injury.

CAUTION
Signal word to indicate a potentially hazardous situation which, if not avoided, could result in minor or moderate injury.
ATTENTION
Signal word to indicate a potentially hazardous situation which, if not avoided, could result in product or property damage.
5 Safety instructions
General power tool safety warnings

WARNING
Read all safety warnings, instructions, illustrations and specifications provided with this power tool.
Failure to follow all instructions listed below may result in electric shock, fire and/or serious injury.
Save all warnings and instructions for future reference.
The term "power tool" in the warnings refers to your mains-operated (corded) power tool or battery-operated (cordless) power tool.
1) Work area safety
a) Keep your work area clean and well-lit. Cluttered or dark areas invite accidents.
b) Do not operate power tools in explosive atmospheres, such as in the presence of flammable liquids, gases or dust. Power tools create sparks which may ignite the dust or fumes.
c) Keep children and bystanders away while operating a power tool. Distractions can cause you to lose control.
2) Electrical safety
a) The connection plug of the electric tool must fit into the socket. Never modify the plug in any way. Do not use any adapter plugs with earthed (grounded) power tools. Unmodified plugs and matching outlets will reduce risk of electric shock.
b) Avoid body contact with earthed or grounded surfaces, such as pipes, radiators, ranges and refrigerators. There is an increased risk of electric shock if your body is earthed or grounded.
c) Do not expose power tools to rain or wet conditions. Water entering a power tool will increase the risk of electric shock.
d) Do not abuse the cord. Never use the cord for carrying, pulling or unplugging the power tool. Keep cord away from heat, oil, sharp edges or moving parts. Damaged or entangled cords increase the risk of electric shock.
e) When operating a power tool outdoors, use an extension cord suitable for outdoor use. Use of a cord suitable for outdoor use reduces the risk of electric shock.
f) If operating a power tool in a damp location is unavoidable, use a residual current device (RCD) protected supply. Use of an RCD reduces the risk of electric shock.
3) Personal safety
a) Stay alert, watch what you are doing and use common sense when operating a power tool. Do not use a power tool while you are tired or under the influence of drugs, alcohol or medication. A moment of inattention while operating power tools may result in serious personal injury.
b) Wear personal protective equipment and always safety goggles. Protective equipment such as a dust mask, non-skid safety shoes, safety helmet or hearing protection used for appropriate conditions will reduce personal injuries.
c) Prevent unintentional starting. Ensure the switch is in the off-position before connecting to power source and/or rechargeable battery, picking up or carrying the tool. Carrying power tools with your finger on the switch or energising power tools that have the switch on invites accidents.
d) Remove any adjusting tools or spanners/keys before turning the power tool on. A wrench or a key left attached to a rotating part of the power tool may result in personal injury.
e) Avoid abnormal postures. Keep proper footing and balance at all times. This enables better control of the power tool in unexpected situations.
f) Wear suitable clothing. Do not wear loose clothing or jewellery. Keep your hair and clothing away from moving parts. Loose clothes, jewellery or long hair can be caught in moving parts.
g) If devices are provided for the connection of dust extraction and collection facilities, ensure these are connected and properly used. Use of dust extraction can reduce dust-related hazards.
h) Do not let familiarity gained from frequent use of tools allow you to become complacent and ignore tool safety principles. A careless action can cause severe injury within a fraction of a second.
4) Power tool use and care
a) Do not force the power tool. Use the correct power tool for your application. The correct power tool will do the job better and safer at the rate for which it was designed.
b) Do not use the power tool if the switch does not turn it on and off. Any power tool that cannot be controlled with the switch is dangerous and must be repaired.
c) Disconnect the plug from the power source and/or remove the battery pack, if detachable, from the power tool before making any adjustments, changing accessories, or storing power tools. Such precautionary measures reduce the risk of starting the power tool accidentally.
d) Store idle power tools out of the reach of children and do not allow persons unfamiliar with the power tool or these instructions to operate the power tool. Power tools are dangerous in the hands of untrained users.
e) Maintain power tools and attachments. Check for misalignment or binding of moving parts, breakage of parts and any other condition that may affect the power tool's operation. If damaged, have the power tool repaired before use. Many accidents are caused by poorly maintained power tools.
f) Keep cutting tools sharp and clean. Properly maintained cutting tools with sharp cutting edges are less likely to bind and are easier to control.
g) Use electric tools, insertion tools, etc. according to these instructions. Take into account the working conditions and the work to be performed. Use of the power tool for operations different from those intended could result in a hazardous situation.
h) Keep handles and grasping surfaces dry, clean and free from oil and grease. Slippery handles and grasping surfaces do not allow for safe handling and control of the tool in unexpected situations.
5) Battery tool use and care
a) Only charge the batteries with battery chargers recommended by the manufacturer. A battery charger that is suitable for a particular type of battery poses a fire hazard when used with other batteries.
b) Only use the batteries in power tools that are designed for them. The use of other batteries can lead to injuries and a risk of fire.
c) Keep the unused battery away from paper clips, coins, keys, nails, screws or other small metal objects that could cause a short-circuit between the contacts. A short-circuit between the contacts of the battery could result in burns or fires.
d) Liquid may leak from the battery if used incorrectly. Avoid contact with it. In case of accidental contact, rinse with water. If the liquid gets into your eyes, seek additional medical attention. Leaking battery fluid may cause skin irritation or burns.
e) Do not use a damaged or modified battery. Damaged or modified batteries can behave unpredictably and cause fire, explosion or injury.
f) Do not expose a battery to fire or excessive temperatures. Fire or temperatures above 130^ C may cause an explosion.
g) Follow all charging instructions and never charge the battery or rechargeable tool outside the temperature range specified in the operating manual. Incorrect charging or charging outside the approved temperature range can destroy the battery and increase the risk of fire.
6) Service
a) Only have your power tool repaired by qualified specialists and only with original spare parts. This will ensure that the safety of the power tool is maintained.
b) Never attempt to service damaged batteries. Any type of battery maintenance shall be carried out only by the manufacturer or an authorised customer service centre.
Safety instructions for all saws
Sawing process

DANGER
Do not place your hands in the sawing area or on the saw blade. Hold the additional handle or the motor housing with your second hand. If both hands hold the saw, they cannot be injured by the saw blade.
a) Do not reach beneath the workpiece. The protective cover cannot protect you from the saw blade beneath the workpiece.
b) Adjust the cutting depth to the thickness of the workpiece. Less than one full tooth height should be visible beneath the workpiece.
c) Never hold the workpiece that is to be sawn in the hand or over the leg. Secure the workpiece on a stable support. It is important to fasten the workpiece well, in order to minimise any risk of physical contact, jamming of the saw blade or loss of control.
d) When performing work during which the tool attachment can meet with concealed power lines or its own connection cable, hold the power tool by the insulated gripping surfaces. Contact with a live cable will also energise the metal parts of the electrical tool and will lead to an electric shock.
e) When performing a longitudinal cut always use a stop or a straight edge guide. This improves the cutting accuracy and reduces the possibility of the saw blade jamming.
f) Always use saw blades with correct size and shape (diamond versus round) of arbour holes. Saw blades that do not match the mounting hardware of the saw will run off-centre, causing loss of control.
g) Never use damaged or incorrect saw blade washers or screws. The saw blade washers and screws have been specially designed for your saw, for optimum performance and operational safety.
Additional instructions
a) Do not use grinding discs.
b) Make sure that a suitable saw blade for the material to be cut is selected.
c) Saw blades designed to cut wood and similar materials must comply with EN 847-1.
d) The saw may only be used for sawing wood, plastic and light building materials.
e) Only use saw blades with a speed marking equal to or higher than the specified speed of your product.
f) Only use saw blades with 165 mm diameter that match the inscriptions on the saw blade.
g) Avoid overheating the saw teeth.
h) When sawing plastic, avoid melting of the plastic. Use the correct saw blades for the material to be cut. Replace damaged or worn saw blades immediately. When the saw blade overheats, stop the machine. Allow the saw blade to cool down before using the machine again.
i) Adjust the cutting depth to the thickness of the workpiece. Less than one full tooth height should be visible beneath the workpiece.
j) Wear a dust mask.
k) Wear hearing protection and safety goggles during the entire operating period.
Further safety instructions for all saws
Kickback - causes and corresponding safety instructions
- Kickback is a sudden reaction to a hooked, jammed or incorrectly aligned saw blade, which leads to an uncontrolled rebounding of the saw, whereby it moves out of the workpiece in the direction of the operator.
- If the saw blade hooks or jams in the closing sawing gap, it is blocked and the motor power forces the saw back in the direction of the operator.
- If the saw blade skews or is incorrectly aligned in the saw cut, the teeth of the rear saw blade edge can hook into the wooden surface, which results in the saw blade moving out of the sawing gap and the saw jumping back in the direction of the operator.
Kickback is the result of incorrect use or misuse of the saw. It can be prevented by suitable precautionary measures, as described in the following.
a) Hold the saw firmly with both hands and bring your arms into a position in which you can absorb the kickback forces. Always stand to the side of the saw blade; never bring the saw blade in line with your body. During kickback, the circular saw can jump backwards, although the operator is able to control the kickback forces using suitable measures.
b) If the saw blade jams or you interrupt your work, switch off the saw and hold the saw calmly in the material, until the saw blade has come to a standstill. Never attempt to remove the saw from the workpiece or draw it backwards whilst the saw blade is moving, otherwise kickback can occur. Determine and remedy the cause of the saw blade jamming.
c) If you wish to restart a saw that is inserted in a workpiece, centre the saw blade in the sawing gap and check that the saw teeth are not hooked in the workpiece. If the saw blade is hooked in, it can move out of the workpiece or cause kick-back when the saw is restarted.
d) Support large panels to minimise the risk of saw blade pinching and kickback. Large panels tend to sag under their own weight. Panels must be supported on both sides, that is both close to the sawing gap and at the edge.
e) Do not use blunt or damaged saw blades. Saw blades with blunt or incorrectly aligned teeth cause increased friction, jamming of the saw blade and kick-back due to the sawing gap being too tight.
f) Before sawing, determine the cutting depth and cutting angle settings. If you change the settings during sawing, the saw blade can jam and result in kickback.
g) Apply particular caution when sawing in existing walls or other areas that are not visible. The plunging saw blade can jam in concealed objects during sawing and result in kickback.
Function of the lower protective cover
a) Check that the lower protective cover closes correctly before every use. Do not use the saw if the lower protective cover does not move freely or does not close immediately. Never clamp or bind the lower protective cover in the open position. If the saw should accidentally fall to the floor, the lower protective cover may be bent. Open the protective cover with the pull-back lever and make sure it moves freely and does not touch the saw blade or any other parts with all cutting angles and depths.
b) Check the condition and function of the spring for the lower protective cover. Have the saw maintained before use, if the lower protective cover and spring do not function properly. Damaged parts, sticky deposits or adhered chips cause the lower protective cover to function with a delay.
c) Only open the lower protective cover by hand for special cuts, such as "dip and angle cuts". Open the lower protective cover with the pull-back lever and release it as soon as the saw blade dips into the workpiece. For all other sawing operations, the lower protective cover should operate automatically.
d) Do not place the saw on the workbench or the floor without the lower protective cover covering the saw blade. An unprotected saw blade running on moves the saw against the cutting direction and saws anything in its path. Note the run-on time of the saw blade here.
Safety instructions for the use of saw blades
- Avoid uncontrolled release of the saw unit in the lower end position.
- Do not use damaged or deformed saw blades.
- Do not use saw blades with cracks. Separate cracked saw blades. Repairs are not permitted.
- Do not use saw blades made of high speed steel.
- Check the condition of the saw blades before using saws.
-
Make sure that a suitable saw blade for the material to be cut is selected.
-
Only use saw blades recommended by the manufacturer.
Saw blades designed to cut wood and similar materials must comply with EN 847-1. - Only use saw blades for which the maximum permissible speed is not lower than the maximum spindle speed of the saw and which are suitable for the material to be cut.
- Observe the direction of rotation of the saw blade.
- Only use saw blades if you have mastered their use.
- Observe the maximum speed. The maximum speed specified on the saw blade may not be exceeded. If specified, observe the speed range.
- Clean dirt, grease, oil and water off of the clamping surfaces.
- Do not use any loose reducing rings or bushes for the reducing of holes on saw blades.
- Make sure that fixed reducer rings for securing the saw blade have the same diameter and have at least 1/3 of the cutting diameter.
- Make sure that fixed reducer rings are parallel to each other.
- Handle saw blade with caution. They are ideally stored in the originally package or special containers. Wear protective gloves in order to improve grip and to further reduce the risk of injury.
- Prior to use, make sure that the saw blade meets the technical requirements of this saw and is properly fastened.
- Only use the supplied saw blade for cutting wood, never for the processing of metals.
- Use only a saw blade with a diameter that matches the specifications on the saw.
- Use additional workpiece supports, if required for workpiece stability.
• Workpiece support extensions must always be secured and used during work. - Replace table inlays when worn!
- Avoid overheating the saw teeth.
- When sawing plastic, avoid melting of the plastic. Use the correct saw blades for the material to be cut. Replace damaged or worn saw blades immediately. When the saw blade overheats, stop the machine. Allow the saw blade to cool down before using the machine again.
- Use only saw blades that are marked with an equal or higher rotational speed than the rotational speed specified on the electric tool.
• Always ensure that the saw is stable and secure.
Safe work
Tools may only be used by trained and experienced persons who are proficient in handling tools.
- The maximum speed specified on the insertion tool may not be exceeded. Where indicated, the speed range must be observed.
- Circular saw blades with cracks in the blade must be discarded (repair is not permitted).
-
Tools with visible cracks must not be used.
-
Tools must be cleaned regularly.
- Tool parts made of light alloys may only be cleaned, e.g. of resin, with solvents that do not impair the mechanical properties of these materials.
- Tools and tool bodies must be clamped in such a way that they cannot come loose during operation.
- Extending the key or tightening it with the help of hammer blows is not permitted.
- The clamping surfaces must be cleaned of dirt, grease, oil and water.
- Spare parts must comply with the specifications for original parts supplied by the manufacturer.
- Maintenance work and modifications to circular saw blades should only be carried out by a competent person, i.e. a person with specialist training and experience who is familiar with the requirements for construction and design and who is familiar with the required safety levels.
Residual risks
The product has been built according to state-of-the-art and the recognised technical safety rules. However, individual residual risks can arise during operation.
- Damage to hearing if the stipulated hearing protection is not worn.
- Residual risks can be minimised if the "Safety Instructions" and the "Intended Use" together with the operating manual as a whole are observed.
- Use the product in the way that is recommended in this operating manual. This is how to ensure that your product provides optimum performance.
• Furthermore, despite all precautions having been met, some non-obvious residual risks may still remain.

WARNING
This power tool generates an electromagnetic field during operation. This field can impair active or passive medical implants under certain circumstances. In order to prevent the risk of serious or deadly injuries, we recommend that persons with medical implants consult with their physician and the manufacturer of the medical implant prior to operating the power tool.

WARNING
In case of extended working periods, the operating personnel may suffer circulatory disturbances in their hands (vibration white finger) due to vibrations.
Raynaud's syndrome is a vascular disease that causes the small blood vessels on the fingers and toes to cramp in spasms. The affected areas are no longer supplied with sufficient blood and therefore appear extremely pale. The frequent use of vibrating products can cause nerve damage in people whose circulation is impaired (e.g. smokers, diabetics).
If you notice unusual adverse effects, stop working immediately and seek medical advice.
ATTENTION
The product is part of the 20V IXES series and may only be operated with batteries of this series. Batteries may only be charged with battery chargers of this series. Observe the manufacturer's instructions.

WARNING
Follow the safety and charging instructions and correct usage given in the instruction manual of your 20V IXES Series battery and charger. A detailed description of the charging process and further information are provided in this separate manual.
6 Technical data
| Rated voltage 20 V | |
| Idle speed n_0 | 4500 rpm |
| Weight (without battery) | 2.8 kg |
| Max. cut depth | |
| at 90° approx. 55 mm | |
| at 45° approx. 40 mm | |
| Saw blade | |
| Dimensions ∅165 mm x ∅20 mm x 1.0 mm | |
| Tooth thickness / cutting thickness | 1.6 mm |
| Size of hole ∅20 mm | |
| Number of teeth | 24 teeth |
| Idle speed n max | 9200 rpm |
Subject to technical changes!
Noise and vibration

WARNING
Noise can have serious effects on your health. If the machine noise exceeds 85 dB, please wear suitable hearing protection for you and persons in the vicinity.
The noise and vibration values have been determined in accordance with EN 62841-1.
Noise data
| Sound pressure L_pA | 80.1 dB |
| Measurement uncertainty K_pA | 3 dB |
| Sound power L_wA | 88.1 dB |
| Measurement uncertainty K_wA | 3 dB |
Vibration parameters (hand/arm vibration)
| Vibration an Sawing in wood | |
| Handle | 3.368 m/s2 |
| Measurement uncertainty K | 1.5 m/s2 |
The total vibration emission values specified and the device emissions values specified have been measured in accordance with a standardised test procedure and can be used for comparison of one electric tool with another.
The total noise emission values specified and the total vibration emission values specified can also be used for an initial estimation of the load.

WARNING
The noise emission values and vibration emission value can vary from the specified values during the actual use of the power tool, depending on the type and the manner in which the electric tool is used, and in particular the type of workpiece being processed.
Try to keep the stress as low as possible. For example: Limit working time. In doing so, all parts of the operating cycle must be taken into account (such as times in which the power tool is switched off or times in which it is switched on, but is not running under a load).
7 Unpacking

WARNING
The product and the packaging material are not children's toys!
Do not let children play with plastic bags, films or small parts! There is a danger of choking or suffocating!
- Open the packaging and carefully remove the product.
- Remove the packaging material, as well as the packaging and transport safety devices (if present).
- Check whether the scope of delivery is complete.
- Check the product and accessory parts for transport damage. Immediately report any damage to the transport company that delivered the Product. Later claims will not be recognised.
- If possible, keep the packaging until the expiry of the warranty period.
- Familiarise yourself with the product by means of the operating manual before using for the first time.
- With accessories as well as wearing parts and replacement parts use only original parts. Spare parts can be obtained from your specialist dealer.
- When ordering please provide our article number as well as type and year of manufacture for the product.
8 Before commissioning

CAUTION
Danger of injury!
Do not insert the battery until the battery-powered tool is ready for use.
8.1 Fitting/replacing the saw blade (11) (Fig. 1, 3)
You can store the Allen key (25) in the Allen key storage (19).

WARNING
Tool attachments may be sharp and become hot during use. Always wear protective gloves when handling the tool attachments.

CAUTION
Keep your hands away from the tool attachment when the product is in operation.
ATTENTION
The saw blade is not pre-mounted!
- Set 0 mm on the cutting depth scale (20) and lock the lever (21), see 9.3
8.1.1 Mounting the saw blade

CAUTION
The marked running direction on the saw blade must match the marked running direction on the fixed protective cover.

WARNING
Make sure that the saw blade is suitable for the speed of the tool.
- Swing back the protective cover (14) with the retracting lever (15) and place the saw blade (11) from below into the fixed protective cover (10) and onto the spindle.
- Place the flange (13) on the saw blade (11).
- Press the spindle lock (5) and fix the saw blade (11) with the washer (12a) and the Allen screw (12). Use the Allen key (25).
- Swing back the protective cover (14) with the retracting lever (15) and place the product on a level surface.
- Press and hold the spindle lock (5).
- Loosen the Allen screw (12) with washer (12a) with the Allen key (25).
- Remove the Allen screw (12) with washer (12a) and the flange (13).
- Lift the product, hold back the protective cover (14) and carefully remove the saw blade (11) downwards from the fixed protective cover (10).
8.1.2 Removing the saw blade
8.2 Inserting/removing the battery (28) into/from the battery mount (18) (Fig. 2)
Inserting the battery
- Push the battery (28) into the battery mount (18). The battery (28) clicks into place audibly.
Removing the battery
- Press the unlock button (27) of the battery (28) and remove it from the battery mount (18).
8.3 Fitting the suction adapter (26) (Fig. 7)
Notes:
If necessary, it is possible to connect the vacuum hose of a vacuum cleaner directly to the suction adapter on the product without a reduction piece.
When working with materials that generate dust that is hazardous to health, the product must be connected to a suitable, tested, dust class M extraction device.
- Attach the suction adapter (26) to the sawdust ejection port.
- Secure the suction adapter (26) with a Phillips head screw (26a), spring washer (26b) and washer (26c).
- Connect an approved dust and chip extraction system to the suction adapter (26). If necessary, use the reducer (26d) depending on the diameter of the dust and chip extraction system.
8.4 Fitting the parallel stop (23) (Fig. 4)
- Loosen the wing screw (6) for the parallel stop mount (22) and insert the parallel stop (23) into the parallel stop mount (22).
- Set the desired cutting width using the scale (24) on the parallel stop (23) and the recess in the base plate (16).
- Tighten the wing screw (6) for the parallel stop mount (22).
9 Operation
The cordless hand-held circular saw has overload protection, a spindle lock and an LED work light.
Please refer to the following description for the function of the controls.

WARNING
Danger of injury!
Remove the battery from the power tool before carrying out any work on the power tool (e.g. maintenance, tool change, etc.) and when transporting and storing it. There is a risk of injury if the on/off switch is operated unintentionally.
ATTENTION
Make sure that the ambient temperature does not exceed 50^ C and does not fall below -20^ C during work.
ATTENTION
The product is part of the 20V IXES series and may only be operated with batteries of this series. Batteries may only be charged with battery chargers of this series. Observe the manufacturer's instructions.
9.1 Function of the protective cover (14) (Fig. 1)
- Pull the retracting lever (15) of the protective cover (14) as far as it will go.
Note:
The protective cover must not jam and must automatically spring back to its original position when the retracting lever is released.
Note:
If the function is faulty, do not operate the product and contact our Service Centre.
9.2 Setting the cutting angle (Fig. 5)
Note:
Hold the product firmly with both hands during operation to have better control over the product.
You can set the cutting angle with the cutting angle scale (7).
- Loosen the wing screw (8) for setting the cutting angle.
- Use the cutting angle scale (7) to set the required angle.
- Retighten the wing screw (8).
9.3 Setting the cutting depth (Fig. 6)
Note:
For a clean cut, select a cutting depth that is approx. 3 mm greater than the material thickness.
- Loosen the lever (21).
- Set the desired cutting depth on the cutting depth scale (20).
- Re-tighten the lever (21).
9.4 On/Off switch (2) (Fig. 1)
ATTENTION
Before use, check the inserted tool to ensure all fastening parts are attached correctly.
Switching on
- Press the switch-on interlock (3) on the handle (1) to the right or left.
- To switch on the product, push the on/off switch (2).
Note:
After the product has started, you can release the switch-on interlock again.
Switching off
- To switch off, release the on/off switch (2). If the switch-on interlock (3) is in the centre position, the product is secured from being switched on.
9.4.1 LED work lamp (9) (Fig. 1)
This product is equipped with an LED work lamp to illuminate the immediate work area and improve visibility in poorly lit environments.

CAUTION
Do not look directly into the LED work lamp or the light source.
- The LED work lamp (9) lights up automatically as soon as the product is switched on.
The LED work lamp remains lit up for approx. 10 seconds after the product is switched off.
9.5 Overload switch-off
In the event of overloading, the motor will switch itself off. After a cool-down period (time varies) the motor can be switched back on again.
9.6 Right-angled sawing (Fig. 1)
- Hold the product firmly with both hands, one hand on the handle (1) and the other on the additional grip (4).
- Switch on the product, as described in 9.4.
- Place the product down with the front part of the base plate (16) on the workpiece.
- Saw forwards with moderate pressure – never backwards.
9.7 Mitre cuts up to 45° (Fig. 1)
- Set the desired cutting angle as described under 9.3.
- Hold the product firmly with both hands, one hand on the handle (1) and the other on the additional grip (4).
- Switch on the product, as described in 9.4.
- Place the product down with the front part of the base plate (16) on the workpiece.
- Saw forwards with moderate pressure – never backwards.
Note:
Lateral movement when cutting can lead to the saw blade jamming and therefore also to kickback.
10 Cleaning and maintenance
WARNING
Have maintenance and repair tasks that are not described in this operating manual, carried out by a specialist workshop. Use only original spare parts.
There is a risk of accident! Always perform maintenance and cleaning work with the battery removed.
There is a danger of injury! Let the Product cool down before all maintenance and cleaning tasks. Elements of the engine are hot. There is a danger of injury and burning!
The product can start unexpectedly and cause injuries.
- Remove the battery.
- Allow the product to cool down.
- Remove the tool attachment.
10.1 Cleaning
- Keep protective devices, air vents and the motor housing as free of dust and dirt as possible. Rub the product clean with a clean cloth* or blow it off with compressed air* at low pressure. We recommend that you clean the product directly after every use.
- Ventilation openings must always be free.
-
Do not use any cleaning products or solvents; they could attack the plastic parts of the product. Make sure that no water can penetrate the product interior.
-
Always keep the product clean, dry and free from oil or grease. Remove dust after each use and before storage.
- Check the saw blade guard for dirt before each start-up. Remove old shavings and wood splinters using a brush or similar suitable tool.
- Wipe any dirt off the lens with a dry cloth. Be careful to avoid scratching the LED lamp as this can severely reduce the light intensity.
10.2 Maintenance
- Check the saw blade for obvious defects before each use and replace blunt, bent or otherwise damaged saw blades.
- Maintenance work on the saw blades, such as repair or resharpening, should be carried out by an expert.
11 Storage
- Remove the battery from the product before prolonged storage (e.g. winter storage).
- Clean and check the product for damage.
- Store the battery in a partially charged state.
- When stored, check the battery charge level every three months.
Store the product and its accessories in a dark, dry and frost-free place that is inaccessible to children. The optimum storage temperature is between 5°C and 30°C.
Store the product in its original packaging.
Cover the product to protect it from dust or moisture. Store the operating manual with the product.
12 Repair and ordering spare parts
With this product, it is necessary to note that the following parts are subject to natural or usage-related wear, or that the following parts are required as consumables.
ATTENTION
According to the German Product Liability Act, no liability is accepted for damage caused by improper repairs or by not using original spare parts.
Such work should be performed by a customer service centre or an authorised specialists. The same applies to accessory parts.
Spare parts and accessories can be obtained from our Service Centre. To do this, scan the QR code on the front page.
12.1 Ordering spare parts
Please provide the following information when ordering spare parts:
- Model designation
- Item number
- Type plate data
Spare parts / accessories
| Battery pack SBP2.0 - Article no.: 7909201708 |
| Battery pack SBP4.0 - Article no.: 7909201709 |
| Battery charger SBC2.4A - Article no.: 7909201710 |
| Battery charger SBC4.5A - Article no.: 7909201711 |
| Battery charger SDBC2.4A - Article no.: 7909201712 |
| Battery charger SDBC4.5A - Article no.: 7909201713 |
| StarterKit SBSK2.0 - Article no.: 7909201720 |
| StarterKit SBSK4.0 - Article no.: 7909201721 |
13 Disposal and recycling
Notes for packaging


The packaging materials are recyclable. Please dispose of packaging in an environmentally friendly manner.
Notes on the electrical and electronic equipment act (ElektroG)

Waste electrical and electronic equipment does not belong in household waste, but must be collected and disposed of separately!
- Used batteries or rechargeable batteries that are not installed permanently in the old device must be removed non-destructively before disposal! Their disposal is regulated by the battery act.
- Owners or users of electrical and electronic devices are legally obliged to return them after use.
- The end user is responsible for deleting their personal data from the old device being disposed of!
- The symbol of the crossed-out dustbin means that waste electrical and electronic equipment must not be disposed of with household waste.
- Waste electrical and electronic equipment can be handed in free of charge at the following places:
– Public disposal or collection points (e.g. municipal works yards) -
Points of sale of electrical appliances (stationary and online), provided that dealers are obliged to take them back or offer to do so voluntarily.
-
Up to three waste electrical devices per type of device, with an edge length of no more than 25 centimetres, can be returned free of charge to the manufacturer without prior purchase of a new device from the manufacturer or taken to another authorised collection point in your vicinity.
– Further supplementary take-back conditions of the manufacturers and distributors can be obtained from the respective customer service.
- If the manufacturer delivers a new electrical device to a private household, the manufacturer can arrange for the free collection of the old electrical device upon request from the end user. Please contact the manufacturer's customer service for this.
• These statements only apply to devices installed and sold in the countries of the European Union and which are subject to the European Directive 2012/19/EU. In countries outside the European Union, different regulations may apply to the disposal of waste electrical and electronic equipment.
Notes on lithium-ion batteries

Remove the battery before disposing of the device!
- Do not dispose of the battery in household waste, in a fire (risk of explosion) or in water. Damaged batteries can harm the environment and your health if toxic vapours or liquids escape.
- Defective or used batteries must be recycled in accordance with Directive 2023/1542/EC.
- Hand in the device and the battery charger at a recycling centre. The plastic and metal parts used can be separated by type and thus recycled.
- Dispose of batteries when discharged. We recommend covering the poles with an adhesive strip to protect against a short circuit. Do not open the battery.
- Dispose of batteries according to local regulations. Return batteries to a used battery collection point where they can be recycled in an environmentally friendly manner. Ask your local waste disposal company about this.
14 Troubleshooting
| Fault Possible cause | Remedy | |
| The product cannot be started. | The battery power is too weak. | Charge the battery. |
| The battery is not properly inserted. | Push the battery into the battery mount.The battery clicks into place audibly. | |
| Saw cut is rough or wavy | Saw blade dull, tooth shape not appropriate for the material thickness | Resharpen saw blade and/or use suitable saw blade |
| Workpiece pulls away and/or splinters | Excessive cutting pressure and/or saw blade not suitable for use | Insert suitable saw blade |
15 Warranty conditions - Scheppach 20V IXES series
Revision date 25/04/2024
Dear customer,
our products are subject to strict quality checks. However, if a product does not function perfectly, we deeply regret this and ask that you contact our customer service at the address specified below. We will also be glad to assist you by telephone via the service number. The following information is intended to help you to process and settle your claim without any problems.
For the assertion of warranty claims, the following applies:
-
The warranty conditions govern our additional manufacturer warranty services for purchasers (private end consumers) of new products. The statutory warranty claims are not affected by this warranty. This is the responsibility of the dealer who you purchased the product from.
-
The manufacturer's warranty only covers defects in a new product purchased by you that are due to a material or manufacturing defect. If material or manufacturing defects occur during the warranty period, the manufacturer as guarantor shall provide one of the following services of its choice under this warranty:
– Free repair of the goods
- Free replacement of the goods with an item of equal value (if necessary also replacement with a successor model if the original goods are no longer available).
Replaced products or parts shall become our property. Please note that our products were not designed for commercial, trade or professional use. A warranty claim is therefore not valid if the product has been used in commercial, trade or industrial operations within the warranty period or has been subjected to equivalent stress.
3. The following are excluded from our warranty services:
- Damage to the product which was caused by non-observance of the assembly instructions, improper installation, non-observance of the operating instructions (e.g. connection to an incorrect mains voltage or type of current) or the maintenance and safety regulations or use of the product in unsuitable environmental conditions as well as by insufficient care and maintenance.
- Damage to the product caused by misuse or improper application (such as overloading the product or using non-approved tools and accessories), penetration of foreign bodies into the product (such as sand, stones or dust), transport damage, use of force or external influences (such as damage caused if dropped).
- Damage to the product or parts of the product which is due to intentional, normal (operational) or other natural wear as well as damage and/or wearing of wear parts.
- Defects in the product which have been caused by the use of accessories, expansions or spare parts that are not original parts or are not used as intended.
– Products on which changes or modifications have been made.
– Minor deviations from the target characteristics which are irrelevant for the value and usability of the product.
– Products on which unauthorised repairs have been carried out, in particular by an unauthorised third party.
- If the marking on the product or the identification information of the product (machine label) is missing or illegible.
- Products that are very dirty and are therefore refused by the service personnel.
– Claims for damages and consequential damages are generally excluded from this warranty.
-
The warranty period is usually 5 years (12 months for batteries/rechargeable batteries) and starts from the date of purchase of the product. The date on the original purchase receipt is decisive. Warranty claims must be made immediately after becoming aware of them. The assertion of warranty claims after expiry of the warranty period is excluded. The repair or replacement of the product does not result in an extension of the warranty period, nor does this service initiate a new warranty period for the product or for any installed spare parts. This also applies when using an on-site service. A prerequisite for a claim under the warranty is that the manufacturer, as the guarantor, is enabled to examine the warranty claim by sending in the goods at the manufacturer's request. Care must be taken to avoid damage during transport by using appropriate packaging. The product concerned is to be cleaned and returned to the service centre together with a copy of the purchase receipt, which must include the date of purchase and the product designation. If a product is sent in incomplete without the complete scope of delivery, the missing accessories will be charged / deducted in value if the product is exchanged or in the event of a refund. Partially or completely dismantled products cannot be accepted as a warranty claim. In the event of an unjustified complaint or if outside the warranty period, the purchaser shall generally bear the transport costs and the transport risk. Please report a warranty claim in advance to the service centre (see below). It is generally agreed upon that the defective product will be returned to the service address given below with a brief description of the fault by organised return or, in the case of repair outside the warranty period, with sufficient postage, taking the appropriate packaging and shipping guidelines into account. Please note that your product (depending on the model) will be free of all operating materials when returned for safety reasons. The product sent to our service centre must be packaged in such a way that damage to the product under complaint is avoided during transport. After successful repair / replacement, we will send the product back to you free of charge. If products cannot be repaired or replaced, a sum up to the purchase price of the defective product may be refunded at our own discretion, taking into account any deduction for wear and tear. These warranties are only for the benefit of the original private purchaser and cannot be assigned or transferred.
-
Extension of the warranty period to 10 years:
Scheppach offers an additional warranty extension of 5 years on products of the Scheppach 20V series. Thus, the warranty period for these products totals 10 years. Batteries / rechargeable batteries, battery chargers and accessories are excluded from this. You can claim this warranty extension by registering your Scheppach product from this range at https://garantie.scheppach.com no later than 30 days from the date of purchase. After registering online successfully, you will receive confirmation for the item-related warranty extension.
- In order to submit your warranty claim, please contact our service centre.
Preferably, please use our form on our homepage: https://www.scheppach.com/de/service
Please do not send us any products without first contacting and registering with our service centre.
Contacting our service centre first is mandatory to claim these warranty promises. Warranty claims must be made before expiry of the warranty period within 14 days of discovery of the defect. For this purpose, the original purchase receipt and, if necessary, confirmation of the item-related warranty extension are required.
-
Processing time - We normally process complaint consignments within 14 days of receipt at our service centre. If, in exceptional cases, the processing time mentioned is exceeded, you will be informed in good time.
-
Wear parts are generally excluded from the warranty! - Wear parts are: a) supplied, attached and/or installed batteries / rechargeable batteries as well as b) all model-dependent wear parts (i.e. belts, saw blades, tool attachments, grinding discs, filters, carbon brushes etc., see operating manual). The warranty does not cover batteries or rechargeable batteries that are deeply discharged or those with damaged housing or battery terminals.
-
Cost estimate - Products that are not covered or no longer covered by the warranty will be repaired at extra cost. Upon request to our service centre, you can send in the defective products for a cost estimate and, if necessary, give the service centre approval for the repair in writing (by post, e-mail). No further processing will take place without approval for the repair.
The warranty conditions only apply in the current version at the time of the complaint and, if necessary, can be found on our homepage (www.scheppach.com).
In case of translations, the German version is decisive.
Scheppach GmbH · Günzburger Str. 69 · 89335 Ichenhausen (Germany)
Tel: +800 4002 4002 ·
E-Mail: customerservice.GB@scheppach.com
Internet: https://www.scheppach.com
We reserve the right to make changes to the warranty conditions at any time without prior notice.
16 EU Declaration of Conformity
Translation of the original Declaration of Conformity
Manufacturer:
Scheppach GmbH
Günzburger Straße 69
D-89335 Ichenhausen
We declare under our sole responsibility that the product described here complies with the applicable directives and standards.
Brand: SCHEPPACH
Art. designation: CORDLESS HAND-HELD
CIRCULAR SAW
BC-HCS165-X
Item No. 5901816900
EU directives:
2014/30/EU, 2006/42/EC, 2011/65/EU*
* The object of the declaration described above fulfils the regulations of the directive 2011/65/EU of the European Parliament and Council from 8th June 2011, on the restriction of the use of certain hazardous substances in electrical and electronic equipment.
Applied standards:
EN 62841-1:2015/A11:2022; EN 62841-2-5:2014;
EN IEC 55014-1:2021; EN IEC 55014-2:2021
Documentation authorised representative:
Dawid Hudzik
Günzburger Str. 69
D-89335 Ichenhausen
Division Manager Product Center
Head of Project Management
Sommaire
Günzburger Straße 69
D-89335 Ichenhausen
Cher client,
Division Manager Product Center
Head of Project Management
Indice
Günzburger Straße 69
D-89335 Ichenhausen, Germania
Egregio cliente,
https://www.scheppach.com/de/service
Günzburger Straße 69
D-89335 Ichenhausen
Division Manager Product Center
Head of Project Management
Inhoudsopgave
Günzburger Straße 69
D-89335 Ichenhausen
Geachte klant,
Günzburger Straße 69
D-89335 Ichenhausen
Division Manager Product Center
Head of Project Management
Índice
Günzburger Straße 69
customerservice.ES@scheppach.com -
Internet: https://www.scheppach.com
Günzburger Straße 69
D-89335 Ichenhausen
Division Manager Product Center
Andreas Pecher
Head of Project Management
Índice
Günzburger Straße 69
Utilize, de preferência, o formulário na nossa homepage: https://www.scheppach.com/de/service
Günzburger Straße 69
D-89335 Ichenhausen
Division Manager Product Center
Andreas Pecher
Head of Project Management
Obsah
1 Úvod....95
Günzburger Straße 69
D-89335 Ichenhausen
Vážený zákazníku,
Günzburger Straße 69
D-89335 Ichenhausen
Division Manager Product Center

Head of Project Management
Obsah
Günzburger Straße 69
D-89335 Ichenhausen
Vážený zákazník,
https://www.scheppach.com/de/service
Günzburger Straße 69
D-89335 Ichenhausen
Division Manager Product Center
Andreas Pecher
Head of Project Management
Tartalomjegyzék
Günzburger Straße 69
D-89335 Ichenhausen
Tisztelt Ügyfelünk!
https://www.scheppach.com/de/service
Günzburger Straße 69
D-89335 Ichenhausen
Division Manager Product Center
Head of Project Management
Spis treści
Günzburger Straße 69
D-89335 Ichenhausen
Szanowny Kliencie
Günzburger Straße 69
D-89335 Ichenhausen
Division Manager Product Center
Head of Project Management
Popis sadržaja
1 Uvod.... 146
2 Opis proizvoda (sl. 1) 146
3 Opseg isporuke (sl. 1).... 147
4 Namjenska uporaba.... 147
5 Sigurnosne napomene.... 147
6 Tehnički podatci 151
7 Raspakiravanje 152
8 Prije stavljanja u pogon.... 152
9 Rukovanje 153
10 Čišćenje i održavanje.... 154
11 Skladištenje.... 154
12 Popravak i naručivanje rezervnih dijelova...... 154
13 Zbrinjavanje i recikliranje.... 155
14 Otklanjanje neispravnosti.... 155
15 Uvjeti jamstva – serija Scheppach 20 V IXES.... 155
16 EU izjava o sukladnosti.... 157
17 Povećani crtež.... 321
Günzburger Straße 69
D-89335 Ichenhausen
Poštovani kupče
Želimo vam mnogo zadovoljstva i uspjeha prilikom rada s novim proizvodom.
Napomena:
Prema važećem njemačkom Zakonu o odgovornosti za proizvode, proizvođač ovog proizvoda ne odgovara za štete koje nastanu na ovom proizvodu ili koje ovaj proizvod uzrokuje u slučaju:
https://www.scheppach.com/de/service
Ne šaljite nam proizvode bez prethodnog stupanja u kontakt i prijave našem servisnom centru.
Günzburger Straße 69
D-89335 Ichenhausen
Division Manager Product Center
Head of Project Management
Kazalo
Günzburger Straße 69
D-89335 Ichenhausen
Spoštovani kupec,
Günzburger Straße 69
D-89335 Ichenhausen
Division Manager Product Center

Head of Project Management
Sisukord
Günzburger Straße 69
D-89335 Ichenhausen
Austatud klient!
8.3 Imuadapteri (26) monteerimine (joon. 7)
Juhised:
E-post: customerservice.EE@scheppach.com
Internet: https://www.scheppach.com
Günzburger Straße 69
D-89335 Ichenhausen
Division Manager Product Center
Andreas Pecher
Head of Project Management
Turinys
Günzburger Straße 69
D-89335 Ichenhausen
Gerbiamas kliente,
Günzburger Straße 69
D-89335 Ichenhausen
Division Manager Product Center
V. Andron Hall
Andreas Pecher
Head of Project Management
Satura rādītājs
Günzburger Straße 69
Günzburger Straße 69
D-89335 Ichenhausen
Division Manager Product Center
Head of Project Management
Günzburger Straße 69
D-89335 Ichenhausen
Bästa Kund!
https://www.scheppach.com/de/service
Günzburger Straße 69
Division Manager Product Center
Andreas Pecher
Head of Project Management
Sisällysluettelo
Günzburger Straße 69
D-89335 Ichenhausen
Arvoisa asiakas
Günzburger Straße 69
D-89335 Ichenhausen
Division Manager Product Center
Head of Project Management
Indholdsfortegnelse
Günzburger Straße 69
D-89335 Ichenhausen, Tyskland
Kære kunde
Günzburger Straße 69
D-89335 Ichenhausen, Tyskland
Division Manager Product Center
Andreas Pecher
Head of Project Management
Innholdsfortegnelse
Günzburger Straße 69
D-89335 Ichenhausen
Kjære kunde
E-post: customerservice.NO@scheppach.com
Internett: https://www.scheppach.com
Günzburger Straße 69
D-89335 Ichenhausen
Division Manager Product Center
Head of Project Management
Съдържание
Günzburger Straße 69
D-89335 Ichenhausen, Германия
Уважаеми клиенти,
https://www.scheppach.com/de/service
Günzburger Straße 69
D-89335 Ichenhausen
Division Manager Product Center
Andreas Pecher
Head of Project Management
Günzburger Straße 69
D-89335 Ichenhausen
Αξιότιμε πελάτη
https://www.scheppach.com/de/service
89335 Ichenhausen (Germany)
Tηλ: +800 4002 4002 ·
E-mail: customerservice.GR@scheppach.com
Internet: https://www.scheppach.com
Günzburger Straße 69
D-89335 Ichenhausen
Division Manager Product Center
Andreas Pecher
Head of Project Management
Cuprins
Günzburger Straße 69
D-89335 Ichenhausen
Stimate client
26b. 1 x Saibă Grower
Division Manager Product Center

Head of Project Management
Sadržaj
1 Uvod....297
2 Opis proizvoda (sl. 1) 297
3 Opseg isporuke (sl. 1)....298
4 Namenska upotreba.... 298
5 Sigurnosne napomene.... 298
Günzburger Straße 69
D-89335 Ichenhausen
Poštovani kupče
Günzburger Straße 69
D-89335 Ichenhausen
Division Manager Product Center
Andreas Pecher
Head of Project Management
İçindekiler
Günzburger Straße 69
D-89335 Ichenhausen
İthalatçı:
Günzburger Straße 69
D-89335 Ichenhausen
Division Manager Product Center
Andreas Pecher
Head of Project Management
text_image
Exploded view diagram of a mechanical assembly with numbered parts for identificationNotizen
CE
SCHEPPACH GMBH
Günzburger Str. 69
D-89335 Ichenhausen
text_image
FR ©Stand der Informationen · Status of the information · Version des informations · Versione delle informazioni · Stand van de informatie · Información disponible · Versão das informações · Stav informaci · Stav informácií · Az információk kelte · Stan informacji · Verzija informacija · Stanje informacij · Informatsiooni seis · Informacijos data · Informácijas stāvoklis · Informationens status · Tietojen tila · Informationsstatus · Status for informasjon · Последна редакция на информацията · ˈΕκδοση των πληροφοριών · Stadiul informațiilor · Izdanje informacija · Bilgilerin güncelliği Update: 02/2025 · Ident.-No.: 5901816900