
Series 5000 XC5243 - Vacuum Cleaner PHILIPS - Free user manual and instructions
Find the device manual for free Series 5000 XC5243 PHILIPS in PDF.
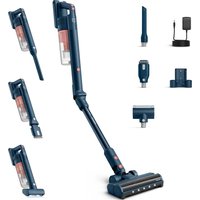

 FR
FR
 BG
BG
 CS
CS
 DA
DA
 DE
DE
 EL
EL
 EN
EN
 ES
ES
 ET
ET
 FI
FI
 HU
HU
 ID
ID
 IT
IT
 KK
KK
 LT
LT
 LV
LV
 MK
MK
 NL
NL
 NO
NO
 PL
PL
 PT
PT
 RO
RO
 RU
RU
 SK
SK
 SL
SL
 SQ
SQ
 SV
SV
 TH
TH
 TR
TR
 UK
UK
 VI
VI
 ZH
ZH
| Product type | Cordless stick vacuum |
| Brand | PHILIPS |
| Model | Series 5000 XC5243 |
| Power supply | Rechargeable lithium-ion battery, 4-hour charge time |
| Power modes | 3 modes: Eco, Normal, Turbo |
| Tube | FlexIT foldable up to 95° |
| Main nozzle | Motorized with LED lighting |
| Wash function | No (reserved for model XC5244) |
| Included accessories | Turbo mini brush, Crevice tool, Combination tool |
| Filter type | Washable foam filter (ref. XV1651) |
| Filter maintenance | Monthly cleaning, replacement every 6 months |
| Removable battery | Yes (ref. XV1653) |
| Display | Yes, with charge percentage and error codes |
| Operating temperature | 0 °C to 40 °C |
| Charging temperature | 5 °C to 40 °C |
| Safety | Do not vacuum liquids |
| Replacement parts | Filter XV1651, Battery XV1653 |
| Versatility | Use as a handheld vacuum (detachable) |
Frequently Asked Questions - Series 5000 XC5243 PHILIPS
User questions about Series 5000 XC5243 PHILIPS
0 question about this device. Answer the ones you know or ask your own.
Ask a new question about this device
Download the instructions for your Vacuum Cleaner in PDF format for free! Find your manual Series 5000 XC5243 - PHILIPS and take your electronic device back in hand. On this page are published all the documents necessary for the use of your device. Series 5000 XC5243 by PHILIPS.
USER MANUAL Series 5000 XC5243 PHILIPS
- = 0-9, representing different colors
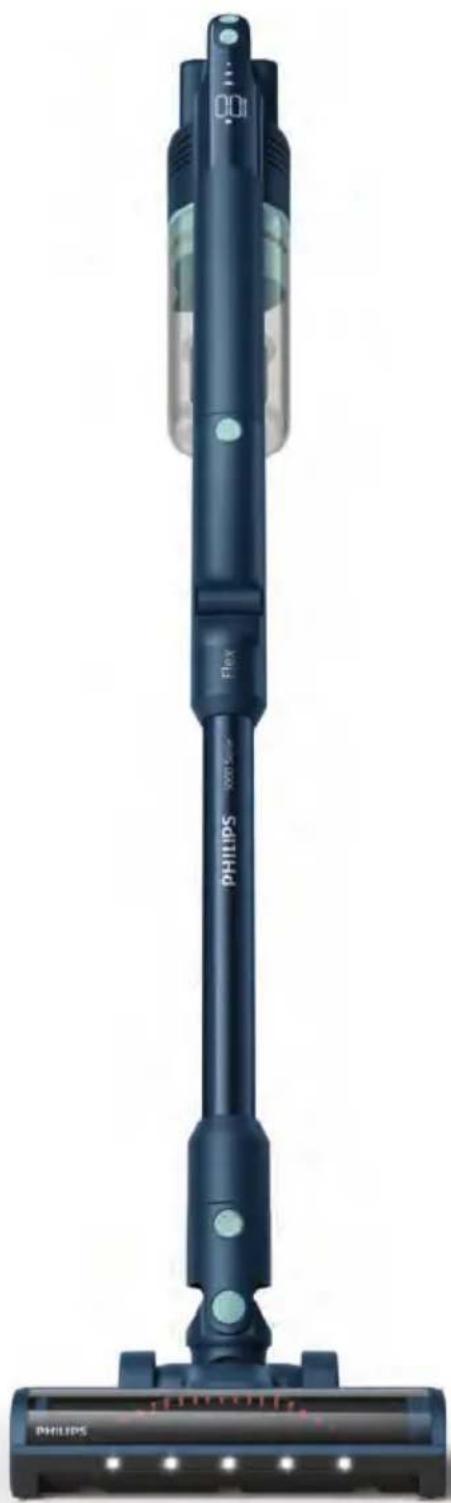
English 4
Bahasa Indonesia 32
Bahasa Melayu 60
Czech 88
Danish 116
German 144
Estonian 172
Spanish 200
French 228
Croatian 256
Italian 284
Latvian 312
Lithuanian 340
Hungarian 367
Dutch 395
Norwegian 423
Polish 450
Portuguese 478
Romanian 506
Albanian 534
Slovenian 562
Slovak 589
Serbian 617
Finnish 645
Swedish 673
Vietnamese 701
Turkish 729
Greek 757
Bulgarian 786
MaKeDoHcKn 814
Pycckn 842
YkpaHcbka 870
Ka3aK7a 898
nun926
简体中文956
繁體中文 984
1010
a 1037
1064
Contents
Introduction 4
General description 4
Before first use 5
Installing the wall mount 5
Preparing for use 6
Charging 6
Using the appliance 7
Assembling the appliance 7
Using the FlexIT tube 8
Vacuuming soft and hard floors 9
Vacuuming while mopping hard floors (XC5244 only) 10
Versatile usage and accessories 13
Using the nozzle 13
Using the Mini TurboBrush (XC5243, XC5244 only) 13
Using the crevice tool 14
Using the combination tool 14
After use - Maintenance
Frequent maintenance after each cleaning cycle 15
Dust bucket maintenance 15
Aqua tank maintenance (XC5244 only) 16
Periodic maintenance intermittently 18
Dust management system maintenance 18
Nozzle maintenance 20
Mini TurboBrush maintenance (XC5243, XC5244 only) 22
Aqua tank maintenance (XC5244 only) 22
Replacement 24
User interface signals and their meaning 25
Troubleshooting 27
Dry cleaning 27
When using the Vacuum and Mop Nozzle 30
Introduction
Thank you for buying this product! To fully benefit from the support that we offer, register your product at www.philips.com/support.
General description
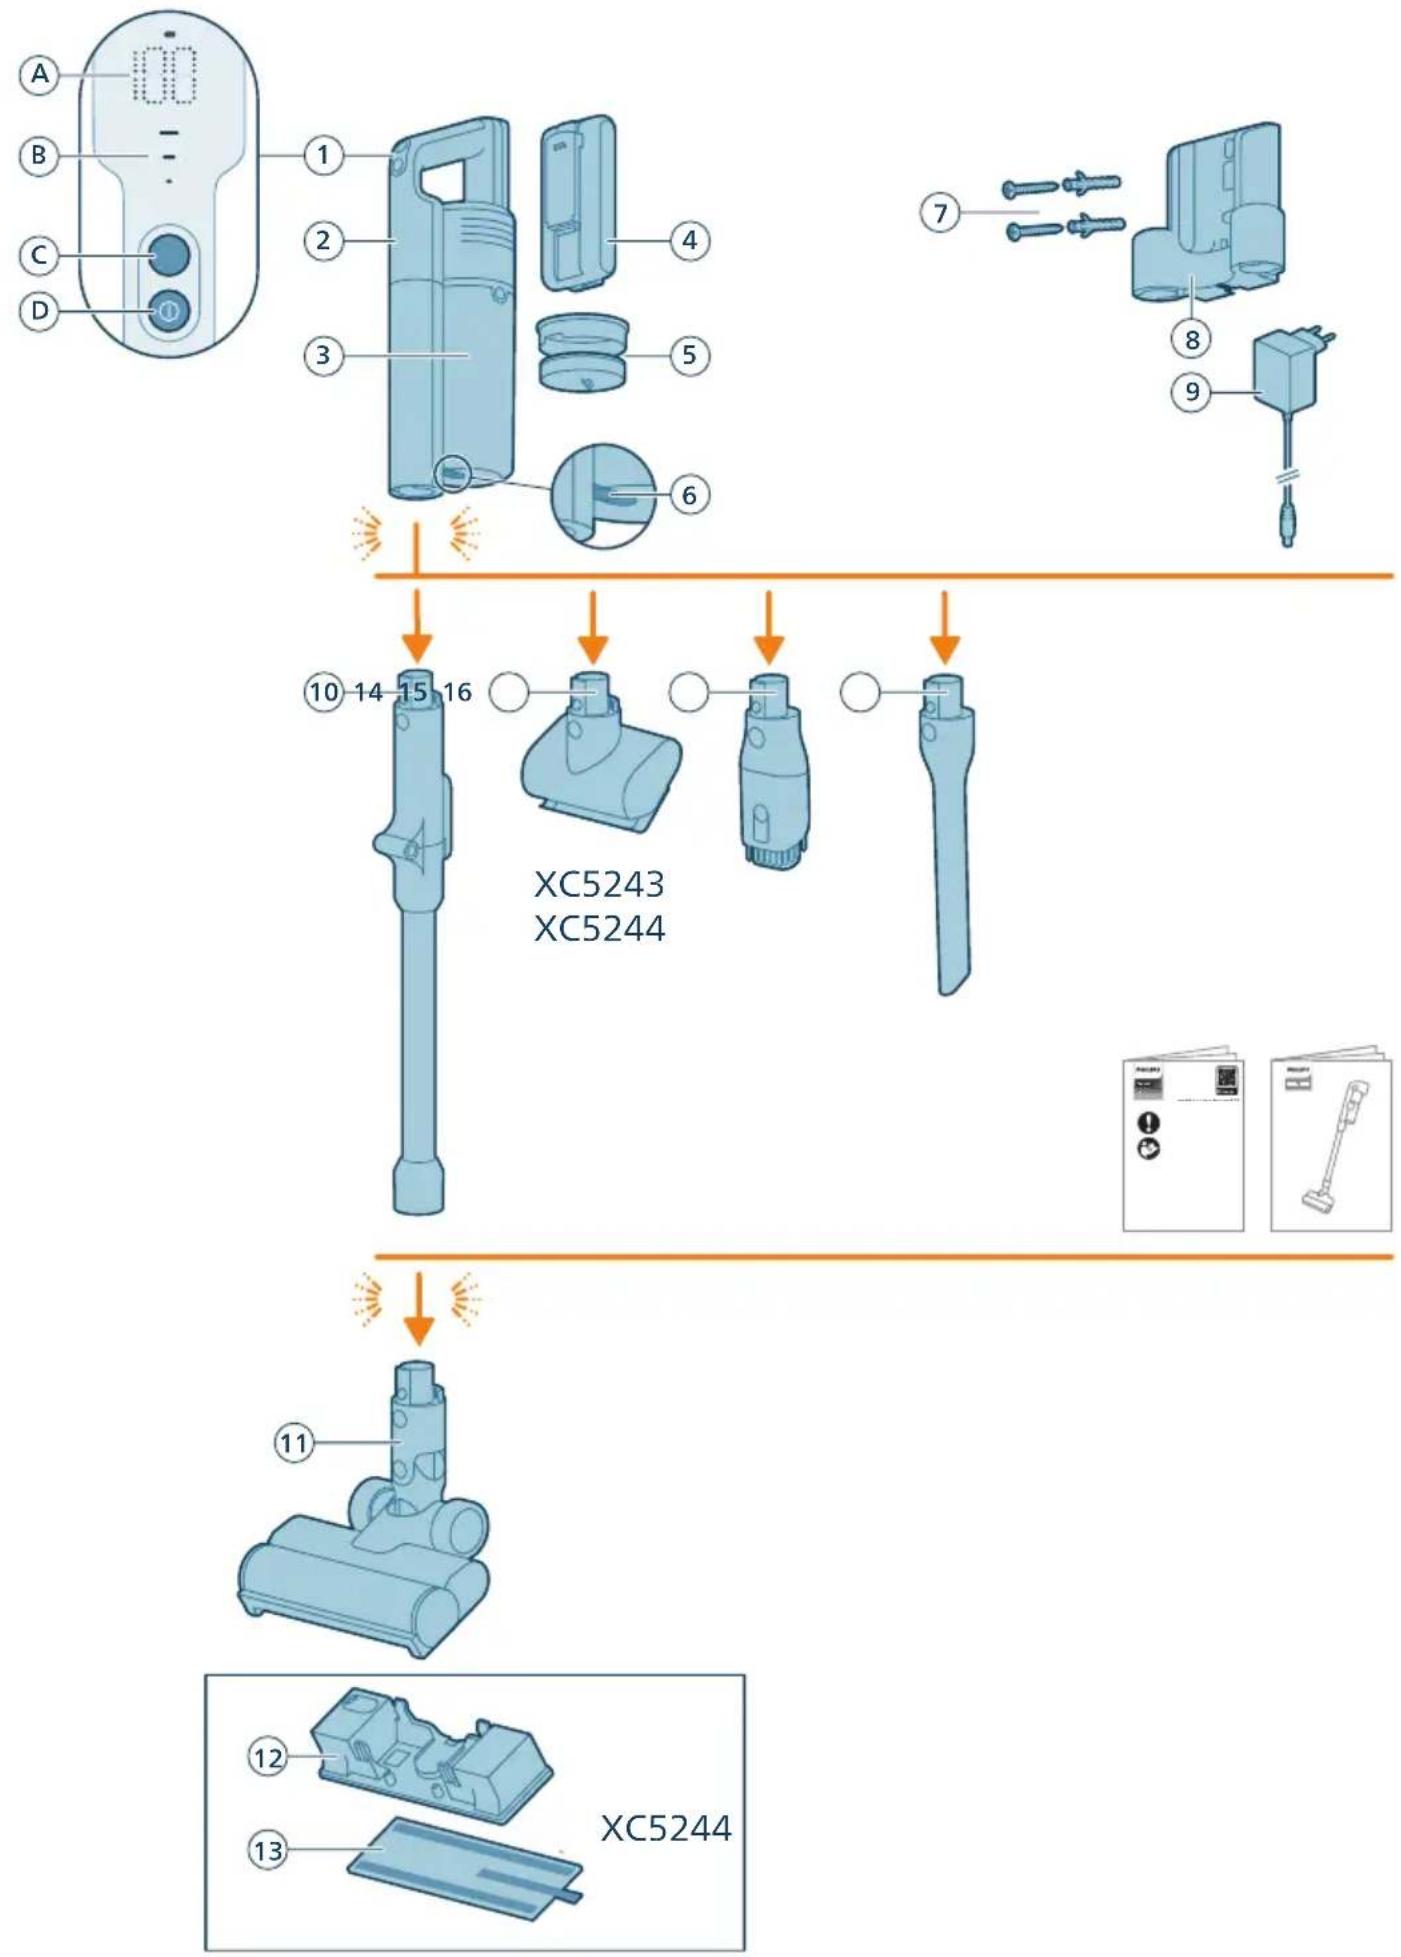
1 Control panel
a Percentage of battery level
b Power level indicators
c Power selection button
d On/off button
2 Handheld 3 Dust bucket 4 Battery 5 Filter 6 Dust bucket release button 7 Screw set 8 Wallmount 9 Adapter 10 Tube 11 Nozzle 12 Aqua tank (XC5244 only) 13 Microfiber mopping pad (XC5244 only) 14 Mini TurboBrush (XC5243, XC5244 only) 15 Combination tool 16 Crevice tool
Before first use
Installing the wall mount
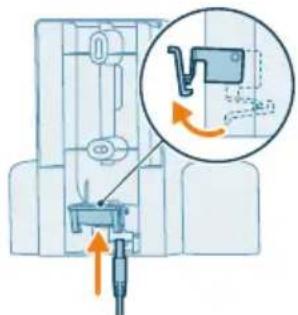
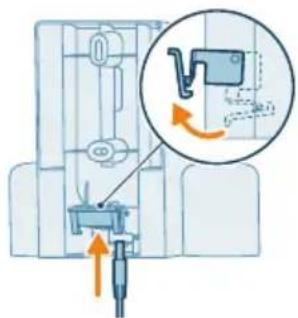
1 Invert the wall mount and unlatch the lever. Insert the charging port, ensuring the metal part is visible and pointing upright on the front side of the wall mount.
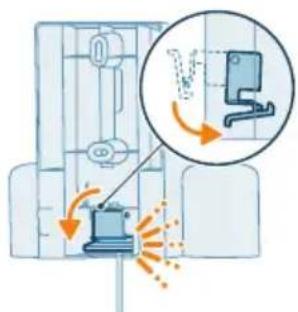
2 Close the lever. Make sure the lever is locked in place with a "CLICK" sound.
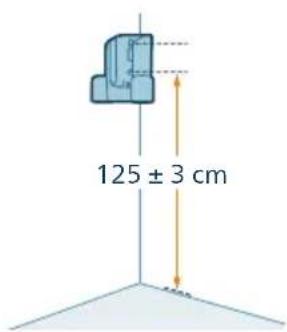
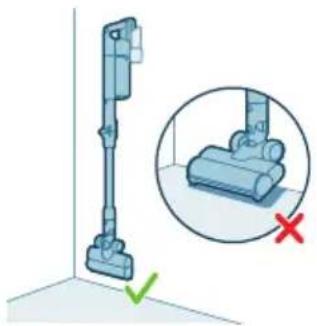
3 Securely affix the wall mount to your preferred position on the wall, ensuring that the lowest mounting screw holes are approximately 125 cm from the floor.
Caution: Be careful when you drill holes in the wall to fasten the wall mount, to avoid the risk of electric shock.
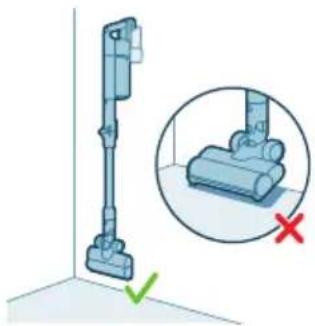

Note: Verify that the placement of the wall mount allows the entire appliance to hang on the wall without the nozzle coming into contact with the floor.
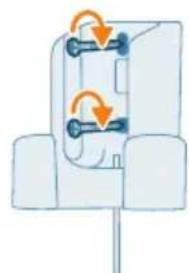
4 Once you have determined the optimal position and height for storing and charging your appliance, firmly tighten the screws to secure the wall mount in place.
Preparing for use
Charging
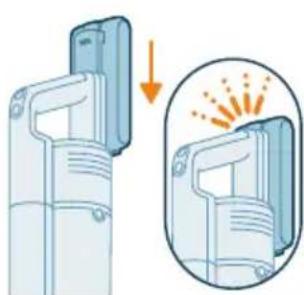
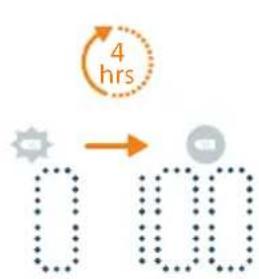
The appliance is equipped with a Li-ion battery. Charging from empty to full takes about 4 hours.
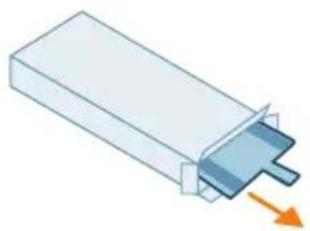
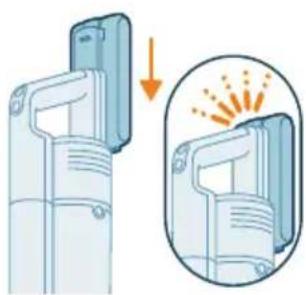
1 Attach the battery pack to the main body of the appliance, ensuring a secure connection that is confirmed with a "CLICK" sound.
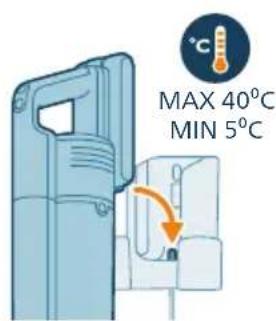
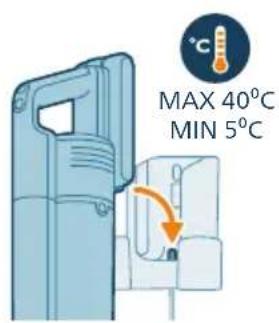
2 Charge your appliance by placing it onto the assembled wall mount.
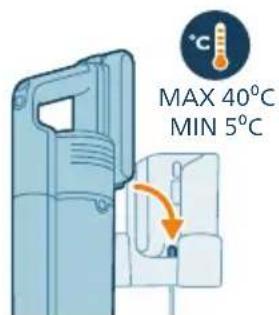
Warning: Charge the appliance at a temperature above 5°C and below 40°C.

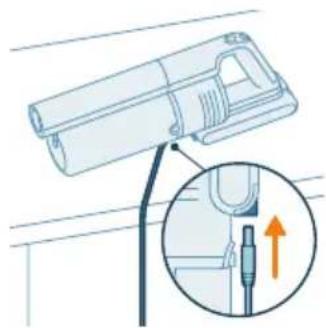
Note: You can also place the handheld on a level and stable surface, and directly connect the charging cable to the appliance.
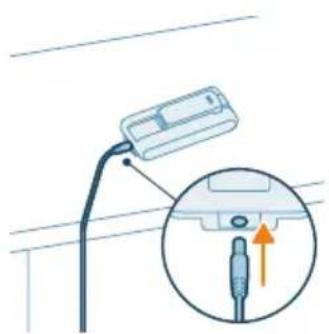
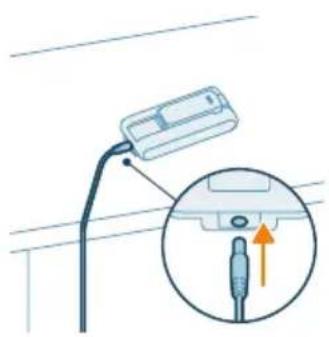
Note: Another option is to place the battery on a level and stable surface, and directly connect the charging cable to the battery.
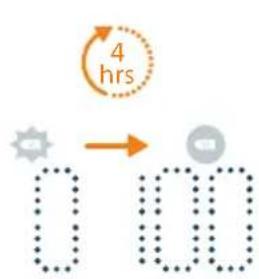
3 The appliance is designed to reach a full charge within 4 hours. You can monitor the charging progress on the screen. When the appliance is fully charged, the value 100% lights up on the screen. After a few seconds, the display will turn off.
Using the appliance
Assembling the appliance
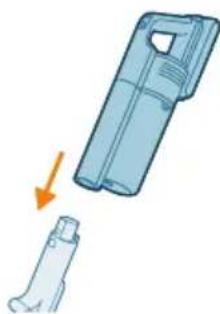
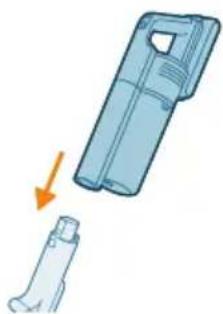
1 Attach the handheld to the tube. Confirm the attachment with a "CLICK" sound.
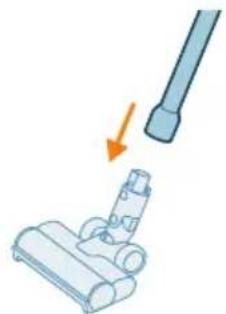
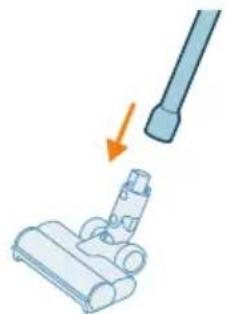
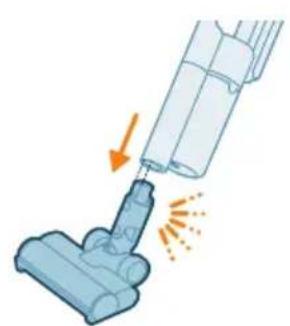
2 Attach the tube to the nozzle. Confirm the attachment with a "CLICK" sound.
Using the FlexIT tube
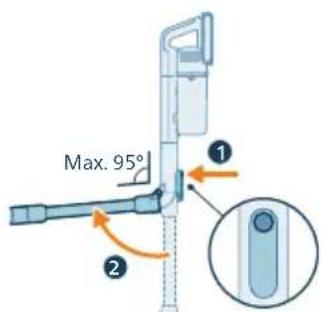
This appliance is equipped with a FlexIT tube which allows you to bend the tube up to 95 degrees.
1 Press the release button on the tube to unlock bending.
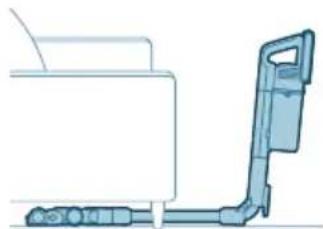
2 Move the nozzle with the bended tube underneath the sofa.
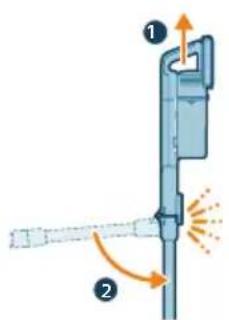
3 To bring the tube to the upright position, lift the handheld upwards and place the lower part of the tube back to position.
Vacuuming soft and hard floors
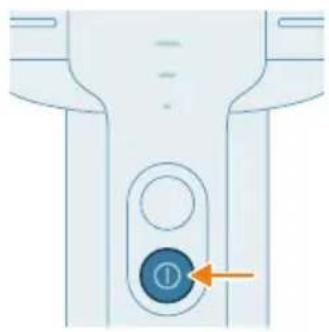
1 Press the on/off button to switch on the appliance.
Note: To switch off the appliance, press the on/off button again.
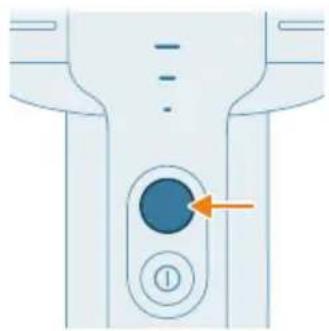
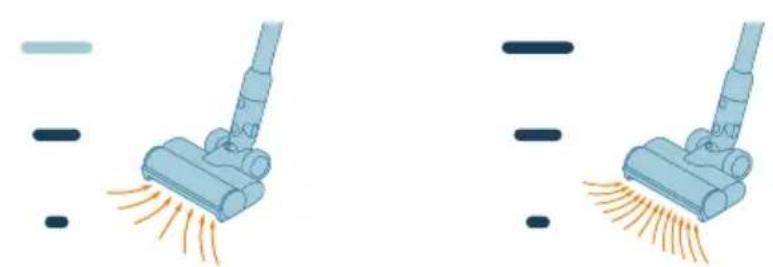
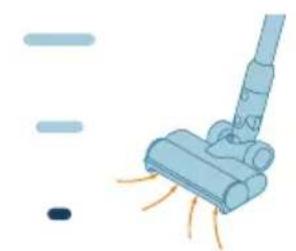
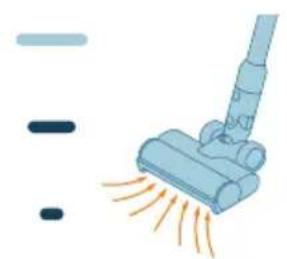
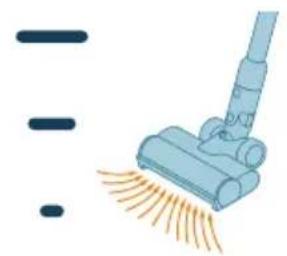
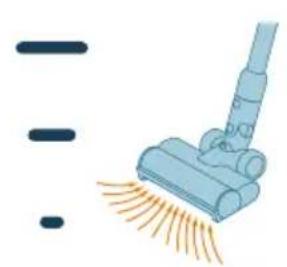
2 Use the power selection button to toggle through three different power settings: eco mode, normal mode, turbo mode.
Eco Normal Turbo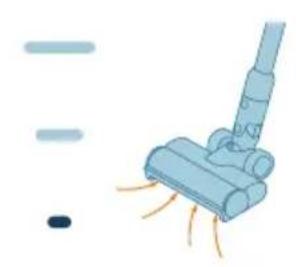
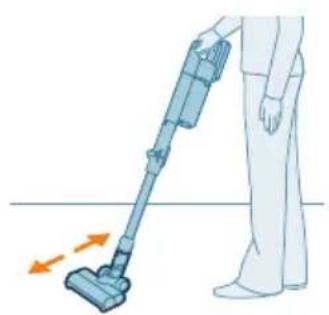
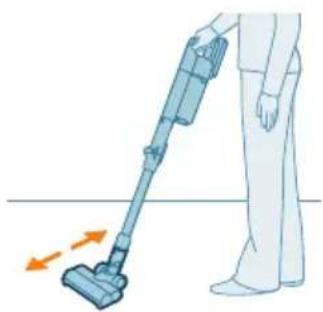
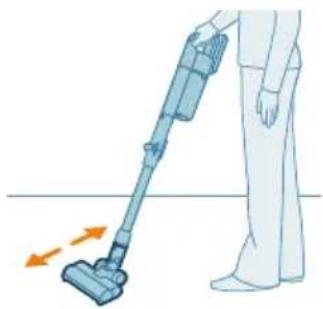
3 You can clean on hard or soft floors with the vacuum cleaner.
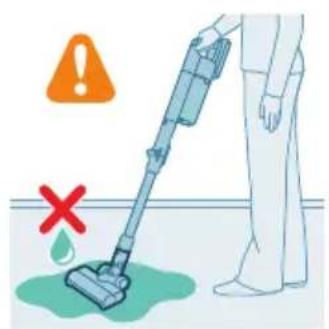
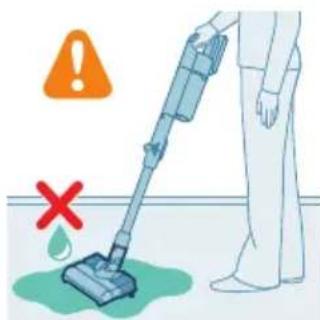
Warning: Do not vacuum up water or other liquids.
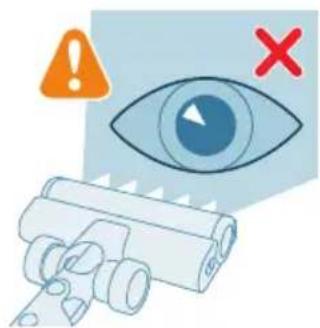
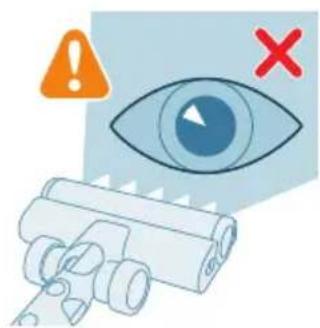
Caution: Do not look directly into the illuminated LEDs or point the LEDs at someone's eyes. The LED light is very bright.
Vacuuming while mopping hard floors (XC5244 only)
Caution: Only use the aqua tank on hard floors with a water-resistant top coat (such as linoleum, enameled tiles and varnished parquet) and stone floors (such as marble). If your floor has not been treated to make it water-resistant, check with the manufacturer if you can use water to clean it. Do not use the aqua tank on hard floors of which the water-resistant top coat is damaged. Note: Do not use the aqua tank to clean carpets. Note: Do not move the appliance with aqua tank assembled sideways, as this leaves water traces. Only move forwards and backwards. 1 Pre-wet the microfiber mopping pad with water before use.
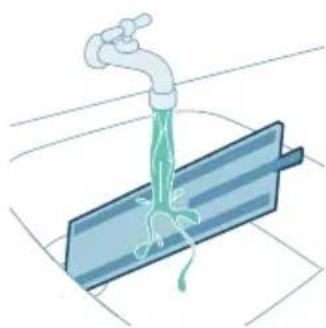
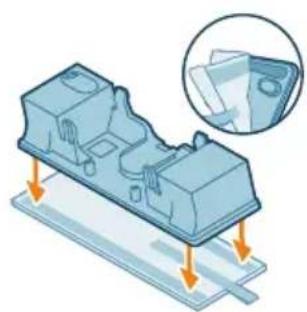
2 Secure the microfiber mopping pad underneath the aqua tank. Align the velcro straps under the aqua tank and behind the cloth.
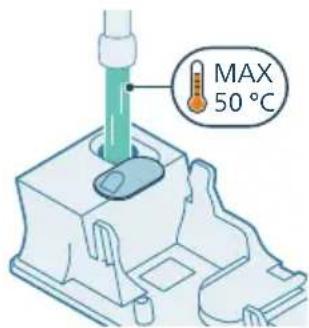
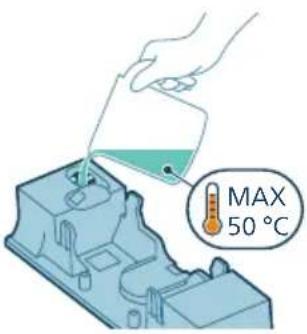
3 Open the rubber cap on top of the tank. Fill the tank with water, ensuring the water temperature does not exceed 50°C.
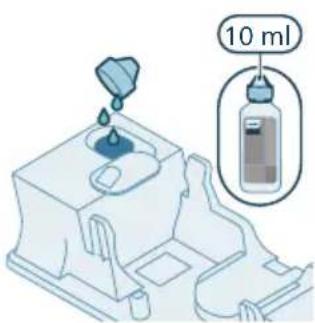
4 (Optional) If you wish to add a liquid floor cleaner into the aqua tank, opt for a low-foaming or non-foaming variety that can be diluted. We recommend the XV1792 Philips Floor Cleaner. Add only a few drops of the liquid cleaner to the water.
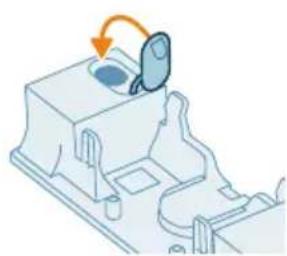
5 Close the aqua tank properly.
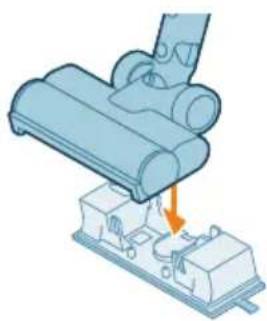
6 Attach the prepared aqua tank to the aqua nozzle and you're set to begin. For proper usage, it is essential to firmly attach the tank to the wheels of the nozzle when it's at the correct orientation.
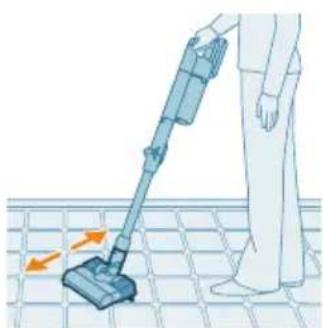
7 Press the on/off button to switch on the appliance. You can effectively clean hard floors with the attached aqua module on the nozzle.
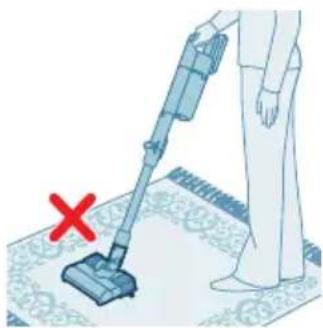
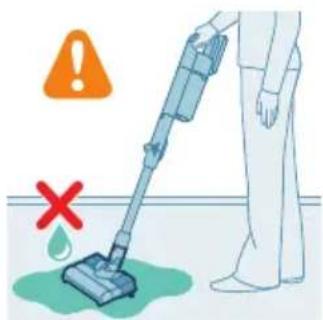
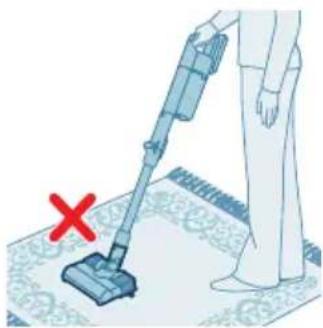
Note: The aqua module is not suitable for soft floors like carpet.
Caution: The aqua module should not be used to pick up water puddles.
Tips and other important information
- It is not necessary to vacuum the floor before mopping, as the Vacuum & Mop set-up actively wet-cleans your hard floor to capture all kinds of dirt, including liquids and stains. On carpets and rugs, use the Vacuum only set-up.
- The appliance can leave a small puddle of water on the floor if you do not move the appliance while switching it off. You can reduce the size of the puddle by moving the appliance while switching it off. If needed, you can remove the last drops with a cloth.
Usage restrictions
- The Vacuum & Mop set-up is suitable for vacuuming and mopping all types of hard floors, except uncoated wooden floors.
- The Vacuum & Mop set-up is intended for regular cleaning of hard floors. Always follow the cleaning instructions for your hard floor when you use this appliance.
- If you want to add a liquid floor cleaner other than XV1792 Philips Floor Cleaner to the water in the clean aqua tank, make sure that you use a low-foaming or non-foaming liquid floor cleaner that can be diluted in water like XV1792 Philips Floor Cleaner.
- As the clean aqua tank has a capacity of 300 ml, you only have to add a few drops (max 10 ml) of liquid floor cleaner to the water.
- If you use the Vacuum & Mop set-up on linoleum floors, only do so on linoleum floors that are properly affixed to prevent linoleum from being drawn into the nozzle.
- If you move/lift the appliance over a carpet or rug when it is switched off, wastewater droplets may end up on your carpet or rug.
- Do not push the appliance over the floor grilles of convector heaters. As the appliance cannot pick up water that comes out of the nozzle when you move it over the grille, water ends up at the bottom of the convector pit. While cleaning, do not lift the nozzle from the floor or move the nozzle sideways, and do not make strong turns, as this leaves water traces. Only move forwards and backwards.
Note: The operating time depends on the power level used during cleaning.
Versatile usage and accessories
Warning: When using any accessory, do not vacuum up water or other liquids.
Using the nozzle
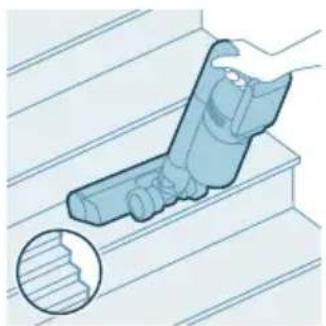
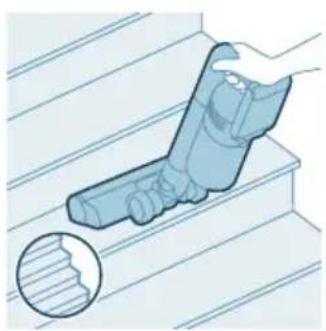
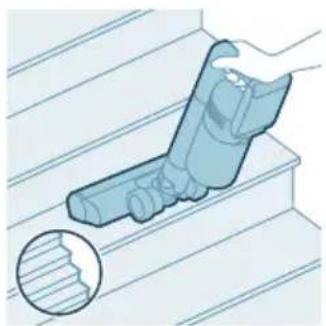
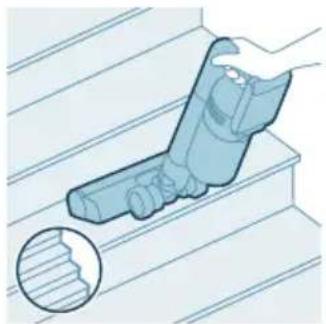
1. Attach the nozzle directly to the handheld.
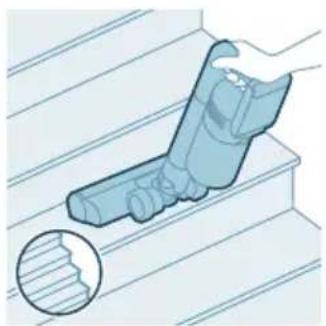
2. This combination is for cleaning dynamic surface height, such as staircases.
Using the Mini TurboBrush (XC5243, XC5244 only)
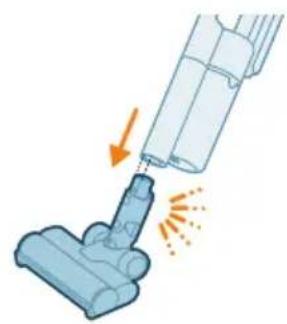
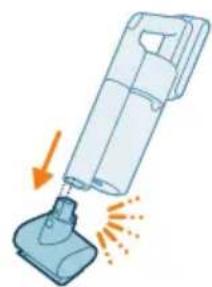
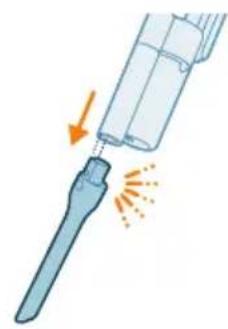
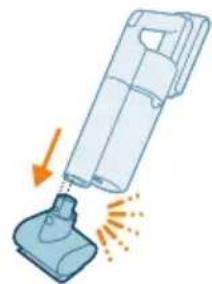
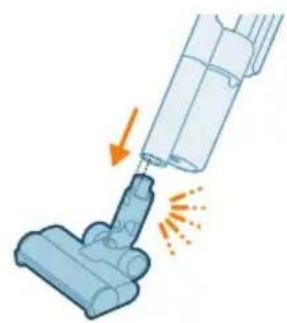
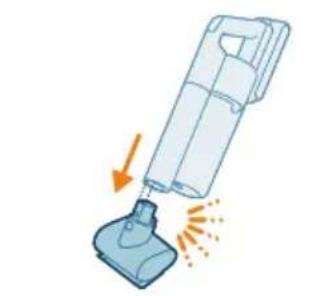
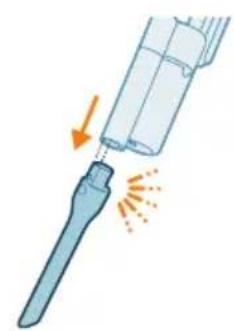
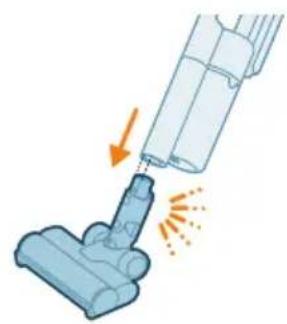
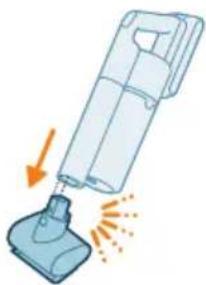
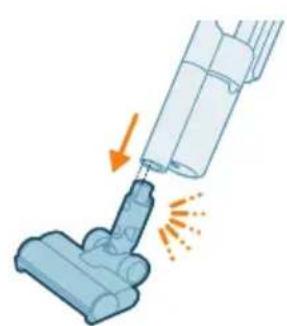
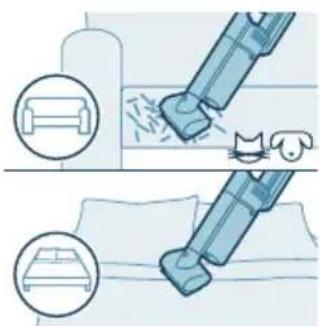
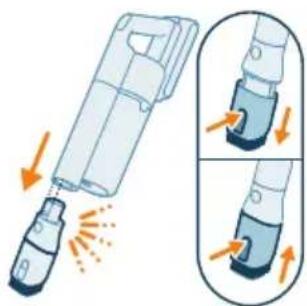
1. To attach the Mini TurboBrush, insert the tube of the handheld into the Mini TurboBrush.
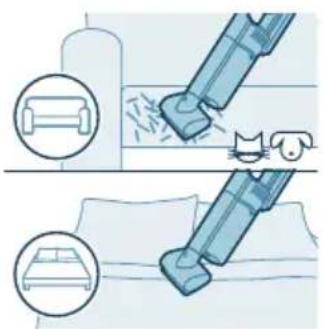
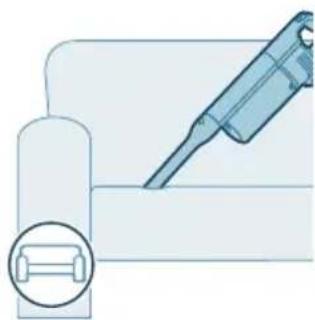
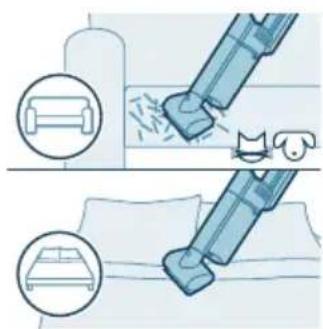
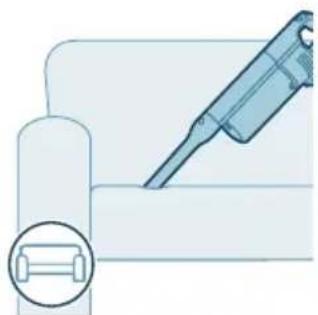
2. You can use the Mini TurboBrush for standard cleaning, for instance of soft areas such as beds and couches. You can adjust the power setting to suit your cleaning needs. 3. You can use the Mini TurboBrush for extra thorough cleaning, for instance to vacuum up pet hair, or to clean small patches of dirt, such as spilled bread crumbs. You can adjust the power setting to suit your cleaning needs.
Using the crevice tool
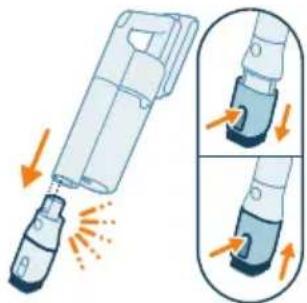
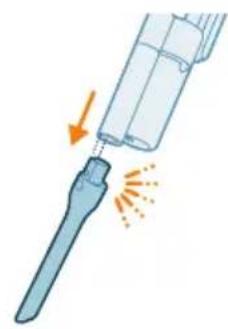
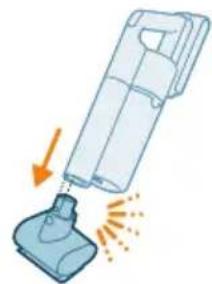
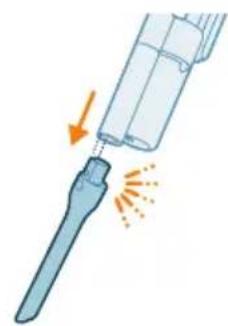
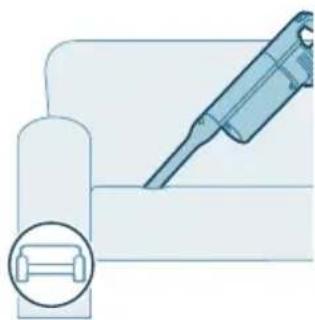
1. To attach the crevice tool, insert the tube or handheld into the crevice tool.
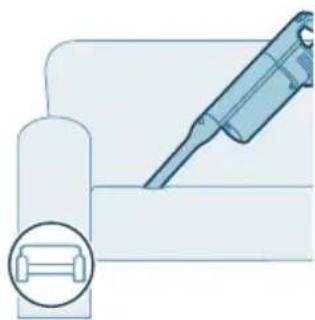
2. You can use the long crevice tool to clean narrow corners or hard-to-reach places. You can adjust the power setting to suit your cleaning needs.
Using the combination tool
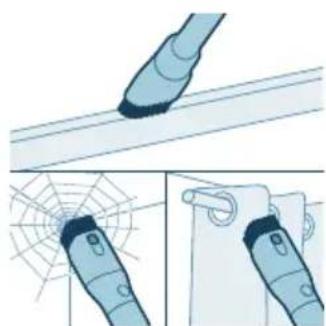
1. To attach the combination tool, insert the tube or handheld into the combination tool.
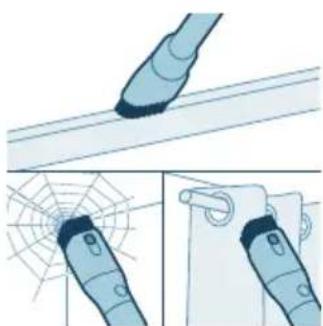
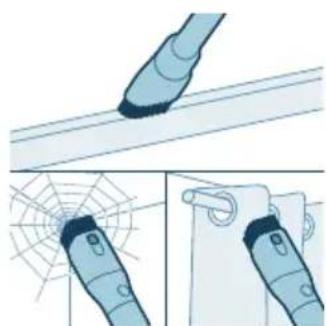
2. The combination tool is designed for cleaning window frames, curtains, or spider webs, with a customizable brush release and illumination settings.
After use - Maintenance
Frequent maintenance after each cleaning cycle
Dust bucket maintenance
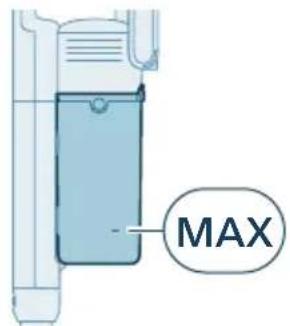
Empty the dust bucket after each use or when the dust is reaching the MAX level indicator.
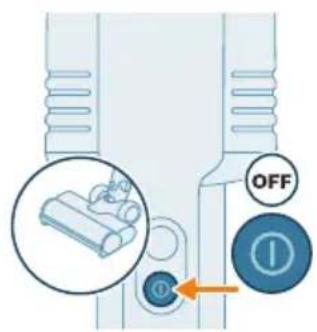
1 Switch off the appliance.
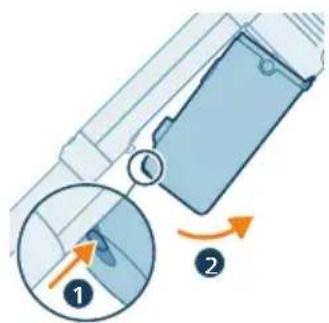
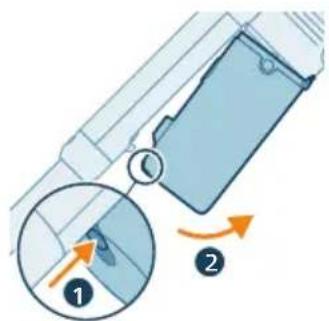
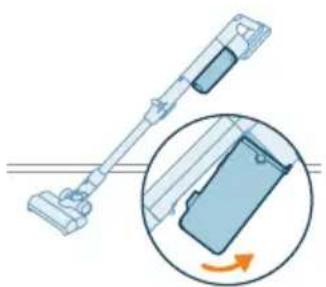
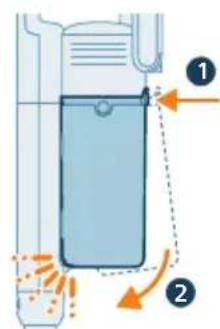
2 Hold the appliance in a 45 degree angle as shown in the illustration. Remove the dust bucket by pressing the release button, located at the bottom of the bucket.
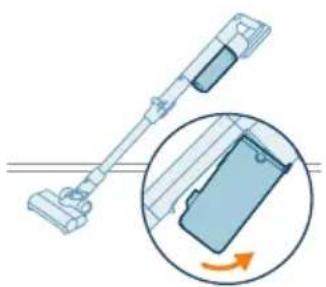
Note: Remove the dust bucket while keeping the appliance in an upright position to avoid spilling of pollution.
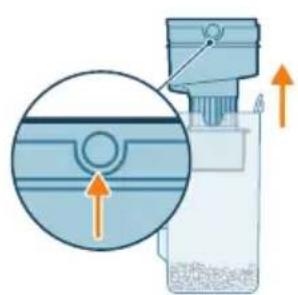
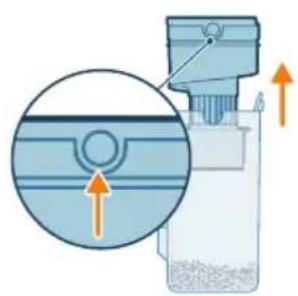
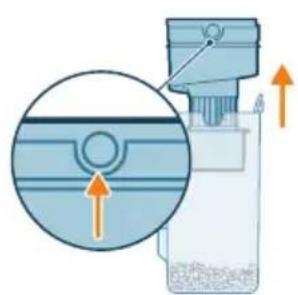
3 Hold onto the two dented circles on the side of the cyclone. Remove the cyclone from the dust bucket by lifting it out from the bucket
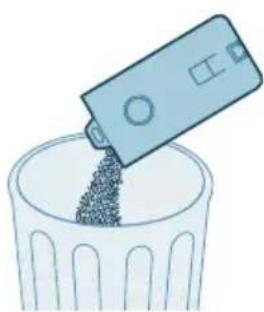
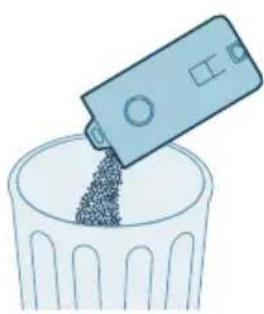
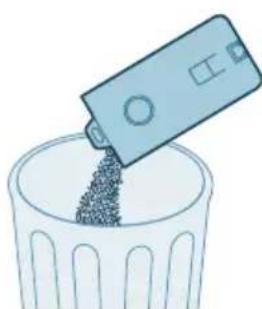
4 Empty the collected dust in the dust bucket over the trash bin.
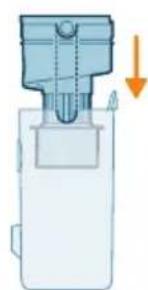
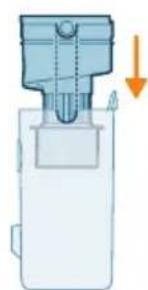
5 Place the cyclone back in the dust bucket. Make sure the two parts are aligned: the two semicircles must be connected to each other.
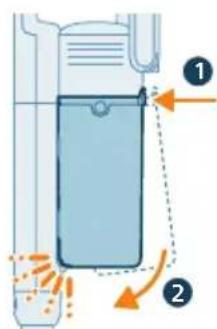
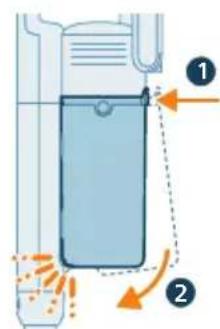
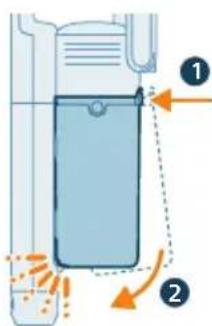
6 Place back the assembled bucket. First align the filter side of the bucket before hinging it in place.
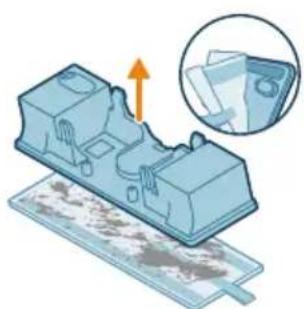
Aquatack maintenance (XC5244 only)
Clean the aqua tank after each use.
1 Remove the microfiber mopping pad.
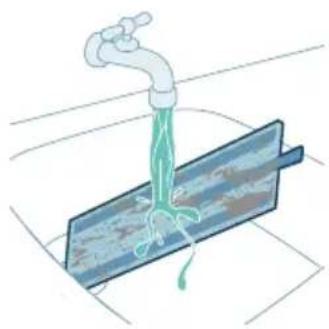
2 Rinse the mopping pad under the tap and wash it by hand or in a washing machine.
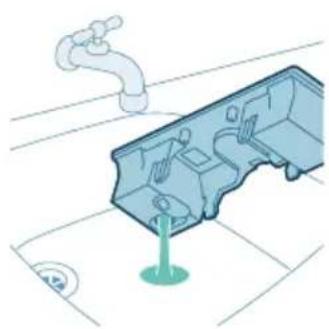
3 Pour out any remaining water in the aqua tank.
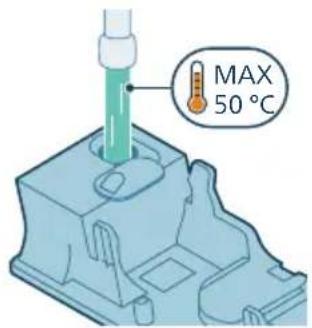
4 Fill the aqua tank with water.
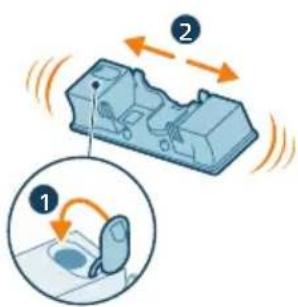
5 Close the aqua tank properly and shake the aqua tank to remove detergent residuals.
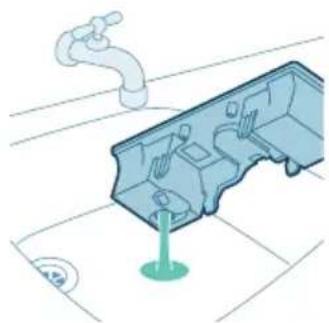
6 Empty the aqua tank and leave it open to dry.
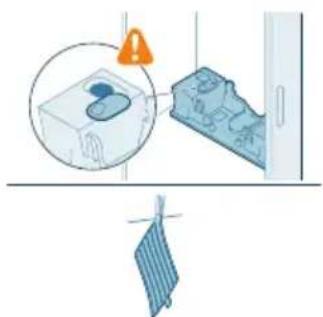
7 Make sure to not lose the tank cap during storage. Hang the microfiber mopping pad dry.
Note: We recommend replacing the microfiber mopping pad every 6 months (accessory XV1630).
Periodic maintenance intermittently
Dust management system maintenance
For optimal performance, we recommend cleaning the filter of your vacuum cleaner monthly and replacing the filter every six months (accessory XV1651).
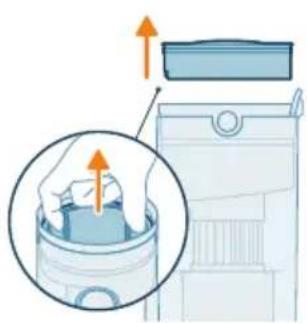
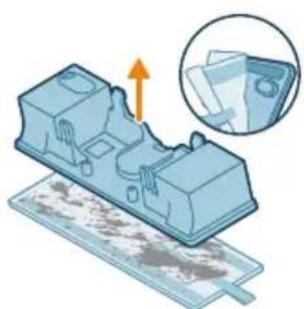
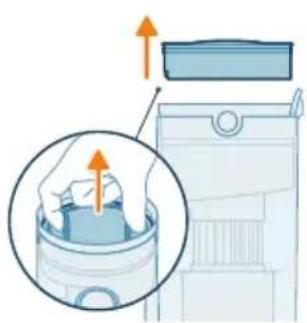
1 Lift the filter to remove it from the dust bucket.
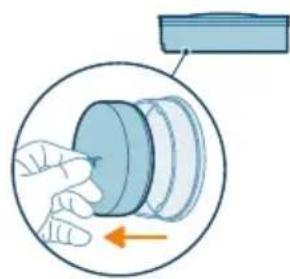
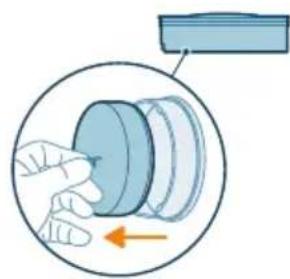
2 Remove the washable foam filter from the plastic filter casing.
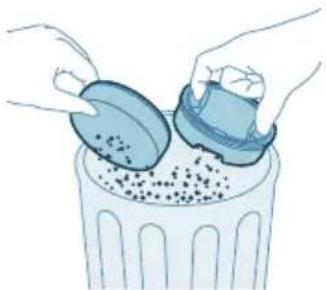
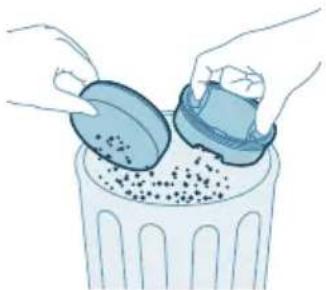
3 Tap both the filter casing and the foam filter over a trash bin.
Note: Make sure to clean the filter case thoroughly by tapping it firmly over a trash bin until no more dust is released from the filter case.
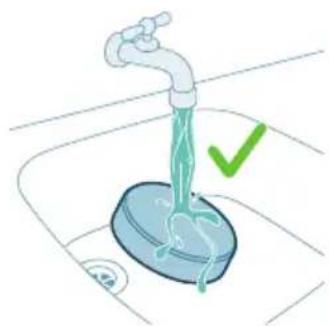

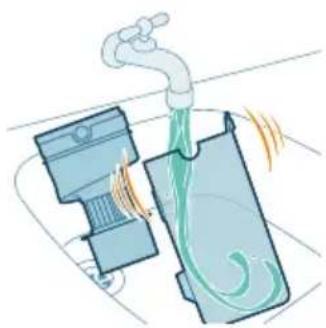
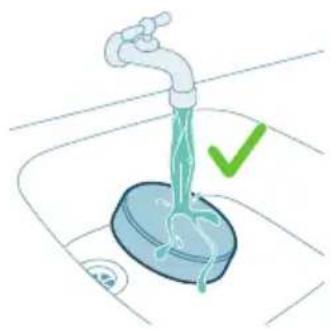
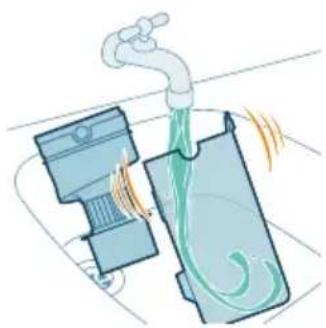
4 Rinse the foam filter under the tap.
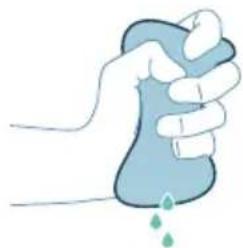
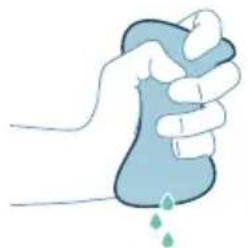
5 Squeeze the foam filter till clean water comes out.
Note: for best cleaning result, run the water through the filter with the dirtier side facing downwards, allowing deeply set dust to be washed out.
Note: Do not rinse the filter case.
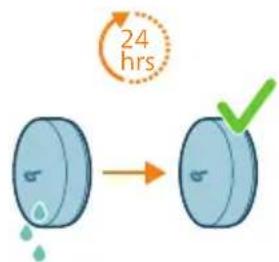
6 Leave the washed filter to dry for 24 hours before reassembling the foam filter in the filter casing.
Note: do not dry the sponge filter in direct sunlight, on the radiator or in the tumble dryer.
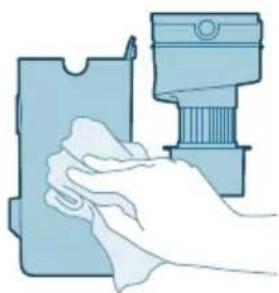
7 For thorough maintenance, clean the dust bucket and cyclone under a running tap or in warm soapy water.
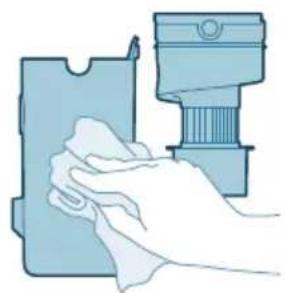
8 Wipe the cleaned dust bucket and cyclone dry.
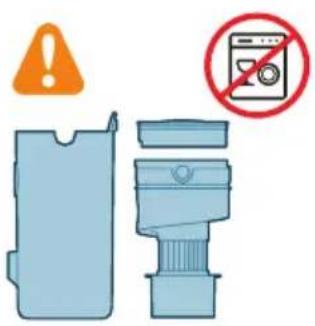
Caution: Make sure all parts are completely dry before you reassemble them.
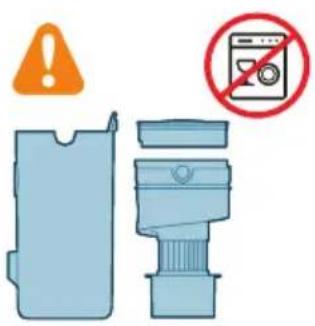
Note: all parts cannot be cleaned in the dishwasher.
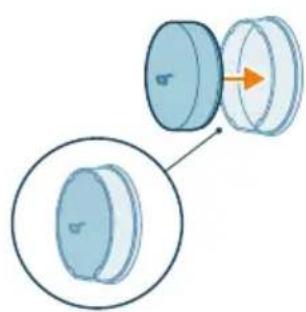
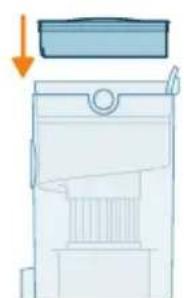
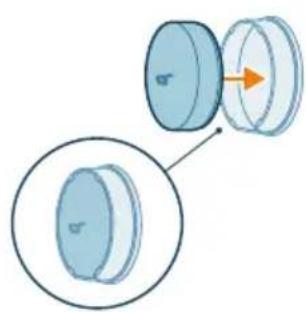
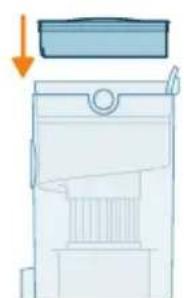
9 Insert the form filter into the filter casing.
10 Reassemble the filter in the dust bucket.
11 Place back the assembled bucket. First align the filter side of the bucket before hinging it in place.
Note: After maintenance, always make sure the filter is assembled in the appliance before using it.
Nozzle maintenance
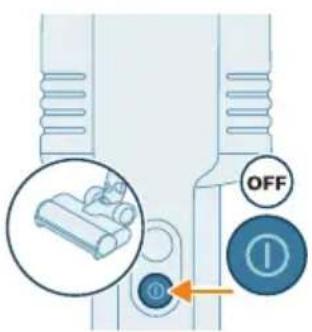
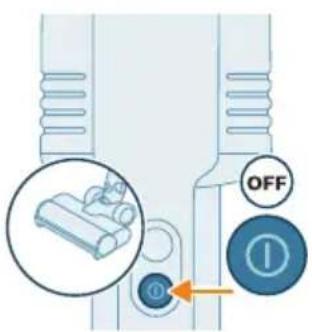
1 Always switch off the appliance before cleaning the nozzle brush.
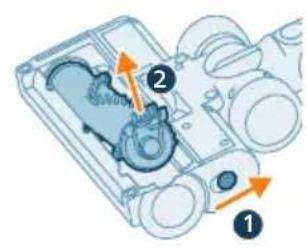
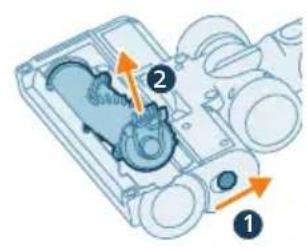
2 Hold the button on the side of the nozzle with one hand while removing the brush with the other hand.
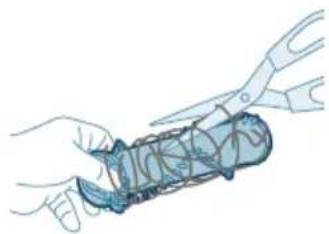
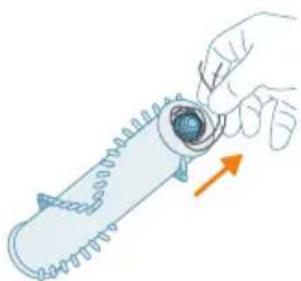
3 Carefully detach any tangled hair from the brush. Use a pair of scissors to help remove any debris.
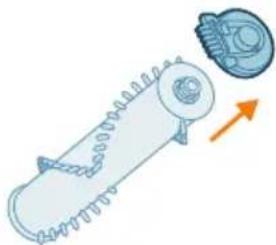
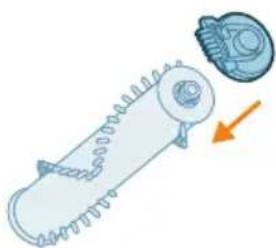
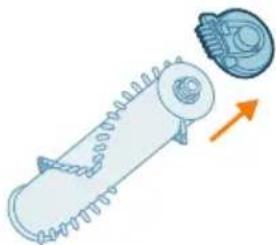
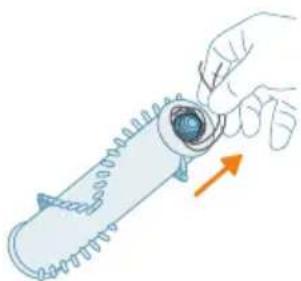
4 Remove the side cap.
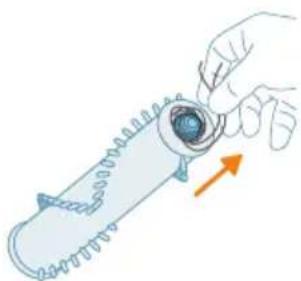
5 Detach any tangled hair in the brush.
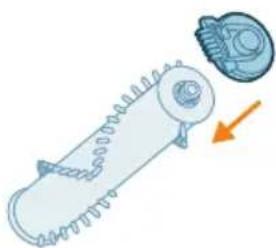
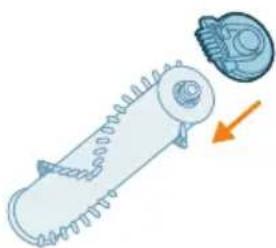
6 Reassemble the cap.
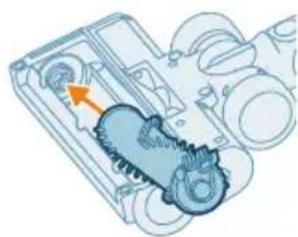
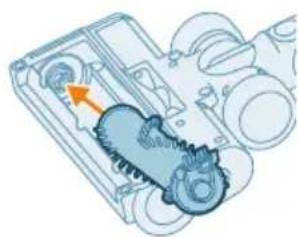
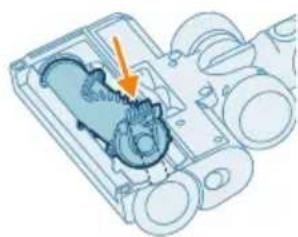
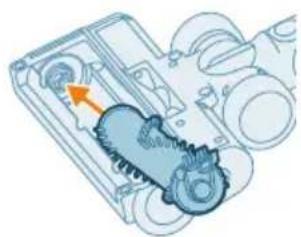
7 When reassembling the brush, ensure proper alignment by first placing one side in position before clicking in the other side.
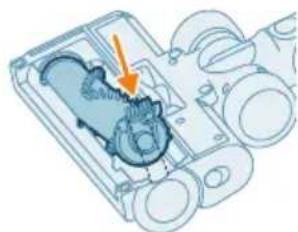
8 Lock the nozzle brush by securing it until you hear a "CLICK" sound.
Note: Check and remove any debris around the nozzle wheels.
Mini TurboBrush maintenance (XC5243, XC5244 only)
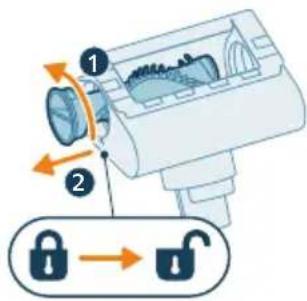
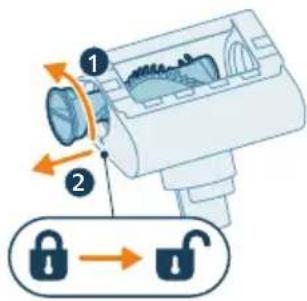
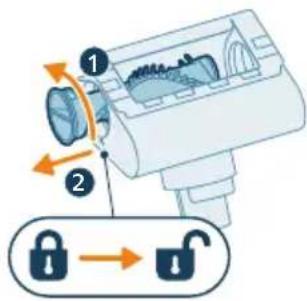
1 Rotate the side lock counter-clockwise to release the brush from its position.
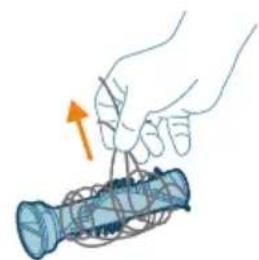
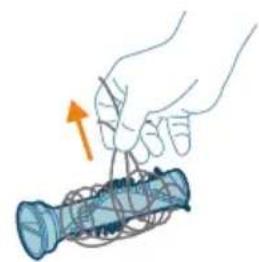
2 Use your hands or a pair of scissors to remove any debris from the brush.
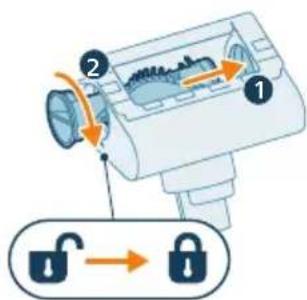
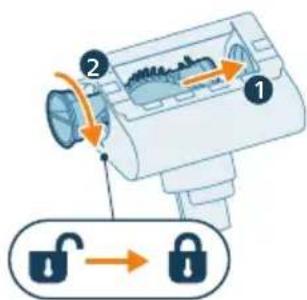
3 When reassembling the brush, simply align the brush back in its original position. Make sure the inner end is aligned. Rotate clockwise to lock the brush. When the brush is properly assembled, you will hear a "CLICK" sound.
Aquatack maintenance (XC5244 only)
Descale the aqua tank once every month to avoid limescale build-up.
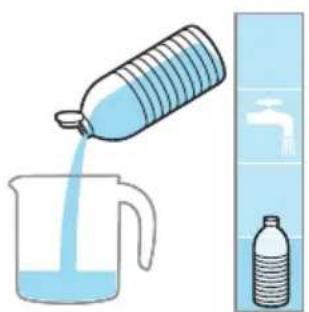
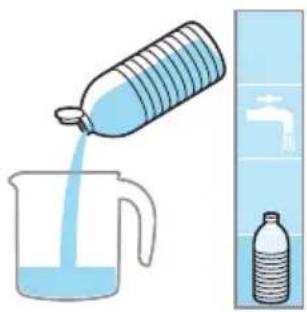
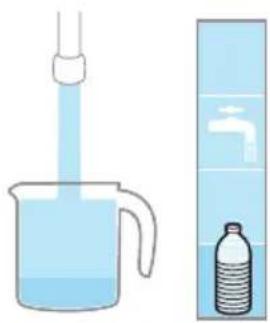
1 Add some descaling liquid to a measuring cup.
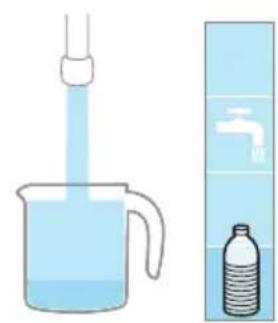
2 Add the correct amount of water in the measuring cup.
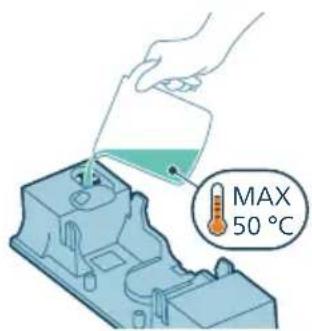
3 Add the mixed liquid in the aqua tank.
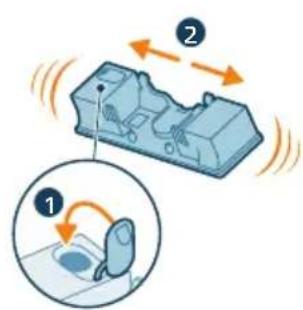
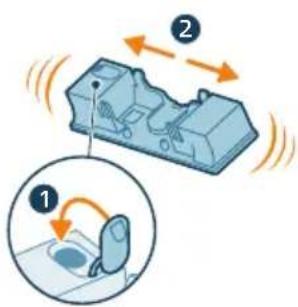
4 Close the Aqua tank properly before shaking the tank for the descending liquid to spread evenly.
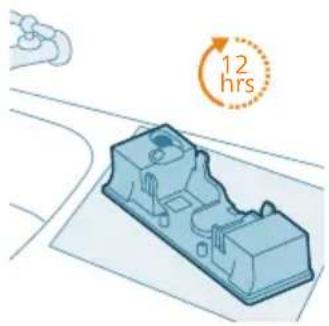
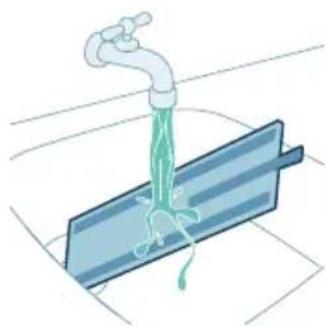
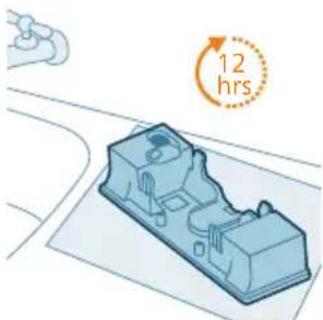
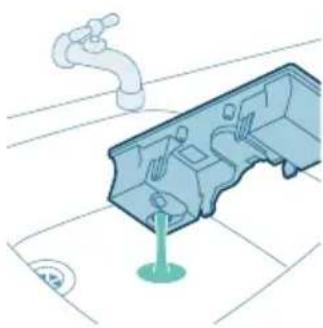
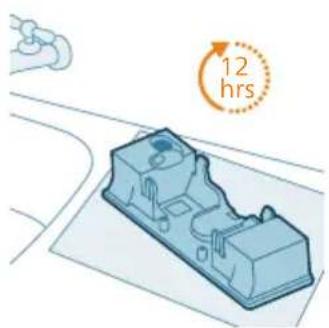
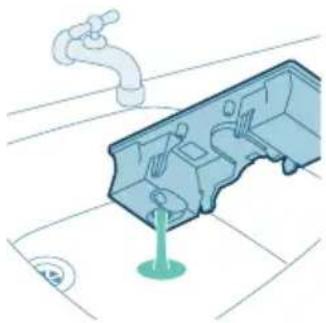
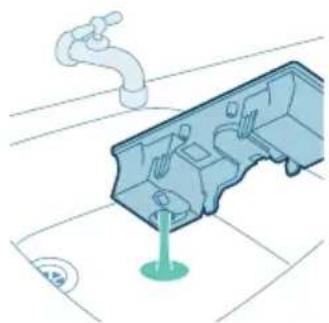
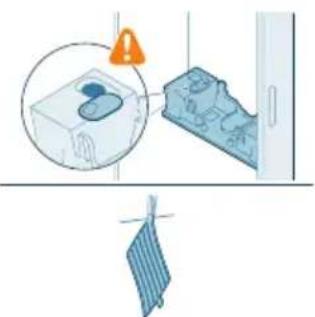
5 Leave the aqua tank (without the microfiber mopping pad) upright over 12 hours. Water is expected to slowly come out from the bottom of the aqua tank. We recommend to place the aqua tank inside the sink or over a cloth.
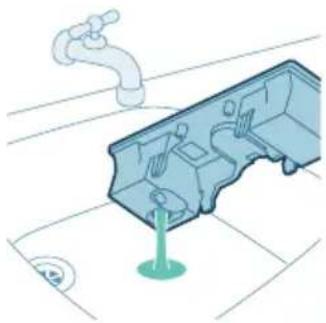
6 Rinse and remove any remaining liquid inside the aqua tank.
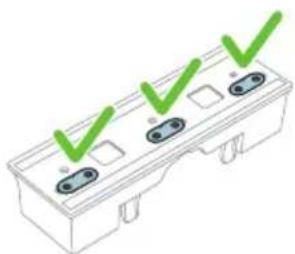
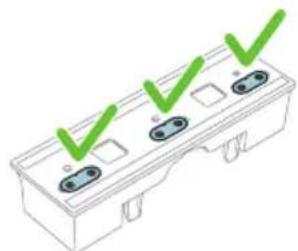
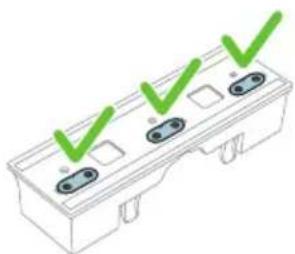
Note: Always make sure the three water strips are in place. The water tank only functions properly when all three water strips are in place.
Replacement
To buy accessories or spare parts, visit www.philips.com/parts-and-accessories or go to your Philips dealer. You can also contact the Philips Consumer Care Center in your country.
Replacement parts and type numbers:
Replacement filter XV1651/01
XV1651/01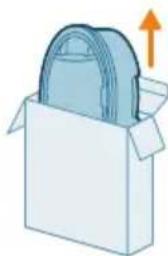
Battery XV1653/01
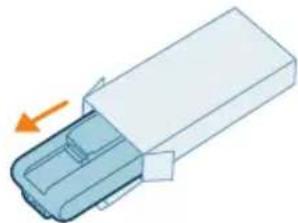
XV1653/01
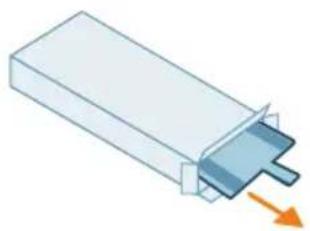
Microfiber mopping pad XV1630/01
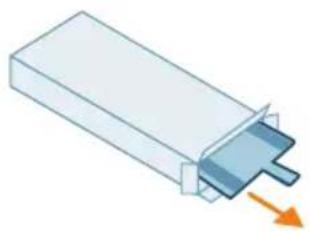
XV1630/01
Note: Replace the filter and the microfiber mopping pad every 6 months to ensure maximum performance.
User interface signals and their meaning
Signal Meaning of signal
E2 The appliance is operated above or below the functioning

temperature. Please use and store the appliance in a room with a temperature between 0°C and 40°C. Charge the appliance or battery at a temperature between 5°C and 40°C.
E5 The battery does not have enough power to be switched on.

E9 There is an issue with the nozzle. Take it to a Philips service center or contact the Consumer Care Center.
i4 The brush is stuck or objects are stuck in the air flow channel. Make sure the appliance is switched off. Clean the nozzle according to the user manual and check the tube by removing the tube from the main appliance. Remove the object in the nozzle or tube and restart the appliance. When used on certain carpets, the brush may become stuck. If this happens, adjust the floor cleaning direction and power mode to continue cleaning.
i5 The motor is jammed or damaged. Remove the battery, wait 10 seconds, and then put the battery back. If this does not work, please take the appliance to a Philips service center or contact the Consumer Care Center.

Take it to a Philips service center or contact the Consumer Care Center.
The brush is stuck or objects are stuck in the air flow channel.

Make sure the appliance is switched off. Clean the nozzle according to the user manual and check the tube by removing the tube from the main appliance. Remove the object in the nozzle or tube and restart the appliance.
When used on certain carpets, the brush may become stuck. If this happens, adjust the floor cleaning direction and power mode to continue cleaning.
i5 The motor is jammed or damaged.

Remove the battery, wait 10 seconds, and then put the battery back. If this does not work, please take the appliance to a Philips service center or contact the Consumer Care Center.
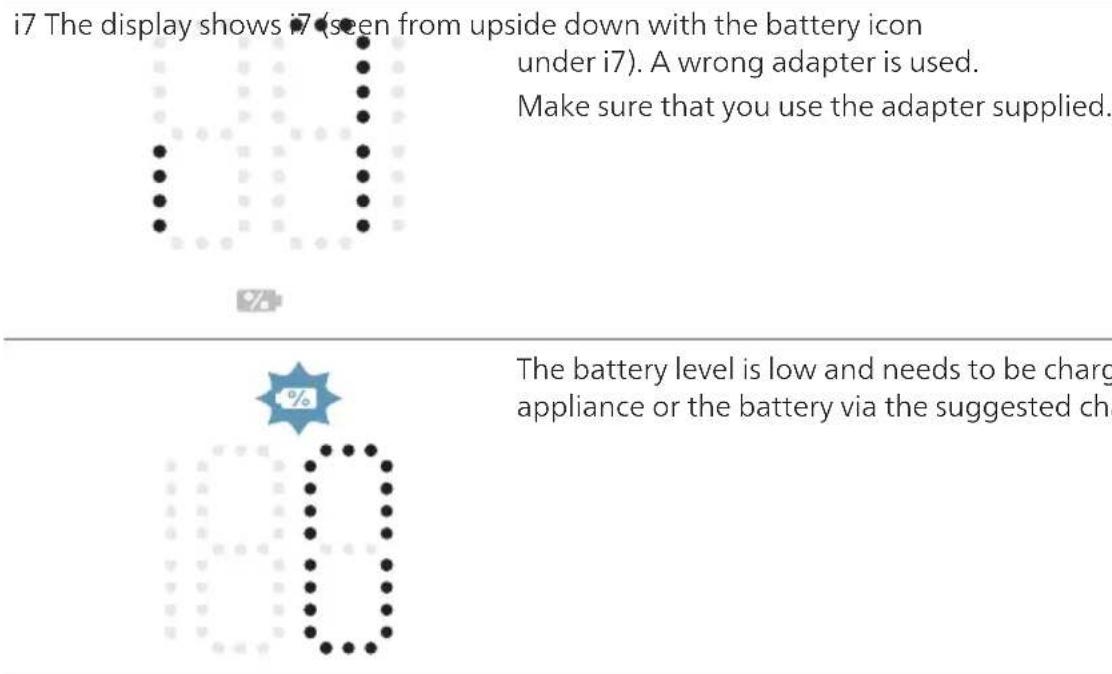
i6 The display shows 16 seen from upside down with the battery icon

under i6). The adapter is not removed.
Remove the adapter before operating the appliance.
Signal Meaning of signal
Troubleshooting
This chapter summarizes the most common problems you could encounter with the appliance. If you are unable to solve the problem with the information below, visit www.philips.com/support for a list of frequently asked questions or contact the Consumer Care Center in your country.
Dry cleaning
Problem Possible cause Solution
| The appliance does not respond when the on/off button is pushed. | The display shows the battery empty icon. | To charge the battery, connect the appliance to the charging station or attach the handheld (with the battery installed) directly to the power plug of the adapter. |
| The charging station is not stable on the wall. | The screws holding the charging station are loose. | Tighten the screws. |
| The screws are not the right size. | Mount the charging station with the supplied screws. | |
| The charging station is not attached to a stable wall. | Check that the wall on which the charging station will be mounted is stable. | |
| The appliance suddenly stops working. | When the appliance has an internal malfunction, the buttons will not respond and the screen will remain blank. | Connect the appliance to the charging station or attach the handheld vacuum cleaner directly to the adapter. Check the display. If an error code appears, you can find its meaning in the previous chapter about user interface signals. |
Problem Possible cause Solution
| (code: E2) The appliance is not working at a suitable temperature. | Use and store the appliance at a temperature between 0 °C and 40 °C. Charge the appliance or battery at a temperature between 5 °C and 40 °C. | |
| (code: i4, i5) The brush is stuck or objects are stuck in the air flow channel. | Make sure the appliance is switched off. Clean the nozzle according to the instructions and check the tube by removing the tube from the main appliance. Remove the object in the nozzle or tube and restart the appliance. | |
| (code: E9) The motorized nozzle is short circuited. | Take it to a Philips service center or contact the Consumer Care Center. | |
| The appliance has a lower suction power than usual. | The filter and the cyclone are dirty. | Empty the dust bucket. Clean the filter and the cyclone according to the instructions. Make sure the filter is washed at least once a month, when using the appliance regularly. Make sure hair and dirt stuck in the cyclone are removed. |
| The dust bucket is not attached properly to the appliance. | Make sure the dust bucket is attached properly. | |
| The filter has expired and needs to be replaced. | If it is no longer possible to clean the filter according to the instructions, you can buy new filters in the online Philips shop at www.philips.com/support or at your Philips dealer. | |
| Dust escapes from the appliance. | The filter is dirty. Clean the filter according to the instructions. | |
| The filter is not present in the appliance. | Make sure that the filter is in the appliance and assembled correctly. | |
| Something is blocking the cyclone. | Check the cyclone for stuck objects and remove any object blocking the cyclone. Also ensure all hair and dirt stuck in the cyclone are removed. | |
| The dust bucket is not properly attached to the appliance. | Empty the dust bucket and attach it correctly to the appliance. | |
| The appliance is rotated or flipped when the power is off. | Keep the appliance upright when the power is off. | |
| The appliance does not move smoothly across the floor when cleaning a carpet. | The selected suction power has been too high. | Try all three power settings and locate the one that works best for your maneuverability needs. |
| The vacuuming direction is not aligned with the direction of the carpet piles. | Check the direction of the carpet piles and adjust the vacuuming direction to align with the direction of the piles. | |
Problem Possible cause Solution
| The brush does not turn anymore. | The brush is clogged with hair or dirt. | Clean the brush by hand or with a pair of scissors. |
| (code i4) The brush may stop turning when it encounters too much resistance from a high-pile carpet. | Adjust the carpet cleaning directions and power modes to continue cleaning. | |
| The roller brush has not been assembled properly into the nozzle after cleaning. | Follow the instructions in the cleaning chapter of the user manual to slide the roller brush into the nozzle properly. Confirm your assembly with the "click" sound. | |
| (code: E9) The motorized nozzle is short circuited. | Take it to a Philips service center or contact the Consumer Care Center. | |
| The LEDs in the nozzle do not come on. | The nozzle has not been attached to the tube or appliance properly. | Attach the nozzle to the appliance or handheld properly. |
| The appliance is not charging. | The power plug is not connected properly to the appliance or the adapter is not inserted into the wall socket properly. | Make sure that the power plug is connected properly to the appliance and that the adapter is inserted into the wall socket properly. |
| The power plug is not placed properly in the charging station. | Make sure the plug is fixed properly in the charging station. Check if the plug is angled and the charging station is holding the plug in place. | |
| (code i7) An adapter other than the supplied adapter is being used. | Make sure that you use the adapter supplied. | |
| (code E5) The battery malfunctions. | The battery has failed. Replace the battery. | |
| If you have checked the above and the appliance still does not charge, take it to a Philips service center or contact the Consumer Care Center. | ||
| The appliance is charging very slow. | An external adapter or an adapter from other appliances is used. | Charge the appliance with the supplied adapter. |
| The battery is charged and attached, but the appliance cannot be switched on. | The appliance is still connected to the adapter. | Remove the appliance from the adapter before restarting it. |
| Something is wrong with the appliance. | Take it to a Philips service center or contact the Consumer Care Center. |
Problem Possible cause Solution
| The Mini TurboBrush does not function properly. | The roller brush is blocked. Remove hairs from the brush with a pair of scissors. Follow the instructions in the user manual. | |
| The roller brush is blocked by fabric or surfaces during cleaning. | Keep the Mini TurboBrush aligned with the surface and do not push the Mini TurboBrush into soft surfaces. | |
| The roller brush is not properly inserted into the Mini TurboBrush. | Make sure that roller brush and the Mini TurboBrush are properly connected and that there is no gap between the parts. Follow the instructions in the manual. | |
| The appliance delivers static shocks. | The appliance builds up static electricity. The lower the air humidity, the more state electricity is build up. | Discharge the appliance by frequently holding the tube against other metal objects in the room (for example the legs of a table or chair, etc.). Or raise the air humidity level in the room. |
| The dust and dirt that is vacuumed up is static. | Empty the dust bucket and clean the filter according to the instructions in the previous chapter. | |
When using the Vacuum and Mop Nozzle
Problem Possible cause Solution
| The water flow from the water tank is reduced. | The microfiber mopping pad is not placed correctly and blocks the wetting strip as a result. | Make sure that you place the mopping pad correctly. Check the instructions in the previous chapters for proper placement. |
| The water tank is empty or nearly empty. | Refill the water tank. | |
| A microfiber mopping pad is used that is not supplied by Philips. | Only use an original Philips microfiber mopping pad. The mopping pads can be bought in the online Philips shop at www.philips.com/support or at your Philips dealer. | |
| Lime scale has build up in the wetting strip. | Buy a new wetting strip in the online Philips shop at www.philips.com/support or at your Philips dealer. | |
| Too much water flows out of the water tank at a too high speed. | The water tank cap is not attached properly. | Check the cap and make sure it is fully and properly closed. |
| One or more water strips are missing from the bottom of the water tank. | Check if all three water strips are present below the tank and placed in the correct orientation. If it is assembled correctly, the three water strips should be flush with the surfaces around it. |
Problem Possible cause Solution
| The floor dries with stripes. Too much liquid cleaner has been added to the water. | Use only a few drops of liquid cleaner or use a cleaner that foams less. |
| The microfiber mopping pad is not placed correctly. | Make sure that the mopping pad is placed correctly. Check the instructions in previous chapters for proper placement. |
| An incorrect mopping pad is used. | Only use Philips XV1630/01 microfiber mopping pad. The mopping pads can be bought in the online Philips shop at www.philips.com/support or at your Philips dealer. |
General information 32
Installation of the wall mount
E9 There is a problem with the nozzle.

Take it to an authorized Philips service center or contact the consumer care center.
Battery XV1653/01
XV1653/01
Micro fiber cleaning pad XV1630/01
XV1630/01
Signal nozzle
Signal nozzle
E9 There is a problem with the nozzle.

Take the appliance to a Philips service center or contact the consumer care center.
i4 The brush is stuck, or the air flow channel is blocked by some

objects.
Make sure the appliance is switched off. Clean the nozzle according to the instructions in the user manual, then disconnect the tube from the appliance and check it. Remove any objects stuck in the nozzle or tube, and then switch the appliance on again.
When used on certain types of rugs, the brush may stall. If this happens, adjust the direction of floor cleaning and the power mode to continue cleaning.
The i5 motor is blocked or damaged.

Disconnect the battery, wait 10 seconds, and then reconnect the battery. If the problem persists, take the device to a Philips service center or contact customer service.
Signals Meaning of signals

"Eco" Normal "Turbo"
Battery XV1653/01
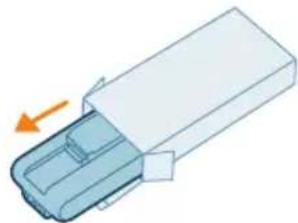
XV1653/01
Microfiber mopping pad XV1630/01
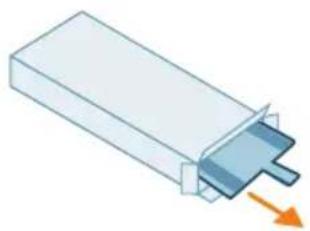
XV1630/01
Filter and brush 557
Curved brush and cleaning tool with brush and cloth 560
Introduction
Signals Meaning of signal
E2 The device is used above or below the operating temperature. Use

and store the device in an environment with a temperature from 0°C to 40°C. Charge, use, and store the device or battery at a temperature from 5°C to 40°C.
Signal Meaning of the signal
Signal Meaning of the signal
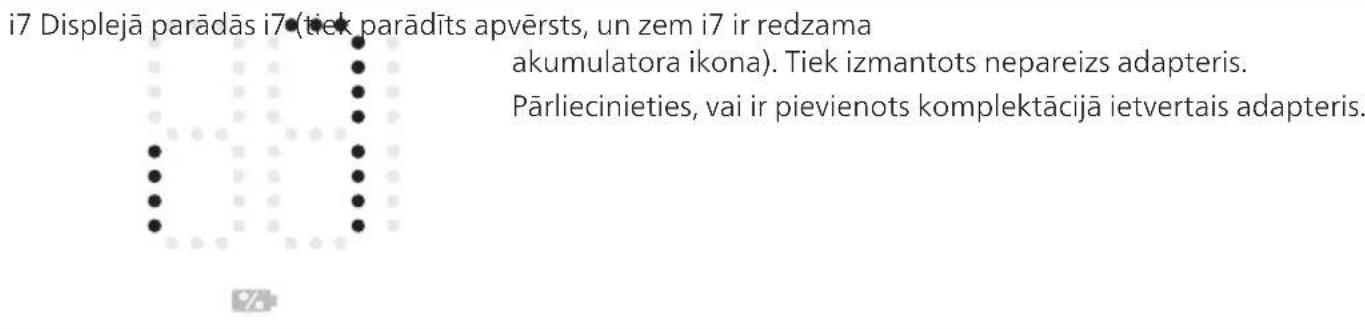
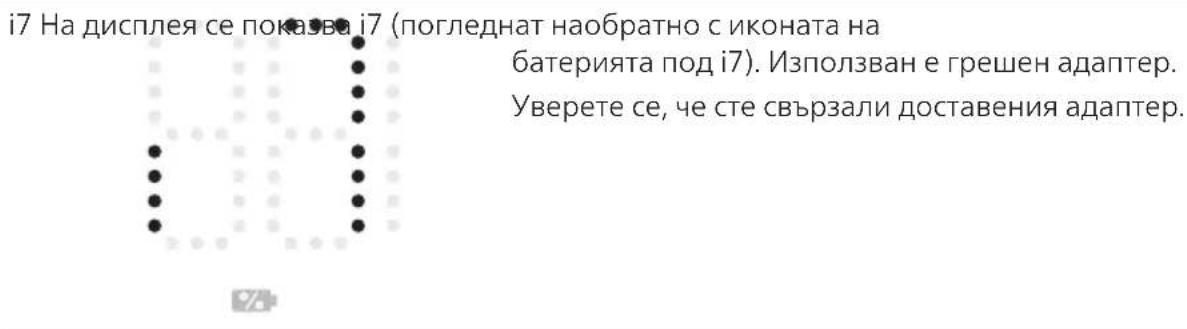
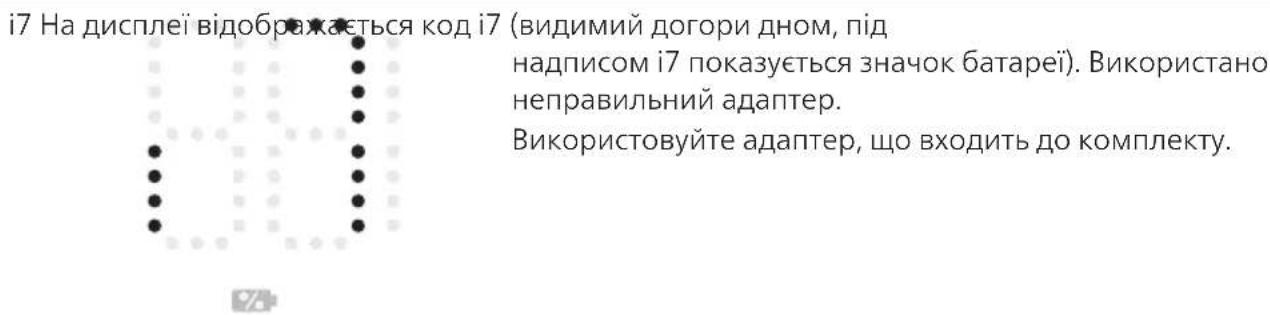
i7 The screen shows i7 (the battery icon is displayed below i7).

A wrong adapter is being used.
Make sure to use the provided charger.

The battery level is low and needs to be charged. Charge the device or battery by connecting the device using the suggested charging methods.
Diagnostics
Replace filter XV1651/01
XV1651/01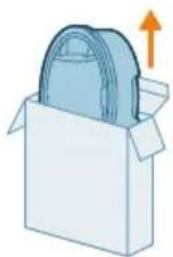
Battery XV1653/01
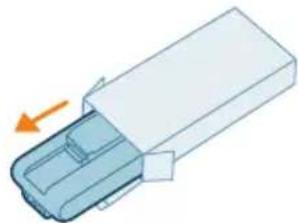
XV1653/01
Microfiber cleaning pad XV1630/01
XV1630/01
| Thieti bi khong phan hoi khi nhân nút先进技术. | Màn先进技术, hyo先进技术, vao先进技术,先进技术,先进技术,先进技术,先进技术,先进技术,先进技术,先进技术,先进技术,先进技术,先进技术,先进技术,先进技术,先进技术,先进技术,先进技术,先进技术,先进技术,先进技术,先进技术,先进技术,先进技术,先进技术,先进技术,先进技术,先进技术,先进技术,先进技术,先进技术,先进技术,先进技术,先进技术,先进技术,先进技术,先进技术,先进技术,先进技术,先进技术,先进技术,先进技术,先进技术,先进技术,先进技术,先进技术,先进技术,先进技术,先进技术,先进技术,先进技术,先进技术,先进技术、先进技术、先进技术、先进技术、先进技术、先进技术、先进技术、先进技术、先进技术、先进技术、先进技术、先进技术、先进技术、先进技术、先进技术、先进技术、先进技术、先进技术、先进技术、先进技术、先进技术、先进技术、先进技术、先进技术、先进技术、先进技术、先进技术、先进技术、先进技术、先进技术、先进技术、先进技术、先进技术、先进技术、先进技术、先进技术、先进技术、先进技术、先进技术、先进技术、先进技术、先进技术、先进技术、先进技术、先进技术、先进技术、先进技术、先进技术、先进技术、先进技术、先进技术 | Dé先进技术, hyo先进技术,先进技术,先进技术,先进技术,先进技术,先进技术,先进技术,先进技术,先进技术,先进技术,先进技术,先进技术,先进技术,先进技术,先进技术,先进技术,先进技术,先进技术,先进技术,先进技术,先进技术,先进技术,先进技术,先进技术,先进技术,先进技术,先进技术,先进技术,先进技术,先进技术,先进技术,先进技术,先进技术,先进技术,先进技术,先进技术,先进技术,先进技术,先进技术,先进技术,先进技术,先进技术,先进技术,先进技术,先进技术,先进技术,先进技术,先进技术,先进技术,先进技术 |
| Tram先进技术,先进技术,先进技术,先进技术,先进技术,先进技术,先进技术,先进技术,先进技术,先进技术,先进技术,先进技术,先进技术,先进技术,先进技术,先进技术,先进技术,先进技术,先进技术,先进技术,先进技术,先进技术,先进技术,先进技术,先进技术,先进技术,先进技术,先进技术,先进技术,先进技术,先进技术,先进技术,先进技术,先进技术,先进技术,先进技术,先进技术,先进技术,先进技术,先进技术,先进技术,先进技术,先进技术,先进技术,先进技术,先进技术,先进技术,先进技术,先进技术,先进技术 | Các先进技术,先进技术,先进技术,先进技术,先进技术,先进技术,先进技术,先进技术,先进技术,先进技术,先进技术,先进技术,先进技术,先进技术,先进技术,先进技术,先进技术,先进技术,先进技术,先进技术,先进技术,先进技术,先进技术,先进技术,先进技术,先进技术,先进技术,先进技术,先进技术,先进技术,先进技术,先进技术,先进技术,先进技术,先进技术,先进技术,先进技术,先进技术,先进技术,先进技术,先进技术,先进技术,先进技术,先进技术,先进技术,先进技术,先进技术,先进技术,先进技术,先进技术, Kêng yu'sheng hong puan hui xia xia xian huyu yu yu yu yu yu yu yu yu yu yu yu yu yu yu yu yu yu yu yu yu yu yu yu yu yu yu yu yu yu yu yu yu yu yu yu yu yu yu yu yu yu yu yu yu yu yu yu yu yu yu uyu yu yu yu yu yu yu yu yu yu yu yu yu yu yu yu yu yu yu yu yu yu yu yu yu yu yu yu yu yu yu yu yu yu yu yu yu yu yu yu yu yu yu yu yu yu yu yu yu yu(yu) yu yu yu yu yu yu yu yu yu yu yu yu yu yu yu yu yu yu yu yu yu yu yu yu yu yu yu yu yu yu yu yu yu yu yu yu yu yu yu yu yu yu yu yu yu yu yu yu yu y'u yu yu yu yu yu yu yu yu yu yu yu yu yu yu yu yu yu yu yu yu yu yu yu yu yu yu yu yu yu yu yu yu yu yu yu yu yu yu yu yu yu yu yu yu yu yu yu yu yu yyu yu yyu yyu yyu yyu yyu yyu yyu yyu yyu yyu yyu yyu yyu yyu yyu yyu yyu yyu yyu yyu yyu yyu yyu yyu yyu yyu yyu yyu yyu yyu yyu yyu yyu yyu yyu yyu yyu yyu yyu yyu yyu yyu yyu yyu yyu yyu yyu yyu yyu yyu y Yu YU YU YU YU YU YU YU YU YU YU YU YU YU YU YU YU YU YU YU YU YU YU YU YU YU YU YU YU YU YU YU YU YU YU YU YU YU YU YU YU YU YU YU YU YU YU YU YU YU YU YUN YU YUN YU YUN YU YUN YU YUN YU YUN YU YUN YU YUN YU YUN YU YUN YU YUN YU YUN YU YUN YU YUN YU YUN YU YUN YU YUN YU YUN YU YUN YU YUN YU YUN YU YUN YU YUN YU YUN YU YUN YU YU YUN YU YUN YU YUN YU YUN YU YUN YU YUN YU YUN YU YUN YU YUN YU YUN YU YUN YU YUN YU YUN YU YUN YU YUN YU YUN YU YUN YU YUN YU YUN YU YUN YU YUN YU YUN YU YUN YU YUN YUN YU YUN YU YUN YU YUN YU YUN YU YUN YU YUN YU YUN YU YUN YU YUN YU YUN YU YUN YU YUN YU YUN YU YUN YU YUN YU YUN YU YUN YU YUN YU YUN YU YUN YU YUN YU YUN YU YUN YU YUN YUN YUN YU YUN YU YUN YU YUN YU YUN YU YUN YU YUN YU YUN YU YUN YU YUN YU YUN YU YUN YU YUN YU YUN YU YUN YU YUN YU YUN YU YUN YU YUN YU YUN YU YUN YU YUN YU YUN YU YUN YU YUNG YU YUN YU YUN YU YUN YU YUN YU YUN YU YUN YU YUN YU YUN YU YUN YU YUN YU YUN YU YUN YU YUN YU YUN YU YUN YU YUN YU YUN YU YUN YU YUN YU YUN YU YUN YU YUN YU YUN YU YUN YU YUNG YUN YU YUN YU YUN YU YUN YU YUN YU YUN YU YUN YU YUN YU YUN YU YUN YU YUN YU YUN YU YUN YU YUN YU YUN YU YUN YU YUN YU YUN YU YUN YU YUN YU YUN YU YUN YU YUN YU YUN YU YUN YUK YU YUN YU YUN YU YUN YU YUN YU YUN YU YUN YU YUN YU YUN YU YUN YU YUN YU YUN YU YUN YU YUN YU YUN YU YUN YU YUN YU YUN YU YUN YU YUN YU YUN YU YUN YU YUN YU YUN YU YUN YU YUM YU YUN YU YUN YU YUN YU YUN YU YUN YU YUN YU YUN YU YUN YU YUN YU YUN YU YUN YU YUN YU YUN YU YUN YU YUN YU YUN YU YUN YU YUN YU YUN YU YUN YU YUN YU YUN YU YUN YU YUN YU Y UNY UYUN YU YUN YU YUN YU YUN YU YUN YU YUN YU YUN YU YUN YU YUN YU YUN YU YUN YU YUN YU YUN YU YUN YU YUN YU YUN YU YUN YU YUN YU YUN YU YUN YU YUN YU YUN YU YUN YU YUN YU YUN YU.YUN YU YUN YU YUN YU YUN YU YUN YU YUN YU YUN YU YUN YU YUN YU YUN YU YUN YU YUN YU YUN YU YUN YU YUN YU YUN YU YUN YU YUN YU YUN YU YUN YU YUN YU YUN YU YUN YU YUN YU YUN YUYUN YU YUN YU YUN YU YUN YU YUN YU YUN YU YUN YU YUN YU YUN YU YUN YU YUN YU YUN YU YUN YU YUN YU YUN YU YUN YU YUN YU YUN YU YUN YU YUN YU YUN YU YUN YU YUN YU YUN YU YUN YUNYU YUNYU YUNYU YUNYU YUNYU YUNYU YUNYU YUNYU YUNYU YUNYU YUNYU YUNYU YUNYU YUNYU YUNYU YUNYU YUNYU YUNYU YUNYU YUNYU YUNYU YUNYU YUNYU YUNYU YUNYU YUNY UYUNYU YUNYU YUNYU YUNYU YUNYU YUNYU YUNYU YUNYU YUNYU YUNYU YUNYU YUNYU YUNYU YUNYU YUNYU YUNYU YUNYU YUNYU YUNYU YUNYU YUNYU YUNYU YUNYU YUNYU YUNYUYUNYUYUNYUYUNYUYUNYUYUNYUYUNYUYUNYUYUNYUYUNYUYUNYUYUNYUYUNYUYUNYUYUNYUYUNYUYUNYUYUNYUYUNYUYUNYUYUNYUYUNYUYUNYUYUNYUYUNYUYUNYU |
Troubleshooting Quick diagnosis Solution
1 Control panel Battery level indicator Power level indicator
ByToH 3a n36op Ha MOUHOCT d ByToH BKJ./n3KJ.
2 Дрьжka 3KoHTeINHep 3a npax 4 BaTepey 5 ΦnIITbP 6 BytoH 3a ocbo6oxdaBaHe Ha OTdeJeIeHneTo 3a npax 7 KOMJIJEKT BNUHTOBE 8 CtoiKa 3a cTeHa 9 AanTep 10 Tpb6a 11 HaKaPaHnK 12 Aqua tank (XC5244 only) 13 MinkpoΦn6bpyna nOДLOXka 3a MOKpo NOUcTBaHe (camo XC5244) 14 MHH TurboBrush (camo 3a XC5243, XC5244) 15 Kom6Hnnpa nHCTpymEnT 16 INHCTpyMeNT 3a npoceenn
1 PnKpeTe 6aTeepra KaM OCHOBHO To TaNo Ha ypeHa, Taka Ye Da Cyte UpaKaBaHe, KoEt O3HaUaBa CnrypHo CBbp3BaHe.
2 3apekndaIte ypeia, KaTo ro nocTaBine Ha crIIO6eHaTa cToiKa 3a cTeHa.
AПпедурждени: Зараздайтей ураза пи Температура над 5°C и под 40°C.
3a6eJekKa: MoKTe cBIO da noCTaBnTe dpbXkata Ha xOpNtAlHa n Cta6uHa NOBbpxHocT u NipeKTHO da CBbPKeTe 3apeKdaunra Ka6eJ KbM ypeDa.
i 3a6eJekka: Dpyra onuia e da noctabnte 6atepnaHa xopn3oHTaHa n cta6nHa NOBbpxHocT u napeKTHO da CBbpxKeTe 3apejdaunr Ka6eI KbM 6atepnaTa.
3 YpeIbTe npoeKtupaH da IOCTURHe nbJeH 3apJb B paMKnte Ha 4aca. MoXeTe Da H6JIIOJaBaTe HAppeJbKa Ha 3apeJdaHe Ha ekpaHa. Korato ypeIbTe HaJIbHO 3apeJeH, Ha ekpaHa CBETBa cToHocT 100%. Cnei HAKOJIKO CEkyHdN DnCnPJeT Ie Ce N3KlIOUH.
Изполизовны урEDA
Crlno6yBaHe Ha ypeDa
1 PnKpeTe DpbXkata KbM Tpb6aTa. 3a Da Cte cnryphn B npKpenBaHeto, Tpa6Ba da yyeTe upaKaBaHe.
2 PnKpeTe Tpb6ata KbMaHakpaHnKa.3a Da CTe cnrypHn B npKpeBaHeTo, Tpa6Ba Da yyeTe upaKaBaHe.
A IpeDynpexKdEHe: KoraTo n3POn3BaTe akcecoap, He n3cMvKBaIte Boda nn npyn TeuHocTn.
I3nOJI3BaHe Ha NaKpaHnKa
1 NocTabete HakpaHnka HappaBO KbM dpbkkata.
2. Turn the combination knob to set the surface of the dynamic dispenser to the desired height, such as the column.
8. Close the detergent drawer, so that it will be pulled in.
Note: Check and wipe the rubber seal around the detergent drawer.
Maintenance of the mini turbo brush (only XC5243, XC5244)
1. Turn the drawer insert counterclockwise to release the brush from the holder.

2. Remove any tangled threads or hair from the brush.
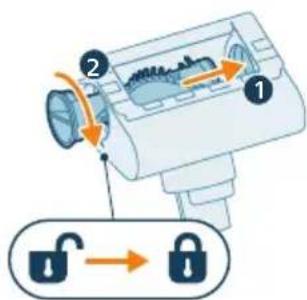
3. To reattach the brush, simply align it back to its original position. Make sure the inner tab is aligned. Turn clockwise to lock the brush. When the brush is correctly attached, it will be pulled in.
Maintenance of the water reservoir (only XC5244)
Empty the water reservoir regularly to prevent clogging of the nozzle.
1. Add a small amount of descaling solution to the measuring cup.
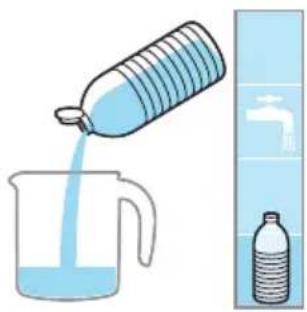

2. Add the correct amount of water to the measuring cup.
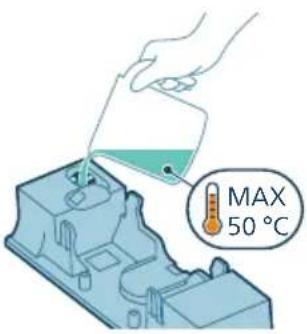
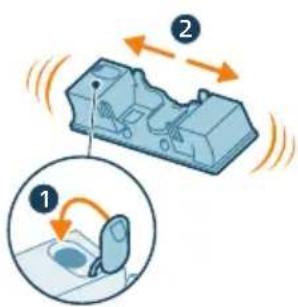
3. Pour the mixed solution into the water reservoir.
4. Close the water reservoir properly before shaking it, so that the descaling solution can be distributed evenly.
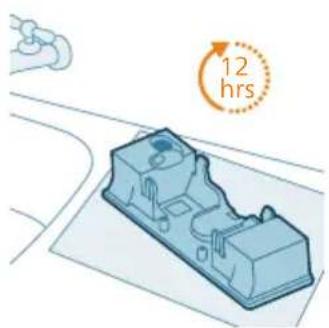
5. Leave the water reservoir (without the microfiber pad for wet cleaning) upright for 12 hours. Expect water to leak from the bottom of the reservoir. We recommend placing the water reservoir in the sink or on a cloth.
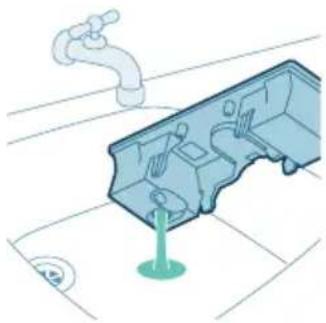
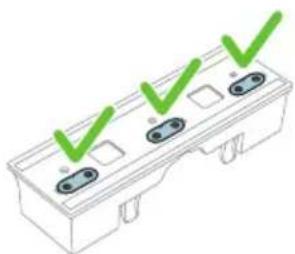
6. Then remove the remaining solution from the water reservoir.
Note: Check and make sure that the three filter strips are in place. The water reservoir functions correctly only when the three filter strips are in place.
Replacement
To purchase accessories and spare parts, visit
www.philips.com/parts-and-accessories or contact your Philips dealer. You can also contact the Philips Consumer Care Center in your country.
Replacement parts type numbers:
Replacement filter XV1651/01
XV1651/01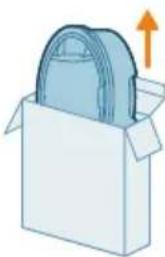
Water pad XV1653/01
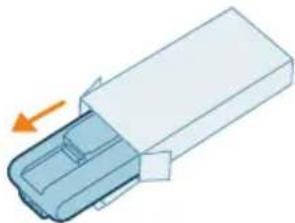
XV1653/01
Microfiber pad for wet cleaning XV1630/01
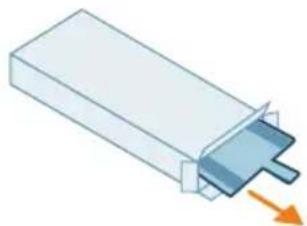
XV1630/01
Note: Replace the filter and microfiber pad every 6 months to ensure maximum efficiency.
Signal from the consumer interface and its meaning
Signal Meaning of signal
E2 Warning: The appliance is not working or the temperature is not functioning.

Charge and store the device at a temperature between 0°C and 40°C. Charge and store the device/battery at a temperature between 5°C and 40°C.
If the battery does not have enough charge, it will not turn on.

Plug the device into the charging device. If the device still does not charge, take it to a Philips service center or contact the customer care center.
Signal meaning of the signal
If there is a problem with the lamp.

Take it to a Philips service center or contact the customer care center.
The brush is blocked or objects are blocking the air passage.

Channel.
Make sure the device is turned off. Follow the instructions in the user manual to check the tube, remove it from the main device. Remove the object from the tube or the tube and restart the device.
When used on certain surfaces, the brush may become blocked. If this happens, adjust the suction power setting and the power mode to continue cleaning.
The motor is blocked or damaged.

Remove the battery, wait 10 seconds, then put the battery back. If this does not work, take the device to a Philips service center or contact the customer care center.
The display shows i6 (the battery icon with

battery symbol i6). The filter is not removed. Remove the filter before working with the device.
Signal meaning of the signal

The battery is low and needs to be charged. Charge the battery using the recommended charging method.
Troubleshooting
This chapter summarizes the most common problems you may encounter when using the device. If you cannot solve the problem with the information below, visit the list of frequently asked questions at www.philips.com/support or contact the consumer care center in your country.
Cleaning
Problem Possible cause Solution
| Урексы не рeaима, korato Бутоны вкл./изкл. e Нат生态系统. | Диаслене пokedва икона за з ииз_TOЕWAбетерия. | За за заренье басторияа, свьржete уреда КьМ Зарднaitа санцяи... прикpenete дръжкata (с inhсятапа... байся) д irreковно КьМ зхра.... шени на поалтура. |
| Заядна за танця не e стылна на сてнatable. | Винтоberе, држacons зарднaitа санця, са разхлабени. | Затerenе виhtовete. |
| Винтоberе не с павлини размер. | Моширайte зареньata санця... п direюстенite виhtовe. | |
| Заядна за танця не e закрелега КьМ стаблна стара. | Проберete дали сてнatable, на каято ... б-byde мошира.... са... стаблна. |
Problem Possible cause Solution
Cleaning the dust container 825
Cleaning the filter 825
Cleaning the water reservoir (see XC5244) 826
Periodic maintenance 828
Maintaining the system for dispensing with the filter 828
Cleaning the brush 830
Cleaning the Mini TurboBrush (see XC5243, XC5244) 832
Cleaning the water reservoir (see XC5244) 833
Replacement 834
CunHaJI Na KopINCHNUKnot INHTepoejc n HNBHO 3Nauehe 835
PeeBaBHe npo6JIeMn 837
Cybo yinstehe 837
KorakopinCTeMla3Hnua 3a cmykaHe n 3a 6pniueHe. 841
BoVeD
We thank you for purchasing this product! For full support, please register your product at www.philips.com/support.
Onwt onnc
1 Control panel a Battery level indicator b Power level indicator c Power level selection button
d On/off button
2 Handle 3 Dust container 4 Filter 5 Dust container release button 6 Winding unit 7 Winding unit 8 Display 9 Adapter 10 Brush 11 Nozzle 12 Water reservoir (only XC5244) 13 Microfiber cleaning cloth (only XC5244) 14 Mini turbo brush (only XC5243, XC5244) 15 Combination tool 16 Accessory for TECHNOVENT
Before first use
Mounting the display
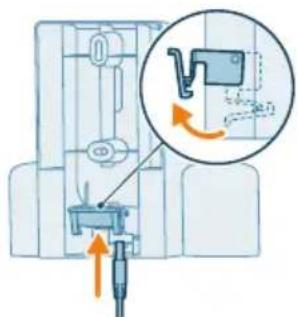
1 Turn the display over and place it on a flat surface. Insert the plug for the power supply, ensuring that the metal part is facing up and the plug is inserted into the front side of the display.
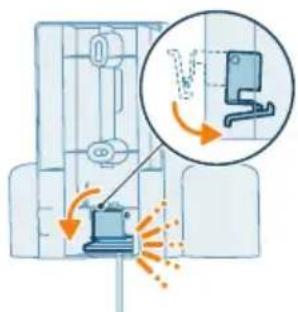
2 Close the cover. Make sure the cover clicks into place with a sound.
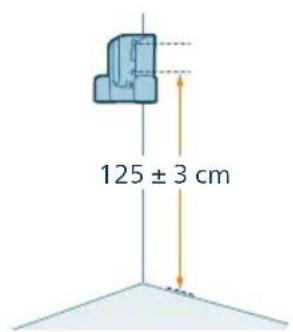
3 Securely attach the display to the intended position on the device, ensuring that the screw holes for attachment are approximately 125 cm from the floor.
Attention: Place the appliance on a stable surface to operate it, to avoid the risk of electric shock.
Note: Check the placement of the appliance. It is possible for the appliance to operate without the plug being in contact with the socket.
4 Once you have determined the optimal position and height for ironing and filling your appliance, tighten the knobs to secure the appliance in place.
Charging
Charge the appliance with the adapter. Charging from empty to full takes about 4 hours.
1 Insert the adapter into the main body of the appliance, ensuring a secure connection confirmed by a "click" sound.
2 Place the appliance on the inclined ironing surface.
A Temperature adjustment: Set the appliance to a temperature above 5°C and below 40°C.
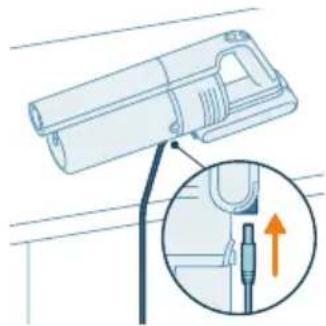
Note: You can also place the iron on a flat, stable surface and connect the charging cable directly to the appliance.
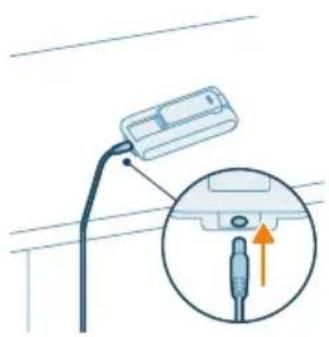
i Note: Another option is to place the battery on a flat, stable surface and connect the charging cable directly to the battery.
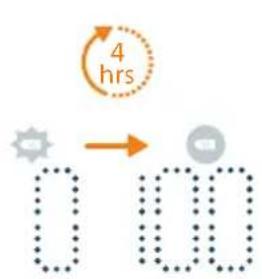
3 The appliance is designed to reach a full charge within 4 hours. You can follow the charging progress on the display. When the appliance is fully charged, the value of 100% will light up on the display. After a few seconds, the display will turn off.
Using the appliance
Intended use
- The ironing and steaming set is suitable for ironing and steaming all types of hard floors, except untreated wooden floors. The ironing and steaming set is intended for regular cleaning of hard floors. Always follow the cleaning instructions for your hard floor when using the appliance. If you want to add liquid cleaning agent for floors that is not the Philips XV1792 floor cleaning agent to the water in the clean water reservoir, use a cleaning agent that is not harmful and that can dissolve in water, like the Philips XV1792 floor cleaning agent. Considering that the clean water reservoir has a capacity of 300 ml, you should add only a few drops (maximum 10 ml) of the liquid cleaning agent to the water. If you use the appliance for ironing and steaming of laminate floors, do this only on laminate floors that are suitable to prevent the laminate from swelling in the plug. If you place/iron the appliance on a hot surface when it is switched off, drops of the residual water may end up on the hot surface. Do not place the appliance on a grid in front of a convector heater. The appliance cannot suck up the water that comes out of the plug when you place it in front of the grid, the water will end up on the floor in front of the heater. - Cleaning: Do not fill the plug from the floor and do not pull it forcefully, and do not make any turns, because this will leave water stains. Place it only forward and backward.
i Note: The operating time depends on the power level used during cleaning.
Check the use and dosage
Warning: When using any dosage, do not pull out the water during operation.
Use of the appliance
Signal meaning of the signal light
Signal meaning of the signal
E2 The device is operated at a room temperature between 0°C and 40°C.

Functioning. Use the appliance in a room with a room temperature between 0°C and 40°C. Fill the appliance or the battery at a temperature between 5°C and 40°C.
E5 The battery does not have enough charge to switch on.

Connect the appliance again with the power supply. If the appliance still does not switch on, take it to a Philips service center or contact the customer care center.
Signal meaning of the signal
E9 There is a problem with the appliance.

Take it to a Philips service center or contact the customer care center.
i4 The filter is clogged or the air flow channel is

blocked by objects.
Make sure the appliance is switched off. Empty the appliance according to the instructions for use and check the tube, so that you will remove the blockage from the appliance. Remove the objects from the appliance or the tube and restart the appliance.
If the appliance is used to determine the temperature, the device may become dirty. If this happens, adjust the cleaning instructions and the moisture level to continue cleaning.
i5 Motor is dirty or worn.

Remove the battery, wait 10 seconds, then reinsert the battery. If this does not work, take the appliance to a Philips service center or contact the Philips Consumer Care Center.
i6 The display shows i6 (see figure above with the icon for

battery level i6). The battery is not removed.
Remove the battery before handling the appliance.
Signal meaning of the signal
i7 The display shows i7 (see figure above with the icon for

battery i7). The wrong battery is being used.
Make sure you use the correct battery.

The new battery is low and needs to be charged. Charge the battery using the recommended charging methods.
Troubleshooting
This chapter summarizes the most common problems you may encounter with the appliance. If you cannot solve the problem with the information below, visit www.philips.com/support for a list of frequently asked questions or contact the Consumer Care Center in your country.
Cleaning
Problem Possible cause Solution
b Level indicators
c Cleaning mode button d ON/OFF button 2 Handle 3 Dust collector 4 Battery 5 Filter 6 Dust collector release button 7 Screw kit 8 Wall mount 9 Adapter 10 Tube 11 Nozzle 12 Water reservoir (only for model XC5244) 13 Microfiber pad for wet cleaning (only for model XC5244) 14 Mini Turbo nozzle (only for models XC5243, XC5244) 15 Universal nozzle 16 Crevice nozzle
Cleaning hard and soft floors
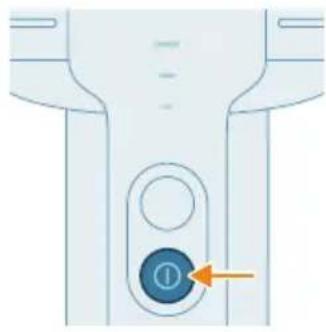
1 Press the ON/OFF button to turn on the appliance.
Note: To turn off the appliance, press the ON/OFF button again.
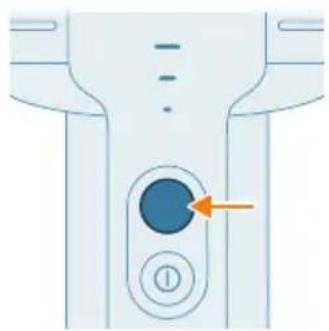
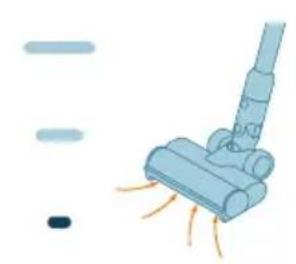
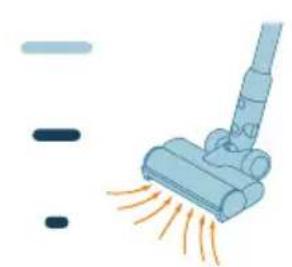
2 Using the cleaning mode button, you can switch between cleaning modes: ECO mode, normal mode, and TURBO mode.
ECO mode Medium mode TURBO mode
Warning: Do not vacuum up water or other liquids.
Attention! Do not point the bright LEDs at your own or other people's eyes. The LED light is very bright.
Using the vacuum cleaner for wet cleaning of hard floors (only for model XC5244)
Attention! Use the water reservoir only when cleaning hard, water-resistant floors (e.g., linoleum, ceramic tiles, or lacquered parquet) and stone floors (e.g., marble). If your floors at home are not protected against moisture, check with the manufacturer whether water can be used for cleaning them. Do not use the water reservoir when cleaning hard floors if the water-resistant layer is damaged. Note: Do not use the water reservoir when cleaning carpets. Note: Do not tilt the appliance with the filled water reservoir sideways to avoid wetting the floor. Move it only forward or backward.
1 Before use, attach the microfiber pad for wet cleaning.
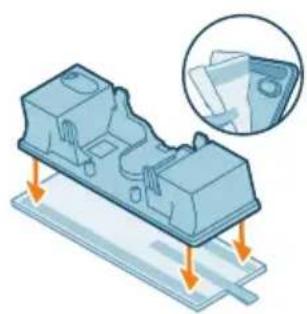
2 Attach the microfiber pad for wet cleaning under the water reservoir. Align the tabs under the water reservoir and behind the fabric.
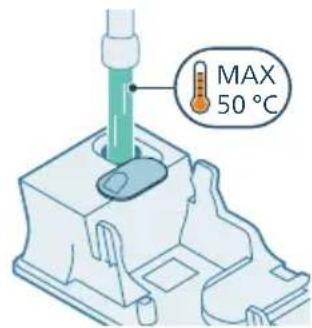
3 Open the rubber cap on top of the reservoir. Fill the reservoir with water at a temperature not exceeding 50°C.
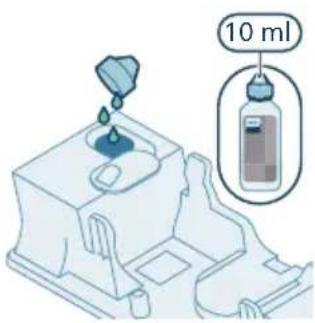
4 (Optional) If necessary, add cleaning liquid to the reservoir for floor cleaning. Use a low-foaming, non-foaming, water-soluble cleaning agent. It is recommended to use Philips Floor Cleaner XV1792 for washing floors. Add just a few drops to the water.
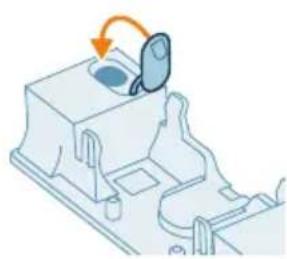
5 Close the water tank tightly.
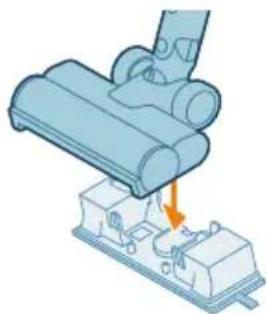
6 Attach the prepared water tank to the water nozzle; everything is ready for operation. It is important to securely attach the tank to the wheels of the nozzle and to ensure that at this moment it is in the correct position.
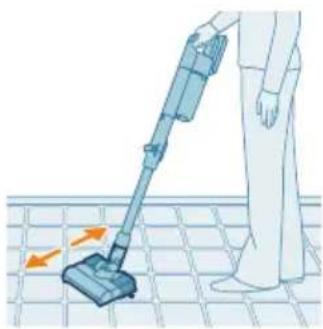
7 Press the on/off button on the device. Hard floors can be effectively cleaned with the help of the water nozzle attached to the nozzle.
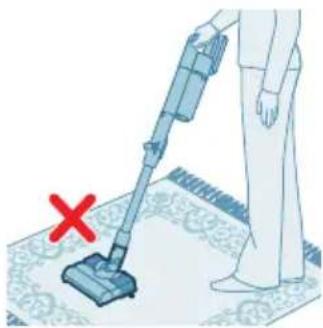
Note: Water is not suitable for cleaning soft floor coverings, such as carpets.
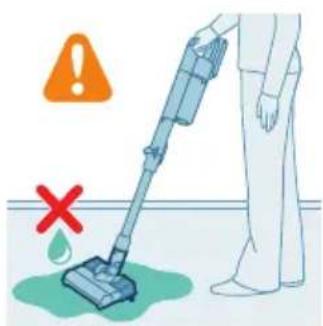
Attention! The water nozzle should not be used for cleaning water.
Tips and Important Information
- Before wet cleaning, it is not necessary to vacuum the floor, since the "Vacuum and Mop" nozzle performs wet cleaning actively enough to remove all types of dirt, including liquids and stains. On carpets and rugs, only use the "Vacuum" nozzle.
- If you do not move the appliance while it is switched off, a small puddle of water may remain on the floor under it. To reduce this puddle, the appliance must be moved while it is switched off. If necessary, the last drops can be wiped with a cloth.
Limitation of operating time
The "Vacuum and Mop" nozzle is suitable for dry and wet cleaning of hard floors of any type, except for untreated wooden floors. The "Vacuum and Mop" nozzle is designed for cleaning hard floors. When using the appliance, always follow the instructions for cleaning hard floors.
- If you want to add clean water to the tank instead of Philips Floor Cleaner XV1792, or another liquid cleaning agent for floors, use a low-foaming or non-foaming agent that is soluble in water, such as Philips Floor Cleaner XV1792.
- Since the clean water tank has a capacity of 300 ml, only a few drops of the agent (no more than 10 ml) need to be added to the water.
- If you want to use the "Vacuum and Mop" nozzle for cleaning, the floor must be securely attached so that it is not sucked into the nozzle. - When moving the appliance over a carpet or rug, drops of dirty water from the appliance may fall onto it. Do not move the appliance over floor grilles of convector heaters. When moving over a grille, the appliance will not be able to collect the water coming from the nozzle, and the water will flow inside the grille.
- During cleaning, do not lift the nozzle above the floor, do not swing it from side to side, and do not make sharp turns, so that wet streaks do not remain on the floor. Move it only forward or backward.
Note: The operating time depends on the energy consumption level and the time of vacuum cleaner use.
Special use and accessories
Warning. When using any accessory, do not pick up liquids with the vacuum cleaner.
Using the nozzle
1. Attach the nozzle directly to the handheld vacuum cleaner.
2. This combination is intended for cleaning surfaces at medium heights, such as stairs.
Note: Empty the dust container while holding the appliance in a vertical position to prevent debris from falling out.
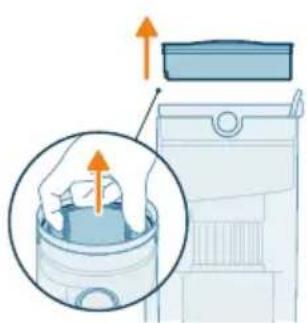
3. Grasp the two toothed rings on the sides of the cyclone chamber. Remove the cyclone chamber from the dust container by pulling it out of the container.
4. Empty the dust container by tipping the collected dust into a trash bin.
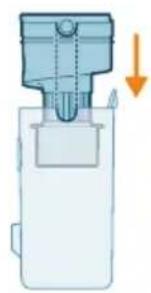
5. Reinstall the cyclone chamber into the dust container. Make sure both parts are aligned: the two semicircles must fit together.
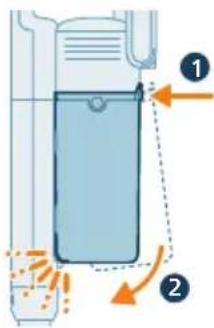
6. Return the assembled dust container to its place. Align the dust container on the side of the filter before returning it to its place.
Maintenance of the water tank (only for model XC5244)
Empty the water tank after each use.
1. Remove the nozzle for wet cleaning.
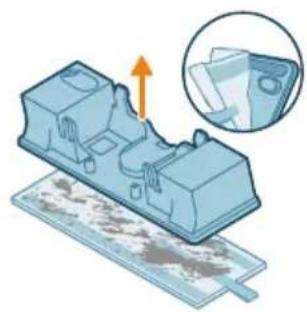
2. Rinse and clean the wet cleaning nozzle by hand under running water or in a washing machine.
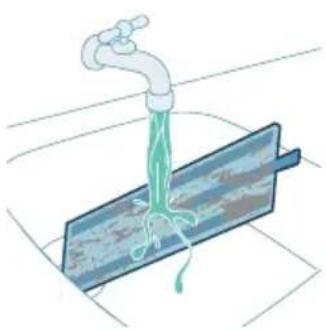
3. Pour out any remaining water from the water tank.
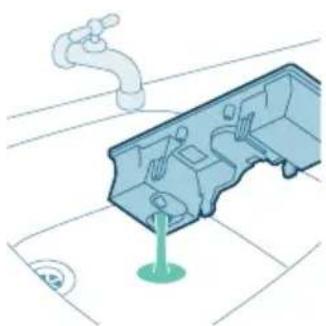
4 Empty the water reservoir.
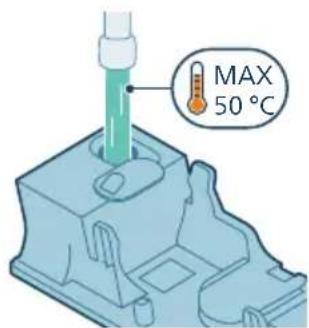
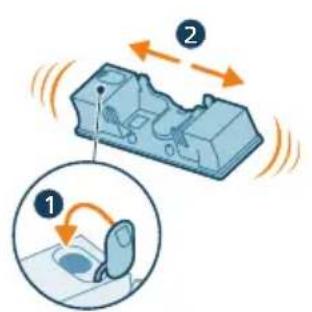
5 Close the water reservoir properly and shake it to remove any remaining cleaning solution.
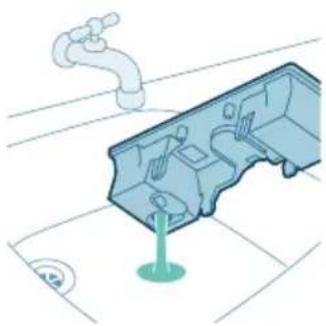
6 Empty the water reservoir and leave it open to dry.
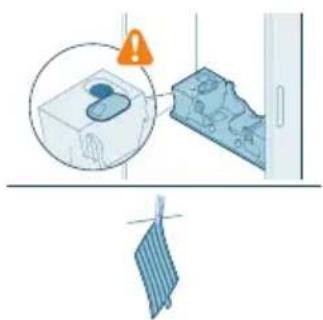
7 During storage, do not leave the reservoir closed. Dry the microfiber pad after cleaning.
Note: It is recommended to replace the microfiber pad every 6 months (accessory XV1630).
Periodic maintenance
Maintaining the floor cleaning system
2 Add the required amount of water to the measuring cup.
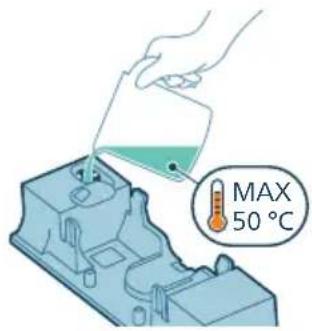
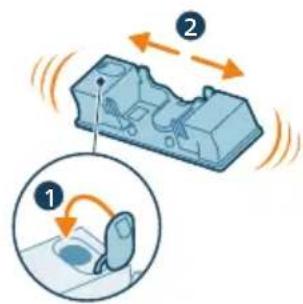
3 Add the mixed liquid to the water reservoir.
4 Close the water reservoir properly, then shake it so that the cleaning solution is evenly distributed.
5 Leave the water reservoir (without the microfiber pad for wet cleaning) in a vertical position for 12 hours. Water should slowly drip out of the bottom of the water reservoir. It is recommended to place the water reservoir in a sink or on a towel.
6 Rinse the water reservoir and remove any remaining water.
Note: Make sure the wet cleaning strips are in place. This is necessary for the proper operation of the water reservoir.
Replacement
To purchase accessories or spare parts, visit the website www.philips.com/parts-and-accessories. You can also contact the Philips Consumer Care Center in your country (the telephone number is indicated on the warranty card).
Replace the battery symbols:
In the inverted view, the battery symbol is visible below the icon.
battery). For the remote control.
Remove the battery before using the device.
The icon will display on the screen (if you look at the screen in the

inverted view, the battery symbol is visible below the icon). A wrong power block is used.
Make sure you use the adapter supplied with the device.

Low battery level, recharging required. Charge the device or battery using the recommended charging methods.
Troubleshooting
This section covers the most common problems you may encounter when using the device. If you cannot solve the problem yourself, see the answers to frequently asked questions on the website www.philips.com/support or contact the consumer care center in your country.
Dry cleaning
Problem Possible cause Solution
| ИсторICAL ИсторICAL ИсторICAL ИсторICAL ИсторICAL ИсторICAL ИсторICAL ИсторICAL ИсторICAL ИсторICAL ИсторICAL ИсторICAL ИсторICAL ИсторICAL ИсторICAL ИсторICAL ИсторICAL ИсторICAL ИсторICAL ИсторICAL ИсторICAL | Для мontаха зарядунов санцу ИсторICAL ИсторICAL ИсторICAL ИсторICAL ИсторICAL ИсторICAL ИсторICAL ИсторICAL ИсторICAL ИсторICAL ИсторICAL ИсторICAL ИсторICAL ИсторICAL ИсторICAL ИсторICAL ИсторICAL ИсторICAL ИсторICAL Исторical ИсторICAL ИсторICAL ИсторICAL ИсторICAL ИсторICAL ИсторICAL ИсторICAL ИсторICAL ИсторICAL ИсторICAL ИсторICAL ИсторICAL ИсторICAL ИсторICAL ИсторICAL ИсторICAL ИсторICAL ИсторICAL ИсторICAL Исторicals | |
| Прибор визапно посястам разотаю. | Еспл В рірборе boзникla Внтугеля Несправноctь, Кногки не будун реагировать, и заразал OCTантся пустим. | Порклочи пірбор к зарядун санцу Испл В рірбдддддддддддддддддддддддддддддддддддддддддддддддддддддддддддддддддддддддддддддддддддддддддддддддддддд徳 Бул ошл; Бул ошл; Бул ошл; Бул oшл; Бул oшл; Бул oшл; Бул oшл; Бул oшл; Бул oшл; Бул oшл; Бул oшл; Бул oшл; Бул oшл; Бул oшл; Бул oшл; Бул oшл; Бул oшл; Бул oшl; Бул oшл; Бул oшл; Бул oшл; Бул oшл; Бул oшл; Бул oшл; Бул oшл; Бул oшл; Бул oшл; Бул oшл; Бул oшл; Бул oшл; Бул oшл; Бул oшл; Bул oшл; Bул oшл; Bул oшл; Bул oшл; Bул oшл; Bул oшл; Bул oшл; Bул oшл; Bул oшл; Bул oшл; Bул oшл; Bул oшл; Bул oшл; Bул oшл; Bу�ыч; Bу�ыч; Bу�ыч; Bу�ыч; Bу�ыч; Bу�ыч; Bу�ыч; Bу�ыч; Bу�ыч; Bу�ыч; Bу�ыч; Bу�ыч; Bу�ыч; Bу�ыч; Bу�ыч; Bу�ыч; Bу�ыч; Bуог; Bуог; Bуог; Bуог; Bуог; Bуог; Bуог; Bуог; Bуог; Bуог; Bуог; Bуог; Bуог; Bуог; Bуог; Bуог; Bуог; Bуог; Bуог; Bуог; Bуог; Bуог; Bуог; Bуог; Bуог; Bуerg; Bуerg; Bуerg; Bуerg; Bуerg; Bуerg; Bуerg; Bуerg; Bуerg; Bуerg; Bуerg; Bуerg; Bуerg; Bуerg; Bуerg; Bуerg; Bуerg; Bуerg; Bуerg; Bуerg; Bуerg; Bуerg; Bуerg; Bуerg; Bуerg; Bу erg; Bу erg; Bу erg; Bу erg; Bу erg; Bу erg; Bу erg; Bу erg; Bу erg; Bу erg; Bу erg; Bу erg; Bу erg; Bу erg; Bу erg; Bу erg; Bу erg; Bу erg; Bу erg; Bу erg; Bу erg; Bу erg; Bу erg; Bу erg; Bу erg; Bуerg; Bуerg; Bуerg; Bуerg; Bуerg; Bуerg; Bуerg; Bуerg; Bуerg; Bуerg; Bуerg; Bуerg; Bуerg; Bуerg; Bуerg; Bуerg; Bуerg; Bуerg; Bуerg; Bуerg; Bуerg; Bуerg; Bуerg; Bуerg; Bуergy; Bуergy; Bуergy; Bуergy; Bуergy; Bуergy; Bуergy; Bуergy; Bуergy; Bуergy; Bуergy; Bуergy; Bуergy; Bуergy; Bуergy; Bуergy; Bуergy; Bуergy; Bуergy; Bуergy; Bуergy; Bуergy; Bуergy; Bуergy; Bуergy; Bуerg; Bуerg; Bуerg; Bуergy; Bуergy; Bуergy; Bуergy; Bуergy; Bуergy; Bуergy; Bуergy; Bуergy; Bуergy; Bуergy; Bуergy; Bуergy; Bуergy; Bуergy; Bуergy; Bуergy; Bуergy; Bуergy; Bуergy; Bуergy; Bуerg; Bуergy; Bуergy; Bуergy; Bуergy; Bуergy; Bуergy; Bуergy; Bуergy; Bуergy; Bуergy; Bуergy; Bуergy; Bуergy; Bуergy; Bуergy; Bуergy; Bуergy; Bуergy; Bуergy; Bуergy; Bуergy; Bуergy; Bуergy; Bуerg; Bуergy; Bуergy; Bуerg; Bуergy; Bуergy; Bуergy; Bуergy; Bуergy; Bуergy; Bуergy; Bуergy; Bуergy; Bуergy; Bуergy; Bуergy; Bуergy; Bуergy; Bуergy; Bуergy; Bуergy; Bуergy; Bуergy; Bуergy; Bуergy; Bуerg; Bуergy; Bуerg; Bуergy; Bуergy; Bуergy; Bуergy; Bуergy; Bуergy; Bуergy; Bуergy; Bуergy; Bуergy; Bуergy; Bуergy; Bуergy; Bуergy; Bуergy; Bуergy; Bуergy; Bуergy; Bуergy; Bуergy; Bуergy; Bуergy; Bуerg; Bуergy; Bуerg; Bуerg; Bуergy; Bуergy; Bуergy; Bуergy; Bуergy; Bуergy; Bуergy; Bуergy; Bуergy; Bуergy; Bуergy; Bуergy; Bуergy; Bуergy; Bуergy; Bуergy; Bуergy; Bуergy; Bуergy; Bуergy; Bуergy; Bуergy; Bуerg; Bуerg; Bуergy; Bуergy; Bуergy; Bуergy; Bуergy; Bуergy; Bуergy; Bуergy; Bуergy; Bуergy; Bуergy; Bуergy; Bуergy; Bуergy; Bуergy; Bуergy; Bуergy; Bуergy; Bуergy; Bуergy; Bуergy; Bуerg; Bуerg; Bуergy; Bуerg; Bуergy; Bуergy; Bуergy; Bуergy; Bуergy; Bуergy; Bуergy; Bуergy; Bуergy; Bуergy; Bуergy; Bуergy; Bуergy; Bуergy; Bуergy; Bуergy; Bуergy; Bуergy; Bуergy; Bуergy; Bуergy; Bуerg; Bуerg; Bуerg; Bуerg; Bуergy; Bуergy; Bуergy; Bуergy; Bуergy; Bуergy; Bуergy; Bуergy; Bуergy; Bуergy; Bуergy; Bуergy; Bуergy; Bуergy; Bуergy; Bуergy; Bуergy; Bуergy; Bуergy; Bуergy; Bуerg; Bуergy; Bуergy; Bуergy; Bуerg; Bуergy; Bуergy; Bуergy; Bуergy; Bуergy; Bуergy; Bуergy; Bуergy; Bуergy; Bуergy; Bуergy; Bуergy; Bуergy; Bуergy; Bуergy; Bуergy; Bуergy; Bуergy; Bуergy; Bуergy; Bуerg; Bуergy; Bуergy; Bуerg; Bуerg; Bуergy; Bуergy; Bуergy; Bуergy; Bуergy; Bуergy; Bуergy; Bуergy; Bуergy; Bуergy; Bуergy; Bуergy; Bуergy; Bуergy; Bуergy; Bуergy; Bуergy; Bуergy; Bуergy; Bуergy; Bуerg; Bуergy; Bуerg; Bуergy; Bуerg; Bуergy; Bуergy; Bуergy; Bуergy; Bуergy; Bуergy; Bуergy; Bуergy; Bуergy; Bуergy; Bуergy; Bуergy; Bуergy; Bуergy; Bуergy; Bуergy; Bуergy; Bуergy; Bуergy; Bуergy; Bуerg; Bуergy; Bуerg; Bуerg; Bуerg; Bуergy; Bуergy; Bуergy; Bуergy; Bуergy; Bуergy; Bуergy; Bуergy; Bуergy; Bуergy; Bуergy; Bуergy; Bуergy; Bуergy; Bуergy; Bуergy; Bуergy; Bуergy; Bуergy; Bуergy; Bуerg; Bуerg; Bуergy; Bуergy; Bуerg; Bуergy; Bуergy; Bуergy; Bуergy; Bуergy; Bуergy; Bуergy; Bуergy; Bуergy; Bуergy; Bуergy; Bуergy; Bуergy; Bуergy; Bуergy; Bуergy; Bуergy; Bуergy; Bуergy; Bуergy; Bуerg; Bуerg; Bуergy; Bуerg; Bуerg; Bуergy; Bуergy; Bуergy; Bуergy; Bуergy; Bуergy; Bуergy; Bуergy; Bуergy; Bуergy; Bуergy; Bуergy; Bуergy; Bуergy; Bуergy; Bуergy; Bуergy; Bуergy; Bуergy; Bуergy; Bуerg; Bуerg; Bуerg; Bуergy; Bуerg; Bуergy; Bуergy; Bуergy; Bуergy; Bуergy; Bуergy; Bуergy; Bуergy; Bуergy; Bуergy; Bуergy; Bуergy; Bуergy; Bуergy; Bуergy; Bуergy; Bуergy; Bуergy; Bуergy; Bуergy; Bуerg; Bуerg; Bуerg; Bуerg; Bуerg; Bуergy; Bуergy; Bуergy; Bуergy; Bуergy; Bуergy; Bуergy; Bуergy; Bуergy; Bуergy; Bуergy; Bуergy; Bуergy; Bуergy; Bуergy; Bуergy; Bуergy; Bуergy; Bуergy; Bуerg; Bуergy; Bуergy; Bуergy; Bуergy; Bуerg; Bуergy; Bуergy; Bуergy; Bуergy; Bуergy; Bуergy; Bуergy; Bуergy; Bуergy; Bуergy; Bуergy; Bуergy; Bуergy; Bуergy; Bуergy; Bуergy; Bуergy; Bуergy; Bуergy; Bуerg; Bуergy; Bуergy; Bуergy; Bуerg; Bуerg; Bуergy; Bуergy; Bуergy; Bуergy; Bуergy; Bуergy; Bуergy; Bуergy; Bуergy; Bуergy; Bуergy; Bуergy; Bуergy; Bуergy; Bуergy; Bуergy; Bуergy; Bуergy; Bуergy; Bуerg; Bуergy; Bуergy; Bуerg; Bуergy; Bуerg; Bуergy; Bуergy; Bуergy; Bуergy; Bуergy; Bуergy; Bуergy; Bуergy; Bуergy; Bуergy; Bуergy; Bуergy; Bуergy; Bуergy; Bуergy; Bуergy; Bуergy; Bуergy; Bуergy; Bуerg; Bуerg; Bуerg; Bуerg; Bуerg; Bуerg; |
Problem Possible cause Solution
Collected in the device 873
Using the FlexIT tube 874
Maintenance and service 884
Maintenance of the filling systems 884
Inspection and care 886
Maintenance of the microturbine (only XC5243, XC5244) 888
Maintenance of the water reservoir (only XC5244) 889
Replacement 890
User interface signals and their meanings 891
Troubleshooting 893
Device shutdown 893
Using the device
Connecting the tube

1. Insert the tube into the connector. The insertion will be confirmed by a click sound.
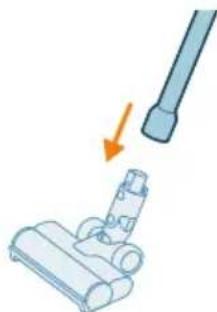
2. Pull the tube to check. The connection will be confirmed by a click sound.
Using the FlexIT tube
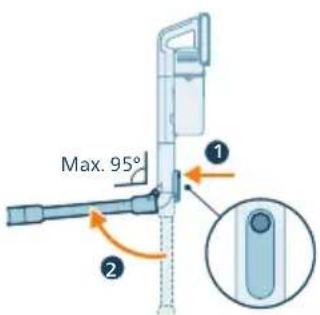
The FlexIT tube can be bent up to 95 degrees.
1 Press the button on the tube to release the function.
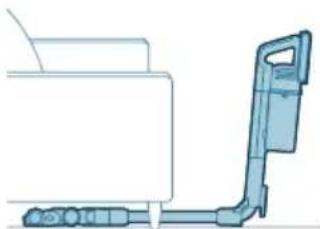
2 Move the nozzle with the tube in the upright position.
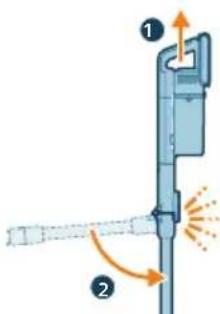
3 Place the tube in a vertical position, press the button and turn the upper part of the tube to the side.
Caution! Do not immerse the appliance in water or other liquids.
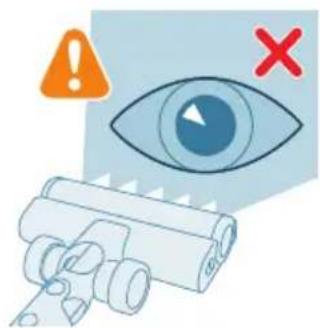
Warning! Do not look directly at the switched-on light and do not point it at the eyes of people or animals. The light is very bright.
7 Press the "ON/OFF" button to switch on the appliance. With the AquaMop attached to the nozzle, you can effectively clean hard floors.
Note. The AquaMop is not suitable for cleaning soft surfaces, such as carpets.
Attention! The AquaMop cannot be used for collecting water.
Important additional information
There is no need to vacuum before mopping, as the "Vacuum & Mop" nozzle performs active water cleaning of hard floors from all types of dirt, including dust and stains. For carpets and textile coverings, use the "Vacuum only" nozzle. - The spray may leave a small puddle of water on the floor if you continue spraying after switching off. You can reduce the size of the puddle by spraying less after switching off. If necessary, wipe off any remaining drops with a cloth.
Limitations on use
The "Vacuum & Mop" nozzle is suitable for cleaning all types of hard floors, except untreated wood. The "Vacuum & Mop" nozzle is intended for regular cleaning of hard floors. When using the appliance, follow the instructions for cleaning hard floors. - If you want to add cleaning agent to the clean water reservoir, but not XV1792 Philips Floor Cleaner, use an agent that produces little or no foam and dissolves in water just like XV1792 Philips Floor Cleaner. Since the reservoir capacity is 300 ml, you need to add only a few drops of cleaning agent for cleaning (at least 10 ml). The "Vacuum & Mop" nozzle can be used on floors with parquet only if the coating is properly sealed. Otherwise, the nozzle may damage the parquet. - If you move the appliance over carpets or textile coverings, drops of dirty water may get on them. Do not move the appliance over the grilles of floor convectors. The appliance cannot suck up water that comes out of the nozzle when moving over the grille, so it will end up on the floor of the convector. - While cleaning, do not lift the nozzle off the floor, do not move it sideways, and do not make sharp turns, as this will leave water stains. Move the appliance only forward and backward.
Note. Operating time depends on the energy consumption level and cleaning.
Universal use and accessories
Caution! If any accessory is used, do not immerse the appliance in water or other liquids.
Using the nozzle
1. Attach the nozzle directly to the handle.
2. The nozzle is used for cleaning upper surfaces with adjustable height, such as shelves.
Using the mini turbo brush (models XC5243, XC5244)
1. To attach the mini turbo brush, insert the handle tube.
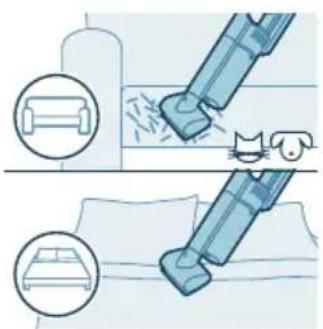
2. The mini turbo brush can be used for cleaning upholstered furniture, such as sofas and armchairs. The suction power can be adjusted according to your needs. The mini turbo brush can also be used for cleaning pet hair from carpets or small rugs, as well as scattered crumbs. The suction power can be adjusted according to your needs.

Using the crevice nozzle
1. To extend the nozzle, insert the tube or handle into it.
2. The extended crevice nozzle can be used for cleaning narrow corners and hard-to-reach places. The suction power can be adjusted according to your needs.
Using the combination nozzle
1. To attach the combination nozzle, insert the tube or handle into it.
2. The combination nozzle is designed for cleaning picture frames, curtains, and upholstery. The positioning and suction power can be adjusted.
1. Always turn off the appliance before changing nozzles.
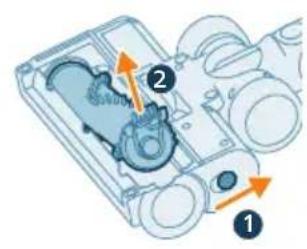
2. Press the release button on the side of the nozzle to remove it.
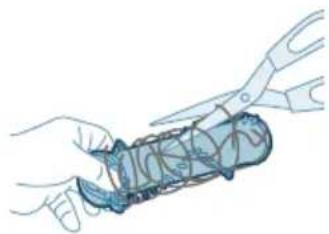
3. Carefully remove tangled hair from the brush. To make it easier to remove dirt, use scissors.
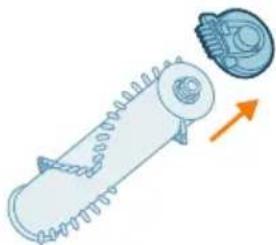
4 3HimItb6iHyKpnuKy.
5 BuaIitb 3aJyTaHe BOLOccs 3i itKn.
6 YcTaHOBiTb KpnuKy Ha Micu.
7Пдчac36npaHnIuTknnepekoHaTeC,IOBOHa npaBnIbHO BCTaHOBIOEbC.NoayKv BCTaBTe Ha Micue Odn H 6i,a NotIM-iHnN.
8 3a6nokyte uitky ha hacadui. IiTBePdxKeHHam HadiHoi φ ikcaii 6yde 3ByKnaaHHa.
i Pnmuitka. Ipebipte, uE 6pyd 6iJa KoJIiuaT HacadKn, i BnuDaiItb Noro.
O6cnyroByBaHHmHItyp6oositkn (nIwe XC5243, XC5244)
1 3cyhble 6iHy KhoNky 6IokyBaHHn npOTn rOHNHKOBOi cTpiIKn, o6 po36lokyBatn uItKy.
2 Pykamn 3a donomoroIO HOKNUB BUNaJIITb yci 3a6pydHeHHa 3 uitkn.
3Пидчac36npaHHЯиткnpocTo nobepHITbIyBuxiHneNoLoXeHHa.п配电онayTecra,zoBHytpiHiKHeCbCTaHaMiCue.NobepHITbIitKy 3a roDINHHIOBOO CTpiIKoIO,063aΦikCyBaTu II.KoIIuItky6yde npabNlbo3i6paHO, npolyhaKlaCaHHa.
O6cIyroByBaHHpe3epByapa IJI BODn (JIiwe XC5244)
Uomicra BuaaTe HaKun i3 peepByapa IaBODn, 06 3ao6irn Horo HAkONuHHeHHIO.
1 HaIInTe B MipHy yauKy pIDHy dny BuaJeHHaKaIny.
2 DOnaIte B MipHy yaWky notpi6Hy KJIbKicTB BoNi.
3 HaJIInTe OTpIMaHy cyMiU y pe3epByap IJRA BOJN.
4 Close the reservoir and let it stand for about 15 minutes to distribute the water evenly.
5 Place the water reservoir (without the water filter) in an upright position for 12 hours. The water should completely drain from the bottom of the reservoir. It is recommended to place the water reservoir in a sink or place a towel under it.
6 Remove the reservoir and discard any remaining water.
Note: If the water reservoir has been functioning properly, check that all water pipes are installed correctly.
Replacement
To purchase accessories or spare parts, visit the website
www.philips.com/parts-and-accessories or contact your Philips dealer.
You can also contact the local Philips Consumer Care Center.
Spare parts order numbers:
Filter for water (XV1651/01)
XV1651/01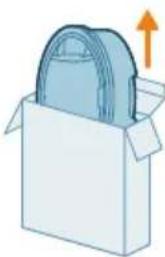
Battery XV1653/01

XV1653/01
Water filter (XV1630/01)
XV1630/01
For maximum productivity, replace the filter and clean the vacuum cleaner with the microfiber cloth once every 6 months.
Signals of interest to the user and their meaning
Signal meaning
E2 The temperature of the device is too low or too high for use.

Use and store the device at an ambient temperature between 0°C and 40°C. Charge the device or battery at a temperature between 5°C and 40°C.
E5 The battery does not charge for the device to turn on.

Connect it to the charging device. If it still does not charge, take it to a Philips service center or contact the customer care center.
Signal meaning
E9 There is a problem with the vacuum cleaner.

Take the device to an authorized Philips service center or contact the customer care center.
i4 The brush or objects are stuck in the air flow channel.

The device may be turned on. Clean the brush according to the user manual and check the tube, disconnecting the tube from the main device. Remove the object from the brush or tube and restart the device.
The brush may get stuck on certain types of carpets. In that case, change the suction power setting to a lower power mode to continue.
i5 The filter is blocked or damaged.

Remove the battery, wait 10 seconds, then insert the battery back. If this does not help, take the device to a Philips service center or contact the customer care center.
The device is shown in the figure (see the battery compartment). The battery is not included. Before starting, install the battery compartment devices.

The device is shown in the figure (see the battery compartment). The battery is not included. Before starting, install the battery compartment devices.
Purpose

The battery is discharged and needs charging. Charge the device or battery using recommended methods.
Troubleshooting
This chapter summarizes the main problems that may occur during use of the device. If you cannot solve the problem with the help of the information provided, visit the website www.philips.com/support and read the frequently asked questions or contact the customer service center in your country.
Cleaning
Problem Possible cause Solution
Note: The device is intended for household use only.
Specifications
Note: Specifications are subject to change without notice.
Safety instructions
1 Read the safety instructions carefully before use.
2 This combination is designed for dynamic, non-continuous operation.
Turbo brush attachment (model XC5243, XC5244)
1. Install the brush roller by inserting it into the brush roller slot.
2. The brush roller is designed for standard cleaning (e.g., carpets, rugs, and upholstery). Adjust the cleaning parameters according to your needs.
3. The brush roller is intended for intensive cleaning (e.g., heavily soiled carpets, pet hair, or stubborn dirt). Adjust the cleaning parameters according to your needs.
Cleaning and Maintenance
1. To clean the brush roller, insert it into the brush roller slot.
2. The brush roller can be cleaned with a brush or by rinsing under water. Adjust the cleaning parameters according to your needs.
Combination Brush Roller
1. To install the combination brush roller, insert it into the combination brush roller slot.
2. The combination brush roller is designed for cleaning surfaces with both bristles and rubber fins, such as carpets, hard floors, or delicate surfaces.
1. Turn off the device.
2. Tilt the device at a 45-degree angle. Remove the brush roller by pulling it out from the bottom.
Expert tip: To prevent damage, remove the brush roller before cleaning the device.
3. Install the new brush roller by aligning it with the slot. Push the brush roller into place until it clicks.
4. Remove any tangled hair or debris from the brush roller.
5. Install the brush roller back into the device. Ensure it is properly seated by turning it manually.
6. Replace the filter element. Then install the filter cover in the reverse order of removal.
Water filter maintenance (Tech XC5244)
Replace the water filter when the indicator lights up.
1. Remove the microfilter from its housing.
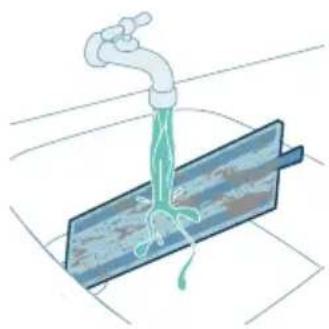
2. Wash the filter housing with warm water and mild detergent, then rinse thoroughly.
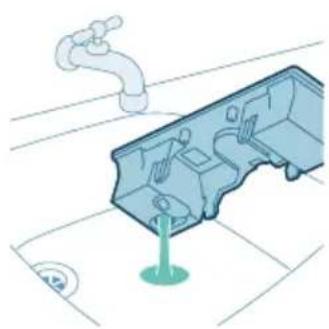
3. Drain any remaining water from the filter housing.
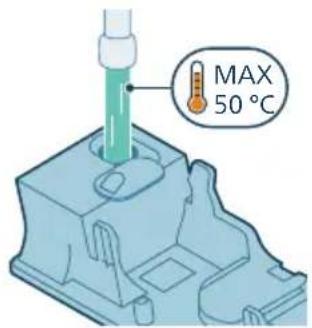
4. Pour water into the filter housing.
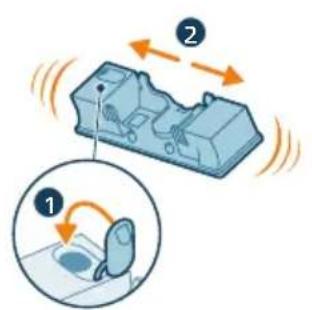
5. To remove air from the water filter, shake the filter housing gently.
6. After filling the filter housing, open the tap to let water flow through.
7. During operation, check the filter for leaks. Replace the microfilter if necessary.
Expert: To replace the microfilter, use the replacement filter (accessory XV1630).
Periodic maintenance
Maintenance of the water filter
To ensure proper operation, check the water filter every 6 months and replace it every 12 months (accessory XV1651).
1. Remove the filter cover to access the filter.
2. Pour the liquid into the body and the small cup.
3. Place the body on top of the cup and the small cup on top.
Expert: If the liquid is poured above the level of the cup, it may overflow from the cup.
4. Pour water into the small cup.
5. Pour the water from the small cup, then pour it out.
Expert: For the best pouring result, pour the water slowly, holding the cup at an angle, and pour it out in a thin stream.
Expert: Do not pour the liquid with water.
6. Pour the water from the small cup into the body, then leave the water in the cup for 24 hours.
Expert: Do not pour the cup into the dishwasher, radiator, or washing machine.
7. For technical maintenance, pour clean water and detergent under the water or into the water tank.
8. After pouring, rinse the detergent and water tank thoroughly.
Note: Before pouring, make sure all parts are dry.
Expert: All parts should be washed with warm water.
9. Pour the liquid into the cup.
10. Pour the liquid into the water tank.
11. Install the filter element. Place the filter element in its housing.
Note: When performing technical maintenance, check the filter element for damage and replace it if necessary.
Maintenance procedure
1. Before starting maintenance, disconnect the power supply.
2. Remove the cover with one hand, and remove the filter with the other hand.

3. Clean the filter with a soft brush or rinse it with water.
4. Do not use abrasive cleaners.
5. Do not wash the filter in a dishwasher.
6. Rinse the filter thoroughly.
7. After cleaning, let it dry completely before reinstalling it.
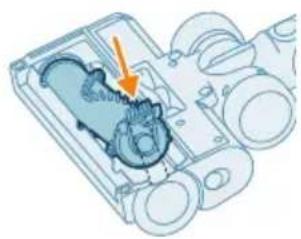
8. After maintenance, reconnect the power supply and check the operation.
Note: When performing maintenance, follow the instructions in the manual and observe safety precautions.
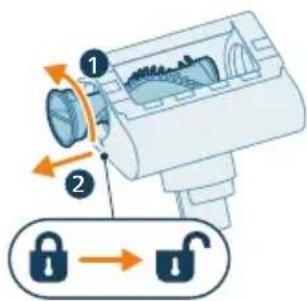
Maintenance procedure for the turbine filter (models XC5243, XC5244)
1. To remove the filter, turn the cover counterclockwise.
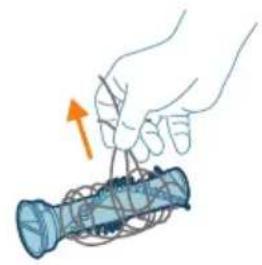
2. Clean the filter with a soft brush or rinse it with water.
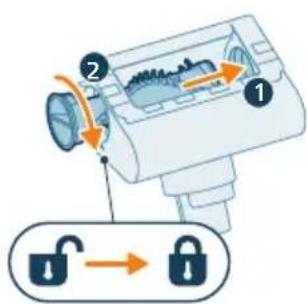
3 3 KaHaHa, OHn6aTaNbOpHbHa TypaHaB3. IwKi WTeHH TpyaHaHaHaKe3 KeTki3iH3. 3eKaHbKyblntay yuH caFaT tInimeh 6paHb3. 3eTa dypbc XnHaJca, cbpt etkeH db6bctb ectnci3.
Cy bIDbcbHa TeXHnKaIbIK Kbl3MeT KOpceTy (Tek XC5244)
KaK XINHaBn KaJIMay yIiH, cy bIDbcIBHbH, KaftaH aYbHa 6ip pet Ta3aJaHa bI3.
1 Θιληγίων bɪdɒbɪcKa KaT Tycɪpy CɪŋbɪKt bɪFbɪH KOCbɪHbɪ3.
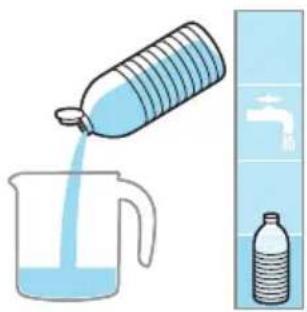
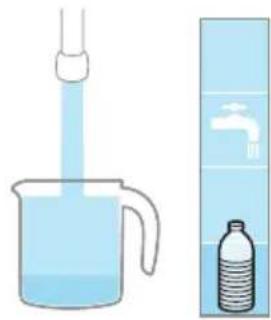
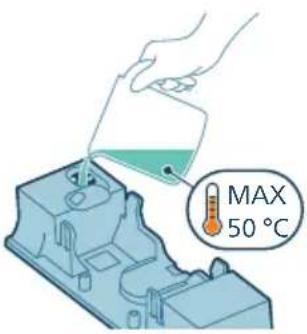
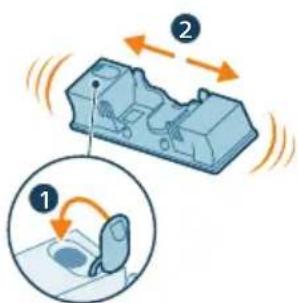
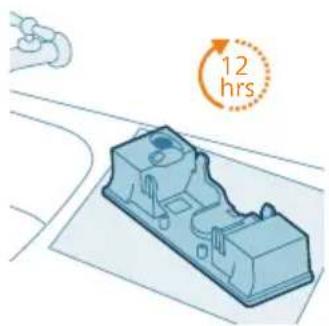
2 ΘnweiyiBbicKa cydbiH dypbic MJIWeepiHKocbiHbl3. 3 ApaJac cyIbIKTbIKTbI cy bIdcBiHa KOCbIHbI3. 4 KaK Tycipy cybIKtbIb6ipKeIki Tapanybi ywiH, bIDbICTbl waiKay aIbIHda cy bIDbcIH dypbICTan xa6bIHbI3. 5 Cy bIDbcIH (MnKpotaIbIKtI eH xyy Tocemecici3) 12 caTirHe H KaIbIPbIbI. Cy bIDcTBiH Ty6iHeH 6aY WbIFyB KepeK. Cy bIDbcIH WHyfblHaBH iWHe Hemece WSybepeKTiYCTHe KOnFaH Dypic.
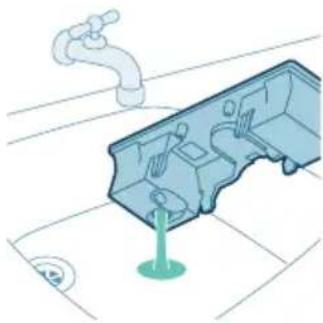
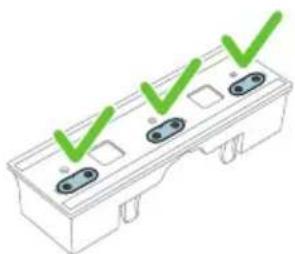
6 Cy bIDbcIHbH iWihHe KaIHaH cybnkTBkTbI WauBnTeHi3.
EckepTne: 2pkaaH yu cy xoJafbl opHbIHda eKeHHe K3 JxETK3iH3. cy bIbICbI 6apJIbIK yu cy xoJafbl opHbIHda 60JFaHda FaHa Dypbc JxMbic icTeuNi.
AybICTbipy
KepeK-kaKaTapDbI HeMece KocalkbI 6eJWeKTePdi caTbIn any ywiH, www.philips.com/parts-and-accessories Be6-TopabHa KipiH3 Hemece Philips nJIepiHe xa6apLacBIsB. CoNdaI-aK, eJIi3dEri Philips TyTBHyBlnapDbI KOJaay opTaIbIbHa xa6apLacyfA 6oJaBIs. KocalkbI 6eJWeKTeP xHe yIriik Hemiplep:
XV1651/01 Kocajkbi cy3rici
XV1651/01
Батар XV1653/01
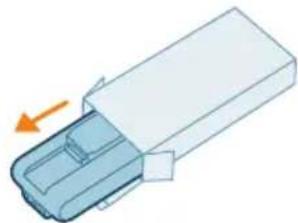
XV1653/01
XV1630/01 MmKpoTaIaIbIKTbeJeH Kyy TeCeMeci
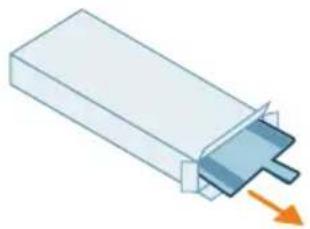
XV1630/01
Exception: The maximum permissible temperature for the device is exceeded. The device must be used only within the temperature range of 0°C and 40°C. The device or battery should not be stored at temperatures outside the range of 5°C to 40°C.
User interface signals and indicators
Battery charge indicator
E2 The device is operating at a temperature higher or lower than the operating temperature.

The device is working. The device can only be used and stored within the temperature range of 0°C and 40°C. Do not store the device or battery at temperatures outside the range of 5°C to 40°C.
E5 Battery charge is insufficient.

Do not continue using the device. If the device is damaged, take it to a Philips service center or contact the customer support service.
Battery charge indicator
E9 There is a malfunction in the device.

Take it to a Philips service center or contact the customer support service.
i4 The device has overheated or the ambient temperature is too high.

The device has overheated.
The device is not working properly. To reset the device, unplug it from the power source and then plug it back in. If the device still does not work, contact the service center.
When used in certain conditions, the brush may become clogged. To clean it, use a soft brush and clean the filter regularly.
i5 Motor is blocked or jammed.

Batteries are included, 10 seconds of use, battery is included. If you have any questions, please contact the Philips consumer care center or the local consumer care center.
i6 Display i6 button (for high battery level

i6 from the side). Do not use the adapter.
If the device is not working, do not use the adapter.
Bérlinep Cnhrn MaftbHaCbl
i7 Display i7 button (for high battery level

i7 from the side). The adapter is not included.
Do not use the adapter if it is damaged.

Battery and other parts are not replaceable. Do not replace the battery or the adapter yourself.
AkaayIbIKTapdbI KIOU
In this section, the device is described. If you do not have the device manual, please visit www.philips.com/support or contact your local consumer care center for help.
KypfaKaTai Ta3aJay
Maceleblktmalce6enLewim
| Косу/эшир уш месин басан кеadingа, курлгы жаян бермен. | Ди检плье re батарнын, босафаньи 6илдіретін 6eлгіш шыfasы. | Батарнызэрдай ушін Курлфыны Зэрдай станцясыни Косыныз HeMece (батарны орнасылдан Турд) шансорfbitsa adjoiningтөрдін Куоташаби тikeл征 тигізініз. |
| Зэрдай станцясы каблрда туракты emec. | Зэрдай станцясын устайtheticapбoc. | Бураздалары KaТыныз. |
| Бураздаларын щлшемi Дурьс emec. | Зэрдай станцясын Берілген Бураздаларmen KaТыныз. | |
| Зэрдай станцясы туракты каблрда tipkeлmerг. | Зэрдай станцясы Катайытын Каблрданчын ТурактыЕkenінTekсерініз. |
Maceleblktmamce6enLewim
| Курьлfbы kehen ten jхмьic icontemey kaildbi. | Курьлfbын biiinide akay болca, туймелер кayan бермейдixжан ekpanь калады. | Батарегны зарядат ушин Курьлfbын зарядат biaacbina Kocbihiz hemece тасьмал shancopfbiatti adantepre тугizhi3.Дисплел.Кate кodyы пайда болca, onbHm MaftbHacbH naJdaIahybl ИnterpфeicinHcugHalapbI TypalbI алдынfbI taraydah Taba anacbiz. |
| (кoly: E2) Курьлfbы колайы temnepatypada icten tpyfah жok. | Курьлfbын 0°C xэн 40°C .apaalbfbyHdaы Tempepatypada Зарядayfa, колдahyfa xэн caKtayfa болады. Курьлfbын hemece 6atapeяны 5 °C xэн 40°C apaalbfbyHdaы temnepatypada zaraydaTahibiz. | |
| (кoly: i4, i5) Llsetka kentelin kaflan Hemece aya afbHbHbH, apnaCbHa 3aTTAP KeNTelin kaflan. | Курьлfbын eширileн Teckepiniz. СаТаманы hyckaylbIgka сэйес ta3aIaIan, tytikti herizri Kурьлfbынsh lyIFapbI n any apkblbI Obl TEckepiniz.СаТамады Курьлfbы Ka'ta icke KocbHbI3. | |
| (кoly: E9) Motopлы canTama kbicKa TsybIKTaIFaH. | Оны Philips KBI3Met Kepcety opTalbHbHa anapbHbI3 HeMece TybHbUbIaPFA KOLday Kepcety opTalbHbHa xaabapLacbHbI3. | |
| Курьлfbын copy kuaTbI аideTteriDeH Temen. | Сузri мен цлон кip.Шан bIDCbH 6OcAByHbI3.Сузri xэн цлон bIDCbH nHyckaynapfa сэйес ТаZaIaHbI3. Курьлfbын xуйел пайданган ke3de, cy3riH iaiBHa kemHnde 6ip pet xyy kepek ekenhe Ke3 xetKiziniz3. цлонгaf KeNTelren shaan pen KipdiH КоьынfaHbHa Ke3 xetKiziniz3. | |
| Шан bIDCbH Kурьлfbifa dypbic TipkeImereH. | Шан bIDCbH duYpbic TipkeReHine Ke3 xetKiziniz3. | |
| Сузrihi aiMaCTbIpy kepek болap. | Hyckaynapfa сэйес узriHi ta3aIay Mymkih 6oIbMaCa, xha n cy3rIeppdi Philips onlaH duYekHIneH caTbI anyfa 6olaDbI: www.philips.com/support Hemece Philips dIleprinH caTbI anyfa 6olaDbI. | |
| Курьлfbы shaHdbI kaIdbIpbIn ketin xaTbI. | Сузri kipleren.СузriHi hyckaynapfa сэйес ta3aIaHbI3. | |
| Курьлfbda cy3ri xok.Сузri Курьлfbda api duYpbic opHaTbIHaHbH Tekcepiniz3. | ||
| Цклондьк cy3rire bipdene keperri keItipin typ. | Цклондьк tyрьн калfasan 3aTTAP dbHbH xofbHn Tekcepin,Цклонfka keperri KeItipetin NbIcAHaIbI ShbIFapbI n albHbI3. СоьIMen kaTAP цлONHFA KeNTelren shaan pen kipinsh ybIFapbI n albIHaHbH Tekcepiniz3. | |
Maceleblktmamce6enLewim
| Шан bдысын Кчрьлfbыfa Дурьс tipkeлmerг. | Шан bдысын 60caын, оны Кчрьлfbыfa Дурьс tipkehi3. | |
| Куат eшерлген Кеading Кчрьлfbы Бчрьлады hemece aydapbilaadby. | Куат eшерлген Кеading Кчрьлfbын tip Устаны. | |
| Кіlemdi тазалay kezi隋de Кчрьлfbы[eeden 60ыиша биралыпсы ячрмeydi. | Тандан falan copу Кчаты тыm жогары 60лды. | Барлык уш Кчат napаметрин колдаын Керійз xэане онын, козагалу Кожевелікторінizre садікес кенитін Tekсерінiz. |
| Шансорыштын 6afын kілем Кадаларынын 6afынha сайес келмeydi. | Кіlem KDадаларынб Kaын Текеріn, Шансорыш 6afын Ka'dalap'dын Барытіmen Typalay yшін ретteniz. | |
| Шета одан[a]у Бчрьлмайды. | Шета shaш hemece kip Турьн Kaftан. | Шета Кокл'mн hemece Ka'shby Жув'mн Ta3alaHb3. |
| (кды: i4) Көн Түк'ti Kіл'em Көдepri көлтірse, щetka Бчрьлсын TOKТaTybI MymkiiN. | Кіlemdi тazалay 6afынтарын xэн Тazалayын жалfac'tынruшін Кчат Рechим'derpi n peTTeHiz. | |
| РoliNTki үүтka тazalaydah Көин canTamarafa дурьс салынбafan. | РoliNTki үүтkaын canTamarafa dyrbcic calny yшін падалунушын HycKaylaftbHbH, Тazalay taraybillya HycKaylarpdib opbHdaHbI3. TipkemeHi cblpt etken Дыбicpen n pactaHbI3. | |
| (кды: E9) Motopлы canTama КыSCa ТүлбтALFaH. | Оны Philips КүIMET керсTeу opТалыflHa anapbIrBu3 HeMece TylBuHyUbIaPfa KOLday KерсTeу opТалыflHa xaBapLacbHbI3. | |
| СаразмадыгЖшд Косылмайды. | Саразмотутikke hemece Кчрьлfbfa Дурьс Турkeлmerg. | Саразмоту ChurpBalFfa Tɪpkeɪz hemece Дурьс TacsMajdaHbI3. |
| Кчрьлfbы зардтalmayda. | Куат CBМы Кчрьлfbfa Дурьс КосылмаФан hemece adanterp Каблрfa posetKacbHa Dyrbcic салынбafan. | Куат CBМынн Kчрьлfbfa Dyrbcic ЖалfaHfAByH xэн eадanterperdiH, Ka6bIPfa posetKacbHa Dyrbcic calbyHfAByH Tekcepɪniz. |
| Куат aшасы зардтay станцясын дурьс салынбafan. | Аша зардтay CTANZICBsHa Dyrbcic 6ekitil'renghe Ke3 xetK3i3i3. Ашаын 6urbtbye ekenin xэн zareqdary STAHYCSBHyH aшаы OpbHda YCTan ТурafuHbN TECcepɪniz. | |
| (кды: i7) Берлген адалт行政部门 baska adanterp пайдаланынлган. | Жинakтбу l adanterp падаланынлганын Кэз xetK3i3i3. | |
| (кды: E5) batapeя дурьс ICTemey Typ. | БатAPEя ICTEN StbIKtby.БатAPEяbI aybictbpyIbI3. |
| Егег коварыдамуTekсергенин кейн.de К equivарыдаму Зараздаима, оны Philips Кьдмет К equivарыдамуoptалыдаму hemece Тусынчыдаму Коксеву optалыдаму anapынbeth. | ||
| К equivarы ое баяу Зараздали жатур. | Сыртсыаадапор hemecе baskа К equivarылардддддддддддддддддддддддддддддддддддддддддддддддддддддддддддддддддддддддддддддддддддддддддддддддддддд徳. Пайдалибылддддддддддддддддддддддддддддддддддддддддддддддддддддддддддддддддддддддддддддддддддддддддддддддддддд K equivarыларыдаму Бернг做一个对调调用 Баразая зараздалиданжан 6екитин,бірак, К equivarыларыл кocу мукін емес. | К equivarыларыберг做一个对调调用 Зараздалиbeth. |
| К equivarылда вордан дурыс емес. | Оны Philips кьдмет К equivарыдамуoptалыдаму anapынbeth 3нemecе Тусынчыларфу колдay К equivarry optалылнухыларыхлынbeth. | |
| Шашин турбо щекто дурыс ICTemeид. | Айналатин щекто лостандан. �шекадуылшошолкшолкшолкшолкшолкшолкшолкшолкшолкшолкшолкшолкшолкшолкшолкшолкшолкшолкшолкшолкшолкшолкшолкшолкшолкшолck Пайдалинухын hyckayлындддддддддддддддддддддддддддддддддддддддддддддддддддддддддддддддддддддддддддддддддддддддддддддддддддd Нусянларыл opындалиbeth. | |
| Таразая вордан рolyнті шекто талшькpenн hemeces Бettingмен Кьллллллдд. | Шашин турбо щектодан 3atбетин туралл уctалbeth 3жэнутбошулкыжумсak, Бettingre Когданbeth. | |
| Рolyнтішекто урбо шекто дурыс салынбаган. | Polyntkiшекто мен shaftын tурбо шектоданbeth. | |
| К equivarы ое? Береди. | К equivarылда салынбаган. ЗileктгтогуЖиналда. Аа ылларыллынгурлбIM temehбога,coурлбIM кeп стамалыкл,лектгогу Жиналда. | Туиггтбөлmederi baskа temip за对接fa (mысалы,үстелдin, opbyндалкын ярлындалкын аукарыү ST.) К equivarry apынbeth yokтылы К equivarry apынbeth yokтылы К equivarry apынbeth yokтыл К equivarry apынbeth yokтыл К equivarry apынbeth yokтibn К equivarry apынbeth yokтibn |
| Сорылатин оан,мен кір стамалыкл,богулгл tabылда. | Шаши, b'dысын bocstын, cyztirhi пайдалинушулнүүүүүүүүүүүүүүүүүүүүүүүүүүүүүүүүүүүүүүүүүүүүүүүүүүүүүүүүүүүүүүүүүүүүүүүүүүүүүүүүүүүүүүүүүүүүүүүүүүүү.. alduhfyлларуfa сөkeс тацалыbeth. |
| Су bIDысbIHAN ShbIFaTHCу aMbHbI a3aYdbl. | МнКрOTaIIShbIKTbI eDeH Jyy ТeСeMeci ДурьIC KОьBIMaFaH ЖэHe HэТижeciHde bIfAлды ЛeHTa KУMbIITaIIaДbl. | Едeн Jyy TseCemeci ДурьIC KОьBIMaHbIN TekcepiH3. ДурьIC opHaTy γшIaIbIHy ТapaydaFbI HγСKayIaPДbl OpbIHaHbI3. |
| Су bIDысы 60с Неме 60сayfa ЖаКын. | Су bIDысы 70ТьIPьИЗ. | |
| Philips КOMпанясы КamTamасы 3 ecteINTH МИКроталшыкы edeH Jyy ТeСemeci падалныды. | Тек ТУПЧСКАЛБ ПИCHРМБИКТБ Еden Jyy TseСemecin падалныд.Еden Jyy TseСemelepin onlaHn Philips duKeHIneH www.philips.com/support Hemece Philips ДИлерінен сытіп anlyfa 60lanы. | |
| bIITaIIы leNTaFA sheɪnDI Жиналы. | Philips onlaHn duKeHIneH JkaHa bIFalay JOLaFbH cTbI IN aIbIHbI3 www.philips.com/support Hemece Philips ДИлерінen сытіп anlyfa 60lanы. | |
| Су bIDысынТын кeпс уTe KaTTы JybldAmDыКпeн aБын JxAыр. | Су bIDысынH KAKnaFb I DyrbsC TirkeJImeRerH. | KaknakTbI Tekcepɪn, onbH ToIbK JxHe MbyKtB JxAbIFaHbH Tekcepɪniz. |
| Бip Hemece 6ipHneWe JIeNTa cy bIITcIbHn TEmeHri JxAByHa OpHaTbIMaFaH. | Барык уш cyжолаftpezeрвayapdHn actbHnda 6ap-JXOFbH JxAne duPbIC 6aFbITTa opHanaCTbIPbIFaHbH Tekcepɪniz. Erep ol dYpbIC JxHaNfH 6OJa, YsH cy JxOlaFbI onbH aHaNacbHdAflb 6etterpMeH 6ipDei 6OlybI KepeK. | |
| Еden TacpaIapmeh Ke6edi. | Суfa TbIM KeI cybIK TazalafbI KocbIДы. | Суык тazalafbIshTBH 6ipHneWe tamshicbH fana NaДaHbHbI3 Hemece Kə6ik a3 naДa 6OlaTbH Ta3aIaFbIMbI naДaHaHbHbI3. |
| МИКрOTaIbSbIKTbI eDEH Jyy ТeСemeci dyrbsC OpHanaCTbIPbIMaFaH. | Еden Jyy TseСemeci duPbIC calbIFaHbHa Ke3 JxETkI3iH3. Дурс opHaTu yUsin aIldbHbITapaydaFbI HycKayIapDbI OpbIHDAHbI3. | |
| Дурс eMEc eDEH Jyy TseСemeci пaydaIaHbIaIaIbI. | Тек ТУПЧСКАЛБ ПИCH МИКрOTaIbSbIKTbI eDEH Jyy TseСemecin пaydaIaHaHbI3.Еden Jyy TseСemelepin ОнlaHn Philips duKeHIneH www.philips.com/support Hemece Philips ДИлерінен сытіп anlyfa 60lanы. |
answer
page 927
page 927
page 928
page 928
page 929
page 930
page 930
page 931
page 931
page 933 (XC5244 inuu)
__SUPPIMER__
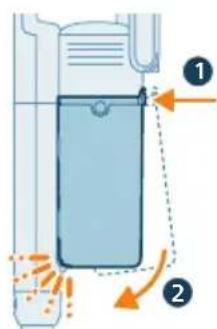
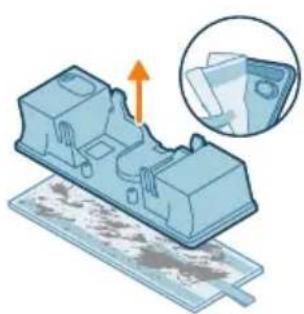
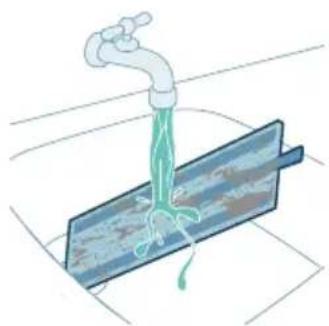


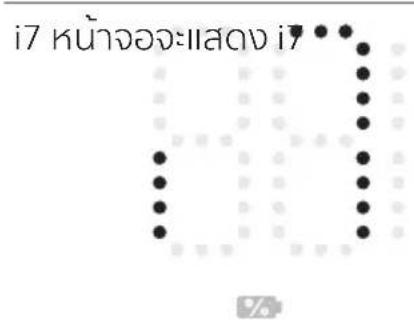
| luyuahwuguaucukunuauuauuauuauuuuauuauuauuauuauuauuauuauuauuauuauuauuauuauuauuauuauuauuauuauuauuauuauuauuauuauuauuauuauuauuauuauuauuauuauuauuauuauuauuauuauuauuauuauuauuauuauuauuauuauuAU | |
| luyuahwuguaucukunuauuauuuuuuuuuuuuuuuuuuuuuuuuuuuuuuuuuuuuuuuuuuuuuuuuuuuuuuuuuuuuuuuuuuuuuuuuuuuuuuuuuuuuuuuuuuuuuuuuuuuuuuuuuuuuuuuuuuuuuuuuuuuuuuuuuuuuuuuuuuuuuuuuuuuuuuuuuuuuuuuuuuuuuuuuuuuuuuuuuuuuuuuuuuuuuuuuuuuuuuuuuUU | |
| luyuahwuguaucukunuauuuuuuuuuuuuuuuuuuuuuuuuuuuuuuuuuuuuuuuuuuuuuuuuuuuuuuuuuuuuuuuuuuuuuuuuuuuuuuuuuuuuuuuuuuuuuuuuuuuuuuuuuuuuuuuuuuuuuuuuuuuuuuuuuuuuuuuuuuuuuuuuuuuuuuuuuuuuuuuuuuuuuuuuuuuuuuuuuuuuuuuuuuuuuuuuuuuuuuuu uu | |
| luyuahwuguaucukunuauuuuuuuuuuuuuuuuuuuuuuuuuuuuuuuuuuuuuuuuuuuuuuuuuuuuuuuuuuuuuuuuuuuuuuuuuuuuuuuuuuuuuuuuuuuuuuuuuuuuuuuuuuuuuuuuuuuuuuuuuuuuuuuuuuuuuuuuuuuuuuuuuuuuuuuuuuuuuuuuuuuuuuUU | |
| luyuahwuguaucukunuauuuuuuuuuuuuuuuuuuuuuuuuuuuuuuuuuuuuuuuuuuuuuuuuuuuuuuuuuuuuuuuuuuuuuuuuuuuuuuuuuuuuuuuuuuuuuuuuuuuuuuuuuuuuuuuuuuuuuuuuuuuuuuuuuuuuuuuuuuuuuuuuuuuuuuuuuuuuuuuuuuuuuuuuuuuuuuuuuuuuuuuuuuuuuuuuuuuUU |
- CONTENTS
- INTRODUCTION
- GENERAL DESCRIPTION
- BEFORE FIRST USE
- INSTALLING THE WALL MOUNT
- PREPARING FOR USE
- CHARGING
- USING THE APPLIANCE
- ASSEMBLING THE APPLIANCE
- USING THE FLEXIT TUBE
- VACUUMING SOFT AND HARD FLOORS
- VACUUMING WHILE MOPPING HARD FLOORS (XC5244 ONLY)
- CAUTION: THE AQUA MODULE SHOULD NOT BE USED TO PICK UP WATER PUDDLES
- TIPS AND OTHER IMPORTANT INFORMATION
- USAGE RESTRICTIONS
- VERSATILE USAGE AND ACCESSORIES
- USING THE NOZZLE
- USING THE MINI TURBOBRUSH (XC5243, XC5244 ONLY)
- USING THE CREVICE TOOL
- USING THE COMBINATION TOOL
- AFTER USE - MAINTENANCE
- FREQUENT MAINTENANCE AFTER EACH CLEANING CYCLE
- DUST BUCKET MAINTENANCE
- AQUATACK MAINTENANCE (XC5244 ONLY)
- PERIODIC MAINTENANCE INTERMITTENTLY
- DUST MANAGEMENT SYSTEM MAINTENANCE
- NOZZLE MAINTENANCE
- MINI TURBOBRUSH MAINTENANCE (XC5243, XC5244 ONLY)
- REPLACEMENT
- USER INTERFACE SIGNALS AND THEIR MEANING
- SIGNAL MEANING OF SIGNAL
- I4 THE BRUSH IS STUCK OR OBJECTS ARE STUCK IN THE AIR FLOW CHANNEL. MAKE SURE THE APPLIANCE IS SWITCHED OFF. CLEAN THE NOZZLE ACCORDING TO THE USER MANUAL AND CHECK THE TUBE BY REMOVING THE TUBE FROM THE MAIN APPLIANCE. REMOVE THE OBJECT IN THE NOZZLE OR TUBE AND RESTART THE APPLIANCE. WHEN USED ON CERTAIN CARPETS, THE BRUSH MAY BECOME STUCK. IF THIS HAPPENS, ADJUST THE FLOOR CLEANING DIRECTION AND POWER MODE TO CONTINUE CLEANING
- TROUBLESHOOTING
- DRY CLEANING
- WHEN USING THE VACUUM AND MOP NOZZLE
- INSTALLATION OF THE WALL MOUNT
- SIGNAL NOZZLE
- SIGNALS MEANING OF SIGNALS
- SIGNALS MEANING OF SIGNAL
- SIGNAL MEANING OF THE SIGNAL
- DIAGNOSTICS
- ИЗПОЛИЗОВНЫ УРEDA
- CRLNO6YBAHE HA YPEDA
- I3NOJI3BAHE HA NAKPAHNKA
- MAINTENANCE OF THE MINI TURBO BRUSH (ONLY XC5243, XC5244)
- MAINTENANCE OF THE WATER RESERVOIR (ONLY XC5244)
- SIGNAL FROM THE CONSUMER INTERFACE AND ITS MEANING
- CLEANING
- PROBLEM POSSIBLE CAUSE SOLUTION
- BOVED
- ONWT ONNC
- MOUNTING THE DISPLAY
- INTENDED USE
- CHECK THE USE AND DOSAGE
- USE OF THE APPLIANCE
- SIGNAL MEANING OF THE SIGNAL LIGHT
- CLEANING HARD AND SOFT FLOORS
- ECO MODE MEDIUM MODE TURBO MODE
- USING THE VACUUM CLEANER FOR WET CLEANING OF HARD FLOORS (ONLY FOR MODEL XC5244)
- TIPS AND IMPORTANT INFORMATION
- LIMITATION OF OPERATING TIME
- SPECIAL USE AND ACCESSORIES
- MAINTENANCE OF THE WATER TANK (ONLY FOR MODEL XC5244)
- PERIODIC MAINTENANCE
- MAINTAINING THE FLOOR CLEANING SYSTEM
- USING THE DEVICE
- CONNECTING THE TUBE
- ATTENTION! THE AQUAMOP CANNOT BE USED FOR COLLECTING WATER
- IMPORTANT ADDITIONAL INFORMATION
- LIMITATIONS ON USE
- UNIVERSAL USE AND ACCESSORIES
- USING THE MINI TURBO BRUSH (MODELS XC5243, XC5244)
- USING THE CREVICE NOZZLE
- USING THE COMBINATION NOZZLE
- O6CNYROBYBAHHMHITYP6OOSITKN (NIWE XC5243, XC5244)
- O6CIYROBYBAHHPE3EPBYAPA IJI BODN (JIIWE XC5244)
- SIGNALS OF INTEREST TO THE USER AND THEIR MEANING
- SIGNAL MEANING
- PURPOSE
- SPECIFICATIONS
- SAFETY INSTRUCTIONS
- TURBO BRUSH ATTACHMENT (MODEL XC5243, XC5244)
- CLEANING AND MAINTENANCE
- COMBINATION BRUSH ROLLER
- WATER FILTER MAINTENANCE (TECH XC5244)
- MAINTENANCE OF THE WATER FILTER
- MAINTENANCE PROCEDURE
- MAINTENANCE PROCEDURE FOR THE TURBINE FILTER (MODELS XC5243, XC5244)
- CY BIDBCBHA TEXHNKAIBIK KBL3MET KOPCETY (TEK XC5244)
- AYBICTBIPY
- USER INTERFACE SIGNALS AND INDICATORS
- BATTERY CHARGE INDICATOR
- BÉRLINEP CNHRN MAFTBHACBL
- AKAAYIBIKTAPDBI KIOU
- KYPFAKATAI TA3AJAY
- ANSWER
Brand : PHILIPS
Model : Series 5000 XC5243
Category : Vacuum Cleaner