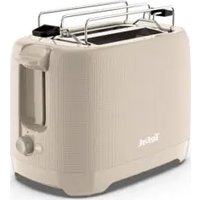
Majestuo TT883D - Toaster TEFAL - Free user manual and instructions
Find the device manual for free Majestuo TT883D TEFAL in PDF.

User questions about Majestuo TT883D TEFAL
0 question about this device. Answer the ones you know or ask your own.
Ask a new question about this device
Download the instructions for your Toaster in PDF format for free! Find your manual Majestuo TT883D - TEFAL and take your electronic device back in hand. On this page are published all the documents necessary for the use of your device. Majestuo TT883D by TEFAL.
USER MANUAL Majestuo TT883D TEFAL
natural_image
Line drawing of a modern toaster with control panel and display (no text or symbols)EN FR DE NL IT PT ES BG BS CS DA HU RO RU SK SL SR SV HR EL ET LT LV PL TR KK UK AR FA
3206000733_03
1


||


III

IV


V
natural_image
Hand holding a plug inserted into an electrical outlet, with an arrow indicating direction (no text or symbols)
text_image
> 10 min.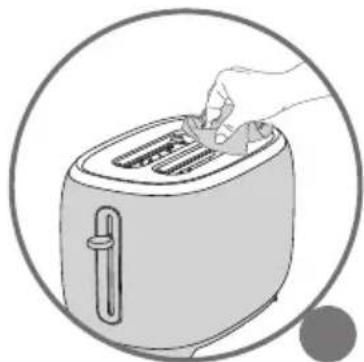
natural_image
Illustration of a hand using a grater to press or install a tray (no text or symbols)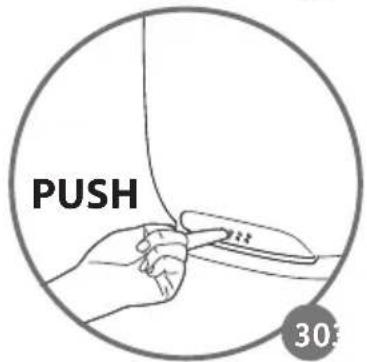
text_image
PUSH 30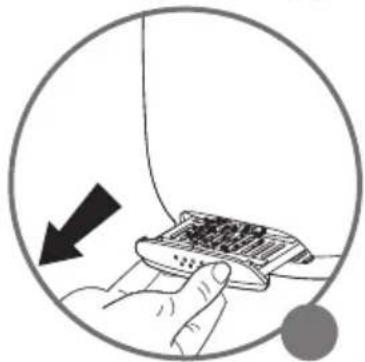
natural_image
Illustration of a hand holding an abacus with a black arrow pointing downward (no text or symbols)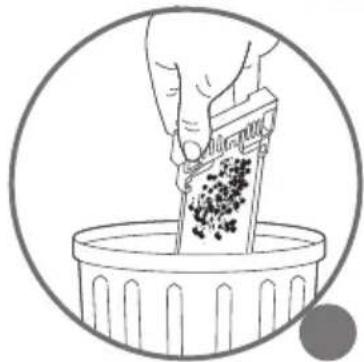
natural_image
Illustration of a hand using a tool to remove granular material from a trash bin (no text or symbols)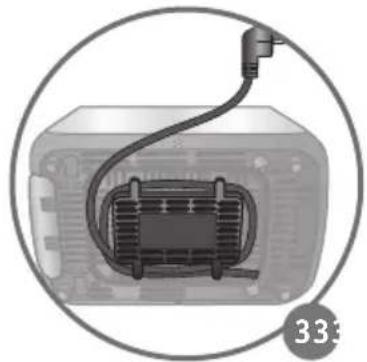
natural_image
Interior view of a device showing a coiled cable and internal components (no text or symbols visible)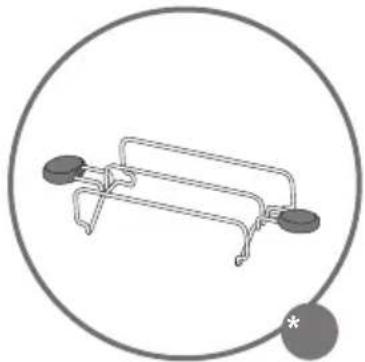
natural_image
Simple line drawing of a mechanical device with two circular components and a small circle containing an asterisk (no text or symbols)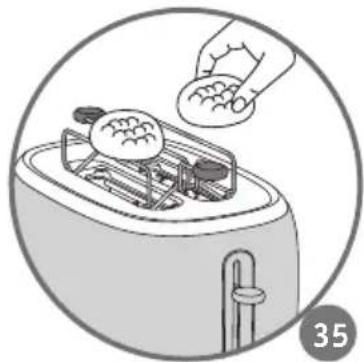
natural_image
Illustration of a toaster with a hand holding a glove above it, no text or symbols present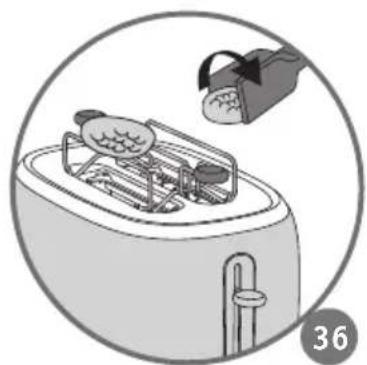
natural_image
Illustration of a toaster oven with a hand holding a small object above it, no text or symbols present.Please read the instructions for use carefully before using your appliance for the first time and retain them for future reference: Manufacturer cannot accept any liability for non compliant appliance use.
SAFETY INSTRUCTIONS
IMPORTANT SAFEGUARDS:
■ This appliance is not intended to be operated using an external timer or separate remote control system.
- Your appliance is intended for domestic use inside the home only at an altitude below 2000 m.
■ This appliance is intended to be used in household only. It is not intended to be used in following applications, and the guarantee will not apply for:
– staff kitchen areas in shops, offices and other working environments;
- farm houses;
– by clients in hotels, motels and other residential type environments;
- bed and breakfast type environments.
■ This appliance is not intended for use by persons (including children) with reduced physical, sensory or mental capabilities, or lack of experience and knowledge, unless they have been given supervision or instruction concerning use of the appliance by a person responsible for their safety.
■ Children must be supervised to ensure that they do not play with the appliance.
■ If the supply cord is damaged, it must be replaced by the manufacturer, its service agent or similar qualified persons in order to avoid a hazard.
■ Bread can burn, therefore the appliance must not be used near or below curtains and other combustible materials such as curtains, drapes or wood (shelving, cupboards...) it should be attended when in use.
■ This appliance can be used by children aged from 8 years and above and persons with reduced physical, sensory or mental capabilities or lack of experience and knowledge if they have been given supervision or instruction concerning use of the appliance in a safe way and
understand the hazards involved. Children shall not play with the appliance. Cleaning and user maintenance shall not be made by children unless they are older than 8 and supervised.
- Keep the appliance and its cord out of reach of children less than 8 years.
■ Use a dust cloth on parts that come into contact with bread.
■ Make sure you dispose of any crumbs regularly by emptying the crumb-tray which is on the lower part of the toaster.

*The temperature of the accessible surfaces may be high when appliance is in operation.
Do not touch the hot surfaces of the appliance.
For your safety, this appliance conforms with applicable standards and regulations (Directives on low voltage, electromagnetic compatibility, materials in contact with foodstuffs, environment, etc.)
In accordance with the CSC notice of 2/12/04, this product features a mechanical design allowing the bread ejection mechanism to be detached from the power cutoff element.
- Check that the electricity supply voltage corresponds to the voltage indicated on the appliance (ac current only).
■ Given the many standards in effect, if this toaster is used in a country other than the country where it was purchased, have it checked by an approved service centre (see enclosed after sales service information).
- Check that the electricity installation is sufficient to supply the power required by this appliance.
- Always plug the toaster into an earthed socket.
■ Use extension leads which are in good condition, with an earthed connection, and with a minimum rating of 10A.
TO PREVENT ANY ACCIDENTS
When using electrical appliances, basic safety precautions should always be followed:
DO
■ Carefully read and follow all the instructions for use.
■ Close supervision is necessary when the toaster is used by or near children or certain disabled persons who are not familiar with these instructions and should only use this toaster under surveillance of a responsible adult.
■ The toaster must always be used in the upright position, never on its side or tilted forwards or backwards.
Before each use make sure that the crumb tray is fitted correctly.
■ Regularly remove crumbs from the crumb tray.
- The toasting lever must be in the "Up" position before plugging in or unplugging the appliance.
- Unplug the appliance if it shows any working abnormalities.
■ Unplug from the power socket when not in use during and before cleaning. Allow to cool down before cleaning or storing.
■ To unplug remove the plug from the wall socket (when the toasting cycle is finished).
If the bread jams in the slots after toasting and the elements do not switch off, unplug the plug immediately and wait for the appliance to cool before attempting to remove the bread.
■ Use on a flat, stable heat-resistant work surface, away from any contact with water and never use underneath a built in kitchen alcove.
DO NOT
■ Do not let the toaster operate unattended, particularly when toasting for the first time or when settings have been changed.
■ Do not store the cord or the plug between the slots in the appliance.
■ Do not unplug the appliance by pulling on the cord.
■ Do not move or carry the appliance during use.
■ Do not leave the appliance within the reach of children.
■ Do not use outdoors. Avoid humid environments.
■ Do not use the appliance for any other use other than that for which it was designed.
■ Do not touch the metal parts or hot surfaces of the appliance when it is working.
■ Oversized foods, metal foil packages, or utensils (spoon, knife, etc.) must not be inserted into a toaster as they may cause an electric shock or fire.
■ Do not use accessory attachments that are not recommended by the manufacturer as this may be dangerous.
■ To protect yourself against and electrical shock do not immerse the cord, plugs, or appliance in water or other liquids.
■ Bread can burn, therefore do not use this appliance near any flammable materials such as curtains, under shelving or under wall cupboards.
Do not toast breads that may melt (with frosting), sink or fall into the toaster; do not toast food that may fall between the grills (for example: rolls, croutons, blinis, etc.), this could cause damage to the appliance or become a fire hazard.
Do not try to toast very thick slices of bread that could become stuck in the toasting slots.
■ Do not use this appliance if:
-it has a damaged cord.
-the appliance has been dropped and has visible damage or does not operate properly.
in any of these instances, the appliance must be sent to your local approved aftersales service centre to avoid any risk of danger. Refer to the guarantee enclosed.
■ Do not let the cord hang over the edge of the worktop or come into contact with hot surfaces.
■ Do not place on or near a gas burner, electric ring/hob, or near a heated oven.
■ Do not cover this appliance while in use.
■ Do not put paper towels, cardboard or plastic in, on or under the toaster.
If flames were to arise from parts of the toaster, never attempt to extinguish them with water. Unplug the appliance and smother the flames with a damp cloth.
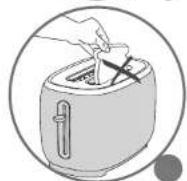
■ Do not attempt to dislodge food once the toasting cycle is engaged.
■ Do not use this appliance as a source of heating or drying.
■ Do not use the toaster for cooking, grilling or defrosting frozen food other than bread products.
■ Do not use the appliance to toast bread and warm croissants (or similar products) at the same time (depending on model).
■ The metal frame can become very hot. Do not touch it! Use an oven glove or tongs (depending on model).
■ The bun warmer metal part can become very hot when toaster is working. Do not touch it.
■ The toaster surface and top roof part can become very hot. Do not touch these parts when you remove the bun warmer.
■ Do not use any abrasive cleaning agents (no soda-based scouring products, no scouring pads...), no metallic utensils, metal scouring pads etc.
■ For appliances with a metallic finish: do not use any cleaning products designed for metals to avoid corrosion of the metal parts. Use a soft cloth with a window or glass cleaner.
SAVE THESE INSTRUCTIONS

Environment protection first!
① Your appliance contains valuable materials which can be recovered or recycled.
Leave it at a local civic waste collection point.
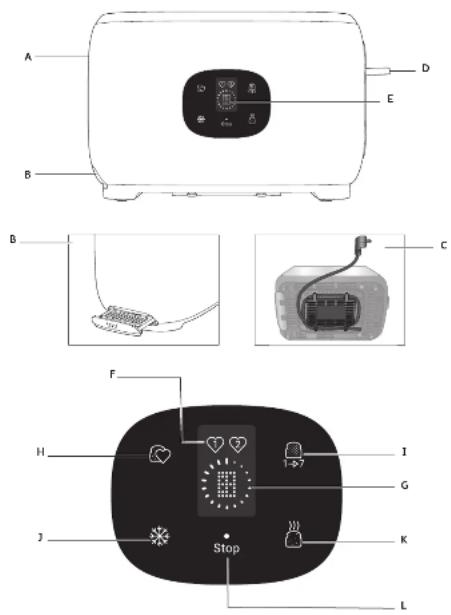
DESCRIPTION
A Insulated casing
B Crumb tray
C Cord storage
D Toasting lever
E Display
F Favorite 1 & Favorite 2 indicated
G Countdown display & Toasting level display
Touch function button
H Favorite function
I 1-7 Browning level selection
J Defrost function
K Reheat function
L Stop(cancel) function
* Bun warmer
DIFFERENT MODES
Wakeup mode:
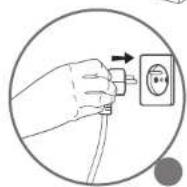
Plug the toaster into the wall socket (Fig. 3). After a short beep, the whole interface is displayed for 1 second, and then the screen will turn off. There is only the marked dot on the interface.
Standby mode:
-Click on the dot
-The 4 touchable icons and default level 3 will light up for 1 minute on semi-luminance.
BEFORE FIRST USE I
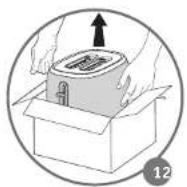
■ Remove all packaging and other accessories inside as well as outside of the appliance (Fig. 1-2).
■ Unwind the cord under the toaster (Fig. C).
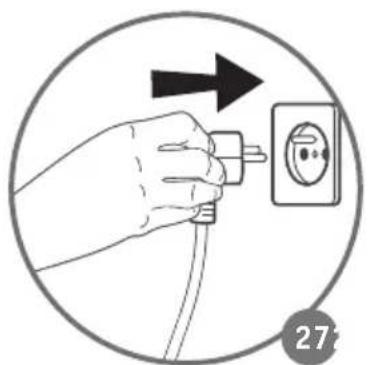
Plug the toaster into the wall socket (Fig. 3). And then you will go to wake up mode (please see the DIFFERENT MODES part).
■ Press the dot to enter the standby mode. The display will turn off and return to wakeup mode if there is no action within 1 minute.
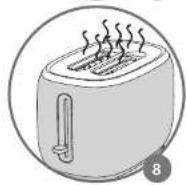
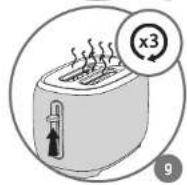
■ Select the maximum browning setting without inserting any bread, then press the lever down. Repeat the toasting sequence 3 times to remove the "new" smell.
USING THE TOASTER II
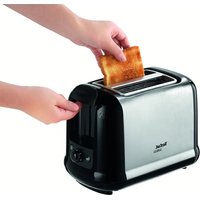
■ Insert the slices of bread (Fig. 10).
Do not use slices which are too large or too thick as that can block the toasting mechanism.
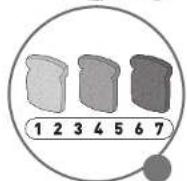
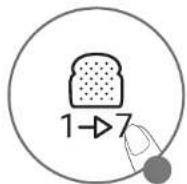
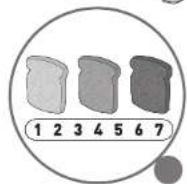
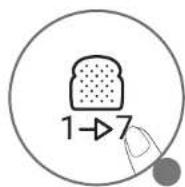
■ Choose between 7 different levels of browning by setting the selector to the appropriate level (Fig. 11).
level 1 = lightly toasted
level 7 = very well toasted
When using a new bread, you may have to experiment to find your preferred toasting setting, as the toasting result depends upon the type of bread and the degree of moisture. Therefore, if you have a brand new loaf, a higher setting will be needed than when the same loaf looses freshness. Generally, a higher browning setting is required for dark breads than white breads. When toasting only 1 slice of bread, lower the browning setting for best result.
Caution:
Relatively dry slices of bread, or bread that has already been toasted once, will brown much more quickly and may under certain circumstances catch fire. Therefore, set the heating control to a lower setting and do not leave the toaster unattended.
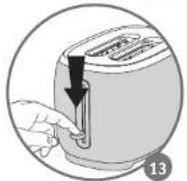
■ Fully push down the toasting lever, which will then lock into position (Fig. 13). The appliance will begin to operate the STOP(CANCEL) touch button and display
(Number & Countdown cycle) will illuminate. The toasting lever will only lock if the toaster is plugged in.
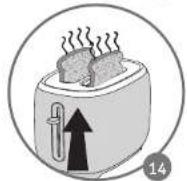
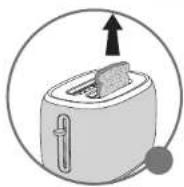
■ After toasting cycle is complete, the toast will automatically be raised (Fig. 14).
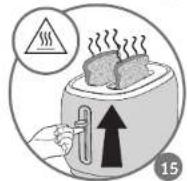
■ To make it easier to remove the bread you can lift the toaster lever up (Fig. 15).
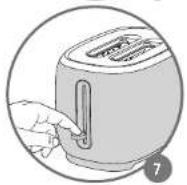
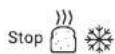
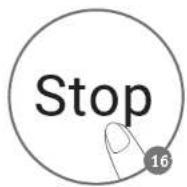
■ To stop the toasting cycle, press the STOP(CANCEL) button (Fig. 16).
Note:
Should a slice of bread become trapped in the toasting well, unplug the power cord, let the appliance cool down and then carefully free the toast without touching the heating elements.
ADDITIONAL FUNCTIONS III, IV
STOP(CANCEL) function
You can press the STOP button to cancel the toasting process and pop up the bread at any time.
REHEAT function

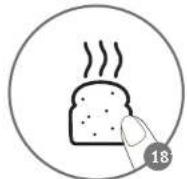
The toaster has reheating feature. It can reheat sliced bread without over toast (Fig. 18-19).
■ Press the reheat button after you put in the sliced bread in the toaster, and then push down the toasting lever to start.
■ REHEAT button, STOP button and countdown circle will be on.
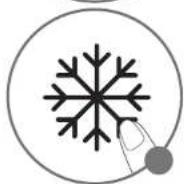
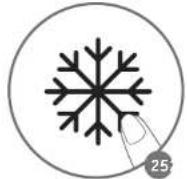
DEFROST function
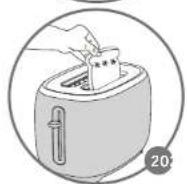
The toaster has a pre-programmed defrosting feature. Toasting frozen bread takes longer than toasting bread which is not frozen (Fig. 20-21).
■ Insert one or two frozen slices of bread or toast in the toaster.
■ Press the DEFROST button.
■ Select the desired toasting level and push down the toast lever (please see the USING THE TOASTER paragraph).
The STOP (CANCEL) button, DEFROST button and display will be on.
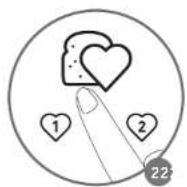
FAVORITE function

This toaster has a favorite(memory) function (Fig 22).
■ What is the favorite(memory) function?
You can save your favorite toasting settings: 1-7 browning levels and (with/without) defrost function to meet your customized needs.
■ To program the FAV function 2 (Fig 23-26):
- The first time to set favorite 1 ☐: After you wake up the screen, you can click once the favorite button ☐ to set favorite 1 ☐ the default number and favorite indicator light 1 blinks; and then you can press the browning button ☐ to choose your favorite browning levels (1-7) and press the defrost button ☐ if you want to toast frozen bread. The favorite 1 will stop flashing to confirm saved settings.

- The first time to set favorite 2 After you wake up the screen, you can click twice the favorite button to set favorite 2 the default number and favorite indicator light 2 blocks; and then you can press the browning button to choose your favorite browning levels (1-7) and press the defrost button if you want to toast frozen bread. The favorite 2 will stop flashing to confirm saved settings.
■ One-touch recall of your programmed favorite settings:
After you set your favorite browning level, you can press the favorite button ☐, the saved screen number and heart 1 📊 or 2 🏠 drinks, and then you can press down the toasting lever to activate the favorite 1 🏠 or 2 🏠 directly.
■ How to change the favorite settings:
You can change the settings when the display flashes. If the screen does not flash, it means that the settings have been saved.
Note:
The Fav setting can be changed before and during toasting. Even when the display flashes, you also can press down the lever and start toasting.
\*ADDITIONAL ACCESSORIES (depending to model)
Bun warmer
- Put the bun warmer above the toaster slots (Fig 34).
- Place a number of croissants, rolls, brioches, etc. on it (Fig 35). Choose level 2 and then push down the toasting lever to reheat.
- Use oven gloves or tongs to turn croissants or rolls over if necessary (tongs not supplied with the product).
- The bun warmer metal part, toaster surface and toaster top roof can become very hot. Do not touch these parts when you remove the bun warmer.
- The bun warmer should not be used for longer than 10 minutes.
CLEANING V
There is a removable crumb tray at the bottom of the toaster, to collect the falling bread crumbs during toasting. Before pulling out the crumb tray, allow the toaster to cool for at least ten minutes after completion of the preceding toasting operation (Fig. 27-28).
■ Unplug the toaster before cleaning.
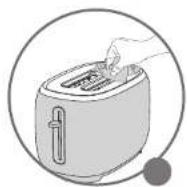
■ Remove the crumb tray by first pushing on the dots to release the tray and then pull it out. Clean the toaster regularly (Fig. 30-31).
■ Never immerse the appliance in water or put it under running water.
■ Never use an abrasive sponge to clean the toaster. Clean it with a damp cloth and wipe it with a soft, dry cloth (Fig. 29).
■ Wipe using a damp cloth then return the crumb tray to its place.
Never use the toaster without the crumb tray.
■ Do not use any cleaning products designed for metals to avoid corrosion of the metal parts.

REPAIR SERVICE
PROBLEM SOLUTION
| The toaster does not work. Ensure the plug is properly connected to the socket. | |
| The bread is stuck in the appliance. | Unplug the appliance and leave it to cool. Remove the bread carefully. Be careful not to damage the heating elements when removing the bread. Never use a metallic object to remove the bread. |
| The bread is too brown or not brown enough. | Check the setting level selected. Select a lower level if your bread is too brown, or a higher level if it is not brown enough.Ensure the freezing buttons have not been selected. |
| The bread pops out almost immediately and is not toasted. | Ensure the handle has been lowered to the bottom.If the bread still does not stay in the toaster, bring your appliance to an approved service center. |
| Smoke is coming out of the toaster. | It is possible that the toasting level selected is too high. Press the CANCEL (STOP) button to stop the toasting cycle and unplug the appliance. |
| The cord is damaged. If the cord | on the appliance is damaged, it must be replaced in an approved service center. |
DISPOSAL

The packaging comprises exclusively environmentally-friendly materials which should be disposed of according to the local recycling arrangements. Disposal methods for the appliance itself can be found at the appropriate department of the local authority in your area.

Environment protection first!
① Your appliance contains a lot of recoverable or recyclable material.
When disposing of it, take it to a local civic waste collection point.
TIETO POKYNY SI USCHOVAJTE.