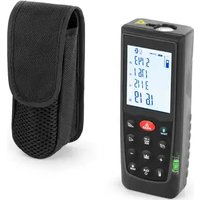
SBS-LDM-110 - Measuring equipment STEINBERG - Free user manual and instructions
Find the device manual for free SBS-LDM-110 STEINBERG in PDF.


| Product type | Laser distance meter |
| Brand | Steinberg |
| Model | SBS-LDM-110 |
| Rated voltage | 230 V~ / 50 Hz |
| Protection rating | IP54 |
| Dimensions (W x D x H) | 53 x 30 x 135 mm |
| Weight | 0.16 kg |
| Power supply | 2 AA 1.5 V batteries (alkaline recommended) |
| Laser class | 2 |
| Maximum laser power | < 1 mW |
| Laser wavelength | 630-670 nm |
| Accuracy | ± 1.5 mm |
| Measuring range | 0.05 - 70 m |
| Tilt sensor | ±65° |
| Measurement units | Meters, inches, feet |
| Bluetooth | Range up to 10 m |
| Operating temperature | 0 to +40 °C |
| Storage temperature | -10 to +60 °C |
| Main functions | Single, continuous, area, volume, indirect, stake out, tilt, addition/subtraction, timer, history storage, Bluetooth |
| Maintenance | Clean with a soft, damp cloth; do not use solvents or chemicals |
| Safety | Class 2 laser: do not stare directly into the beam; avoid eye exposure |
Frequently Asked Questions - SBS-LDM-110 STEINBERG
User questions about SBS-LDM-110 STEINBERG
0 question about this device. Answer the ones you know or ask your own.
Ask a new question about this device
Download the instructions for your Measuring equipment in PDF format for free! Find your manual SBS-LDM-110 - STEINBERG and take your electronic device back in hand. On this page are published all the documents necessary for the use of your device. SBS-LDM-110 by STEINBERG.
USER MANUAL SBS-LDM-110 STEINBERG
natural_image
Three black electronic devices: a digital thermometer, a black bandage device, and a battery pack (no visible text or symbols on the devices themselves)natural_image
Exploded view diagram of a battery pack with internal components and labeled part (13), showing no text or symbols beyond the label.natural_image
Illustration of two mobile phone modules with buttons and connectors, placed on a wooden base (no text or symbols visible)natural_image
Three mechanical components with spring-like springs and a handle, shown in sequence (no text or symbols)DISPLAYBELEUCHTUNG

natural_image
Diagram showing a device emitting beams to a wall-mounted component (no text or symbols present)MAX



Messbedingungen
This User Manual has been translated using machine translation. We have made every effort to ensure the translation is accurate, but please note that automated translations are not perfect and are not meant to replace human translators. The official version of the User Manual is in English. Any differences between the translated version and the original English are not legally binding. If you have any questions about the accuracy of the translation, please refer to the English version, which is the official reference.
Technical data
| Parameter description Parameter value | ||
| Product name | Laser distance meter | |
| Model | SBS-LDM-110 | |
| Rated voltage [V~] / frequency [Hz] | 230 / 50 | |
| IP protection rating | IP54 | |
| Dimensions [width x depth x height; mm] | 53 x 30 x 135 | |
| Weight [kg] | 0.16 | |
| Laser class | 2 | |
| Laser max output | <1 mW | |
| Laser wavelength [nm] | 630-670 | |
| Battery type | AA 1.5 V (x2) | |
| Bluetooth | Up to 10 m range | |
| Accuracy [mm] | ± 1.5 | |
| Measurement range [m] | 0.05-70 | |
| Tilt sensor | ± 65° | |
| Measuring units | Meters, inches, feet | |
| Ambient temperature [°C] | Operation | 0 - +40 |
| Storage | -10 - +60 | |
natural_image
Black textured pouch with mesh pattern, no visible text or symbols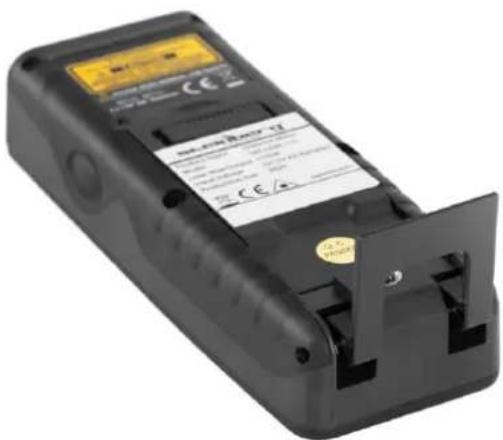
This product is designed to measure the distance between this device and a target object using a laser beam. These are often used in construction, surveying and even hunting or golf, where precise distance measurement is required.

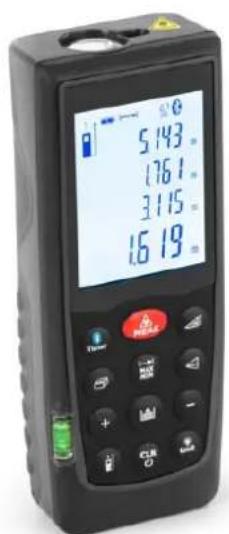
- ON/MEAS button
- Bluetooth/Timer button
- Single/Continuous distance measurement button
- Area/Volume button
- Storage button
- Plus (+) button
natural_image
Exploded view diagram of a battery pack with internal components and labeled part (13), showing no text or symbols beyond the number.- Clear/OFF button
- Reference button
- Tilt/Stake out button
- Indirect measurement button
- Minus (-) button
- Illuminating/Unit button
- Side MEAS button
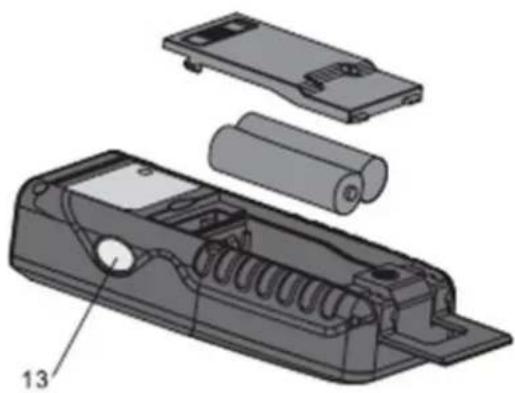
Inserting/Replacing batteries
a) Remove battery compartment lid.
b) Insert batteries, observing correct polarity.
c) Close the battery compartment again.
- Replace the batteries when an empty battery icon flashes permanently on the display.
• Use alkaline batteries only. - Remove the batteries before any long period of non-use to avoid the danger of corrosion.
Display
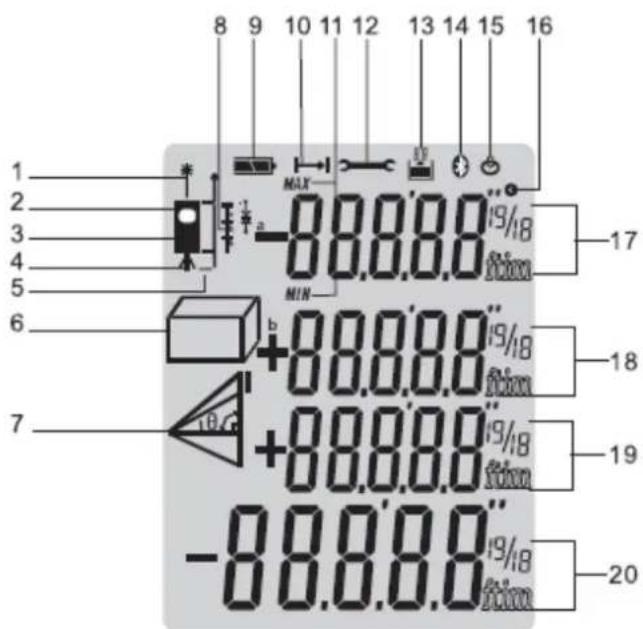
| 1 | Laser active | ||||
| 2 | Reference level (front) | ||||
| 3 | Reference level (rear) | ||||
| 4 | Reference level (tripod) | ||||
| 5 | Reference level (end piece) | ||||
| 6 | Area / Volume measuring functions |  | Area measurement | ||
| Volume measurement | |||||
| 7 | Variable indirect measuring functions |  | Single Pythagorean measurement | ||
 | Double Pythagorean measurement | ||||
| [y225] | Double Pythagorean (partial height) measurement | ||||
 | Tilt measurement | ||||
| 8 | Stake out function | ||||
| 9 | Battery status | ||||
| 10 | Single distance measurement | ||||
| 11 | Continuous measurement & Max and Min measurement | ||||
| 12 | Instrument error warning | ||||
| 13 | Stored history | ||||
| 14 | Bluetooth | ||||
| 15 | Timer | ||||
| 16 | Tilt | ||||
| 17 | Intermediate line 1 | ||||
| 18 | Intermediate line 2 | ||||
| 19 | Intermediate line 3 | ||||
| 20 | Summary line | ||||
Operation and setting
SWITCHING ON AND OFF
 | Switches on the instrument and laser. |
 | Press this button longer to switch off the instrument |
| The laser switches off automatically after 30 seconds and the instrument after 3 minutes of inactivity. | |
CLEAR BUTTON
 | The last action is cancelled or the data display is cleared. If in the mode of history storage, pressing storage and clear button simultaneously will clear all storage data in the memory. |
REFERENCE LEVEL SETTING
| The default reference setting is from the rear of the instrument. | |
| Press this button to take the section from the front edge.A special beep sounds whenever the reference setting is changed.After a re-startup the reference returns automatically to the default setting (rear reference). | |
USING THE TRIPOD REFERENCE
The reference must be appropriately adjusted in order to be able to take correct measurements with a tripod. You can switch the reference on the tripod on or off by longer pressing the reference button.
MULTIFUNCTIONAL END PIECE
The instrument can be adapted for the following measuring situations:
• For measurements from an edge, fold out the positioning bracket until it first locks in place:
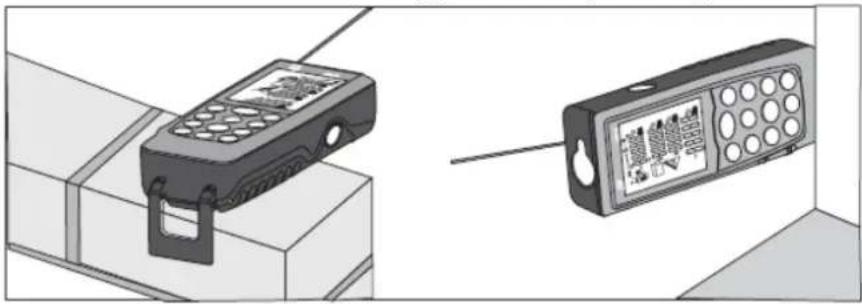
natural_image
Two mobile phone devices mounted on blocks, one with a grid display and the other with a keypad (no visible text or symbols)- For measurements from a corner, open the positioning bracket until it locks in place, then push the positioning bracket lightly to the right to fold it out fully:
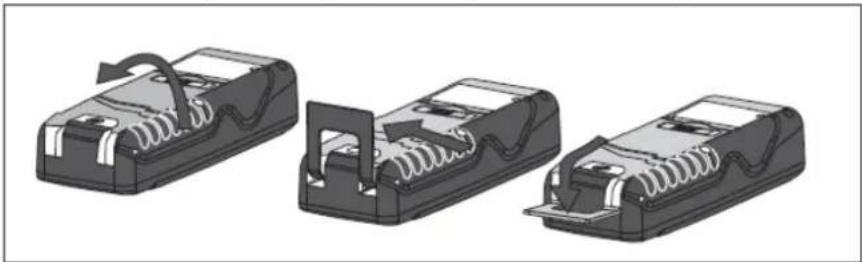
natural_image
Three identical mechanical components with spring-like springs, shown in different orientations (no text or symbols visible)DISPLAY ILLUMINATION
| Unit | Click “Illumination/Unit” button on the display to switch on or off the illumination. |
DISTANCE UNIT SETTING FOR INSTRUMENT
| Unit | Click this button longer to change the type of unit. The following unit can be set: | |||
| Distance | Area | Volume | ||
| 1 | 0.000 m | 0.000 m2 | 0.000 m3 | |
| 2 | 0.0 in | 0.000 ft2 | 0.000 ft3 | |
| 3 | 0 1/16 in | 0.000 ft2 | 0.000 ft3 | |
| 4 | 0.000 ft | 0.000 ft2 | 0.000 ft3 | |
| 5 | 0' 00" 1/16 | 0.000 ft2 | 0.000 ft3 | |
Measuring
SINGLE DISTANCE MEASUREMENT
 | Press this button to activate the laser.Press again to trigger the distance measurement. The measured value is displayed immediately. |
CONTINUOUS LASER
 | Press and hold down this button until the laser active icon appears permanently on the display and a beep sounds. Every further press of the key releases a distance measurement. You can switch the continuous laser function on or off by press this button longer. |
 | Or you can press the key to switch the device and laser continuous operation off. If the laser is in continuous operation mode, the laser automatically switches off after 3 minutes. |
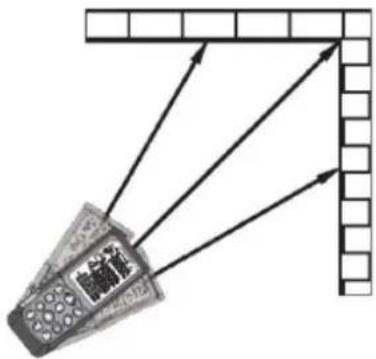
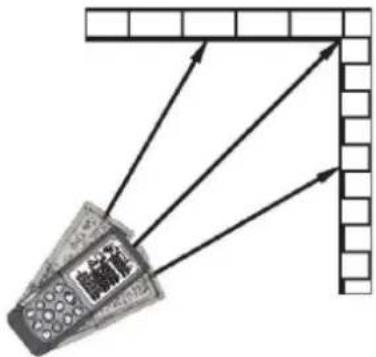
CONTINUOUS MEASUREMENT (TRACKING) & MAX AND MIN MEASUREMENT
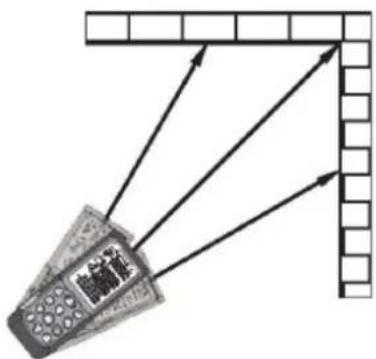
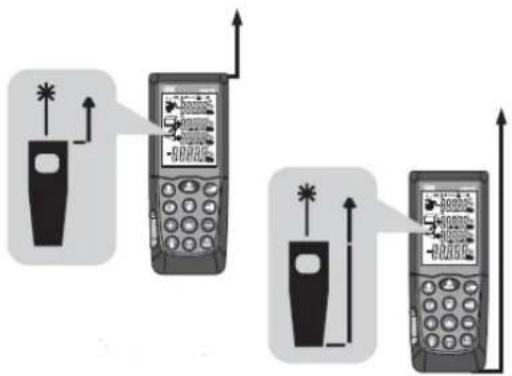
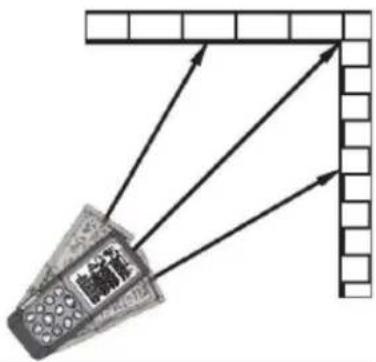
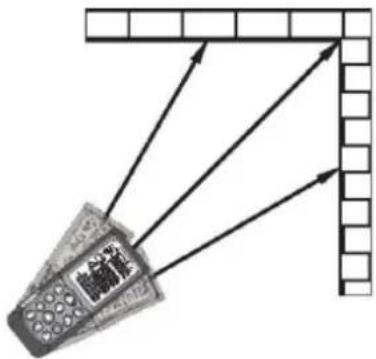
The continuous measurement function (tracking) is used for the transferring of measurements, e.g., from construction plans. In continuous measurement mode, the measuring tool can be moved to the target, whereby the measured value is updated approx. every 0.5 seconds in the third line. The corresponding minimum and maximum values are displayed dynamically in the first and second line.
MIN
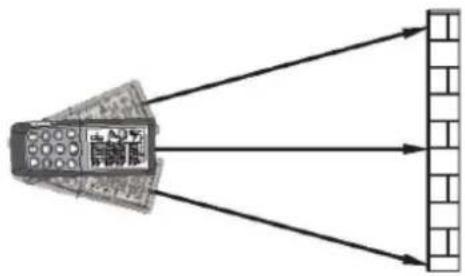
natural_image
Diagram showing a device emitting beams to a wall-mounted component (no text or symbols present)MAX
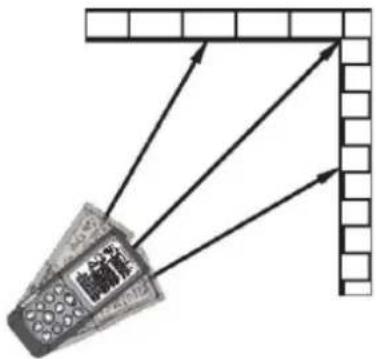
 | As an example, the user can move from a wall to the required distance, while the actual distance can be read continuously. For continuous measurement, push this button until the indicator for continuous measurement appears in the display. |
 | Press one of these buttons again to stop the function. This function is terminated automatically after continuous 100 times measurement. |
 |
Functions
ADDITION/SUBSTRACTION
| Distance measuring | |
 | The next measurement is added to the previous one. |
 | The next measurement is subtracted from the previous one. |
 | The last step is cancelled. |
 | Return to the single distance measurement. |
AREA MEASUREMENT
 | Press the Area/Volume button once. | |
 | This icon appears on the display. | |
 | Press this button to take the first length measurement (e.g. length). | |
 | Press this button again to take the second length measurement (e.g. width). | |
| The result of this function is displayed in the summary line. | ||
VOLUME MEASURMENT
 | Press the Area/Volume button twice until... |
 | ...volume icon appears on the display. |
 | Press this button to take the first distance measurement (e.g. length). |
 | Press this button again to take the second distance measurement (e.g. width). |
 | Press this button again to take the third distance measurement (e.g. width). |
| The result of this function is displayed in the summary line. | |
INDIRECT MEASUREMENT
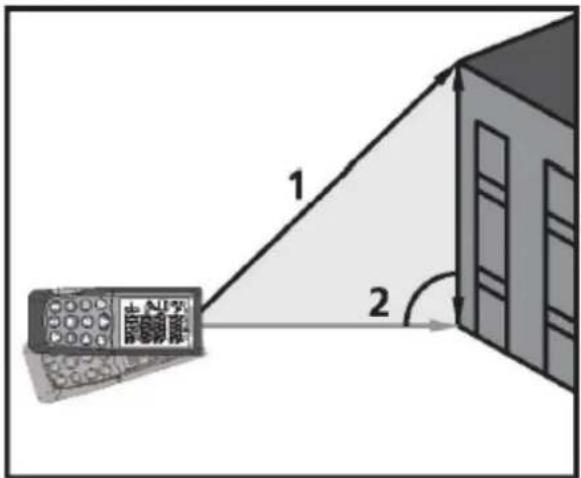
| Indirect measurement - determining a distance using 2 auxiliary measurements e.g. when measuring heights that require the measurement of two or three measurements as following step: | |
 | Press this button once... |
 | ...the distance icon appears on the display. The distance to be measured flashes in the symbol. |
 | Aim at the upper point (1) and trigger the measurement. After the first measurement the value is adopted. Keep the instrument as horizontal as possible . |

Press to measurement the distance result of the horizontal point (2).
The result of this function is displayed in the summary line.
INDIRECT MEASUREMENT- DETERMINING A DISTANCE USING 3 MEASUREMENTS
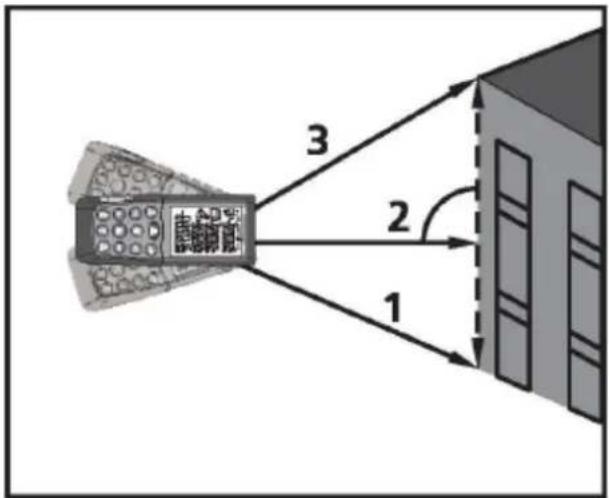





The result of this function is displayed in the summary line.
INDIRECT MEASUREMENT- DETERMINING A DISTANCE USING 3 MEASUREMENTS
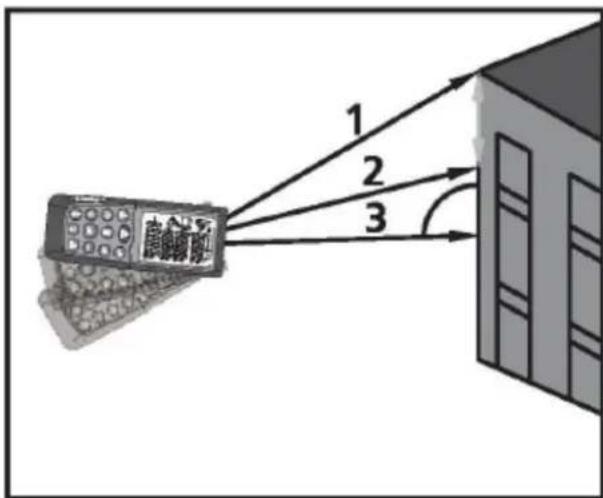
 | Press this button three times. | |
 | The display shows the following symbol and the distance to be measured flashes in the symbol. | |
 | Keep the instrument as horizontal as possible, aim at the point (1) and trigger the measurement. | |
 | Press to measurement the distance result of the middle point (2). | |
 | Press to measurement the distance result of the upper point (3). | |
| The result of this function is displayed in the summary line. | ||
HISTORICAL STORAGE
 | Press this button to show the previous 20 records (measurements or calculated results) – shown in reverse order. | |
 | Push these buttons to navigate through the records. | |
 | ||
 | You can clear all records by pressing these buttons simultaneously in historical storage mode. | |
 |
TIMER (SELF-TRIGGERING)
 | Press this button to set a 5-second time delay or press and hold this button until the desired time delay is reached (max. 60 seconds) or... |
 | ...use these buttons to set the time delay. |
 | |
 | Press this button and remaining seconds until measurement (e.g. 59, 58, 57 ... ) are displayed in a countdown. The last 2 seconds will flash and beep faster. After the last beep the measurement is taken and the value is displayed. |
BLUETOOTH FUNCTION
 | Press and hold until the Bluetooth symbol appears in the display. Then you can use external MeterboxAPP (installation required) to connect with this appliance.Whilst the first connection between the Phone/PC and the laser distance meter is being established, a prompt for the Pin-code of the instrument may be displayed. In this case, enter the code “0000” into your Phone/PC. |

Press and hold this button again until the Bluetooth symbol disappears from the display. The BLUETOOTH switches off as soon as the instrument is switched off.
STAKE OUT FUNCTION
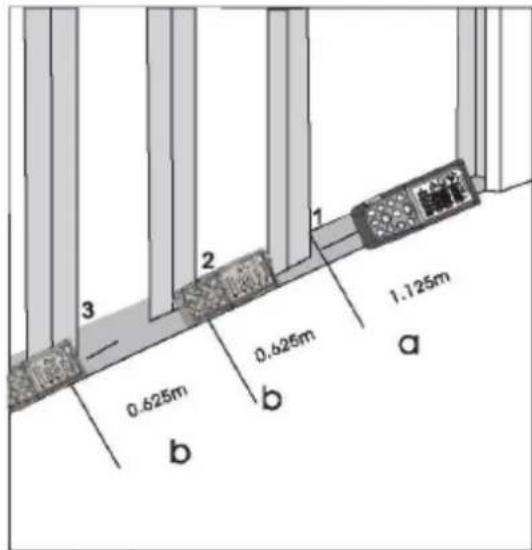
Two different distances (a and b) can be entered into the instrument and can then be used to mark off defined measured lengths, e.g. in the construction of wooden frames.
 | Press this button longer and the stake out function symbol appears in the display. The value (a) and the corresponding intermediate line flash. |
 | By using these buttons you can adjust the values (first a and then b) to suit the desired stake out distances. Holding the buttons down increases the rate of change of the values. |
 | |
 | Once the desired value (a) has been reached it can be confirmed by pressing this button. |
 | The value (b) and the intermediate line flashes (the defined value (a) is automatically adopted). Value (b) can be entered using these buttons. |
 | |
 | The defined value (b) is confirmed by pressing this button. |
 | Pressing this button starts the laser measurement. The display shows current measuring distance in the summary line. Then moved slowly along the stake out line the displayed distance decreases. The instrument starts to beep at a distance of 0.1 m from the next stake out point.The arrows in the display indicate in which direction the instrument needs to be moved in order to achieve the defined distance (either a orb). As soon as the stake out point is reached the beep changes and the intermediate line starts to flash. |
The function can be stopped at any time by pressing one of these buttons.
TILT MEASUREMENT
The inclination sensor measures tilts between ±65^ . During tilt measurement the instrument should be hold without a transverse tilt ( ±10^ ).

Press this button once to activate the tilt sensor. The symbol appears in the display. The tilt value is displayed in the intermediate line 1. Press to measure the inclination and the distance. The distance (L) shows in the summary line, and the distance (A) (B) calculated by and L shows in the intermediate line 2, 3.

Measuring conditions
- At night or dusk and if the target is in shadow the measuring range without target plate is increased. Use a target plate to increase the measurement range during daylight or if the target has poor reflection properties.
- Measuring errors can occur when measuring toward colourless liquids (e.g. water) or dust free glass, Styrofoam or similar semi-permeable surfaces. Aiming at high gloss surfaces may deflect the laser beam and lead to measurement errors. Against non-reflective and dark surfaces the measuring time may increase.
Maintenance
a) Use only non-corrosive cleaners to clean the surface.
b) Store the unit in a dry, cool place, free from moisture and direct exposure to sunlight.
c) Do not spray the device with a water jet or submerge it in water.
d) Do not allow water to get inside the device through vents in the housing of the device.
e) Do not leave the battery in the device if it will not be used for a longer period of time.
f) Use a soft, damp cloth for cleaning.
g) Do not clean the device with an acidic substance, agents of medical purposes, thinners, fuel, oils or other chemical substances because it may damage the device.
Safe removal of batteries and rechargeable batteries
Remove used batteries from the device using the same procedure by which you installed them. Recycle batteries with the appropriate organisation or company.
Disposing of used devices
Do not dispose of this device in municipal waste systems. Hand it over to an electric and electrical device recycling and collection point. Check the symbol on the product, instruction manual and packaging. The plastics used to construct the device can be recycled in accordance with their markings. By choosing to recycle you are making a significant contribution to the protection of our environment.
Contact local authorities for information on your local recycling facility.

natural_image
Black textured pouch with mesh outer layer and mesh inner side (no text or symbols visible)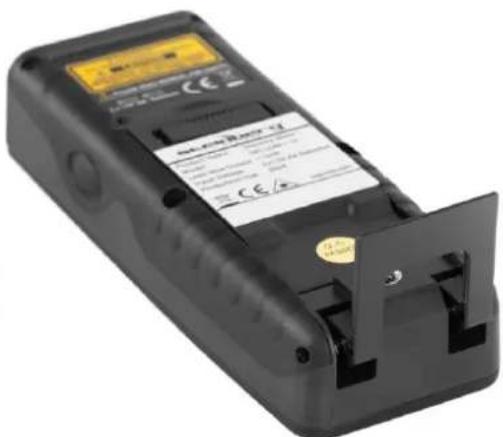
natural_image
Exploded view diagram of a battery pack with internal components and labeled part (13), showing no text or symbols beyond the number.natural_image
Illustration of two mobile phone devices with buttons and connectors, placed on a wooden base (no text or symbols visible)natural_image
Three identical black plastic electrical connectors with coiled wires, shown from different angles (no text or symbols visible)PODŚWIETLENIE WYŚWIETLACZA

CIĄGŁY POMIAR (ŚLEDZENIE) I POMIAR MAKSYMALNY I MINIMALNY
Warunki pomiaru
natural_image
Black textured pouch with mesh pattern, no visible text or symbols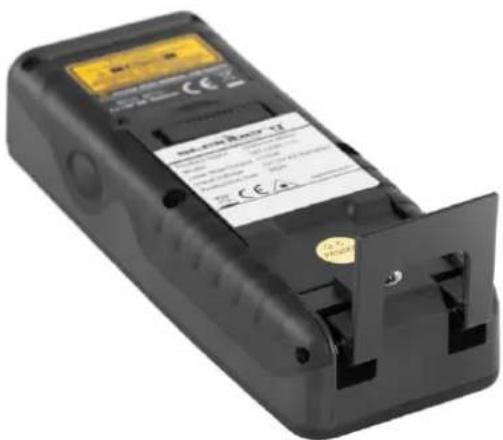
natural_image
Exploded view diagram of a handheld electronic device showing internal components and casing (no text or symbols)natural_image
Illustration of two mobile phone devices with buttons and connectors, placed on a rectangular base (no text or symbols visible)natural_image
Three black electrical fuse holders with coiled leads and a spring mechanism, shown from different angles (no text or symbols)OSVĚTLENÍ DISPLEJE
natural_image
Diagram showing a device emitting beams to a wall-mounted component (no text or symbols present)MAX
natural_image
Diagram showing light rays reflecting off a wall and a small object inside a container (no text or symbols)Podmínky měření
natural_image
Black textured pouch with mesh pattern, no visible text or symbols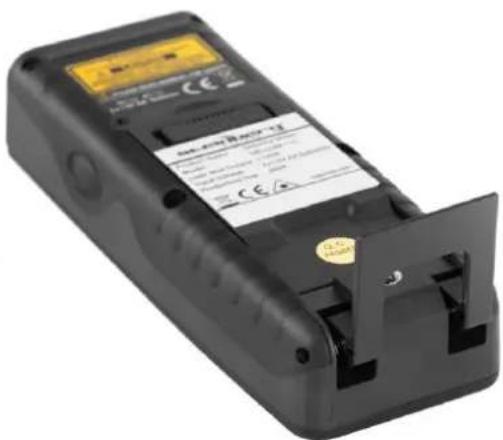
natural_image
Exploded view diagram of a battery pack with internal components and labeled part (13), showing no text or symbols beyond the number.natural_image
Illustration of two mobile phone devices with buttons and connectors, placed on a rectangular base (no text or symbols visible)natural_image
Three identical black-and-white diagrams of a battery pack with coiled spring and internal circuit breakers, shown from different angles (no text or symbols)ÉCLAIRAGE DE L'ÉCRAN

natural_image
Diagram showing light rays passing through a conical structure and projecting onto a wall (no text or symbols)MAX
natural_image
Black textured pouch with mesh pattern, no visible text or symbols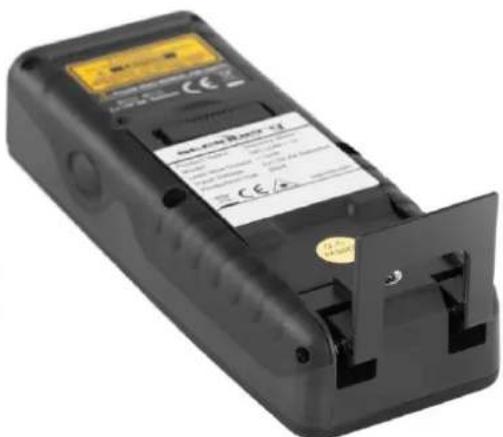
natural_image
Exploded view diagram of a battery pack with internal components and labeled part (13), showing no text or symbols beyond the number.natural_image
Illustration of two mobile phone modules mounted on blocks, one with a grid display and the other with a keypad (no text or symbols visible)natural_image
Three identical mechanical components with spring-like connectors, shown from different angles (no text or symbols visible)ILLUMINAZIONE DEL DISPLAY
natural_image
Diagram showing a device emitting beams to a wall-mounted component (no text or symbols present)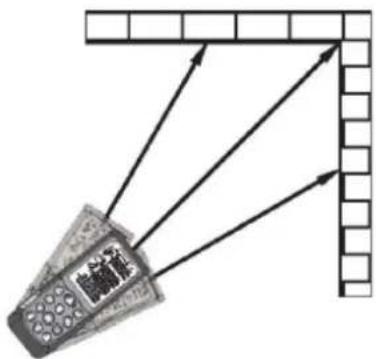
natural_image
Black textured pouch with mesh pattern, no visible text or symbols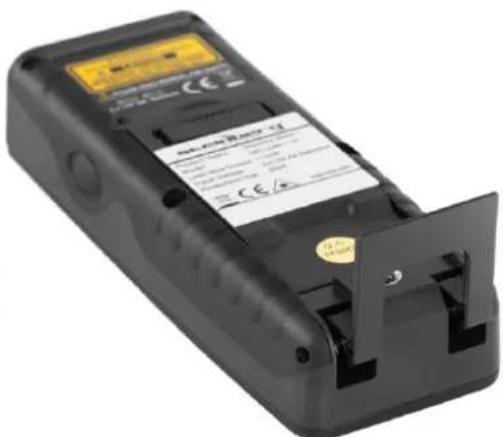
natural_image
Exploded view diagram of a battery pack with internal components and labeled part (13), showing no text or symbols beyond the number.natural_image
Illustration of two mobile phone devices with buttons and a connector, placed on blocks (no text or symbols visible)natural_image
Three identical black plastic electrical connectors with coiled wires, shown from different angles (no text or symbols visible)natural_image
Black textured pouch with mesh pattern, no visible text or symbols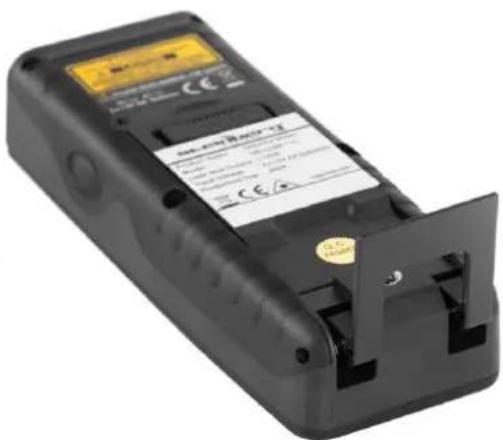
natural_image
Exploded view diagram of a battery pack with internal components and labeled part (13), showing no text or symbols beyond the number.natural_image
Illustration of two mobile phone devices with buttons and a connector, placed on blocks (no text or symbols visible)natural_image
Three identical mechanical components with spring-like connectors, shown in a row (no text or symbols visible)natural_image
Diagram showing a conical object emitting beams to a brick wall, with no visible text or symbols.MAX
Mérési feltételek
natural_image
Black textured pouch with mesh pattern, no visible text or symbols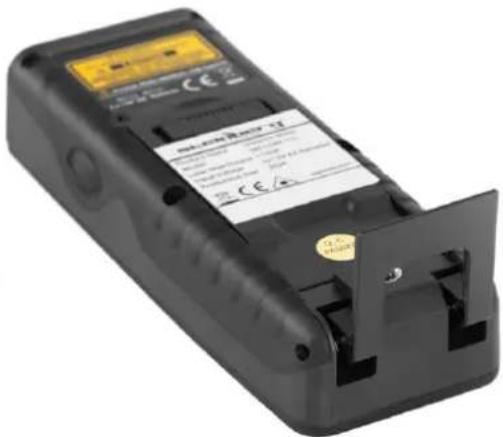
natural_image
Exploded view diagram of a battery pack with internal components and labeled part (13), showing no text or symbols beyond the number.Standardreferenceindstillingen er fra instrumentets bagside.

natural_image
Illustration of two mobile phone devices with buttons and connectors, placed on a rectangular base (no text or symbols visible)natural_image
Three black electrical fuse holders with coiled leads and a spring mechanism, shown from different angles (no text or symbols)BELYSNING AF DISPLAYET

natural_image
Diagram showing light rays reflecting off a wall and a projector screen (no text or symbols)Målebetingelser
natural_image
Black textured pouch with mesh pattern, no visible text or symbols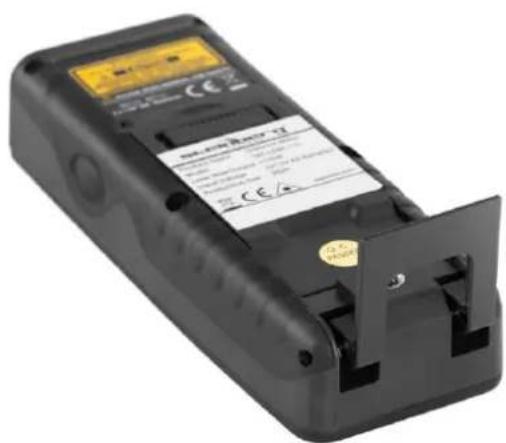
natural_image
Exploded view diagram of a battery pack with internal components and labeled part (13), showing no text or symbols beyond the number.natural_image
Illustration of two mobile phone devices with buttons and connectors, placed on a rectangular base (no text or symbols visible)natural_image
Three identical black plastic electrical connectors with coiled wires, shown from different angles (no text or symbols visible)NÄYTÖN VALAISTUS

Mittausolosuhteet
natural_image
Three black electronic devices: a digital display, a black bandage, and a battery pack (no visible text or symbols)natural_image
Exploded view diagram of a battery pack with internal components and labeled part (13), showing no text or symbols beyond the label.natural_image
Illustration of two mobile phone devices with buttons and connectors, placed on a wooden base (no text or symbols visible)natural_image
Three views of a mechanical component with spring-like clamps and internal springs (no text or symbols)DISPLAYVERLICHTING

CONTINUE METING (VOLGEN) & MAX EN MIN METING
Meetomstandigheden
natural_image
Black textured pouch with mesh pattern, no visible text or symbols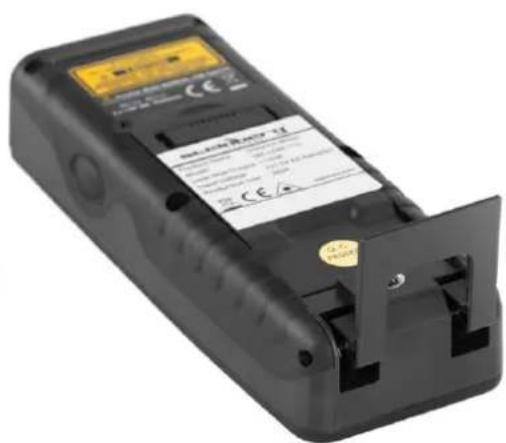
natural_image
Exploded view diagram of a battery pack with internal components and labeled part (13), showing no text or symbols beyond the number.natural_image
Illustration of two mobile phone devices with buttons and a connector, placed on blocks (no text or symbols visible)natural_image
Three identical black electrical connectors with coiled wires and metal contacts, shown from different angles (no text or symbols visible)DISPLAYBELYSNING

natural_image
Diagram showing light rays reflecting off a wall and a projector screen (no text or symbols)Måleforhold
natural_image
Black textured pouch with mesh pattern, no visible text or symbols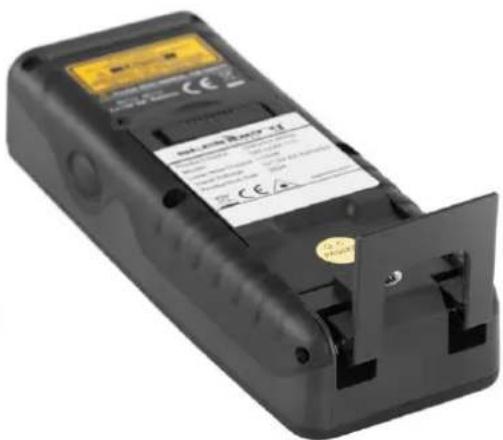
natural_image
Exploded view diagram of a handheld electronic device showing internal components and casing (no text or symbols)natural_image
Illustration of two mobile phone devices with buttons and a connector, placed on blocks (no text or symbols visible)natural_image
Three black electrical connectors with coiled wires and metal contacts, shown from different angles (no text or symbols visible)DISPLAYBELYSNING

natural_image
Diagram showing light rays reflecting off a wall and a projector screen (no text or symbols)Mätförhållanden
natural_image
Black textured pouch with mesh pattern, no visible text or symbols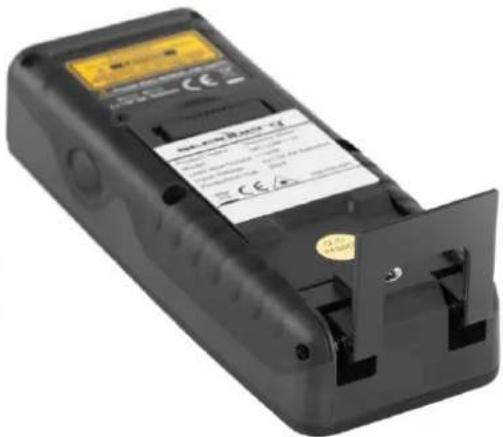
natural_image
Exploded view diagram of a battery pack with internal components and labeled part (13), showing no text or symbols beyond the number.natural_image
Two 3D-rendered mobile phone modules mounted on rectangular blocks, one with a keypad and the other with a grid display (no visible text or symbols)natural_image
Three identical black battery pack components with coiled leads and a spring-like opening (no text or symbols visible)natural_image
Diagram of a mobile phone emitting signals from a wall-mounted sensor array (no text or symbols)natural_image
Black textured pouch with mesh pattern, no visible text or symbols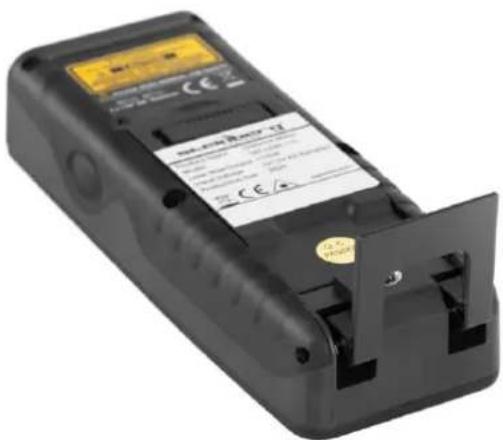
natural_image
Exploded view diagram of a battery pack with internal components and labeled part (13), showing no text or symbols beyond the number.- Tlačidlo Clear/OFF
- Referenčné tlačidlo
- Tlačidlo naklonenia/vysunutia
- Tlačidlo nepriameho merania
- Tlačidlo mínus (-).
- Tlačidlo podsvietenia/jednotky
- Bočné tlačidlo MEAS
natural_image
Illustration of two mobile phone devices with buttons and a connector, placed on blocks (no text or symbols visible)natural_image
Three identical mechanical components with spring-like end caps, shown from different angles (no text or symbols visible)OSVETLENIE DISPLEJA
| Unit | Kliknutím na tlačidlo „Illumination/Unit“ na displeji zapnete alebo vypnete osvetlenie. |
NASTAVENIE JEDNOTKY VZDALENOSTI PRE NÁSTROJ
natural_image
Diagram showing a device emitting beams to a wall-mounted component (no text or symbols present)MAX
- DISPLAYBELEUCHTUNG
- MAX
- Messbedingungen
- Inserting/Replacing batteries
- Display
- Operation and setting
- USING THE TRIPOD REFERENCE
- MULTIFUNCTIONAL END PIECE
- Measuring
- CONTINUOUS MEASUREMENT (TRACKING) & MAX AND MIN MEASUREMENT
- MIN
- Functions
- TILT MEASUREMENT
- Measuring conditions
- Maintenance
- Safe removal of batteries and rechargeable batteries
- Disposing of used devices
- PODŚWIETLENIE WYŚWIETLACZA
- Warunki pomiaru
- Podmínky měření
- ÉCLAIRAGE DE L'ÉCRAN
- ILLUMINAZIONE DEL DISPLAY
- Mérési feltételek
- BELYSNING AF DISPLAYET
- Målebetingelser
- NÄYTÖN VALAISTUS
- Mittausolosuhteet
- DISPLAYVERLICHTING
- CONTINUE METING (VOLGEN) & MAX EN MIN METING
- Meetomstandigheden
- DISPLAYBELYSNING
- Måleforhold
- Mätförhållanden
Brand : STEINBERG
Model : SBS-LDM-110
Category : Measuring equipment