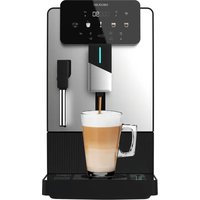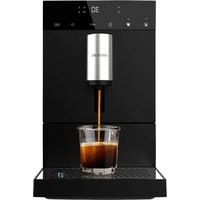
Cremmaet Touch OCS - Coffee machine CECOTEC - Free user manual and instructions
Find the device manual for free Cremmaet Touch OCS CECOTEC in PDF.


User questions about Cremmaet Touch OCS CECOTEC
0 question about this device. Answer the ones you know or ask your own.
Ask a new question about this device
Download the instructions for your Coffee machine in PDF format for free! Find your manual Cremmaet Touch OCS - CECOTEC and take your electronic device back in hand. On this page are published all the documents necessary for the use of your device. Cremmaet Touch OCS by CECOTEC.
USER MANUAL Cremmaet Touch OCS CECOTEC
natural_image
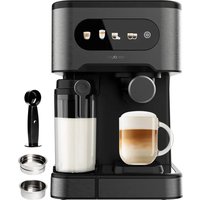
Exterior view of a modern coffee machine with a digital display showing coffee cups and tea products (no readable text or symbols)Safety instructions 7
-
Parts and components 47
-
Before use 47
-
Operation 48
-
Cleaning and maintenance 56
-
Troubleshooting 58
-
Technical specifications 61
-
Disposal of old electrical and electronic appliances 61
-
Technical support and warranty 61
-
Copyright 62
SOMMAIRE
Read these instructions thoroughly before using the device. Keep this instruction manual for future reference or new users.
- The appliance can be used by people with reduced physical, sensory, or mental capabilities or lack of experience and knowledge if they have been given supervision or instruction concerning use of the appliance in a safe way and understand the hazards involved.
- The device is not intended to be used by children. Keep the appliance and its power cable out of the reach of children.
- Cleaning and maintenance tasks should not be carried out by children.
- Children must not play with the appliance.
- Check the power cable regularly for visible damage. If the power cable is damaged, it must be replaced by the official Cecotec Technical Support Service or similar qualified personnel to avoid risks.
- This device is designed for domestic use only and is not intended for bars, restaurants, farmhouses, hotels, motels, and offices.
- Do not immerse the cable, plug, or any other part of the appliance in water or any other liquid or expose electrical connections to water. Make sure your hands are dry before handling the plug or switching on the appliance.
- WARNING: the filling opening must not be opened during operation.
- WARNING: take precautions to avoid spillage of liquids on the cable.
-
WARNING: incorrect or improper use can be dangerous for the user and damage the appliance. Use the appliance only for the purposes described in this manual. The surface of the heating element is subject to residual heat after use.
-
Always disconnect the appliance from the power supply if it is left unattended and before assembly, disassembly, or cleaning.
- It is your responsibility to make sure every user is informed about the warnings and precautions stated in this instruction manual. Do not use the appliance for any use other than the one specified in this manual.
- Make sure that the mains voltage matches the voltage stated on the rating label of the appliance and that the wall outlet is earthed.
- Disconnect the appliance from the mains in any of the following circumstances:
A. Before filling up the water tank.
B. Before removing or installing any of the appliance's parts.
C. Before cleaning or maintenance.
D. When the appliance is not working properly.
E. After using the appliance.
- Empty the water tank when the appliance is not going to be used for some time.
- Make sure the appliance has cooled down completely before removing or installing parts and before cleaning it.
- Always use cold water. The use of hot water or other liquids may damage the appliance.
- Use the grinder to grind only coffee beans.
- Do not use caramelised or frozen coffee beans. This appliance can only be used with natural coffee beans.
- Never leave the appliance unattended when it is connected to a mains power supply.
- Do not let the cable protrude over the edge of the table or worktop or come into contact with hot surfaces or sharp edges.
-
Place the appliance on a flat, stable surface. Do not use or place the appliance on a hot or damp surface.
-
Do not use the appliance if the drip tray is not properly positioned.
- Do not use the appliance if any of its parts are damaged or if the appliance is not working properly.
- WARNING: this appliance has undergone a quality control previous to its commercialisation with the aim of ensuring its correct operation. After the quality control testing, the appliance is cleaned thoroughly, therefore, although it is unlikely to occur, there could be rests of water or coffee drops inside it.
INSTRUCTIONS DE SÉCURITÉ
- Water tank
- Power switch
- Power cable
- Drip tray
- Coffee bean tank
- Button/indicator light
- Touch display
- Coffee spout
- Milk tank
Cappuccinatore (parts and components). Fig. 2
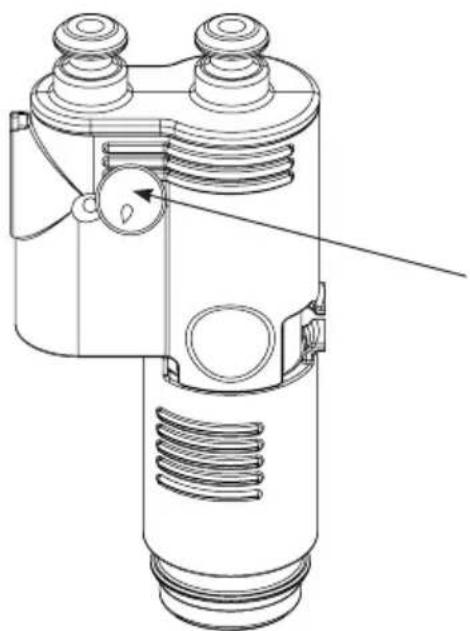
Steam knob (in detail). Fig. 3
NOTE:
The graphics in this manual are schematic representations and may not exactly match the device.
2. BEFORE USE
- This appliance is packaged in a way as to protect it during transport. Take the appliance out of its box and remove all packaging materials. You can keep the original box and other packaging elements in a safe place. This will help you prevent damage to the appliance when transporting it in the future. In case the original packaging is disposed of, make sure all packaging materials are recycled accordingly.
- Make sure all parts and components are included and in good conditions. If there is any piece missing or in bad conditions, contact the official Cecotec Technical Support Service immediately.
Box content
- Cremmaet Touch OCS coffee machine
- Milk tank
- Instruction manual
ENGLISH
3. OPERATION
3.1 Parts description
Following the enumeration in the parts and components section:
- Water tank: always use bottled mineral water or filtered water.
- Power switch: it is at the back of the coffee machine.
- Power cable
- Drip tray: collects waste water and coffee grounds. Clean and empty the grounds when the appliance requires it or when the machine is not to be used for a long period of time.
-
Coffee waste tank, consisting of:
-
Coffee bean hopper: only fill it with natural roasted coffee beans. Do not use blended coffee or roasted coffee. Do not put any other product into the hopper. The hopper has a mesh to improve the distribution of the coffee. The grinding level knob is located on the top left-hand side of the hopper.
- Grinding level knob: located inside the bean hopper, the higher the grind number you choose, the coarser the ground coffee will be. Turning the knob clockwise will increase the size of the ground coffee. Turning the knob counterclockwise will decrease the size of the ground coffee.
- Coffee powder inlet/cleaning tablets: only for single-use coffee powder (not a coffee powder container) and cleaning tablets for cleaning the brewing system. To access this part, you must open a tab with slots.
- Button/indicator light: It is used to switch on/off the coffee machine, and to indicate the state in which the appliance is (on/off or standby mode).
- 7" touch display.
- Coffee spout: adjustable between 8 and 14 cm.
- The spout is fitted with a device called "Cappuccinatore", which is removed by pressing the two release tabs on the sides to facilitate cleaning. This part is responsible for expelling coffee, milk, and water.
- Fig. 3. The cappuccinatore is made up of 4 parts, the largest part where the steam comes out to froth the milk has a small knob to select the amount of steam you want. For highly steamed milk, turn the knob clockwise.
- Milk tank: only fill it with cold whole milk to improve the milk froth result. Clean it after each use with water following the milk system quick clean.
3.2 Using the coffee machine for the first time
- Plug in the coffee machine: Pull out the power cable and connect it to the mains.
- Fill the coffee bean tank. Open the tank cover, fill it with coffee beans and put the cover back in place.
- NOTE: only fill it with natural roasted coffee beans. Do not use blended or roasted coffee. Do not put any other product into the hopper.
-
Fill up the water tank. First, take it out and clean it. Then, put in bottled or filtered water, never exceed the MAX mark. Next, place it back in the appliance.
-
Switch on the coffee machine. Press the power switch that is at the back of the appliance. The display will light up and start a process of preparing and starting the coffee machine (Filling water - Checking - Warming up - Quick cleaning), after which you can select the drink, you wish to prepare.
3.3 Switching off the coffee machine
Method 1
When the coffee machine is in standby mode, press and hold the button on the top of the appliance for 3 seconds. Then, follow the steps until the machine enters standby mode. To exit this mode, press and hold the button again for 3 seconds.
Method 2
1 Press the shortcut icon at the top of the display to open the drop-down menu.
2 In this menu, press the "Switch off" option.
3 Then, follow the steps until the machine enters standby mode. (In standby mode, press and hold the button on the top of the machine for 3 seconds to restart it).
4 When the machine is in standby mode, you can press the switch at the back of the machine to the off position to switch the machine completely off.
Note: do not turn this switch to the off position if the machine is not in standby mode. Doing so could damage the coffee machine.
3.4 Drinks preparation
The coffee machine has 16 types of drinks, one of which comes with no settings so that it can be adjusted from scratch. To select one of them, scroll through the drinks list containing all the preparations and press the one you want to prepare.
NOTE: all drinks are configurable.
Coffee drinks
For example, an Espresso.
- Press the Espresso icon and select the parameters.
-
During the coffee preparation process, press the cup icon 📋 on the display to display the setting parameters. You can change the selected parameters during the preparation of the drink. The appliance will modify the step parameters during the preparation if the step being performed has not been completed. Parameters changed during the preparation of the drink will not be remembered by the appliance.
-
From this screen you can adjust the coffee settings.
-
If you want to stop the drink preparation process, press "Cancel", located below the circle on the left that marks the percentage of the completed process.
NOTE: in section "3.6.4. Machine settings" → Custom settings → Preparation mode, you can select whether or not you want the parameters to be changeable before preparing the drink.
ENGLISH
Milk drinks:
For example, a Cappuccino.
- Press the Cappuccino icon and select the parameters.
- During the coffee preparation process, press the cup icon 📄 on the display to display the setting parameters. You can change the selected parameters during the preparation of the drink. The appliance will modify the step parameters during the preparation if the step being performed has not been completed. Parameters changed during the preparation of the drink will not be remembered by the appliance.
- From this screen you can adjust the drink settings.
- If you want to stop the beverage preparation process, press "Cancel".
NOTE: in section "3.6.4. Machine settings" → Custom settings → Preparation mode, you can select whether or not you want the parameters to be changeable before preparing the drink.
Parameters setting
After pressing on each drink, you can modify and adjust the parameters of each of them. To do this, use the quantity adjustment bars and the selectable options for the different parameters. The meaning of each parameter and the range of values is explained below:
- Coffee beans: amount of beans to be ground by the machine. Values from 1 to 5, where 1 is the minimum and 5 is the maximum amount of ground coffee.
| Level Amount of coffee beans (g) | |
| 1 7 1 | |
| 2 8 1 | |
| 3 9 1 | |
| 4 10 1 | |
| 5 11 1 | |
- Pre-brewing (s): pre-brewing is the number of seconds in which the coffee extracts its aromas after moistening with hot water. Values from 0 to 5 seconds.
- Coffee (ml): amount of coffee. Values from 10 to 240 ml.
- Extraction method: it is the strength with which the coffee is extracted, generating stronger flavours the more it is extracted. Selectable values between Standard, Strong and Extra-strong.
- Temperature level: temperature at which the coffee is extracted and dispensed. Selectable values between: Low temp. (85 °C), mid (90 °C) and high (95°C)
-
Amount of milk (s): amount of warm milk ejected. Values from 0 to 60s.
-
Milk froth: amount of milk froth (s). Values from 0 to 60s.
- Quantity of hot water (ml): amount of hot water. Values between 0 and 300 ml.
Adjusting the grinding level
- Open the coffee bean container cover. Inside is the grinding level knob. The higher the number you select, the coarser the ground coffee will be. The knob features 9 grinding levels.
- Pressing the start of any drink on the display will activate the grinder. Turn the knob to set the desired grinding level.
Note: only move the knob when the grinder is on; otherwise, the coffee machine could be damaged.
3.5 Users
- The appliance has the possibility to create 8 user profiles. Each user has and can modify their 16 drinks as they like.
- To select and add user profiles, press on the icon of a person in the top left corner. Once pressed, a drop-down menu will open showing the profiles with the icons and the different names associated with them.
- Within this drop-down you will also see the "+" icon to add more users. Press it, a window will open in which you can select the image and name for the new users.
- To replace the image, you must insert a USB drive at the bottom left of the display.
NOTE: the image to be replaced in the drink must respect an image size of 100x100 pixels, maximum 2 MB in size, in PNG format and the file name may only contain letters and numbers.
You can also enter this window by pulling down the menu from the double inverted arrow icon in the top centre. Enter Machine settings and press User settings.
3.6 Menus
To access the different menus you can do so by pulling down the menu from the double inverted arrow icon in the top centre of the main screen of the selectable drinks. All available menus are explained below:
3.6.1 Quick cleaning of the brewing system
The brewing system cleaning is used to clean the brew unit where coffee extraction takes place. Follow the instructions on the display to confirm the steps.
- Press "OK" to start a quick cleaning of the brewing system.
- The brewing system cleaning will start and last approximately 1 minute.
Note: it is very important to perform this cleaning after a full day of use.
ENGLISH
3.6.2 Quick cleaning of the milk system
The milk system cleaning is used to clean the milk system where milk extraction and steaming take place. Follow the instructions on the display to confirm the steps.
- Press "OK" to start a quick cleaning of the milk system.
- Remove the milk tube from the milk tank and insert it into the drip tray. Then, press "OK"
- Milk system quick cleaning will be in process. This may take some minutes.
Note: perform this cleaning after each use of the milk system.
3.6.3 Maintenance
Deep cleaning of the brewing system
The brewing system deep cleaning is used to clean the brew unit where coffee extraction takes place. This deep cleaning is carried out by using cleaning tablets. Follow the instructions on the display to confirm the steps.
NOTE: the deep cleaning process is estimated to take 15 minutes and cannot be cancelled once started.
- Press "OK" to start.
- Remove and empty the drip tray and coffee waste tank. Then, reinstall them.
- Quick cleaning will be in process. This may take some minutes.
- Open the cover of the ground coffee tank and add one cleaning tablet. Place a 1 l container at the coffee spout, and press "Next step".
- The estimated time is 10 minutes.
- After this time, the brewing system deep cleaning will be completed. Press "OK" to return.
Deep cleaning of the milk system
The milk system deep cleaning is used to clean the milk system where milk extraction and steaming take place. Follow the instructions on the display to confirm the steps.
NOTE: the deep cleaning process is estimated to take 15 minutes and cannot be cancelled once started.
- Press "OK" to start.
- Pour 0.5 l of lukewarm water at about 40 °C into the milk tank, add 1 cleaning tablet and dissolve it thoroughly (about 5 minutes). Then press "Next".
- Connect the milk tube and place a 1 l container at the coffee spout before pressing "Next".
- The estimated time is 3 minutes.
- Rinse the milk tank, add 0.5 l of clean water, and connect the milk tank tube. Press "Next".
- The estimated time is 3 minutes.
- After this time, the milk system deep cleaning will be completed. Press "OK" to return.
Descaling
The descaling process is used to clean the entire piping system of the coffee machine. During normal use the coffee machine accumulates scale deposits due to the hardness of the water. Follow the instructions on the display to confirm the steps.
NOTE: the descaling process is estimated to take 25 minutes and cannot be cancelled once started.
- Press "OK" to start.
-
Remove the water tank. Fill the water tank with up to approx. 1 l of water, then add descaling powder (follow the manufacturer's instructions). Stir to dissolve and reinstall the tank. Press "OK" to continue.
-
No
-
Remove the milk tank tube and insert it into the drip tray. Place a 1 l container under the coffee spout, and press "Next".
-
Descaling will be in process. This may take some minutes.
-
Take out the water tank and rinse it. Fill it up with clean water. Put it back in place and press "Next".
-
Descaling will be in process. This may take some minutes.
-
Coffee machine descaling will be finished. Press "OK" to return.
3.6.4 Machine settings
Drinks settings
After selecting this menu, the machine will display all available drinks settings. After selecting the drink, you want to configure, 3 icons appear at the right of the drink.
- The first icon allows you to change the appearance position of the selected drink in the preset drinks list on the main screen. To do this, press the icon of the drink you want to move and press the new drink you want to change the position of.
- The second icon allows you to delete the drink you select. You will need to confirm if you want to delete the drink.
- The third icon allows you to configure everything related to the characteristics of the drink itself.
- Drink name/English - Change to: this section allows you to rename the selected drink, either in your chosen language or in English.
- Image: to replace the image, you must insert a USB drive at the bottom left of the display. NOTE: the image to be replaced in the drink must respect an image size of 390x355 pixels, maximum 2 MB in size, in PNG format and the file name may only contain letters and numbers.
- Sequence: this section allows you to select the order in which the different drinks appear, coffee, hot water, milk, milk froth and pause. Please note that some drinks, such as the use of milk and water, are incompatible in the order of the sequence of drinks.
- For the configuration of the drinks sequence, drag the colour blocks to the desired step in the diamonds just above them.
ENGLISH
- Steps: this sequence allows you to adjust each parameter for each step. These parameters have been explained in section "3.4 Drinks preparation".
- You can test the selected configuration to see if it is to your liking, if so, press "Save" to save the final drink configuration.
NOTE: you can switch between users by pressing on the user icon at the top centre of the display. Remember that each user has their own preset drinks.
User settings
- After selecting this menu, the 8 available users are displayed. Press the name box to name the user.
- To replace the image, you must insert a USB drive at the bottom left of the display.
NOTE: the image to be replaced in the drink must respect an image size of 100x100 pixels, maximum 2 MB in size, in PNG format and the file name may only contain letters and numbers.
- Once you have selected the name and image press "Save".
- To delete users, press the bin icon in the top right corner, then press the user(s) you wish to delete and press "Save".
Maintenance settings
In the following section you can adjust the maintenance parameters of the machine, such as when the appliance will demand cleaning.
- Preheating setting for brewing system: this setting allows us to heat the brew unit with hot water to improve the subsequent extraction of the coffee. The appliance will ask you whether or not you want to warm up. For example, if you select 5 minutes, after 5 minutes you will be asked before making the coffee whether or not you want to warm up. After that coffee, you must wait 5 minutes for the appliance to ask you again if you want to heat up the brew unit.
- You can select: "No", "Now", "In 5, 10, 15 or 20 minutes", and "In 2 hours".
- Quick cleaning settings for milk system: allows you to select after how many uses of the milk system the machine will ask for quick milk system cleaning.
- You can select: "No", "Now", "In 5, 10, 15 or 20 minutes", and "In 2 hours".
- Brewing system deep cleaning settings (number of cups): allows you to select the number of coffees after which the machine will ask for deep cleaning of the brewing system.
- Selectable from 100 to 1000 coffees.
- Milk system deep cleaning settings (number of cups): allows you to select after how many uses of the milk system the machine will ask for a deep cleaning of the milk system.
- Water hardness settings: water hardness is one of the most important factors affecting the lifetime of the coffee machine. The appliance allows you to vary the hardness of the water you use. The Merk scale is used to measure water hardness by analysing the amount of milligrams of calcium carbonate per litre of water. Between 100 and 500 values, being the lowest for soft water and the highest for very hard water.
Auto switch-off
- Press the auto power off selector to activate the auto power off, when active the selector will turn green.
- You can select from 15-30-45 minutes to 1-23 hours.
ECO mode
- ECO mode 1: if no operation is performed on the machine for one hour, the display will dim by 50% and the word "ECO" will appear on the display. If you touch the display, you will exit this mode and you will be able to prepare the drink of your choice.
- ECO mode 2: if no operation is performed on the machine for one and a half hours, the display will switch off. Press the Power button on the top right-hand side of the machine to exit this mode and prepare the drink of your choice.
Custom settings
The basic appliance personalisation settings are explained below:
- Standby mode: it shows how you will see the main screen where all drinks are displayed, you can select in grid mode or in 3D mode, the latter will show a ring with all selectable drinks.
- Preparation mode: this option allows you whether or not to modify the parameters of the drink before brewing. You can select between Adjustable volume and Non-adjustable volume.
- Display backlight brightness: select the brightness of the display in the bar.
- LED strip: select the desired colour for the LED light strip on the coffee spout.
- RGB colour: select the colour of the LED strip.
NOTE: press "Save" to keep the changes.
Function icon
- Dregs counter: counts the number of coffee grounds to warn you to clean the drip tray and empty the coffee waste tank. It is recommended to always keep it active.
- Display drink name in 2 languages.
- Password: the password is used to restrict access to the "Machine settings" menu. If you activate this option, you will be asked to enter the old and the new password. Remember the password if you are going to activate this function.
NOTE: press "Save" to keep the changes.
Language
Choose the desired language.
ENGLISH
Grinding capacity
For further control of the amount of ground coffee, it is possible to apply a factor to increase or decrease the amount of ground coffee. The value displayed will be multiplied by the amount of ground coffee selected. If the number selected is greater than 1, the quantity of ground coffee will be greater than normal; if the number selected is less than 1, the quantity of coffee will be less. Values from 0.7 to 1.3
Factory settings
You can then perform a reset of various parameters to factory settings:
- Reset drinks
- Reset parameters
- Reset to factory settings
3.6.5 Machine information
The following section provides information on the use of the machine:
- Total cups: displays the total number of cups and the total for each drink.
- Maintenance records: displays the total cleanings and the total for each drink.
- Software version: displays the software version, HMI, and model.
- Machine information.
3.6.6 Display lock for cleaning
When activating this function, the appliance will lock the display for 10 seconds to allow the display to be cleaned without generating any unwanted keystrokes.
3.6.7 Switch-off
Press this option to switch off the appliance. Confirm if you want to switch it off.
4. CLEANING AND MAINTENANCE
The cleaning of the coffee machine is the most important point on the maintenance of the appliance. A quick daily cleaning of the brewing system is necessary. In addition, after each use of the milk system, it should be given a quick cleaning of the milk system.
After each use, milk forms deposits in the ducts through which it passes, even blocking them. In addition, bad tastes and odours can be generated by the accumulation and degradation of the same.
It is essential for the proper functioning of the milk system and cappuccinatore that the ducts are clean. One of the main reasons why milk is no longer well steamed and frothed is the accumulation of milk in these ducts.
The following daily cleanings are recommended:
- Quick cleaning of the brewing system
- Quick cleaning of the milk system
The following weekly/monthly cleanings are recommended:
- Deep cleaning of the brewing system
- Deep cleaning of the milk system
4.1 Removing and cleaning the cappuccinatore (milk frother). Fig. 2
- Remove the milk tank tube from the cappuccinatore.
- Press the cappuccinatore release tabs and pull it firmly downwards.
- Disassemble the coffee spout, cappuccinatore, connector and other parts and wash them with soap and a precision cleaning brush.
- Rinse the parts thoroughly and place them back as shown in the figure.
4.2 Maintenance tips
- Do not add water to the coffee bean container.
- Do not remove the drip tray, water tank or any other parts while the machine is in operation.
- Fill the water tank only with natural mineral or filtered bottled water at room temperature. Do not add water that is too hot or too cold.
- It is recommended to use medium roasted or medium-dark roasted coffee beans that are not too oily and of natural roast; high roasted coffee should not be used.
- When preparing a drink, do not place your hand under the coffee spout; you could burn yourself.
- Clean the machine with a damp cloth. Do not use abrasive or corrosive products.
- When filling the water or coffee bean container, make sure not to exceed the "MAX" marks.
- Do not disconnect the machine from the power supply during drink preparation, automatic cleaning or restarting.
- To avoid splashing, you can adjust the height of the coffee spout to match the height of the cup of your choice.
- Every time you switch off the machine, empty the coffee waste tank and residual water.
- To ensure the quality of the coffee, it is recommended to clean the water tank every day (this also involves changing the water).
-
Do not immerse the machine in water for cleaning.
-
TROUBLESHOOTING
| Note Possible causes Possible solutions | ||
| Water tank is empty | 1. Water level is below the minimum level.2. The water tank is not correctly installed.3. The water level detection sensor does not work. | 1. Remove the water tank and fill it with water.Make sure that the water level does not exceed the "Max" mark.2. Re-install the water tank.3. Contact the official Cecotec Technical Support Service. |
| Coffee waste tank is full | There are more than 15 deposits in the coffee waste tank. | Remove the drip tray, take out the coffee waste tank and empty it. |
| Hopper is empty | 1. Hopper is empty.2. The coffee beans are stuck together. | 1. Fill the hopper with coffee beans.2. Stir the bean until they are loose. |
| The hopper is not properly positioned | 1. Hopper sensor does not work.2. Hopper magnet is missing or damaged. | 1-2. Contact the official Cecotec Technical Support Service. |
| The drip tray is not positioned correctly | 1. The drip tray is not positioned correctly.2. The sensor is damaged.3. The magnet is lost or damaged. | 1. Position the drip tray correctly.1-3. Contact the official Cecotec Technical Support Service. |
| The drip tray is full | 1. The drip tray is full of dirty water.2. The sensor is dirty. | 1. Remove the tray and empty it.2. Clean the sensor. |
| No water is coming out | 1. The tank inlet is blocked.2. The tank is not correctly positioned.3. The filter in the coffee system is blocked.4. The flow meter is damaged. | 1-2. Fill up the water tank. Replace it.3. Clean the filter and replace it. You can clean it using the tablet cleaning programme or by disassembling it.4. Contact the official Cecotec Technical Support Service. |
| No milk comes out | 1. Milk tank is empty.2. The steam outlet is blocked.3. The cappuccinatore is blocked. | 1. Fill up the milk tank.2. Start the milk system cleaning function.3. Disassemble and clean the cappuccinatore or replace it. |
| Pressure is too high | 1. The filter in the brewing system is blocked.2. Coffee is too fine.3. The hopper is too full.4. Air enters the pump while coffee is brewing. | 1. Perform a quick rinse of the coffee system.2. Turn the grinding level knob clockwise. The higher the number selected, the thicker the coffee.3. Do not overfill the hopper.4. Clean the water tank inlet. |
| It is necessary to carry out a cleaning of the coffee system | When the coffee system needs to be cleaned, a beep will sound. | Follow the instructions in this manual and carry out a deep cleaning. |
| It is necessary to carry out a descaling process | When a descaling process is required, a beep will sound. | Follow the instructions in this manual and carry out a descaling process. |
| Water leakage | There is a water leak inside the coffee machine. | Check all the parts of the coffee machine to confirm that everything is correctly fitted. If the problem persists, contact the official Cecotec Technical Support Service. |
| No coffee comes out | 1. The ground coffee is too fine.2. The hopper is too full.3. The filter in the brewing system is blocked. | 1. Turn the grinding level knob clockwise. The higher the number selected, the thicker the coffee.2. Do not overfill the hopper.3. Clean the coffee system using cleaning tablets. If the problem persists, please contact the official Cecotec Technical Support Service. |
| The machine does not switch on | 1. No power supply.2. Voltage is not high enough.3. The coffee machine is not switched on.4. The PCB is damaged.5. Main power supply fuse is blown. | 1. Check that the appliance is connected to the mains.2. Make sure that the voltage is correct.3. Check that the appliance is switched on.1-5. Contact the official Cecotec Technical Support Service. |
| The thermoblock system has overheated | The temperature is above 160 °C. | If the message “The hot water thermoblock is cooling down, please wait” appears on the display, wait until the system cools down. |
| Room temperature is too low | Room temperature is 0 °C or lower. | Switch the machine back on when the room temperature is between 10 °C and 40 °C. |
| Check the brewing system | The brewing system is not correctly positioned. The brewing system is damaged. The motor of the brewing system is damaged. | Press “Check up”. Replace the brewing system. Replace the motor. |
| No milk froth, only hot milk | Air valve inlet is blocked or dirty. | Perform a deep cleaning of the milk system.Check the tube and the air valve inlet. Clean the air valve. |
6. TECHNICAL SPECIFICATIONS
Product reference: 01803
Product: Cremmaet Touch OCS
Power: 1500 W
Voltage: 220-240 V
Frequency: 50/60 Hz
Water tank capacity: 2 L
Coffee bean container: 400 g
Technical specifications may change without prior notification to improve product quality.
Made in China | Designed in Spain
7. DISPOSAL OF OLD ELECTRICAL AND ELECTRONIC APPLIANCES
This symbol indicates that, according to the applicable regulations, the product and/or batteries must be disposed of separately from household waste. When this product reaches the end of its shelf life, you should dispose of the cells/batteries/accumulators and take them to a collection point designated by the local authorities.
Consumers must contact their local authorities or retailer for information concerning the correct disposal of old appliances and/or their batteries.
Compliance with the above guidelines will help protecting the environment.
8. TECHNICAL SUPPORT AND WARRANTY
Cecotec shall be liable to the end user or consumer for any lack of conformity that exists at the time of delivery of the product under the terms, conditions, and deadlines established by the applicable regulations.
It is recommended that repairs be carried out by qualified personnel.
If at any moment you detect any problem with your product or have any doubt, do not hesitate to contact the official Cecotec Technical Support Service at +34 963 210 728.
ENGLISH
9. COPYRIGHT
The intellectual property rights over the texts in this manual belong to CECOTEC INNOVACIONES, S.L. All rights reserved. The contents of this publication may not, in whole or in part, be reproduced, stored in a retrieval system, transmitted, or distributed by any means (electronic, mechanical, photocopying, recording or similar) without the prior authorization of CECOTEC INNOVACIONES, S.L.
1. PIÈCES ET COMPOSANTS
Parties. Img. 1
5. PROBLEEMOPLOSSING
text_image
Technical diagram of a laboratory instrument with numbered parts labeled 1 through 9Fig./Img./Abb./Afb./Rys.1
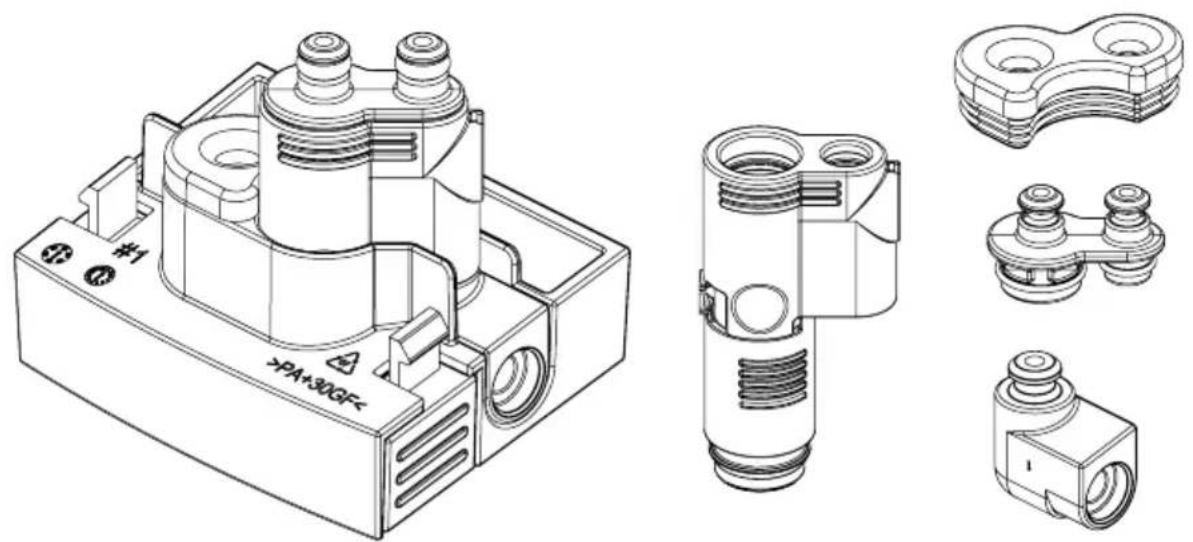
Fig./Img./Abb./Afb./Rys.2
natural_image
Technical line drawing of a mechanical device with threaded ports and a dial indicator (no text or symbols)Fig./Img./Abb./Afb./Rys. 3
www.cecotec.es