
HDY7 H9A3BCEX-S - Tumble dryer HOOVER - Free user manual and instructions
Find the device manual for free HDY7 H9A3BCEX-S HOOVER in PDF.
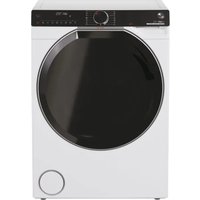


| Brand | Hoover |
| Model | HDY7 H9A3BCEX-S |
| Type | Heat pump dryer |
| Rated capacity | 9 kg |
| Energy class | A+++ |
| Weighted annual consumption | 194 kWh/year |
| Dimensions (H x W x D) | 845 x 595 x 695 mm |
| Weight | Not specified (estimated ~50 kg) |
| Power supply | 220-240 V~50 Hz, 2.7 A, 650 W |
| Refrigerant | R290 (flammable, 0.15 kg) |
| Connectivity | Wi-Fi (2.4 GHz), hOn app |
| Programs | 15 programs (Cotton, Synthetics, Delicates, Eco, Quick, etc.) |
| Drying levels | Extra dry, Ready to store, Ready to wear, Ready to iron |
| Special functions | Delayed start, Anti-crease, Active drying, Easy iron, Child lock |
| Maintenance | Clean lint filter after each cycle, Clean condenser filter after each cycle, Empty water tank |
| Water tank | Empty after each cycle, possible direct drainage |
| Noise level | 63 dB (cotton standard program) |
| Ambient temperature | 5 °C to 35 °C |
| Warranty | According to conditions of certificate provided |
Frequently Asked Questions - HDY7 H9A3BCEX-S HOOVER
User questions about HDY7 H9A3BCEX-S HOOVER
0 question about this device. Answer the ones you know or ask your own.
Ask a new question about this device
Download the instructions for your Tumble dryer in PDF format for free! Find your manual HDY7 H9A3BCEX-S - HOOVER and take your electronic device back in hand. On this page are published all the documents necessary for the use of your device. HDY7 H9A3BCEX-S by HOOVER.
USER MANUAL HDY7 H9A3BCEX-S HOOVER


5.3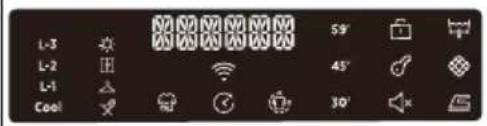
5.1 OFF

or via the link: go.haier-europe.com/download-app
Frequency (OFR) 2400 MHz-2483.5 MHz
Max power (EIRP) 20 dBm
Wireless standard IEEE802.11b/g/n and BLE V4.2

Note: Registration

Notice


5.3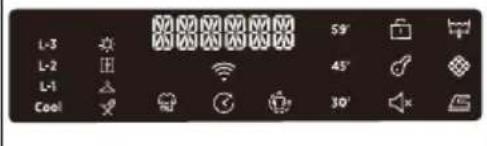
5.1 AUS

Note


Note
Thank you for purchasing a Haier Product.
Please read this instruction carefully before using the appliance. The instruction contains important information which will guide you in order to have a safe and proper installation as well as daily use and maintenance.
Keep this manual in a convenient place so you can always refer to it for the safe and proper use of the appliance.
Safety notice


WARNING! - Important safety information
General information and tips
Environmental information
Disposal
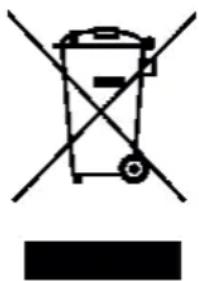
This marking on the product, accessories or literature indicates that the product and its electronic accessories (e.g. charger, headset, USB cable) should not be disposed of with other household waste at the end of their working life.
To prevent possible harm to the environment or human health from uncontrolled waste disposal, please separate these items from other types of waste and recycle them responsibly to promote the sustainable reuse of material resources.
Household users should contact either the retailer where they purchased this product, or their local government office, for details of where and how they can take these items for environmentally safe recycling. Business users should contact their supplier and check the terms and conditions of the purchase contract.
This product and its electronic accessories should not be mixed with other commercial wastes for disposal.

WARNING!
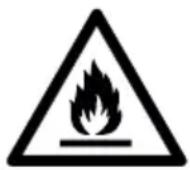
This appliance is filled with R290. Flammable material risk of fire.
WARNING: In the appliance enclosure or in the built-in structure, keep ventilation openings clear of obstruction.
WARNING: Do not damage the refrigerant circuit.

WARNING!
Risk of injury or suffocation!
To ensure safety when disposing of an old tumble dryer, disconnect the mains plug from the socket, cut the mains power cable and destroy this together with the plug. To prevent children shutting themselves in the machine, break the door hinges or the door lock.

WARNING!
The appliance must not be powered through an external switching device, such as a timer, or connected to a circuit that is regularly switched on and off by a utility.
Content
1 - Safety information .... 4 2 - Installation 7 3 - Practical hints .... 10 4 - Product description 11 5 - Control panel 12 6-Programmes....16 7 - Consumption....17 8 - Suggestions and tips....18 9 - Daily use 20 10 - Remote control (Wi-Fi) 23 11 - Care and cleaning....26 12 - Troubleshooting....28 13 - Customer service 32
Download the app



WARNING!
Before first use
▶ Make sure there is no transportation damage. Remove all package and keep it out of children's reach. ▶ Always move the appliance with two people at least because it is heavy.
Daily use
This appliance can be used by children aged from 8 years and above and persons with reduced physical, sensory or mental capabilities or lack of experience and knowledge if they have been given supervision or instruction concerning use of the appliance in a safe way and understand the hazards involved. - Keep away children under 3 years of age from the appliance unless they are constantly supervised.
▶ Children shall not play with the appliance. ▶ Do make sure the room is dry and well ventilated. The ambient temperature should be between 5°C and 35°C.
▶ Do not cover any ventilation openings in the base by a carpet or similar object.
- Keep the area around the tumble dryer free of dust and lint.
- Make sure that there is only laundry inside the appliance and no pets or children before you use it.
▶ Only touch the mains plug with dry hands and do not touch or use the appliance if you are barefoot or with wet hands or feet.
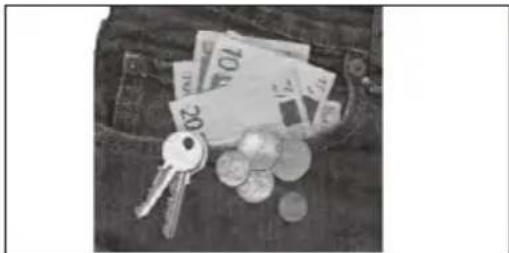
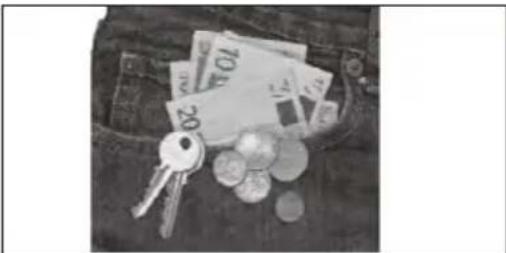
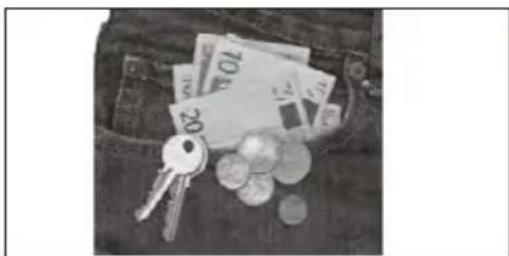
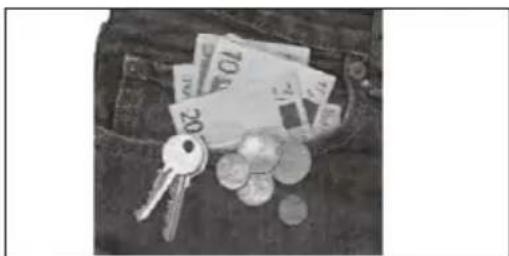
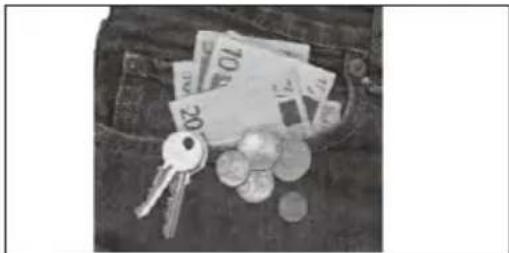
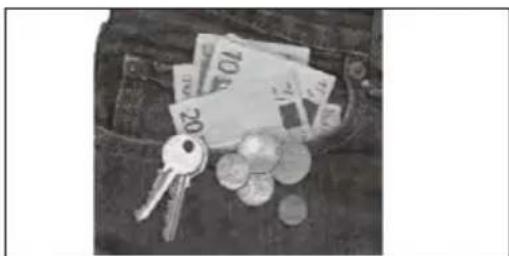
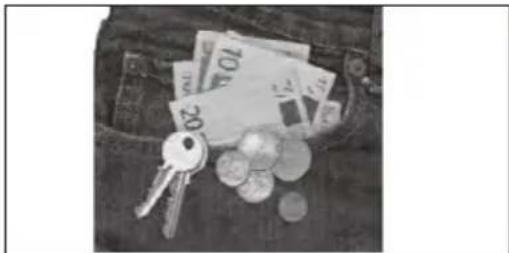
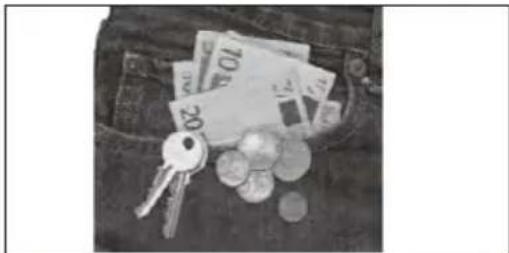
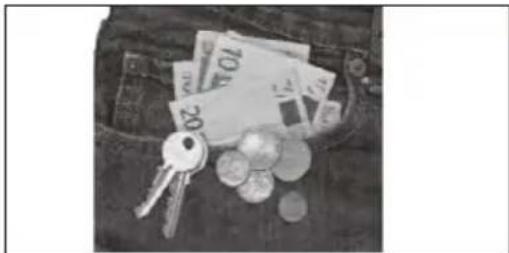
▶ Do not dry unwashed items in the tumble dryer. ▶ Make sure not to load more than the nominal load. - Remove all items such as lighters and matches from pockets.
- Fabric softeners, or similar products, should be used as specified by the fabric softener instructions.
- Do not use or store any flammable sprays or flammable gas in close vicinity to the appliance.
- Do not place heavy objects or sources of heat or damp on top of the appliance.
▶ Hold the plug, not the cable, when unplugging the appliance. ▶ Do not touch the rear and the drum during operation, they are hot.

WARNING!
Daily use
▶ Do not use the appliance to dry the following items:
▶ Items which are not washed. ▶ Items which have been contaminated with inflammable substances such as cooking oil, acetone, alcohol, benzine, petrol, kerosene, spot removers, turpentine, waxes, wax removers or other chemicals. The fumes can cause a fire or explosion. Items that have been soiled with substances such as cooking oil, acetone, alcohol, petrol, kerosene, spot removers, turpentine, waxes and wax removers should be washed in hot water with an extra amount of detergent before being dried in the tumble dryer.
- Items which contain padding or fillings (e.g. pillows, jackets), as the filling can get out with the risk of causing ignition.
▶ Items such as foam rubber (latex foam), shower caps, waterproof textiles, rubber backed articles and clothes or pillows fitted with foam rubber pads should not be dried in the tumble dryer.
▶ Do not drink the condensed water.
- Do not use the appliance without the lint filter or condenser filter in place or with damaged filter.
- Notice that the last part of the drying cycle occurs without heat (cool down cycle) to ensure remaining garments are under a temperature which does not damage them.
- Do not leave the appliance unattended during run time for a long time. If a long absence is needed, the drying cycle have to be interrupted by switching off and unplugging the mains.
- Do not switch off the appliance until drying cycle is finished. Never stop a tumble dryer before the end of the drying cycle unless all items are quickly removed and spread out so that the heat is dissipated
- Switch off the appliance after each drying program to save electricity and for safety.
Maintenance / cleaning
▶ Make sure children are supervised if they carry out cleaning and maintenance. - Disconnect the appliance from the electrical supply before undertaking any routine maintenance.

WARNING!
Maintenance / cleaning
- Clean the lint filter and the condenser filter after each programme (see "11 - Care and cleaning" on page 26). ▶ Do not use water spray or steam to clean the appliance. ▶ Do not use industrial chemicals to clean the appliance.
If the supply cord is damaged, it must be replaced by the manufacturer, its service agent or similarly qualified persons in order to avoid a hazard. - Do not try to repair the appliance by yourself. If a repair is needed, please contact our customer service.
Installation
▶ Ensure put the machine in a place which allows opening the door fully. Do not install the tumble dryer behind a lockable door, a sliding door or a door with hinges on the opposite side of the tumble dryer door as this limits the full opening of the door. ▶ Install the appliance in a well-ventilated, dry place.
▶ Never install the appliance in a damp outdoor, or in an area which has the risk of water leakage such as under or near a sink unit. Once a water leakage happened, cut power supply and allow the machine to dry naturally. ▶ Install or use the appliance only in a place where the temperature is above 5° C.
- Do not place the appliance directly on a carpet, or close to a wall or furniture.
- Do not expose the appliance to any frost, heat or direct sunlight or around any heat sources(e.g. stoves, heaters). ▶ Make sure that the electrical information on the rating plate aligns with the power supply. If it does not, contact an electrician.
▶ Do not use multi-plug adapters and extension cables.
▶ Make sure not to damage the electric cable and the plug. If it is damaged, have it replaced by an electrician. ▶ Use a separate earthed socket for the power supply which is easy to access after installation. The appliance must be earthed. Only for UK: The appliance's power cable is fitted with a 3-cord (grounding) plug that fits a standard 3-cord (grounded) socket. Never cut off or dismount the third pin (grounding). After the appliance is installed, the plug should be accessible.
Notice: all installation relevant pictures can be found at the beginning of this manual.
2.1 Preparation
Remove all packages including the polystyrene base firstly. While removing the package, water drops may be observed. This is a normal phenomenon resulting from the water test at the factory.

Notice
Dispose of the package in an environmental friendly manner. For information referring to current disposal sites, consult your retailer or the local authorities.

WARNING!
After transportation and installation, you MUST leave the dryer to stand for two hours before use.
2.2 Transport and waiting time
Transport the appliance in horizontal position only. The maintenance-free lubrication oil is located in the capsule of the compressor. This oil can get through the closed pipe system during slanting transport. Before connecting the appliance to the power supply you have to wait 2 hours so that the oil runs back into the capsule.
2.3 Place the appliance
The appliance should be placed on a flat and solid surface. Set the feet to the desired level.
2.4 Electrical connection
Before each connection check if:
▶ Power supply, socket and fusing are appropriate to the rating plate. The power socket is earthed and no multi-plug or extension. ▶ The power plug and socket are strictly match. ▶ Only UK : The UK plug meets BS1363A standard.
Put the plug into the socket.

WARNING!
If the supply cord is damaged, it must be replaced by the service agent (see warranty card) in order to avoid a hazard!
2 - Installation
2.5 Level the dryer
It is IMPORTANT to level the dryer to ensure the machine runs efficiently with minimal noise. The dryer should be levelled in, so it stands balanced evenly on all four feet. Ensure the dryer does not rock in any direction.
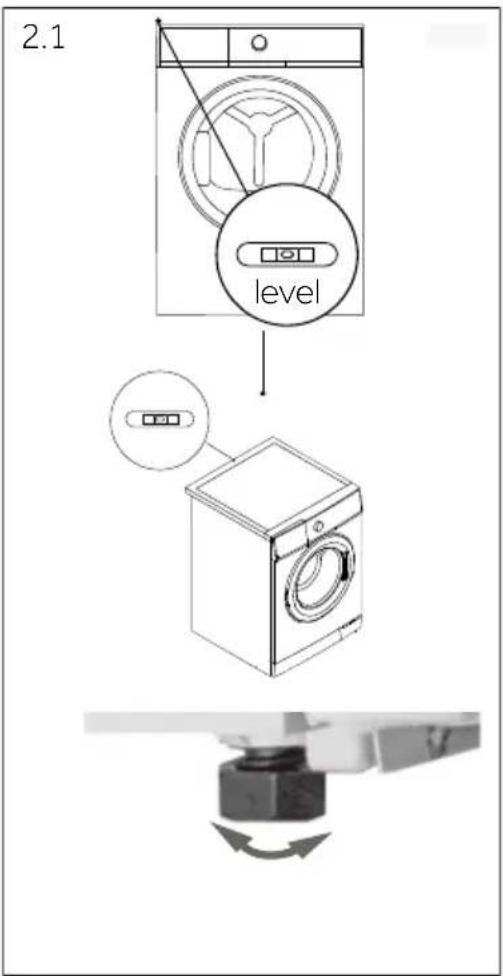
Level the dryer side to side:
- Place the gradienter at the centre back of the dryer.
- Adjust the rear feet until the dryer is level side to side. • Never fully screw the feet completely from their housings.
Level the dryer front to back:
- Place the gradienter on the left side.
- Adjust the front left foot (wind down).
- Repeat the above for the right foot.
Double check the dryer is balanced:
- Place the gradienter at the centre front of the dryer.
- Ensure the dryer does not rock in any direction.
- If dryer is not balanced repeat the above steps.
After levelling, the corners of the dryer cabinet should be clear of the floor and the dryer must not rock in any direction.
2.6 Drainage pipe connected to the outside
During the drying process of clothes, condensed water will be automatically stored in the water box located in the upper left corner of the machine. The water box is full or needs to be emptied after each drying session. If your dryer is placed near the drainage floor drain, you can directly drain the condensate water into the drain through the drain hose in the attachment, so you don't have to empty the water box every time.
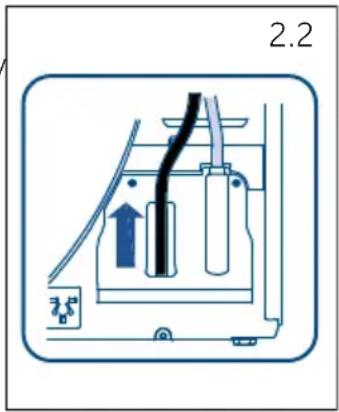
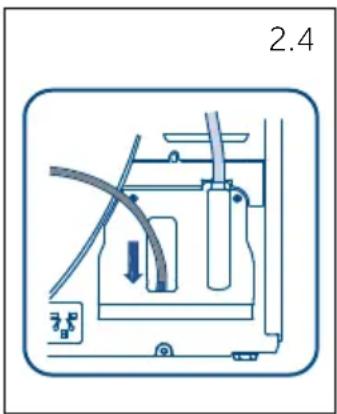
The method of connecting the drainage hose is as follows:
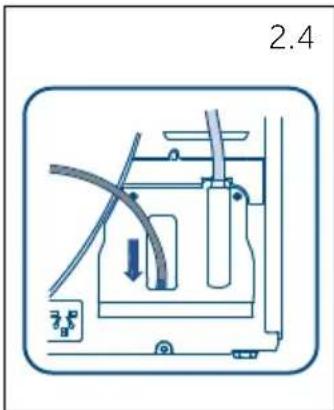
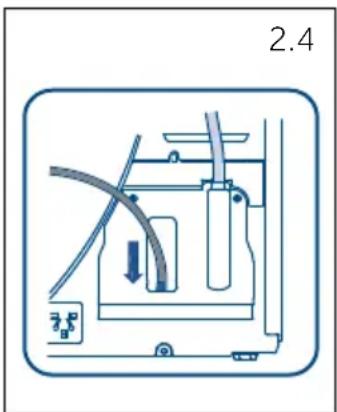
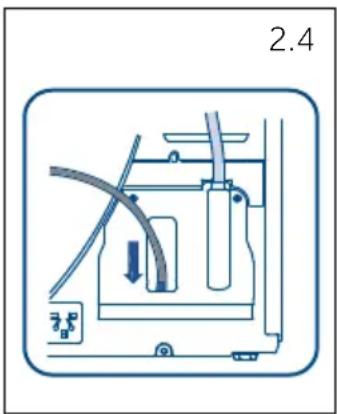
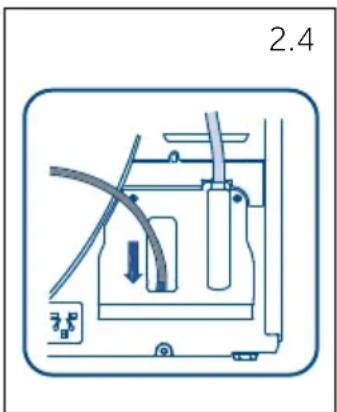
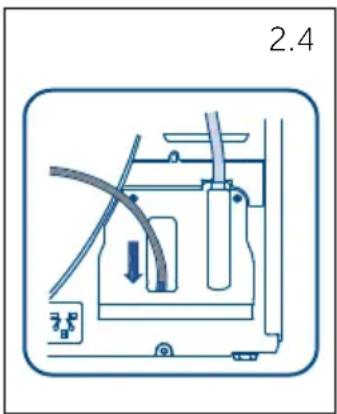
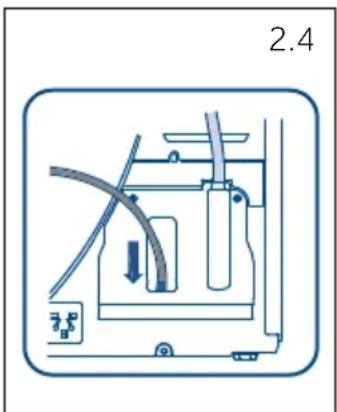
- Remove the black hose from the connection at the back of the dryer (Bottom right of the back Fig. 2.2).
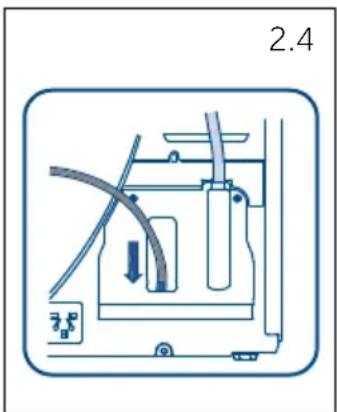
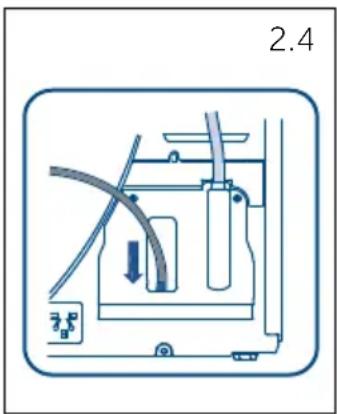
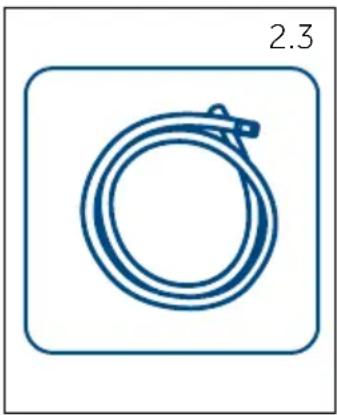
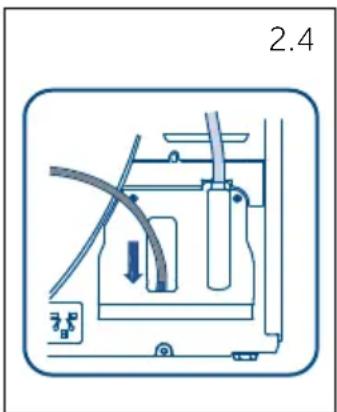
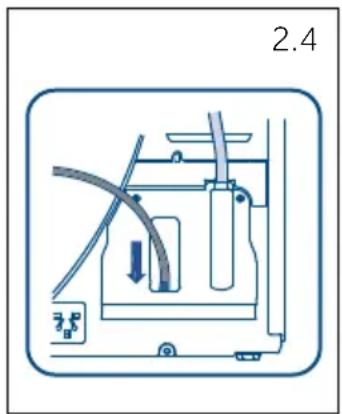
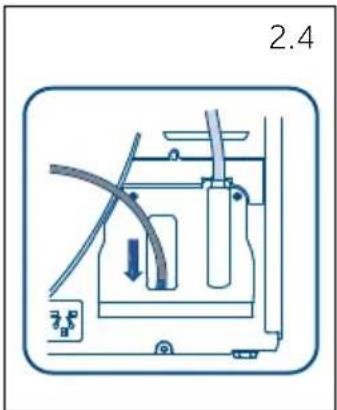
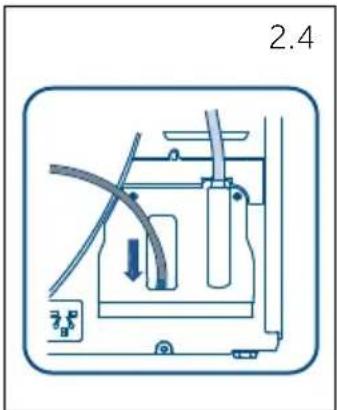
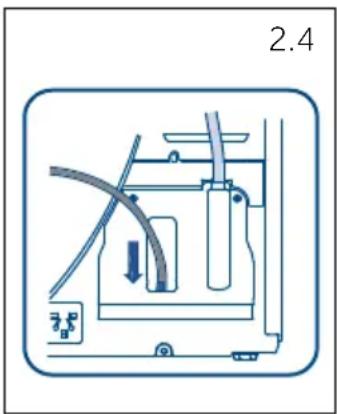
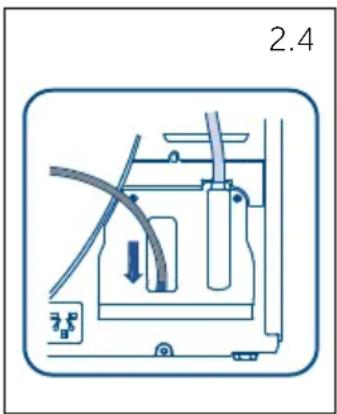
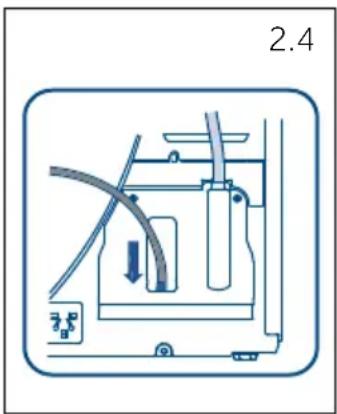
- Uncoil the grey drain hose (included with your dryer) and connect it to the machine drain port (Fig. 2.3, 2.4).
- Place the other end of the drain hose into a tub or standpipe.

Note: The external drainage hose must be firm
The gray drainage hose must be securely fixed after being inserted at both ends.
The gray drainage hose cannot be bent.
The gray drainage hose cannot be higher than the top of the machine by 15 cm.
Intended use
This appliance is intended for drying items which have been washed in a water solution and are marked on the manufacturer's care label as being suitable for tumble drying.
It is designed exclusively for domestic use inside the house. It is not intended for commercial or industrial use. Changes or modifications to the device are not allowed. Unintended use may cause hazards and loss of all warranty and liability claims.
Standards and directives CE
This product meets the requirements of all applicable EC directives with the corresponding harmonised standards, which provide for CE marking.

Environmentally responsible use
▶ Completely spin: Spin the laundry with the maximum spin speed. ▶ Maximum load: Use the maximum filling amount according to the programme table, but do not overload the dryer. To take advantage of the maximum load, the laundry which should be dried "READY to wear", can be first dried easily with "Ironing reminder". When program ends, remove the laundry which should be ironed and dry the remaining laundry then to end. ▶ Loosen up the laundry: Shake out the laundry before putting them into the dryer.
- Avoid excess drying: An excessive drying should be avoided. Select the right programme and the appropriate dry level.
▶ Softener unnecessary: Do not use softener when washing, because the laundry will become fluffy and soft in the dryer.
▶ Cleaning of the lint filters: Clean the lint filters after each cycle.
▶ Ventilation: Make sure the appliance is properly ventilated (see "2 - Installation" on page 7).
Condensed water reuse: The collected condensed water can be used for the steam iron. Before that, it should be poured through a fine sieve or coffee filter paper. Smallest parts will be retained by the filter.

Note:
Due to technical changes and different models, the illustrations in the following chapters may differ from your model.
4.1 Picture of appliance
Front (Fig. 4.1-a): Rear side (Fig. 4.1-b):
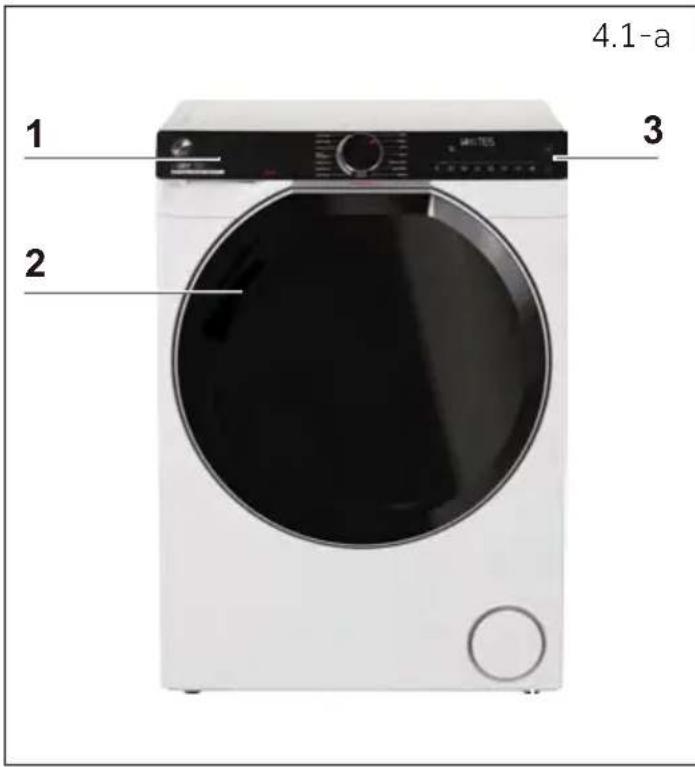
1 Water tank 2 Tumble dryer door 3 Control panel
4 Power supply cord 5 Back plate 6 Drainage outlet 7 Adjustable feet
4.2 Accessories
Check the accessories and literature in accordance with this list (Fig. 4.2):
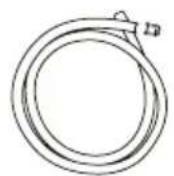
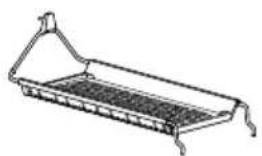
Drain hose Drying rack (optional)
Energy label Warranty cards Quick guide
4.2
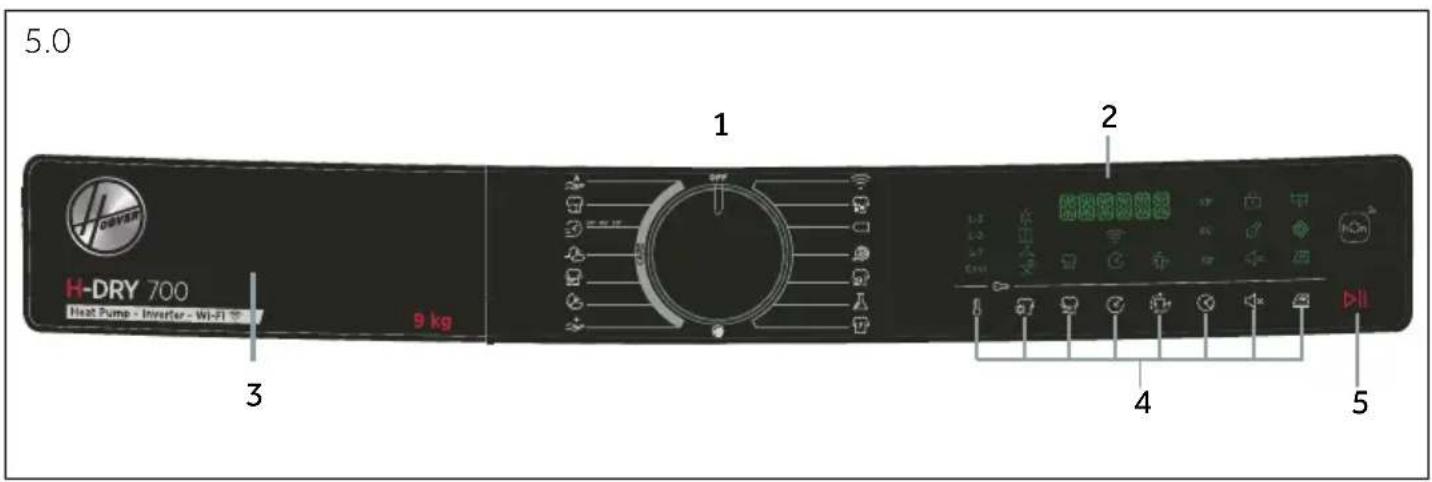
5 - Control panel
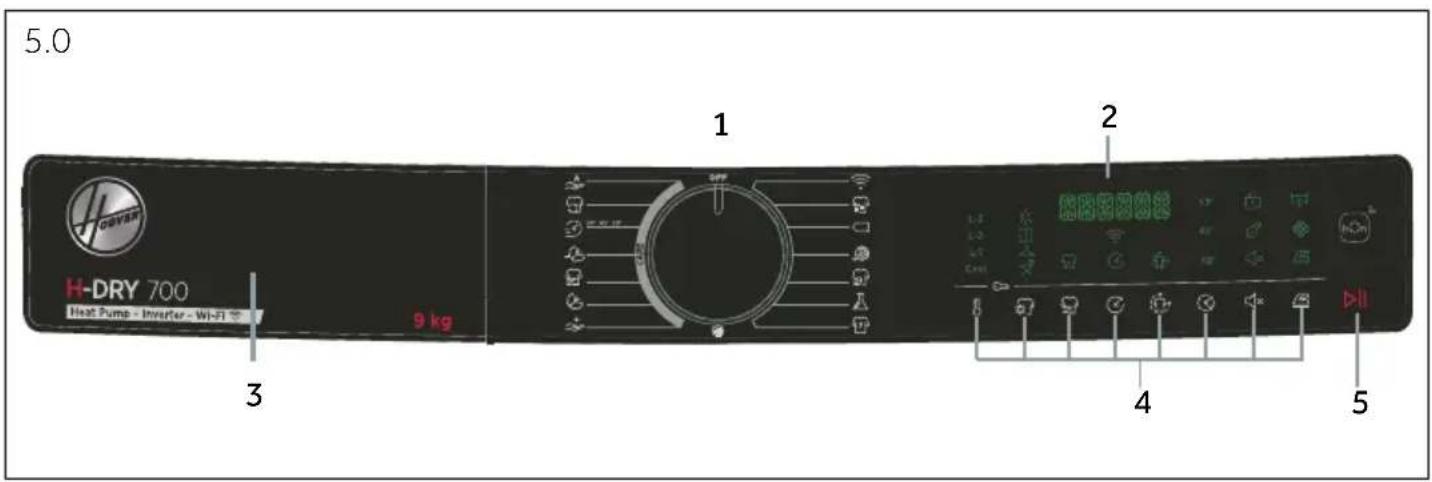
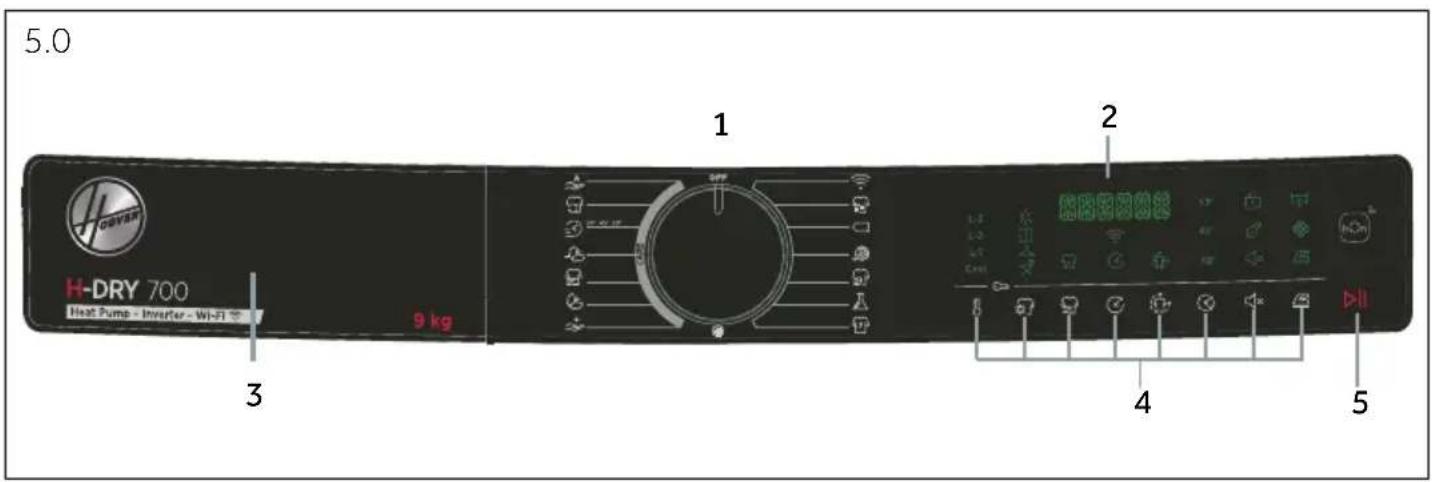
1 Programme selector
3 Water tank
5 "Start/Pause" button
2 Display
4 Function buttons

Note: Acoustic signal
The acoustic signal can be selected or cancelled if necessary. See "5.5.7 "Beep on - Beep off" function button 📂 × " on page 14.
5.1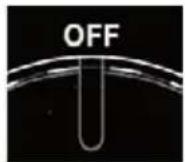
5.2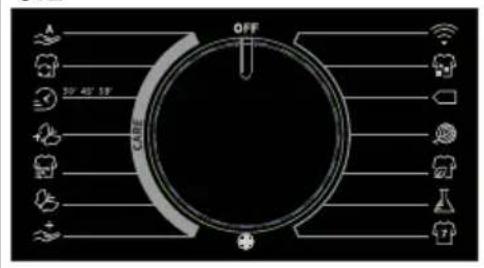
5.3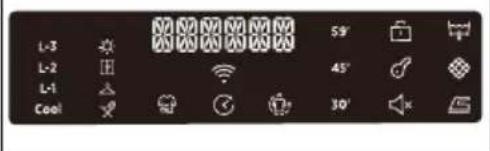
5.1 OFF
Turn the knob to any position (except OFF) to start the machine. Turn the knob to the OFF position to shut down the machine (Fig. 5.1).
5.2 Programme selector
By turning the knob (Fig. 5.2) one of 15 programmes can be selected, its default settings will be displayed.
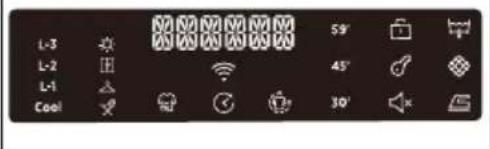
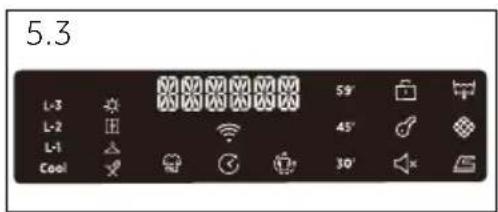
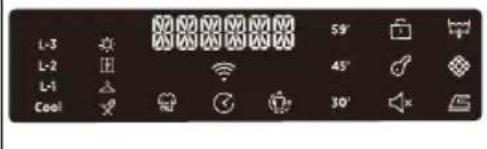
5.3 Display
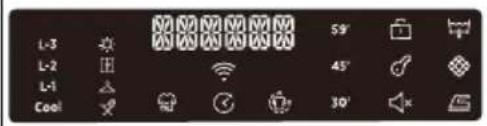
The display (Fig. 5.3) shows following information:
▶ Program name ▶ Remaining time ▶ Reservation remaining time ▶ Alarm information and prompt information ▶ Pause end information ▶ Delay time
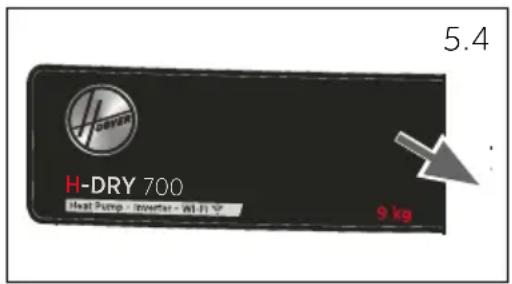
5.4 Water Tank
Open water tank, the following components can be seen (Fig. 5.4):
- water tank.
- The location of pouring water
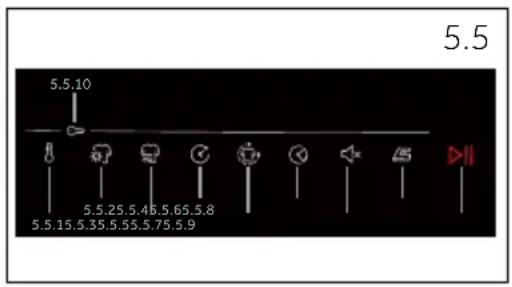
5.5 Function buttons
The function buttons (Fig. 5.5) enable additional options in the selected programme before the programme starts.
The related indicators are displayed.
By switching off the appliance or setting a new programme, all options are displayed.
If a button has multiple options, the desired option can be selected by pressing the button sequentially.
By touching the buttons, when the light is dull, the function is unselected; when the light is bright, the function is selected.

Note: Factory settings
To get the best results in each programme, Hoover has well-defined specific default settings. If there is no special requirement, default settings are recommended.
5.5.1 "Temperature level" function button
- This function is set to adjust the drying temperature based on personal needs or requirements. Press the button (Fig. 5.5.1) to set the drying temperature you want.
There are 4 levels: High, Medium, Low, Cool.
Please note that:
▶ A bright light means that the function is selected. ▶ A dull light means that the function is unselected. ▶ When the light is off, the function cannot be selected.
5.5.1

5.5.2 "Drying level" function button

- Press the button (Fig. 5.5.2) to set the final moisture content of the laundry at the end of the cycle.
There are 4 levels: Extra dry, Cupboard, Ready to wear, Ready to iron.
Please note that:
▶ A bright light means that the function is selected. ▶ A dull light means that the function is unselected. ▶ When the light is off, the function cannot be selected.
5.5.2
5 - Control panel
5.5.3
5.5.4

5.5.5
5.5.6

5.5.7

5.5.8

5.5.3 "Active dry" function button

- This button (Fig. 5.5.3) is used to refresh drying clothes, making them fresher when stored for a long time, and also to remove moisture from clothing.
- By touching the buttons, when it is in dull light, the function is unselected; when it is in bright light, the function is selected. Loop display of Active dry and remaining time (0:40) on the screen.
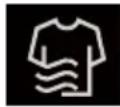
5.5.4 "Start delay" function button

- This button allows you to delay the start of the programme from 30 minutes (1 hour on some models) to 24 hours, in 30-minute intervals (1 hour on some models). The selected delay is shown on the display.
- After pressing the START/PAUSE button, the time displayed decreases minute by minute.
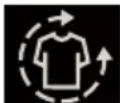
5.5.5 "Anti-crease" function button

- If the clothes cannot be taken out immediately after the drying cycle is completed, wrinkles may occur again due to long-term storage in the drum. This function can prevent this issue. When the drying ends, the drum will keep rotating for another 1-12 hours with cold air. There is no need to worry about forgetting to take out the clothes.
5.5.6 "Rapid 30' 45' 59'" function button

- If the programme selector is positioned on the rapid programmes CARE (30'/45'/59'), pressing the button repeatedly allows you to choose one of the three indicated durations. It can be increased in steps of 1 hour from 1-12 hours.
5.5.7 "Beep on - Beep off" function button

- Press the button (Fig. 5.5.7) to set the buzzing sound on/off. The buzzing sound will be turned on by default.
5.5.8 "Easy Iron" function button

- Press the button (Fig. 5.5.8) to set the iron reminder. If the reminder function is turned on, there will be a 2-minute prompt tone when the drying degree of the clothes reaches a suitable humidity for ironing.
5.5.9 "Start pause" function button

- Touch this button (Fig. 5.5.9) gently to start or interrupt the currently displayed programme.
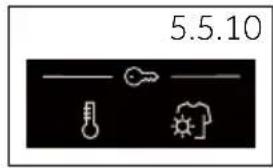
5.5.10 "Child lock" function button
- After selecting a program to start, long press the "temperature" button and "drying level" button for 3 seconds to open the child lock (Fig. 5.5.10). "CHILD LOCK ON" will be displayed on the interface. Press and hold the "temperature" button and "drying level" button for about 3 seconds to unlock the child lock, and "CHILD LOCK OFF" will be displayed on the interface.
- Child lock cannot be set up or cancelled through the hOn APP.

Note: Child lock
The child lock, which is set up manually, must be cancelled manually or will be cancelled automatically at the end of the programme. Power off and error information won't cancel the child lock. It still works when the appliance is powered on next time.
5.6 First starting
5.6.1 Language setting
- After connecting the machine to power and turning it on, press the "✕" or " " button to display the available languages.
- Select the desired language by pressing the START/PAUSE button.
5.6.2 Change the language
- If you want to change the setting language, you will have to press simultaneously "&" and "&" buttons for about 5 seconds to reset language settings.
- Confirm by pressing the START/PAUSE button.
6 - Programmes
 | Temperature | Dry level | i-time | Delay | Anti crease | Iron reminder | Active dry | ||||||||
| L-3 High | L-2 Medium | L-1 Low | Cool Cool Ex | Extra Dry Cup | Board | Ready to wear | Ready to iron | Shortest time (min) | Maximum time (min) | Default time (min) | |||||
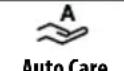 | ● | ○ | ○ | / | ○ | ● | ○ | ○ | / / | 170 | ● | ● | ● | / | |
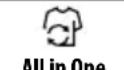 | ● | ○ | ○ | / | ○ | ● | ○ | ○ | / / | 195 | ● | ● | ● | / | |
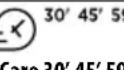 | ● | ○ | ○ | ○ | / | / / / | 305 | 959 | ● | ● | / / | ||||
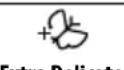 Extra Delicates Extra Delicates | ○ | ● | ○ | / | ○ | ○ | ● | ○ | / / | 65 | ● | ● | / / | ||
 | ○ | ● | ○ | ○ | / | / / / | 109 | 030 | ● | ● | / / | ||||
 | / | ○ | ● | ○ | / | / / / | 151 | 05 | 25 | ● | ● | / / | |||
 | ○ | ● | ○ | ○ | / | / / / | 10 | 1803 | 0 | ● | / / / | ||||
 | - | - | - | - | - | - | - | - | - | - | - | - | - | - | - |
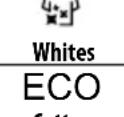 | ● | ○ | ○ | / | ○ | ○ | ● | ○ | / / | 40 | ● | ● | ● | / | |
| [LOTTON] | ● | ○ | ○ | / | ○ | ○ | ● | ○ | / / | 210 | ● | ● | ● | / | |
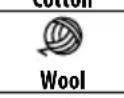 | / | / | ● | / | / | / / | 20 | 150 | 120 | ● | / / / | ||||
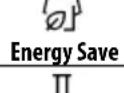 | ● | ○ | ○ | / | ○ | ● | ○ | ○ | / / | 130 | ● | ● | ● | / | |
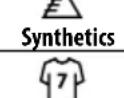 | ○ | ● | ○ | / | ○ | ○ | ● | ○ | / / | 95 | ● | ● | ● | / | |
| — | ● | ○ | ○ | / | ○ | ○ | ● | ○ | / / | 85 | ● | ● | / / | ||
 | ● | / | / | / | ● | ○ | ○ | ○ | / | / | 110 | ● | ● | / / | |
*) EN 61121 test program setting. We recommend that you drain the condensed water externally through the drain hose when drying a full load using the Eco program. This will avoid having to empty the water tank during the cycle. ** Optional: means not all levels are available. Please refer to the actual machine display for details.
Heat pump technology
The condensation dryer with heat exchanger is outstanding in terms of efficient energy consumption. These are guide values determined under standard conditions. The values may differ from those given, depending on overvoltage and undervoltage, the type of fabric, composition of the laundry to be dried, the residual moisture, and the actual loading.
| Program Cotton / Linen | Spin speed in rpm | Residual moisture in % | Time in h:min | Energy consumption in kWh |
| Extra dry 1000 approx. 60 3:50 2.30 | ||||
| Cupboard 1000 approx. 60 3:35 2.12 | ||||
| Ready to wear 1000 approx. 60 3:20 1.63 | ||||
| Ready to iron 1000 approx. 60 3:00 1.43 |

Environmentally responsible use
▶ Spin the laundry as dry as possible before putting it into the tumble dryer. - Avoid overloading the tumble dryer. ▶ Shake the laundry loose before putting it into the tumble dryer.
- Choose a proper drying program. Make sure the laundry is not dried longer than needed.
▶ Make sure to use the tumble dryer with cleaned filters.
8.1 Starched laundry
Starched laundry leaves a film of starch in the drum and is not suitable for the dryer.
8.2 Softener
Do not use softener when washing, because the laundry will become soft and fluffy in the dryer.
8.3 Soft care cloths
The use of "soft care cloths" can lead to a coating at the lint filters. This can cause a blockage of the filters. In such cases, we recommend either to abstain from adding soft care cloths or to choose a different brand. In any case note the manufacturer's instructions.
8.4 Small amounts of filling
In a quantity of less than 1,0 kg, the "Timer" programme should be selected because the dry level of clothes cannot be sensored sometimes due to the small load.
8.5 Drum interior light
When the appliance is switched on, the drum light will keep on when the door is open.
8.6 Service flap
Make sure that the service flap is always closed during operation.
8.7 Anti crease protection
At the end of the cycle, if the laundry is not taken out, the drum moves from time to time to prevent creases.
8.8 Remaining time
The program duration is influenced by the following factors: the type of fabric, the loading quantity, moisture content, the desired dry level, as well as the spin speed during washing. These factors are registered by the electronics during the program and the remaining time will be corrected accordingly.
8.9 Extra large pieces
When the cycle ends, if the desired dry level is not achieved, loosen up the laundry and dry again with the time programme (TIMER).
8.10 Especially delicate fabrics
Textiles which can easily shrink or lose their shape, as well as silk stockings and lingerie, should not be put in the dryer directly. Put delicate garments inside a laundry bag and avoid over-drying them.
8.11 Jersey and knitwear
For clothes like jersey and knitwear, we recommend using the Delicate program to dry to avoid over-drying.
8.12 Flipping clothes
It is recommended to close the zipper and flip it inside out before operation to avoid over-drying.
8.13 Metal ornament
If metal decorations and plastic nail beads are used on the clothing, they should be properly wrapped to avoid hitting the drum and causing damage before operation.
8.14 Acoustic signal
An acoustic signal can be activated:
▶ When the water tank is full. ▶ Failures happen.
Care chart
| Washing | |||||
 | Washable up to 95°C normal process |  | Washable up to 60°C normal process |  | Washable up to 60°C mild process |
 | Washable up to 40°C normal process |  | Washable up to 40°C mild process |  | Washable up to 40°C very mild process |
 | Washable up to 30°C normal process |  | Washable up to 30°C mild process |  | Washable up to 30°C very mild process |
 | Wash by hand max 40°C Do |  | wash | ||
| Bleaching | |||||
 | Any bleaching allowed |  | Only oxygen / non chlorine |  | Do not bleach |
| Drying | |||||
 | Tumble drying possible normal temperature |  | Tumble drying possible lower temperature |  | Do not tumble dry |
 | Line drying Flat drying |  | |||
| Ironing | |||||
 | Iron at a maximum temperature up to 200°C |  | Iron at a medial temperature up to 150°C |  | Iron at a low temperature up to 110°C; without steam (steam ironing may cause irreversible damage) |
 | Do not iron | ||||
Bleaching Drying Ironing
9 - Daily use
9.1 Prepare the appliance
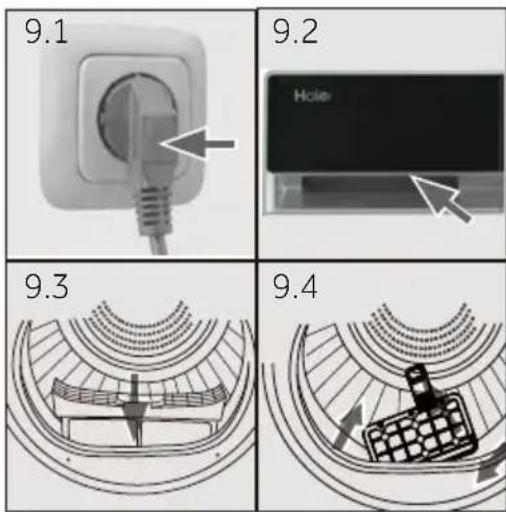
- Connect the appliance to a power supply (220V to 240V~/50Hz) (Fig. 9.1). Please also refer to section "2 - Installation" on page 7.
- Make sure:
The water tank is empty and properly installed (Fig. 9.2). The lint filter is clean and properly installed (Fig. 9.3). The condenser filter is clean and properly installed (Fig. 9.4).
9.2 Prepare the laundry
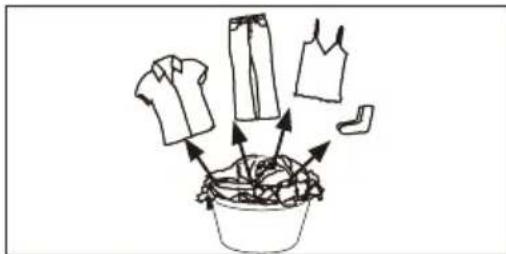
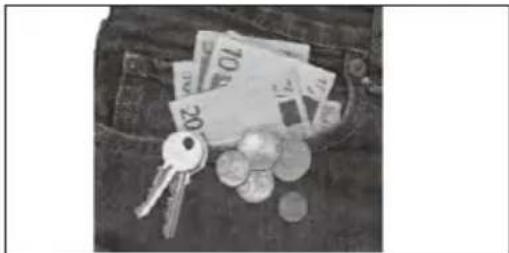
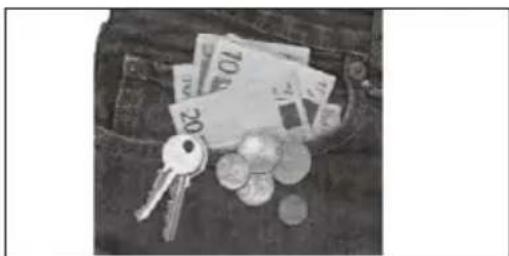
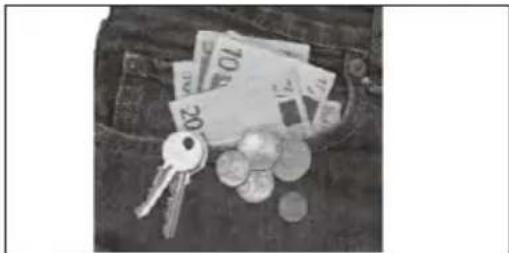
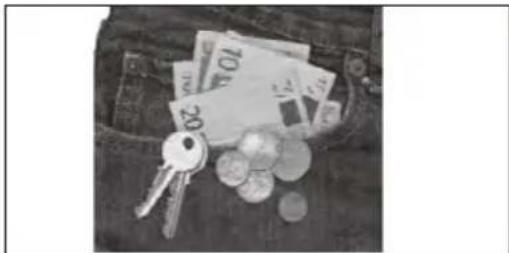
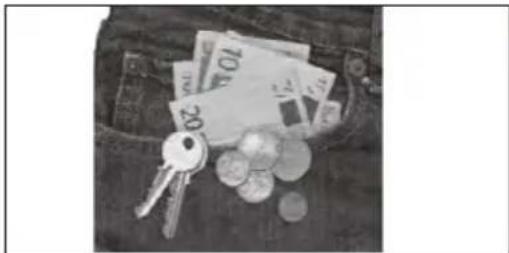
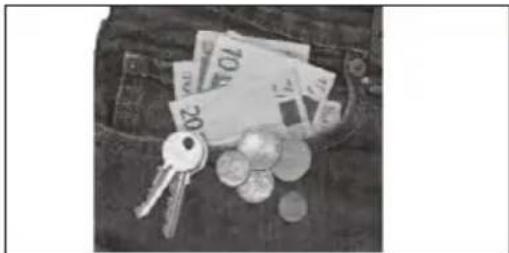
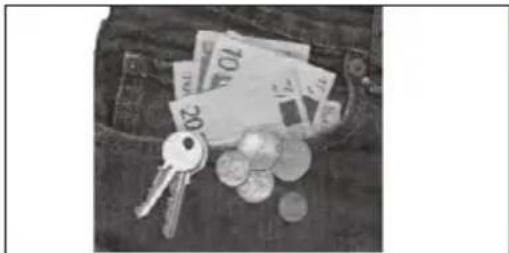
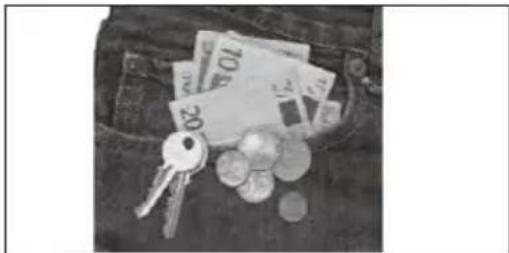
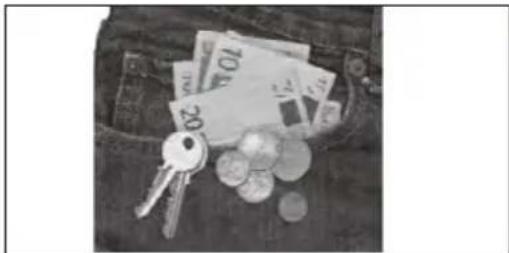
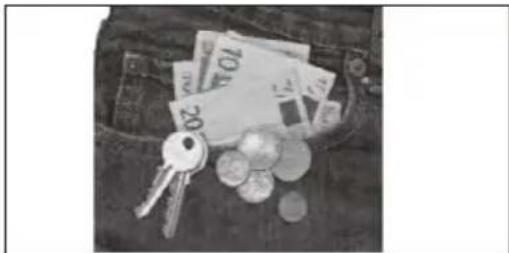
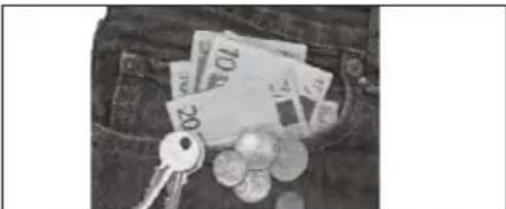
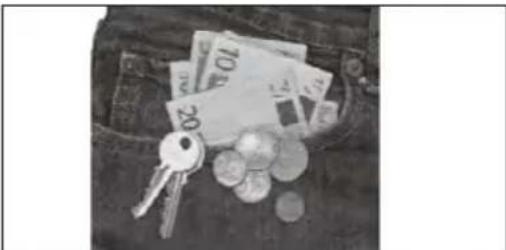
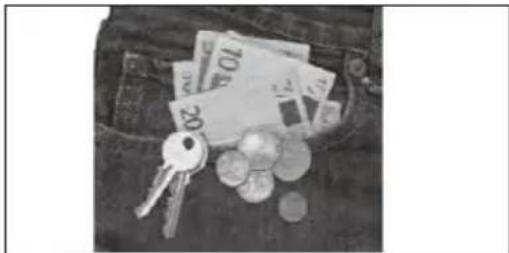
▶ Sort clothes according to fabric (cotton, synthetics, wool etc.). Only dry clothes that have been spun. ▶ Empty pockets of all sharp or flammable objects such as keys, lighters and matches. Remove hard decorative objects such as brooches. - Zippers up and make sure the buttons are sewn on tightly and place small items such as socks, bras etc. in a wash bag. ▶ Unfold bulky items of fabric such as bed sheets, table cloth etc. ▶ Follow the instructions on the laundry label and dry those garments that can be dried by machine.
| Load Reference Composition | Average weight per item | |
| Bed sheet (single) Cotton Approx. 800 g | ||
| Blended fabric clothes / Approx. 800 g | ||
| Jackets Cotton Approx. 800 g | ||
| Jeans / Approx. 800 g | ||
| Overalls Cotton Approx. 950 g | ||
| Pyjamas | / Approx. 200 g | |
| Shirts | / Approx. 300 g | |
| Socks | Blended fabrics | Approx. 50 g |
| T-Shirts Cotton Approx. 300 g | ||
| Underwear | Blended fabrics | Approx. 70 g |

Tips:
▶ Separate white clothes from coloured ones. ▶ Bed linen and pillowcases should be buttoned, so that small parts cannot get stuck inside. ▶ Close zippers and hooks, and tie loose belts without metal parts, apron strings etc. together. ▶ Remove loose metal parts of clothes before putting into dryer such as metal buttons. ▶ Do not over-dry easy-care linen. Risk of creases. Allow final drying in open air. Clothes like knitwear can be over-drying sometimes. Ironing dry level are always recommended to choose. For pre-dried, multi-layered garments or for final drying the time-programme (TIMER) should be chosen.
9.3 Load clothes the appliance
▶ Loosen up and insert presorted laundry. ▶ Don't overload. ▶ Close the door carefully. Make sure that clothes are not pinched.
9.4 Take out and add clothes
To remove or add clothes, the program can be interrupted at any time:
▶ The cycle will be interrupted if opening the door. Be careful when taking out or adding clothes! The interior of the drum or the clothes themselves may be hot, so that there is danger of burns. ▶ To continue the program, press the "Start/Pause" button after closing the door.

CAUTION!
Non-textile, as well as small, loose or sharp-edged items may cause malfunctions and damage of clothes and appliance.

WARNING!
Never turn the dryer off before the end of the drying cycle unless all items are quickly removed and spread out so that the heat can be released.
9.5 Loading the dryer
- Place the laundry evenly in the drum making sure not to overload the dryer.
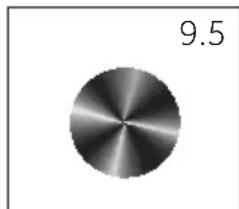
- Switch on the tumble dryer by turning the knob (Fig. 9-5).

Notice
Fabric softeners or similar products should be used as specified in the manufacturer's instructions.
9.6 End of dry cycle
The tumble dryer stops operation automatically when a dry cycle is complete. The display shows END for about 5 seconds. Open the tumble dryer door and take out clothes.
- Switch off the tumble dryer by turning the knob to the Off position.
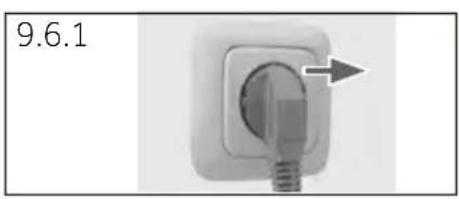
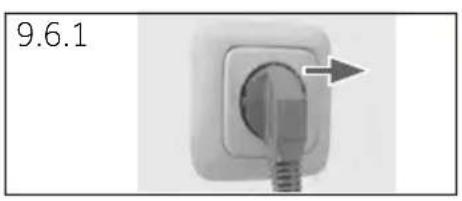
- Unplug the tumble dryer from the power socket (Fig. 9.6.1).
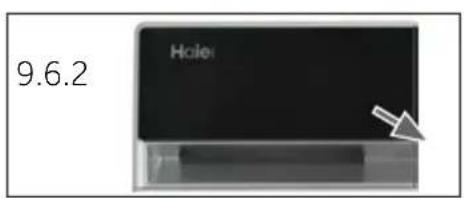
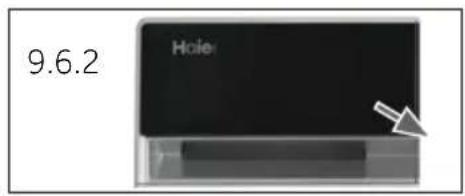
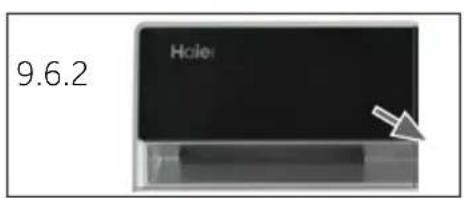
- Empty the water tank after each drying cycle (Fig. 9.6.2).
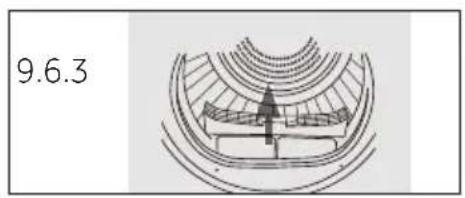
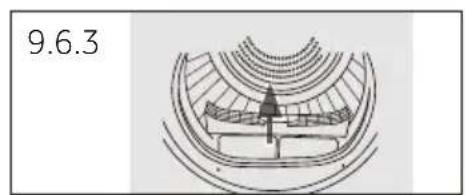
- Clean the lint filter after each drying cycle (Fig. 9.6.3).
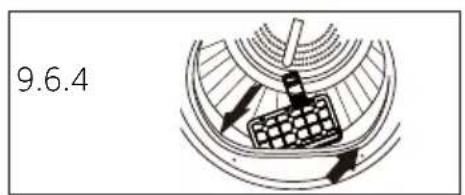
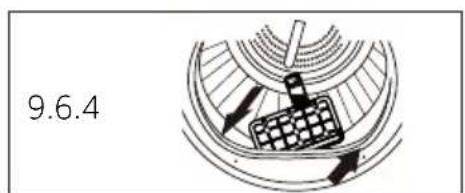
- Clean the condenser filter after each drying cycle (Fig. 9.6.4).
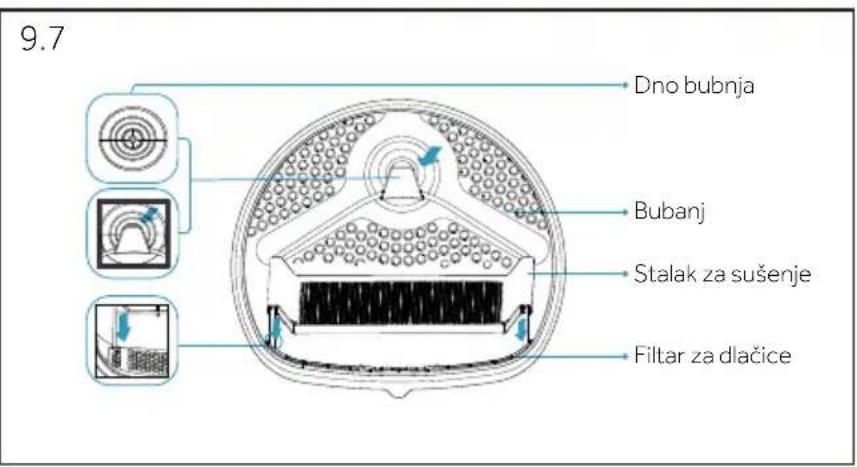
9.7 Using the dryer rack (optional)
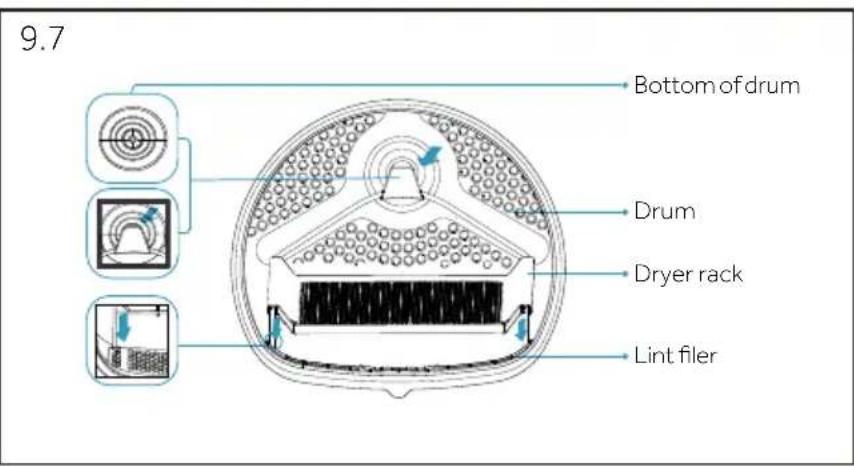
The dryer rack is designed for items that are not recommended for tumble drying, such as trainers, sneakers, sweaters, or delicate lingerie.
- Open the dryer door.
- Check that the drum is empty.
- Place the dryer rack into the drum.

Notice
▶ Do not use this dryer rack when there are other clothes in the dryer. During drying, make sure the items are placed on the rack with no risk of entangling with the baffles while the drum is rotating. ▶ Maximum weight of wet items: 1.5 kg.
10.1 General
This appliance is equipped with Wi-Fi technology that allows you to control it remotely via the app.

WARNING!
Please observe the safety precautions in this user manual and make sure that these are complied even when operating the appliance via the hOn APP while you are away from home. You must also follow the instructions in the hOn.
10.2 Requirements
- One wireless router (802.11b/g/n protocol) which supports only the frequency band of 2.4 GHz. Length of Router SSID is 1-31 characters (including 1 and 31), and password is 8-64 characters. Minimum length of password must be 8 characters. Router encryption methods include open, WPA-PSK and WPA2-PSK.
- The App is available for devices running Android, Huawei or iOS, both for tablets and for smartphones.
- The appliance shall be installed in a position where it can receive a strong Wi-Fi signal. Once the appliance has been correctly associated with the APP, if it's not properly connected to the wireless router, no Wi-Fi icon appears on the display.
10.3 Download and installation of hOn APP
Download the hOn App on your device by framing the following QR code:
Download the App

Download on the App Store
ANDERED APPON
Google play
EXPLORE IT ON
AppGallery
or by the link: go.haier-europe.com/download-app
Frequency rate (OFR) 2400 MHz - 2483.5 MHz
Max. power (EIRP) 20dBm
Wireless standard IEEE802.11b/g/n & BLE V4.2

Note: Registration
Registration is required when using the appliance for the first time or if the formal account has been deleted or closed. For further use, you need to enter your username and password when you log in.
10 - Remote control (Wi-Fi)
10.4 Appliance pairing (on app)
- The App is available for devices running both Android and iOS, for both tablets and smartphones.
- Get all the details of the Wi-Fi functions by browsing the App in DEMO mode.
- The frequency of the home Wi-Fi network has to be set on the 2.4 GHz band. You cannot configure the machine if your home network is set to the 5 GHz band.
- Open the App, create the user profile (or log in if it has already been created previously) and pair the appliance following the instructions on the device display.

Note: Wi-Fi network
It is not possible to connect the appliance to a public Wi-Fi network. This may cause malfunction.

Note: Use same Wi-Fi
Connect with your smartphone to the network you want to connect the product to.
10.5 To enable Remote Control
- Check that the router is switched on and connected to the Internet.
- Load the laundry and close the door.
- Press the button, the door locks.
- Start the cycle using the app, control panel will be disabled except for "POWER" and "START/PAUSE" button. After starting the program, only child lock is available.
- The Remote Control can be also activated by pressing " 🔍 " button during the cycle running. After remote authorization, the main control board is still available.
- Once the cycle has been completed, the door unlocks and Remote Control turns off.
- After 2 minutes the appliance goes to OFF mode.

Note: Remote Control expiration
Once the remote control is activated, if the end user doesn't start any cycle from app in 10 minutes, the appliance will go to Networked Standby Mode, and keeps remote control up to 24 hours, then shut off.
10.6 To disable Remote Control
- To exit remote control while a cycle is running, press " 🔍 " button on the control panel. The appliance will keep running the cycle and go to READ ONLY mode.
- To resume the Remote Control by pressing the " 🔊 " button again.
- Control the appliance using the App.
10.7 End of cycle with Remote Control on
- At the end of the cycle, the door will unlock and the Remote Control will deactivated.
- After 2 minutes the appliance will automatically switch off.
11 - Care and cleaning
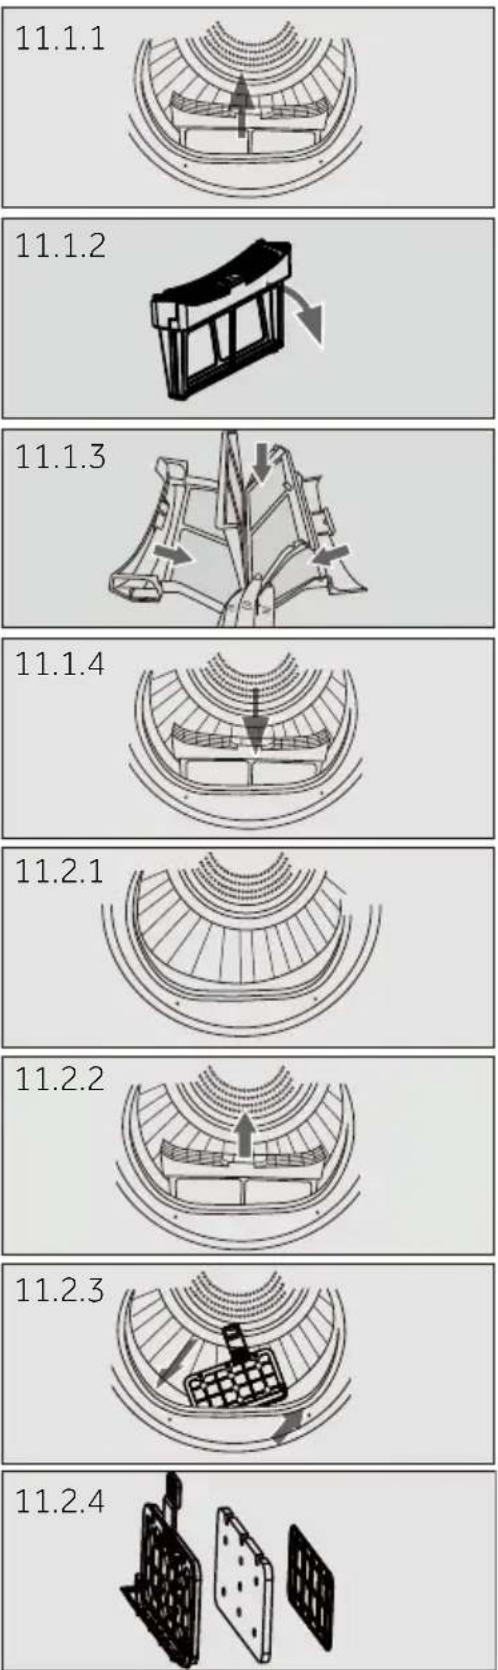
11.1 Lint filter cleaning
Clean the lint filter after each dry cycle.
- Remove the lint filter from the drum (Fig. 11.1.1).
- Open up the lint filter (Fig. 11.1.2).
- Remove the lint residuals from lint filter (Fig. 11.1.3).
- Reinstall the cleaned lint filter in the tumble dryer (Fig. 11.1.4).
11.2 Condenser filter cleaning
Clean the filter after each dry cycle.
- Open the door (Fig. 11.2.1).
- Pull out the lint filter from front duct (Fig. 11.2.2).
- Pull out the condenser filter from the air duct (Fig. 11.2.3).
- Separate the sponge filter from the condenser filter and clean it from any residuals (Fig. 11.2.4).
- Reinstall the sponge to the condenser filter and put it back into the duct.

Notice
If the lint / the condenser filter is very dirty, it can be cleaned under running water. Let it dry completely before use.
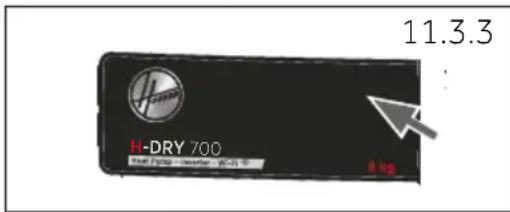
11.3 Empty the water tank
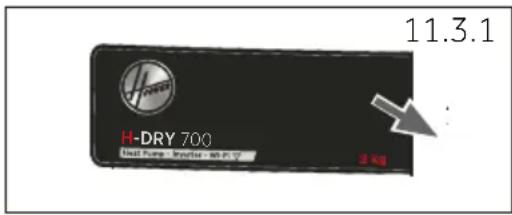
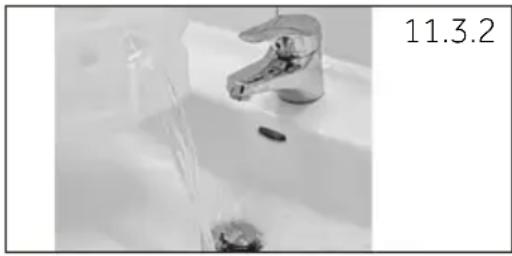
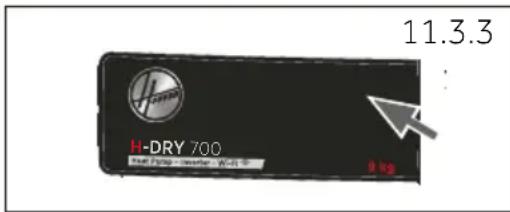
During operation, steam is condensed into water and collected in the water tank. Empty the water tank after each drying cycle.
- Pull out the water tank from its housing (Fig. 11.3.1).
- Empty the water tank (Fig. 11.3.2).
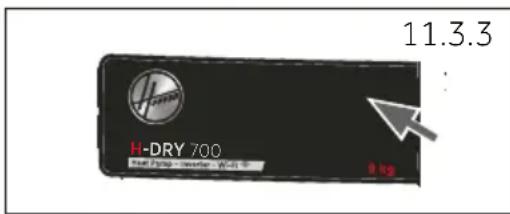
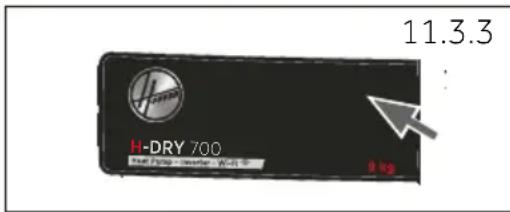
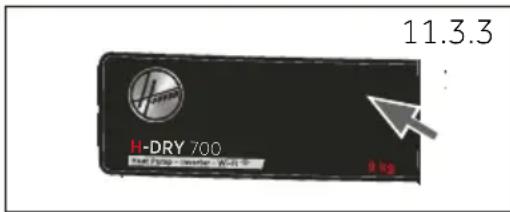
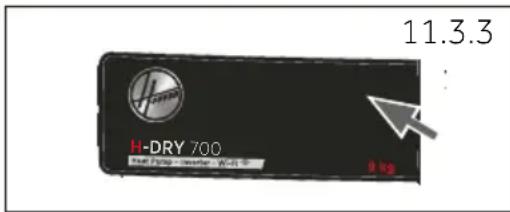
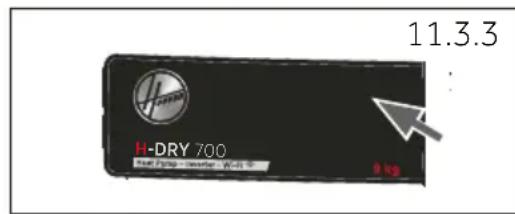
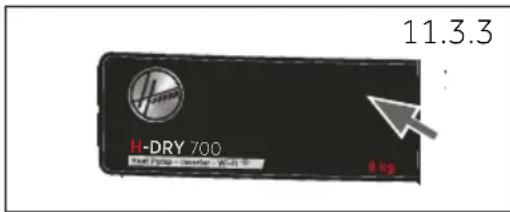
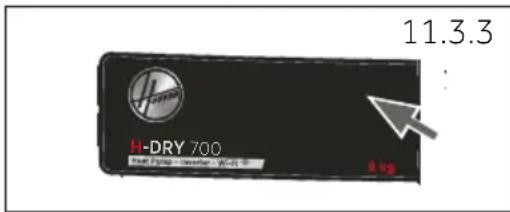
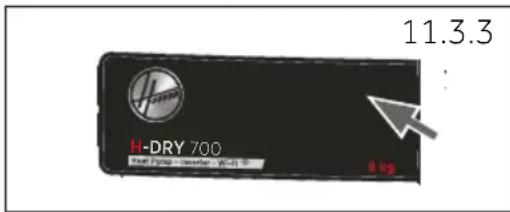
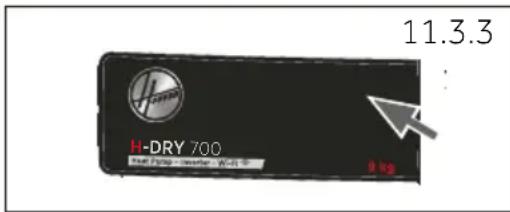
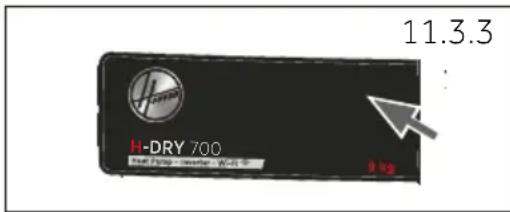
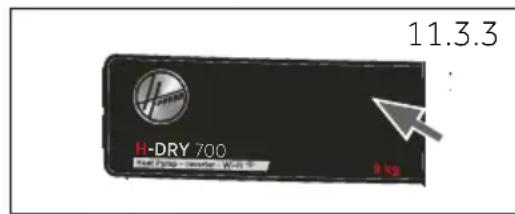
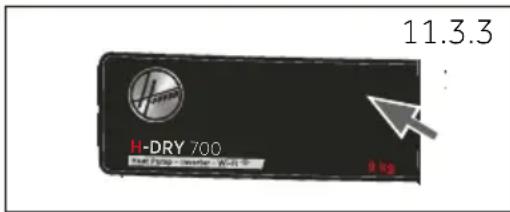
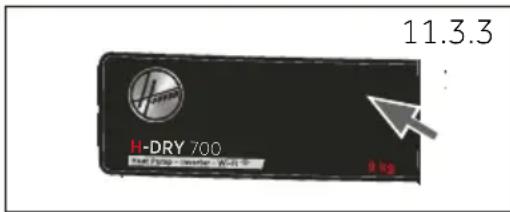
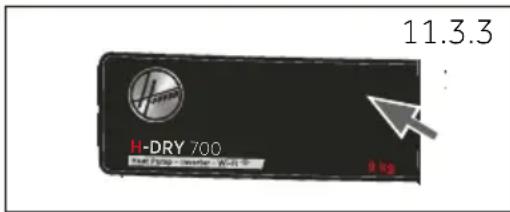
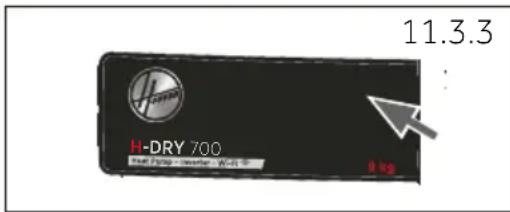
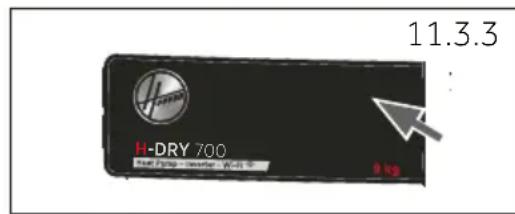
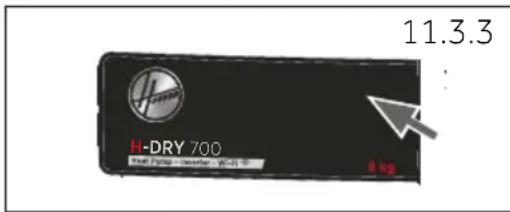
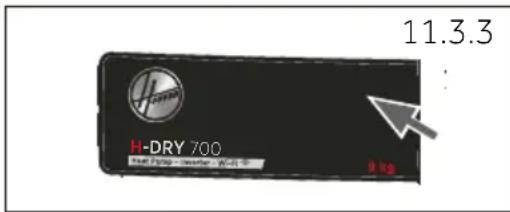
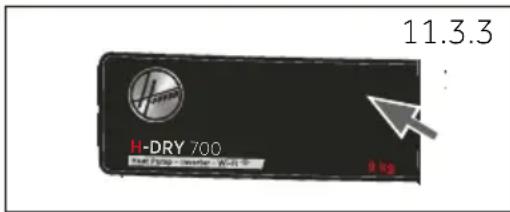
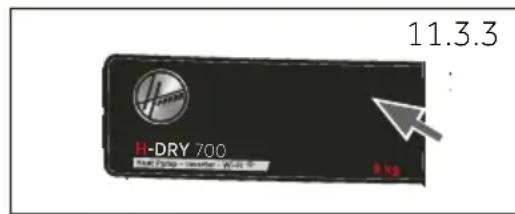
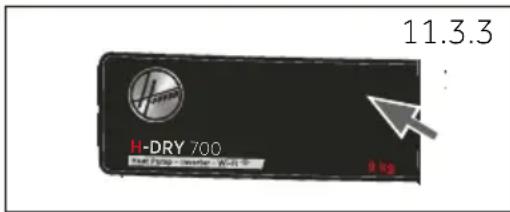
- Reinstall the water tank to the tumble dryer (Fig. 11.3.3).

Notice
Do not use the water for any kind of drinking or food processing.
11.4 Tumble dryer
Wipe the outside of the tumble dryer and the control panel with a damp cloth. Do not use any organic solvent or corrosive agent to avoid damage to the device.
11.5 Drum
After running for a while, micro elements like calcium and mineral substances contained in the water will result in an invisible film formed inside the drum. Use a damp cloth and some detergent to remove it. Do not use any organic solvent or corrosive agent to avoid damage to the device.
12 - Troubleshooting
Many problems can be solved by yourself without specific expertise. Please check all shown possibilities and follow below instructions before you contact an after sales service. See "13 - Customer service" on page 32.

WARNING!
Before maintenance, turn off the appliance and disconnect the mains plug from the socket. Electrical equipment should be serviced only by qualified electrical experts, because improper repairs can cause considerable consequential damages. ▶ A damaged power cable should only be replaced by the manufacturer, its service agent or similarly qualified workers in order to avoid a hazard.
| Display Solution | |
| The water tank is full please empty it. Empty the tank. | |
| F2: The drain pump malfunction or the water level switch malfunction. | Contact the customer service. |
| F32: The temperature sensor located at the condenser outlet iis broken. | Contact the customer service. |
| F33: The temperature sensor located at the compressor outlet it is broken. | Contact the customer service. |
| F4: Abnormal heating. Contact the customer service. | |
| FC2: The power board and the display board communication malfunction. | Contact the customer service. |
| FC0: Main line malfunction. Contact the customer service. | |
| FC1: The motor communication malfunction. Contact the customer service. | |
| F7: The motor malfunction (the motor driver board overload or overheating.) | Contact the customer service. |
| FH: IOT configuration failed. Contact the customer service. |
If the error codes appear again after taking measures, switch off the appliance, disconnect the power supply and contact the customer service.
Troubleshooting without display-codes
| Problem Possible cause Possible solution | ||
| Tumble dryer fails to operate. | ·Poor connection to the power supply.·Power failure.·No drying program is set.·Device has not been switched on.·The door is not closed properly. | ·Check connection to the power supply.·Check the power supply.·Set a drying program.·Switch on the device.·Close the door properly. |
| Tumble dryer fails to operate and the display shows END.. | ·The laundry has reached the dry level defined by the pro- gram. | ·Check the program setting is appropriate or not. |
| Drying time is too long and the results are not satisfactory | ·The program setting is not correct.·The filter is clogged.·The evaporator is blocked.·The tumble dryer is overloaded.·The laundry is too wet.·The vent duct is blocked. | ·Make sure the program is set correctly.·Clean the filter screen.·Clean the evaporator.·Reduce the amount of laundry.·Spin the laundry completely before drying.·Check and clean the vent duct. |
| Remaining time on the display stops or skips. | The remaining time will be adjusted continuously based upon the following factors:·Fabric of laundry.·Loading weight.·Moisture degree of the laundry.·Ambient temperature. | The automatic adjustment is a normal operation. |
12 - Troubleshooting
Product specifications (acc. to EU 392/2012)
| Trademark Hoover | |
| Model identifier HDY7 H9A3BCEX-S | |
| Rated capacity (kg) 9 | |
| Kind of tumble dryer Heat Pump | |
| Energy efficiency class A+++ | |
| Weighted Annual Energy Consumption (AEc in kWh/year)1) | 194 |
| Tumble dryer with or without automatic with automatic | |
| Energy consumption of the standard cotton program3) at full load (kWh/cycle) | 1.56 |
| Energy consumption of the standard cotton program3) at partial load (kWh/cycle) | 0.8 |
| Power consumption of the off-mode (W) 0.29 | |
| Power consumption of the left-on mode (W) 0.60 | |
| Duration of the "left-on mode" (min)2) | 15 |
| Standard drying program3) | ECO |
| Weighted program time of the standard drying program3) at full and partial load (min) | 155 |
| Program time of the standard cotton program3) at full load (min) 208 | |
| Program time of the standard cotton program3) at partial load (min) 115 | |
| Condensation efficiency class4) | A |
| Weighted condensation efficiency for the standard cotton program3) at full and partial load (%) | 91 |
| Average condensation efficiency of the standard cotton program3) at full load. | 91 |
| Average condensation efficiency of the standard cotton program3) at partial load | 91 |
| Weighted sound power level of the standard cotton program3) at full load (dB) | 63 |
| Built-in or free-standing Free-standing/built under |
1) Based on 160 drying cycles of the standard cotton program at full and partial load, and the consumption of the low-power modes. Actual energy consumption per cycle will depend on how the appliance is used.
2) In case there is a power management system.
3) This program used at full and partial load is the standard drying program to which the information in the label and the fiche relates to. This is the program suitable for drying normal wet cotton laundry and it is the most efficient program in terms of energy consumption for cotton.
4) Class G is the least efficient and Class A is the most efficient.
Additional data
| Power supply (refer to rating plate) - voltage / current / input | 220–240 V~50 Hz / 2.7 A / 650 W |
| Permissible ambient temperature 5°C to 35°C | |
| Fluorinated greenhouse gas | R290 |
| Volume | 00.15 kg |
Product dimensions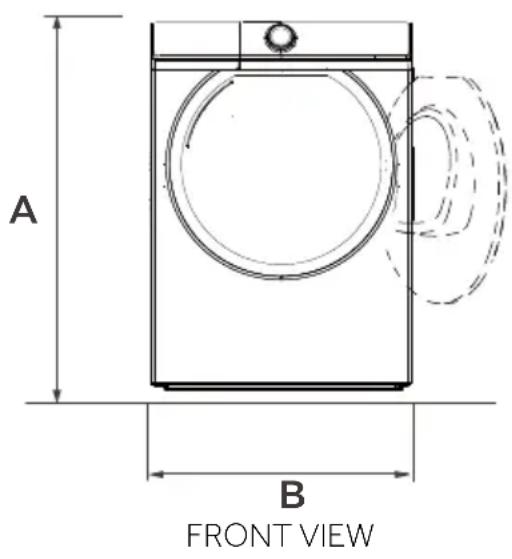
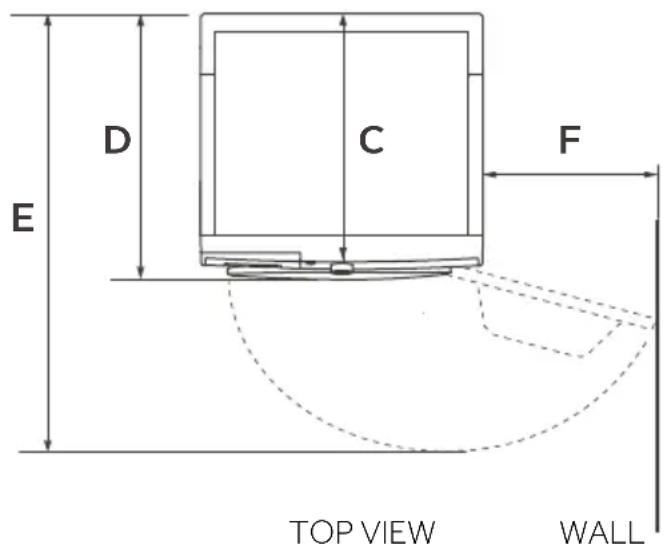
| PRODUCT DIMENSIONS HD90 | |
| A Overall height of product mm 845 | |
| B Overall width of product mm 595 | |
| C Overall depth of product (To main control board size) mm | 640 |
| D Overall depth of product mm 695 | |
| E Depth of door open mm 1185 | |
| F Minimum door clearance to adjacent wall mm 210 |
Note: The exact height of your dryer is dependent on how far the feet are extended from the base of the machine. The space where you install your dryer needs to be at least 40mm wider and 20mm deeper than its dimensions.
13 - Customer service
We recommend our Hoover Customer Service and the use of original spare parts. If you have a problem with your appliance, please first check section TROUBLESHOOTING.
If you cannot find a solution there, please contact:
▶ your local dealer.
the Assistance Area on the Hoover website where you can find information on Warranties, Accessories and Spare Parts and Contact numbers.
To contact our Service, ensure that you have the following data available.
Each product is identified by a unique code, also called the "serial number", printed on a sticker. This can be found inside the door opening.
Model ____ Serial No. ____
Also check the Warranty Card supplied with the product in case of warranty.
It is always recommended to use original spare parts, that are available at our Authorised Customer Service Centres.
Warranty
The product is guaranteed under the terms and conditions stated on the certificate included with the product. The certificate has to be stored so as to be shown to the Authorized Customer Service Centre in case of need. You can also check the warranty conditions on our web site. To obtain assistance, please fill in the form on-line or contact us at the number indicated on the support page of our web site.
The standard manufacturer warranty covers faults caused by electrical or mechanical faults in the product due to an act or omission of the manufacturer. If a fault is found to be caused by factors outside the product supplied, miss-use or as a result of the instructions on use not being followed, a charge may be applied.
The manufacturer declines all responsibility for any printing errors in the booklet included with this product. Moreover, it also reserves the right to make any changes deemed useful to its products without changing their essential characteristics.
*For more information please refer to www.haier-europe.com


5.1 OFF


Notice
Download on the App Store
Google play
EXPLORE IT ON
AppGallery

WARNING!
2.4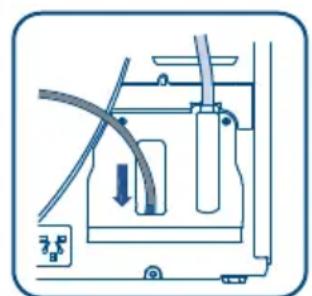

5.1 OFF


Notice

5.3
5.1 OFF

Notice
take out the clothes.

Or via the link go.haier-europe.com/download-app
Frequency range (OFR) 2400 MHz–2483.5 MHz
Max. power (EIRP) 20 dBm
Wireless standard IEEE802.11b/g/n & BLE V4.2


Notice


Drying rack (optional)
Energy label
Warranty cards
Quick Guide
4.2
1 Program selector
2 Display
3 Water tank
4 Function buttons
5.3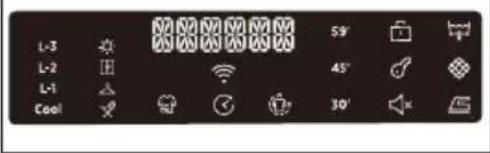
5.1 OFF


Notice

2.4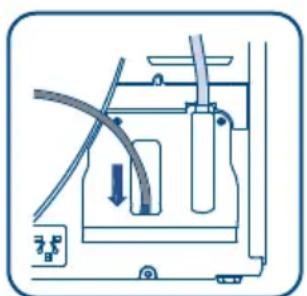

Drying rack (optional)
Energy label
Warranty cards
Quick guide
4.2
5.1 OFF
Download on the App Store
GET IT ON Google Play
EXPLORE IT ON AppGallery

Note
WALL
Disposal
This marking on the product, accessories or literature indicates that the product and its electronic accessories (e.g. charger, headphones, USB cable) must not be disposed of with other household waste at the end of their working life.
To prevent possible harm to the environment or human health from uncontrolled waste disposal, separate these items from other types of waste and recycle them responsibly to promote the sustainable reuse of material resources.

Drying rack (optional)
Energy label
Warranty sheets
Quick guide
4.2
5.1 OFF
Turn the selector to any position (except OFF) to start the appliance. Turn the regulator to the off position to switch off the appliance (figure 5.1).
5.2 Program menu
By turning the regulator (figure 5.2) you can select one of 15 programs, after which its default settings are displayed.
5.3 Display
9.1 Preparing the appliance
- Connect the appliance to the power supply (220 V to 240 V ~ / 50 Hz) (figure 9.1a). Also refer to section "2 - Installation" on page 7.
- Make sure of the following:
▶ The water tank is empty and correctly positioned (figure 9.2) ▶ The lint filter is clean and correctly positioned (figure 9.3). ▶ The condenser filter is clean and correctly positioned (figure 9.4).
9.2 Preparing the laundry
Sort the clothes according to the type of fabric (cotton, synthetic, wool, etc.). Only dry spun-dry clothes. Empty the pockets of all sharp or flammable objects such as keys, lighters, and matches. Remove hard decorative items such as brooches. Close zippers and check that buttons are firmly sewn on, and put small items such as socks, bras, etc. in a washing bag. Unfold bulky fabric items such as bedding, tablecloths, etc. ▶ Follow the instructions on the laundry label and only dry clothes that can be tumble-dried.
| Vrsta predmeta u sušilici Sastav | Prosječna težina po predmetu | |
| Posteljina (jednostruka) Pamuk cca 800 g | ||
| Odjeća od mješovitih tkanina / cca 800 g | ||
| Jakne Pamuk cca 800 g | ||
| Traperice / cca 800 g | ||
| Kombinezon Pamuk cca 950 g | ||
| Pidžama | / cca 200 g | |
| Košulje | / cca 300 g | |
| Čarape | Miješana tkanina | cca 50 g |
| Majice Pamuk | cca 300 g | |
| Donje rublje | Miješana tkanina | cca 70 g |

Tips:
9 - Daily use
9.6 End of the drying cycle
The tumble dryer automatically stops working at the end of the drying cycle. The display shows END for approximately 5 seconds. Open the dryer door and remove the clothes.
- Turn off the dryer by turning the dial to the off position.
- Disconnect the dryer from the socket (figure 9.6.1).
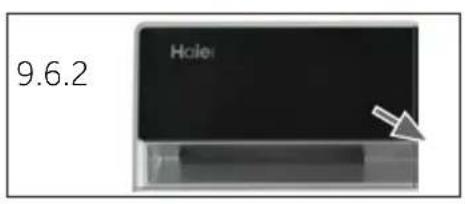
- Empty the water tank after each drying cycle (figure 9.6.2).
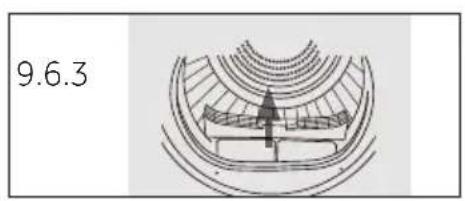
- Clean the lint filter after each drying cycle (figure 9.6.3).
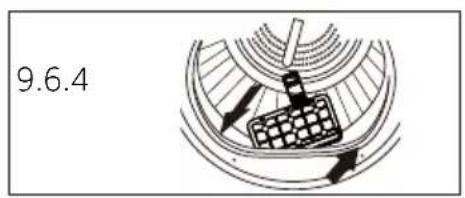
- Clean the condenser filter after each drying cycle (figure 9.6.4).
9.7 Using the drying rack (option)

or via the following link: go.haier-europe.com/download-app
Frequency (OFR) 2400 MHz - 2483.5 MHz
Maximum power (EIRP) 20 dBm
Wireless connection standard IEEE802.11b/g/n and BLE V4.2

Note: Registration
Registration is required before first use or if the official account has been deleted/closed. For further use, you must enter your username and password when logging in.
10 - Remote control (Wi-Fi)
10.4 Pairing devices (in the app)
- The app is available for Android and iOS devices on tablets and smartphones.
- Learn all the details of the Wi-Fi function by browsing the app in DEMONSTRATION mode.
- The home Wi-Fi network frequency must be set to the 2.4 GHz band. You cannot configure the device if your home network is set to the 5 GHz band.
- Open the app, create a user profile (or log in if it has already been created) and pair the device following the on-screen instructions.

Note: Wi-Fi network
The device cannot be connected to a public Wi-Fi network. Malfunctions may occur.

Note: Use the same Wi-Fi

Note

2.3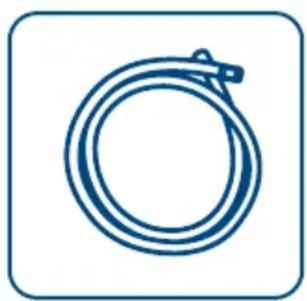
2.4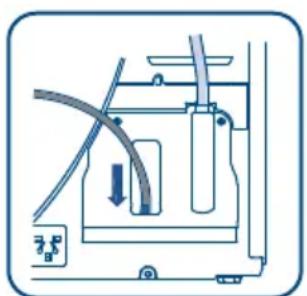

5.3
5.1 OFF

Note

Note
Thank you for purchasing a Haier product.
Download on the App Store
Google play
EXPLORE IT ON
AppGallery

Note: The external drain hose must be secure.
CE standards and directives
5.3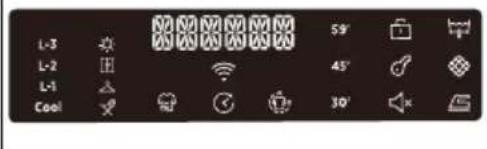
5.1 OFF
Turn the knob to any position (except OFF) to start the machine. To turn off the machine, turn the knob to the OFF position (figure 5.1).
5.2 Program selector
8.11 Jersey and knitwear
9.1 Prepare the appliance

Notice

or via the link: go.haier-europe.com/download-app
Frequency (OFR) 2400 MHz – 2483.5 MHz

Notice
Thank you for purchasing a Haier product.
Disposal
This marking on the product, accessories, or documentation indicates that the product and its electronic accessories (e.g., charger, headphones, USB cable) should not be disposed of with other household waste at the end of their working life.

Note: The external drain hose must be firmly
The grey drain hose must be firmly attached after insertion at both ends.
The grey drain hose cannot be bent.
Drying rack (optional)
Energy label
Warranty certificates
Quick guide
4.2
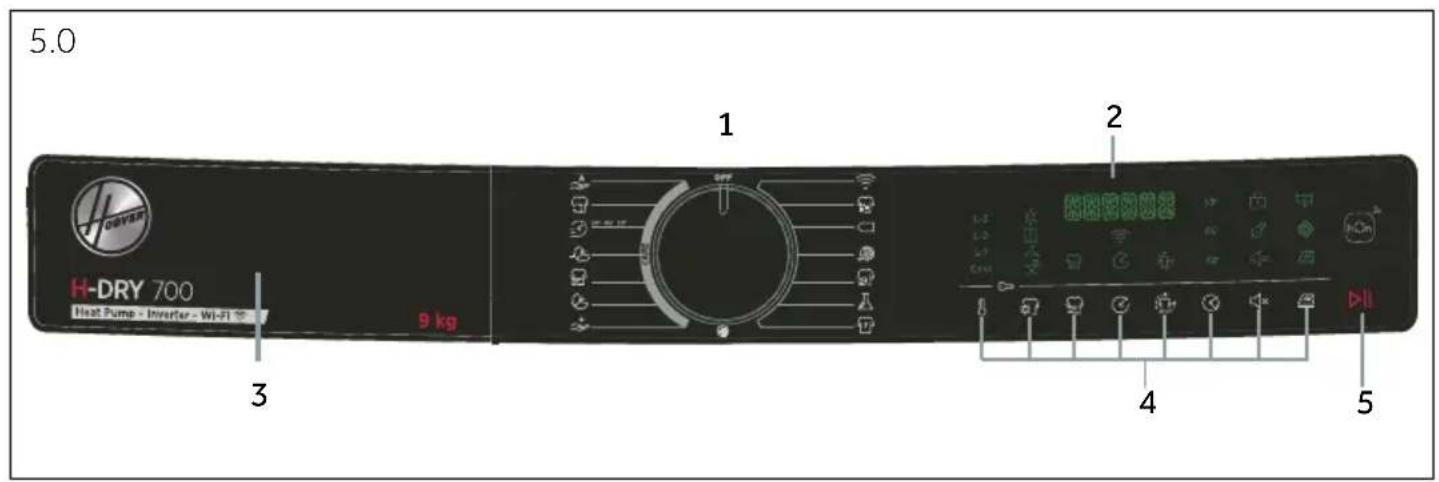
1 Program selector
2 Display
3 Water tank
4 Function buttons
5 Start/Pause button

Note: Acoustic signal
The acoustic signal can be selected or cancelled if necessary. See "5.5.7 Function button Acoustic signal on – acoustic signal off" on page 14.
5.1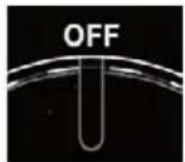
5.2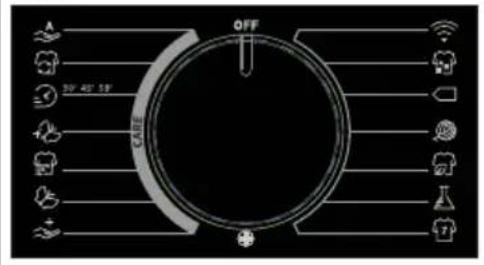
5.3
5.1 OFF
Turn the knob to any position (except OFF) to start the machine. Turn the knob to the OFF position to switch off the machine (figure 5.1).
5.2 Program selector
By turning the rotary knob (figure 5.2), one of the 15 programs can be selected, and its default settings will be displayed.
5.3 Display

Note

or via the link: go.haier-europe.com/download-app
Operating frequency range (OFR) 2400 MHz – 2483.5 MHz
Max. power (EIRP) 20 dBm
Wireless standard IEEE802.11b/g/n and BLE V4.2

Note: Registration
Registration is mandatory when using for the first time or if the formal account has been deleted/closed. For future use, you must enter your username and password when logging in.
10 - Remote control (Wi-Fi)
10.4 Pairing the device (in the app)

Note

5.1 OFF

Warning

or from this link: go.haier-europe.com/download-app
Frequency range (OFR) 2400 MHz–2483.5 MHz

Warning

2.4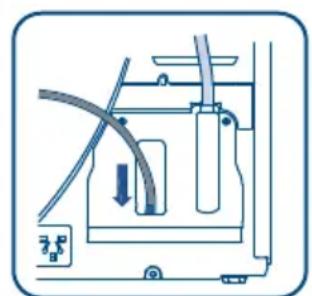

5.1 OFF.
and remove the clothes.

or via the link: go.haier-europe.com/download-app

Attention

3 - Practical tips
Drying support (optional)
Energy
label
Warranty
cards
Quick guide
4.2
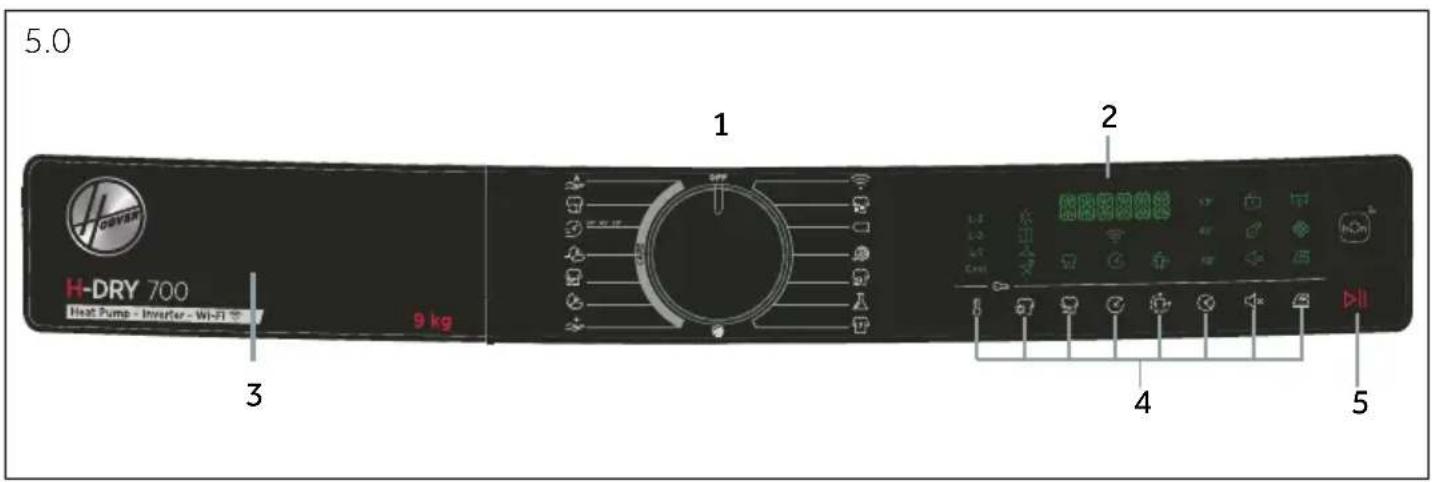
1 Program selector
2 Display
3 Water tank
5.3
5.1 OFF

or via the link: go.haier-europe.com/download-app

Notice

2.4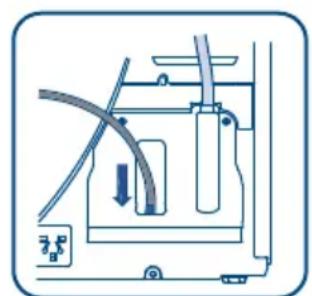

Dryer (optional)
Energy
label
Warranty cards
Quick guide
4.2
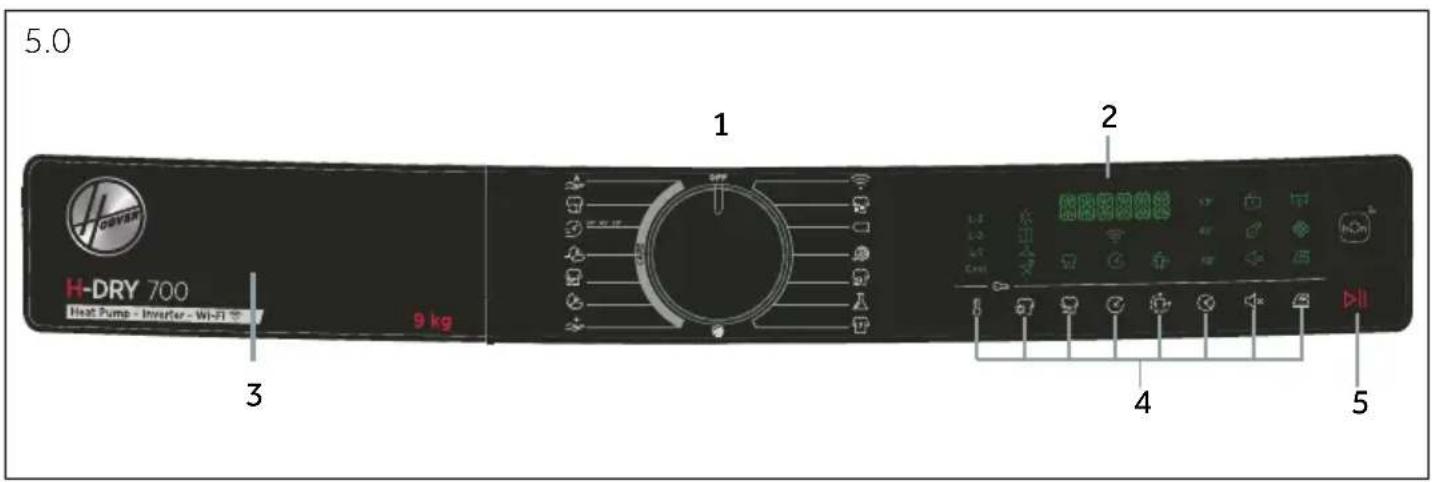
1 Program selector
2 Display
3 Water tank
4 Function buttons
5.1 OFF
Turn the appliance on by rotating the knob to any position (except the OFF position). Rotate the knob to the OFF position to turn the appliance off (fig. 5.1).
5.2 Program selector
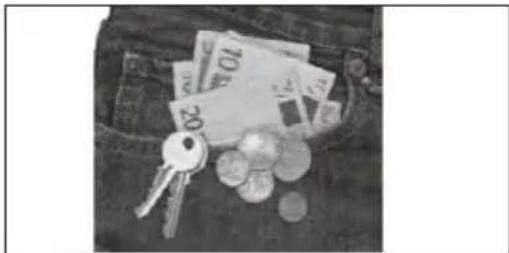
9.1 Preparing the appliance

or via the link: go.haier-europe.com/download-app
Operating frequency (OFR) 2400 MHz – 2483.5 MHz

Notice
WALL

2.4

5.3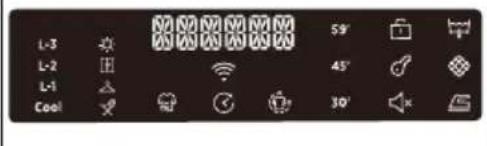
5.1 OFF
5.5 Function buttons
and remove the clothes.


Note
Thank you
2.4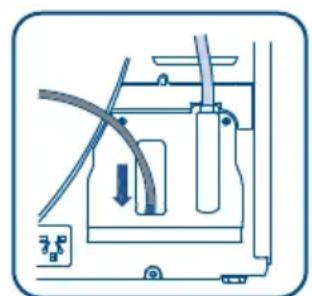

5.1 DEACTIVATION

Notice


Notice

5.1 OFF

Note
- Turn off the dryer by turning the knob to the Off position.
- Unplug the dryer from the power outlet (Fig. 9.6.1).

or via the link: go.haier-europe.com/download-app
Frequency rate (OFR) 2400 MHz - 2483.5 MHz
Max. power (EIRP) 20 dBm
Wireless standard IEEE802.11b/g/n & BLE V4.2


Note
Environmental information
Disposal


5.3 Display

Note

or via the link: go.haier-europe.com/download-app
Operating frequency range (OFR) 2400 MHz – 2483.5 MHz
Max. power (EIRP) 20dBm

Note
Download on the App Store
Google play
EXPLORE IT ON
AppGallery

WARNING!

5.3 Display

Note


Note
Thank you for purchasing a Haier product.


5.3
5.1 AV
9.1 Prepare the appliance
- Connect the appliance to a power supply (220 V to 240 V~/50 Hz) (Fig. 9.1). Also see the section "2 - Installation" on page 7.
- Make sure that:

NOTE

or via the link: go.haier-europe.com/download-app
Frequency rate (OFR) 2400 MHz – 2483.5 MHz
Max. power (EIRP) 20 dBm
Wireless standard IEEE802.11b/g/n & BLE V4.2

Note: Registration

NOTE
Thank you


5.2 Program selector
5.3 Display

Notification
remove.

Notification
- OFF
- NOTE: REGISTRATION
- NOTICE
- AUS
- NOTE
- SAFETY NOTICE
- DISPOSAL
- WARNING
- RISK OF INJURY OR SUFFOCATION
- CONTENT
- BEFORE FIRST USE
- DAILY USE
- MAINTENANCE / CLEANING
- INSTALLATION
- PREPARATION
- TRANSPORT AND WAITING TIME
- PLACE THE APPLIANCE
- ELECTRICAL CONNECTION
- LEVEL THE DRYER
- LEVEL THE DRYER SIDE TO SIDE
- LEVEL THE DRYER FRONT TO BACK
- DOUBLE CHECK THE DRYER IS BALANCED
- DRAINAGE PIPE CONNECTED TO THE OUTSIDE
- NOTE: THE EXTERNAL DRAINAGE HOSE MUST BE FIRM
- INTENDED USE
- STANDARDS AND DIRECTIVES CE
- ENVIRONMENTALLY RESPONSIBLE USE
- PICTURE OF APPLIANCE
- ACCESSORIES
- CONTROL PANEL
- NOTE: ACOUSTIC SIGNAL
- PROGRAMME SELECTOR
- DISPLAY
- WATER TANK
- FUNCTION BUTTONS
- NOTE: FACTORY SETTINGS
- TEMPERATURE LEVEL" FUNCTION BUTTON
- DRYING LEVEL" FUNCTION BUTTON
- ACTIVE DRY" FUNCTION BUTTON
- START DELAY" FUNCTION BUTTON
- ANTI-CREASE" FUNCTION BUTTON
- RAPID 30' 45' 59'" FUNCTION BUTTON
- BEEP ON - BEEP OFF" FUNCTION BUTTON
- EASY IRON" FUNCTION BUTTON
- START PAUSE" FUNCTION BUTTON
- CHILD LOCK" FUNCTION BUTTON
- NOTE: CHILD LOCK
- FIRST STARTING
- LANGUAGE SETTING
- CHANGE THE LANGUAGE
- PROGRAMMES
- HEAT PUMP TECHNOLOGY
- STARCHED LAUNDRY
- SOFTENER
- SOFT CARE CLOTHS
- SMALL AMOUNTS OF FILLING
- DRUM INTERIOR LIGHT
- SERVICE FLAP
- ANTI CREASE PROTECTION
- REMAINING TIME
- EXTRA LARGE PIECES
- ESPECIALLY DELICATE FABRICS
- JERSEY AND KNITWEAR
- FLIPPING CLOTHES
- METAL ORNAMENT
- ACOUSTIC SIGNAL
- PREPARE THE APPLIANCE
- PREPARE THE LAUNDRY
- TIPS
- LOAD CLOTHES THE APPLIANCE
- TAKE OUT AND ADD CLOTHES
- CAUTION
- LOADING THE DRYER
- END OF DRY CYCLE
- USING THE DRYER RACK (OPTIONAL)
- GENERAL
- REQUIREMENTS
- DOWNLOAD AND INSTALLATION OF HON APP
- REMOTE CONTROL (WI-FI)
- APPLIANCE PAIRING (ON APP)
- NOTE: WI-FI NETWORK
- NOTE: USE SAME WI-FI
- TO ENABLE REMOTE CONTROL
- NOTE: REMOTE CONTROL EXPIRATION
- TO DISABLE REMOTE CONTROL
- END OF CYCLE WITH REMOTE CONTROL ON
- CARE AND CLEANING
- LINT FILTER CLEANING
- CONDENSER FILTER CLEANING
- EMPTY THE WATER TANK
- TUMBLE DRYER
- DRUM
- TROUBLESHOOTING
- CUSTOMER SERVICE
- WARRANTY
- PROGRAM MENU
- PREPARING THE APPLIANCE
- PREPARING THE LAUNDRY
- END OF THE DRYING CYCLE
- USING THE DRYING RACK (OPTION)
- PAIRING DEVICES (IN THE APP)
- NOTE: USE THE SAME WI-FI
- NOTE: THE EXTERNAL DRAIN HOSE MUST BE SECURE
- CE STANDARDS AND DIRECTIVES
- PROGRAM SELECTOR
- NOTE: THE EXTERNAL DRAIN HOSE MUST BE FIRMLY
- PAIRING THE DEVICE (IN THE APP)
- ATTENTION
- PRACTICAL TIPS
- THANK YOU
- DEACTIVATION
- AV
- NOTIFICATION
Brand : HOOVER
Model : HDY7 H9A3BCEX-S
Category : Tumble dryer