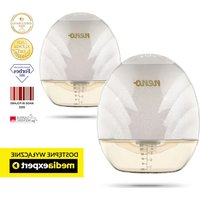
Perla Twin - Breast Pump Neno - Free user manual and instructions
Find the device manual for free Perla Twin Neno in PDF.


| Product Type | Double Electric Breast Pump |
| Brand | Neno |
| Model | Perla Twin |
| Dimensions (per breast pump) | 13 × 11 × 6.5 cm |
| Weight (per breast pump) | 277 g |
| Milk container capacity | 120 ml × 2 |
| Container material | Tritan |
| Power supply | AC adapter 110-240 V, 50-60 Hz, output 5 V 1 A |
| Battery | Lithium-ion 3.7 V 1100 mAh |
| Battery life | Up to 120 minutes |
| Charging time | Approximately 120 minutes |
| Aspiration modes | Stimulation, Deep Extraction, Mixed |
| Aspiration levels | 9 levels per mode |
| Aspiration pressure (stimulation) | 3-21 kPa |
| Aspiration pressure (deep extraction) | 15-38 kPa |
| Aspiration pressure (mixed) | 14-37 kPa |
| Included components | 2 complete breast pumps, 4 membranes, 4 valves, 2 connectors, 2 reducers 19 mm, 2 reducers 22 mm, 2 funnels 26 mm, 2 containers, 2 caps, 3 charging cables |
| Cleaning and disinfection | Wash with soapy water after each use; disinfection by boiling (except container, connector, and cap: 5 min in boiling water removed from heat) |
| Consumables replacement | Membrane: every 8 weeks (use 1-3×/day) or 3-4 weeks (>3×/day); valve: every 2-3 months (1-3×/day) or 4 weeks (>3×/day); funnel and connector: every 6 months (>3×/day) |
| Warranty | 24 months |
| Usage precautions | Do not use during pregnancy; stop if pain occurs; do not use if components are damaged; keep out of reach of children |
Frequently Asked Questions - Perla Twin Neno
User questions about Perla Twin Neno
0 question about this device. Answer the ones you know or ask your own.
Ask a new question about this device
Download the instructions for your Breast Pump in PDF format for free! Find your manual Perla Twin - Neno and take your electronic device back in hand. On this page are published all the documents necessary for the use of your device. Perla Twin by Neno.
USER MANUAL Perla Twin Neno
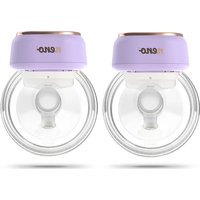
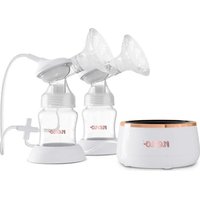
The Neno Perla Twin device you have purchased is two electronic, three-phase shell breast pumps for pumping breast milk from a woman's breast after childbirth. Read the instructions for use before use.
01. PRECAUTIONS
- Do not use a breast pump during pregnancy - it can cause premature labour.
- Do not use the device if you suffer from a chronic illness or hypersensitivity, which would cause you pain when using the breast pump.
- Before each use, make sure that none of the components are damaged. Do not use the breast pump if any component is visibly damaged.
- Keep the device out of the reach of children and pets.
- Avoid exposing the device to mechanical damage caused, for example, by falling.
- Keep the silicone parts of the breast pump away from hot surfaces to avoid distortion.
- Whenever you intend to store pumped breastmilk, clean and disinfect the breast pump first.
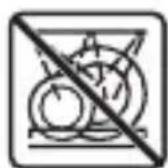
- Do not clean machine parts with abrasive agents.
- Do not attempt to repair the breast pump yourself - this will invalidate the warranty.
- If using the device causes pain or severe discomfort, switch it off and move the breast pump away from the breast.
- Do not connect the charging device to a voltage higher than specified.
02. BEFORE FIRST USE
- Connect the breast pump to the power supply. Charge the batteries for 2 hours.
- Disconnect breast pump parts that will come into direct contact with the breast or milk.
- Unscrew the milk container from the joint.
- Pull the valve down to disconnect it from the connector.
- Remove the connector and the diaphragm.
- Clean the appliance components (refer to the CLEANING AND DISINFECTION section).
03. ELEMENTS
FIG.A
- Reducer 19mm x2
- Reducer 22mm× 2
- Breast shield 26mm x2
- Pumping device x2
- Membrane x4
- Charging cable x3
- Milk container cap x2
- Milk container x2
- Valve x4
- Connector x2
04. DISPLAY ICONS
FIG.B
- Battery status - The battery icon shows the state of charge of the battery. Connect the device to charge when the battery is close to empty.
- Power button - Hold the button for 2 seconds to switch the device on or off. When the device is on, press to pause the breast pump.
- Mode change button - Press the button to change the mode of the device. There are 3 modes available (stimulation, deep suction, mixed).
- Stimulation mode icon.
- Suction level - Shows the currently selected suction power level.
- Deep extraction mode icon.
- Changing the suction level - Press _n + ^n to increase the suction power.
- Changing the suction level - Press _,^ to reduce the suction power.
- Mixed mode icon.
05. CLEANING AND DISINFECTION
Washing and disinfecting are two different operations. They must be carried out separately to protect your baby and to ensure that the breast pump works properly. Washing - washing the surface of the unit and removing dirt.
Disinfection - killing organisms such as bacteria or viruses that may be present on the surface of the equipment.
Breast shield, membrane, valve, reducers, connector, milk container:
Wash and disinfect before first use.
Wash after each use.
Once a day and before first use - disinfection.
A. WASHING:
- Disassemble all parts of the breast pump (except the pumping device) and wash in warm soapy water for 5 minutes, then rinse. Do this immediately after using the
machine. This will remove milk deposits and prevent bacterial growth.
- Only use drinkable tap water for washing. Use bottled water if the water in your tap does not meet this requirement.
- When cleaning silicone parts, do not use brushes. Be careful not to pierce them through.
- Use a mild dishwashing liquid or soap.
- Allow the parts to dry naturally. Store dry appliance parts in a cool, dry place when you are not using them.
B. DISINFECTION:
1. Membrane, valve, reducers, funnel
-
Fill the pot or steriliser with water so that all the components inside (membrane, valve, reducers, funnel) are covered when placed inside. Bring to the boil. Place the breast pump parts in the boiling water for 10 minutes. Do not boil.
-
Allow the items to dry naturally. Store dry kit items in a cool, dry place when you are not using them.
2. Milk container, connector, container cap
- Fill a pot or steriliser with water and bring to the boil. Then turn off and transfer the water to another pot and place the breast pump parts (membrane, valve, reducers, connector, milk container) in the water for 5minutes. Do not boil.
CAUTION: do not boil the milk container, connector or cap at 100^ C. It can cause damage to the components. Disinfection is carried out as described above.
- Allow the items to dry naturally. Store dry kit items in a cool, dry place when you are not using them.
C. CLEANING THE PUMPING DEVICE:
- Wipe the pump unit with a soft, wet cloth and a mild dishwashing liquid/soap.
Other cleaners or abrasives may damage the unit and its display.
- When not using the pump unit, store it in a cool, dry place.
06. BREAST PUMP ASSEMBLY
FIG.C
NOTE: Wash your hands thoroughly with soap and water before touching the breast pump and breast.
- Connect the valve to the connector in the direction shown.
- Insert the membrane into the connector.
- Attach the connector with the membrane to the pumping device.
- Tighten the milk container in the pumping unit.
- Attach the breast shieldl to the pumping device.
- Insert the breast pump into your bra/lactation corset to fit your breasts.
Start expressing your milk.
NOTES:
Before each use, check the parts of the breast pump for damage. If necessary, replace damaged parts with new ones.
Always check the cleanliness of components before using the unit.
07. CHARGING THE BREAST PUMP
Full blinking battery - low battery, connect device to charge.
Incomplete blinking battery - battery connected to charge, current battery charge status.
Full battery - battery fully charged.
Fully charge the breast pump battery before putting it into storage if you intend not to use the device for a long period of time. Charge the device battery before it is completely depleted. This extends the life of the battery. If the breast pump has been stored in a hot place, the device battery may not work at first. Allow the breast pump to cool down for one hour before you start using it.
08. USE OF A BREAST PUMP
FIG. D
- Place the breast shield on your breast so that the nipple is inside the drainage channel. Press the breast shield and breast pump connector against your breast using your thumb and forefinger.
- Place the breast pump in your bra/lactation corset. Turn on the breast pump by pressing the power button and select the mode of operation that suits you.
NOTES:
- The breast pump starts in stimulation mode. Set the level of suction strength comfortable for you using the + / - buttons. Stimulation mode - fast pumping that mimics your baby's natural sucking of breast milk to stimulate milk flow. After 2 minutes, the breast pump will automatically activate the deep pumping mode.
Adjust the suction level using the + / - buttons to find the highest level of suction that is comfortable for you. If milk starts to flow from your breast before two minutes have elapsed, press the mode change button to manually switch to deep extraction mode.
-
Deep pumping mode - slower pumping that gently and efficiently sucks milk from the breast. In intake mode, increase the suction until you feel slight discomfort (not pain) and reduce the suction by one degree.
-
Mixed mode - mimics the baby's sucking reflex. Can be used after pumping to help empty the breast and increase lactation.
09. PREPARING MILK FOR FEEDING
- A milk container cap is included for storing milk in the fridge.
- Do not thaw frozen milk in the microwave or in boiling water. There is a risk
of scalding the baby's face.
- Thaw the milk in the fridge overnight. Do not refreeze milk once thawed. You can thaw milk quickly by holding it under running water at a maximum temperature of 37^ .
- Place the sealed bottle/bag in a bowl of warm water for 20 minutes to bring the milk to body temperature.
- Do not add freshly drained milk to previously frozen milk if the amount of fresh milk exceeds the amount of previously frozen milk.
10. REPLACEMENT OF CONSUMABLES
Consumable components are subject to natural wear and tear during operation of the breast pump and are therefore not covered by the manufacturer's warranty. Worn components of the breast pump that come into contact with milk should be replaced. A worn component has a crack, deformation, tarnishing or a distinct change in colour.
- The membrane should be replaced every 8 weeks (if you use the breast pump 1-3 times a day) or every 3-4 weeks (if you use the breast pump more than 3 times a day).
- The valve should be replaced every 2-3 months (if you use the breast pump 1-3 times a day) or every 4 weeks (if you use the breast pump more than 3 times a day).
- The breast shield and connector should be replaced every 6 months if you use the breast pump more than 3 times a day.
11. LONG-TERM STORAGE
The breast pump has a built-in rechargeable battery. To protect itself from damage, the device enters storage mode after a long period of inactivity. To deactivate the storage mode, connect the device to power and charge it for 2 hours. Before you put the breast pump away for a long period of time, make sure that:
- All components of the breast pump are clean.
- You have cleaned the pumping device.
- The device's battery is fully charged.
12. FAQ
- If the unit does not start: make sure that the breast pump is plugged into a functioning socket. If the breast pump has no power source, the display will not switch on and no error message will appear.
-
No/poor suction: make sure all breast pump parts are positioned correctly. Take the breast pump apart and make sure all parts are clean and undamaged. Reassemble the breast pump according to the instructions in the LACTATOR ASSEMBLY section. When pumping, make sure the funnel is fully seated against the breast.
-
More milk has flowed from the breast than the container can hold: use a damp (not wet) cloth to wipe the breast pump. Wash the parts of the breast pump that contain milk according to the instructions in the CLEANING AND DISINFECTING section. When all parts of the machine are dry, reassemble.
13. SPECIFICATION
Capacity of milk container: 120ml× 2
Material of milk container: tritan
Battery capacity: 3.7V 1100mAh Li-ion
Input power: 110-240V 50-60Hz
Output power: 5V 1A
Operating time: up to 120min
Charging time: approx. 120min
Dimensions of one breast pump: 13 × 11 × 6.5 cm
Weight of one breast pump: 277g
Suction power:
- Stimulation mode (9 levels): 3-21kPa
- Deep extraction mode (9 levels): 15-38kPa
- Mixed mode (9 levels): 14-37kPa
Permissible variation ± 5 Kpa.
14. WARRANTY/ COMPLIANTS CARD
The product comes with a 24-month warranty. Warranty terms and conditions can be found at: https://neno.pl/gwarancja
Details, contact and service address can be found at: https://neno.pl/kontakt
Specifications and contents are subject to change without notice. We apologise for any inconvenience.
DE
2. Melkcontainer, connector, tankdop
2. Recipient de lapte, conductor, capac de recipient
The crossed out trash can symbol indicates that unusable electrical or electronic devices, its accessories (such as power supplies, cords) or components (for example batteries, if included) cannot be disposed of alongside with household waste. In order to dispose of the devices or its components (for example, batteries) deliver the device to the collection point, where it will be accepted free of charge. Disposal is subject to the recast version of the WEEE Directive (2012/19/EU) and the Directive on batteries and accumulators (2006/66 / EC). Proper disposal of the device prevents degradation of the natural environment. Information about the collection points of the facilities is issued by the competent local authorities. Incorrect disposal of waste is subject to penalties provided for by the law in force in the given area.
DE
KGK TREND Sp. z o.o.
ul. Ujastek 5b, 31-752 Kraków, Polska.
Wyprodukowano w PRC
Manufacturer:
KGK TREND Sp. z o.o.
Ujastek 5b, 31-752 Cracow, Poland.
Made in PRC


- PRECAUTIONS
- BEFORE FIRST USE
- ELEMENTS
- FIG.A
- DISPLAY ICONS
- FIG.B
- CLEANING AND DISINFECTION
- WASHING:
- DISINFECTION:
- Membrane, valve, reducers, funnel
- Milk container, connector, container cap
- CLEANING THE PUMPING DEVICE:
- BREAST PUMP ASSEMBLY
- FIG.C
- NOTES:
- CHARGING THE BREAST PUMP
- USE OF A BREAST PUMP
- D
- PREPARING MILK FOR FEEDING
- REPLACEMENT OF CONSUMABLES
- LONG-TERM STORAGE
- FAQ
- SPECIFICATION
- Suction power:
- WARRANTY/ COMPLIANTS CARD
- DE
- Melkcontainer, connector, tankdop
- Recipient de lapte, conductor, capac de recipient
- Manufacturer:
Brand : Neno
Model : Perla Twin
Category : Breast Pump