
Dualchef S 325 G - Barbecue Outdoorchef - Free user manual and instructions
Find the device manual for free Dualchef S 325 G Outdoorchef in PDF.
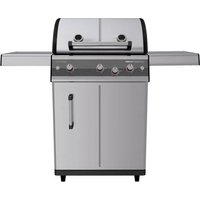


| Product type | Gas barbecue |
| Brand | Outdoorchef |
| Model | Dualchef S 325 G |
| Category | Barbecue |
| Gas type | Propane/Butane (30/31) |
| Total power | 15.4 kW |
| Gas consumption | 1120 g/h |
| Number of main burners | 2 (DGS Twin Burner) |
| Side burner | Yes, 3.4 kW |
| DGS system | Dual Gourmet System with Zone Divider, Heat Diffuser and Protection Bars |
| Electric ignition | Yes, with AAA 1.5 V batteries |
| Safety Light System (SLS) | Yes, with NiMH AA rechargeable batteries 1.2 V / 2400 mAh |
| Grill lighting | Yes, halogen G9 (12 V / 10 W) |
| Burner material | Stainless steel |
| Griddle material | Enamelled cast iron (RTG) |
| Maximum gas bottle capacity | 11 kg |
| Warming grid | Yes, height adjustable |
| Thermometer | Yes, with accuracy ±10% |
| Warranty | 8 years on main parts (body, burner, grids, etc.) |
| Cleaning | Use Outdoorchef Barbecue Cleaner or Chef Cleaner |
Frequently Asked Questions - Dualchef S 325 G Outdoorchef
User questions about Dualchef S 325 G Outdoorchef
0 question about this device. Answer the ones you know or ask your own.
Ask a new question about this device
Download the instructions for your Barbecue in PDF format for free! Find your manual Dualchef S 325 G - Outdoorchef and take your electronic device back in hand. On this page are published all the documents necessary for the use of your device. Dualchef S 325 G by Outdoorchef.
USER MANUAL Dualchef S 325 G Outdoorchef
Please read these instructions carefully before using your OUTDOORCHEF Gas Barbecue.
MODE D'EMPLOI 36
Before using your OUTDOORCHEF gas barbecue for the first time, the following information applies.
ISTRUZIONI PER L'USO 52
GEBRUIKSAANWIJZING 68
BRUGSANVISNING 84
BRUKSANVISNING 100
BRUKSANVISNING 116
Read the operating instructions carefully before using the gas grill OUTDOORCHEF.
KÄYTTÖOHJE 132
OPERATING INSTRUCTIONS
Instructions for use of the OUTDOORCHEF gas grill

DUAL CHEFS 8285 G & DUAL CHEFS 4285 G
BEFORE FIRST USE
Please read these instructions carefully before using your OUTDOORCHEF gas barbecue.
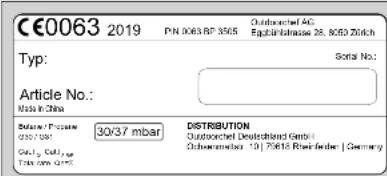
IMPORTANT:
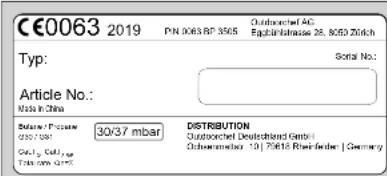
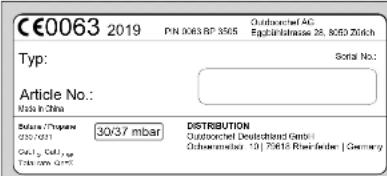
First of all, make a note of the serial number of your gas barbecue on the back of this user guide. Depending on the barbecue model, you will find the number on the data sticker that is either on the barbecue frame or the base piece.
The serial number and item number are important to allow smooth processing of enquiries, orders for spare parts and any warranty claims. Keep the user guide in a safe place. It contains important information about safety, operation and maintenance.
Read the User Guide before using the appliance. Keep the User Guide in a safe place. It contains important information about safety, operation and maintenance.
IMPORTANT FOR YOUR SAFETY
Anyone who operates the barbecue must know and follow the ignition process precisely. Children are not allowed to use the barbecue. Follow the assembly instructions in the set-up instructions precisely. Incorrect assembly can have dangerous consequences. Do not position any flammable liquids, materials or spare gas bottles in the vicinity of the barbecue. Never set up the barbecue or the gas bottles in enclosed rooms without ventilation. Please read these instructions carefully before using your gas barbecue. The barbecue is for outdoor use only and a safety clearance of at least 1.5 m from flammable objects must be ensured.
GAS BOTTLES
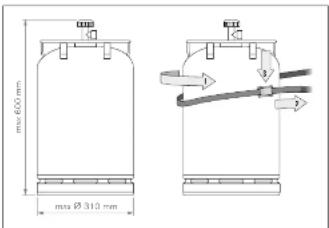
Please first and foremost observe the gas bottle manufacturer's safety instructions and user guide. Only gas bottles up to a maximum net weight of 11 kg may be placed on the base plate. Position the bottle in the place provided, see assembly instructions. Please make sure there are no leaking screw connections. CHECK FOR LEAKS before use and after each gas bottle change. Gas bottles must not be exposed to a temperature of more than 50°C and must never be stored in an enclosed room or basement. Read and follow the safety instructions indicated on the gas bottles used.
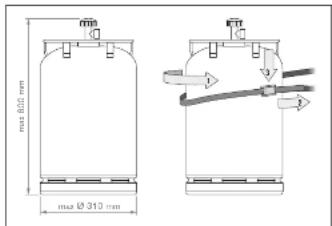
NOTE: Check whether the pressure regulator and gas bottle are approved for use in your country. Use only gas bottles that comply with the applicable national standards. The different sealing systems mean that any discrepancy in the pressure regulator and gas bottle systems will prevent the secure closure of the seal. This could result in gas leakage which could then be ignited by an open fire or a spark. For safety and liability reasons, in all cases, we recommend choosing gas barbecues intended for sale and, if required, adapting the pressure regulator and gas hose according to national regulations or arranging for this work to be performed.
SAFETY INFORMATION
This user guide must be kept by the owner and be close at hand at all times. Take the barbecue into operation in accordance with the INSTRUCTIONS FOR LIGHTING chapter. For outdoor use only. Read the user guide before using the appliance. CAUTION: Accessible parts may be very hot. Keep children away! This appliance must be kept away from flammable materials during use. Do not move the appliance during use. Turn off the gas supply at the gas cylinder after use. Never use the same under a canopy. Devices equipped with castor wheels are not allowed to be pushed across uneven floors or steps. Make sure that the drip collector tray and the drip pan are always fully closed and engaged during operation. Wear protective gloves when you touch hot parts. After grilling, always turn the gas regulating knob to the 'O' position and close the gas supply at the gas bottle. When changing the gas bottle, make sure that the gas regulating knob is in the 'O' position and the gas supply is closed at the gas bottle. IMPORTANT: No sources of ignition are permitted to be in the area. After connecting a new gas bottle, check the connection parts in accordance with the instructions in CHECKING FOR LEAKS. If you suspect that parts are leaking, turn the gas regulating knob to the 'O' position and close the gas supply at the gas bottle. Have the parts that carry gas checked by a specialist gas equipment retailer. Renew the gas hose immediately if it is damaged or displays signs of wear. The hose must be free from kinks and must not have any cracks. Do not forget to switch off the gas regulating knob and the gas supply before you remove the hose. Renew the hose and the gas pressure regulator after it has been in use for 5 years from the date of purchase. Make sure that the gas pressure regulator and the hose are in accordance with the corresponding EN standards (gas pressure regulator EN 16129 / gas hose EN 16438). The recommended length of the gas hose is 90 cm, and it must not be longer than 150 cm. Never block the air intake slots in the housing or the air slots in the lid. The ventilation openings in the gas stove compartment must never be closed or covered. Do not modify the appliance. Contact a specialist if you suspect that there is a malfunction. The barbecue is supplied with a gas hose and gas pressure regulator. It is essential to keep the gas hose away from the hot outside surfaces of the barbecue. The hose is not allowed to be twisted. On barbecue models that have a hose guide, it is essential for the hose to be secured in this guide. The hose and regulator are in accordance with the particular national regulations and EN standards (gas pressure regulator EN 16129 / gas hose EN 16436). Contact a specialist gas equipment retailer if full power is not achieved and you suspect there may be a blockage in the gas supply. Only use the barbecue on firm, secure ground. Never place the barbecue on wooden floors or other flammable surfaces while it is in use. Keep the barbecue away from flammable materials. Do not operate the barbecue in the vicinity of highly flammable liquids or materials. If you store the barbecue indoors over winter, it is essential for the gas bottle to be removed. It should always be stored in a well-ventilated location which is inaccessible to children. Select a location protected as much as possible from the wind before lighting the barbecue. When the barbecue is not in use, and once it has cooled down fully, protect it against the effects of the weather using a cover. Covers can be purchased from your barbecue retailer. Remove the cover after heavy rain in order to avoid condensation build-up. Only use the device if the main cable, socket outlet, and the device itself are undamaged. Check before each use. Only operate the device on an earthed socket outlet. Disconnect the plug after each use or in case of a fault. CAUTION: Pull the plug, not the cable. Keep the main cable away from hot parts. Do not touch the plug if your hands are wet. Do not move the barbecue while it is operating. Never leave the barbecue unsupervised during operation. The barbecue remains hot for a long time after use. Make sure you do not burn yourself or place any objects on the barbecue; danger of burns. Do not use the barbecue during rain or snowfall, because this barbecue includes electrical components. If it is necessary to use an extension cable, it must be earthed and suitable for a current of at least 10A / 280V with a conductor cross-section of at least 1.5 mm². Make sure that the cable does not create a trip hazard or a potential means of the device being knocked over. Preferably use a short extension cable and never combine 2 or more extension cables. Do not run the mains cable over paths.
LEAK TEST
WARNING: No sources or ignition are permitted to be in the vicinity during the leak test. This also includes smoking. Never check for leaks with a burning match or on a motor exhaust. Always do this task outdoors.
The gas regulating room must be well ventilated.
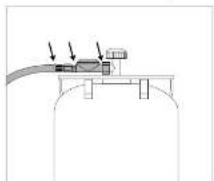
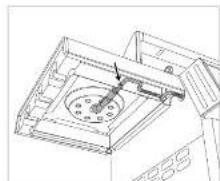
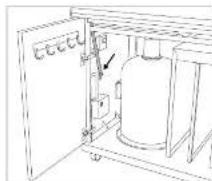
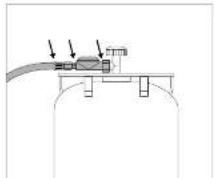
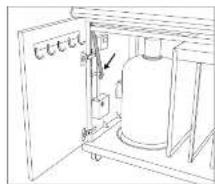
1. Turn on the gas supply at the bottle and brush a soap solution comprising 50% liquid soap and 50% water onto all parts that carry gas (connection at the gas bottle / gas pressure regulator / gas hose / gas inlet / connection on the valve). You can also use a leak detector spray. 2. Bubble forming in the soap solution indicates there are leaks. IMPORTANT: Do not use the barbecue until all bubbles have been eliminated. Turn off the gas supply on the gas bottle. 3. Eliminate the leaks by tightening the connections if possible, or by repairing the defective parts. 4. Repeat steps 1 and 2. 5. Contact your specialist gas equipment retailer if the leaks cannot be eliminated.
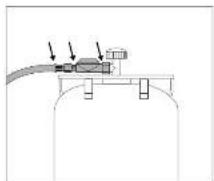
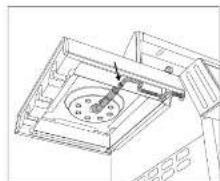
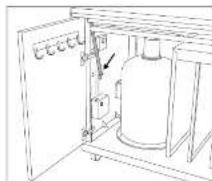
NOTE:
Carry out the LEAK TEST each time you connect or change the gas bottle, and at the start of the barbecue season.
Heat settings/heat levels and ignition
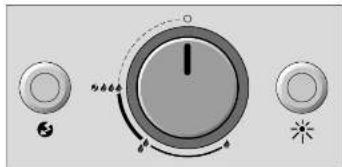
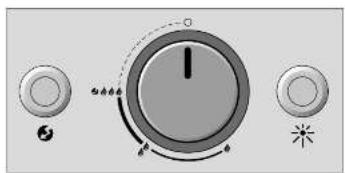
0250: LOW POWER, Medium, High
BEFORE FIRST USE
1. Clean all parts that come into contact with food. 2. Check all parts that carry gas, as described in the CHECKING FOR LEAKS chapter. Also do this if your gas barbecue was delivered already assembled by the retailer. 3. Let the barbecue burn for about 20-25 minutes at the highest setting. Make sure the drip tray and the grease pan have been pushed in fully. This also applies to normal use of the barbecue.
IGNITING INSTRUCTIONS
NOTE: It is not always necessary to use the ignition. This depends on the type of cooking and the amount of food.
IGNITING THE MAIN BURNERS
DUALCHEF 315 G/DUALCHEF 325 G/DUALCHEF S 325 G
DUALCHEF 415 G/DUALCHEF 425 G/DUALCHEF S 425 G
- Make sure that all connections between the gas hoses, the gas pressure regulator and the gas bolts are firmly tightened (follow the instructions in the CHECKING FOR LEAKS section).
- Switch on the main switch at the electric panel (O).
- CAUTION: Never use the burners when the lid is closed.
- Open the gas supply at the gas bottle.
- If the gas does not ignite within 3 seconds, set the gas regulating knob to MAX for 2 minutes to allow the accumulated gas to disperse. Then repeat again up to 4 times. If it is not possible to ignite the barbecue after 8 attempts, check the cause (as described in the TROUBLESHOOTING section).
- Make sure that all connections between the gas hoses, the gas pressure regulator and the gas bottle are firmly tightened (follow the instructions in the CHECKING FOR LEAKS chapter).
- Switch on the main switch at the electric panel (ON = indicator will light up).
- Open the cover plate at the side corner of the DUALCHEF 325 G / DUALCHEF S 325 G / DUALCHEF S 425 G. CAUTION: Never lift the side corner when the cover plate is closed.
- Open the gas supply at the gas bottle.
- Press the gas regulating knob marked SIDE BURNER and turn the dial switch to the desired setting.
- If the gas does not ignite within 3 seconds, set the gas regulating knob to OFF for 2 minutes to allow the unburned gas to disperse. Then repeat steps 4 to 5.
- If it is not possible to ignite the side burner after 3 attempts, search for the causes (as described in the TROUBLESHOOTING section).
- Do not use cooking utensils with a diameter less than 150 mm or greater than 270 mm on the side heating areas.
INFO FOR LEFT SIDE TABLE (APPLIES ONLY TO MODELS WITH SIDE BURNERS)
Extension with BLAZING ZONE Infrared side burner (applies only to Dualchef models with side burners)
If you have a Dunblad's model with side burners, it is possible to remove the side cooking plate in the left side heater and replace it with an OUTDOOR CHEF BLAZING ZONE (inner side burner).
The BLAZING ZONE is available separately as an accessory from your specialist barbecue retailer. It is a ceramic burner that generates infrared radiation on the surface, emitting concentrated heat in excess of 900 degrees Celsius, allowing food to be grilled to create a perfect crust on your steaks.
Left side table (applies only to DualChef models with side burners)
To ensure the stability of the left side table (in models with side burners or BLAZING ZONE) and safe operation, the left side table cannot be folded down.
THE ELECTROBOX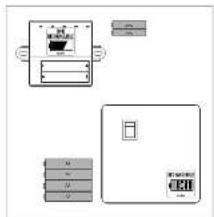
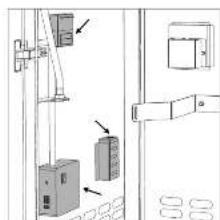
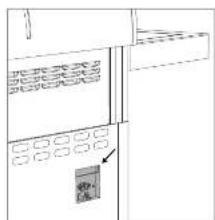
The electrobox includes:
- 4 Ni-MH rechargeable batteries (type AA 1.2V/2400 mAh) for the Safety Light System (SLS) - 2 batteries (type AAA 1.5V) for the electric ignition
- Master switch to interrupt the power supply to the individual components and prevent the discharge of the rechargeable batteries. 1 battery charging station: The battery charging station can be connected to a wall-locked outlet using the included mains cable and the connecting socket on the rear side for the DUALCHEF S 5245 G and DUALCHEF S 4065 G models. When the included mains cable is connected, the 4 integrated rechargeable batteries are charged automatically when the power switch is switched on. During charging, the LEDs on the battery charging station are illuminated continuously (approximate charging time of up to 19 hours). Other DUALCHEF models are not supplied with an included mains cable. However, these models also offer a battery charging function. A corresponding mains cable is available from some specialist retailers and electronic stores.
CAUTION: The included rechargeable batteries for your DUALCHEF can be recharged in the electrobox thanks to the integrated battery charging station. These batteries must NOT be replaced with conventional non-rechargeable batteries. If you try to insert non-rechargeable batteries and connect the battery to a socket outlet using the mains cable, the device will try to recharge the non-rechargeable batteries. This can result in serious damage and fire.
THE SAFETY LIGHT SYSTEM (SLS)
The SAEPY L18-1 SY5/8 (SLS) of your DUALCHEF barbecue will be activated when you turn the gas regulating knob from the position towards sealing the gas supply to the DUAL BURNER. The light, firing around the gas regulating knob, enables you to see from a distance whether the gas supply of one or multiple burners is sufficient. The 4-in. extrusion resealings a boreaus ensures the energy supply for the SLS. It's the rechargeable battery capacity sales in around 2095; the SLS will start flashing in indication that the SLS display will soon prove to be the batteries are not recharged. The gas regulation function will work even if the rechargeable batteries are depleted. DUALCHEF barbecues are equipped with an integrated battery charging device (see chapter ELECTROBOX). The operating console is equipped with a light sensor. The sensor measures the environmental light intensity and adjusts the luminosity of the SLS accordingly. NOTE: The glass above the sensor must be clear and clean so that its function works properly.
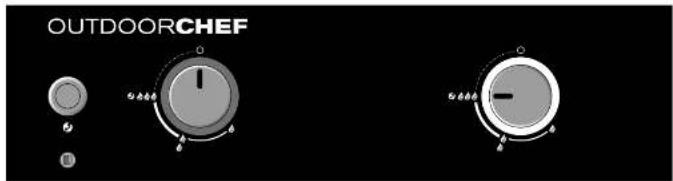
INSTRUCTIONS FOR USING THE DUALCHEF
It couldn't be simpler:
If you only want to prepare small amounts of food and just use one or two burners, disconnect the unused grilling zone using the DGS* ZONE DIVIDER for increased efficiency (see chapter DGS* ZONE DIVIDER). Grilling with the lid closed reduces the grilling time and gas consumption. 2. Preheat the barbecue with its lid closed for about 10-15 minutes at the end of the heating. 3. Place the food to be grilled on the barbecue grid and regulate the temperature according to your requirements infinitely.
Bewerer
- After grilling, always set the gas regulating knob to the Open position. Then close the gas supply at the gas inlet. The garlic must be closed seven to eight cloves.
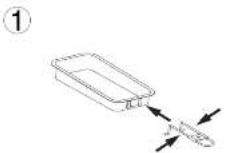
- After grilling, always let the barbecue and its parts cool down completely before cleaning. CAUTION: THE DUALCHEF S 328 S and DUALCHEF S 428 S models are equipped with a grid chamber lighting (theogen) which may be dangerous if the exhaust is suspected to harm objects. CAUTION: The drip pan may only be removed for emptying and cleaning when it is cold. The retained hot fat can cause burn injuries. The drip pan may be removed using the included tape only!
In addition to traditional barbecue methods (see chapter DIRECT AND INDIRECT BARBECUE METHOD), the DUALCHEF also offers the unique DGS® SYSTEM (DGS). The DGS® ZONE DIVIDER, which divides our DUALCHEF into two grilling zones, is a very key feature of the DUALCHEF SYSTEM (DGS). The zone divider offers new options for grilling - be it preparing numerous dishes at the same time or cooking the transfer of smells and odours between various grilled foods. In addition to the separation of the grill chamber, you can also fully control the temperature of the grilling zones. Both zones can be operated and controlled separately. The thermometers indicate the temperature of the respective zones. The DGS accessories range helps you to properly use the zones and supports you in achieving the best harmonic result. The following sections describe the individual components of the DUALCHEF SYSTEM (DGS®).

THE DGS® ZONE DIVIDER
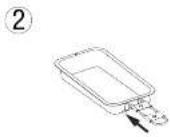
The DGS® ZONE DIVIDER divides the burning chamber into two separately controllable grilling zones.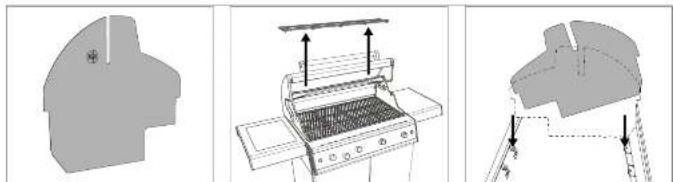
The DUALCHEF 015 G/DUALCHEF 325 G and DUALCHEF 325 G models are equipped with a zone separation sealing.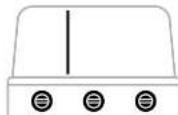
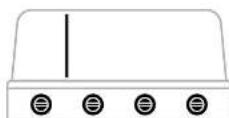
The DUALCHEF 415 C/DUALCHEF 425 C and DUALCHEF 425 C models are equipped with two zone separation sealings. SEPARATING THE GRILL CHAMBER INTO VARIOUS ZONES ENABLES A CONVENIENT AND EFFICIENT USE OF THE FOLLOWING FUNCTIONS: The DGS® ZONE DIVIDER of your DUALCHEF barbecue allows you to prepare various foods simultaneously, separately and thus without any transfer of colors or flavors! 3. The individual zones can be controlled separately from the DGS® ZONE DIVIDER as the generated heat of the DGS™ TWIN BURNER flows inside the burning chamber and the DGS™ ZONE DIVIDER prevents a major heat transfer to the other grilling zone. This separation allows you to work with various temperatures for your food under the DUALCHEF barbecue hood. AVAILABLE TEMPERATURE ZONES WITH THE DGS® ZONE DIVIDER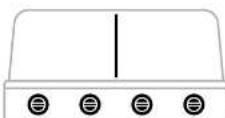

2627
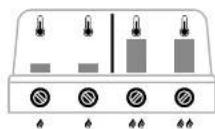
DIFFERENCE BETWEEN THE TEMPERATURE ZONES WITH OR WITHOUT THE DGS® ZONE DIVIDER
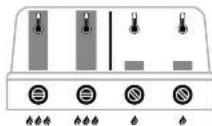
WITH DGS® ZONE DIVIDER WITHOUT DGS® ZONE DIVIDER You may e.g. prepare a crispy steak on the right barbecue side, using the DGS® HEAT DIFFUSER (see chapter DGS® HEAT DIFFUSER) and at the same time a pizza or square bread on the left side. 3. The DGS® ZONE DIVIDER also supports an optimized gas consumption, if you only want to grill a small amount of food, use the DGS® ZONE DIVIDER to separate the unused grill surfaces. Reducing the size of the DUALCHEF grill chamber increases the efficiency of the unused grill surface and the operated burner. See the illustrations below to understand how to separate into zones. 4. THE DGS® ZONE DIVIDER enables direct grilling in one grilling zone and at the same time indirect cooking in the other zone.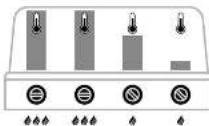

THE DGS® HEAT DIFFUSER
When preparing food with a rotisserie, the resultant heat is usually produced by a rear burner. The rear burner's rising heat and the 'west positions' in front of it require a large amount of gas to achieve the desired result. At the same time, the temperature control is highly limited.
The DBS HEAT DIFFUSER guides the required heat directly from the DBS TWIN BURGER to the food to be grilled in the rottiere. This arrangement creates a cost to be prepared with just one owner set to position 1. Correlating the DBS TWIN BURGER with the DBS ZONE DIVIDER and the DGS HEAT DIFFUSER reduces the gas consumption and increases the temperature range.
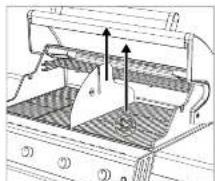
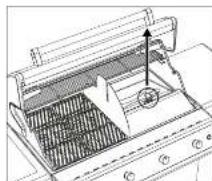
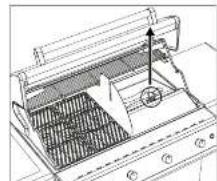
How to use the DGS HEAT DIFFUSER 1. Use the Grid Lifter to remove the barbecue grid from the right hand side of the barbecue. 2. Place the DGS HEAT DIFFUSER as shown above. 4. Push the rotisserie into the motor block (part of the DGS ROTISSERIE KIT). Next, place the opposite side on the DGS ZONE DIVIDER. b. Next, start the DualChlor and cook the rice with the desired temperature. c. Use the Grid Lifter to remove the DGS HEAT DIFFUSER after use.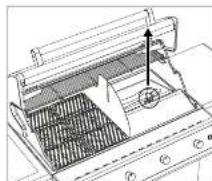
The DGS PROTECTION BARS and the DGS HEAT DIFFUSER protect the DGS TWIN BURNER from dropping fat and prevent flare-up. The concentric fat is drained in controlled manner, thanks to the smooth shape of the DGS HEAT DIFFUSER between the DGS TWIN BURNER. The drilling zone design enables you to pressure more fluid to get drilled on the remaining free drilling zone.
HEIGHT-ADJUSTABLE WARMING RACK
The warming rack acts as an additional grill surface with a separate temperature zone. Depending on the size of the food to be grilled, the warming rack may be attached in 2 different positions. The warming rack can also be used to prepare a roast with the help of the DGS HEAT DIFFUSER and the DGS ZONE DIVIDER. However, in this case, just one position is possible.
CAST IRON BARBECUE GRIDS
USAGE
Clean the cast iron barbecue grids with water before using them for the first time. Always put on barbecue gloves before touching the grids starting use on the barbecue. Never place the hot cast iron barbecue grids on Tarnside or heated-sensitive surfaces. The Grid Lifter can be used for easier removal of the cast iron barbecue grids.
CLEANING
Allow the cast iron barbecue grids to burn out on the barbecue at full power for around 10 minutes. Use a brush with force brushes (fastening point).
Let them cool down after 8pm.
In case of persistent dirt, use the GUITOOORCHEF BARBECUE-CLEANER for effective cleaning.
ND7F
After cleaning, all the herbaceous grid lightly with an oledra oil

DGS ACCESSORIES
Using the D65° ZONE DIVIDER, the DUALCHF provides you with virtually unlimited cooking options. And on top of the stated cooking options, OUTDOORCHEF has developed matching accessories for grilling, cooking, baking for even more fun with your DUALCHF. Get inspired and discover the world of D65° ACCESSORIES.
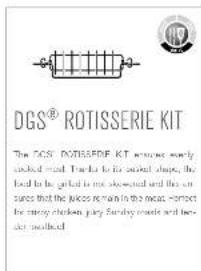
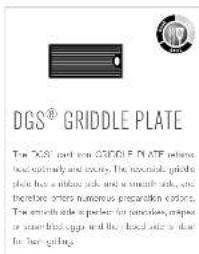


28.29
OUTDOORCHEF.COM

DIRECT AND INDIRECT GRILLING METHOD WITH THE DUALCHEF
WHAT IS THE DIFFERENCE?
DIRECT GRILLING METHOD
As the name says, the food to be grilled is placed directly above the heat source for the direct grilling method.
The method is ideal for searing meat. The high temperature enables a nice crust on the surface of the steak.
INDIRECT GRILLING METHOD
With indirect grilling, hot surfaces surround the food to be served. The closed lid turns the barbecue into a convection oven.
The method is ideal for cooking large pieces of meat at low temperatures, for gently cooking fish or making egg dishes.
With the grilling system of the gas barbecue stations, you can switch from direct to indirect heat in the blink of an eye.
For indirect grilling, cooking and baking, place the food to be grilled in the middle of the grate and only ignite the two outer burners.
DIRECT HEAT INDIRECT HEAT For direct grilling and cooking: Place the food to be grilled above the ignited burner.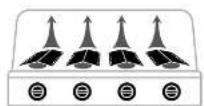
For indirect grilling, cooking and baking: Place the food to be grilled in the middle, close the lid and gently ignite the two outer burners.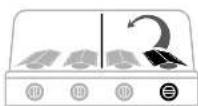
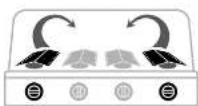
GRILL CHAMBER LIGHTING
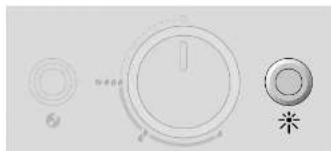
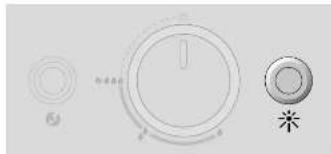
The DUALCHF S 325 G and DUALCHF S 425 G models are equipped with a grill chamber lighting. The halogen lamps (CS, 12 W) are operated with the included insulator cable which is plugged into the rear slice of the barbecue. The switch is located on the right side of the operating console.
CAUTION: The grill chamber light may be damaged if the net barbs are subjected to major impacts.
AFTER GRILLING
- Set the gas regulating knob of each burner to O
- Turn off the gas supply at the gas bottle.
- Shut off the master switch of the electrod
- Allow the barbecue to cool down fully and clean it
- Protect the barbecue with the corresponding cover
CAUTION: After grilling, please let this DALUO ICE cool down completely, before moving it. The DALUO ICE S 426 G and DALUO ICE S 426 G models are equipped with a halogen grill charing ignition valve which can be forged in the hot charcoal to submerge to major impacts.
CAUTION: The drip pan may only be removed for storage and cleaning when it is cold. The retained hot fat can cause burn injuries. This drip pan may be removed using the included handle only.
CLEANING
Only very minor cleaning is required between uses of the barbecue because most of the grease either evaporates or is gathered in the drip pan. To clean the barbecue grill use a herbicide spray with grass fertilizer (fasted grasses). For a more thorough cleaning of the burning chars, use the OUTDOORCHEF BARBECUE CLEANER. Alternatively, you can use a myrist kernel sponge and soapy water in order to remove all loose residues. A bit later, you can pull out the collecting tray, empty it and clean it using the OUTDOORCHEF BARBECUE CLEANER. You can clean the stainless steel components with a conversion stainless steel cleaner or a polishing sponge available in DIY stores. RECOMMENDATION: Clean the DGS HEAT DIFFUSER and the DGSE PROTECTION BARS after each use to avoid soaring and fire up.
USING THE OUTDOORCHEF BARBECUE CLEANER
IMPORTANT: the barbecue must not be operated while using the OUTDOORCHEF BARBECUE CLEANER. Wear gloves to protect your hands and, if possible, goggles to shade your eyes. Spray the paraffin or accessories thoroughly when they are still slightly warm and leave the product to work for 10-30 minutes. Spray stained surfaces again, rinse thoroughly with water and leave to dry. WARNING: Do not use the OUTDOORCHEF Barbecue Cleaner on powder-coated surfaces.
USING THE OUTDOORCHEF CHEF CLEANER
IMPORTANT: This appliance must not be operated while using the OUTDOORCHEF CHEF CLEANER. Wear safety glasses and gloves for protection. Spray the barbecue or accessory while still slightly warm and leave the product to work for 10 minutes until the foam has dissolved. If required, remove any remaining residue using a suitable brush on a nylon sponge. Then rinse thoroughly with water and dry. WARNING: Not suitable for wood, plastic, powder coated or varnished surfaces.
SERVICING THE DGS® TWIN BURNERS
The burners can be clogged by insects. This can impair performance or cause plastic blocks. Please perform the following steps to inspect and clean the burner regularly.
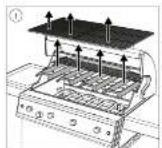
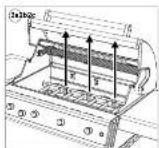
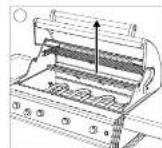
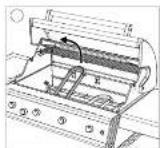
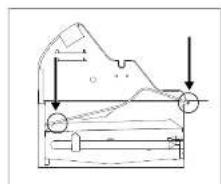
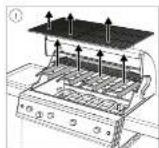
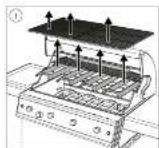
- Remove the barbecue grids and the DCS PROTECTION BARS from the OUTDOORCHEF.
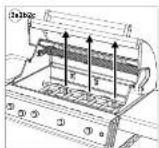
2a. Next, remove the retainer clip from the burner fixation.
- Then remove the top burner from its axis.
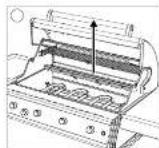
2c. Next, lift the burner out of the burning chamber.
- Clean the burner with a thin bolt brush or wire.
- After having been cleaned successfully, reassemble the individual components in reverse order in the burning chamber and start as described in the 'IGNITING THE MAIN BURNERS' section.
IMPORTANT: If you use a cleaning agent for cleaning, you must allow the barbecue to dry immediately after cleaning. To accelerate the drying procedure, you can switch the barbecue on and let it burn out for a few minutes at the highest setting with the lid open.
MAINTENANCE
Regular maintenance of your OUTDOORCHEF will ensure it functions correctly. At least once a year, check all parts that carry gas; also check them when you have not used them for longer periods. Spiders and other insects can cause blockages that must be cleared before use. If the barbecue is regularly pushed across uneven ground, check from time to time that all screws are still tight.
If you have not used the tracecode for a long period, you should carry out a CHECK FOR LEARS before using it again. If you have any doubt, please contact your gas supplier or the refiner.
To prevent damage due to corrosion of all metal parts before lengthy storage. Following lengthy storage, and at least once a year during the barbecue season, you should check the gas hose for cracks, cuts and other damages. A damaged gas hose must be replaced immediately as described in the SAFETY NOTES chapter.
To allow you to enjoy using your barbecue for as long as possible, protect it from the effects of the weather, using a suitable OUTDOORCHEF cover once it has cooled down completely. Remove the cover after any rain in order to prevent condensation build-up. Covers can be purchased from your barbecue retailer.
TROUBLESHOOTING
The burner does not ignite:
- Check that the gas supply is open at the gas bottle. Make sure there's enough gas in the bottle.
- Check if sparks are passing between the electrode and the burners.
CAUTION: This inspection may only be performed with the gas supply fully closed!
No spark:
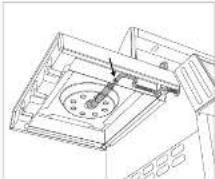
- Check that the batteries have been inserted correctly and are charged. The distance between the burner and electrode is only allowed to be 4.5 mm.
- Check whether the cables of the electric ignition and electronic are plugged in and firmly connected.
- Insert 2 new batteries (type AAA, 1.5 V) in the electronic ignitor.
Please contact the retailer if you cannot get the barbecue to operate with reference to the measures above.
The SAFETY LIGHT SYSTEM (SLS) does not work:
Check if the gas supply is open at the gas regulating knobs (with the gas bottle valve closed) - Ensure the propane regulator has been purged correctly and if the restorable balances are properly you can (depending on the model)
Plug the milled wine case to start the charging process (for the DUALCHEF S 8256 and DUALCHEF S425 G models) - purchase a corresponding multi case and directly plug it to the electrode (for the DUALCHEF 415 G / DUALCHEF 325 G / DUALCHEF 415 G / DUALCHEF 405 G models).
Grill chamber lighting
CONSUMER WARRANTY
1. Warranty and relation to other rights of the purchaser
As a private end user (consumer) purchasing this OUTDOORCHEF product from an authorized dealer, you are entitled to receive a manufacturer's warranty.
This manufacturer's warranty enables you to assert warranty claims against the warranty provider in accordance with this agreement. The warranty claims exist, and you can turn to your contractor for advice on statutory rights. These other rights are not exclusive or restricted by this warranty. Therefore, you can also assert other commercial or statutory claims against the respective obligated parties. Thus, for example, claims ascertained under the Firm's Terms & Conditions are not affected by this guarantee.
As the purchaser, you may in particular also assert contractual warranty claims against the seller. The reversal of the purchase contract, for example, can only be pursued against the seller, but not against OUTDOORCHEF under this warranty.
2. Participants and warranty conditions
OUTDOORCHEF is the warranty provider. This warranty applies to all end customers purchasing a new product from an authorized dealer for private purposes. Proof of purchase is the purchase receipt. A purchase for commercial use is excluded from the warranty. If a warranty claim is accepted, said warranty claims must be asserted against the warranty provider within two months. Otherwise, the warranty claims will be excluded. For obvious defects, this limitation period begins upon receipt of the product. OUTDOORCHEF therefore recommends that you check the product for defects immediately upon receipt.
3. Scope
The warranty is valid from the date of purchase and is granted in the following cases provided that no exclusion of factors exists pursuant to Part 4.
| ALUMINIUM DIE-CAST AND STAINLESS STEEL HOUSING | 10 years | Agreement concerning location |
| DGS7 TANK BURNER | 6 years | Agreement concerning location of main line |
| BARBECUE GRIDS | 3 years | Agreement concerning location of subflooring |
| ENAMEL UD | 5 years | Agreement concerning location and location of the water storage pool in front of |
| DGS7 ZONE DIVIDER / DGS7 HEAT DIFFuser / DGS7 PROTECTION DARS | 3 years | Agreement concerning performance on路面 |
| OTHER PARTS | 6 years | For installing transformers/underlined cables |
Interferences which are not considered to be defects include functionality, significant and reasonable irregularities; differences in the colour of the paint and minor defects such as product-related support points at the lower edge of the lid or the suspensions.
In this warranty case, OUTDOORCHEF will exchange and replace at the purchaser's request, either the damaged/defective parts or the entire product. As far as reasonable, an exchange can be made for a similar model of a newer design, e.g., for a successor model, insofar as the functionality of the products is not affected by a defect and to an extent reasonable for you as the customer, appropriate financial compensation can be offered to you in lieu of repair.
During the processing of a warranty claim (verification and possible replacement), the purchaser shall not be entitled to assess a claim for a replacement or other compensation against OUTDOORCHEF. Underlying warranty services does not mean that the warranty period is extended or restated. Exchanged parts become the property of OUTDOORCHEF. The warranty period will only start again if the proposed in-process, Any further claims against the warranty provider are not covered by this warranty. However, this does not restrict or exclude your claims on other legal grounds (see section 1 above).
4. Exclusion
The warranty shall not apply in the following cases:
- Normal wear and tear resulting from normal use, especially to general wear parts such as thermometer, ignition and battery electronic, ignition cable, gas hoses, gas pressure regulator, halogen lamps, drip collector tray and drip paint.
- Damage to the enamel from the use of utensils and other devices, provided that the defect did not already demonstrably exist before first use.
Defects and/or damage due to misuse, improper use in particular due to not following the user's guide, safety instructions or operating/maintenance instructions (for example, use of outdoor equipment indoors, damage resulting from incorrect installation, improper cleaning of the enamelled surface of the funnel or grill bars, failure to perform a leakage test to the external, recommended in the user's guide, use of harmful chemicals, unintended use, etc.).
- Defects and/or damages that are removed through intervention or repair by persons other than those authorised by OUTDOORCHEF.
- Defects and/or damage caused by destructive weather influences (e.g. hail or lightning).
Defects and/or damage due to landslide or due to intentional or negligent damage to the extent that this was not caused by OUTDOORCHEF.
- Defects and/or damages incurred during transport to the buyer, unless the transport was arranged by the warranty provider.
Defects and/or damage due to force majeure.
Defects and/or damage due to wear caused by professional use for commercial purposes (e.g. use in a hotel or restaurant).
5. Processing of warranty claims
In the event of a warranty claim, please contact us or one of our authorized dealers (a dealer directory is available at www.automotron.com) as soon as possible and tell us your address and, if possible, the product/part number, sales receipt information, serial number, and EAN number (both can be found on the data sticker on your tabletop, see the first section of the User Guide). Please describe the defect and, if possible, also send us a photo of it. In order to verify your warranty claim, you will need to return the product to us or your local dealer within the warranty period. In the case of justified warranty claims, we will reimburse the necessary and required transport and shipping costs. Otherwise, we will send the product back to you at your expense.
The registered brand OUTDOORCHEF is represented by the following entities:
A dealer directory can be found on our website at OUTDOORCHEF.COM
The serial number can be found on the data sticker on your tabletop
(see the first section of this USER GUIDE).
3435
TECHNICAL INFORMATION
DUALCHEF 315 G
C 0083
Gas type: propane/butane: 30/31
Total output: 12 kW
Gas consumption: 870 g/h
Nozzle (28-30/37 mm): 0.98 mm/mark: BK
Total weight of the gas bottle
on the barbecue frame: 11 kg
DUALCHEF 325 G / S 325 G
CE 0063
Gas Propane/butane 80/81
Total output 15.4 kg
Gas consumption 1120 g/h
Nozzle (28-30/37 mbar) 0.98 mm/mark: BK
Nozzle (50 mm) 0.84 mm/mark: AR
Gas pressure Butane 20 mbar.
Propane 37 mbar
Maximum admissible
net weight of the gas bottle
on the barbecue frame 11 kg
DUALCHEF 415 G
Gas Propane/butane 30/31
Total output 15 kW
Gas consumption: 1150 g/h
Nozzle (28-30/37 mbar) 0.98 mm/mark BK
Nozzle (50 mm) 0.84 mm mark: AR
Gas pressure Butane 28 mbar.
Propane 37 mbar
Maximum admissible
relative weight of the gas bottle
on the barbecue frame 11 kg
DUALCHEF 425 G / S 425 G
0063
1
net weight of the gas bottle
in the barbecue frame
SIDE BURNER
(DUALCHEF 325 G / S 325 G / 425 G / S 425 G)
C 6063
Gas Propane/butane 30/91
POA 3.4kW
Gas consumption 250 g/h
Novil (26-30/37 mbar) 0.88 mm/mark A-H
Nozzle (50 mbar) 0.76 mm/grade AK
Gas pressure Hana 26 mbar.
Propane 37 mbar
13.
18.
13 (2017) A
ELECTRIC IGNITION / THE SAFETY LIGHT SYSTEM (SLS)
- Batteries (type AA, 1.5V) are required to operate the slot
V72100/AA/0 are needed for the SAFETY LIGHT SYSTEM.
HALOGEN LIGHTING (DUALCHEF S 325 G / S 425 G)
The grill chamber lighting requires G9 halogen lamps (12V/10W).
NOTE ON THE TEMPERATURE DISPLAY
The thermoreceptor display is subject to a +/−10 % fluctuation.
WEB PAGE
More information, tips and tricks, recipes and all kinds of useful
Information about OUTDOORCHEF products can be found at OUTDOORCHEF.com

USER MANUAL
Please read this notice carefully before putting your OUTDOORCHEF gas barbecue into service.
IMPORTANT:
LIGHTING INSTRUCTIONS
NOTE: It is not necessary to light all burners. This ensures the second side is properly grilled and cooked.
LIGHTING THE MAIN BURNER
DUALCHEF 315 G/DUALCHEF 325 G/DUALCHEF S 325 G
DUALCHEF 415 G / DUALCHEF 425 G / DUALCHEF S 425 G
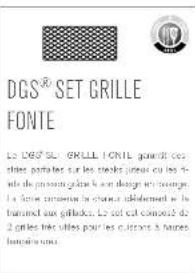


DGS COOKING SET
Total power: 15.4 kW
Cmnnn 100
1.00000000000000000000000000000000000000000000000000000
Injection 09/18-08/19/18eage AR
Prepare 37 mbar
Injection (35mL) 684 ml/100g
Prepare 37 mbar
DGS CAST IRON GRIDDLE SET

A
STAINLESS STEEL
DGS COOKING SET
DIRECT AND INDIRECT GRILLING METHODS WITH DUALCHEF
WHAT ARE THE DIFFERENCES?
DIRECT GRILLING METHOD
SYSTEM occurrence of the balleries NiH (Igo AA, 12V/2400
mAI
HALOGEN LIGHTING (DUALCHEF S325 G / S 425 G)
As a part of the new web-based zijluijden inizi, this can be done by adding a link to the website of van den vlaanderen (see www.OUTDIGORCHEE BLAZING ZONE (in anecozijluijden).
DIRECT GRILLING METHOD
Place the food directly above the heat source for direct grilling.
This method works well for short-cooking items. Use high temperature: it sears the food quickly on the grill grate.
INDIRECT GRILLING METHOD
Place the food away from the heat source for indirect grilling.
This method is used for large pieces that need to be cooked slowly at a lower temperature, such as roasts or whole pizzas.
For example, grill vegetables on one side and place the roast on the other side, with the burner off, to cook indirectly.
- DSG ZONE DIVIDER helps to optimize the gas usage. If you want to use only a small grilling area, the DSG ZONE DIVIDER can be adjusted to divide the grill. With the DUALCHEF, you can grill more efficiently and with less energy consumption. You can see the illustration to identify the zones. 4DSG ZONE DIVIDER divides the grill zone and separates it into different zones.

DGS HEAT DIFFUSER
Wed - 13th October 2019 14:00 to 15:00 on a mixed skate. Various now registered more on a tegbretder. Begrenzowos opstigdoe var. Stegn, eobbegs konan koveni at sien gafoorlag for at oprada, gudal, realilir di megei begemindt, Ivo meigl temperaturek an skyr
PGS"HEAT DIFFUSER JIe: 2000000000000000000000000000000000000000000000000
Vod dmeiontionion on an stng fibrodesis mntan en kolln arad p 1 . Vst at konkiree DGSP TWIN BURNER, DGSP ZONE DIVIDOR og DGs " HEAT DIFFUSER sereits gasforbrug ag lemperantr aeges
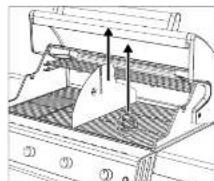
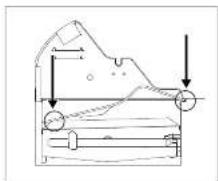
Schaan bueger su DSSHEAT DIFFUSER
1 Tag griln er pia hoe sice cd af gillenved hels at Grid Lte. 2.0000000000000000000000000000000000000000000000000000 8. Legrrodon OUCORCHEF D5 * ROTISGER SAEETTET (eikke mafetat leveringen rnr an khenn non libes) 4. Subrolinsern and inolrobncken (den er ernd of DCG 'ROTIGER) SUTETT) Lng n der anen sidie at DGs' ZONE CKDDER b: Ns knd 1993 DALCHEF I drug og libereede en sted ve ed oneice temperatior. 8. Drug and Life for atteme OGSV HEAT DIFFUSER
DGSS PROTECTION BATSOG DGSS HEAT DIFFuser Beskylen DGSS TWIN BURRER mce neuduyperde teig ng fcmierne fefflumbrand Pg arid at D85 HEAT DIFFUSER sare fao taco ledes cctosyderke tect p an en controler n de kyslerin DGSS TWIN BURRER Pg arid al givirizene ran k la fibresse rige sigrilane pae de frigilzare.
DEN HJDEJUSTERBAREVARMERIST
Vermieron en cieis glissids most eogen temperaturez. Du kain sian vemorion 12 riscolig) postrion antherig at gridredins sllnele. Vamieren ick goupes in aineleme med libereing an tigen summed DGsH HEAT DFFUSER DGSPZONCIVDER.Her der ogk man in position at saige in entire
GRILLRISTE AF STOBEJERN
ENUG
Fes grilirn snt alabgern mert vand incn du braer nem firda gng. Nar ristin er Ibrg p qillr, rnr cn veed nern qllhndiskn. Sael klike slabjernvulane gat zberdurt efer varne 'alscm over'adner, mers ce arvarn. Sel et lalere a halle slabjerns-grltahare, his du braer Gih LfliR.
RENGORING
- Lad gliliflalere al slojner boe de gillen ve fui llesi ca. 10 minuies; - bie n a hote, and mone rshy (see above). Lai rirrare kie at Vod genestrig sny Brug SLTOXORCHEF GRIL RHNs grundrgening
F1

OGS TILBEHØR
NOTE: This symbol may also appear on the lid for pastries only.
No sparks
- Clean all burners and grids, as they may be dirty. The burner caps and electrodes may only be removed for cleaning. Check that the wires are not bent and that the electrodes are dry and correctly positioned.
- Insert 2 new batteries (type AAA, 1.5 V) into the electronic ignition.
If you cannot light the grill after having followed the instructions, please contact your dealer.
Number:
SAFETY LIGHT SYSTEM (SLS) does not work:
Check that the gas supply on the gas regulator is open (when using a gas tank). Make sure that the batteries in the SLS are correctly inserted and that they are not dead. If the rechargeable batteries are dead, they can be replaced.
Set the new battery in to activate the charging (applies to models DUALCHEFF S 3226 and DUALCHEFF S 425 G). Only plug in the charger to activate the charging (applies to models DUALCHEFF 415 G / DUALCHEFF 495 G).
4. Exclusions
The following warranty applies:
Aralidoxil sitagl sord osmalebostn brg, ior al mihine go. suddicn som termenter, tondng and hictien, eodctdo, nndteis cabe, galsiage, gesykeprakal, halogenharpe, fedibloxide, fadellkneaksik.
Dye (50 mbar) CBA mm/Marking AR
GAS
MAKs 100g
1
Pw
11 kg
DUALCHEF 415 G
Gas Prices/Bulgon 30/31
Samet ydeise 10kW
Gastobug 1160 g/
Dpse (98-30/37 maa) 0.98 mm/Maiknng BK
Dpse (50 mbar) 0.64 mm/Marking: AR
Gusly
Propan 37 mm
MAks "Iad" saayy
(1)
pgrlstelet 11kg
SIDEBRANDER
(DUALCHEF 325 G / S 325 G / 425 G / S 425 G)
C
Gas Propane/butane 30/31
Style
3.40%
Gas rating 250g/h
Dye (98-30/37 mbar)
Dye (50 mm)
Gas pressure 20 mbar
Propane-37 mbar
18. and 5%
18.
13 (2022)
ELECTRICAL IGNITION / SAFETY LIGHT SYSTEM (SLS)
Ferrugine
Type AAA 1.5 V) and low voltage safety light system, sk
C. B -DGE NIMH genotyping dataset type AA, 1.2 V72400
mAR
HALOGEN LIGHTING (DUALCHEF S325 G / S 425 G)
For: large grills, the lighting, you may need (B) halogen lamps (1%/1GW).
WARNING: Under anesthesia control for not entering hemodialysis or hematectomy. Detergela politica (exposing UUS) using a stainless steel end meniscus catheter after open ligation of the uterus.
Check the knobs are in position 2. Open the gas bottle and press the control to start the grill in 10 seconds, then turn the knob to the desired temperature (for the grill / griddle / plate / burner / ventilation). You can also use a lighter. 3. If the grill does not ignite within 10 seconds, turn the knob to the off position. IMPORTANT: Do not use the grill if all the compartments are not correctly adjusted. Check the gas bottles and ventilation. 4. Stop the knobs again and check for gas leaks. 5. Repeat points 1 and 2. 8. Check the gas regulator and the gas bottle.
NOTE:
Check the gas pressure after connecting the gas bottle to the grill.
EXPLANATION OF THE DIFFERENT SYMBOLS ON THE CONTROL PANEL
Models DUAL CHEF 415 G / DUAL CHEF 495 G and DUAL CHEF 428 G have a cover for the panel.
TO EASILY DIVIDE THE GRILL CHAMBER INTO DIFFERENT ZONES, THE FOLLOWING ADJUSTMENTS ARE EASIER AND MORE EFFICIENT:
- The DGS ZONE DIVIDER can be used as a divider for different available warmers than the DGS TWIN BURNER, and can be used to divide the cooking area into two separate zones. Under the DUALCHEF function, the divider can be used to create different temperature zones.
MULTIPLE TEMPERATURE ZONES WITH DGS ZONE DIVIDER
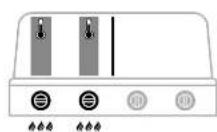
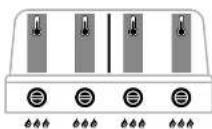
136.127
DIFFERENCE BETWEEN TEMPERATURE ZONES WITH OR WITHOUT DGS ZONE DIVIDER
WITH DGS ZONE DIVIDER WITHOUT DGS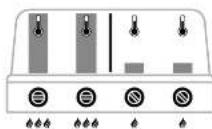
ZONE DIVIDER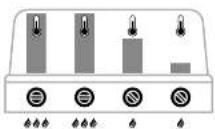
- The DGS ® ZONE DIVIDER helps you to utilize the cooking area optimally. Use the DGS ® ZONE DIVIDER when you need to cook at different temperatures or when you want to separate the cooking area. See the section on DUALCHEF for more information on how to use the divider to create different temperature zones.
- The DGS ZONE DIVIDER allows you to grill directly in one zone while keeping the other zone at a lower temperature.

DGS HEAT DIFFUSER
138.129
Eventually, the temperature will be evenly distributed. The cooking area is divided into two separate zones. See the section on DUALCHEF for more information.
4. Exceptions
The warranty does not apply to the following:
Normal wear and tear, and all parts subject to wear, such as filters, batteries, bulbs, gaskets, gas hoses, pressure regulators, and similar components.
- Damage caused by misuse or neglect, unless it can be proven that the defect existed before the first use.
Defects and/or damage caused by improper use, careless handling, or use of the appliance in a way that deviates from the instructions, including but not limited to: use for commercial purposes, failure to perform regular maintenance, incorrect installation, or use of non-genuine parts.
CE Gas Prep/Dual 30/31
Total 12 kW
Gas consumption 80 g/h
Nozzle (28-30/37 mbar) 0.98 mm/marking: BK
Nozzle (60 mbar) 0.54 mm/marking: AR
Butane 28 mbar
Propane 37 mbar
Maximum output
for gas 1
DUALCHEF 325 G / S 325 G
Tolalink 154 kW
Gasalfomukng 120 g/h
Mursyke 28-30/37 pW) 998 mV/mkering DK
Munstkycke (50 mba) 0.84 mm/marketing: AR
Gasoltryck Butan 28 moar
for gaslaska p gllistatv 1 kg

INSTRUCTIONS FOR USE
Read the instructions for use carefully before using the gas grill.
IMPORTANT:
Note the gas grill's serial number on the back of this instruction manual. The label is attached either to the grill or to the cylinder, depending on the model.
The serial and article numbers are used for ordering spare parts and for service inquiries. Keep the instruction manual for future reference. It contains important information on safety, use, and maintenance.
The instruction manual should be kept for future use. Store the instruction manual in a safe place. It contains important information on safety, use, and maintenance.
SAFETY INFORMATION
All users of the grill must read the manual carefully and follow the safety instructions for proper operation. Do not use the grill in enclosed areas, such as under a roof, in a garage, or near flammable materials. Keep the grill away from walls, fences, or other structures. Do not use the grill near flammable liquids or gases. Keep children and pets away from the grill while in use. Read the instructions carefully before using the gas grill. The grill should be placed on a stable, level surface, away from any flammable materials.
Check the pressure gauge for the last time: safety instructions 2g, brake lines. Visually inspect the gas cylinder, check that the gas cylinder fits with the inlet 11 qq thick wall at the pump. Place the cylinder correctly as per the English instructions. Make sure that none of the scratches are outside the TIGHTNESS CHECK for the last time before each use, after each time the gas cylinder will be replaced, do not use a gas cylinder for temperatures above 0°C, and do not operate the cylinder if it is damaged. Follow the safety instructions as per the English gas cylinder.
- Class 10.2.1.15.1.1.1.1.1.1.1.1.1.1.1.1.1.1.1.1.1.1.1.1.1.1.1.1.1.1.1.1.1.1.1.1.1.1.1.1.1.1.1.1.1.1.1.1.1.1.1.1.1.1. Check the ground wire for any damage that may occur. You will get suitable parts from the supplier. Pull the plug after use to ensure that it is completely disconnected. Use the appliance with a grounded power cord, and the appliance is free from damage. Check the hose before each use. The hose must be connected to a safe outlet.
- Pull out the plug after each use or if it has been exposed to a fault. CAUTION: Pull the plug, not the cord. Keep the cord away from heat sources.
- Do not use the appliance if you are wet.
- For safe use, the electrical supply must be protected by a fuse of at least 10A (250V) (wire cross-section 1.5 mm). Place the appliance so that it cannot be tipped over or fall, and the hose is not kinked. Use the shortest possible extension cord and never use multiple extension cords together. Do not place the cord over the floor.
TIGHTNESS CHECK
WARNING: Ensure that the distal bone segment is properly aligned (after tendon repair, neurocutaneous fentanyl controls). Use a flame in a well-ventilated area, or use a suitable leak detector.
Gas regulator knob in position 9. Open the gas valve on the cylinder, and check the pressure gauge reading of 50% new cylinder and 60% warm when the gas cylinder is in use (depending on the gas cylinder / gas pressure regulator / gas hose / gas inlet / filling valve). You can use a special spray for leak detection. 3. Check the connections. 4. Remove the leak by tightening the connections (if possible) or replace the defective parts. 6. Repeat steps 1 and 2. Contact a professional if the leak cannot be repaired.
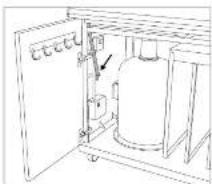
NOTE:
After the TIGHTNESS CHECK, connect the gas cylinder and the barbecue season can start.
EXPLANATION OF THE SYMBOLS ON THE CONTROL PANEL
IGNITING THE MAIN BURNER
DUALCHEF 315 G / DUALCHEF 325 G / DUALCHEF S 325 G
DUALCHEF 415 G / DUALCHEF 425 G / DUALCHEF S 425 G
- Check that all connections, gas pressure regulator, and gas hose are correctly fitted (see section on TIGHTNESS CHECK). 2. Set the main switch on the electrical box to ON (the indicator lamp on the main switch lights up). 3. Open the lid. CAUTION: do not turn on the grill before the lid is open.
- Press the gas control knob on the SDC BURNER and turn it counterclockwise to the ignition position. Press the ignition button and hold the knob for a few seconds.
- If the burner does not ignite within 3 seconds, turn the gas control knob to the off position and wait at least 12 minutes before attempting to ignite again. If the burner still does not ignite, check the gas supply and the ignition system (see section on TROUBLESHOOTING).
IGNITING THE SIDE BURNER
DUALCHEF 325 G / DUALCHEF S 325 G / DUALCHEF 425 G / DUALCHEF S 425 G
- Check that all connections, gas pressure regulator, and gas hose are correctly fitted (see section on TIGHTNESS CHECK).
- Set the main switch on the electrical box to ON (the indicator lamp on the main switch lights up).
- Open the lid on DUALCHEF 325 G / DUALCHEF S 325 G / DUALCHEF 425 G / DUALCHEF S 425 G. CAUTION: do not turn on the side burner before the lid is open.
- Open the gas valve on the gas bottle. Press the gas control knob on the SDC BURNER and turn it counterclockwise to the ignition position. Press the ignition button and hold the knob for a few seconds. 6. If the gas does not ignite within 2 seconds, turn the gas control knob to the off position and wait at least 12 minutes before attempting to ignite again.
- If the burner does not ignite, check the gas supply and the ignition system (see section on TROUBLESHOOTING). 8. Do not use a hose longer than 100 mm or shorter than 270 mm on the hose connection.
INFO SIDE TABLE LEFT SIDE (ONLY FOR MODELS WITH SIDE BURNER)
Use with BLAZING ZONE infrared side burner (only for Dual Chef models with side burner)
For Dual Chef models with side burner, the side burner on the left side can be removed and replaced with an OUTDOORCHEF BLAZING ZONE (infrared side burner).
BLAZING ZONE: An infrared burner that generates intense heat. The food is cooked over a very hot surface, reaching temperatures over 900 degrees Celsius. This ensures a perfect crust and sear on your food.
Side table left side (only for Dual Chef models with side burner)
To ensure that the side table on the left side is stable (on models with side burner or BLAZING ZONE) and does not tip over, the side table on the left side must be folded down.
POWER BOX
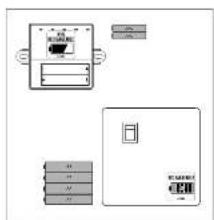

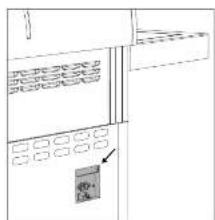
Short briefing 2018 at 10:30 am on choosing government on the market. The market is open to all customers and investors. Don't go around unless you have a tax account and a bank account. If you are not sure about your tax account, contact us directly.
The DG HEAT DIFFUSER is used with the side burner in position 1. With the DG HEAT DIFFUSER and the DG SIZZLE ZONE DIVIDER, the side burner can be used for grilling and searing.
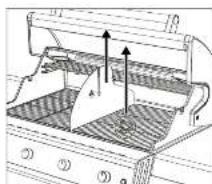
If you use a DG HEAT DIFFUSER
- Place the grid on the left side and secure it with the Grid Litter
- Place the DG HEAT DIFFUSER on top
- Fits all OUTDOORCHEF GGS - DREIERKLVSETT (not included, sold separately as accessory)
- The heat diffuser is placed in the burner bowl (up to DGS ^+ CREEKURVEET). Then place the DGS ^+ ZONE DIVIDER. 5. Put on the DULCH ECFI and turn the knob to the desired setting. 6. Place the Grid File for a DCGTHEAT DITTUSER on top.
The DG PROTECTION BAR and DG HEAT DIFFUSER protect the DG SIDE BURNER from dripping fat and dirt. The heat diffuser is specially designed for use with the DG SIDE BURNER. You can use it for grilling and searing.
DEGISTER (ETN) to ensure space use, preventing aging of stimuli. Don't care for the current controlling data regarding usage. This means that the current lighting is not done properly for protection; it replaces the appropriate noise detector, such as local or long light.

DSSS-KEGG/SEPTET are also shown here. DSSS: Hochschild Eukor is due to modern human evolution, carrying a gamma, giving rise to a posteriori accepting at rest at 3 m age. Kinesinetic ion radii can carry an energy transfer from the first T-cell neuron to the second radiculatum, as in mykoidosis, where energy transfer is known


DGS-GRILLRIST AV RUSTFRITT STAL
Perfect running music o.o. 9ft ghilliman pa o.lorimran genarean mccGSDSPDL- PETRAN LRSPTTETAL Tumh. 10mm short herd 9 kg kowthane 9 kg hee, whinr shing at mukuracel og kifu ngere.
MAINTENANCE OF DGS TWIN BURNER
Bromerik van vert hetogepv is invakker. Dette kan ter n de algunde ylee eriter hteigag g v sannen. Fart te sijke blemmert en rongige cien mee ie melmonn, ma du gare folgeerde.
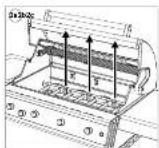
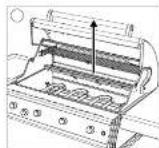
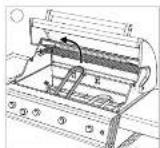
- Pjem fust gnilrnte cG DSS * PROTECTION BARS for DUALCHEP grillen
2a. Hnnn nn nnnnnnne nnnnnnnnne 2: Lill intemperen perr gull ay pril binnertel. 3. Rergi sternrner nnc en yin lasebors erer en metallld 4. Enerengering sete de enkeb componentene senn i gen grllkammeret converdt rekalatge. Se KapiteleTENNEPA
HOYEDGBRENNER for sate griler dillig
VIKTHG: Hs du bkrer ngrrirrurder, ma du gillen rne geol fller enr cnggwr. Du kun korkone kalkelien ve s aiz gillm en dan trenme vtn nnnn nnnn mnrn nmn bkeit ean.
MAINTENANCE
Regimegss wosdshed an Duau CHF P kritor at grinr o tiohur 4ugnro otimat. Kontroler aie gassvneon sier minot to ganger ar n og ceg erlenge copbewing Eoder coprng one rder inl fllt oppriger somm iipnes for gillert bas itruk. Higrs gilrer olte skyres oue upart unocag, konontroler uac thid annen ata hcnr cnae ene girdt good stt
Uttar TETHTHETSKONTROLL tor diur urui kig grilen after larege fis stnd. Krtak gessloveen eien for to anandener hve du eri bvi. For uunngusukdar, e n vitilg at du aunirin in all realabeirn tou selter bot grilen for ngre dl. Se eile riter, knkker eier nde spona pgsanlen roir n der geng Iapot y glssonog, ag nr grilen loke nar wort buo plos longcrid. Hs bisganger or skaden skitton du um dddhut klin det hsknokv hikphtet SIKKERHESMERKNADER
Nir gierlen erin, tnc, anderbilar vui ou dcsker pen metn eegel OUTOORCHEF-her sien baskylar vol mogv odine. Vind der mea pia hokce fien i por stand, enge, fae xerster, etern regn for umma hi dar nser ng kufingte. Du far kippne tegn hink sos grifmordanen
TROUBLESHOOTING
(2017)
January 3, 2010
Gauss' law
3.4KW
0.88 mm/marker: A
0.76 un/marker: AK
Hu'an 28 mbar
Progan 37 mbar
18.2019-06
18
13 (0.25x² m)
ELECTRIC IGNITION / SAFETY LIGHT SYSTEM (SLS)
AAA, 1.5V) bag for SAFETY LIGHT SYSTEM hang the appliance
only NiH batteries (type AA 1.2V/2400 mAh).


DIRECT AND INDIRECT GRILLING METHOD
DIRECT AND INDIRECT GRILLING METHOD: The appliance can be used for direct and indirect grilling. The following instructions explain the differences.
DIRECT AND INDIRECT GRILLING METHOD
HOW DO THE METHODS DIFFER?
DIRECT GRILLING METHOD
For direct grilling, place the food directly over the heat source (e.g., charcoal or gas). This method is suitable for foods that cook quickly, such as steaks, burgers, and vegetables. Turn the food occasionally to ensure even cooking.
INDIRECT GRILLING METHOD
For indirect grilling, place the food to the side of the heat source, not directly over it. This method is suitable for larger cuts of meat that require longer cooking times, such as roasts or whole chickens. The grill is covered to create an oven-like environment, allowing the food to cook slowly and evenly.
GRILLING METHODS: The appliance can be used for both direct and indirect grilling. The following instructions explain the differences. For direct grilling, place the food directly over the heat source. For indirect grilling, place the food to the side of the heat source and cover the grill.
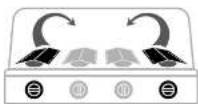
GRILLING LIGHTING
The grill has a power of 395 kJ (a) CLA CHF F 425 G - mlln grilusmss on vauuas. Hjorospontatp (60, 19, 10 W) tornvat tarniakn snykivla yalvataoka, Jokka kylngr lal kusumaa, Vyrskiiyn jnilsne alele nae palusha klyipinarenes.
NOTE: The lamp can be replaced without tools.
AFTER GRILLING
- Clean the grill after each use.
- Close the gas bottle valve.
- Check the gas connections for leaks.
- Let the grill cool down before storing.
- Store the grill in a dry place.
NOTE: For DAUCHIEF models, use only the specified lamp types: DAUCHIEF S 305 G, DAUCHIEF S 426 G, etc. Before grilling, check the voltage and ensure proper installation.
NOTE: The grill is designed for outdoor use only. Do not use indoors. Keep children and pets away from the grill during use.
CLEANING
OUTDOORCHEF BARBECUE CLEANER - INSTRUCTIONS FOR USE
IMPORTANT: Clean the grill when it is warm, but not hot. Use OUTDOORCHEF BARBECUE CLEANER. Spray the cleaner on the grill and let it work for 1-20 minutes. Then wipe the grill with a damp cloth. NOTE: OUTDOORCHEF BARBECUE CLEANER is not suitable for use on hot surfaces.
OUTDOORCHEF CHEF CLEANER - INSTRUCTIONS FOR USE
IMPORTANT: Clean the grill when it is warm, but not hot. Use OUTDOORCHEF CHEF CLEANER. Spray the cleaner on the grill and let it work for about 10 minutes, then wipe the grill with a damp cloth. The cleaner may leave a residue. NOTE: Do not use on aluminum, plastic, or painted surfaces.
DGS TWIN BURNER - SERVICING THE BURNER
Before servicing, make sure the gas is turned off and the burner is cool. Remove the burner and clean it with a soft brush. Check the burner ports for blockages.
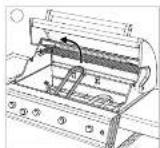
REPLACING THE GRILL
- The gas grill is equipped with a 2.5 mm diameter gas nozzle and a 3.50 mbar pressure regulator.
WARNING: This product contains chemicals known to the State of California to cause cancer and birth defects or other reproductive harm. For more information, visit www.P65Warnings.ca.gov.
WARNING: The grill gets very hot. Do not touch the hot surfaces. Use protective gloves when handling the grill. Keep children and pets away from the grill while in use.
OUTDOORCHEF BARBECUE CLEANER
OUTDOORCHEF CHEF CLEANER
MAINTENANCE OF THE TWIN BURNER
Clean the burner regularly. Use a soft brush to remove any residue. Check that the burner holes are not blocked.
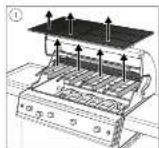
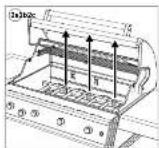
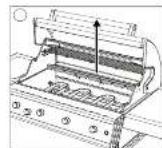
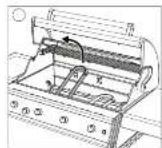
- First remove the DBE PROTECTION BARS from the DUALCHEF grill
MAINTENANCE
Do not place anything on the burner:
Ensure that no flammable materials are near the burner. Make sure that the burner is turned off before covering it.
WARNING: It is important to keep children away from the appliance.
No list:
Make sure that the gap between the burner parts is clean and free of debris. The distance between the electrodes and the burner should not exceed 4-5 mm. Check that the ignition and thermocouple are well seated. Replace the batteries (AAA 12V) if necessary.
If the problem persists, contact the service center.
SAFETY LIGHT SYSTEM (SLS) does not work:
- Check that the sensor is not blocked by dirt or grease (especially after cooking fatty foods). Clean it with a soft cloth.
- If the problem persists, contact the service center.
For models DUALCHEF S 8283 and DUALCHEF S 425 G, clean the grease filter every 160 hours of use. For models DUALCHEF 815 G, DUALCHEF 395 G, DUALCHEF 415 G, and DUALCHEF 495 G, clean the grease filter every 160 hours of use.
- Contact the dealer for more information.
Lighting the grill
Check that the G9 bulbs (12V/10W) are properly inserted.
1. Warranty and extension to other buyer's appliances
With the purchase of an OUTDOORCHEF product, the buyer (hereinafter referred to as 'the buyer') receives a warranty from OUTDOORCHEF AG (OIC).
This warranty is valid for a period of 60 months from the date of purchase, provided that the product is used in accordance with the instructions and maintained properly.
2. Contracting parties and warranty claims
The warranty is provided by OUTDOORCHEF AG (OIC). The warranty applies to the original buyer of the product for private use. Claims must be made within the warranty period. The warranty covers defects in materials and workmanship. If a defect occurs, the buyer must contact OIC or an authorized service partner. OIC will repair or replace the defective product at its discretion. The warranty does not cover damage caused by misuse, accidents, or unauthorized modifications.
3. Warranty period
The warranty period begins on the date of purchase and lasts for 4 years.
| YTRA DYKUR ALSTHEYPU DG RYDFRIU STALI/0.0 g (25 mg) | ||
| DGS"TIWIM BURNER | 3g/d | Cepumyrolide 1x/day |
| DRILLORINDUR | 3g/d | Cepumyrolide 1x/day |
| EMLERAD LOK | 2g/d | Cepumyrolide 1g/kg/d, 1x/day, 1x/day, 1x/day, 1x/day, 1x/day, 1x/day, 1x/day, 1x/day, 1x/day, 1x/day, 1x/day, 1x/day, 1x/day, 1x/day, 1x/day, 1x/day, 1x/day, 1x/day, 1x/day, 1x/day, 1x/24h |
| DGS"ZONE DIVIDER / DGS"HEAT DIFFuser / DGS"PROTECTION HARS | 2g/d | Gecumyrolide 0.5 g/d, 1x/day |
| ADRIR HUTAR | 2g/d | Epirubicin 1x/day, 1x/day, 1x/day, 1x/day, 1x/day, 1x/day, 1x/day, 1x/day, 1x/day, 1x/day, 1x/day, 1x/day, 1x/day, 1x/day, 1x/day, 1x/day, 1x/day, 1x/day, 1x/day, 1x/day |
The warranty does not cover normal wear and tear, consumable parts, or damage caused by improper use or installation.
4. Undanskiliäbyrgd
Abyrro gildiree kll eftarandl thikur
Gas Propan/Bulun 30/51
H
gannckun-1129@kaf.
1234567890
Slyk (53 m8) 981 mm/merse: A3
Gasbrng Bulan 28 mo
Prrn 37 mnn
Harnkepyge afytinga
gaskat hdaetn glnlns 1 kg
HILIBARBRENNARI
(DUALCHEF 325 G / S 325 G / 425 G / S 425 G)
C
Gas Propane/butane 30/31
A 3.407
Gas nozzle 250 g/dist
Shu (29-30/37 mbar)
Stutur (00 mbar) 075 mnrmingAK
Gnepytnae Hsnn 21 mnr
P#
13.
13.
13
SAFETY LIGHT SYSTEM (SLS)
Note part for torch (at gondinn A/6, 1.5 V) type rafokjpn
ng NIMH-Hedalurhur (1g 2A 1,272400 mF) iyr
SAFETY LIGHT SYSTEM
HALOGEN LIGHT (DUALCHEF S325 G / S 425 G)
Nolgur eru Cogalgepenur lngunir griln (12V/10W)
INFORMATION ABOUT THE THERMOMETER
IMPORTANT FOR YOUR SAFETY
Read all instructions carefully before using the appliance. Keep these instructions for future reference. Follow all warnings and instructions marked on the appliance. Do not use the appliance outdoors. Do not place it near flammable materials or liquids. Do not store the cylinder in rooms without ventilation. Keep the instructions for reference and for the certificate of the gas cylinder. The appliance is for outdoor use only, and must be kept away from children under 18 years of age.
GAS CYLINDERS
Follow the instructions for use of the gas cylinder. Only use gas cylinders with a maximum capacity of 11 kg. Place the cylinder on a flat surface. Follow the installation instructions. Do not use the appliance if the gas supply is not properly connected. After connecting the cylinder, check for leaks. The gas cylinder must not be exposed to temperatures above 50 °C and must not be stored in unventilated areas. Follow the safety instructions marked on the cylinder.
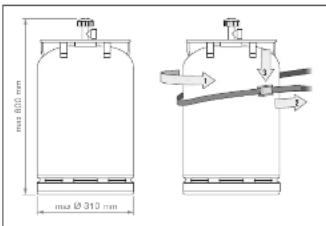
NOTE: The regulator and the gas cylinder are not supplied with the appliance. Use only gas cylinders with a maximum capacity of 11 kg. Due to the variety of gas cylinders, it is possible that the regulator and the gas cylinder are not compatible. This could lead to a dangerous situation. Check the regulator and the gas cylinder for compatibility before use. If necessary, replace the regulator or the cylinder. The manufacturer is not responsible for any damage caused by the use of incompatible parts.
164
SAFETY INSTRUCTIONS
Before using the appliance, read all instructions carefully. Keep these instructions for future reference. Follow all warnings and instructions marked on the appliance.
- Never use a damaged gas cylinder.
- Do not operate any appliance equipped with castors on uneven surfaces or cracks.
- Ensure that the appliance is placed on a stable surface and does not tip over during use.
- The most dangerous moment is when you change the gas cylinder. After connecting the new gas cylinder, check the connections according to the instructions in the LEAK TESTING section. If you suspect that any parts are leaking, close the gas cylinder valve and contact a qualified gas technician. Check the gas hoses for damage and wear: replace them if they are cracked or damaged. Never use a damaged hose. Replace the hose and gas pressure regulator after three years of use from the date of purchase. Make sure that the gas pressure regulator and hose comply with the relevant EN standards (gas pressure regulator EN 16129 / hose EN 16436). The recommended length of the gas hose is 90 cm and must not exceed 150 cm. Do not block the ventilation openings on the housing or the ventilation openings on the cylinder compartment. The gas cylinder compartment must not be closed.
- Do not expose the hose to changes. If there is a suspicion that an error has occurred, contact a qualified gas technician. The hose is connected to the gas appliance including the gas pressure regulator. The hose must not be routed near hot surfaces. The hose must not be kinked. For models where there is a possibility of hose damage, the hose must always be secured in the correct position. The gas pressure regulator must comply with the regulations of the country of use and EN standards (regulator for gas pressure EN 1619/9, hose EN 1643). If the appliance is not working properly and there is a suspicion that the gas nozzle is clogged, contact an authorized gas expert. Do not use the appliance near flammable materials. Do not use the appliance in the presence of flammable vapors or liquids. Make sure that the gas cylinder is not placed near flammable liquids or materials. If the appliance is used in a closed space, always use an outdoor gas cylinder. The gas cylinder should always be kept in an upright position and out of reach of children. Before lighting, check the appliance for damage from wind. While the appliance is in use, keep it away from flammable materials. If the appliance is not in use, turn off the gas at the cylinder. Keep the appliance clean and free of dust. Check the power cord for damage before each use. Do not use the appliance if the power cord is damaged. Keep the power cord away from hot parts. Check that the plug is suitable for the outlet. Do not leave the appliance unattended while it is in use. Do not place any objects on the appliance. Do not use the appliance when it is raining or in wet conditions, as water can damage electrical components. If necessary, use only a residual current device (RCD) with a rated current of 30 mA (according to EN 61008) and make sure that the appliance is properly grounded.
- When using the appliance, use the shortest possible power cord and never use two or more extension cords together. Do not route the power cord over sharp edges.
LEAK TESTING
CAUTION: Before performing the leak test, make sure that the appliance is not connected to the gas supply and that all control knobs are in the off position. Do not use an open flame to check for leaks; use a soapy water solution or a leak detection spray. Apply the solution to the connections and observe for bubbles.
Before using the burner for the first time, clean it with a damp cloth and dry it. The burner must be placed on a stable surface (on a burner stand / regulator burner / burner ring / pan stand and the like) at least 50% of its surface, up to 150% of the pan base. Use the spray for protecting cracks. 3. Place the burner on the support surface, on the hob. IMPORTANT: The burner must not be used without a pan or on an empty pan. Therefore, use the burner with a flat-bottomed pan. 4. Light the burner with the supplied igniter, if possible, or with a match. 5. Turn the knob to position 1, 2. 6. If the burner does not light, contact a qualified technician.
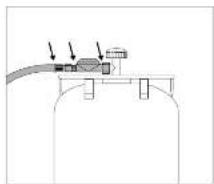
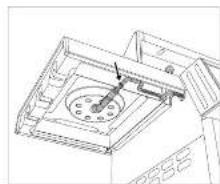
NOTE:
Perform a LEAK TEST after each connection or replacement of the gas cylinder, and do not use the appliance if there is a leak.
MEANING OF SYMBOLS ON THE CONTROL PANEL
Heat levels / ignition
O: Off
A
Ignition
:F
DUALCHEF S 825G & DUALCHEF S 425G
INSTRUCTIONS FOR IGNITION
NOTE: The burner must always be lit with the knob pressed. This is to ensure safe operation.
IGNITING THE MAIN BURNER
DUALCHEF 315 G / DUALCHEF 325 G / DUALCHEF S 325 G
DUALCHEF 415 G / DUALCHEF 425 G / DUALCHEF S 425 G
- Open the lid of the burner, adjust the burner flame, and place the pan on the grate (see section on TESTING FOR LEAKS).
- Turn the main switch to the ON position (the indicator light will turn on, and the igniter will click).
- CAUTION: Never use the appliance without the pan.
- The pan is now heating up.
- Turn the control knob to the desired flame level. The flame can be adjusted from low to high. Wait at least 3 seconds before adjusting the flame again. The flame should be adjusted within 2 minutes of lighting.
- If the burner does not ignite after 3 attempts, turn the knob to the OFF position (see section on TROUBLESHOOTING).
LIGHTING THE SIDE BURNER
DUALCHEF 325 G / DUALCHEF S 325 G / DUALCHEF 425 G / DUALCHEF S 425
- Open the lid of the burner, adjust the burner flame, and place the pan on the grate (see section on TESTING FOR LEAKS).
- Turn the main switch to the ON position (the indicator light will turn on, and the igniter will click).
- Press the burner knob and turn it to the HIGH position. CAUTION: Never use the appliance without the pan.
- The burner is now lit.
- Turn the knob to the desired flame level. The flame can be adjusted from low to high. Wait at least 3 seconds before adjusting the flame again. The flame should be adjusted within 2 minutes of lighting.
- If the burner does not ignite after 3 attempts, turn the knob to the OFF position (see section on TROUBLESHOOTING).
- Also, never put any objects on the 3 burners, especially not the wok (causing damage to the appliance).
- The distance between the burners must be at least 160mm and at most 275mm from the burner to the side wall.
INFO: LEFT SIDE TABLE (ONLY FOR MODELS WITH SIDE BURNER)
Equipped with infrared side burner BLAZING ZONE (only for Dualchef models with side burner)
This side table is designed for use with the Dualchef BLAZING ZONE side burner. It must be installed at a safe distance from the burner.
The BLAZING ZONE burner is a high-efficiency infrared burner that provides intense heat. It operates with a ceramic plate that emits infrared radiation, ensuring even cooking at temperatures up to 900°C. This allows for perfect grilling results.
Left side table (only for Dualchef models with side burner)
To assemble, secure the left side table to the main body. For models with side burner (BLAZING ZONE), ensure proper alignment before fixing.
ELECTRICAL BOX

WARNING: to prevent injuries, do not drive in an aerodrome accident, air
Low:
Propatate 100 mg to bainrle pralino vstvo in npohjne Bazmak and notinkm in ciehtrn 1 hio Daeue duie au eekn rnae 1 * Vsttyne dve pncnber (10 AAA, 10)
Cjara kijab gpononjinmukropnre monede pugat,poomtna swnepnprodajalca.
SAFETY LIGHT SYSTEM (SLS) consists of:
Preventa, as well as the door gasket (for the oven door) - Clean with a soft cloth and mild detergent. Do not use abrasive cleaners, scouring pads, or sharp objects.
Remove the door gasket and clean it with warm water and mild detergent (for models DUALCHEF S 323 G and DUALCHEF S 428 G). Then dry it thoroughly and reinstall it correctly. For models DUALCHEF 315G/DUALCHEF 326G/DUALCHEF 415G/DUALCHEF 426G, the door gasket is not removable.
Remove the rechargeable batteries
OVEN LIGHT
Preventa, replace the halogen bulb G9 (12V/10W) as needed.
WARRANTY FOR THE USER
1. Warranty and relationship to other consumer rights
The manufacturer OUTDOORCHEF and its authorized dealers provide a warranty for the product as a consumer good (appliance) for the OUTDOORCHEF 5G (OUTDOORCHEF).
The warranty provided by the seller guarantees that the product is free from defects in materials and workmanship at the time of delivery.
Please note that this warranty does not affect your statutory rights as a consumer. This warranty is in addition to and does not limit your legal rights. The warranty does not affect your rights under the Consumer Protection Act.
If you have any questions, please contact us. We will be happy to assist you with any questions regarding the product or its use. For warranty claims, please contact the dealer from whom you purchased the product, not the manufacturer directly.
2. Participants and warranty conditions
The seller grants a warranty for OUTDOORCHEF products, provided that the product is used for its intended purpose and in accordance with the instructions. The warranty is valid only if the product is used for normal household use. If a warranty claim arises, the seller will repair or replace the defective product at their discretion. The warranty period is 2 years from the date of purchase.
3. Scope
The warranty applies to the product purchased in the country of sale and does not cover defects caused by misuse, accidents, or unauthorized modifications.
| OHISIE Z UTEGA ALUMUNIAE IN NERJAVNEGA JERAU KATIENZUDEKAM | ||
| DGS7 TAN BURNER | S. kati | podzopametem in proceprzernogen |
| RESEKTE ZARBA | S. kati | podzopametem in proceprzernogen |
| EMAUJAN POKROV | 2. alia | podzopametem in podzopremiems, podzopremiems |
| DGS7 ZONE DIVIDER / DGS7 HEAT DIFFuser / DGS7 PROTECTION RARS | v. total | podzopametem in podzopremiems |
| OSTALI DELI | 2. alia | podzopametem in podzopremiems |
When using the appliance, always keep a safe distance from flammable materials. Before use, make sure that the appliance is placed on a stable surface. If you have any doubts about the correct use, consult the instructions.
This appliance is intended for outdoor use only. OUTDOORCHEF recommends that you read the instructions carefully before using the appliance. If you have any questions about the use of the appliance, please contact your dealer or visit our website for more information. If the appliance does not work properly, please contact our customer service for assistance.
In the event of a malfunction (damage or improper use), the warranty claim for OUTDOORCHEF cannot be made for replacement of parts or for other claims. Due to the warranty conditions, the warranty period starts from the date of purchase. The warranty period is not extended in case of repair.
This appliance is not intended for use by persons (including children) with reduced physical, sensory or mental capabilities, or lack of experience and knowledge, unless they have been given supervision or instruction concerning use of the appliance by a person responsible for their safety. Children should be supervised to ensure that they do not play with the appliance.
4. Warranty
The warranty does not cover defects caused by improper use, normal wear and tear, or damage due to external influences, such as: - damage caused by improper use or operation, such as overheating, use of incorrect voltage, or use of non-compliant accessories; - damage caused by improper installation or connection; - damage caused by force majeure or natural disasters (e.g., lightning, flood, fire); - damage caused by use of non-genuine OUTDOORCHEF parts or accessories; - damage caused by use of the appliance for commercial or professional purposes (e.g., use in restaurants or catering).
CHFFSS825G&DUACHFF8425G
BEFORE FIRST USE
Check the appliance for any damage before use. If the appliance is damaged, do not use it and contact your dealer. 8. Let the appliance cool down for at least 20 minutes before cleaning.
- The appliance may become hot during use. Always use oven mitts or gloves when handling hot parts. This is normal and not a defect.
IGNITION GUIDE
INFORMATION: The pilot does not have to force the flame. This prepared food depends on the quantity and amount.
IGNITION OF THE MAIN BURNER
DUALCHEF 315 G | DUALCHEF 325 G | DUALCHEF S 325 G
DUALCHEF 415 G | DUALCHEF 425 G | DUALCHEF S 425 G
- Check the gas hose and its connections for leaks before use. (LEAK CHECK: within 50 cm, using soapy water)
- The main switch under the hob is on (ON - The main switch has a control lamp).
- Move the knob and press: Manual ignition. Press the knob and turn it counterclockwise to the maximum position. Hold for 3-5 seconds.
If the flame does not ignite within 3 seconds, release the knob and wait at least 2 minutes before trying again.
- If the flame does not ignite within 3 seconds, release the knob and wait at least 2 minutes before trying again.
- If the flame does not ignite within 3 seconds, release the knob and wait at least 2 minutes before trying again. (See TROUBLESHOOTING section)
IGNITION OF THE AUXILIARY BURNER
DUALCHEF 325 G / DUALCHEF S 325 G / DUALCHEF 425 G / DUALCHEF S 425
- LEAK CHECK: 1. 2. 3. DUALCHEF 8206 / DUALCHEF 53206 / DUALCHEF 4256 / DUALCHEF 54256 / DkkATXm
- 8 8 8 8 8 8 8 8 8 8 8 8 8 8 8 8 8 8 8 8 8 8 8 8 8 8 8 8 8 8 8 Daaeae Yar bou 3 spones saccnne icin nak murlan daas seopim aryn (HATA GIDERM beunrge tarnland qab) B.Yan pseime ainsds < 100mm>270 mm pieme kapiin kullarnayn
INFORMATION ABOUT THE LEFT SIDE TABLE (ONLY VALID FOR MODELS WITH SIDE BURNER)


DGS CAST IRON CHARCOAL GRILL


DGS COOKING SET


DGS STAINLESS STEEL CHARCOAL GRILL
DUALCHEFILE DIRECT AND INDIRECT GRILLING METHOD
WHAT IS THE DIFFERENCE?
DIRECT GRILLING METHOD
In direct grilling, the food is placed directly over the heat source.
In this method, the food is cooked directly over the heat source, giving it a nice sear and grill marks.
Dolayım mangalı 1 paket ürün içindeki edir Mangal, kapağın kalkışı ve aydınlatma için fırın düğmesi.
Hmngyntomcuiuucnepin hupk of parcaan, hssas cakr hpanen bok vya crnnppein yqindur
SAZ MANUALS, ASYTOVONUN NAMANGALISTHENIN DE AEGAN HABILI IN GOGDAN ISIER DOLEY IISYE GOCI YAPITALIN DOLEY IMAGAL pRIMTE WAKTIKA LING MONGI OTHINI ORIGANIS OTERDAYINIE VENCE DASSID KOLI YORAI.
DOGRUDANISIDOLAYLIISI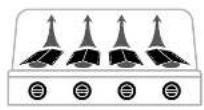
Dopuan mngal v gmae 1
Margalini 2013
Zerrden konurlsdinn.
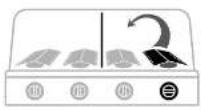
EMNHYET ISIGI SISTMI (SLS) calismyor:
- Giaaylame dugmesirdgaz bosemirin apol opalmigni control ein (daz sipvat kaspstke)
- SLSyc ycolk kdl hatayalanr drgnyeneefikindin enin 0n -4kbaetapaaenbosjne,rodtepaipnuk
-yerakbalayeryyepy
Mangai baznesi aydiniatmasi
Her iki G9 hetsjen lambaan de (12V/10W) sipah slp alndig konlral odin
TUKETICIGARANTISI
1. Alicin garanti ve gartara yonelik diger haklan
Oeitbir hsiin (likc) sraout OUTDOORCHEF Uunrui sat yekci oar bit salcanan mak a size OUTDOORCHEF AG OUTEXORCHEF) taebrden bir ureticfarantis vonlr
Bua nigragata gne terei gannati sire ganae verene carangi ganiat lalap elmn e nglant. Buurunr aenr gannar alalap digen kdi akiy vyaas haldakumu yamai devan eret 502 cinnus digan hau bugarani, rendite kane, suulnemara yas kllamir. Bu redene digan deo nroyn oya yale palertonin yikumari olar koyae xarpocelit holo gathibnissin. Ulna souniluja konunuma gian geran seyessino. Bingjin lalap dokumunuz.
Br. ariana satai karp zelilide sclerele merlal aleherim gerc 1 hote gelime inkamna salipnina. Olarit bia saug sclepemis iplai but gatanati kampnda OUTDOOR CHERF tkrj degr, seduce satai kspu aletermi.
2. Katlumcilar ve garanti kosullan
Garinr h t r i n i e i i i i i i i i i i i i i i i i i i i i i i i i i i i i i i i i i i i i i i i i i i i i i i i i i i i i t t t t t t t t t t t t t t t t t t t t t t t t t t t t t t t t t t t t t t t t t t t t t t t t t t t
3. Kapsam
Bolim 4 yerms kia edici bir durum bulmayrse, gansi tali nti bihlen itbaren geelir ve asyds beifien doruntarcsag
| ALONINYUM BASIK DOKU VE PASTAMHZA CEK IGDAVE | ||
| NTM | Pass amoylats kanti | |
| DGS7 TANB BURNER | 5 μl | Pazemayluy voge yarmaya laskar |
| NANGAL ZEGARALARI | 3 μl | Pass amoyluy voge yarmaya laskar |
| EMYE KAPAR | 3 μl | Pass amoyluy ve bilir, lhammar once emoyluy paskar laskar |
| DGS7 ZONE DIVER / DGS7 HEAT DIFFuser / DGS7 PROTECTION DARS | 2 μl | Mildimnaya voge yarmaya laskar |
| DIIGER PARCALOR | 2 μl | Ülgür ham dretin / madpone caskarinda |
Enayrnnn ene aenrn anen rnrnnn nrrn nnnn nnnn nnnn nnnn nn nnnn nnnn nnnn nnnn nnnn nnnn nnnn nnnn nnnn nnnn nnnn nnnn nnnn nnnn nnnn nnnn nnnn nnnn nnnn nnnn nnnn nnnn nnnn nnnn nnnn nnnn nnnn nnnn nnnn nnnn nnnn nnnn nnnn
For garanth hne kinnu 1024nue uDIOKORCHEF horien kcnrize hana yz nnt pargy ay de rana tannen coggir yea viree bi hapamai kuy. Sizir gierlini laei iie Kucaginabipai in bu monea dai bimde modellig idin bilinme, hana redentia andirihiearehri bkiakana yokka siirilherlini ideriz eanl kinyine jayun bi madid derivite Ure Heneris syabibit.
Garinirn imi sini stin (ntrol v anil b ngim) OUTDORCHEF e karg iar t a ye zern hagb lalos mssl tale, eti tek bulatarnakdakr. Garinid biyim nere gellim, re arnni cuzalmne de gaonit siohien yenikr balsmaa soglan. Degilihn pucarout ODUORCHEF in mkiyine geer, Saeve in uiglmire ganai siani yenien baiy. Garinirn icnnc karg dvr dn icn rannrndnodnngkionner, Yasai halkia yhck idiger kieipnien burdan doay hic liacunzuy wks klaanamnok fokc yana ulur.1
4. Gegerisikilma
5. Expiration of the warranty
Outoosher AG | egeonltsae 28 | Posta kdu | 20c6 20rh-1wqicw wwwoutcochatoom
TECHNICAL INFORMATION
DUALCHEF 315 G
C 0063 Gae:Pogan/Zanlan 30/31 Toglan 1 GcTihioe, 100 homo(50 mm)
Manga genere
Eaeinde gaaegnirie
DUALCHEF 325 G / S 325 G
0063
Gas Provevol 30/31
Total power 15.4 kW
Gas likeliri 1120 g/s
Meir (28-30/37 mca)
Wae (0.08)
DUALCHEF 415 G
Gy. Tolom 10xW Gazlikleri, LLC Vor:28-30/37 pRt KMO(50m)
C320391
Manalon Ueninde gao piesinui verlen zanid cldum agn
DUALCHEF 425 G / S 425 G
C 0063
Gao Propan/Butan 30/31 Toplan quc 154 kw Gucukeliri 1410/5 Mere (38.30/37 mca) Name (or more) FATDAN
Mangai carpenalis Izondde qar digsnin irr weilen am dem agtig
0063
098mm/ square BK GAAHJ/ Hunan ZH MONG Prose 37 pt
11kg
YAN BRULOR
(DUALCHEF 325 G / S 325 G / 425 G / S 425 G)
0063
Gg.
Goo 3.4


- BEFORE FIRST USE
- IMPORTANT
- IMPORTANT FOR YOUR SAFETY
- GAS BOTTLES
- SAFETY INFORMATION
- LEAK TEST
- IGNITING INSTRUCTIONS
- IGNITING THE MAIN BURNERS
- DUALCHEF 315 G/DUALCHEF 325 G/DUALCHEF S 325 G
- DUALCHEF 415 G/DUALCHEF 425 G/DUALCHEF S 425 G
- INFO FOR LEFT SIDE TABLE (APPLIES ONLY TO MODELS WITH SIDE BURNERS)
- THE ELECTROBOX INCLUDES
- THE SAFETY LIGHT SYSTEM (SLS)
- INSTRUCTIONS FOR USING THE DUALCHEF
- IT COULDN'T BE SIMPLER
- BEWERER
- THE DGS® ZONE DIVIDER
- THE DGS® HEAT DIFFUSER
- HEIGHT-ADJUSTABLE WARMING RACK
- CAST IRON BARBECUE GRIDS
- DGS ACCESSORIES
- DIRECT AND INDIRECT GRILLING METHOD WITH THE DUALCHEF
- WHAT IS THE DIFFERENCE
- GRILL CHAMBER LIGHTING
- AFTER GRILLING
- CLEANING
- USING THE OUTDOORCHEF BARBECUE CLEANER
- USING THE OUTDOORCHEF CHEF CLEANER
- SERVICING THE DGS® TWIN BURNERS
- MAINTENANCE
- TROUBLESHOOTING
- THE BURNER DOES NOT IGNITE
- NO SPARK
- THE SAFETY LIGHT SYSTEM (SLS) DOES NOT WORK
- CONSUMER WARRANTY
- WARRANTY AND RELATION TO OTHER RIGHTS OF THE PURCHASER
- PARTICIPANTS AND WARRANTY CONDITIONS
- SCOPE
- EXCLUSION
- PROCESSING OF WARRANTY CLAIMS
- TECHNICAL INFORMATION
- DUALCHEF 315 G
- DUALCHEF 325 G / S 325 G
- DUALCHEF 415 G
- DUALCHEF 425 G / S 425 G
- SIDE BURNER
- NOTE ON THE TEMPERATURE DISPLAY
- WEB PAGE
- USER MANUAL
- LIGHTING INSTRUCTIONS
- LIGHTING THE MAIN BURNER
- DUALCHEF 415 G / DUALCHEF 425 G / DUALCHEF S 425 G
- DGS COOKING SET
- DGS CAST IRON GRIDDLE SET
- A
- STAINLESS STEEL
- DIRECT AND INDIRECT GRILLING METHODS WITH DUALCHEF
- WHAT ARE THE DIFFERENCES
- DGS HEAT DIFFUSER
- DEN HJDEJUSTERBAREVARMERIST
- GRILLRISTE AF STOBEJERN
- OGS TILBEHØR
- SAFETY LIGHT SYSTEM (SLS) DOES NOT WORK
- EXCLUSIONS
- SIDEBRANDER
- ELECTRICAL IGNITION / SAFETY LIGHT SYSTEM (SLS)
- HALOGEN LIGHTING (DUALCHEF S325 G / S 425 G)
- EXPLANATION OF THE DIFFERENT SYMBOLS ON THE CONTROL PANEL
- EXCEPTIONS
- INSTRUCTIONS FOR USE
- TIGHTNESS CHECK
- EXPLANATION OF THE SYMBOLS ON THE CONTROL PANEL
- IGNITING THE MAIN BURNER
- DUALCHEF 315 G / DUALCHEF 325 G / DUALCHEF S 325 G
- IGNITING THE SIDE BURNER
- DUALCHEF 325 G / DUALCHEF S 325 G / DUALCHEF 425 G / DUALCHEF S 425 G
- INFO SIDE TABLE LEFT SIDE (ONLY FOR MODELS WITH SIDE BURNER)
- POWER BOX
- DGS-GRILLRIST AV RUSTFRITT STAL
- MAINTENANCE OF DGS TWIN BURNER
- ELECTRIC IGNITION / SAFETY LIGHT SYSTEM (SLS)
- DIRECT AND INDIRECT GRILLING METHOD
- HOW DO THE METHODS DIFFER
- GRILLING LIGHTING
- OUTDOORCHEF BARBECUE CLEANER - INSTRUCTIONS FOR USE
- OUTDOORCHEF CHEF CLEANER - INSTRUCTIONS FOR USE
- DGS TWIN BURNER - SERVICING THE BURNER
- REPLACING THE GRILL
- OUTDOORCHEF BARBECUE CLEANER
- OUTDOORCHEF CHEF CLEANER
- MAINTENANCE OF THE TWIN BURNER
- NO LIST
- LIGHTING THE GRILL
- WARRANTY AND EXTENSION TO OTHER BUYER'S APPLIANCES
- CONTRACTING PARTIES AND WARRANTY CLAIMS
- WARRANTY PERIOD
- UNDANSKILIÄBYRGD
- HILIBARBRENNARI
- SAFETY LIGHT SYSTEM (SLS)
- HALOGEN LIGHT (DUALCHEF S325 G / S 425 G)
- INFORMATION ABOUT THE THERMOMETER
- GAS CYLINDERS
- SAFETY INSTRUCTIONS
- LEAK TESTING
- MEANING OF SYMBOLS ON THE CONTROL PANEL
- INSTRUCTIONS FOR IGNITION
- LIGHTING THE SIDE BURNER
- DUALCHEF 325 G / DUALCHEF S 325 G / DUALCHEF 425 G / DUALCHEF S
- INFO: LEFT SIDE TABLE (ONLY FOR MODELS WITH SIDE BURNER)
- ELECTRICAL BOX
- LOW
- SAFETY LIGHT SYSTEM (SLS) CONSISTS OF
- OVEN LIGHT
- WARRANTY FOR THE USER
- WARRANTY AND RELATIONSHIP TO OTHER CONSUMER RIGHTS
- WARRANTY
- IGNITION GUIDE
- IGNITION OF THE MAIN BURNER
- DUALCHEF 315 G | DUALCHEF 325 G | DUALCHEF S 325 G
- DUALCHEF 415 G | DUALCHEF 425 G | DUALCHEF S 425 G
- IGNITION OF THE AUXILIARY BURNER
- INFORMATION ABOUT THE LEFT SIDE TABLE (ONLY VALID FOR MODELS WITH SIDE BURNER)
- DGS CAST IRON CHARCOAL GRILL
- DGS STAINLESS STEEL CHARCOAL GRILL
- DUALCHEFILE DIRECT AND INDIRECT GRILLING METHOD
- EMNHYET ISIGI SISTMI (SLS) CALISMYOR
- MANGAI BAZNESI AYDINIATMASI
- TUKETICIGARANTISI
- ALICIN GARANTI VE GARTARA YONELIK DIGER HAKLAN
- KATLUMCILAR VE GARANTI KOSULLAN
- KAPSAM
- GEGERISIKILMA
- EXPIRATION OF THE WARRANTY
- YAN BRULOR
- (DUALCHEF 325 G / S 325 G / 425 G / S 425 G)
Brand : Outdoorchef
Model : Dualchef S 325 G
Category : Barbecue