
St-Tropez - Barbecue Outdoorchef - Free user manual and instructions
Find the device manual for free St-Tropez Outdoorchef in PDF.



| Brand | Outdoorchef |
| Model | St-Tropez |
| Category | Barbecue |
| Product Type | Gas Barbecue |
| Fuel Type | Propane / Butane Gas |
| Overall Dimensions (W x D x H) | 120 cm x 60 cm x 110 cm |
| Total Weight | Approximately 50 kg |
| Cooking Area | Stainless steel cooking grid, approx. 2500 cm² |
| Burner System | Outdoorchef Ceramic Burner (Gas) |
| Number of Burners | 2 main burners + 1 side burner |
| Ignition | Electronic ignition (battery powered) |
| Temperature Control | Continuous flame adjustment via control knobs |
| Material | Stainless steel housing and lid |
| Cleaning | Removable drip tray and grease collector |
| Safety Features | Gas regulator and safety shut-off valve |
| Mobility | Two locking casters for easy movement |
| Spare Parts Availability | Yes, through Outdoorchef service network |
| Warranty | 2 years standard manufacturer warranty |
| Included Accessories | Grid, grease tray, gas regulator, hose |
Frequently Asked Questions - St-Tropez Outdoorchef
User questions about St-Tropez Outdoorchef
0 question about this device. Answer the ones you know or ask your own.
Ask a new question about this device
Download the instructions for your Barbecue in PDF format for free! Find your manual St-Tropez - Outdoorchef and take your electronic device back in hand. On this page are published all the documents necessary for the use of your device. St-Tropez by Outdoorchef.
USER MANUAL St-Tropez Outdoorchef


City Gas
Ambri
Delta
Milano
Munich
Porto
Ascona
Como
Leon
Monaco
Montreux
Roma
Roma Deluxe
GEO
Paris
Paris Deluxe
St-Tropez

www.outdoorchef.com

THE BARBECUE COMPANY
Gas-Cookingsystem
Original OUTDOORCHEF Accessories
Item #: 18.211.51

Item #: 18.211.52 Item #: 18.211.30 Item #: 18.211.24
: 18.211.30 Item #: 18.211.24
Item #: 18.211.25
Item #: 18.211.22
Item #: 18.211.27
Item #: 18.211.29 Item #: 18.291.05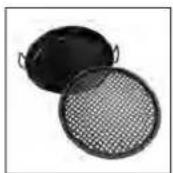
18.291.05

Item #: 18.211.40, Item #: 18.211.41, Item #: 18.291.07, Item #: 18.211.41, Item #: 18.291.07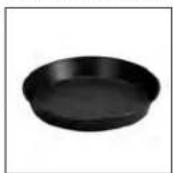
Item #: 18.291.08

Item #: 14.112.36, Item #: 14.112.33, Item #: various, Item #: various, Item #: 18.211.34, Item #: 14.421.12
Item #: 14.112.33, Item #: various, Item #: various, Item #: 18.211.34, Item #: 14.421.12
Item #: various, Item #: 18.211.34, Item #: 14.421.12, Item #: 18.211.34, Item #: 14.421.12
12

Item #: 14.421.10, Item #: 14.112.18, Item #: 14.112.23, Item #: 14.112.35, Item #: 14.491.10, Item #: 14.491.16
Item #: 14.112.18, Item #: 14.112.23, Item #: 14.112.35, Item #: 14.491.10, Item #: 14.4
Item #: 14.112.23, Item #: 14.112.35, Item #: 14.491.10, Item #: 14.4, Item #: 14.491.10, Item
Item #: 14.491.16

Item #: 14.112.24, Item #: 14.212.06, Item #: various, Item #: 18.291.15, Item #: 18.221.29
Item #: 14.212.06, Item #: various, Item #: 18.291.15, Item #: 18.221.29
Item #: 18.291.15, Item #: 18.221.29
: 18.221.29
1. January 1, 2017
Item #: 18.221.08

IMPORTANT: Please write the serial number of your barbecue immediately on the back page of this manual. You will find the number on the underside of the control panel and on the packaging. The serial number is important for an unproblematic handling of queries, ordering of spare parts or a warranty claim. Always quote the serial number when contacting your retail outlet in the event of a query or warranty claim. Keep the user guide in a safe place, it contains important information about safety, operation and maintenance of your Gas Kettle Barbecue.

Please read these instructions carefully before using your OUTDOORCHEF Gas Kettle Barbecue.
For Your Safety
Every person using this barbecue must understand and exactly follow the ignition instructions. Do not allow children to operate the barbecue. The user is responsible for the correct assembly, handling and maintenance of the barbecue. Disregard can cause accidents.
Keep flammable liquids, materials and spare gas bottles away from the barbecue. Do not store or use the barbecue or a spare gas bottle indoors.
Before starting up your Gas kettle barbecue, please read, understand and observe the following instructions!
The barbecue is for outdoor use only. Keep it at a safe distance of at least 1 meter from flammable objects (i.e. walls, projecting roofs, fences etc).
Gas Bottles
Gas bottles may have a maximum weight of 7.5 kg when placed on the base plate. Position the bottle on the designated spot, see assembly instructions. Please make sure that the gas regulator and all other connections are tightened. Conduct a «Leak Test» before starting up the barbecue and after every time you exchange the gas bottle. Gas bottles must
not be exposed to temperatures higher than 50 °C, or stored in closed areas or in basements. Follow the safety instructions mentioned on the gas bottle.
Safety Instructions
Operate your gas barbecue following these «Lighting and Operating Instructions».
- The gas barbecue is for outdoor use only.
- Never leave the barbecue unattended while in use.
- Keep the barbecue a safe distance of at least 1 meter from flammable objects (i.e. walls, projecting roofs, fences etc).
- WARNING: Some parts become very hot during use, keep the barbecue out of the reach of children.
- Keep flammable material at a safe distance away from the barbecue.
- Do not move the barbecue when in use.
- Do not push appliances which are fitted with castors over uneven surfaces or ledges!
- Wear protective gloves or a long sleeved barbecue safety mitt when operating the barbecue.
- After use turn off the gas supply on the barbecue first and then turn off the gas cylinder.
- When changing the gas cylinder, ensure that the gas supply is turned off both at the barbecue and at the gas cylinder and make sure there are no combustible materials nearby.
- After every gas cylinder replacement, carry out the leak test to ensure that there are no leakages.
- If you think there is a gas leak, turn off the barbecue and gas cylinder immediately and have the fittings checked by your local gas distributor.
- If the tube is damaged or worn out, replace the tube and regulator immediately. The tube must be kept straight at all times. Ensure that it does not bend or twist. Remember to turn off the gas supply on the barbecue and the gas cylinder before removing the tube.
- OUTDOORCHEF recommends that the gas tube and gas regulator be changed every two to three years.
- Ensure that the air vents in the barbecue lid and base remain clear at all times.
- Important: Ensure that the gas tube is routed away from the hot barbecue surfaces and that it is not bent or twisted.
- Do not change or alter any of the barbecue components or settings.
- Important: Ensure the correct regulator is used: 28 mbar butane (not supplied but available locally), 37 mbar fixed (not adjustable) propane (not supplied but available locally).
- If the barbecue is not working at full capacity or if there is suspicion of a blocked gas supply, consult your local gas distributor.
- Only use the barbecue on firm, safe, non-flammable surfaces.
- Avoid temperature shocks on appliances with granite surfaces.
- Never store the barbecue near flammable liquids or flammable materials.
- Not for use with natural gas. Use butane or propane bottled gas only (7/6 kg cylinders).
- The gas cylinder must be stored in an open, well ventilated area out of the reach of children.
- Never store a gas cylinder (full or empty) indoors.
Leak Test
WARNING: Do not permit sources of ignition in the area while performing the leak test – this includes smoking! Never test for gas leaks with a lighted match or open flame! Always check for leaks outdoors.
- Check that the control knob is turned to the «OFF position».
- Open the gas supply on the gas cylinder by turning the knob counterclockwise.
- Check all gas connections by brushing a 50/50 solution of liquid soap and water onto all connections.
- Look for bubbles in the soap solution which indicate that there is a leak. IMPORTANT! The barbecue must not be used until leak is eliminated. Close the gas cylinder. The leak(s) must be stopped by tightening the connections, if possible, or by replacing the defective parts as recommended by the barbecue distributor.
- Repeat steps 1 and 2.
- Consult your local gas distributor if leaks persist. NOTE: Conduct a leak test each time the gas supply is connected or replaced and every year when using your barbecue for the first time in the barbecue season.

Explanation of the Symbols on the Control Console
Funnel positions on control panel of the kettle only
Funnel positions


to barbecue with lid OPEN/REMOVED

e with lid CLOSED
Heat Settings
low heat LOW
medium heat
MEDIUM
Figure 3
maximum heat
HIGH
Lighting Instructions for the Kettle
Models with one ring burner
The burner reaches its maximum capacity at maximum and minimal capacity at minimum.
Models with two ring burners
The large burner reaches its maximum capacity at maximum and minimal capacity at minimum. It is set up for use in the middle to high temperature range.
The small ring burner is set up for cooking at low temperatures and can only be slightly regulated. The difference between maximum and minimum is very small and not visible. It reaches a temperature of 100 to 120°C.
Burner System Additional Grilling Surface
The two burners are identical. The highest setting is maximum and the lowest setting is minimum. The round barbecue is designed for use in the middle to high temperature range.
Before the first use
- Wash all parts that come in contact with food.
- Conduct a leak test on all gas piping parts as described under chapter «Leak Test».
- Light the Gas Kettle Barbecue and heat on for approximately 20 to 25 minutes.
Lighting Instructions for the Ring Burners
- Ensure that the gas regulator and all other connections are tightened. Proceed according to the instructions given under «Leak Test».
- Open/remove the lid. CAUTION: Never ignite the barbecue with the lid closed.
- Open gas supply at gas cylinder. 4a. Models with single burner: Push the gas control knob and turn counter clockwise to the high position. Push the black ignition button and hold it until the gas ignites. 4b. Models with double burner: Push gas control knob (left knob) of the small burner and turn counter
clockwise to the high position. Push the black ignition button and hold it until the gas ignites. or
Push the gas control knob (right knob) of the large burner and turn counter clockwise to the high position. Push the black ignition button and hold it until the gas ignites.
- If the gas does not ignite after three seconds, turn gas control knob to «OFF», wait two minutes so that unburnt gas can evaporate, then repeat step 4.
- If the barbecue does not ignite after 3 tries, refer to chapter «trouble shooting» to find the problem and solution.
Lighting Instructions for the City Gas and the Side Burner
- Ensure that the gas regulator and all other connections are tightened. Proceed according to the instructions given under «Leak Test».
- Open/remove the lid, or rather the side burner cover. CAUTION: Never ignite the barbecue or rather the side burner with the lid closed.
- Open gas supply at gas cylinder.
- Push and turn gas knob counter clockwise to the high position and press the ignition button several times.
- If the unit fails to light, turn gas control knob to «OFF», wait two minutes so that the unburnt gas can evaporate. Then repeat step 4.
- If the cooling grid or rather the side burner does not ignite after 3 tries, refer to chapter «trouble shooting» to find the problem and its solution.
- Do not close the side burner cover until the side burner has cooled completely.
Lighting Instructions for the Additional Grilling Surface of the Venezia
- Ensure that the gas regulator and all other connections are tightened. Please refer to the instructions given under «Leak Test».
- Remove the granite cover on the additional grilling surface and set it on the side shelf in the holder provided. IMPORTANT! Never ignite the barbecue when the granite cover is closed. Granite cover.
- Open the gas supply at the gas cylinder.
- Press the right or left gas control knob and turn it counter clockwise to 📄. Press the ignition button and hold it down until the gas ignites.
- If the unit fails to light, turn gas control knob to «OFF», wait two minutes so that the unburnt gas can evaporate. Then repeat step 4.
- If the burners on the additional grilling surface do not ignite after 3 attempts, check the potential causes, as described in the «Trouble Shooting» section.
- To start the second burner, follow step 4.
- Put the granite cover on the additional grilling surface only after it has cooled completely.
Cooking Instructions for the gas kettle barbecue
- Select grilling, roasting, cooking or baking method by placing the funnel in the correct position and using the correct accessories. WARNING: When using the barbecue always wear heat-resistant oven mitts to change the position of the funnel.
- Pre-heat for 10 to 15 minutes on with the lid closed.
- Place food on the cooking grid, close the lid and leave until the food is ready. (refer to the barbecue time cart).
- After grilling, first turn the gas control knob to the «OFF» position on the barbecue, then turn off the gas cylinder last.
Below we show the two different funnel positions (normal & volcano) and the use of some of the OUTDOOR-CHEF cooking accessories available. The preparation of food can be adapted to your individual tastes and needs.
Grilling, Baking & Cooking
on the barbecue

large funnel: normal position cooking grid: standard position lid: closed
For roasting joints of meat or whole chickens
Pre-heat on for 10 minutes with the lid closed. There is no need to turn the food, as the funnel barbecue system cooks food quickly and all the way through by providing evenly distributed top and bottom heat. Just place food on the pre-heated cooking grid, close the lid quickly and let the funnel go to work. By keeping the lid closed, your food is being continuously cooked all around, and tastes better as more of the juices are sealed in. Always leave some air space around each piece being cooked. Roast for approximately 5 to 10 minutes on , then reduce to and leave until done.
See «Barbecue Time Chart», as times vary greatly depending on size, thickness and type of meat.
To avoid any risk we recommend that you use the «Gourmet Check» core temperature sensor for larger pieces of meat.
For items that cook quickly such as steaks, sausages etc.
Pre-heat the barbecue on for 10 minutes with the lid closed. Open the lid, arrange the meat around the edges of the cooking grid and brown quickly all around on . Then place the meat in the centre of the cooking grid, close the lid, reduce to and leave to finish cooking. For best results when using short cooking times we recommend the OUTDOOR-CHEF cast-iron plate.
On the cast-iron plate

large funnel: volcano position cooking grid: remove, replace with the cast-iron plate lid: open/removed optional accessories: cast-iron plate
Ideal for grilling foods with a short cooking time (steaks, sausages etc.) and for pancakes and fried eggs, as the heat is evenly distributed and the meat is immediately sealed to ensure that it remains juicy.
Place the cast-iron plate on the volcano funnel. Light the burner, turn the gas control knob to and preheat the griddle plate for approximately 10 minutes with the lid open/removed before you start cooking.
In the cast-iron pan (NOT suitable for City Grill)

large funnel: volcano position cooking grid: remove and replace with the universal pan lid: open/removed optional accessories: cast-iron pan
Put the cast-iron pan on the funnel. Light the burner and turn the gas control button to the position to pre-heat the barbecue with closed lid for about 10 minutes. Preparation instructions can be found in your personal cooking documentation.
Baking
On the pizza plate
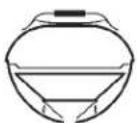
large funnel: normal position cooking grid: standard position lid: closed optional accessories: pizza plate
Pre-heat the barbecue on for 10 to 15 minutes. Place the baking tray containing the pizza, bread or cakes on the cooking grid and close the lid. Cook on or as long as indicated in the recipe.
With the stone for pizza and bread (NOT suitable for City Grill)

large funnel: normal position cooking grid: standard position lid: closed optional accessories: stone for pizza and bread
Place the stone for pizza and bread in the middle of the cooking grid. Light the burner and turn the gas knob to the position. Heat the stone for 15 to 20 minutes with the lid closed before placing food to
be baked on the pizza and bread stone. Bake according to your recipe on order.
With the baking plate

large funnel: normal position cooking grid: standard setting lid: closed optional accessories: baking plate
Pre-heat the barbecue on the position with closed lid for 10 minutes. Put the cake on the barbecue and close the lid. Bake it according to the temperature indicated in the recipe on 📄, 🌐 oder 🌐.
Cooking
using wok with wok support (NOT suitable for City Grill)

large funnel: volcano position cooking grid: remove, replace with the wok support and the wok lid: open/removed optional accessories: wok with wok support
Place the wok support over the inverted funnel. Light the burner and turn the gas knob to the desired position. Place the wok in the support and heat with an open or removed lid for approximately 10 minutes before beginning to cook your Chinese or other Asian dish.
using the universal pan

large funnel: volcano position cooking grid: remove, replace with universal pan lid: open/removed optional accessories: universal pan
Place the universal pan on the inverted funnel. Light the burner and turn the gas knob to the desired position. Heat the universal pan approximately 10 minutes with an open or removed lid before beginning to cook.
Cooking and Gratinating
In the cast-iron pan (NOT suitable for City Grill)
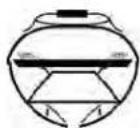
large funnel: volcano position cooking grid: remove and replace with universal pan lid: open/removed optional accessories: cast-iron pan
Put the cast-iron pan on the funnel. Light the burner and turn the gas control button to the desired position
and heat the barbecue (with closed lid) for about 10 minutes. Preparation instructions can be found in your personal cooking documentation.
Cooking and Simmering
In the Gourmet Crescent (NOT suitable for City Grill)

large funnel: normal position cooking grid: standard setting lid: closed optional accessories: Gourmet Crescent
Pre-heat the barbecue to the desired position with the lid closed for 10 minutes. Put the Gourmet Crescent onto the cooking grid. Preparation instructions can be found in your personal cooking documentation.
Further information, tips and tricks can be found in the OUTDOORCHEF cook book.
Grilling on the Additional Grilling Surface
Pre-heat your barbecue at full power («HI») for about 10 minutes. Put the food on the cooking grid and adjust the temperature to your requirements accordingly («LO» to «HI»).
After Cooking
- Switch the gas knob to the «OFF» position.
- Close the gas supply on the gas bottle (turn clockwise).
- Leave the barbecue to cool down completely before cleaning it.
- Put the barbecue cover on the barbecue.
Cleaning
Gas kettle barbecue
Very little cleaning is required between uses as most of the fat either vaporizes or drains into the drip pan.
If heavily soiled, heat the barbecue to high and let it burn for approximately 10 minutes. To clean the grid and funnel use a brass bristle barbecue brush (not a steel brush).
For the remaining parts and a thorough cleaning, use the BBQ Cleaner from OUTDOORCHEF or a nylon sponge and soapy water to remove all loose deposits.
IMPORTANT: After rinsing off the oven cleaner, dry the barbecue off completely by heating on 📞.
Additional Grilling Surface of the Venezia
Since most of the grease either burns off or collects in the drip pan, the amount of cleaning required between grilling rounds is minimal. To clean the barbecue, use a barbecue brush with brass bristles (not steel bristles). Remove the grilling surface and clean the cast-iron burners. Once you have finished cooking, you can remove and clean the drip pan with the OUTDOORCHEF BBQ Cleaner.
Important! If you use an oven cleaner, make sure you leave the barbecue to dry completely after cleaning. To accelerate the drying process, you can turn the barbecue to the highest setting for several minutes.
OUTDOORCHEF BBQ Cleaner – Use:
For the sake of your hands, wear gloves and even glasses. Spray the barbecue or the accessories thoroughly while still warm. Leave to set for 15–30 minutes. Spray soiled surfaces again, vigorously rinse with water, and then dry.
Regular maintenance
Regular care of your barbecue will help keep it operating properly. Inspect the gas supply parts at least twice a year and always after long periods of storage. Inspect the burner tubes, as spider webs and other insect nests can cause blockage of the gas flow from the valve(s) to the burner(s). Remove all obstructions. Occasionally inspect and tighten all hardware as this may become loose if the barbecue is moved over rough or hard ground. After a period of non-use you should perform a leak test before using the barbecue again. If you are in any doubt, contact your local gas supplier or the agent responsible for selling the barbecue. Before storing your barbecue for the winter, lightly grease all exposed metal parts to prevent corrosion. After winter storage and AT LEAST once more during the season, check the tube for cracking, chafing, kinking or other damage. A damaged tube MUST be replaced immediately as described in this manual. To preserve the appearance of your barbecue and to enjoy using it for as long as possible, we recommend that once a year you treat all wooden parts with a wood oil – this will help to prevent distortion cracking. For an extension of the lifespan of your barbecue, we recommend covering the barbecue with an OUTDOORCHEF barbecue cover after it has cooled off completely, to protect it from the elements. To avoid the accumulation of humidity, remove the barbecue cover after rain.
Trouble Shooting
Gas does not light
- Check if the gas tank tap is open.
• Make sure there is enough gas in the tank - Make sure that a spark is jumping from the electrode to the burner.
No spark
- Ensure that the battery is properly inserted (for barbecues with electric ignition).
- The distance between the burner and the electrode should be between 5-8 mm.
- Make sure the cables at the electronic ignition and the electrode are plugged in and fit tightly.
- Insert a new battery in the electric ignition (type AAA (LR03) 1.5 Volt). Minus pole (-) inserted first.
If you cannot start the barbecue after the above-mentioned troubleshooting, please contact your local dealer.
Warranty
This warranty covers faulty parts or flawed workmanship for the following period:
- 3 years from the original purchase date on enamelled kettle (base and lid) as well as stainless steel parts
- 2 years from the original purchase date on remaining parts
Warranty claims along with proof of purchase must be taken to the authorized dealer where the barbecue was purchased. Any damage claim regarding the enamelling must be submitted within 30 days of purchase to be 100% covered by the warranty. This applies to new barbecues which have not been used.
The following conditions are NOT covered by this warranty:
- Unevenness and colour variations in the enamelling.
- Damage caused by improper assembly or disregard of the manual.
- Change of colour due to corrosion or rust, as a result of the effects of weather or improper use of chemicals.
- Damage due to alterations, use of product for purposes other than it is intended for, or wilful damage.
- Damage caused by improper maintenance or repairs by an unauthorised person.
- Acts of god.
- Normal wear and tear of grid, funnel, burners, thermometer, ignition, electrodes, ignition cable, gas tube and gas pressure regulator.
- Shipping and handling costs occurring in connection with a claim.
- Damages occurring as a result of industrial use. (hotels, restaurants, organized events etc.)
Technical Information
Ascona, Como, GEO, Monaco, Montreux, Paris, Paris Deluxe Roma, Roma Deluxe, St-Tropez, Venezia
CE 0063
Gas propane/butane 30/31
Heat input max
– Small burner 1.20 KW
– Large burner 8.50 KW
Gas consumption 702 g/h 28–30/37 mbar
Injector small burner 0.55 mm/marking: BF Injector large burner 1.47 mm/marking: BT
50 mbar
Injector small burner 0.48 mm/marking: AF Injector large burner 1.27 mm/marking: AT Butane 28 mbar, Propane 37 mbar Recommended bottle size Butane max. 13 kg Propane max. 10.5 kg
Leon
CE 0063
Gas propane/butane 30/31
Heat input max
Gas consumption 612 g/h
Injector 28–30/37 mbar
Injector 50 mbar
Pressure
Recommended bottle size
8.50 KW
1.47 mm/marking: BT
1.27 mm/marking: AT
Butane 28 mbar, Propane 37 mbar
Butane max. 13 kg
Propane max. 10.5 kg
Gas consumption 389 g/h
Injector 28-30/37 mbar
Injector 50 mbar
Pressure
Recommended bottle size
5.40 KW
1.15 mm/marking: BN
1.02 mm/marking: AN
Butane 28 mbar, Propane 37 mbar
Butane max. 13 kg
Propane max. 10.5 kg
City Gas
CE 0063
Gas propane/butane 30/31
Heat input max
Gas consumption 315 g/h
Injector 28-30/37 mbar
Injector 50 mbar
Pressure
Recommended bottle size
0063
4.3 KW
1.02 mm/marking: BL
0.88 mm/marking: AH
Butane 28 mbar, Propane 37 mbar
Butane max. 13 kg
Propane max. 10.5 kg
Side burner
CE 0063
Gas propane/butane 30/31
Heat input max
Gas consumption 276 g/h
Injector 28–30/37 mbar
Injector 50 mbar
Pressure
0.98 mm/marking: BK
0.85 mm/marking: AG
Butane 28 mbar, Propane 37 mbar
Additional Grilling Surface
CE 0063BT3928
Gas propane/butane 30/31
Heat input max 8.6 KW
| Gas consumption | 630 g/h |
| Injector 28-30/37 mbar | 0.90 mm/marking: BM |
| Injector 50 mbar | 0.80 mm/marking: AM |
Categories
| I3B/P (30 mbar) | DK, FI, NL, NO, SE, LU |
| I3B/P (50 mbar) | CH, AT, DE |
| I3+ (28/30/37 mbar) | BE, CH, ES, FR, GB, IT, PT |
Electronic ignition
Use type AAA 1.5 Volt batteries for the electronic ignition.
Information for temperature indicator:
A tolerance of +/- 10% is possible.
OUTDOORCHEF operates a policy of continuous product development and improvement. As such we reserve the right to alter product design and or specification without prior notice.
OUTDOORCHEF Barbecue Time Chart
Preparation of larger pieces of meat, fish or poultry (funnel in normal position with closed lid, accessories: cooking grid)
IMPORTANT: cooking times can vary between 10 to 20 minutes depending on the type and thickness of meat as well as on outdoor ambient temperature.
Cooking time for approx. 1 kg/2.21 lb meat
On lowest heat setting
(approx. 200 °C to 220 °C/390F–425F)
| Roast pork | 45–60 minutes |
| Roast loin of pork | 25–35 minutes |
| Fillet of pork | 15–25 minutes |
| Roast veal | 40–55 minutes |
| Crown of veal | 55–70 minutes |
| Beef ribs | 20–40 minutes |
| Roast beef | 30–40 minutes |
| Fillet of beef | 12–25 minutes |
| Rack of lamb | 25–35 minutes |
| Leg of lamb | 30–45 minutes |
| Saddle of lamb | 10–20 minutes |
| Chicken | 45–60 minutes |
| Meat loaf | 30–45 minutes |
| Roast venison | 30–40 minutes |
| Saddle of venison (off the bone) | 10–20 minutes |
| Salmon | 10–20 minutes |
Preparation on the enamelled cast-iron plate
(large funnel in volcano position, lid open/removed)
| Chops, burgers | 8–12 minutes |
| Medallions, steaks, chicken breast | 5–10 minutes |
| Sausages | 8–10 minutes |
| Tiger prawns | 3–6 minutes |
| Whole fish 7–12 minutes |
| Fish fillets in foil 3–5 minutes |
| Vegetables, fruit 5–10 minutes |
| Mushrooms 3–5 minutes |
Preparation on the cooking grid
(large funnel in normal position, lid closed)
| Potatoes in foil (medium sized) 30–40 minutes |
| Corn on the cob in foil 20–30 minutes |
| Tomatoes 8–10 minutes |
| Soft vegetables 15–25 minutes |
| Whole pineapple 25–35 minutes |
| Potato gratin in a dish 25–40 minutes |
| Cake 45–60 minutes |
| Cheesecake or fruit cake 40–60 minutes |
Preparation in universal pan
(large funnel in volcano position, lid closed or open/removed)
Risotto: follow packaging instructions
Polenta: follow packaging instructions
Mixed vegetables: 15–20 minutes
Soufflé (fruit, vegetables etc.) 15–30 minutes
THIS USER GUIDE SHOULD BE KEPT AND STORED IN A PLACE THAT IS ACCESSIBLE AT ALL TIMES.
Manual Gas Kettle Barbecue 2011_article number 19.110.24
Distribution:
Sales: OUTDOORCHEF International Ltd.
Neuhaltenring 1
CH-6030 Ebikon
Tel. +41 41 444 33 44
Fax +41 41 440 84 88
E-mail: info@outdoorchef.com
www.outdoorchef.com
Serial number

THE BARBECUE COMPANY


- ITEM
- FOR YOUR SAFETY
- GAS BOTTLES
- SAFETY INSTRUCTIONS
- LEAK TEST
- EXPLANATION OF THE SYMBOLS ON THE CONTROL CONSOLE
- HEAT SETTINGS
- LIGHTING INSTRUCTIONS FOR THE KETTLE
- MODELS WITH ONE RING BURNER
- MODELS WITH TWO RING BURNERS
- BURNER SYSTEM ADDITIONAL GRILLING SURFACE
- BEFORE THE FIRST USE
- LIGHTING INSTRUCTIONS FOR THE RING BURNERS
- LIGHTING INSTRUCTIONS FOR THE CITY GAS AND THE SIDE BURNER
- LIGHTING INSTRUCTIONS FOR THE ADDITIONAL GRILLING SURFACE OF THE VENEZIA
- COOKING INSTRUCTIONS FOR THE GAS KETTLE BARBECUE
- GRILLING, BAKING & COOKING
- FOR ROASTING JOINTS OF MEAT OR WHOLE CHICKENS
- SEE «BARBECUE TIME CHART», AS TIMES VARY GREATLY DEPENDING ON SIZE, THICKNESS AND TYPE OF MEAT
- FOR ITEMS THAT COOK QUICKLY SUCH AS STEAKS, SAUSAGES ETC
- BAKING
- COOKING
- COOKING AND GRATINATING
- COOKING AND SIMMERING
- GRILLING ON THE ADDITIONAL GRILLING SURFACE
- AFTER COOKING
- CLEANING
- GAS KETTLE BARBECUE
- ADDITIONAL GRILLING SURFACE OF THE VENEZIA
- OUTDOORCHEF BBQ CLEANER – USE
- REGULAR MAINTENANCE
- TROUBLE SHOOTING
- NO SPARK
- WARRANTY
- TECHNICAL INFORMATION
- ASCONA, COMO, GEO, MONACO, MONTREUX, PARIS, PARIS DELUXE ROMA, ROMA DELUXE, ST-TROPEZ, VENEZIA
- LEON
- CITY GAS
- SIDE BURNER
- ADDITIONAL GRILLING SURFACE
- ELECTRONIC IGNITION
- OUTDOORCHEF BARBECUE TIME CHART
- PREPARATION ON THE ENAMELLED CAST-IRON PLATE
- PREPARATION ON THE COOKING GRID
- PREPARATION IN UNIVERSAL PAN
- DISTRIBUTION
Brand : Outdoorchef
Model : St-Tropez
Category : Barbecue