WMN4277TT - Wall mount SAMSUNG - Free user manual and instructions

Find the device manual for free WMN4277TT SAMSUNG in PDF.
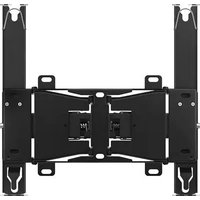
SAMSUNG WMN4277TT - Wall mount
📄 72 pages English EN Download 💬 AI Question 10 questions ⚙️ Specs
Notice SAMSUNG WMN4277TT - page 1
Pick your language and provide your email: we'll send you a specifically translated version.
Product TypeTilt and swivel wall mount
BrandSamsung
ModelWMN4277TT
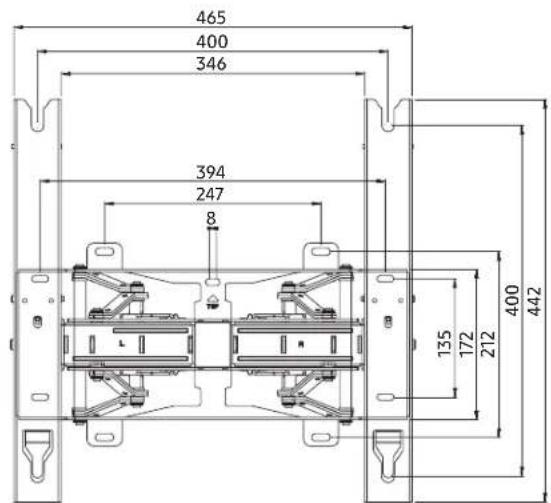
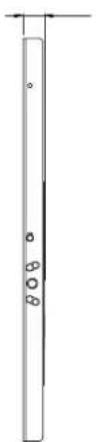
Dimensions (W x H x D)465 x 442 x 24.5 mm
Weight5.5 kg
Compatible VESA standard400 x 300, 400 x 400
Downward tilt angle10° to 15°
Left/right rotation angle-20° to +20°
MaterialSteel
Wall fixingConcrete anchors and screws (provided)
Compatible wall typesConcrete, solid wood, reinforced plywood (minimum thickness 50 mm for concrete, 30 mm for wood)
Box contentsTilt bracket (left and right), fixing studs, M8 screws, washers, anchors, cable clip
Cable managementYes, with cable clip and integrated cable routing
InstallationRequires two people, pre-drilling
Height adjustmentYes, via adjustment system
SafetyDo not hang on the mount, avoid shocks, keep out of reach of children
MaintenanceClean with a soft, dry cloth
Mount depth24.5 mm
WarrantyNot specified
Recommended useIndoor use only

Frequently Asked Questions - WMN4277TT SAMSUNG

What types of walls are compatible with the Samsung WMN4277TT mount?
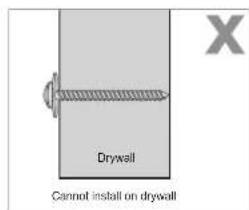
The mount is designed for installation on concrete, solid wood, or reinforced plywood walls. The recommended minimum thickness is 50 mm for concrete and 30 mm for wood. It cannot be installed on unreinforced drywall or unreinforced surfaces.
What is the maximum weight capacity of the mount?
The manual does not specify an explicit maximum weight capacity. However, the mount weighs 5.5 kg and is designed for TVs that meet VESA 400x300 and 400x400 standards. For safety reasons, ensure that the TV does not exceed a reasonable load (usually up to 50 kg for this type of mount, but check the manufacturer's specifications).
How to install the Samsung WMN4277TT wall mount?
Installation requires two people. Follow these steps: 1) Attach the tilt bracket to the wall using the provided anchors and screws, drilling holes with a diameter of 6x50 mm. 2) Insert the fixing studs and tighten the screws. 3) Remove the screws from the TV and install the plastic brackets with the provided screws. 4) Hang the TV on the mount and turn the safety pins. 5) Use the cable clip for cables.
What are the tilt and rotation angles of the mount?
The mount allows a downward tilt of 10° to 15° and left/right rotation of -20° to +20°. These angles may vary slightly depending on the TV model.
Is the mount compatible with all Samsung TVs?
The mount is compatible with TVs that meet VESA 400x300 and 400x400 standards. Check the dimensions and weight of your TV. For ultra-slim TVs, additional precautions are necessary.
What to do if the provided screws are not suitable for my wall?
The provided screws and anchors are suitable for concrete walls. For other wall types (plaster, marble, steel), you must use appropriate screws available commercially. Ensure the fixing is strong enough to support the weight.
How to hide cables with this mount?
The mount is equipped with a cable clip to attach the power cord and peripheral cables. Route the cables through the provided hole to avoid interfering with rotation. Tighten the clip to keep the cables together.
Can I install the Samsung WMN4277TT mount alone?
It is strongly recommended to have two people for installation, especially when attaching the TV to the mount. A single person risks dropping the device or injuring themselves.
How to adjust the tilt of the mount after installation?
To adjust the tilt, hold the product by the upper center part and tilt it downward. For rotation, hold both sides and turn left or right. Do not force if the mount is too close to the wall.
Where can I download the full manual for the mount?
The full PDF manual is available for free on the site notice-facile.com for the Samsung WMN4277TT model. You can also request a translation in your language by providing your email address.

User questions about WMN4277TT SAMSUNG

0 question about this device. Answer the ones you know or ask your own.

Ask a new question about this device

Your email remains private: it is only used to notify you if someone answers your question.

No questions yet. Be the first to ask one.

Download the instructions for your Wall mount in PDF format for free! Find your manual WMN4277TT - SAMSUNG and take your electronic device back in hand. On this page are published all the documents necessary for the use of your device. WMN4277TT by SAMSUNG.

USER MANUAL WMN4277TT SAMSUNG

Angle Adjustment and Rotation Type Wall-Mount Bracket Installation Guide WMN4277TT

SAMSUNG WMN4277TT - Angle Adjustment and Rotation Type Wall-Mount Bracket Installation Guide WMN4277TT - 1

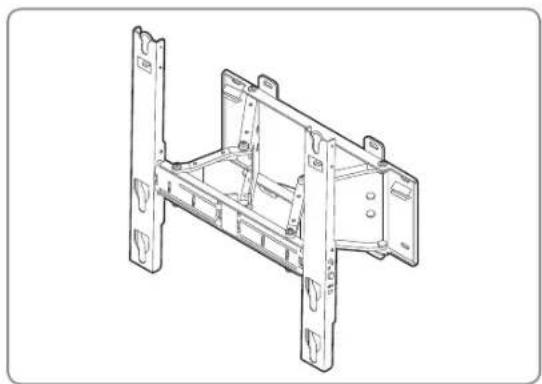
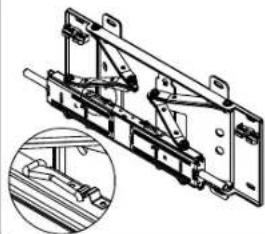
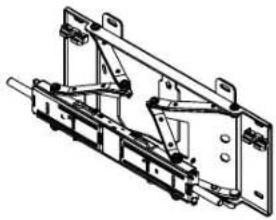
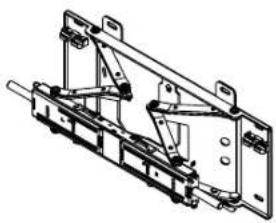
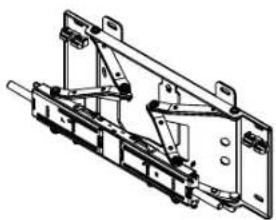
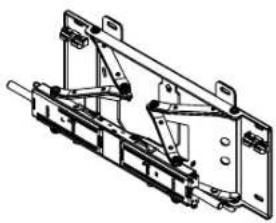
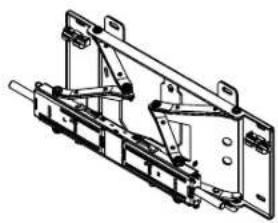
Product Image

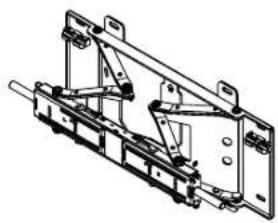
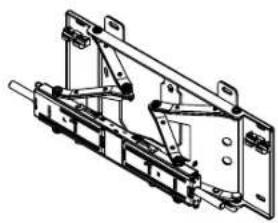
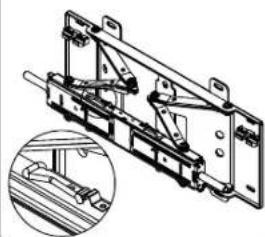
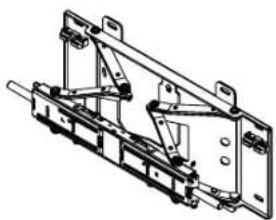
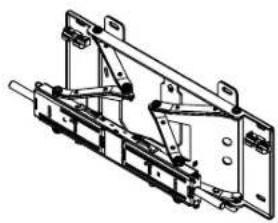
Technical line drawing of a mechanical frame assembly (no text or symbols)

SAMSUNG WMN4277TT - Product Image - 2

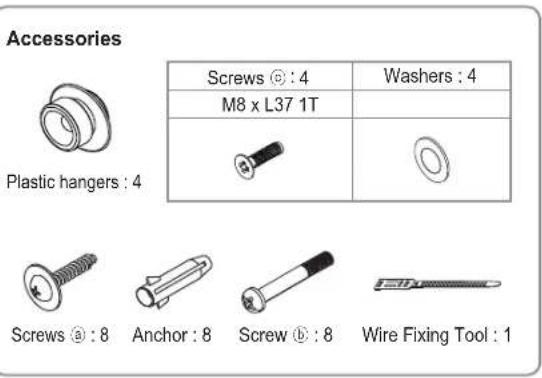
Components

* Only use the supplied components for the bracket installation.
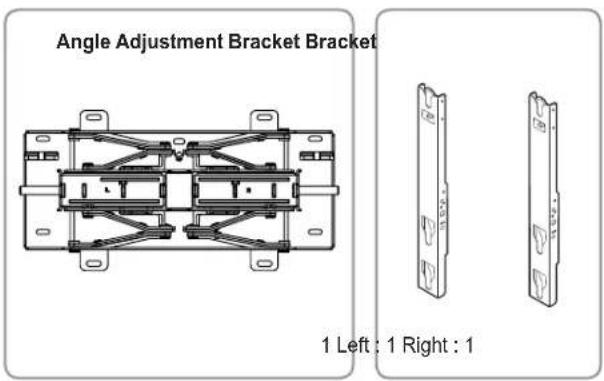
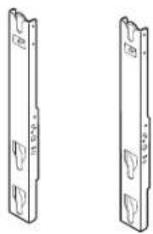
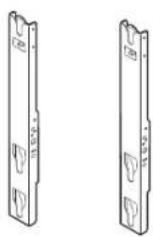
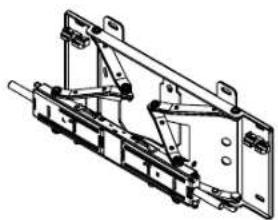
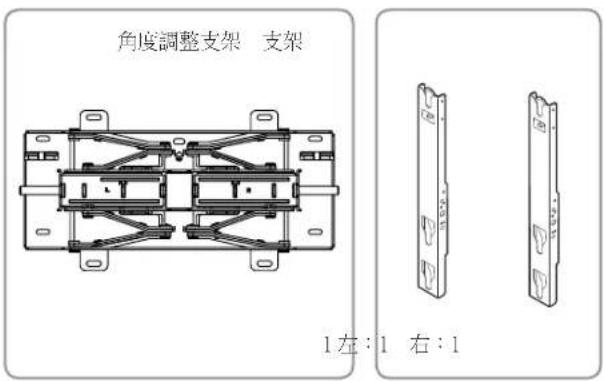
Angle Adjustment Bracket: 1 left, 1 right

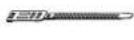
Accessories: Screws (4), M8 x L37 (1), Plastic hangers (4), Washers (4), Screws (8), Anchors (8), Screws (8), Wire fixing tool (1)

SAMSUNG WMN4277TT - Components - 3

Safety Instructions

! Be sure to contact an authorized service center when installing your set.

Contact a qualified technician at your dealer for moving or replacing the product after installation.

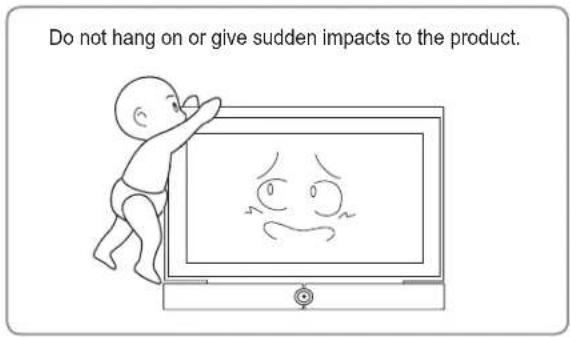
Do not hang on or give sudden impacts to the product.

  1. Be sure to keep the product away from children. There can be serious damage on the head when hit by the edge of the product.
  2. Be careful when you adjust the angle or rotate the set. The product can be damaged if it is too close to touch the wall. (Attach some sponges to 4 corners of the product to avoid the product or wall damage.)
  3. Do not install the product in a place with high temperature and high humidity. Avoid to install the product on the wall which cannot bear the weight.
  4. Since there is a danger of electric shock, do not insert your fingers into the TV stand installation hole while installing the TV.
  5. Make sure to cover the TV stand installation hole with the hole cover supplied with the TV before completing the wall installation.

SAMSUNG WMN4277TT - Safety Instructions - 3

Wall Bracket Assembly

⚠️ Check the type of the wall before installing.

Standard Installation Requirements by Wall Type

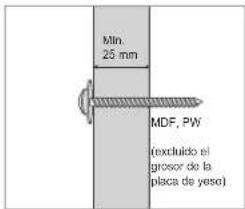
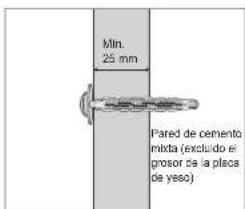
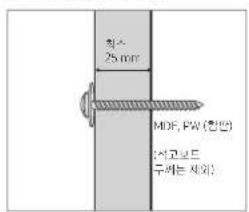
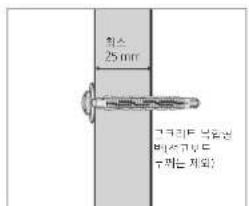
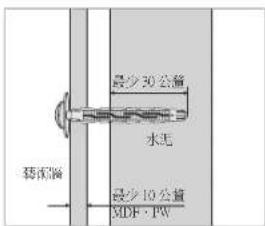
- Can only be mounted on a concrete or interior wall of sufficient thickness. Refer to the diagrams below.

MDF = Medium Density Fiberboard PW = PlywoodSAMSUNG WMN4277TT - Wall Bracket Assembly - 1
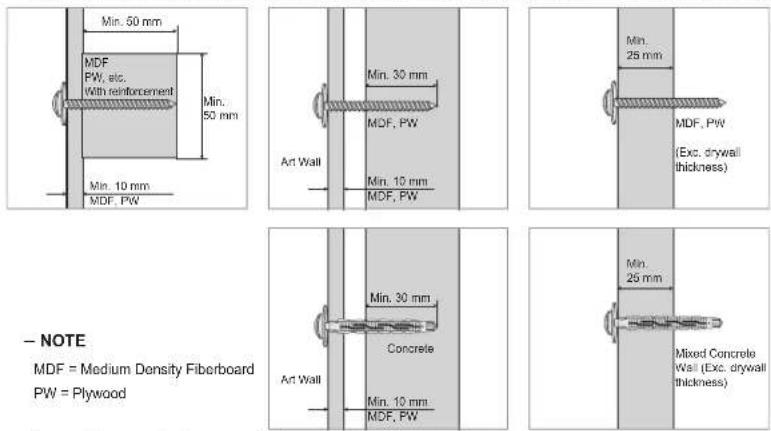
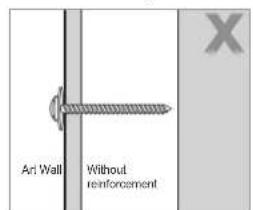
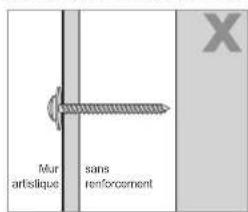
- Cannot be mounted on unreinforced wall or drywall surfaces.
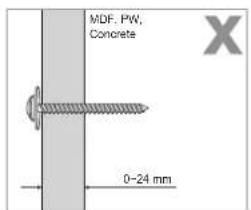
MDF, PW, Concrete: 0-24 mm

Ari Wall: Without reinforcement

Drywall: Cannot install on drywall

1 Install the angle adjustment bracket on the wall as shown in the figure.
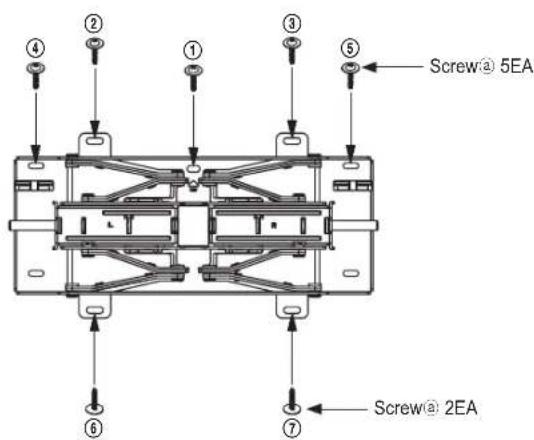
④ ② ① ③ ⑤ Screw@ 5EA ⑥ ⑦ Screw@ 2EA

Tighten the angle adjustment bracket by using anchors and screws ④ orderly from ① to ⑦.

If it cannot be installed on the assigned area, install at the nearest place.

How to Tighten Anchors or Screws
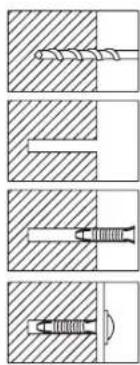
Diagram showing four different types of screwdriver tool configurations (no text or labels)

Make a hole in the wall with the drill of 6X50.

Clean up the hole.

Insert the supplied anchor to the hole.

Match the angle adjustment bracket to the holes on the wall and tighten the screws ①.

* Use the drill with the required size when making a hole in the wall. Be sure to follow the directions for the installation to avoid safety problems.

Check the solidity of the wall before the installation. Strengthen the wall and install the bracket if the wall is not firm enough. The supplied screws and anchors are for installing on concrete walls. For the wall of plaster, marble, or steel, use the appropriate screws.

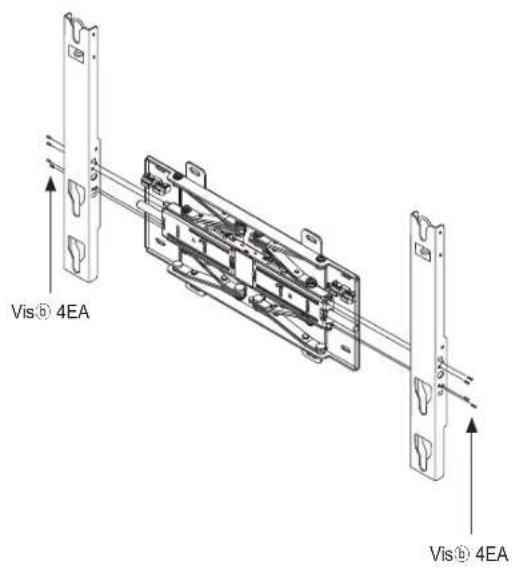
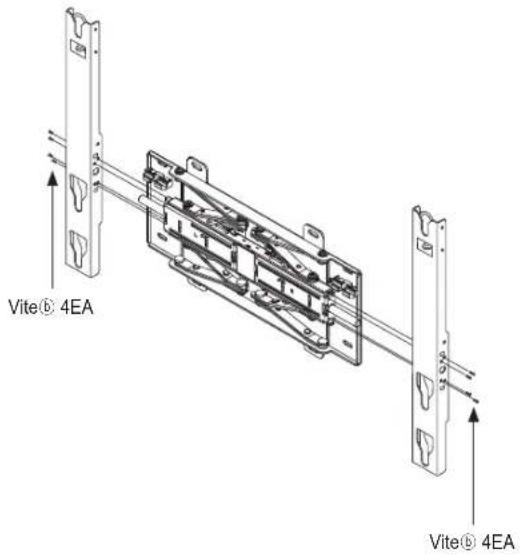
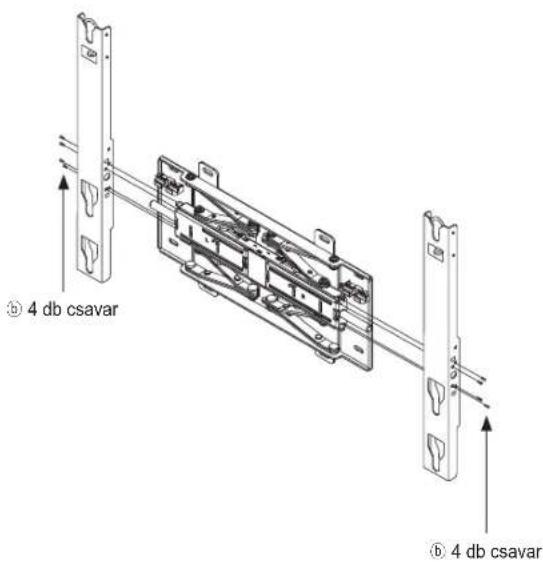
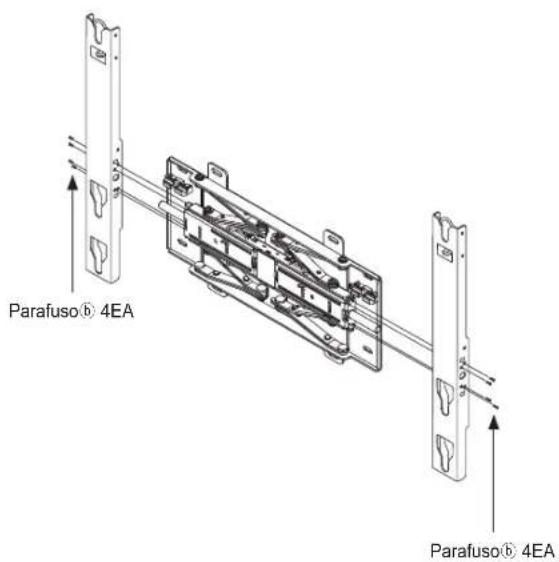
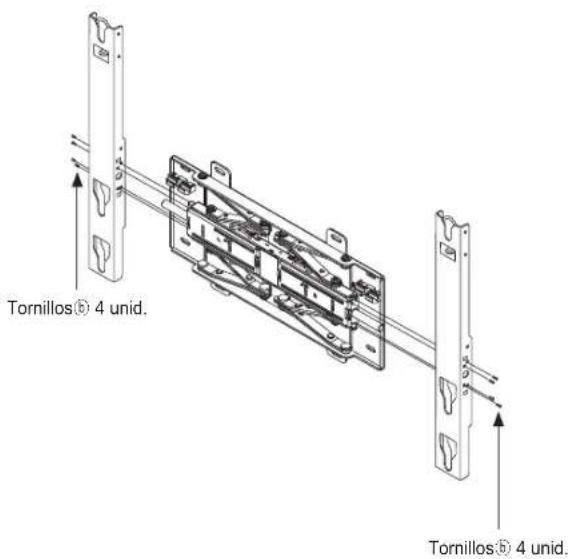
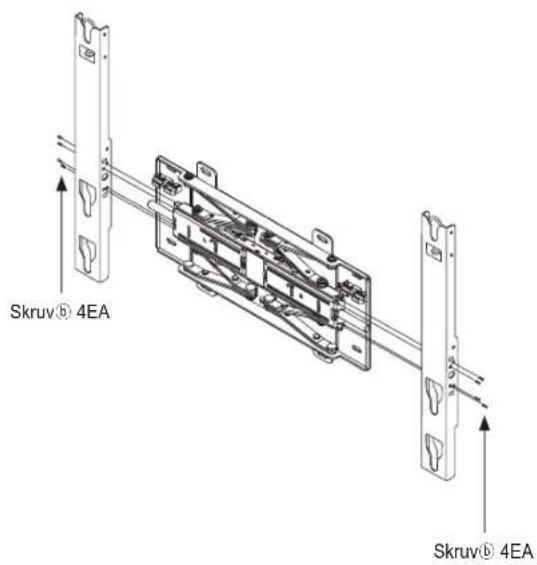
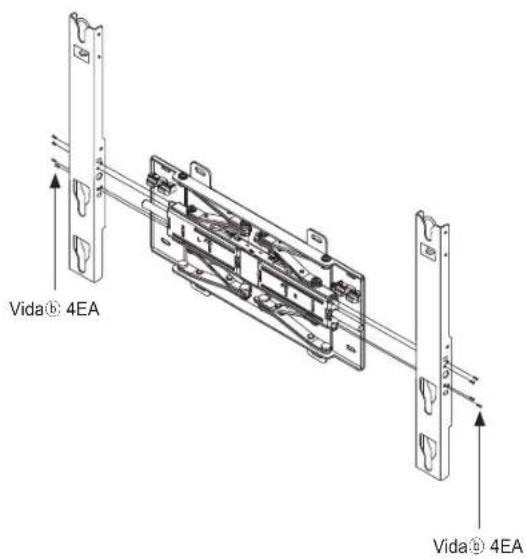
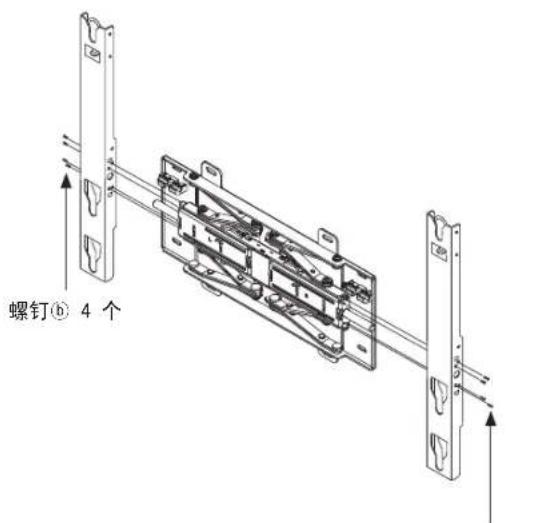
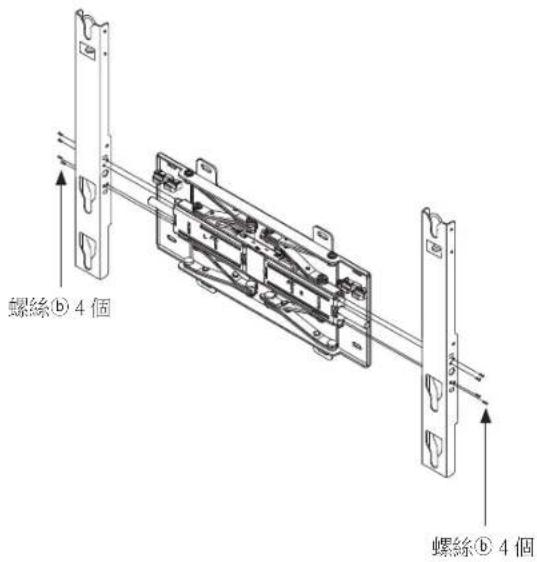
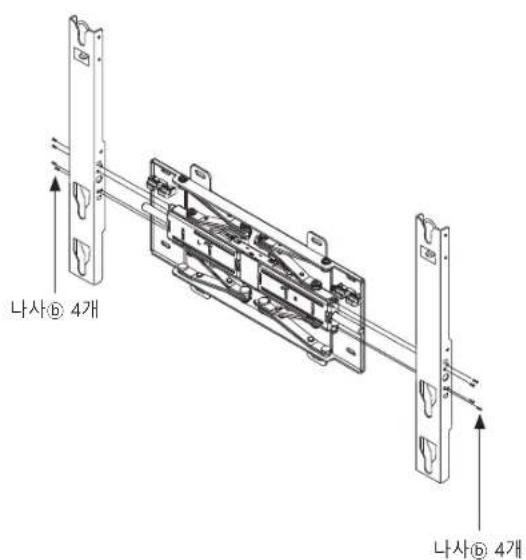
2 Securely fix the set to the wall. Pull the bracket forward and unfold it. Insert the bracket to the assigned area of the angle adjustment bracket and tighten the supplied 8 screws (b). (Same for both left and right side)
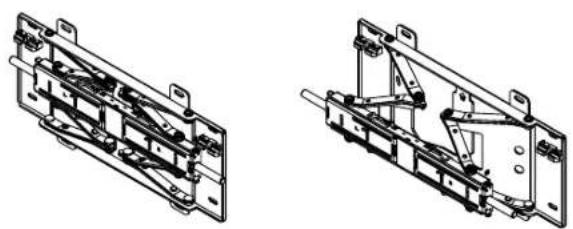
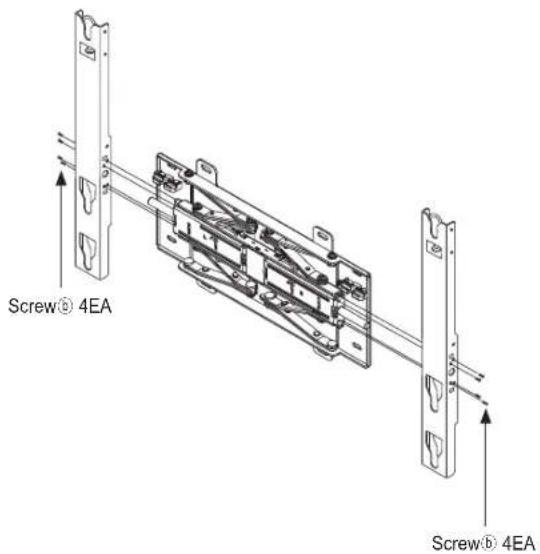
Technical line drawings of mechanical components, no text or symbols present

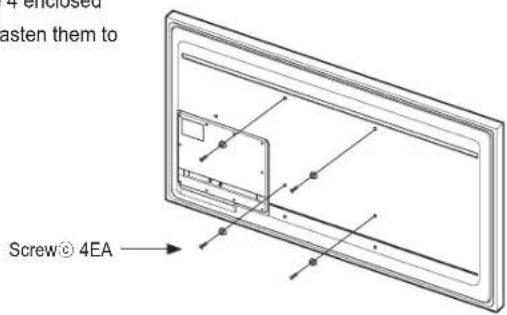
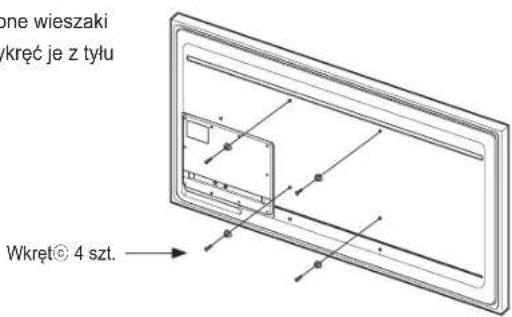
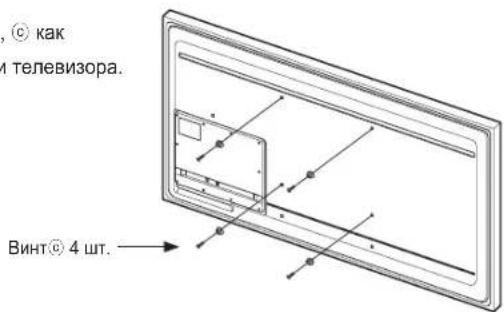
Screw® 4EA, Screw® 4EA

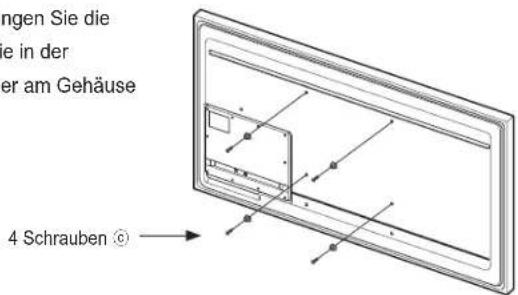
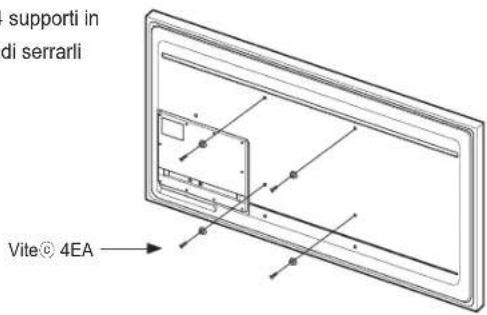
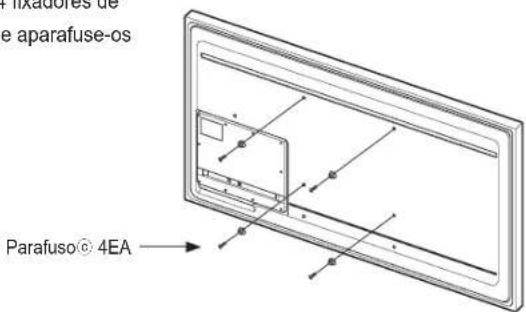
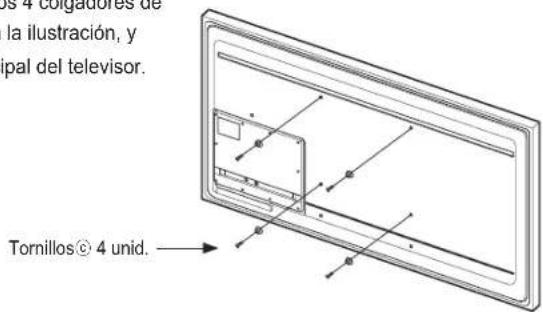
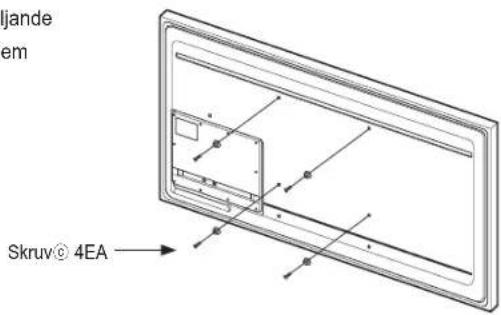
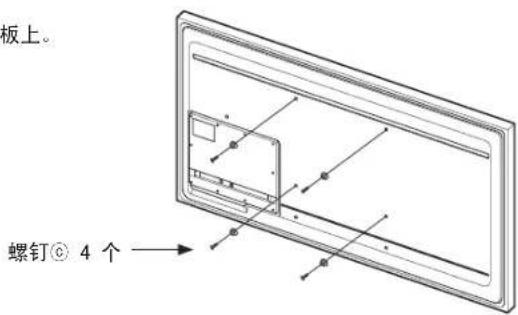
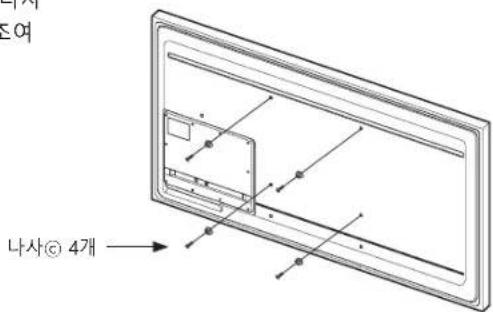
3 Remove the screws from the main body of the TV, assemble the 4 enclosed plastic hangers and screws © as shown by the figure and firmly fasten them to the back of the main body of the TV.

graph LR A["Start"] --> B["Arrow to Top"] B --> C["Arrow to Bottom"] C --> D["Arrow to Right"]

4 enclosed, fasten them to Screw© 4EA

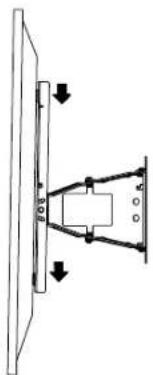
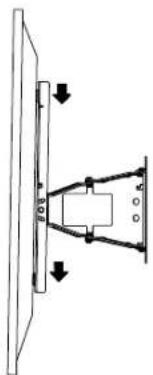
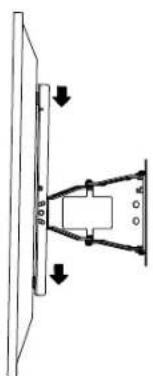
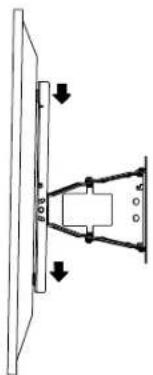
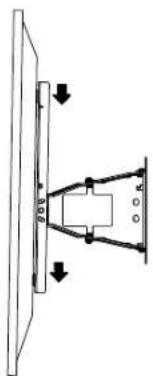
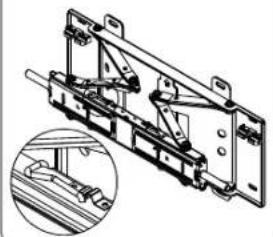
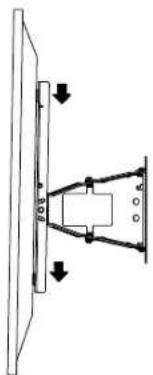
Mount the product on the wall bracket. Be sure to check on the left and right side to see if it is properly fixed. Be careful when installing the product or adjusting the angle as fingers can be caught in the holes. Be sure the wall bracket is securely fixed to the wall. Falling down the product may cause physical damage.

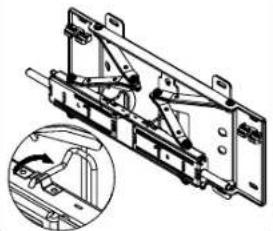
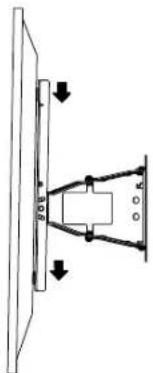
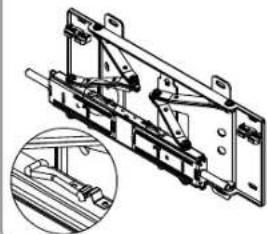
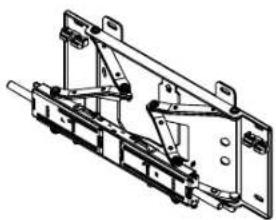
4 Pull the wall bracket fixing part forward. Two people are required to install the product on the assigned area of the wall bracket.
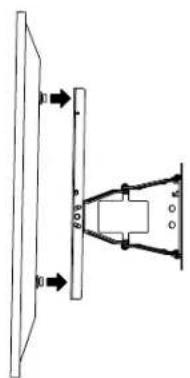
Pure diagram of a mechanical or electrical component with arrows indicating direction, no text or symbols present

Simple line drawing of a mechanical assembly with arrows indicating direction (no text or symbols)

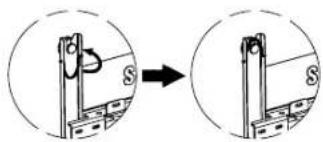
Diagram showing a mechanical assembly with two views of a vertical rod and a curved arrow indicating rotation (no text or symbols).

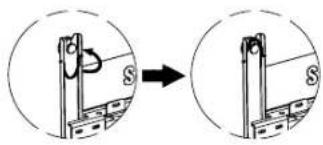
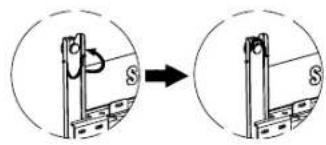
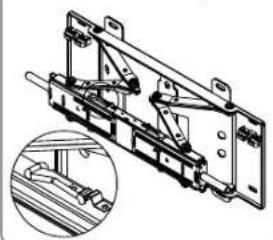
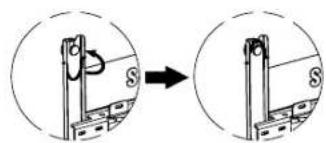
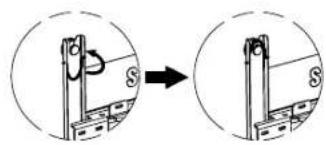
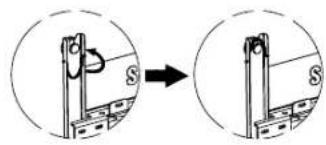
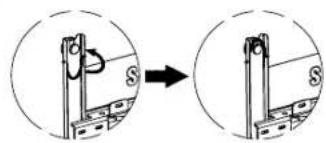
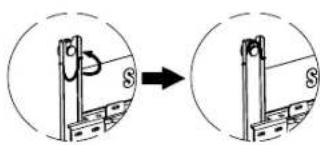
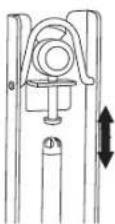
⚠️ Install the TV set to the wall bracket and rotate the 2 safety pins on the upper part to fix.

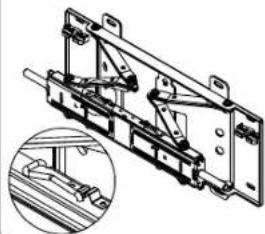
▲ You can keep the TV level using the height leveler.
SAMSUNG WMN4277TT - How to Tighten Anchors or Screws - 9

[Slim, Normal TV] [Ultra-Slim Only]Technical line drawing of a mechanical assembly with an inset showing a close-up of a component (no text or symbols present).

Technical line drawing of a mechanical assembly with a magnified inset showing a bracket detail (no text or symbols).

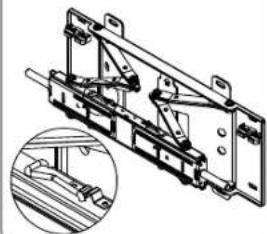
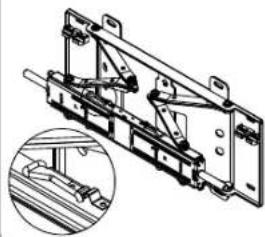
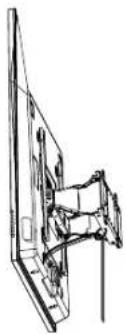
5 For managing the power cord and other cables for peripheral equipments, bundle the wires by using the supplied wire fixing tool. Be sure the wires are not unbundled or came off when rotating or operating.

* Insert the cables and pull the angle adjustment bracket forward. Arrange the wires by using the hole to avoid the interference with wires when rotating the set. Check the operation 2 \~ 3 times and fix the wall molding if it works properly.
Line drawing of a person standing beside a computer monitor (no text or symbols).

SAMSUNG WMN4277TT - How to Tighten Anchors or Screws - 13

Wall Bracket Angle Adjustment

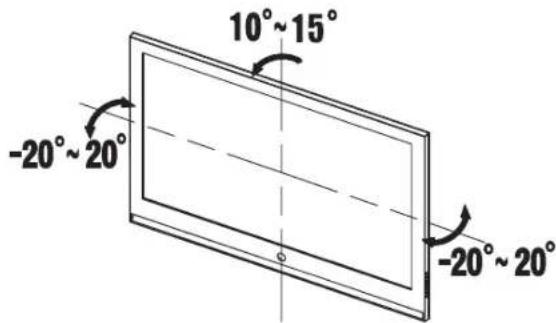
* The smooth moving mechanism is applied to this product to move the product smoothly for convenience. * Adjust the installation angle and then stick the TV close to the wall.
10°~15° -20°~20° -20°~20°

Do not adjust the angle with force. The product can be damaged if it is too close to touch the wall.

Hold the left and right side of the product when you want to adjust the left and right angle.

Hold the top center to adjust the down angle.

* You can adjust the angle to left, and right side between -20° 20° , to down side to 10° 15° .

The adjustable angle range may be vary depending on the model.

SAMSUNG WMN4277TT - Wall Bracket Angle Adjustment - 2

Product Specifications

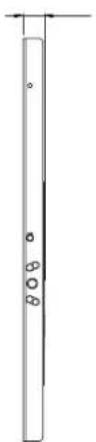
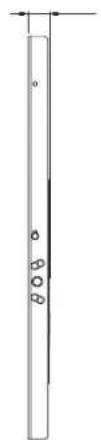
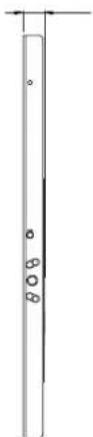
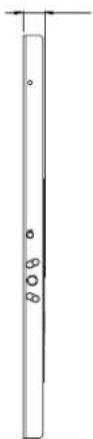
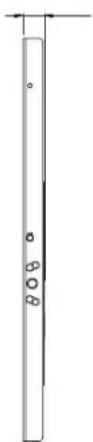
465 400 346 394 247 8 135 172 212 400 442

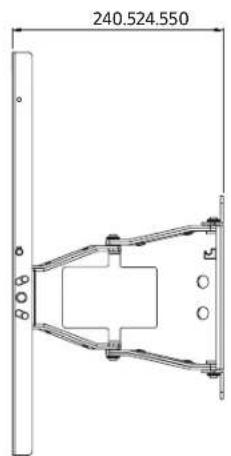
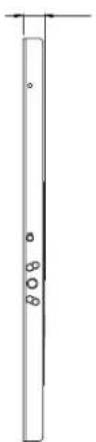
240.524.550

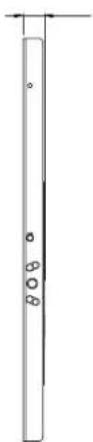
Pure technical line drawing of a vertical cylindrical component with four circular holes, no text or symbols present.

SAMSUNG WMN4277TT - Product Specifications - 4

SAMSUNG WMN4277TT - Product Specifications - 5

Product Standards

Width (mm) 465
Height (mm) 442
Dept (mm) 24.5
Weight (Kg) 5.5
Bracket VESA Standard 400X 300, 400 X 400

Information in this document is subject to change without notice.

SAMSUNG WMN4277TT - Product Standards - 1

Components

SAMSUNG WMN4277TT - Components - 1

Wall mount installation

Four technical diagrams showing different screw and thread assembly states (no text or labels).

Technical line drawing of a mechanical assembly with brackets and mounting holes (no text or symbols).

Vis® 4EA Vis® 4EA

240.524.550

Pure technical line drawing of a vertical cylindrical component with four circular holes, no text or symbols present.

SAMSUNG WMN4277TT - Wall mount installation - 6

SAMSUNG WMN4277TT - Wall mount installation - 7

Product standards

ComponentsIllustration of two people: one reading a book and the other holding a phone to a Samsung (no text or symbols present).

Technical line drawing of a mechanical assembly with brackets and mounting holes (no text or symbols).

graph LR A["Start"] --> B["Arrow to Top"] B --> C["Arrow to Bottom"] C --> D["Arrow to Left"]

Mechanical assembly diagram showing a bracket with internal components and a magnified inset of a mechanical component (no text or symbols).

Technical line drawing of a mechanical frame assembly (no text or symbols).

SAMSUNG WMN4277TT - Product standards - 6

Components

Five technical diagrams showing different screw and drill bit configurations (no text or labels).

Technical line drawing of a mechanical assembly with brackets and mounting holes (no text or symbols).

Vite® 4EA Vite® 4EA

supporti in di serrarli Vite® 4EA

Simple line drawing of a mechanical assembly with arrows indicating direction (no text or symbols).

Diagram showing a mechanical assembly or mounting process with labeled components and directional arrow.

Technical line drawing of a mechanical assembly with mounting brackets and a magnified inset showing internal components (no text or symbols).

240.524.550

Technical line drawing of a mechanical frame assembly (no text or symbols).

SAMSUNG WMN4277TT - Components - 10

Components

1 Left: 1 Right: 1
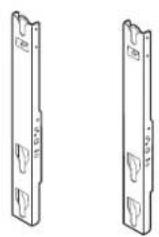
Illustration of two people: one reading a book and the other holding a phone to a Samsung (no text or symbols present).

Technical line drawing of a mechanical assembly with brackets and mounting feet (no text or symbols).

Pure mechanical diagram showing a lever and pivot mechanism without any text, numbers, or symbols.

Pure mechanical diagram showing a lever mechanism with arrows indicating direction (no text or symbols).

Diagram showing a mechanical assembly with two views of a vertical structure, one with a circular arrow indicating rotation (no text or symbols present).

240.524.550

Pure technical line drawing of a vertical cylindrical component with four circular holes, no text or symbols present.

SAMSUNG WMN4277TT - Components - 8

SAMSUNG WMN4277TT - Components - 9

Product standards

SAMSUNG WMN4277TT - Product standards - 1

Components

1 Left: 1 Right: 1
BracketIllustration of two people: one reading a book and the other talking on a phone with an 'AS' cap (no text or symbols in the image).

Technical line drawing of a mechanical assembly with brackets and mounting feet (no text or symbols).

graph LR A["Initial State"] --> B["Arrow to Top"] B --> C["Arrow to Bottom"] C --> D["Arrow to Right"]

Mechanical assembly diagram showing a bracket with internal components and a magnified inset of a tool (no text or symbols).

Technical line drawing of a mechanical assembly with an inset close-up showing a component detail (no text or symbols).

240.524.550

Pure vertical line diagram with three circular markers and a small circle, no text or symbols present.

SAMSUNG WMN4277TT - Components - 8

SAMSUNG WMN4277TT - Components - 9

Product parameters

SAMSUNG WMN4277TT - Product parameters - 1

Components

Technical line drawing of a mechanical assembly with brackets and mounting feet (no text or symbols).

Parafuso® 4EA Parafuso® 4EA

fixadores de e aparafuse-os Parafuso® 4EA

Diagram showing a mechanical or structural assembly with labeled components and directional arrows indicating motion or force.

Diagram showing a mechanical assembly with two views of a bracket, one rotated to form a wire (no text or symbols present)

Mechanical assembly diagram showing a bracket with mounting flanges and a close-up inset of a wooden frame (no text or symbols)

240.524.550 O O

Pure technical line drawing of a vertical cylindrical component with four circular holes, no text or symbols present

SAMSUNG WMN4277TT - Components - 9

SAMSUNG WMN4277TT - Components - 10

Product standards

Largura (mm) 465
Altura (mm) 442
Profundidade (mm) 24.5
Peso (Kg) 5.5
Norma VESA do suporte 400X 300, 400 X 400

SAMSUNG WMN4277TT - Product standards - 1

Components

Technical line drawing of a mechanical assembly with brackets and mounting holes (no text or symbols)

graph LR A["Start"] --> B["Arrow to Top"] B --> C["Arrow to Bottom"] C --> D["Arrow to End"] style A fill:#f9f,stroke:#333 style D fill:#bbf,stroke:#333

Simple line drawing of a mechanical assembly with no text or symbols

Pure mechanical diagram showing a lever and pivot mechanism without any text or symbols

Diagram showing a mechanical assembly with labeled components and a directional arrow, likely illustrating a process or assembly.

Technical illustration of a mechanical assembly with a magnified inset showing internal components (no text or symbols).

240.524.550

SAMSUNG WMN4277TT - Components - 8

Product dimensions

SAMSUNG WMN4277TT - Product dimensions - 1

Components

Min. 30 mm MDF, FW Cara pared Min. 10 mm MDF, FW

Cemonlo Min. 30 mm Min. 10 mm MDF, PW Cara pared

Four-panel diagram showing different types of screw and nut components, no text or symbols present.

Technical line drawing of a mechanical assembly with brackets and mounting feet (no text or symbols).

Tornillos® 4 unid. Tornillos® 4 unid.

Technical line drawing of a mechanical assembly with an inset showing a close-up of a component (no text or symbols present).

Technical line drawing of a mechanical assembly with no visible text or symbols.

240.524.550

Technical line drawing of a vertical cylindrical component with four circular holes, no text or symbols present.

SAMSUNG WMN4277TT - Components - 10

Technical line drawing of a metal frame structure with mounting holes and mounting brackets (no text or symbols).

Components④ ② ① ③ ⑤ Screw @ 5EA ⑥ ⑦ Screw @ 2EA

Technical line drawing of a mechanical assembly with brackets and mounting holes (no text or symbols).

Screw® 4EA Screw® 4EA

Pure diagram of a mechanical or electrical component with arrows indicating direction, no text or symbols present.

Simple line drawing of a mechanical assembly with arrows indicating direction (no text or symbols).

Diagram showing a mechanical assembly with two views of a vertical structure, one with a circular arrow indicating rotation (no text or symbols present).

Technical line drawing of a mechanical assembly with a magnified inset showing internal components (no text or symbols).

240.524.550

Pure technical line drawing of a vertical cylindrical component with four circular holes, no text or symbols present

SAMSUNG WMN4277TT - Components - 21

SAMSUNG WMN4277TT - Components - 22

Product standards

SAMSUNG WMN4277TT - Product standards - 1

Components

Technical line drawing of a mechanical assembly with brackets and mounting feet (no text or symbols)

Vida® 4EA Vida® 4EA

Simple line drawing of a mechanical component with arrows indicating direction (no text or symbols)

Diagram showing a mechanical assembly with two views of a bracket, one with a rotating arrow and the other with a straight rod (no text or symbols)

Technical illustration of a mechanical assembly with a magnified inset showing internal components (no text or symbols)

240.524.550

Pure technical line drawing of a vertical cylindrical component with four circular holes, no text or symbols present.

SAMSUNG WMN4277TT - Components - 8

SAMSUNG WMN4277TT - Components - 9

Product standards

SAMSUNG WMN4277TT - Product standards - 1

Components

* Only use the mounting bracket provided with the product.

Angle adjustment bracket BracketPure electrical circuit lines without any symbols.
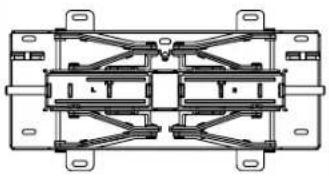
1 left:

SAMSUNG WMN4277TT - Components - 2

1 right: 1

AccessoriesSAMSUNG WMN4277TT - Components - 3

Plastic hangers: 4

螺钉◎:4Washers:4
M8×L37 1T
SAMSUNG WMN4277TT - Components - 4SAMSUNG WMN4277TT - Components - 5

SAMSUNG WMN4277TT - Components - 6

SAMSUNG WMN4277TT - Components - 7

SAMSUNG WMN4277TT - Components - 8

SAMSUNG WMN4277TT - Components - 9

Screws ①: 8

Anchor bolts: 8

Screws ⑥: 8

Cable ties: 1

SAMSUNG WMN4277TT - Components - 10

Safety instructions

Technical line drawing of a mechanical assembly with brackets and mounting holes (no text or symbols).

Screws ⑥, 4 pieces.

Screws ⑥ 4 pcs

Technical line drawing of a mechanical assembly with an inset showing a close-up of a component (no text or symbols present).

Technical line drawing of a mechanical assembly with an inset close-up showing a bracket detail (no text or symbols).

SAMSUNG WMN4277TT - Safety instructions - 5

Wall mount bracket angle adjustment

ComponentsSAMSUNG WMN4277TT - Wall mount bracket angle adjustment - 1

* Use only the provided components to install the bracket.SAMSUNG WMN4277TT - Wall mount bracket angle adjustment - 2
MDF = Medium Density Fiberboard PW = Plywood
Four-panel diagram showing different types of screw and drill bit configurations (no text or labels).

Drill holes in the wall using a 6X50 drill.

Clean the holes.

Insert the provided fixing bolts into the holes.
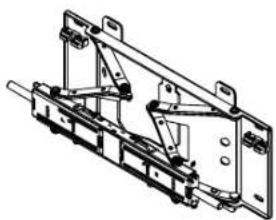
Technical line drawing of a mechanical assembly with brackets and mounting feet (no text or symbols)

Screw ①: 4 pieces Screw ②: 4 pieces

SAMSUNG WMN4277TT - Wall mount bracket angle adjustment - 6

Wall mount bracket angle adjustment

SAMSUNG WMN4277TT - Wall mount bracket angle adjustment - 1

Product standards

30 mm MDF, PW (diameter) 10 mm MDF, PW (diameter)

SAMSUNG WMN4277TT - Product standards - 2

NOTE MDF = Medium Density Fiberboard PW = Plywood
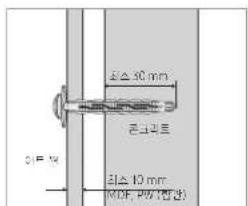
30 mm 50 mm 10 mm MΩ, 100 (mm)

Screw ③: 5 pieces Screw ④: 2 pieces

Drill holes with a 6X50 drill bit.

Insert the provided anchors into the holes.
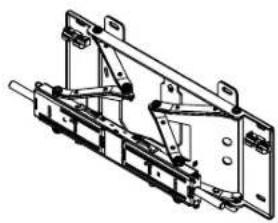
Technical line drawing of a mechanical assembly with brackets and mounting holes (no text or symbols)

Screw ⑥: 4 pieces Screw ⑥: 4 pieces

Screw ©: 4 pieces

Diagram showing a mechanical assembly or lifting process with labeled components and directional arrow

SAMSUNG WMN4277TT - Product standards - 9

Components

SAMSUNG WMN4277TT - Components - 1

Product specifications

Manual assistant
Powered by Anthropic
Waiting for your message
Product information

Brand : SAMSUNG

Model : WMN4277TT

Category : Wall mount