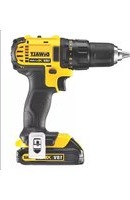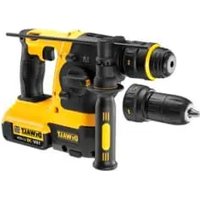
DCH214 - Drill DEWALT - Free user manual and instructions
Find the device manual for free DCH214 DEWALT in PDF.


User questions about DCH214 DEWALT
0 question about this device. Answer the ones you know or ask your own.
Ask a new question about this device
Download the instructions for your Drill in PDF format for free! Find your manual DCH214 - DEWALT and take your electronic device back in hand. On this page are published all the documents necessary for the use of your device. DCH214 by DEWALT.
USER MANUAL DCH214 DEWALT
Vibrationsemission sveeri a b
Skrueboring
| a_h= | m/s² | ≤2,5 | ≤2,5 |
| Usikkerhed-K | m/s² | 1,5 | 1,5 |
You have chosen a DEWALT tool. Years of experience, thorough product development and innovation make DEWALT one of the most reliable partners for professional power tool users.
Technical Data
| DCH213 | DCH214 | |||
| Voltage V | 10 | 18 | ||
| Type | 1 | 1 | ||
| No-load speed min | -1 | 0-1100 | 0-1100 | |
| Impact rate | min-1 | 0-4200 | 0-4200 | |
| Impact energy (EPTA 05/2009) | J | 2 | 2 | |
| Maximum drilling rangein steel/wood/concrete | mm | 13/26/20 | 13/26/20 | |
| Chuck | SDS Plus® | SDS Plus® | ||
| Collar diameter mm | 54 | 54 | ||
| Battery Type | L-Ion | L-Ion | ||
| Weight (without battery pack) | kg | 2.3 | 2.5 | |
| L_s的声音 pressure) | dB(A) | 86 | 86 | |
| K_s的声音 pressure uncertainty) | dB(A) | 3 | 3 | |
| L_m的声音 power) | dB(A) | 97 | 97 | |
| K_m的声音 power uncertainty) | dB(A) | 2.9 | 2.9 | |
Vibration total values (triax vector sum) determined according to EN 60745:
| Vibration emission value ah | |||
| Drilling into concrete | |||
| ah,HD= | m/s2 | 6.9 | 6.9 |
| Uncertainty K= | m/s2 | 1.5 | 1.5 |
| Vibration emission value ah | |||
| Chiselling | |||
| ah,Cheq= | m/s2 | 5.3 | 5.3 |
| Uncertainty K= | m/s2 | 1.5 | 1.5 |
| Vibration emission value ah | |||
| Drilling Into metal | |||
| ah,D= | m/s2 | ≤ 2.5 | ≤ 2.5 |
| Uncertainty K= | m/s2 | 1.5 | 1.5 |
| Vibration emission value ah | |||
| Screwdriving | |||
| ah= | m/s2 | ≤ 2.5 | ≤ 2.5 |
| Uncertainty K= | m/s2 | 1.5 | 1.5 |
The vibration emission level given in this information sheet has been measured in accordance with a standardised test given in EN 60745 and may be used to compare one tool with another. It may be used for a preliminary assessment of exposure.

WARNING: The declared vibration emission level represents the main applications of the tool. However if the tool is used for different applications, with different accessories or poorly maintained, the vibration emission may differ. This may significantly increase the exposure level over the total working period.
An estimation of the level of exposure to vibration should also take into account the times when the tool is switched off or when it is running but not actually doing the job. This may significantly reduce the exposure level over the total working period.
Identify additional safety measures to protect the operator from the effects of vibration such as: maintain the tool and the accessories, keep the hands warm, organisation of work patterns.
| Battery pack | DCB180 | DCB181 | |
| Battery type | Li- lon | Li- lon | |
| Voltage | Vcc | 18 | 18 |
| Capacity | Ah | 3.0 | 1.5 |
| Weight | kg | 0.64 | 0.35 |
| Charger | DCB105 | ||
| Mains voltage | Vsc | 230 V | |
| Battery type | Li-Ion | ||
| Approx. charging time | min | 30 | 60 |
| (1.5 Ah battery packs) | (3.0 Ah battery packs) | ||
| Weight | kg | 0.49 | |
| Fuses: | |||
| Europe | 230 V tools | 10 Amperes, mains | |
| U.K. & Ireland | 230 V tools | 3 Amperes, in plugs | |
Definitions: Safety Guidelines
The definitions below describe the level of severity for each signal word. Please read the manual and pay attention to these symbols.

DANGER: Indicates an imminently hazardous situation which, if not avoided, will result in death or serious injury.

WARNING: Indicates a potential hazardous situation which, if not avoided, could result in death or serious injury.

CAUTION: Indicates a potentially hazardous situation which, if not avoided, may result in minor or moderate injury.
NOTICE: Indicates a practice not related to personal injury which, if not avoided, may result in property damage.

Dendrites
risk of fire.
EC-Declaration of Conformity
MACHINERY DIRECTIVE

DCH213, DCH214
DEWALT declares that these products described under Technical Data are in compliance with: 2006/42/EC, EN 60745-1, EN 60745-2-6.
These products also comply with Directive 2004/108/EC. For more information, please contact DEWALT at the following address or refer to the back of the manual.
The undersigned is responsible for compilation of the technical file and makes this declaration on behalf of DEWALT.
Horst Grossmann
Vice President Engineering and Product Development
D-65510, Idstein, Germany
02.02.2011

WARNING: To reduce the risk of injury, read the instruction manual.
General Power Tool SafetyWarnings

WARNING! Read all safety warnings and all instructions. Failure to follow the warnings and instructions may result in electric shock, fire and/or serious injury.
SAVE ALL WARNINGS AND INSTRUCTIONS FOR FUTURE REFERENCE
The term "power tool" in the warnings refers to your mains-operated (corded) power tool or battery-operated (cordless) power tool.
1) WORK AREA SAFETY
a) Keep work area clean and well lit. Cluttered or dark areas invite accidents.
b) Do not operate power tools in explosive atmospheres, such as in the presence of flammable liquids, gases or dust. Power tools create sparks which may ignite the dust or fumes.
c) Keep children and bystanders away while operating a power tool. Distractions can cause you to lose control.
2) ELECTRICAL SAFETY
a) Power tool plugs must match the outlet. Never modify the plug in any way. Do not use any adapter plugs with earthed (grounded) power tools. Unmodified plugs and matching outlets will reduce risk of electric shock.
b) Avoid body contact with earthed or grounded surfaces such as pipes, radiators, ranges and refrigerators. There is an increased risk of electric shock if your body is earthed or grounded.
c) Do not expose power tools to rain or wet conditions. Water entering a power tool will increase the risk of electric shock.
d) Do not abuse the cord. Never use the cord for carrying, pulling or unplugging the power tool. Keep cord away from heat, oil, sharp edges or moving parts. Damaged or entangled cords increase the risk of electric shock.
e) When operating a power tool outdoors, use an extension cord suitable for outdoor use. Use of a cord suitable for outdoor use reduces the risk of electric shock.
f) If operating a power tool in a damp location is unavoidable, use a residual current device (RCD) protected supply. Use of an RCD reduces the risk of electric shock.
ENGLISH
3) PERSONAL SAFETY
a) Stay alert, watch what you are doing and use common sense when operating a power tool. Do not use a power tool while you are tired or under the influence of drugs, alcohol or medication. A moment of inattention while operating power tools may result in serious personal injury.
b) Use personal protective equipment. Always wear eye protection. Protective equipment such as dust mask, non-skid safety shoes, hard hat, or hearing protection used for appropriate conditions will reduce personal injuries.
c) Prevent unintentional starting. Ensure the switch is in the off position before connecting to power source and/or battery pack, picking up or carrying the tool. Carrying power tools with your finger on the switch or energising power tools that have the switch on invites accidents.
d) Remove any adjusting key or wrench before turning the power tool on. A wrench or a key left attached to a rotating part of the power tool may result in personal injury.
e) Do not overreach. Keep proper footing and balance at all times. This enables better control of the power tool in unexpected situations.
f) Dress properly. Do not wear loose clothing or jewellery. Keep your hair, clothing and gloves away from moving parts. Loose clothes, jewellery or long hair can be caught in moving parts.
g) If devices are provided for the connection of dust extraction and collection facilities, ensure these are connected and properly used. Use of dust collection can reduce dust-related hazards.
4) POWER TOOL USE AND CARE
a) Do not force the power tool. Use the correct power tool for your application. The correct power tool will do the job better and safer at the rate for which it was designed.
b) Do not use the power tool if the switch does not turn it on and off. Any power tool that cannot be controlled with the switch is dangerous and must be repaired.
c) Disconnect the plug from the power source and/or the battery pack from the power tool before making any adjustments, changing accessories, or storing power tools. Such preventive safety measures reduce the risk of starting the power tool accidentally.
d) Store idle power tools out of the reach of children and do not allow persons unfamiliar with the power tool or these instructions to operate the power tool. Power tools are dangerous in the hands of untrained users.
e) Maintain power tools. Check for misalignment or binding of moving parts, breakage of parts and any other condition that may affect the power tool's operation If damaged, have the power tool repaired before use. Many accidents are caused by poorly maintained power tools.
) Keep cutting tools sharp and clean. Properly maintained cutting tools with sharp cutting edges are less likely to bind and are easier to control.
g) Use the power tool, accessories and tool bits etc., in accordance with these instructions taking into account the working conditions and the work to be performed. Use of the power tool for operations different from those intended could result in a hazardous situation.
5) BATTERY TOOL USE AND CARE
a) Recharge only with the charger specified by the manufacturer. A charger that is suitable for one type of battery pack may create a risk of fire when used with another battery pack.
b) Use power tools only with specifically designated battery packs. Use of any other battery packs may create a risk of injury and fire.
c) When battery pack is not in use, keep it away from other metal objects like paper clips, coins, keys, nails, screws or other small metal objects that can make a connection from one terminal to another. Shorting the battery terminals together may cause burns or a fire.
Under abusive conditions, liquid may be ejected from the battery, avoid contact. If contact accidentally occurs, flush with water. If liquid contacts eyes, additionally seek medical help. Liquid ejected from the battery may cause imitation or burns.
6) SERVICE
a) Have your power tool serviced by a qualified repair person using only identical replacement parts. This will ensure that the safety of the power tool is maintained.
Additional Safety Instructions for Rotary Hammers
- Wear ear protectors. Exposure to noise can cause hearing loss.
Use auxiliary handles supplied with the tool. Loss of control can cause personal injury. - Hold power tools by insulated gripping surfaces when performing an operation where the cutting tool may contact hidden wiring. Contact with a "live" wire will make exposed metal parts of the tool "live" and shock the operator.
- Use clamps or other practical way to secure and support the workpiece to a stable platform. Holding the work by hand or against your body is unstable and may lead to loss of control.
- Wear safety goggles or other eye protection. Hammering operations cause chips to fly. Flying particles can cause permanent eye damage. Wear a dust mask or respirator for applications that generate dust. Ear protection may be required for most applications.
- Keep a firm grip on the tool at all times. Do not attempt to operate this tool without holding it with both hands. It is recommended that the side handle be used at all times. Operating this tool with one hand will result in loss of control. Breaking through or encountering hard materials such as re-bar may be hazardous as well. Tighten the side handle securely before use.
- Do not operate this tool for long periods of time. Vibration caused by hammer action may be harmful to your hands and arms. Use gloves to provide extra cushion and limit exposure by taking frequent rest periods.
- Do not recondition bits yourself. Chisel reconditioning should be done by an authorized specialist. Improperly reconditioned chisels could cause injury.
- Wear gloves when operating tool or changing bits. Accessible metal parts on the tool and bits may get extremely hot during operation. Small bits of broken material may damage bare hands.
- Never lay the tool down until the bit has come to a complete stop. Moving bits could cause injury.
-
Do not strike jammed bits with a hammer to dislodge them. Fragments of metal or material chips could dislodge and cause injury.
-
Slightly worn chisels can be resharpened by grinding.
- Keep the power cord away from the rotating bit. Do not wrap the cord around any part of your body. An electric cord wrapped around a spinning bit may cause personal injury and loss of control.
Residual Risks
The following risks are inherent to the use of rotary hammers:
Injuries caused by touching the rotating parts or hot parts of the tool.
In spite of the application of the relevant safety regulations and the implementation of safety devices, certain residual risks cannot be avoided. These are:
Impairment of hearing.
- Risk of squeezing fingers when changing the accessory.
Health hazards caused by breathing dust developed when working in concrete and/or masonry.
Markings on Tool
The following pictograms are shown on the tool:

Read instruction manual before use.

Wear ear protection.

Wear eye protection.
DATE CODE POSITION
The date code, which also includes the year of manufacture, is printed into the housing surface that forms the mounting joint between tool and battery.
Example:
2011 XX XX
Year of Manufacture
Important Safety Instructions for All Battery Chargers
SAVE THESE INSTRUCTIONS: This manual contains important safety and operating instrc tions for the DCB105 battery charger.
Before using the charger, reed all instructions and cautionary markings on charger, battery pack and product using the battery pack.
ENGLISH

WARNING: Shock hazard. Do not allow any liquid to get inside charger. Electric shock may result.

N: Burn hazard. To reduce the risk of injury, charge only DEWALT rechargeable battery packs. Other types of batteries may overheat and burst resulting in personal injury and property damage.

CAUTION: Children should be supervised to ensure that they do not play with the appliance.
NOTICE: Under certain conditions, with the charger plugged in to the power supply, the exposed charging contacts inside the charger can be shorted by foreign material. Foreign materials of a conductive nature such as, but not limited to, steel wool, aluminum foil or any buildup of metallic particles should be kept away from charger cavities. Always unplug the charger from the power supply when there is no battery pack in the cavity. Unplug charger before attempting to clean.
DO NOT attempt to charge the battery pack with any chargers other than the ones in this manual. The charger and battery pack are specifically designed to work together.
These chargers are not intended for any uses other than charging DEWALT rechargeable batteries. Any other uses may result in risk of fire, electric shock or electrocution.
- Do not expose charger to rain or snow.
Pull by plug rather than cord when disconnecting charger. This will reduce risk of damage to electric plug and cord.
Make sure that cord is located so that it will not be stepped on, tripped over or otherwise subjected to damage or stress.
- Do not use an extension cord unless it is absolutely necessary. Use of improper extension cord could result in risk of fire, electric shock or electrocution.
- When operating a charger outdoors, always provide a dry location and use an extension cord suitable for outdoor use. Use of a cord suitable for outdoor use reduces the risk of electric shock.
- Do not block the ventilation slots on the charger. The ventilation slots are located
on the top and sides of the charger. Place the charger in a position away from any heat source.
- Do not operate charger with damaged cord or plug - have them replaced immediately.
- Do not operate charger if it has received a sharp blow, been dropped or otherwise damaged in any way. Take it to an authorised service centre.
- Do not disassemble the charger; take it to an authorised service centre when service or repair is required. Incorrect reassembly may result in a risk of electric shock, electrocution or fire.
- In case of damaged power supply cord the supply cord must be replaced immediately by the manufacturer, its service agent or similar qualified person to prevent any hazard.
- Disconnect the charger from the outlet before attempting any cleaning. This will reduce the risk of electric shock. Removing the battery pack will not reduce this risk.
NEVER attempt to connect 2 chargers together. - The charger is designed to operate on standard 230 V household electrical power. Do not attempt to use it on any other voltage. This does not apply to the vehicular charger.
SAVE THESE INSTRUCTIONS
Chargers
The DCB105 charger accepts 10.8 V, 14.4 V and 18 V Li-Ion (DCB121, DCB140, DCB141, DCB180 and DCB181) battery packs.
This charger requires no adjustment and is designed to be as easy as possible to operate.
Charging Procedure (fi g. 4)
- Plug the charger into an appropriate 230 V outlet before inserting the battery pack.
- Insert the battery pack (f) into the charger, making sure the pack is fully seated in the charger. The red (charging) light will blink continuously indicating that the charging process has started.
- The completion of charge will be indicated by the red light remaining ON continuously. The pack is fully charged and may be used at this time or left in the charger.
NOTE: To ensure maximum performance and life of Li-ion batteries, charge the battery pack fully before first use.
Charging Process
Refer to the table below for the state of charge of the battery pack.
State of charge

fully charged

problem pack or charger

em powerline 1
This charger will not charge a faulty battery pack. The charger will indicate faulty battery by refusing to light or by displaying problem pack or charger blink pattern.
NOTE: This could also mean a problem with a charger.
If the charger indicates a problem, take the charger and battery pack to be tested at an authorised service centre.
Hot/Cold Pack Delay
When the charger detects a battery that is too hot or too cold, it automatically starts a hot/cold pack delay, suspending charging until the battery has reached an appropriate temperature. The charger then automatically switches to the pack charging mode. This feature ensures maximum battery life.
XR Li-Ion tools are designed with an Electronic Protection System that will protect the battery against overloading, overheating or deep discharge.
The tool will automatically turn off if the Electronic Protection System engages. If this occurs, place the Li-ion battery on the charger until it is fully charged.
A cold battery pack will charge at about half the rate of a warm battery pack. The battery pack will charge at that slower rate throughout the entire charging cycle and will not return to maximum charge rate even if the battery warms.
Important Safety Instructions for All Battery Packs
When ordering replacement battery packs, be sure to include the catalog number and voltage.
The battery pack is not fully charged out of the carton. Before using the battery pack and charger, read the safety instructions below and then follow the charging procedures outlined.
READ ALL INSTRUCTIONS
- Do not charge or use the battery pack in explosive atmospheres, such as in the presence of flammable liquids, gases or dust. Inserting or removing the battery pack from the charger may ignite the dust or fumes.
- Never force the battery pack into charger. Do not modify the battery pack in any way to fit into a non-compatible charger as battery pack may rupture causing serious personal injury.
- Charge the battery packs only in designated DEWALT chargers.
DO NOT splash or immerse in water or other liquids. - Do not store or use the tool and battery pack in locations where the temperature may reach or exceed 40^ (105°F) (such as outside sheds or metal buildings in summer).
- For best results, make sure the battery pack is fully charged before use.
WARNING: Never attempt to open the battery pack for any reason. If the battery pack case is cracked or damaged, do not insert it into the charger. Do not crush, drop or damage battery pack. Do not use a battery pack or charger that has received a sharp blow, been dropped, run over or damaged in any way (e.g., pierced with a nail, hit with a hammer, stepped on). Electric shock or electrocution may result. Damaged battery packs should be returned to the service centre for recycling.
CAUTION: When not in use, place tool on its side on a stable surface where it will not cause a tripping or falling hazard. Some tools with large battery packs will stand upright on the battery pack but may be easily knocked over.
SPECIFIC SAFETY INSTRUCTIONS FOR LITHIUM ION (Li-Ion)
- Do not incinerate the battery pack even if it is severely damaged or is completely worn out. The battery pack can explode in a fire. Toxic fumes and materials are created when lithium ion battery packs are burned.
- If battery contents come into contact with the skin, immediately wash the area with mild soap and water. If the battery liquid gets into the eye, rinse water over the open eye for 15 minutes or until irritation ceases. If medical
ENGLISH
attention is needed, the battery electrolyte is composed of a mixture of liquid organic carbonates and lithium salts.
- Contents of opened battery cells may cause respiratory irritation. Provide fresh air. If symptoms persist, seek medical attention.

WARNING: Burn hazard. Battery liquid may be flammable if exposed to spark or flame.
Battery Pack
BATTERY TYPE
The DCH213 and DCH214 operate on 18 volt battery packs.
The DCB180 or DCB181 battery packs may be used. Refer to Technical Data for more information.
Storage Recommendations
- The best storage place is one that is cool and dry away from direct sunlight and excess heat or cold. For optimum battery performance and life, store battery packs at room temperature when not in use.
- For long storage, it is recommended to store a fully charged battery pack in a cool, dry place out of the charger for optimal results.
NOTE: Battery packs should not be stored completely depleted of charge. The battery pack will need to be recharged before use.
Labels on Charger and Battery Pack
In addition to the pictographs used in this manual, the labels on the charger and the battery pack show the following pictographs:

Read instruction manual before use.

Charging.

Fully charged.

Hot/cold pack delay.

Problem pack or charger.

Problem powerline.

Do not probe with conductive objects.

Do not charge damaged battery packs.

Use only with DEWALT battery packs. Others may burst, causing personal injury and damage.

Do not expose to water.

Have defective cords replaced immediately.

Charge only between 4^ and 40^ .

Discard the battery pack with due care for the environment.

Do not incinerate the battery pack.

Charges Li-Ion battery packs.

See Technical Data for charging time.

Only for indoor use.
Package Contents
The package contains:
1 Cordless rotary hammerdrill
1 Side handle
1 Charger
2 Battery packs
1 Kitbox
1 Instruction manual
1 Exploded drawing
NOTE: Battery packs and chargers are not included with N-models.
- Check for damage to the tool, parts or accessories which may have occurred during transport.
Take the time to thoroughly read and understand this manual prior to operation.
Description (fig. 1)

WARNING: Never modify the power tool or any part of it. Damage or personal injury could result.
a. Variable speed switch
b. Forward/reverse button
c. Mode selector
d. Worklight
e. Side handle
f. Battery pack
g. Release button
h. Main handle
i. Drill bit symbol (rotary drilling mode)
j. Hammerdrilling symbol (rotary hammering mode)
k. Hammer symbol (hammering only mode)
I. Chuck
m. Sleeve
INTENDED USE
Your DCH213 and DCH214 cordless rotary hammerdrills have been designed for professional drilling and hammerdrilling applications, as well as screwdriving and chipping applications.
DO NOT use under wet conditions or in presence of flammable liquids or gases.
These hammerdrills are professional power tools.
DO NOT let children come into contact with the tool. Supervision is required when inexperienced operators use this tool.
- This product is not intended for use by persons (including children) suffering from diminished physical, sensory or mental abilities; lack of experience, knowledge or skills unless they are supervised by a person responsible for their safety. Children should never be left alone with this product.
Electrical Safety
The electric motor has been designed for one voltage only. Always check that the battery pack voltage corresponds to the voltage on the rating plate. Also make sure that the voltage of your charger corresponds to that of your mains.

Your DEWALT charger is double insulated in accordance with EN 60335; therefore no earth wire is required.
If the supply cord is damaged, it must be replaced by a specially prepared cord available through the DEWALT service organization.
Mains Plug Replacement (U.K. & Ireland Only)
If a new mains plug needs to be fitted:
- Safely dispose of the old plug.
- Connect the brown lead to the live terminal in the plug.
- Connect the blue lead to the neutral terminal.

WARNING: No connection is to be made to the earth terminal.
Follow the fitting instructions supplied with good quality plugs. Recommended fuse: 3 A.
Using an Extension Cable
An extension cord should not be used unless absolutely necessary. Use an approved extension cable suitable for the power input of your charger (see Technical Data). The minimum conductor size is 1mm^2 ; the maximum length is 30m .
When using a cable reel, always unwind the cable completely.
ASSEMBLY AND ADJUSTMENTS

WARNING: Prior to assembly and adjustment, always remove the battery pack. Always switch off the tool before inserting or removing the battery pack.
WARNING: Use only DEWALT battery packs and chargers.
Inserting and Removing the Battery Pack from the Tool (fi g. 3)

WARNING: To reduce the risk of injury, never depress the battery release button without removing the battery pack. Depressing the battery release button without removing the battery pack can result in the battery pack falling out unexpectedly.
NOTE: For best results, make sure your battery pack is fully charged.
TO INSTALL THE BATTERY PACK INTO THE TOOL HANDLE
- Align the battery pack (f) with the rails inside the tool's handle (fig. 3).
- Slide it into the handle until the battery pack is firmly seated in the tool and ensure that it does not disengage.
TO REMOVE THE BATTERY PACK FROM THE TOOL
- Press the battery release button (g) and firmly pull the battery pack out of the tool handle.
ENGLISH
- Insert battery pack into the charger as described in the charger section of this manual.
Variable Speed Switch (fi g. 1)
To turn the tool on, squeeze the trigger switch (a). To turn the tool off, release the trigger switch. Your tool is equipped with a brake. The chuck will stop as soon as the trigger switch is fully released.
The variable speed trigger switch enables you to select the best speed for a particular application. The farther you squeeze the trigger switch, the faster the tool will operate. For maximum tool life, use variable speed only for starting holes or fasteners.
NOTE: Continuous use in variable speed range is not recommended. It may damage the switch and should be avoided.
Side Handle (fi g. 1)
WARNING: To reduce the risk of personal injury, ALWAYS operate the tool with the side handle properly installed. Failure to do so may result in the side handle slipping during tool operation and subsequent loss of control. Hold tool with both hands to maximize control.
The side handle (e) clamps to the front of the gear case and may be rotated 360^ to permit right- or left-hand use. Side handle must be tightened sufficiently to resist the twisting action of the tool if the accessory binds or stalls. Be sure to grip the side handle at the far end to control the tool during a stall.
To loosen side handle, rotate counterclockwise.
Forward/Reverse Control Button (fi g. 1, 2)
WARNING: Always wait until the motor has come to a complete standstill before changing the direction of rotation.
A forward/reverse control button (b) determines the direction of the tool and also serves as a lock off button.
To select forward rotation, release the trigger switch and depress the for ward/re verse control button on the right side of the tool.
To select reverse, release the trigger switch and depress the forward/reverse control button on the left side of the tool.
The center position of the control button locks the tool in the off position. When changing the position of the control button, be sure the trigger is released.
NOTE: The first time the tool is run after changing the direction of rotation, you may hear a click on start up. This is normal and does not indicate a problem.
Worklight (fi g. 1)
There is a worklight (d) located on the front of the tool. The worklight will be activated when the trigger switch is squeezed. The worklight is activated when the trigger switch is depressed, and will automatically turn off 20 seconds after the trigger switch is released. If the trigger switch remains depressed, the worklight will remain on.
NOTE: The worklight is for lighting the immediate work surface and is not intended to be used as a flashlight.
Selecting the Operating Mode (fi g. 1)
WARNING: Do not select the operating mode when the tool is running.
Your tool is equipped with a separate mode selector (c) to switch between rotary drilling, rotary hammering and hammering only mode.

Rotary drilling: for screwdriving and for drilling into steel, wood and plastics.

Rotary hammering: for concrete and masonry drilling.

Jammering only: for light chipping.
For rotary drilling, rotate the mode selector (c) until the arrow points to the drill bit symbol (j). For rotary hammering mode, align the arrow with the hammerdrilling symbol (j). For hammering only mode, align arrow with the hammer symbol (k).
NOTE: The mode selector (c) must be in rotary drilling, rotary hammering or hammering only mode at all times. There are no operable positions in between.
Active Vibration Control (fi g. 1)
The active vibration control neutralises rebound vibration from the hammer mechanism. Lowering hand and arm vibration, it allows more comfortable use for longer periods of time and extends the life of the unit.
For best vibration control, hold the tool with one hand on the main handle (h) and the other hand on the side handle (e). Apply just enough pressure so the hammer is approximately mid-stroke. The hammer only needs enough pressure to engage the
internal active vibration control. Applying too much pressure will not make the tool drill faster and active vibration control will not engage.
SDS Chuck (fi g. 5)
To insert bit, insert shank of bit about 19mm (3 / 4^n) into chuck (I). Push and rotate bit until it locks in place. The bit will be securely held.
To release bit, pull the sleeve (m) back and remove the bit.
Replacing the Tool Holder with the Chuck (fi g. 7)
DCH214
- Turn the locking collar (o) into the unlocking position and pull the tool holder (n) off.
- Push the chuck (p) onto the spindle and turn the locking collar into the locking position.
- To replace the chuck with the tool holder, first remove the chuck the same way as the tool holder was removed. Then place the tool holder the same way as the chuck was placed.

WARNING: Never use standard chucks in the rotary hammering mode.
Overload Clutch
In case of jamming of a drill bit, the drive to the drill spindle is interrupted. Because of the resulting forces, always hold the tool with both hands and take a firm stance.
OPERATION
Instructions for Use

- Always observe the safety instructions and applicable regulations.
-
Be aware of the location of pipe and wiring.
-
Apply only a gentle pressure to the tool (approx. 5 kg). Excessive force does not speed up drilling but decreases tool performance and may shorten tool life.
Do not drill or drive too deep to prevent damage to the dust cover.
Always hold the tool firmly with both hands and ensure a secure stance. Always operate the tool with the side handle properly mounted.

WARNING: To reduce the risk of serious personal injury, tum tool off and disconnect battery pack before making any adjustments or removing/installing attachments or accessories.
Proper Hand Position (fi g. 1, 6)

IG: To reduce the risk of serious personal injury, ALWAYS use proper hand position as shown in figure 6.

IG: To reduce the risk of serious personal injury, ALWAYS hold securely in anticipation of a sudden reaction.
Proper hand position requires one hand on the main handle (h), with the other hand on the side handle (e).
Drill Operation (fi g. 1)

WARNING: To reduce the risk of serious personal injury, turn tool off and disconnect tool from power source before making any adjustments or removing/installing attachments or accessories.

WARNING: To reduce the risk of personal injury, ALWAYS ensure workpiece is anchored or clamped firmly. If drilling thin material, use a wood "back-up" block to prevent damage to the material.
HAMMERDRILLING (FIG. 1)
- Set the mode selector switch (c) to the "rotary hammering" position.
- Insert the appropriate drill bit. For best results use high quality carbide-tipped bits.
3kAdjust the side handle (e) as required.
- Mark the spot where the hole is to be drilled.
- Place the drill bit on the spot and switch on the tool.
ROTARY DRILLING (FIG. 1)
- Set the mode selector switch (c) to the "rotary drilling" position.
-
Depending on your tool, follow either of the following instructions:
-
Fit a chuck adaptor/chuck assembly (DCH213). Special SDS Plus adaptors with threaded sections are available for use with standard 10 or 13mm chucks to enable straight shank bits to be used.
ENGLISH
Replace the tool holder with the chuck (DCH214).
- Proceed as described for rotary hammering.

CAUTION: Never use standard chucks in the rotary hammering mode.
SCREWDRIVING (FIG. 1)
- Set the mode selector switch (c) to the "rotary drilling" position.
- Select the direction of rotation.
- Depending on your tool, follow either of the following instructions:
Insert the special SDSScrewdriver adaptor for use with hexagonal screwdriver bits (DCH213).
Replace the tool holder with the chuck (DCH214).
- Insert the appropriate screwdriver bit. When driving slotted head screws always use bits with a finder sleeve.
- Gently press the variable speed switch (a) to prevent damage to the screw head. In reverse (LH) rotation the tool speed is automatically reduced for easy screw removal.
- When the screw is flush with the workpiece, release the variable speed switch to prevent the screw head from penetrating into the workpiece.
CHIPPING (FIG.1)
- Set the mode selector switch (c) to the "hammering only" position.
- Insert the appropriate chisel and check if it is properly locked.
3 Adjust the side handle (e) as required. - Switch on the tool and start working.
It may be necessary to briefly run the motor after having changed from chiselling to rotary modes in order to align the gears.
Do not use this tool to mix or pump mbustible or explosive fluids alcohol, etc.).
- Do not mix or stir inflammable liquids labelled accordingly.
MAINTENANCE
Your DEWALT power tool has been designed to operate over a long period of time with a minimum of maintenance. Continuous satisfactory operation depends upon proper tool care and regular cleaning.

WARNING: To reduce the risk of serious personal injury, tum tool off and disconnect battery pack before making any adjustments or removing/installing attachments or accessories. An accidental start-up can cause injury.
This machine is not user-serviceable. Take the tool to an authorised DEWALT repair agent after approximately 40 hours of use. If problems occur before this time contact an authorised DEWALT repair agent.
The charger and battery pack are not serviceable. There are no serviceable parts inside.

Lubrication
Your power tool requires no additional lubrication.

Cleaning

WARNING: Blow dirt and dust out of the main housing with dry air as often as dirt is seen collecting in and around the air vents. Wear approved eye protection and approved dust mask when performing this procedure.
WARNING: Never use solvents or other harsh chemicals for cleaning the non-metallic parts of the tool. These chemicals may weaken the materials used in these parts. Use a cloth dampened only with water and mild soap. Never let any liquid get inside the tool; never immerse any part of the tool into a liquid.
CHARGER CLEANING INSTRUCTIONS
WARNING: Shock hazard. Disconnect the charger from the AC outlet before cleaning. Dirt and grease may be removed from the exterior of the charger using a cloth or soft non-metallic brush. Do not use water or any cleaning solutions.
Optional Accessories

WARNING: Since accessories, other than those offered by DeWALT, have not been tested with this product, use of such accessories with this tool could
ENGLISH
be hazardous. To reduce the risk of injury, only DEWALT recommended accessories should be used with this product.
Various types of SDS Plus drill bits and chisels are available as an option.
Accessories and attachments used must be regularly lubricated around the SDS Plus® fitment.
Consult your dealer for further information on the appropriate accessories.
Protecting the Environment
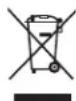
Separate collection. This product must not be disposed of with normal household waste.
Should you find one day that your DEWALT product needs replacement, or if it is of no further use to you, do not dispose of it with household waste. Make this product available for separate collection.

Separate collection of used products and packaging allows materials to be recycled and used again. Re-use of recycled materials helps prevent environmental pollution and reduces the demand for raw materials.
Local regulations may provide for separate collection of electrical products from the household, at municipal waste sites or by the retailer when you purchase a new product.
DEWALT provides a facility for the collection and recycling of DEWALT products once they have reached the end of their working life. To take advantage of this service please return your product to any authorised repair agent who will collect them on our behalf.
You can check the location of your nearest authorised repair agent by contacting your local DEWALT office at the address indicated in this manual. Alternatively, a list of authorised DEWALT repair agents and full details of our after-sales service and contacts are available on the Internet at: www.2helpU.com.

Rechargeable Battery Pack
This long life battery pack must be recharged when it fails to produce sufficient power on jobs which were easily done before. At the end of its technical life, discard it with due care for our environment:
- Run the battery pack down completely, then remove it from the tool.
- Li-ion cells are recyclable. Take them to your dealer or a local recycling station. The collected battery packs will be recycled or disposed of properly.
GUARANTEE
DEWALT is confident of the quality of its products and offers an outstanding guarantee for professional users of the product. This guarantee statement is in addition to and in no way prejudices your contractual rights as a professional user or your statutory rights as a private non-professional user. The guarantee is valid within the territories of the Member States of the European Union and the European Free Trade Area.
30 DAY NO RISK SATISFACTION GUARANTEE
If you are not completely satisfied with the performance of your DEWALT tool, simply return it within 30 days, complete with all original components, as purchased, to the point of purchase, for a full refund or exchange. The product must have been subject to fair wear and tear and proof of purchase must be produced.
ONE YEAR FREE SERVICE CONTRACT
If you need maintenance or service for your DEWALT tool, in the 12 months following purchase, you are entitled to one service free of charge. It will be undertaken free of charge at an authorised DEWALT repair agent. Proof of purchase must be produced. Includes labour. Excludes accessories and spare parts unless failed under warranty.
ONE YEAR FULL WARRANTY
If your DEWALT product becomes defective due to faulty materials or workmanship within 12 months from the date of purchase, DEWALT guarantees to replace all defective parts free of charge or - at our discretion - replace the unit free of charge provided that:
The product has not been misused;
The product has been subject to fair wear and tear;
- Repairs have not been attempted by unauthorised persons;
Proof of purchase is produced;
The product is returned complete with all original components.
If you wish to make a claim, contact your seller or check the location of your nearest authorised DEWALT repair agent in the DEWALT catalogue or contact your DEWALT office at the address indicated in this manual. A list of authorised DEWALT repair agents and full details of our after-sales service is available on the Internet at: www.2helpU.com.
MARTILLO PERFORADOR INALÁMBRICO PARA OPERACIONES PESADAS DCH213, DCH214
Enhorabuena!
m = 311

pb
alimentation

eme de
ne

m = 311

m = 311

m = 311

m = 311

m = 311

m = 311

m = 311
Suspension de charge.

(Isolation double)-outils
Embrayage de surcharge
PERCAGE AVEC PERCUSSION (FIG.1)
Batterie rechargeable
problem me accu of lader
robleem
elektriteitssnoer

Horst Grossmann
Vice President Engineering and Product Development
DEWALT, Richard-Klinger-Strase 11, D-65510, Idstein, Saksa
02.02.2011

vibrationsemissionsnivaerna
representar verktygets
Evikc PPOEIOIOnoeic aQaaleiag nEKTPIKOU epaaeiou
IPOEIOIOHEH DIAIaIae 6AEC T NPOEIOIOINe iOgaaIaG KAI OAE Cn OoNIEc. EAV dNpOouv O I PPOEIOINeIG KAI ODNyE, auto MTOpeVa Exei Wc anotetEaqa nAekTPOANIIgiaWnlaRkai Obaapo Tpaumatio.
EAAHNIKA
ΦYAAETOE OAE TIZ IPOEIOONIOIHZEIEKAI OAHIEIIGIA MEAMONTIKH ANAΦOPA
O opoC "nAekptko epyaleio" oe oaes TIC
TPOEIOOTIOEIG, avapepeTai OE pyaleio
nAektpoobotoumevo (eKaalwo) aTO IV KUPIA
TAPOXH nAektpoobotnoNs, n epyaleio m
aoumuat duvarotnla aeitoupyias (eMittarapia).
1) AΣΦΑΛΕΙA XΟΡΟΥ ΕΡΑΣΙΔ
a) Diatneire To xwpo epyaioac kaepo kai kalá wniouevo. OI TAKTOTIOINJEVOI n oKOTEVOI Xwpo, aTNTEAOUv aiies atuxmuTov.
β) Mn leitoupyeite nAekpiKa epyaiaea ole Xwpouc ME ekpkiKtiAtuOaPapia,OTWs TAPouoia EaEklkTaw Uppw, aepiw, n Kovns. Ta nAekpiKa epyaiaea napayou OTivhpecs Tou mIopei vipokaiaou AVaAeEn tsv Aoyw Okoyns n Atuw.
y) AtojaKpovete ra naiia kai aaaa Tepaotika atoja kata n xponn evoc nektpikov epyaieou. Tuxov npayovtes Tou aootounv tpoooxn oac, mtopei va pokalaeouv atwaleia elyyou.
2) HAEKTPIKH AΦAΛEIA
a) Ta buuata twv nekpiikw epyaaleiw npenteva taipiaocuv me npiic. Mny trotonoie tote to buua naektpodotnncs me onoiovdnonote rpoto. Mn xnpoiomoeite onoiadnonote buuata npoapoyea me yieweva (yeiwn eafouc) nekpika epyaia. Ta un tropontoinveva buuata kai oia taipiaotc npicse peiwouv tv kivuvo nkekpoanlqac.
β) ATOΦUYE TIV Eπaρη TOU σωματως ας ΜE YIeIWUVEVS EπiAPVEIS OTWCS OAWIYES, KALOPIEP, ETIS KOUV W KAI yUeyEA. O KIVouvO ΜλεκθροπAŋξα aucavetai oTAV TO Owua OAS Eivai YeiUJEvo.
y) Mny ektheta Ta nekpiKa epyaia stn Bpoxn n oe auovhkeuyns aroopaipac. H iooos vepoue nekpiK o npAeauvei Tov kivduvo nekptopanfias.
5) MnyKaokotayeiipieoteTo Kaawio.Mn xpnoiotoeite Tote To Kaawio yia T n metapopa,tpaBnyma, an aoouveon Tou nAeKtpiou epyaiEiou. Diatnpere To jaKpia ato 0epuOtna, eaiowes ouics, aixnpa avtikejueva n ywies, n metakivoujueva egapntjura. Kaowio TTO exouv UTOOTe iNua n Tou evai
"uTepoeva", auvavouv tov kivduo nAektpoTAnxiac.
ε) Otav xonoiomoe iEva nlektipko epyaleio e Ewptiko xwpo, xonoiomoe iKaalwoi tEktaoNc katalannlo yia xpon o Eswptiko xwpo. Hxpon kawoiou katalannou via Ewptekn Xpon mieuwei tov Kivouvo nlektpotanxiac.
O) Eav evai avantopeuktn n aeitoupyia nAekpiok oepyaleiou oe xwpo me uynnUypaia, xponiopoioate npoxin nAektpodotanm e aopaaia diapporics nAekpiok peuuratos (RCD). Hxponn TnRCDmuveivovkivduo nAekptpotaingias.
3) NPOZΩNIKH AΦAΛEIA
a) Napaueivete OE epynyopn, npoexet E T KAVETe KAI XPONIOTIOIE T N V KOIVN Aoyikj kata tXpnoEvoC nAekptikoepyaleiou. Mxnpoiotioite OTOIOBNTOE nAekptko epyaaleio eav eioe KoupaoMeVc (-), n UTO TNV Etnpeia vapkwnv, aKooλ, n qapukw. Mia tuxov oniun anoanoc nTNS PPOOONc oac KAOWs xeipceote nAekpiKa epyaaleia, mtopevi eaippeei 0oapop TPOOWTIKIpaumano.
β) Xpnoiojnte npoomega npoatautko eonaiouo. Oopate navta npoatautka yuaia. H xphon npoatautko eonaiouo otwcs avatveuotikns aokaas, avioaogtkuw utoanatuw, kpaovous, npoatautkiwakouotikw yia ts katalanyes auvthekes, 0a ueoi touc npoomega tpaunaiouos.
y) AToIpeYTe Toxov akouia Ekkivon Tou epyaieou. Eaopaiaote ono diakottnc eivai kLeiotaoc (eogn off) npiv ouvdeoeTe to epyaieio nnv npica nKai oTo naketo mntapiaacKaowc Kpiiv onkwoete netaapepeTo epyaieio. H eTApop a nEeKpikwv epyaieiwv me To daktuO ana cto diaKoTT, n ouvdean otnv npica epyaieiwv Me avoIKTO (eogn on) diaKoTT, anoreluov anec aruxnarWv.
8) Apiapeote oiooHnTote kEiδi n puBtiKIOKO EeI iPiv EvpOToIoiTe To NkEeKTIPOKO EpyAei. Eva KEldi npuBtiKIOKO EeIou EeXi aEeOe I PooapntJEvO eKIVNtO tmu Aou NkEeKtIOU EpyAeiU, MTOpeV a TpOKaAoe I PooawTNIKO Tpaumano.
EAAHNIKA
ε) Mny npoataaetae va frace taopakpuva omeia. Aiatnpie t ovexwocsteepo nma kai ioppotia. Auto aac bivei nduvatotnka kalutepou eEyxou Tou nekptikou epyaleoi oet apooosokntc kataataeic.
OT)ΦopateTovkaralAnlo pouxio. Mn φopate xalapa pouxa n koounmuata. Aianpeire ta aalaa oac, ta pouxa kai ta yavtnia paikia atro kivoumeva εxpantura.Ta xalapa pouxa, ta koounmuata n ta paikia maalua mtopei va εmllakouvSTA KIVOUMEVA Eapintura.
Eav biatveioukeuesia n ouvdeon ekBoAIG oKovns kai Eykataotaceuw ouAAoync, Baeaiweite otixouv ouvOe iowar kai xpanoiouvtai katalnnla. Hxpan ouakueuncsouAoyns oKovnc mTpoep va meoetiou s oxenoevoC ME OKOV KIVOUVc.
4) XPHSH KAI ΦPONTIàA TOY HAEKTPKIYO EPTAAEIY
a) Mny xnpoiioToe ie uTepBoIki
duan to nEeKTPIO EpyAIEIO.
XpnoiOIOIOTe TO kAtalAnlo EpyAIEIO
yia Tnv Eapouoyn oac.To ootat
ETNIeYMEo nEeKTPIO EpyAIEIO 0kEteAeaI
kaUTpe Ka aopalaote Pa to Epyo Tou otav
xnpoiOIOINei ME To puOuO yia Tov OTIo
TpoopiZeai.
β) Mny xnpoiotoeite to nAekptiko epyaieo ev oiaokntn (on-off)ev Aetoupyei. Otoiohntoe pyaieo dev utopeoi va eayxbei meos tou diaokntn tou, Eiva etikivuvo kipetteva etiakuaatei.
y) AnouvseTo bua aTo nV npiaKaTo naketo mntapiaacnTo nAekpiK epyaaleio piv kavete OTOIEOBJTorepuuieic,aaayec TaepAkoEvwNpiv ATOBNEOJEOTe NkEPTKO epyaieo.Auro Tou EIOUcTa MePora aopaeiacmuovu Tov KIVUvo aTPOO60NTc LEIoUpyiaTou nAekpiKOp epyaleiou.
8) AToeNKeUoTe OToIO nAekTko EpyaIeio 8ev XpOoiOIOEIRE MaKpia aTo Mepn 6tou mTopoov va To pTaocov PaiDiA KAI mIV EtIITpeTE T N XpOiOn Tou nAekTkoU 8pyAeiou o AeOa Tou 8ev Evai 8eoKiEiwEvva Me auto n e ts Obnyies XpOnc Tou. Ta nAekTkoA epyAeiA evai Etnikovua otav XpOoiOIOuovntai aTo m EKIIaDEueVoucs EpiOTc.
ε) SuvtipnO nIeKtpiKwEpyaIew. ELevTe yia tuxov eOpaAevn Evuypauon n OtpBawon KIOUeuvEgaptmuTuw, yia tuxov 8paun EapntmuTuw kai yia oTOIEoHNTne aLcKataotaeic Tou mTopei va Etnpeaoov n LEitoupyia tou Nektikou Epyaleiou.Eav to IeKtkoEpyaIeioExuTOOTe cNmu, FOVtiTEy iYv ETIAKeUN TO piv To xPOnoiOnIOeTe. NoAa atxmuTa exouv TpokAnei ant neKtpiKa epyaIea Tou dEv exouv ouvtnpnei katalna.
01) DiatnpieTe ra epyaia Konns axunpa kai Kaabap. Ta katAanla ouvtonqevaaeyaleia konrs me aixunpa akpa Konntkexouv Mkiopotepe sivatoLs uviuatoKara Tn Aeioupyia kai Exyovtai Eukolotepa.
Z) Xpnoiomoiotoe to nAekptko epyaaleio, ta napelkómeva kai ticmuetcs Tou katt ouqwva ie tic napouoec odnyies, laubavovtac unoyn tic uovthenes epyaiaoc kai tnv epyaiaou ptokeitai va npayatootinoei. H xon en voc nAekptkoE pyaaleiou via epyaoies diaopotikc at' autc yia tic ortoics trooipizetai, mtopei va onuoupynei ETIKIVUVN KATAOAN.
5)XP'HEH KAI φPONTIà MNIATAPIΩN
a) Etnavaopriote mOvo ME to optiotn TPO KAOpicetai ano tv KATAOKeuaotn. Opiotnc TPO EVAI KAdALNIOc yia eva tTO TAKETOU MNTAPUw, MTOpei VA dnioupyneIKVDOv Ownac otav xpanoiTIOEINa ME nO uBATO TAKETO MTATAPIW.
β) XpnoiOnoiEITE nleKtpiKa epyaIeia mOe EiδiKa katoipjEv a KApTaPiW. H xHON oTOIWvONt e aaWv pKetw vttapiwuMTopevi TPOkAeSei Kivouvo Taupaunaioun kai qwiTAc
y) OraV V xPnOIOIErTo naketo
muTataipwv, biatnpieTe To paKpia ato
aAa MaTAAIAkavtkeiEvae otWc
ouvBeIpeXapriou,voiiaura,KAEiDi,
Kappia,bioc,naAikpaetalaikac
avtkeiEvaaouptopeva npokalaeovu
nEeKpiKnEtnapnEtaSuTwvdu
akpoeKtuv Tou naketou mataipiW.
HbpaxukwAn Tuv akpoeKTu Tns
muTataic ptopeVa npokaloevi Ekyatua
n Kai qwnia.
EAAHNIKA
8) KAtw aTo ouVthkec kakoTeaepion,
muopei va Ektoeute iUpo aTo m
muatapia.Atoquyete nTv eTnAphn e To
uypo auto.Eav EAnthe ^ TnAphn kata
lambdaoc, fennuve tE apbovo vepo.
Emtneov auou, oE npittwn Tou to
uypo EAnei ^ TnAphn fe Ta mana oac,
avaqntote aueos Iatpkn Boinieia.
To uypou Tou Ektoeueai aTo m ptatapia
muopei va npokaleeipteiouoc n
Eykaumata.
6) ΣYNTHPHΣH (ΣEPBΣ)
a)Φoovtioe onwg n ouvtiponou nAekpikou Epyaleoiu npayatottoieiata oTiototoinve yia etokuec atopo, uE tn xpon twv rautoanuv mvo aVtAAakiv. Auto ta eaoaipaiei t thdiiponn ts aospaleic tou nAekpikou Epyaleiou.
PpOoTeoi Kavovc aOqaaIac EIOIKA yia TEPiOTpOPIKcS OUPeC
Φopate PpOaTeuNTa yia ta autia. H ekEeAn oTo oOpUo mIopei va TpokAeoei atwAeia akOnc
Xpnoiotoiie Tc Bonntikcs Aaies cou npexoyvat e to epyaiao. H awnwiae eaeyou mtopei va pokalaeetippoawntiko tpaupanuo.
Kpatate to nAekpiok epyaleio ano novwueves etiavieies laibns otav ekteAleire ia epyaia otnou to aegouap konis mtopeia vepes oe tnpn me aetara kalwia. H tnpn me kalwio uto raon tha eaiu uro nAekpiik taan opiaeva ekteejeva metaalka eepou tou epyaleiou kai th npokaolei nAekpotaIgia sto xeiipotn.
Xpniooioane opiKtnpec n ao npaktko rpoTn ia n tepewon me aopaaia kai nv uOoatpigh tonu uTo katepyaia avtkeiEvov oe ia otaeipn thapopa. To kpatnaouavtkeiEvou ue to xepi n tepewon ou TOn oomega aoc 6ev evyuaia n taoteponya kai evexetai va obnyneoi e anwiae leyyxou.
- Popate npootateunika yuaia n aaaa npootateunikia via ta patia. O epyaies opnpalntns exouw os anoteloeja tv evpavion tnaevow pokaviow. Ta tnaeva oupatidia mtropov na pokakoeu moviques bhaes ota patia. Na popate paoka via tn
okovn n avatveuotnpa yia evapauoyes kara tic ontieo nguioupeitai okov. Evexetar va atarita h npion pnoataeutikw yia ta auria yia tic peiooootepe expauoyes.
Kpatate navtoe otaepa to epyaleio.
Mv etiieipjote va xeiipoteite to npov
epyaleao v dev to kpatate ka ie ta duo
xepia.Suviotai va xpanoitoeire nantrove
tnv pueupikn lah. O xepiaouos tou epyaleiou
e eva xepi tho onnyoae i atwlaia Ekyxou.
Eiongs, nqpaun n anviuetwnion oAnpwv
uukw, otw os pafooi otAioou, Evexetai
va eivai entkivouv. Suqpiie me aopalaea tv
Tne Pueupikn lah npiv ao t npion.
Mn xnpoiotoe to epyaleio yia napatateva xpovika diaotnmuata. H doynan nou pokaetai ano tv evpeyia nts opupac evexetai va eivai embetans yia ta xepia kai touc bpaxioves oac. Xnpoiotoeiyeavria vnyt npaoxni tnnlaveo pooataiac kai terpiopiot nev Ekbeon me ouxva diaotnmuata avattauans.
Mnv EtniOepowete movoi aac ta tpuTnVia. H EtniOepoWn Tuv ouiuov npTeTIeVa npayatotoeirataoEouoiobotnevo EIOKO. Oi aieC Tov exouv EtniOepoBei ataKaAaNla mitopov av Tpokalaeoupauanpo.
Na opate yavnia otav xepicote to epyaleio 6tav aalacete rpuntavia. Ta npootelaoiya metaaika tmuata Tou epyaleiou kai ta purtavia tiopoie va thepuovu utepoikia kata n diapkeia nC aeitoupyiac. Mkpa teuxia bpaauevou uikou tiopoie va tpauiatouov ra yuvv xepia.
Flote unv apnve te kaw to epyaleio evy to pumav dev exei otauatneoi va kiveirai EVTEw. Ta Kivouva tvpunavia mtropov v TPOKAeouu Tpaunaiquo.
MxTtATE KATEOTpaMuEva TpuTAvia u E Ospui yia va ta anokolnoe. Evexer va atokolnou thpauuata erAou npokaviia tou uikou, pokaawvTac Tpaupanpo.
Olaappws qapuEvcs oiles npoov va akoviotov ek voue tyioqa.
Aiatnpetto kawdoiou peuuatoe
muakpi a to npiaotpoeoevopunavi. Mv tuliyte to kawdo yupw ato
otoiohntoe poc tou oomegaosac. Eva
nlektipko kawdoiou exi tulixtei yupw
atoo eva npiotpeofovo tputavi mtopei va
tpokaaleoi atouki trouaiano kai atwlaia
elxyxou.
EAAHNIKA
Aoitoi kivouo
Oi akouoBoi kivduovipnoepoxovta aTTO xphon Tw TEPiOtpoEpuEvW opuiv:
TpaunaiouoEvoc ato eTnepn ta nepioppepeva npn Ta cota npn tov epyaleiou.
Nap a Tnv eapauoyuTuv oxetikuw kavoviauw aopaiaic kai T xphon ouokeuw aopaiaic, kaioi aTO Tou Looiouc KIOUOC IVouvouc Ev Eivai duvo va antopeuxoov. Auto iivai:
-Baβnσηvakoj.
Kivovoc ykawiou tuv axuWv knaV aahayn eapntmuTsw.
- BlaBcS Otvu yEia aTTOIvor TcOkovns Tou npayetai kara Tnv epyaia oTtErov KaVToXOToiia.
Evéiεicπávwσto εpyαλεio
Etnaw oTo epyaleio epaviovraT a TnapakTu EIKOVypmuata:

AiaBaeTo EYxepidio oyniw Tpv anTn xpnan.

ΦopATE TPOOATEUTIKA yia ta autia.

Φopáte TpOoTATEUká yia ta μátia.
OEEH KΩAIKoy HMEPOMHNIAZ
O KwDikos npeopunvias, o otloos Tepiaaabeiv Etnioc To tOc kataakeuhs, elvaektutwueoec Vrto tsntipaviae Tou TEPIAHmuatoc, 0To aneiou OAnmuati cTnv appwn TIpooapoync metaoTu Evyaaleou KAI TnIATAPIAS.
Papadéiμα:
2011 XX XX
EToC kataoKeun
PpOBoLaeCepyaoiac (EIK.1)
YtApxEi QwS epyaoias (d) OTO mPooTIVo epos Tou epyaleIoU. To qws epyaiaos 8a evpyotioieiT otav tieteTo diakottnkovdaan. To qws epyaiac evpyotioieiT otav nataTe to diaokottn
okavdaIg kai attepeyotioeitai autouata 20
deutepeoETTt aetnV atteeuhepwn Tou
biakotttn okaVaIag. Ooo napaevei patnevo c
biakotttns okaVbIaN, npapevei avamepvo kai to
φωε εpyαiαfα.
EHMEIO2H: To 公 ~ w ~ 念 epyaia Tpooipietai yia to 公 ~ w ~ 口 ~ i ~ o ~ 口 ~ t ~ nT aieoN eTikpaveiaepyaiaKai dev Tpooipietai yxponwqakoc.
ETIIAOYn Tou TpOtnou I OUPyiaC (EK.1)

NPOEIONOIHsH:MnV ETIeYETOTv TpToAeroupyiagotavEpyaIeio Aeioupyei.
To epyaioe oac evai eotiauveo eexwpiot diakottn tniayn spotou aeitoupyiac (c) yia evaalnyi meagTuw aeitoupyiw TepiTpoikns biatpans, TepiTpoiknc kpuans kai mvo kpuans.

Piopikdiatpno:viibuaKaia diatpnoe xalaβa, uao kai tataika.

Pepiotopokou: yia diatpnoon OKupoépatoc kai toixtoiac.

AatiEvta TPOaepiKa diapopo TuTOI pTuAVW dpattavou kai oiae SDS Plus.
Ta xnpoiotioiuoueva Eapntjata Kai TapeAkoEv aTpeTei va Iinaivovtaia TAKIKA yupw atto to ouotma SDS Plus.
Umbouauteite TOV AVITINPOoWTO OcYIa TEPIOOTepeL AETIOUEPEIEO Oov apopa Ta KATALNA TAPEAKoEvA.
TnV pOoTaia tou Tepiabaovtoc
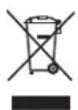
Exwpiotn coulloy. Auto to Tpoiov v TpeTVE aToppTTeTa t a
ouvn oikiaKa atoppmuata.
EAAHNIKA
Eav diATIOTWOETe KAtIOA mepa ot TO TPOiov OAC Tc DEWALT xpeiaCTa avTKaTaoan, n evd Ev To xpeiaCote TIA, mnu To aToppipTE MaJi TE ta OIKIAKA aTTOPPIMATA. TToTbETnOte auto To TPOiov SE EiIKo KaO yia ExwpiTn ouLooyn.

H ExwpiTn oulOyn
xpoaioTOinmuevvW TPOIOVTW
kai OuaKEuaOW EITIPETTE
TNV avakukawon kai
ETTavaopoiOToinon Tuv uIKw.
HETTAVaNTIikxpnON Tov
avakukawewvUkowB0e
ATNV atoayn Tns Mauvoans Tou
TIEpiaAiovTOc KAI MEIWVEI TNI
ZHTNn TPWTUV UAW.
OITOKIKAVOVIAIOI MTOpei va TPOBLeTouV TNV EEXIWOTNI OAUVOH NAEKTPIKUV TPOIovTVW ATo TA VOIKOKUPIA OE DNOTIKA KETPauuAOYIC TATOPAIATW, n ATO TOV AVTIPoAOTTO ATO yopaoEVE vvo TPOiov.