
CAM570 - Video conferencing system AVer - Free user manual and instructions
Find the device manual for free CAM570 AVer in PDF.

| Product Type | Video Conferencing System |
| Brand | AVer |
| Model | CAM570 |
| Power Supply | 12V DC power adapter; PoE compatible (IEEE 802.3AT/802.3AF) |
| Maximum Resolution | 4K (30fps) via USB 3.1, 1080p (60fps) via HDMI |
| Main Lens | Motorized optical zoom |
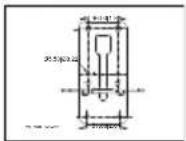
| AI Lens | Participant detection (95° field of view), recommended installation height ≥ 1.5m |
| Microphone | Built-in microphone array (dedicated to audio tracking) |
| Connectivity | USB 3.1 Type-B, HDMI (1080p), RS232, Ethernet (PoE), audio input, HDMI output |
| Smart Functions | Smart framing (SmartFrame), audio tracking, face/body detection, WDR |
| Remote Control | Direction, presets (0-9), standby, SmartFrame activation |
| Installation | Wall mount, tripod mount, ceiling mount (optional bracket) |
| Security | Kensington security lock |
| Control Software | PTZApp 2 (free download), IP web page |
| Compatibility | Zoom, Microsoft Teams, Skype, Google Meet, Cisco WebEx, etc. |
Frequently Asked Questions - CAM570 AVer
User questions about CAM570 AVer
0 question about this device. Answer the ones you know or ask your own.
Ask a new question about this device
Download the instructions for your Video conferencing system in PDF format for free! Find your manual CAM570 - AVer and take your electronic device back in hand. On this page are published all the documents necessary for the use of your device. CAM570 by AVer.
USER MANUAL CAM570 AVer
natural_image
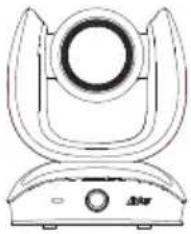
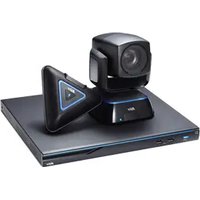
Line drawing of a smart air purifier device with labeled 'AVer' and control knob (no text or symbols beyond branding)CAM570
Conference Camera
Federal Communications Commission Statement
NOTE: This equipment has been tested and found to comply with the limits for a Class A digital device, pursuant to part 15 of the FCC Rules. These limits are designed to provide reasonable protection against harmful interference when the equipment is operated in a commercial environment. This equipment generates, uses, and can radiate radiofrequency energy and, if not installed and used in accordance with the instruction manual, may cause harmful interference to radio communications.
Operation of this equipment in a residential area is likely to cause harmful interference in which case the user will be required to correct the interference at his own expense.
FCC Caution: Any changes or modifications not expressly approved by the party responsible for compliance could void the user's authority to operate this equipment.
This device complies with part 15 of the FCC Rules.
Operation is subject to the following two conditions:
(1) This device may not cause harmful interference, and
(2) this device must accept any interference received, including interference that may cause undesired operation.
This is a class A product. In a domestic environment this product may cause radio interference in which case the user may be required to take adequate measures.
Caution
Risk of explosion if battery is replaced by an incorrect type. Dispose of used batteries according to the instructions.
PSTI Statement of Compliance
Please refer to the following website: https://www.aver.com/product-security-advisory
VCCI-A
No warranty or representation, either expressed or implied, is made with respect to the contents of this documentation, its quality, performance, merchantability, or fitness for a particular purpose. Information presented in this documentation has been carefully checked for reliability; however, no responsibility is assumed for inaccuracies. The information contained in this documentation is subject to change without notice. In no event will AVer Information Inc. be liable for direct, indirect, special, incidental, or consequential damages arising out of the use or inability to use this product or documentation, even if advised of the possibility of such damages.
TRADEMARKS
“AVer” is a trademark owned by AVer Information Inc. Other trademarks used herein for description purpose only belong to each of their companies.
COPYRIGHT
©2024 AVer Information Inc. All rights reserved. | March 11, 2024
All rights of this object belong to AVer Information Inc. Reproduced or transmitted in any form or by any means without the prior written permission of AVer Information Inc. is prohibited. All information or specifications are subject to change without prior notice.
More Help
For FAQs, technical support, software and user manual download, please visit:
Non-USA
Download Center: https://www.aver.com/download-center
Technical Support: https://www.aver.com/technical-support
USA
Download Center: https://www.averusa.com/business/support
Technical Support: https://averusa.force.com/support/s/contactsupport
Contact Information
Headquarters
AVer Information Inc.
8F, No.157, Da-An Rd.,
Tucheng Dist., New Taipei City
23673, Taiwan
Tel: +886 (2) 2269 8535
USA Branch Office
AVer Information Inc., Americas
44061 Nobel Drive, Fremont, CA
94538, USA
Tel: +1 (408) 263 3828
Toll-free: +1 (877) 528 7824
Europe Branch Office
AVer Information Europe B.V.
Westblaak 134, 3012 KM,
Rotterdam, The Netherlands
Tel: +31 (0) 10 7600 550
Japan Branch Office
アバー・インフォメーション株式会社
Vietnam Branch Office
Công ty TNHH AVer Information (Việt Nam)
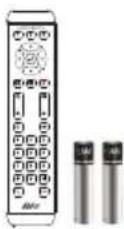
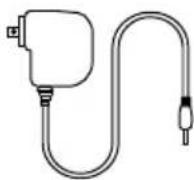
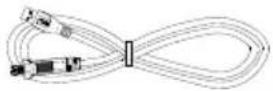
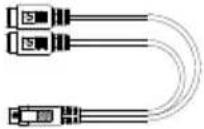
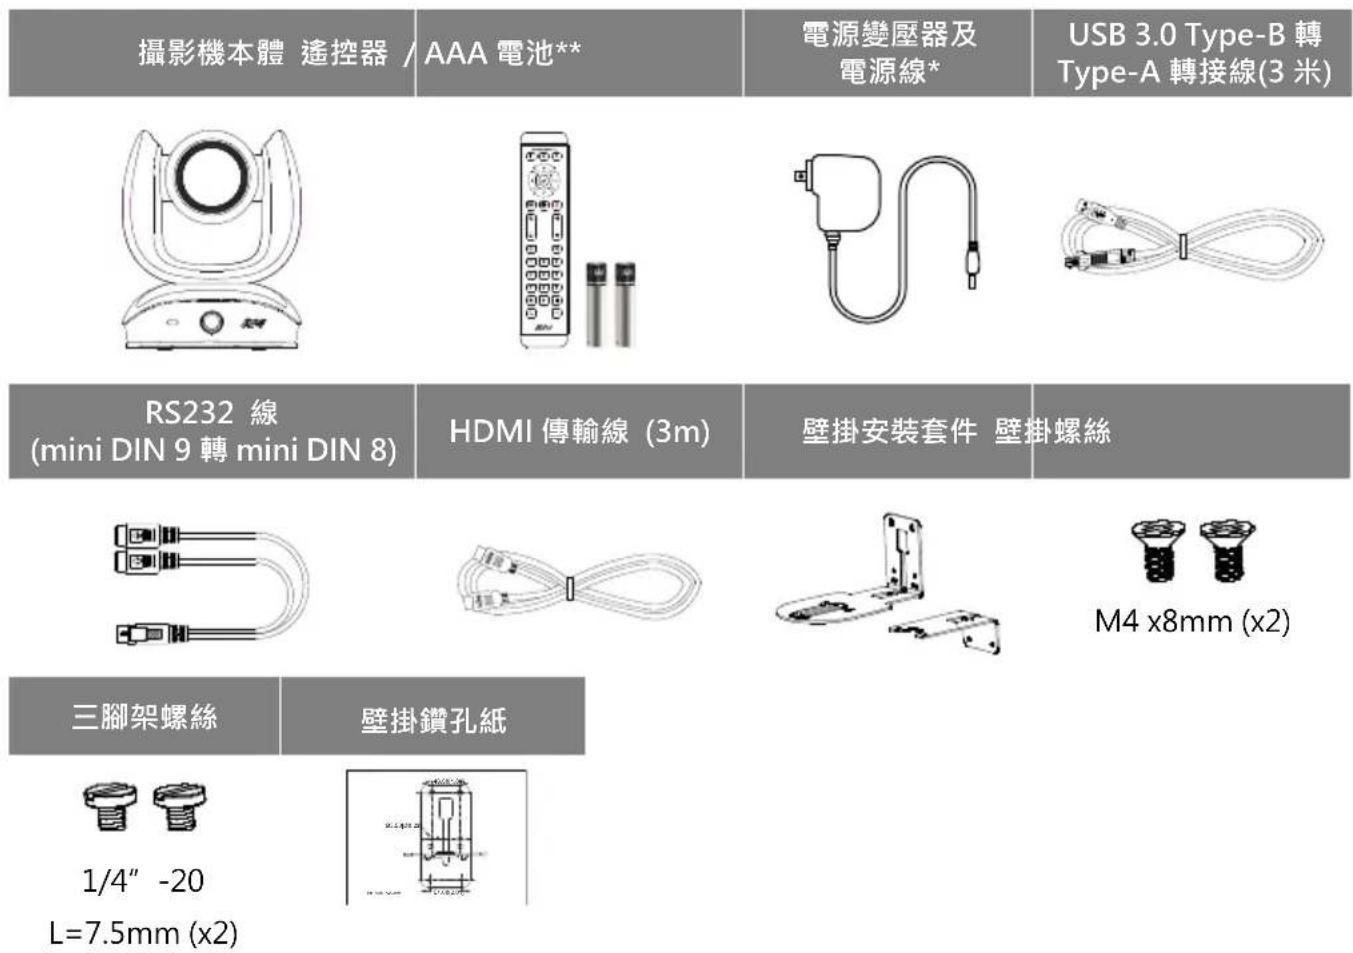
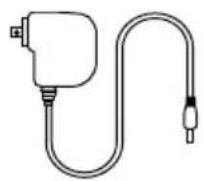
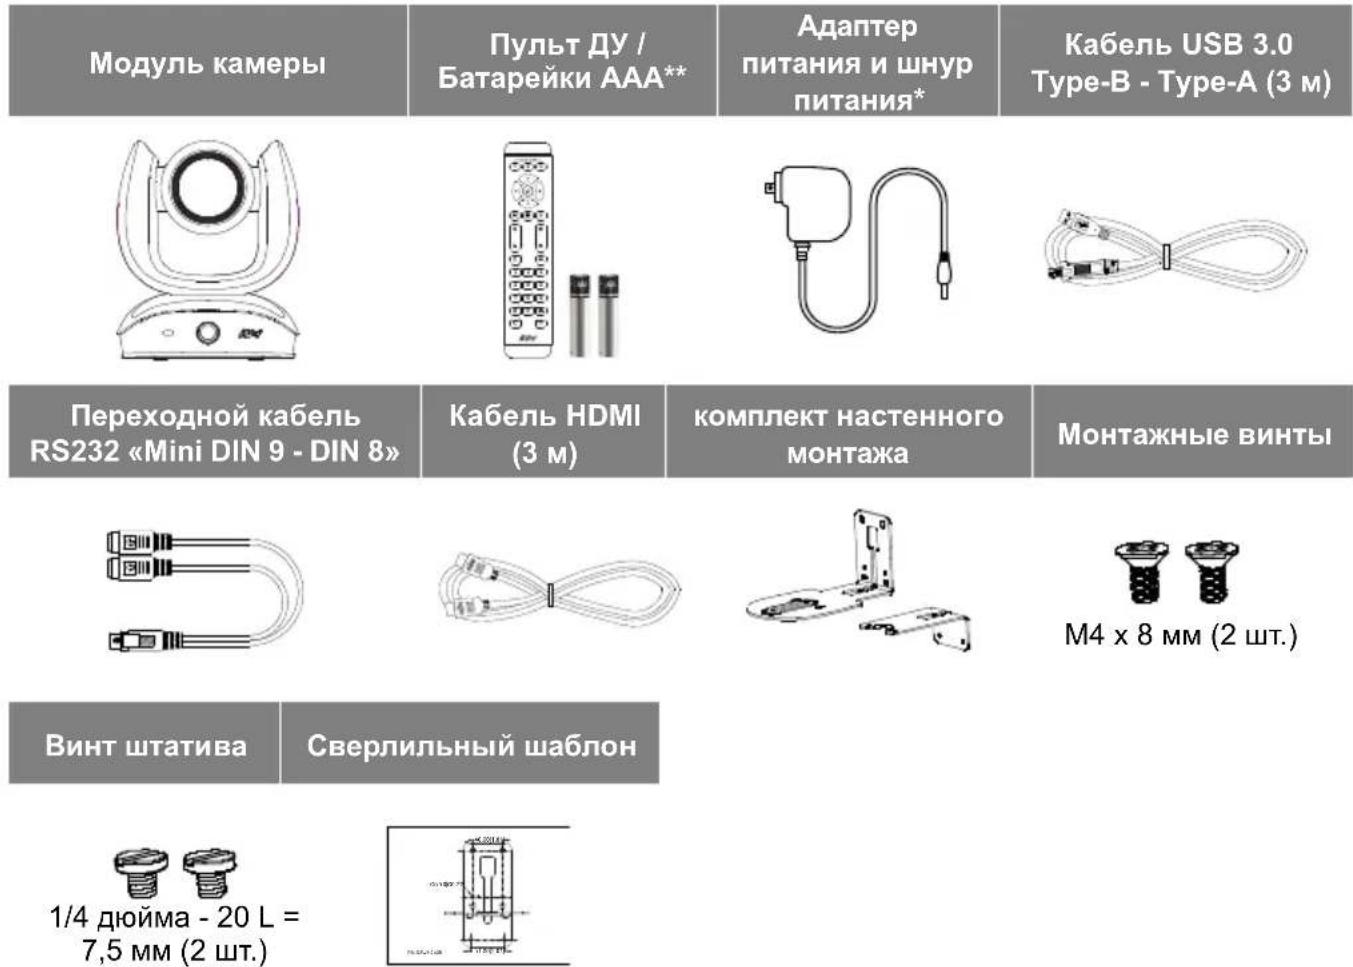
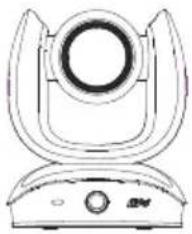
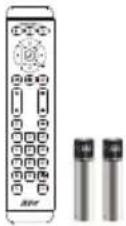
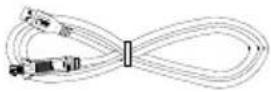
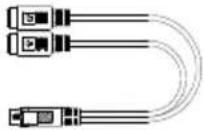
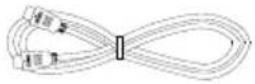
| Camera Unit | Remote Control / AAA Batteries** | Power Adapter & Power Cord* | USB 3.0 Type-B to Type-A Cable (3m) |
 |  |  |  |
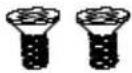
| Mini DIN9 to Mini DIN8 RS232 Adapter Cable | HDMI Cable (3m) Wall Mount Kit | Screws for Mount | |
 | 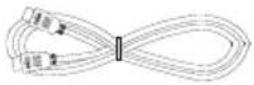 | 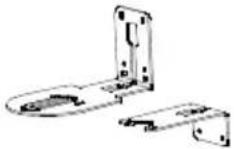 | 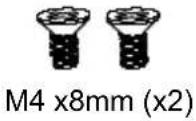 |
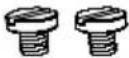
| Tripod Screw | Drilling Paper | ||
 |  | ||
* The power cord will vary depending on the standard power outlet of the country where it is sold.
** AAA batteries are only provided for USA.
Optional Accessories
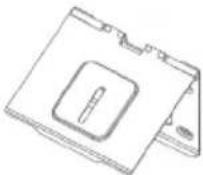
| USB 2.0 Type-B to Type-A Cable (5m) | Mini DIN8 to D-Sub9 Cable | Foldable TV mount | USB 3.1 Extender 10m/20m/30m |
 |  |  |  |
| Ceiling Mount** |
* Optional Accessories will vary depending on the country where it is sold.
** This is a dual lens camera and doesn't support upside down installation. To mount on ceiling, please purchase ceiling mount kit from AVer.
Overview
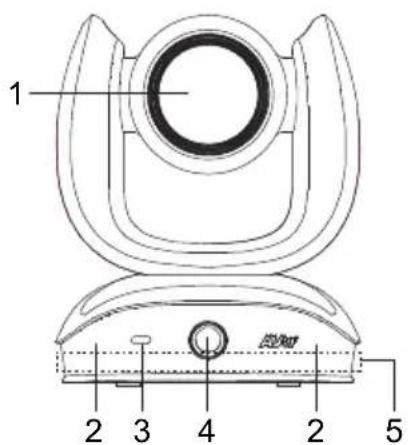
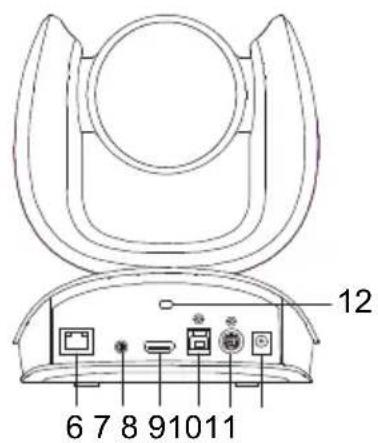
1 Optical Zoom Lens 7 Audio Input Port
2 IR Sensor 8 HDMI Port***
3 Status LED 9 USB 3.1 Type B Port
4 AI Lens ^* 10 RS232 In/Out Port
5 Built-in Microphone Array**** 11 DC 12V Power Jack
6 PoE Port** 12 Kensington Lock
* AI Lens:
Users can see AI lens preview image in PTZApp 2, IP webpage or HDMI out to check camera installation location.
AI lens is used to detect participants within its 95 degree field of view to trigger optical zoom lens to track people in the room. Please don't put the camera on table because the AI lens view will be blocked. The suggested installation height is at least 1.5m.
** Power over Ethernet (PoE) is compatible with IEEE 802.3AT/802.3AF. Please use CAT 5e FTP cable (not included.)
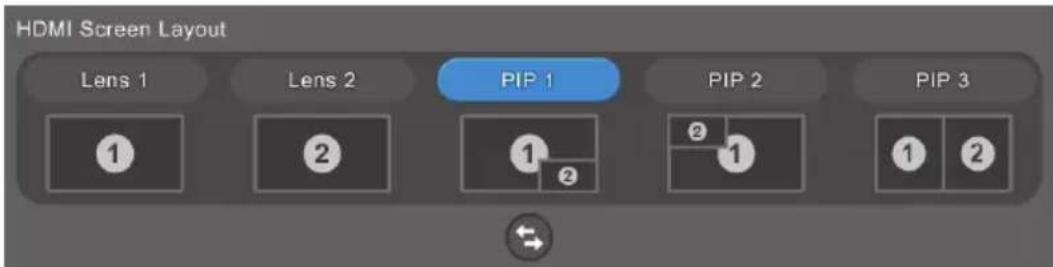
*** HDMI out streaming supports picture in picture (PIP) function. For more details, please refer to user's manual.
**** The built-in microphone array is designed for Audio Tracking detection, which cannot be used as an audio input source for video conference.
LED Indicator
Solid blue: Power on
Solid red: Start-up
Solid orange: Only power cable connected
Solid blue: Video on
Solid white: USB cable is connected but camera doesn't have any streaming out
Flash orange: Manually update FW
Gesture control
Blue light blinks for 2 seconds: Successfully wake up gesture control function by any valid gesture command
Blue light blinks for 4 seconds: Camera recognizes a valid gesture command and start to action.
[Note] The default of gesture control is off. Please enable it via PTZApp 2 or IP web page. The effective distance is up to 5-meter away from the camera.
Installation
-
Connect the camera to the power outlet.
-
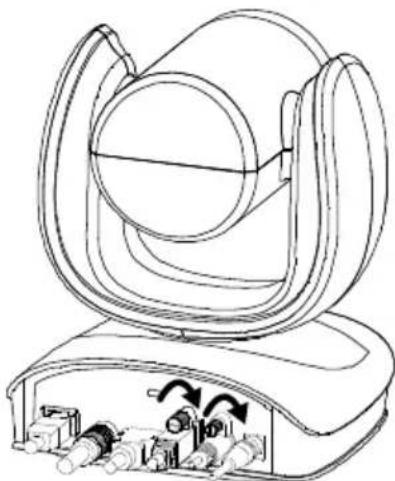
Connect the necessary cables.
[Notes]
■ Secure the USB and RS-232 cables with attached screws.
■ Make sure the cable is well connected to the connector on the camera before securing the cable.
![AVer CAM570 - [Notes] - 1](/content/2026/04/684769/images/b12775c668d3cb99ee3d5cdb98dd3aa0b4c0706b38f2f09b8ea80e2af4840f4e.jpg)
natural_image
Line drawing of a device rear view with ports and connectors, connected to a plug outlet (no text or symbols)Power cord
![AVer CAM570 - [Notes] - 2](/content/2026/04/684769/images/2ac185958dd3d78f07077138575f79ef031b5b7893082e924d73e8c0753e909f.jpg)
natural_image
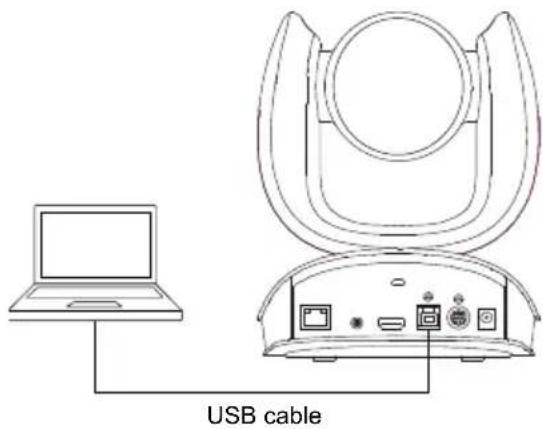
Technical line drawing of a mechanical device with internal components and directional arrows (no text or symbols)3. Connect the camera to the computer/laptop.
[Notes]
■ Use the USB 3.0 cable included in the package.
■ CAM570 has the USB 3.1 port which is USB 2.0 compatible.
Maximum resolution/fps for USB 2.0 and USB 3.1 port are shown below.
| USB 2.0 USB 3.1 HDMI | ||||
| YUV | M-JPEG | YUV | M-JPEG | |
| - 640x480 or less resolution, up to 30fps- 720p, up to 10fps | - 1080p/60fps | - Up to 1080p/30fps- 720p/60fps | - Up to 4k/30fps- 1080p/60fps | - 1080p/60fps- 1080p/30fps |
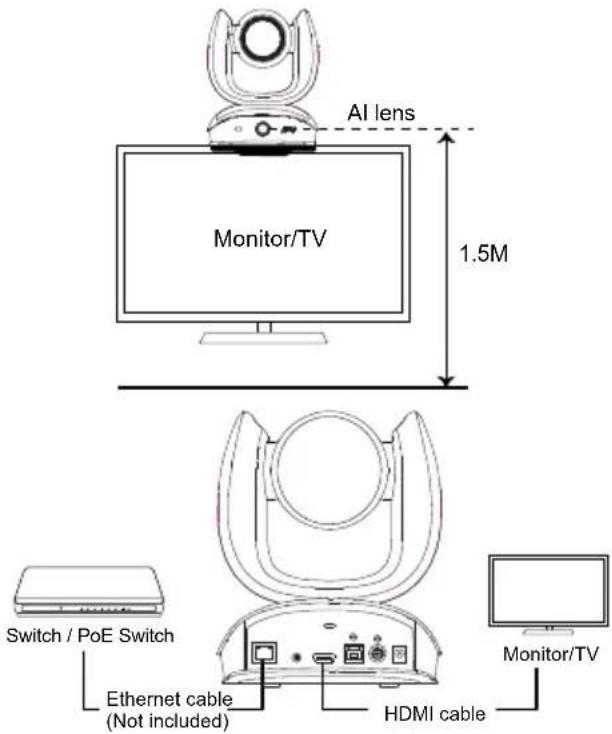
- AI lens is used to detect participants within its 95 degree field of view to trigger optical zoom lens to track people in the room. Please don't put the camera on table because the AI lens view will be blocked. The suggested installation height is at least 1.5m.
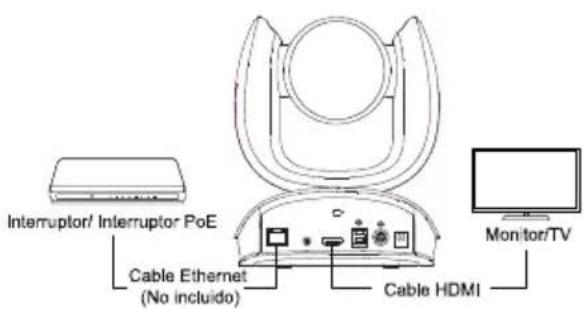
5. Connect the Ethernet cable for IP streaming and remote camera control.
[Note]
■ To ensure stability of IP video streaming, please use CAT 5e FTP cable.
6. Connect an HDMI cable to a TV monitor to have instant live video.
[Notes]
■ HDMI port only supports 1080p resolution.
■ If you select RTSP/RTMP resolution up to 4k resolution, the HDMI out streaming will be disabled.
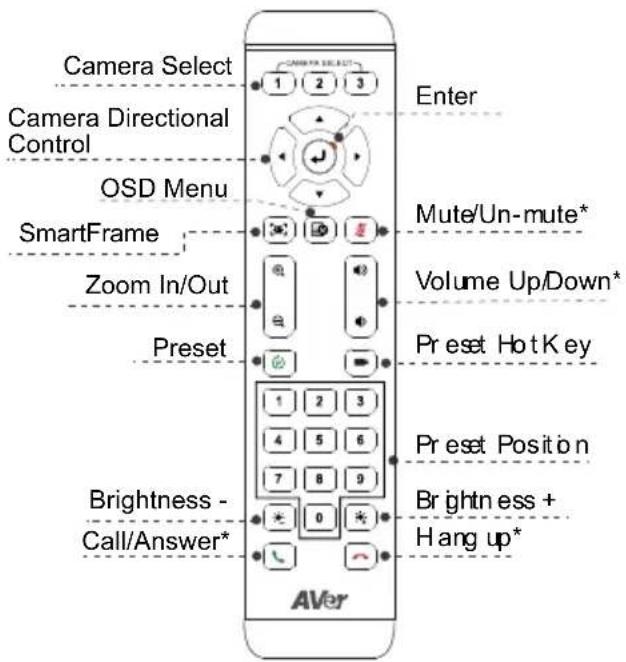
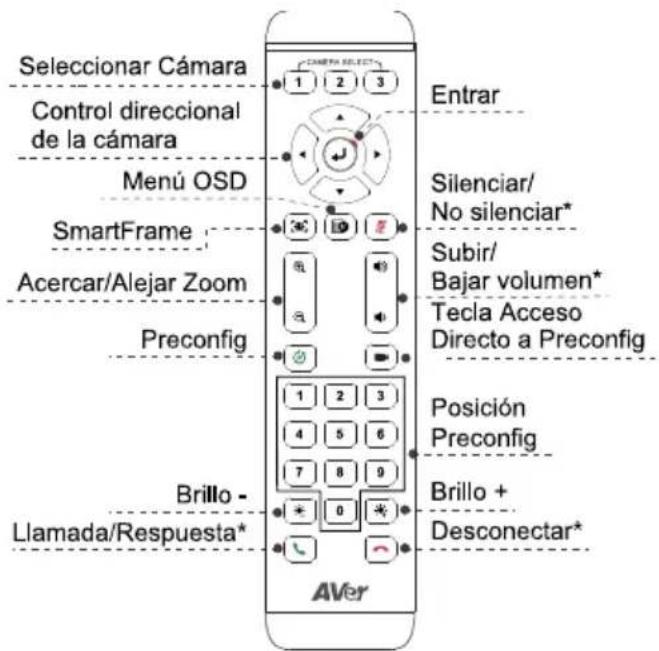
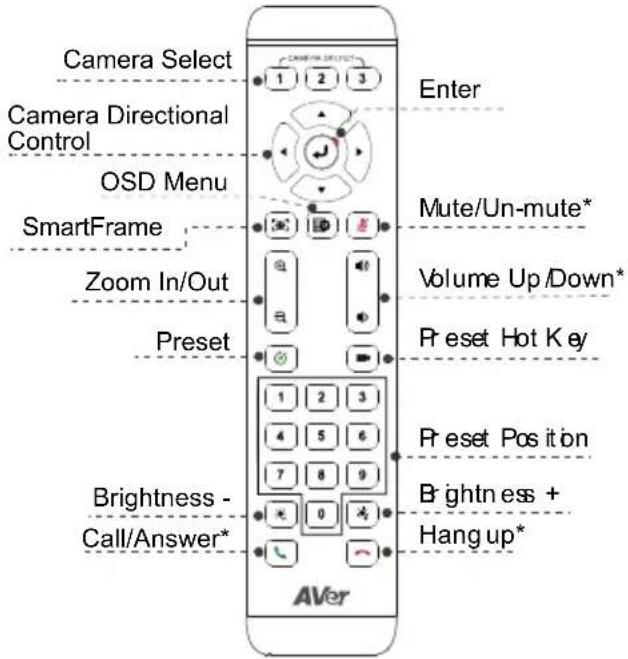
Remote Control
AAA Batteries (required)
*Not supported for CAM570
■ Preset () The Preset button on the remote serves 2 functions.
To Save a Preset- Move camera to desired position. Press and hold the preset button until you receive the save message on the screen. Select preset position button 0-9 to store the current camera position. Repeat steps if needed.
To Load a Preset- Press the preset button and preset position button 0-9 to load a saved camera position. Repeat steps if needed.
■ Press and hold the number button "1" for 1 second to turn on or off the WDR function.
[Note] WDR function is suggested to be used in high contrast background environment to enhance the dark area. The frame rate will drop to 30fps or lower. If the light condition is normal, this function will cause image blur.
■ Press and hold the number button "5for 1 second to turn on or off the SmartFrame function.
■ Press and hold the number button “”8 for 1 second to enable or disable RTMP streaming function.
■ Press and hold the number button “”9 for 1 second to force camera to enter sleep mode. This will end any video streaming. To wake up the camera, press the button or any directional button for 1 second. This mode is not functional while USB streaming is on.
■ Camera Select ( )4 2 3 One remote control can control up to three AVer USB cameras. To bind cameras, please use PTZApp 2 or access IP web page to set it up. If you don't do any binding setting, no matter which number you press, you can control all the AVer USB camera around you.
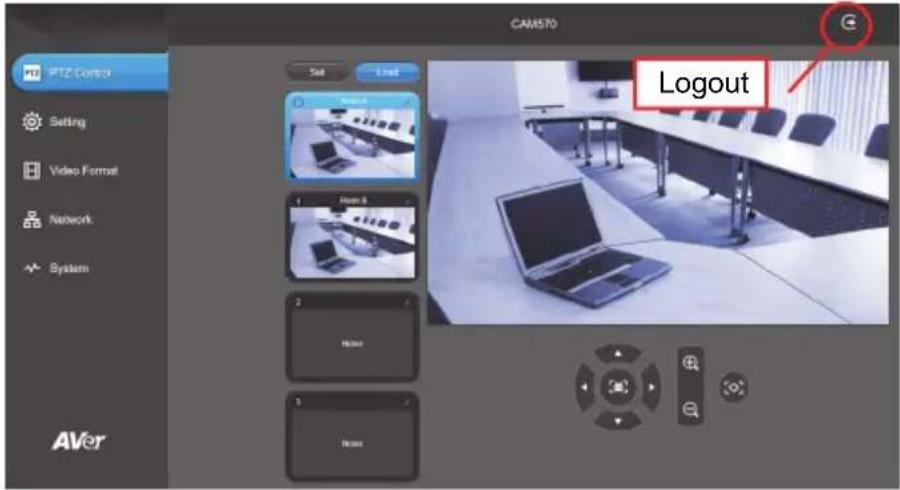
■ SmartFrame ( ) Press for 1\~2 second to switch the SmartFrame function among Manual Frame/Auto Frame/Preset Framing/Audio Tracking/Presentation modes. A message (as figures shown) will display on the screen to indicate the mode while using HDMI out function.
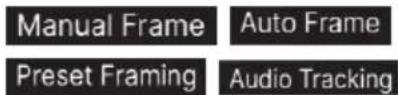
Presentation Mode
[Note] SmartFrame deploys face and body detection technology. People wearing masks and side facial profiles can still be detected. The maximum detection distance is 7-10 meters away from the camera.
Set up preset points in advance (Only for Preset point 1-9. Preset 0 is for home position).
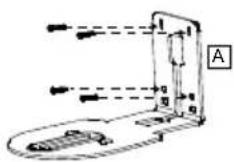
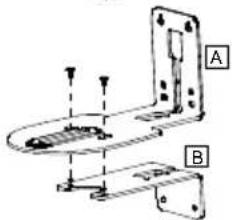
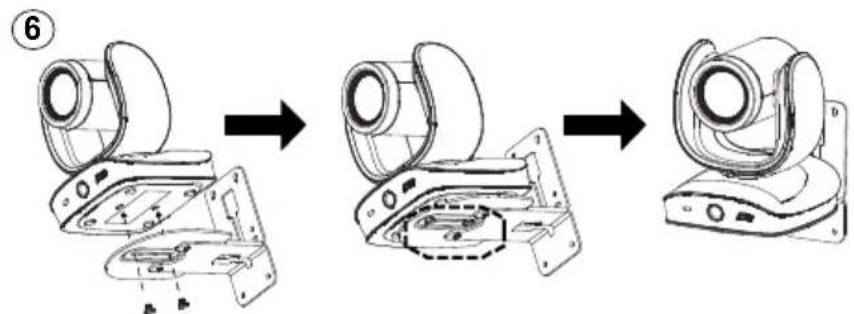
Wall Mount Installation
- Use the drilling paper included in the package to drill the holes in the wall where the user wants to mount the camera.
- Use the screws (not included) to secure the L-mount bracket A on the wall.
[Note] For cement wall: M4 x20mm self-tapping screws (x4) + Plastic conical anchor For wooden wall: M4 x20mm self-tapping screws (x4)
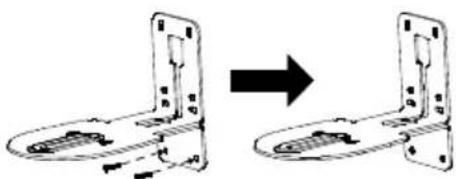
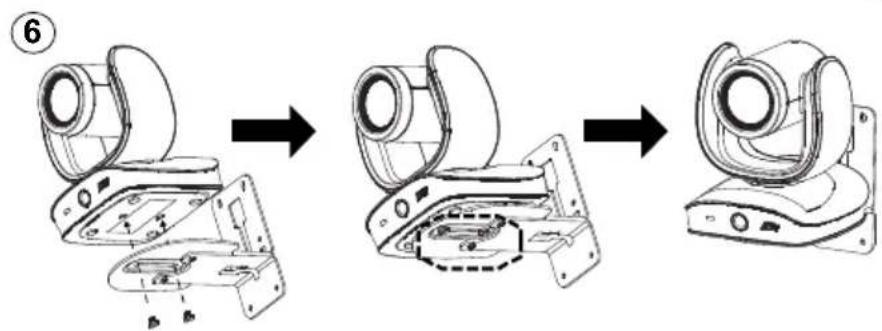
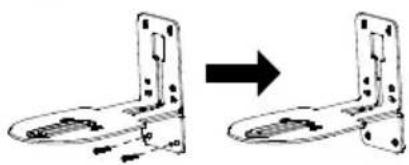
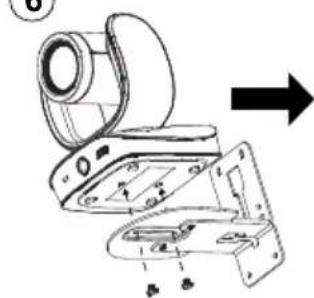
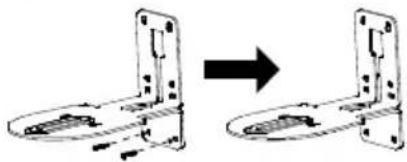
- Then, assemble the L-mount brackets A + B with 2 screws (M4 x8mm, included in the package).
- After assembling the L-mount brackets, use the screws (not included) to secure the lower part of L-mount brackets on the wall.
[Note] For cement wall: M4 x20mm self-tapping screws (x2) + Plastic conical anchor For wooden wall: M4 x20mm self-tapping screws (x2)
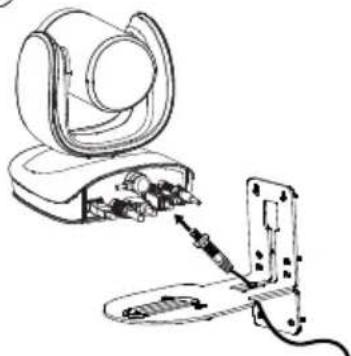
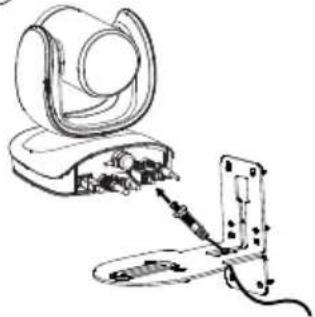
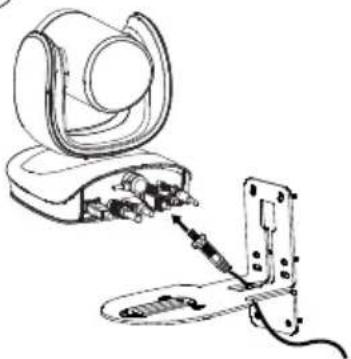
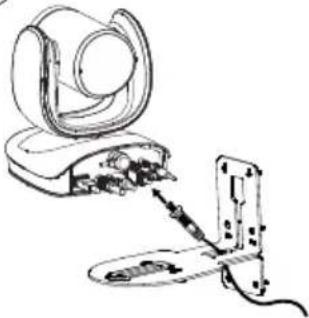
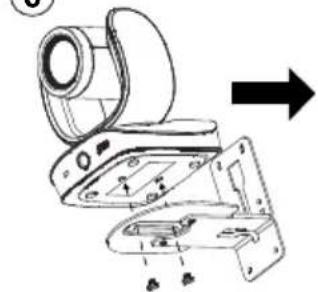
- Pass the cables through the hole on the L-mount brackets and connect the cables to corresponding connection ports.
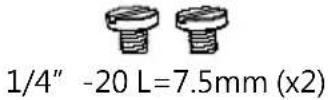
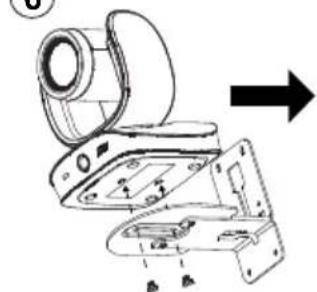
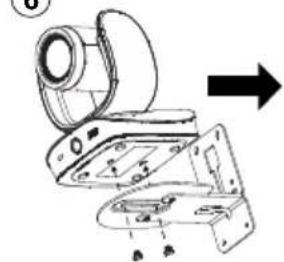
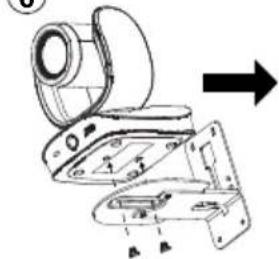
- Use the remaining screws (1/4"-20 L=7.5mm, included in the package) to secure the camera on the L-mount brackets.
①23

O
O
4
natural_image
Diagram showing a mechanical assembly before and after transformation, with no visible text or symbols5
natural_image
Line drawing of a medical device with internal components and a connector (no text or symbols)6
natural_image
Technical line drawing of a mechanical device with no visible text or symbols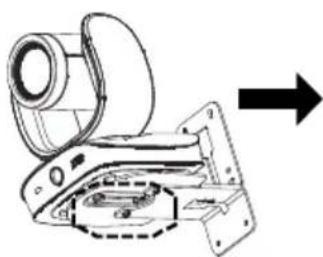
natural_image
Technical line drawing of a mechanical assembly with an arrow indicating direction (no text or symbols present)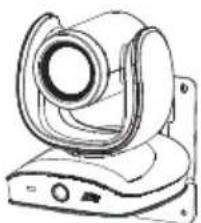
natural_image
Technical line drawing of a mechanical device with no visible text or symbolsMaking a Video Call
A computer is required to use this device.
- Open your video collaboration application such as Zoom, Microsoft ^ Teams, Skype for Business, Skype, Google Meet, Intel ^ Unite ^TM , RingCentral, BlueJeans, V-Cube, LiveOn, CyberLink U Meeting ^ , TrueConf, Adobe Connect, Cisco WebEx ^ , Fuze, GoToMeeting ^TM , Microsoft ^ Lync ^TM , Vidyo, vMix, WebRTC, Wirecast, XSplit.
- Set the CAM570 as your primary camera device in your application (Please consult your application setup guide for details).
- Ready to make a video call.
[Note] CAM570 is a Plug-n-Play Conference Camera. The system requires no special drivers. For advanced setting and firmware update, please download PTZApp 2.
Making a Connection through the Browser
CAM570 has an Ethernet port for IP streaming and allows administrators to remotely control and set up the camera via an internet access. Moreover, CAM570 also supports RTSP and RTMP functions. For more details, please refer to the user's manual or contact our technical support.
- Make sure the CAM570 has an internet access connection.
- Launch PTZApp 2* (PTZ) and connect CAM570 to PC with USB cable.
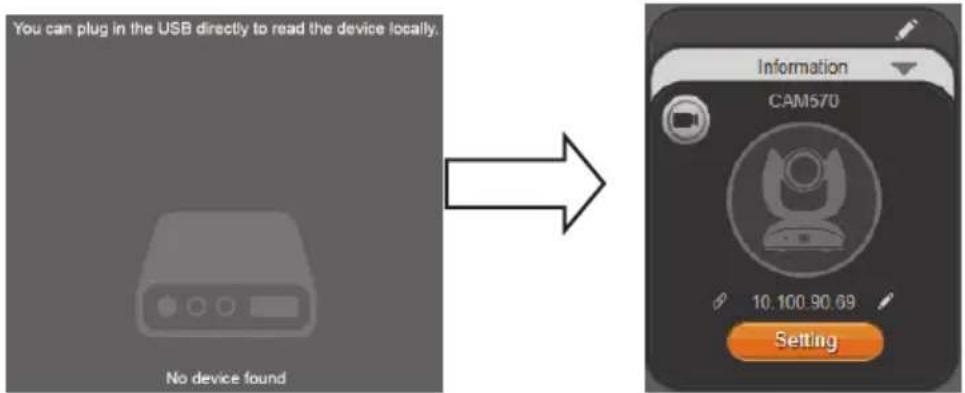
- The camera default IP address is 192.168.1.168. Click pencil icon (☐) to edit IP address**.
flowchart
graph LR
    A["Information CAM570 Setting"] --> B["Device IP"]
    B --> C["DHCP"]
    B --> D["Static IP"]
    B --> E["Confirm"]
- Click weblink icon (💡) to launch Chrome page. Please enter the password (default password is aver4321).
[Note] The browser supports:
- Chrome: version 76.x or above
- Firefox: version 69 or above
- IE: Doesn't support
-
After editing IP address, user can access web settings of the camera with only Ethernet cable connection. Unplug the USB cable.
-
The main web screen is displayed as below.
* In PTZApp 2, user can change the IP address setting of CAM570, configure the parameters of the camera, set up AI tracking functions and some advanced image settings, pan, tilt, and zoom the camera. Please refer to the user manual for details.
Please go to https://www.aver.com/download-center (Headquarters),
https://www.avereurope.com/download-center (Europe), or
https://www.averusa.com/business/support (USA) to download the PTZApp 2. After downloading, double-click on the file and follow the on-screen instructions to complete the installation.
After installing the PTZApp 2, double-click on the PTZApp 2 icon to run the application.
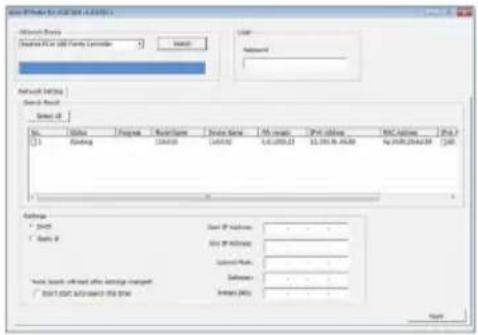
** To support IP address changes in groups, user can download AVer IP Finder app.
-
Download the IP Finder from https://www.aver.com/download-center (Headquarters), https://www.avereurope.com/download-center (Europe), or https://www.averusa.com/business/support (USA).
-
Run the IP Finder.
-
Click "Search", and all available devices will be listed on the screen.
English-8
包装内容物
natural_image
Technical line drawing of a mechanical device with internal components and directional arrows (no text or symbols)3. 將攝影機連接到電腦/筆記型電腦。
[注意]
natural_image
Line drawing of a laptop connected to a device with ports and connectors (no text or symbols)USB 連接線
| USB 2.0 USB 3.1 HDMI | ||||
| YUV M-JPEG | YUV M-JPEG | |||
| -640x480或更低解析度,最高30fps-720p,最高10fps | -1080p/60fps | -最高達1080p/30fps-720p/60fps | -最高達4k/30fps-1080p/60fps | -1080p/60fps-1080p/30fps |
4
![AVer CAM570 - [注意] - 1](/content/2026/04/684769/images/364535944295c14457236d814577f549dfbc81d7d815e0abe84f676490699d04.jpg)
natural_image
Diagram showing a mechanical assembly before and after transformation, with no visible text or symbols5
![AVer CAM570 - [注意] - 2](/content/2026/04/684769/images/19cbdac6e68d7dd2234120a947dd95dd55516f462a560d0a666232267012c17e.jpg)
natural_image
Diagram of a medical device with attached tubing and internal components (no text or symbols)6
![AVer CAM570 - [注意] - 3](/content/2026/04/684769/images/5dc13a87610cda99993a106248d81c1ce9350dcd4f8debf8a642e0100b7dc66a.jpg)
natural_image
Technical line drawing of a mechanical assembly with no visible text or symbols![AVer CAM570 - [注意] - 4](/content/2026/04/684769/images/5700940ecebb7117ba59dea2d5e0b3f9af2326f149c7ff594978961a92f86352.jpg)
natural_image
Technical line drawing of a mechanical component with an arrow indicating direction (no text or symbols present)![AVer CAM570 - [注意] - 5](/content/2026/04/684769/images/e1abfc0f8476dfe740b6e97aa66ff845eaf8b5fc93a2be583ed6a8092ce74db4.jpg)
natural_image
Technical line drawing of a mechanical device with no visible text or symbols進行視訊通話
需要電腦才能使用此設備。
- 從https://www.aver.com/download-center (總部)
https://www.avereurope.com/download-center (歐洲)或
https://www.averusa.com/business/support (美國)下載IP Finder。
包装内容物
natural_image
Technical line drawing of a mechanical device with internal components and directional arrows (no text or symbols)- 将摄影机与电脑/笔记本电脑连接好。
[注]
natural_image
Line drawing of a laptop connected to a portable electronic device (no text or symbols)USB线缆
进行视频通话
使用此装置需要一台电脑。
https://www.avereurope.com/download-center (欧洲)或
https://www.averusa.com/business/support (美国)下载IP Finder。
natural_image
Technical line drawing of a mechanical device with internal components and directional arrows (no text or symbols)④
natural_image
Diagram showing a mechanical assembly before and after transformation, with no visible text or symbols5
natural_image
Technical line drawing of a medical or laboratory device with attached tubing and components (no text or symbols)6
natural_image
Technical line drawing of a mechanical assembly with no visible text or symbols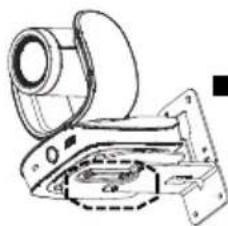
natural_image
Technical line drawing of a mechanical assembly with no visible text or symbols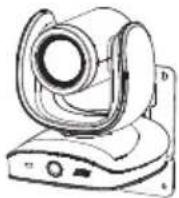
製品の使用方法
패키지 내용물
natural_image
Line drawing of a device rear panel with ports and connectors, connected to a power outlet (no text or symbols)전원 코드
- 필요한 케이블을 연결하십시오.
[참고]
natural_image
Technical line drawing of a mechanical device with internal components and directional arrows (no text or symbols)④

natural_image
Diagram showing a mechanical assembly before and after transformation, with no visible text or symbols5
natural_image
Line drawing of a medical device with attached tubing and a circular component (no text or symbols)6
natural_image
Diagram of a device's internal components with an arrow indicating direction (no text or symbols present)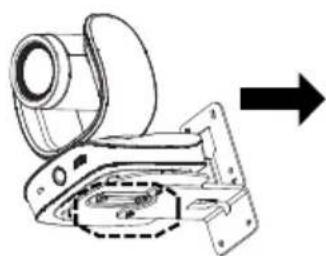
natural_image
Technical line drawing of a mechanical assembly with no visible text or symbols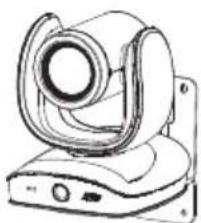
natural_image
Technical line drawing of a mechanical device with no visible text or symbols화상통화 하기
- IP Finder는https://www.aver.com/download-center (글로벌),
https://www.averEurope.com/download-center (유럽)
natural_image
Line drawing of a device rear panel with ports and connectors, connected to a power outlet (no text or symbols)natural_image
Technical line drawing of a mechanical device with internal components and directional arrows (no text or symbols)natural_image
Line drawing of a laptop connected to a device with ports and cables (no text or symbols)Câble USB
Piles AAA (requises)
ou https://www.averusa.com/business/support (USA).
natural_image
Line drawing of a portable electronic device with a circular top and control panel (no text or symbols)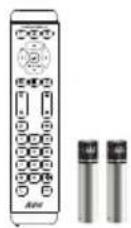
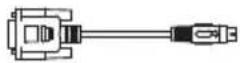
Cable adaptador RS232 Mini DIN 9 a Mini DIN 8
Cable HDMI (3 m)
natural_image
Line drawing of a device rear panel with connected ports and a power outlet (no text or symbols)natural_image
Technical line drawing of a mechanical device with internal components and directional arrows (no text or symbols)natural_image
Line drawing of a laptop connected to a device with ports and connectors (no text or symbols)Cable USB
| USB 2.0 USB 3.1 HDMI | ||||
| YUV | M-JPEG | YUV | M-JPEG | |
| - Resolución de 640x480 o inferior, hasta 30fps- 720p, hasta 10fps | - 1080p/60fps - Hasta | 1080p/30fps- 720p/60fps | - Hasta 4k/30fps- 1080p/60fps | 1080p/60fps1080p/30fps |
Mando a distancia
Комплект поставки
natural_image
Technical line drawing of a mechanical device with internal components and directional arrows (no text or symbols)natural_image
Line drawing of a laptop connected to a device with ports and connectors (no text or symbols)Кабель USB
| USB 2.0 USB 3.1 HDMI | ||||
| YUV | M-JPEG | YUV | M-JPEG | |
| - 640x480 илименее, до 30 кдр/с.- 720p, до 10 кдр/с | - 1080p/60fps | - до 1080p/30 кдр/с- 720p/60fps | - до 4k/30 кдр/с- 1080p/60fps | 1080p/60fps1080p/30fps |
4
natural_image
Diagram showing a mechanical assembly transformation, with no visible text or symbols5
natural_image
Line drawing of a medical device with attached cable and connector (no text or symbols)6
natural_image
Technical line drawing of a mechanical assembly with no visible text or symbols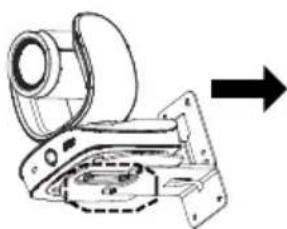
natural_image
Technical line drawing of a mechanical assembly with no visible text or symbols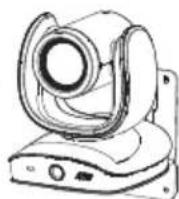
Isi Paket
| Unit Kamera | Remote Control / Baterai AAA** | Adaptor Daya & Kabel Daya* | Kabel USB 3.0 Tipe-B ke Tipe-A (3m) |
 |  |  |  |
| Kabel Adaptor Mini DIN9 ke Mini DIN8 RS232 | Kabel HDMI (3m) | Kit Pemasangan di Dinding | Sekrup untuk Dudukan |
 |  |  |  M4 x8mm (x2) M4 x8mm (x2) |
| Sekrup Tripod | Kertas Pengeboran | ||
 1/4" -20 L=7.5mm (x2) 1/4" -20 L=7.5mm (x2) |  |
natural_image
Technical line drawing of a mechanical device with internal components and no visible text or symbols3. Hubungkan kamera ke komputer/laptop.
[Catatan]
Remote Control
Baterai AAA (diperlukan)
4

natural_image
Diagram showing a mechanical assembly before and after transformation, with no visible text or symbols5

natural_image
Line drawing of a medical device with attached hardware (no text or symbols)6
natural_image
Technical line drawing of a mechanical device with exploded view and directional arrow (no text or symbols)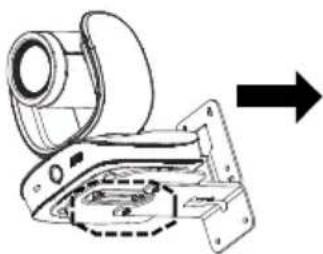
natural_image
Technical line drawing of a mechanical assembly with an arrow indicating direction (no text or symbols present)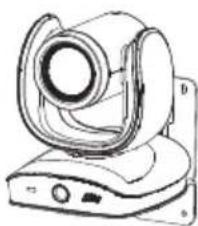
natural_image
Technical line drawing of a medical imaging device (no text or symbols visible)Indonesia -74
- CAM570
- Conference Camera
- Federal Communications Commission Statement
- Caution
- PSTI Statement of Compliance
- VCCI-A
- TRADEMARKS
- COPYRIGHT
- More Help
- Non-USA
- USA
- Contact Information
- Headquarters
- USA Branch Office
- Europe Branch Office
- Japan Branch Office
- Vietnam Branch Office
- Optional Accessories
- Overview
- LED Indicator
- Gesture control
- Installation
- [Notes]
- Connect the camera to the computer/laptop.
- Connect the Ethernet cable for IP streaming and remote camera control.
- [Note]
- Connect an HDMI cable to a TV monitor to have instant live video.
- Remote Control
- Presentation Mode
- Wall Mount Installation
- Making a Video Call
- Making a Connection through the Browser
- 包装内容物
- 將攝影機連接到電腦/筆記型電腦。
- [注意]
- 進行視訊通話
- 进行视频通话
- 製品の使用方法
- 패키지 내용물
- 화상통화 하기
- Mando a distancia
- Комплект поставки
- Isi Paket
- Hubungkan kamera ke komputer/laptop.
- [Catatan]
Brand : AVer
Model : CAM570
Category : Video conferencing system