
VB350 - Video conferencing system AVer - Free user manual and instructions
Find the device manual for free VB350 AVer in PDF.

| Product Type | Video Conferencing System |
| Brand | AVer |
| Model | VB350 |
| Power Supply | 12 V DC via power adapter |
| Lenses | Varifocal lens and fixed focal lens |
| Microphones | 14 built-in microphones |
| HDMI Output Resolution | 4K |
| Connectivity | USB 3.0 (Type-B), HDMI, Ethernet RJ-45, RS232, phone input/audio output, audio extension, USB 2.0 (for BT dongle) |
| Main Features | SmartFrame, audio tracking, gesture control, remote control, presets, WDR, RTMP streaming |
| Included Accessories | Power adapter, USB 3.0 cable (3 m), remote control, wall mount kit, USB Type-A to Type-C adapter, drilling template |
| Optional Accessories | RJ-45 wired speaker or microphone extension (10 m/20 m), USB 3.1 extension (10 m/20 m/30 m), HDMI cable (3 m), Din6 to RS-232 adapter, audio output converter, BT dongle, TV VESA mount kit |
| Gesture Control | Effective distance up to 4 meters, disable AI function for zoom |
| Remote Control | With buttons for power, camera selection, SmartFrame, audio tracking, zoom, volume, mute, presets, etc. |
| LED Indicator | Indicates states: power on, startup, USB connection, video/audio activity, mute, call |
| Management Software | Room Management (formerly PTZApp2) to configure audio and video settings |
| Safety | Compliant with Canadian standard NMB-003 (Class A) and applicable directives |
| Maintenance and Cleaning | Clean the device with a soft, dry cloth. Avoid abrasive products. |
| Spare Parts and Repairability | Contact your local dealer for spare parts and optional accessories. No repairability information provided. |
| Manual | 74 pages, available in multiple languages (FR, EN, ES, ID, JA, KO, RU, ZH) |
Frequently Asked Questions - VB350 AVer
User questions about VB350 AVer
0 question about this device. Answer the ones you know or ask your own.
Ask a new question about this device
Download the instructions for your Video conferencing system in PDF format for free! Find your manual VB350 - AVer and take your electronic device back in hand. On this page are published all the documents necessary for the use of your device. VB350 by AVer.
USER MANUAL VB350 AVer
natural_image
Top-down schematic of a cylindrical device with internal components and a labeled component (no text or symbols)VB350
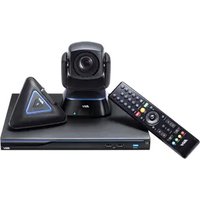
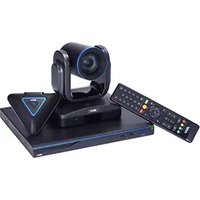
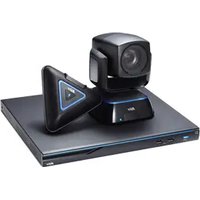
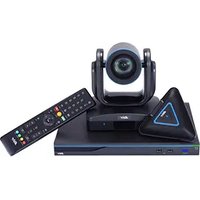
Conference Camera
Federal Communications Commission Statement
NOTE: This equipment has been tested and found to comply with the limits for a Class A digital device, pursuant to part 15 of the FCC Rules. These limits are designed to provide reasonable protection against harmful interference when the equipment is operated in a commercial environment. This equipment generates, uses, and can radiate radiofrequency energy and, if not installed and used in accordance with the instruction manual, may cause harmful interference to radio communications.
Operation of this equipment in a residential area is likely to cause harmful interference in which case the user will be required to correct the interference at his own expense.
FCC Caution: Any changes or modifications not expressly approved by the party responsible for compliance could void the user's authority to operate this equipment.
This device complies with part 15 of the FCC Rules.
Operation is subject to the following two conditions:
(1) This device may not cause harmful interference, and
(2) this device must accept any interference received, including interference that may cause undesired operation.
This is a class A product. In a domestic environment this product may cause radio interference in which case the user may be required to take adequate measures.
Caution
Risk of explosion if battery is replaced by an incorrect type. Dispose of used batteries according to the instructions.
PSTI Statement of Compliance
Please refer to the following website: https://www.aver.com/product-security-advisory
VCCI-A
© 2025 AVer Information Inc. All rights reserved. | March 10, 2025
The information contained in this documentation is subject to change without notice.
Contact Information
Headquarters
AVer Information Inc.
8F, No.157, Da-An Rd.,
Tucheng Dist., New Taipei City 23673, Taiwan
Tel: +886 (2) 2269 8535
USA Branch Office
AVer Information Inc., Americas
44061 Nobel Drive, Fremont, CA 94538, USA
Tel: +1 (408) 263 3828
Tol-free: +1 (877) 528 7824
Europe Branch Office
AVer Information Europe B.V.
Westblaak 134, 3012 KM,
Rotterdam, The Netherlands
Tel: +31 (0) 10 7600 550
Japan Branch Office
アバー・インフォメーション株式会社
Vietnam Branch Office
Công ty TNHH AVer Information (Việt Nam)

Power Adapter & Power Cord

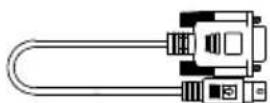
USB 3.0 Type-B to Type-A Cable (3m)
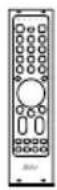
Remote Control
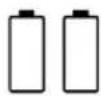
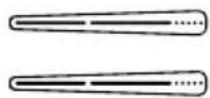
AAA Battery (x2, US only)
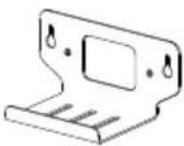
Wall Mount Bracket

1/4"-20 L=7.5 mm Screw (x2)

USB Type-A to Type-C Adapter

Drill Template
Optional Accessories

Expansion
Speakerphone
10 m / 20 m w/ Cable
Expansion
Microphone
10 m / 20 m w/ Cable
Din6 to RS-232
Adapter

Audio-out Converter

BT Dongle
TV VESA Mount
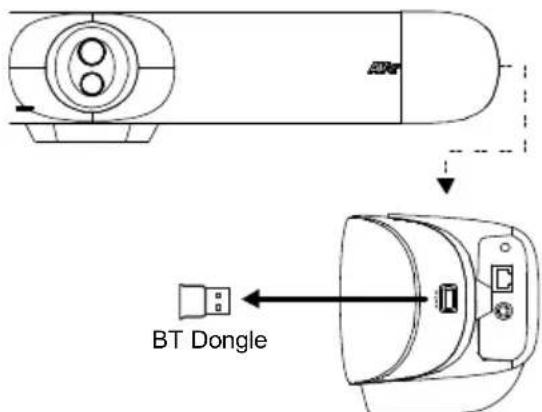
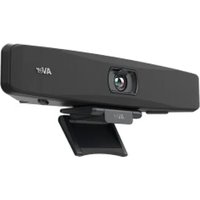
Parts Info
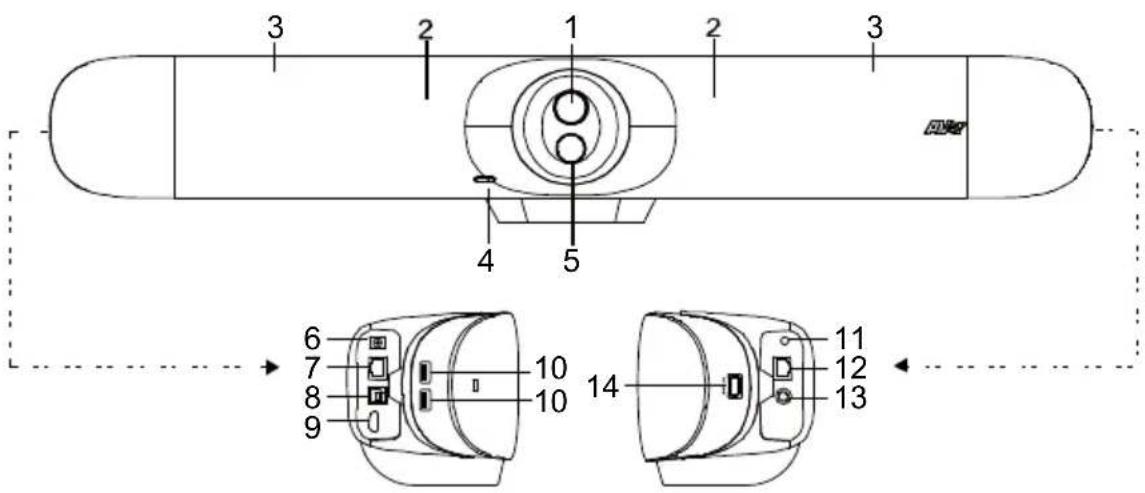
(1) Varifocal Lens
(2) IR Sensor
(3) Microphone Array Area (14 Built-in Microphones)
(4) LED Indicator
(5) Fixed Lens
(6) DC 12V Power Jack
(7) RJ-45 Ethernet Port
(8) USB 3.0 Type B Port (to PC)
(9) HDMI Output Port (to TV) ***
(10) USB Port*2
(11) Phone In/Audio Out Port*
(12) Expansion Audio
(for Speakerphone/ Microphone)
(13) RS232 Port
(14) USB 2.0 Type A Port** (only for BT Dongle)
* The default is phone in function. To support audio out function for HA system, please set it up via Room Management and purchase audio-out convert (TRS female to TRRS male) from AVer.
** BT dongle is an optional item in certain countries. Please contact your local dealer for purchasing.
*** Support built-in USB 3.1 (Gen 1) to HDMI adapter technology. Support HDMI out 4K resolution on TV/monitor.
LED Indicator
Power on: Blink blue once
Start-up: Solid red
Power on completely but no USB connection: Solid orange
Power and USB cable connected but device is idle or a call on hold: Solid white
Video and audio on: Solid blue
Calling: Fast blink white or blue depending on original status
Video on and audio mute (During a call): Solid red
A second calling: Fast blink white, blue, or purple depending on original status
Gesture control
Blue light blinks for 2 seconds: Successfully wake up gesture control function by any valid gesture command.
Blue light blinks for 4 seconds: Camera recognizes a valid gesture command and start to action.
[Note]:
■ The default of gesture control is off. Please enable it via Room Management or IP web page.
■ The effective distance is up to 4-meter away from the camera.
■ Please turn off AI function before doing zoom in/out gesture control.
Remote Control
Your device may come with one of the following remote controls.
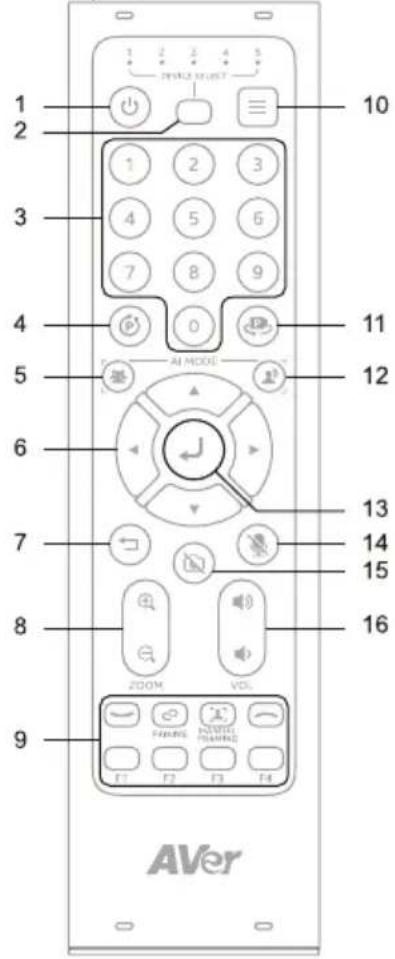
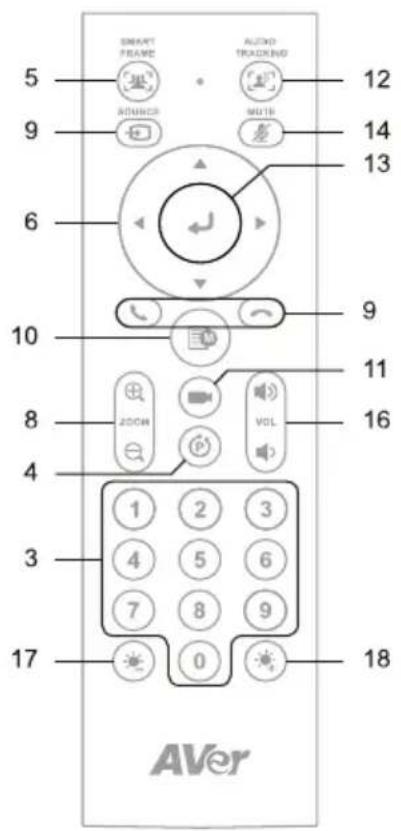
| Name Function | |
| 1. Power N/A | |
| 2. Camera Select Select 1 | to operate the camera.The remote control has been set to 1 at the factory. With each press, cycle through 1-5 |
| 3. Number Buttons | To save a preset: Press and hold aNumber (0-9).To load a preset: Press aNumber (0-9). |
| 4. Combination Button | Open combination buttons guide. Refer tofor details. |
| 5. SmartFrame Press to frame entire group on screen. Press and hold to cycle through tracking modes.To hide theSmartFrameicon , go toSetting > On-ScreenMenu > Offon the web interface or in Room Management. | |
| 6. Pan-Tilt Control Pan and tilt direction control. | |
| 7. Back N/A | |
| 8. Zoom In/Out Zoom in or out. | |
| 9. Function Buttons • Call/Answer: Start or answer a call.• Pairing: Turn Bluetooth on or off.• Manual Framing: N/A• Hang Up: End call.• F1-F4: N/A | |
| 10. Menu N/A | |
| 11. Load Preset With each press, cycle through defined presets. | |
| 12. Audio Tracking | Press and hold to cycle through audio tracking modes. |
| 13. Enter Confirm a selection. | |
| 14. Mute Mute or unmute microphone. | |
| 15. Camera Off N/A | |
| 16. Volume Volume up or down. | |
| 17. Brightness - Decrease image brightness. | |
| 18. Brightness + Increase image brightness. | |
Combination Buttons
| Press consecutively To | |
| + 1 | Turn wide dynamic range (WDR) on or off. |
| + 2 | Turn Save Preset on or off. |
| + 3 | Turn RTMP streaming on or off. |
| + 4 | Enter sleep mode when not streaming over USB. |
Device Connection
- Connect VB350 to PC/laptop with provided USB 3.0 cable and connect the power cord of VB350 to power wall outlet.
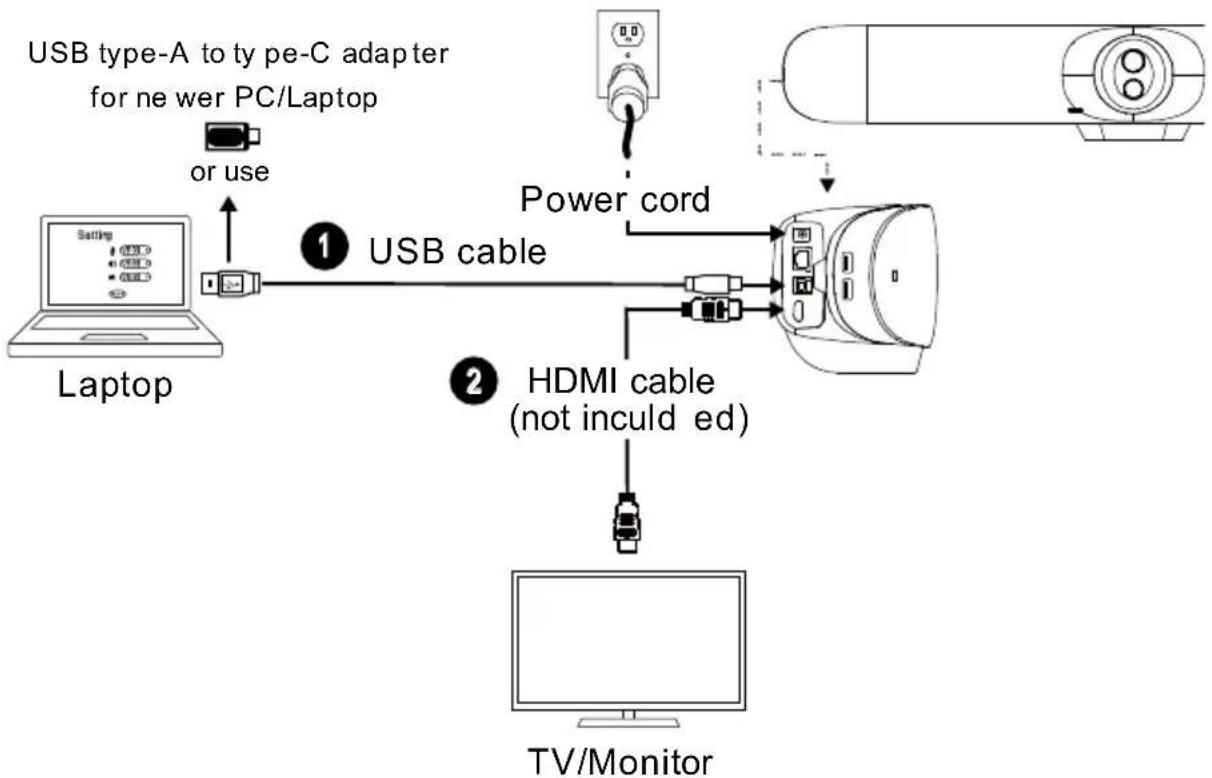
flowchart
graph TD
    A["Laptop"] -->|or use| B["USB type-A to py pe-C adapter for ne wer PC/Laptop"]
    B --> C["Power cord"]
    C --> D["TV/Monitor"]
    E["Device"] --> F["USB cable"]
    G["HDMI cable (not inculd ed)"] --> H["Power cord"]
    I["Monitor"] --> J["Power cord"]
- Connect TV/HDMI monitor to VB350 through the HDMI cable.
[Note] For Windows ^® 7 OS, a driver to support HDMI convert is required for the TV/Monitor connection with VB350. Please use Room Management to install driver.
On Room Management, go to System setting. In the "Install Driver of USB Display" field, click the "Start" button and follow the on-screen instructions to install driver.
![Install Driver of USB Display Start Install Driver of USB Display You can click the [open] button to open the Official USB Display download page. Cancel Open Auto Updates Microsoft Update 1: Download and install the software suitable for your operating system 2: On the settings page, turn on the USB Display function to start using it.](/content/2026/04/684768/images/17362742f4fcb4e81c82ac289f223cb16ebc1c000913dad0f62aba430f3151ef.jpg)
- Install a BT dongle. Plug it into the USB 2.0 type-A port. Use remote control or Room Management to enable Bluetooth function. There are two kinds of connection scenarios.
- Scenario 1: Connection with mobile phone. Enable Bluetooth of mobile phones to find VB350 and connect it to use VB350 as external microphone and speaker during a conference meeting.
● Scenario 2: Connection with AVer FONE540 BT speakerphone.
[Note] The BT dongle is an optional item in certain countries. Regarding detailed settings of Bluetooth, please refer to user's manual.
Configure Settings on Room Management
- Download and install Room Management (formerly PTZApp 2) to your computer from AVer Download Center. (https://www.aver.com/download-center) and launch the software.
Note:
- Uninstall PTZApp 2 before installing Room Management.
-
Room Management opens in your browser. We recommend Chrome 76 and above.
-
Connect your device to your computer using the included USB cable. You device should appear under the Device Control page.
- Click Setting to control audio and video settings.
For additional information, please refer to the Room Management user manual.

包装内容物
VB350 電源變壓器及

電源線
- VB350
- Conference Camera
- Federal Communications Commission Statement
- Caution
- PSTI Statement of Compliance
- VCCI-A
- Contact Information
- Headquarters
- USA Branch Office
- Europe Branch Office
- Japan Branch Office
- Vietnam Branch Office
- Optional Accessories
- Parts Info
- LED Indicator
- Gesture control
- [Note]:
- Remote Control
- Device Connection
- Configure Settings on Room Management
- Note:
- 包装内容物
Brand : AVer
Model : VB350
Category : Video conferencing system