
Isytech 33 - Dishwasher Colged - Free user manual and instructions
Find the device manual for free Isytech 33 Colged in PDF.
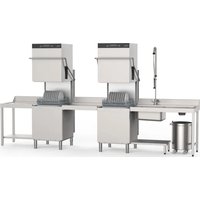
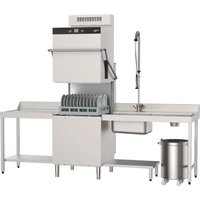
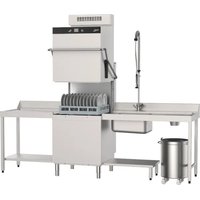
| Product Type | Professional dishwasher for collective use |
| Brand | Colged |
| Model | Isytech 33 |
| Power supply | Three-phase or single-phase (cable H07RN-F) |
| Maximum water pressure | 4 bar (400 kPa) |
| Maximum incoming water temperature | 50 °C |
| Sound pressure level | ≤ 55 dB (under-counter version) or ≤ 65 dB (hood version) |
| Wash programs | 15 programs (standard and special) |
| Resin regeneration function | Yes (optional) |
| Self-diagnostic system | Yes, with error codes |
| Integrated water softener | Optional |
| Integrated dispensers | Detergent and rinse aid |
| Automatic start function | Yes |
| Cleaning of the filter unit | Yes, removable |
| Cleaning of the wash arms | Yes, removable |
| Safety | Grounding, omnipolar switch, magnetothermic protection |
| Materials | Stainless steel tank, steel basket, PP components |
| Approximate weight | 80-100 kg |
| Approximate dimensions (W x D x H) | 600 x 600 x 850 mm |
| Maximum drain height | 1 m with drain pump |
Frequently Asked Questions - Isytech 33 Colged
User questions about Isytech 33 Colged
0 question about this device. Answer the ones you know or ask your own.
Ask a new question about this device
Download the instructions for your Dishwasher in PDF format for free! Find your manual Isytech 33 - Colged and take your electronic device back in hand. On this page are published all the documents necessary for the use of your device. Isytech 33 by Colged.
USER MANUAL Isytech 33 Colged
TRANSLATION FROM THE ORIGINAL INSTRUCTIONS
CONTENTS
CHAP 1 RISKS AND IMPORTANT WARNINGS 2
1.1 N ORMAL OPERATING CONDITIONS 3
CHAP 2 PREFACE 4
CHAP 3 INSTALLATION 4
3.1 U NPACKING 4
3.2 P 4
3.3 E LECTRICAL CONNECTION 5
3.4 W ATER CIRCUITHOOKUP 6
3.5 C ONNECTION TO THE DRAIN LINE 6
3.6 R INSE AID AND DETERGENT 6
CHAP 4 USING THE MACHINE 7
4.1 K EY AND SYMBOLS 7
4.2 S WITCHING THE DISHWASHER ON 7
4.3 FILLING THE RACK 7
4.4 C YCLE SELECTION AND START-UP 7
4.5 STANDARD PROGRAMMES 8
4.6 S PECIAL PROGRAMMES (*OPTIONAL) 8
4.7 A UTOMATIC CYCLE START-UP 9
4.8 R EMOVING THE INTEGRAL FILTER 9
4.9 E MPTYING THE DISHWASHER 9
4.9.1 Appliances with no drain pump 9
4.9.2 Appliances with drain cycle (*optional) 9
4.10 T URNING THE DISHWASHER OFF 9
4.11 R ESIN REGENERATION (OPTIONAL) 9
4.12 D ISPLAYING INFORMATION 10
4.13 L IST OF VIEWABLE MESSAGES 10
4.14 E ND OF SHIFT 10
CHAP 5 MAINTENANCE 11
5.1 G GENERAL RULES 11
5.2 C LEANING 11
5.3 C LEANING THE FILTER UNIT 11
5.4 C LEANING THE ARMS 11
CHAP 6 SELF DIAGNOSTICS 12
CHAP 7 SETTINGS 13
7.1 H ARDNESS SETTINGS FOR THE INCORPORATED WATER SOFTENER 14
CHAP 8 SCRAPPING 14
CHAP 9 ENVIRONMENT 14
In legal terms, the manufacturer reserves the property of this document. It is forbidden to reproduce it or divulge it with any means without prior written authorisation.
The manufacturer reserves the right to introduce changes in order to achieve the improvements it deems necessary without prior notice.

Read the instruction manual carefully before starting the machine. The warnings contained in the manual provide important information on safety and installation, use and maintenance. Failure to observe the instructions in the enclosed documentation may compromise the safety of the appliance and immediately voids the warranty.
Chap 1 RISKS AND IMPORTANT WARNINGS
- This appliance is intended solely for the use for which it was designed. Any other use is improper and therefore hazardous.
- The specialised technician responsible for installing the appliance must instruct the user on its operation and any attendant safety measures, including practical demonstrations.
- Only the manufacturer or an authorised service centre with qualified staff may work on the machine, even in case of malfunction, using only original spare parts.
- Always disconnect or isolate the machine from its power and water supplies before servicing, repairing or cleaning it.
- The machine may NOT be used by persons untrained in its use.
- The appliance may be used by children aged at least 8 years old or persons with reduced physical, sensory or mental capacities, or with no experience or knowledge, provided they are supervised or after they have received training in the safe use of the appliance.
Children must not play with the appliance. - Cleaning and maintenance by the user must not be performed by unsupervised children.
- The machine must NOT be kept powered up when not in use.
- If the machine is not fitted with a plug or other device for completely disconnecting all contacts, these disconnection devices must be incorporated in the power supply, in compliance with the installation rules.
- If the power cable is damaged, it must be replaced by the manufacturer or an authorised technical assistance service, or in any case by a person with similar qualifications, to prevent all associated risks.
- The screw on the appliance marked with the IEC 60417 standard symbol 5021 represents the equipotential connection.
- NEVER open the machine quickly if it has not completed its cycle.
- NEVER use the machine with the guards installed by the manufacturer removed.
- NEVER use the machine to wash objects of any form, size or material not guaranteed to be machine-washable or not in good condition.
- NEVER use the machine or any of its assemblies as steps or support for persons, property or animals.
-
NEVER overload the open door of front-loading machines, which is rated only to support the basket loaded with dishes.
-
NEVER place your bare hands in the wash solution.
- NEVER overturn the machine after it has been installed.
- If you notice any malfunction or fluid leak, immediately disconnect the power supply and shut off the water supply.
- Do not install the dishwasher in the vicinity of heat sources over 50^ .
- NEVER leave the dishwasher exposed to the weather (rain, direct sunlight, etc.)
- The dishwasher may not be installed outdoors without proper cover.
- Never start a wash programme without the overflow in the tub, as applicable.
- Never place magnetic objects in the vicinity of the machine.
- Do not use the top of the machine as a table or support.
- The installer is responsible for checking that the grounding system is fully operational.
- At the end of testing, the installer must issue a written declaration stating that the machine has been installed and tested in accordance with established legislation and good practice.
- DO NOT change the position or tamper with the elements of the machine, as this could compromise the machine safety.
- Noise pressure level according to EN ISO 4871
LpA Max = 55db Kpa=2.5db for undercounter versions
LpA Max = 65db Kpa=2.5db for hood versions
LpA Max = 76 db Kpa = 1.5 db for utensil washer versions
Max inlet water temperature: 50^
- Max inlet water pressure: 4bar (400kPa)
- Appliance designed for permanent connection to the water supply
- Do not clean the appliance with steam or water jets.
- Max loading height
On the ground in the versions with overflow
Maximum height 1 m in versions with discharge pump
1.1 Normal operating conditions
Ambient temperature: 40^ / 4^ (average 30^ )
Altitude : up to 2000 metres
Relative humidity : Max 30% at 40^ / 90% at 20^
Warnings:
Keep all documentation in the vicinity of the appliance; make it available to the technicians and operators charged with operating it and keep it in good condition in a safe place, along with extra copies for frequent reference
The operator must read, understand and familiarise himself with the contents of this manual before working on or with the appliance.
The appliance is intended solely for professional heavy duty dishwashing applications and must be installed, operated and serviced only by qualified persons according to the manufacturer's instructions.
Warranty:
The manufacturer is not liable for any damage or injury resulting from failure to observe the instructions or improper use of the machine
Failure to observe the instructions in the enclosed documentation may compromise the safety of the appliance and immediately voids the warranty
Installation and repair by unauthorised technicians and the use non-original spare parts immediately void the warranty.
Storage:
Transport and storage: -10^ to 55^ with peaks up to 70^ (for no longer than 24 hours)
Chap 3 INSTALLATION
Proper installation is essential to the good operation of the appliance. Some of the data required for installation of the appliance are given on the nameplate on its RH body panel, and a copy is included on the cover page of this manual.

The appliance may only be installed by qualified persons authorised to do so.
For Australia and New Zealand this machine must be installed in accordance with AS/NZS3500.1 and PCA.
3.1 Unpacking
Check the condition of the packaging, and note any evident damage on the shipping bill. Remove the packaging and check that the appliance is in good condition; immediately report any damage to the reseller and the shipping agent by fax or registered letter with return receipt. If the damage is such as to compromise the safety of the appliance, do not install or operate it until it has been inspected by a qualified technician.

The packaging (plastic bags, expanded polystyrene, nails, etc.) are hazardous and must not be left within the reach of children or pets.
3.2 Positioning
- Check that there are no objects or materials in the installation area which may be damaged by the steam emitted by the appliance during operation, or if there are, make sure they are properly protected.
- Before positioning the appliance, set up the electrical power supply, water supply and drain connections
- For flush-mounting single panel machines, leave a space of at least 10mm between the machine walls and the adjacent surfaces.
- The floor or build-in unit must be rated to support the weight of the appliance
-
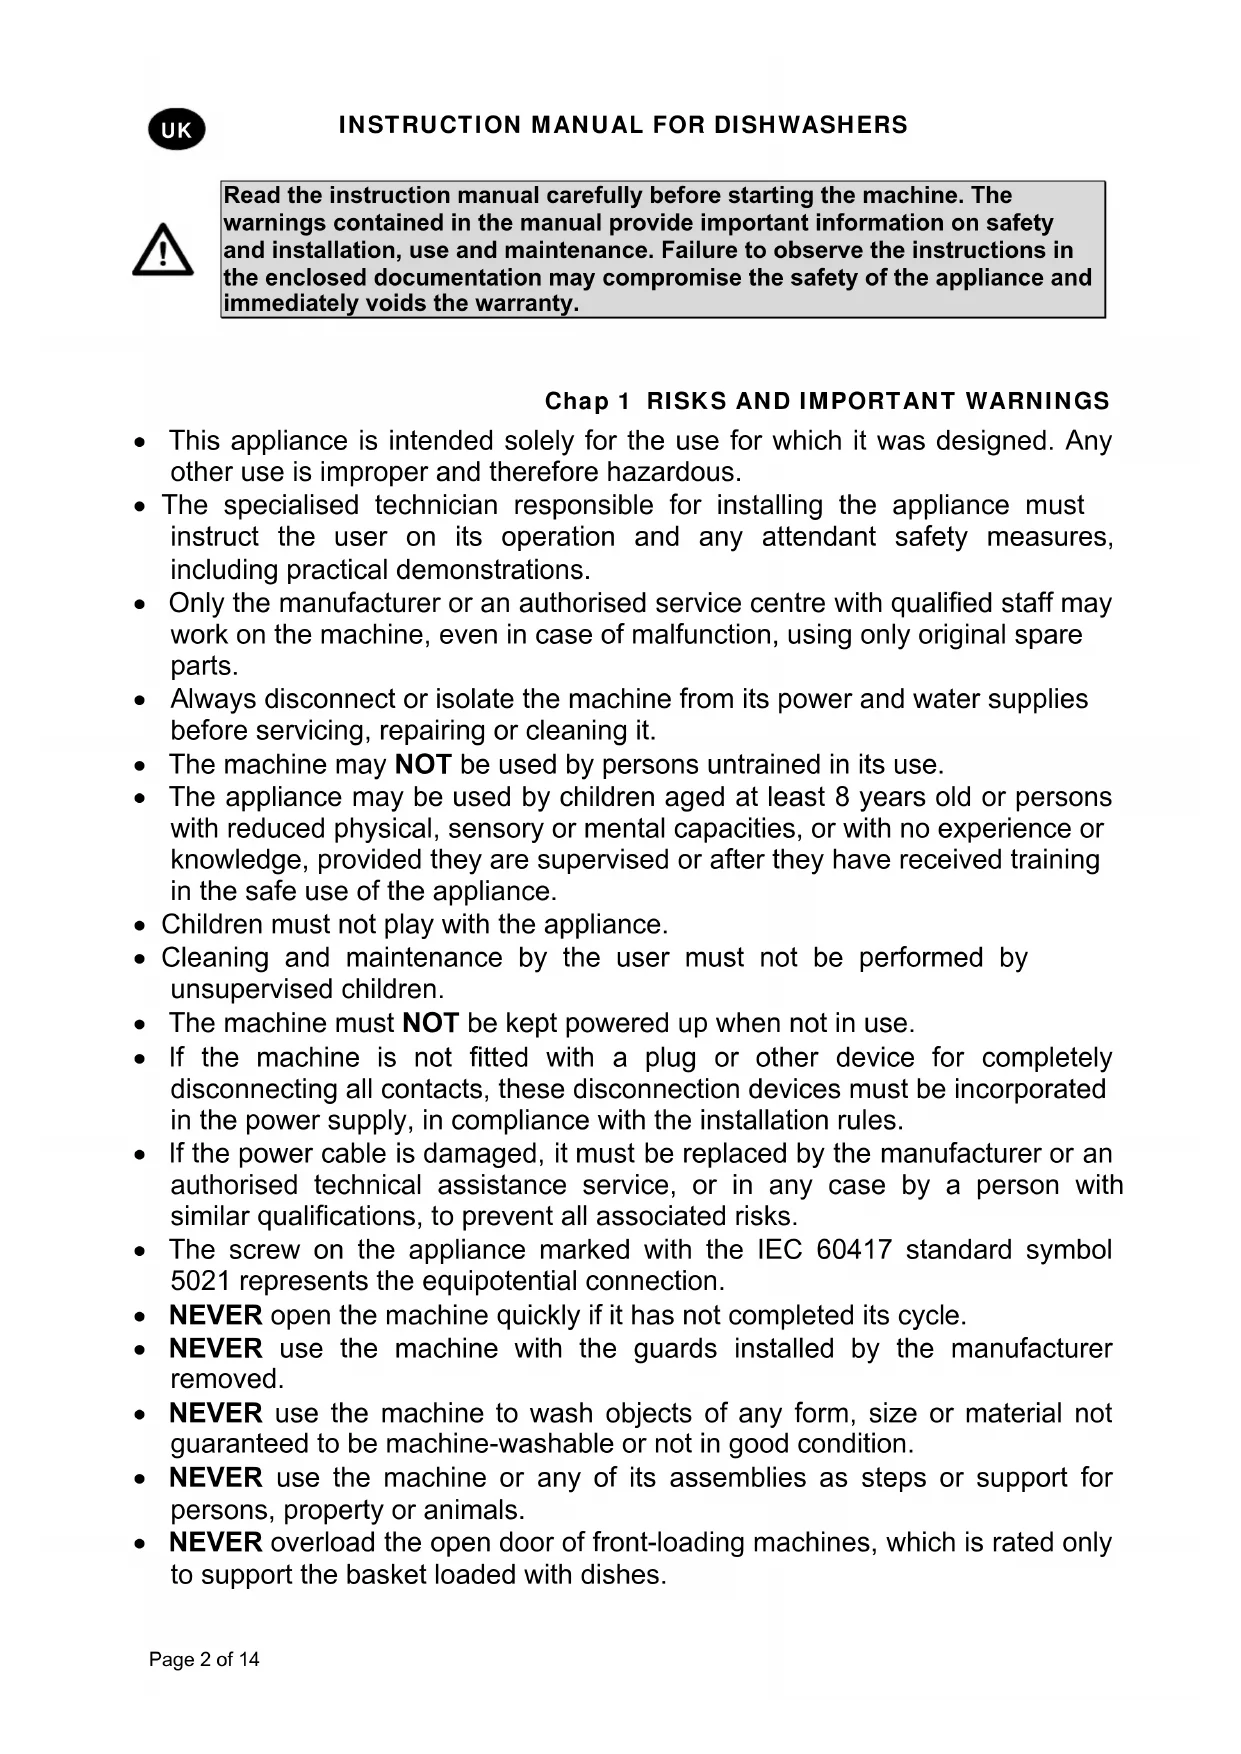
To ensure that it is stable, level the appliance with its four feet.
-
The appliance is intended for fixed installation only; any other approaches must be agreed with and approved by the manufacturer.
- Remove the protective film from its body panels before operating the dishwasher.

3.3 Electrical connection
- The power supply must be fitted with a omnipolar circuit breaker (master power switch) to break all contacts including neutral, with a contact gap of at least 3 mm and thermal cutout or fuses, which must be set or rated to the power indicated on the machine's nameplate.
- The master power switch must be fitted to the power line in the vicinity of the installation and may be connected to only one machine at a time.
The mains voltage and frequency must match the nameplate ratings. -
The installation must include a grounding system conforming with established electrical safety legislation, to protect the operator and the appliance itself
-
This appliance conforms to EN/IEC 61000-3-11 certification if the system impedance Z_sys is less than or equal to Z_max in the point of interface between the user's supply system and the public system. The installer or appliance user is responsible for checking that the appliance is connected exclusively to a supply with system impedance Z_sys less than or equal to Z_max .
| Zmax | |
| Utensil washers | 0.21 Ω |
| Hood | 0.24 Ω |
| Undercounter | 0.41 Ω |
-
The power cable, which must be exclusively type H07RN-F with current capacity at 60^ on the cable:
-
Three-phase machine
-5x2.5 mm^2 up to 20 A
-5x4 mm^2 up to 30 A
-5x6 mm^2 up to 38 A
-5x10 mm^2 up to 54 A
- Single-phase machines
-3x1.5 mm^2 up to 16 A
-3x2.5 mm^2 up to 25 A
- Must not be stretched or crushed during normal operation or routine maintenance.
- The appliance must also be connected to an equipotential system, connected by a screw marked by the symbol 5021 - IEC 60417.
- The equipotential cable must have a cross section of 10mm^2
- Respect the polarities indicated in the wiring diagram.
- For further information, refer to the wiring diagram.

Do not use multi-sockets, adapters, cables of an inadequate cross section or type or with extensions not conforming to established electrical installation regulations.

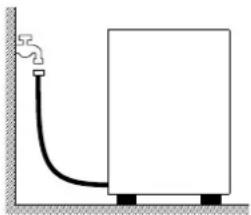
3.4 Water circuit hookup
The appliance must be connected to its water supply with a flexible hose. A shut off valve (cock) must be installed between the water supply line and the appliance's solenoid valve. The cock must be close to the appliance.
- The water supply, temperature and pressure must be compatible with the ratings shown on the technical data plate on the machine.
- Make sure that the water supply flow rate is no less than 20 l/min
- If the water hardness is greater than 14^ ( 8^ ), we recommend using an internal water softener. If the water hardness is greater than 35^ ( 19.5^ ), install an external water softener upline of the solenoid valve
- For machines without water softener: if the water hardness is greater than 14^ ( 8^ ), install an external water softener upline of the solenoid valve.
- If the water has a very high residual concentration of high conductivity minerals, we recommend installing a demineralisation system.
- Machines intended for use with desalinated water or in any case with high sodium chloride concentration must be ordered specifically, as they require specific construction materials
- Do not supply fully demineralised water to machines with a heat recovery unit with batteries with copper pipes. In this case, request the version with batteries with stainless steel pipes.
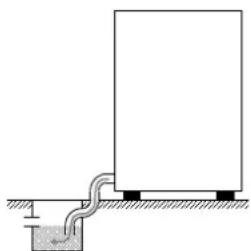
3.5 Connection to the drain line
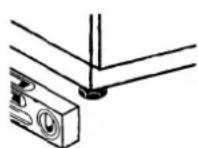
- The drain line must consist of a free drain sump with siphon suited to the flow capacity of the drain hose supplied with the appliance. The hose must be able to reach the sump without stretching, restriction, folding, crushing, pressing or forcing in any way.
- The tub drains under gravity, so the drain sump must be lower than the machine's base.
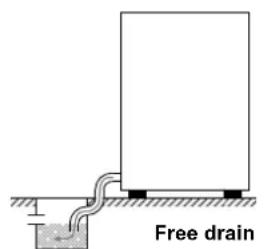
With pump (available on request)
- if the drain is not lower than the base of the appliance, you can use the version with drain pump (available on request).
- In this case, the drain connection may be no higher than 1m
- Always check that the drain works properly and is not blocked.
- Any other solution must be approved by the manufacturer in advance.
3.6 Rinse aid and detergent
- The rinse aid and detergent are dispensed by the machine's integral dispenser (depending on model).
- The dose is set by the installer in relation to the hardness of the water, and he also calibrates the dispensers themselves.
- Before calibrating them, fill the dispenser supply tubes with their respective product.
The units are calibrated with the adjuster screws, or directly with the control panel (as applicable). - The level of fluid in the container must be sufficient for priming; do not allow it to drain completely or top it up with corrosive or impure product.
NEVER use CHLORINE or HYPOCHLORITE based detergents.
We recommend installing an automatic detergent dispenser.
Chap 4 USING THE MACHINE
4.1 Key and symbols
Referring to Fig.1:
| 1 | ON/OFF BUTTON | 5 | INFORMATION DISPLAY |
| 2 | SPECIAL PROGRAMME SELECTION BUTTON | 6 | STATUS BAR (LED) |
| 3 | PROGRAMME SELECTION BUTTON | 7 | CHECK BAR (LED) |
| 4 | START BUTTON |
4.2 Switching the dishwasher on
Referring to Fig.2:
- Turn on the main power switch and open the external water tap.
- Check that an overflow is present, if required.
- Press ON/OFF (1).
- The CHECK BAR (7) lights up, turning from red to green to confirm the check. In the event of a serious fault, the led bar lights up in red and stops the machine operation; a minor error is indicated in orange, and will not stop the machine cycle.
- Loading begins automatically when the machine is switched on.
- The point on the display flashes until the level is reached.
- The STATUS BAR (6) lights up from the top downwards to indicate that the dishwasher is heating up.
- When the working temperature is reached, the STATUS BAR (6) stays on, lit in green.
- The optimal wash conditions have been reached.
4.3 Filling the rack
Referring to Fig. 3, to ensure the correct operation of the dishwasher follow the rules described below:
- Use a suitable rack, fill without overloading and without overlapping the dishes.
- Always wipe the dishes before placing in the dishwasher; do not put dishes with dry or solid residues in the washer.
- Place the empty dishes in the rack facing downwards.
- Place plates and the like in the sloping rack, with the inner surface facing upwards.
- Place the cutlery in the cutlery basket, handle end down.
- Do not place silver and stainless steel cutlery in the same cutlery basket as this will turn the silver brown and may corrode the steel.
- Wash the dishes immediately after use, in order to prevent any residue from hardening and sticking on them.
- Use only solid, dishwasher-proof dishes.
4.4 Cycle selection and start-up
- Press the PROGRAMME SELECTION (3) or SPECIAL PROGRAMME SELECTION (2) button repeatedly to select a wash cycle that is suitable for the dishes to be washed; the display will show the cycle number selected (Fig. 4).
- To run the programme, press START (4); the STATUS BAR (6) starts to flash orange, increasing from the bottom upwards to indicate the progression of the cycle.
- When the cycle is finished, the bar lights up in green (Fig. 5).
- For rapid drying, remove the rack from the machine as soon as the cycle finishes.
- To stop a wash cycle early, press START (4).
N.B. In hood versions, after the first work cycle the automatic start is automatically enabled; the subsequent cycles will be enabled automatically when the hood is closed. This operating mode is marked on the display by "AS".
4.5 Standard Programmes
| Pr 1 | Short wash programme for lightly soiled dishes. |
| Pr 2 | Medium wash programme for averagely soiled dishes. |
| Pr 3 | Long wash programme for heavily soiled dishes. |
| CLE | Drain and self-cleaning cycle to be used at the end of working day. |
| dr | Drain cycle. |
4.6 Special programmes (*optional)
| ECO | Reduces energy consumption by washing at lower temperatures and with reduced water consumption than normal wash programmes; a good washing result is achieved by a prolonged mechanical washing action. |
| Act | Suitable for washing very dirty, even encrusted dishes that have been left for some time. The programme includes 2 washes and 2 rinses. |
| Rct2 | |
| StEE | Suitable for washing forks, spoons, knives and all sorts of other cutlery. This wash programme lasts longer than the other programmes and uses a higher water temperature. |
| rEFr | Recommended when you wish to wash with a total change of water in the washing tub, so suitable for consecutive washes of particularly greasy and dirty dishes. The complete change of the water in the tub requires a longer wash cycle. |
| PLAe | Program for dishes. |
| GLAS | Suited for washing glasses of any shape or type. This programme washes with a low rinse temperature and requires a long drying time. |
| Long | Continuous wash. The cycle can be stopped at any time by pressing the Start button. After a short pause, the rinse stage will start. The cycle ends automatically after 12 minutes. |
| SArn | Recommended when the dishes to be washed also have to be sanitised. This programme controls the wash temperature and time calculating the constant A0. The programme ends when the A0 value equals 30. The length is variable, but is generally around 20 minutes and the wash temperature reaches approximately 70C°. N.B. If you require an A0 value other than 30, contact an authorised technician, who will modify the machine software for you. |
| Pr 5 | The recommended cycle for sparkling glassware; may be used only in combination with a reverse osmosis device. |
| Pr 6 | Long wash programme for heavily soiled dishes (8'). |
| Pr 7 | Long wash programme for heavily soiled dishes (10'). |
Warning: the special programmes vary according to the dishwasher model.
4.7 Automatic cycle start-up
This function is used to make the chosen cycle start automatically when the door is closed. To enable, proceed as follows (Fig.6):
If not made available by default, the function must first be enabled via the settings menu.
- With the appliance on and the door open, press and hold (for at least five seconds) START (4) until AS appears on the display.
- To disable the function, with the door open press START (4) again for five seconds.
4.8 Removing the integral filter
- Move the washing and rinsing arms at right angles to the edge of the door (Fig.7).
If the dishwasher has a 3-arm wash arm, it must be removed in order to remove the integral filters. - Lift each semi-filter by the relative handle.
4.9 Emptying the dishwasher
4.9.1 Appliances with no drain pump
- Switch the dishwasher off.
- Remove the integral filter (Fig.7A).
Pull up and remove the overflow pipe (Fig.8B). - Wait for the tub to empty completely.
If necessary, extract the tub filter and clean (Fig.8C).
4.9.2 Appliances with drain cycle (*optional)
If present, remove the integral filter (Fig.7).
- If present, remove the overflow by pulling upwards (Fig. 9).
- Close the door.
- Select the cycle dr
- Press START (4) to start the cycle.
The machine runs a drain cycle with self-cleaning (*where foreseen) and then switches off.
If necessary, extract the tub filter and clean (Fig.8C).
4.10 Turning the dishwasher off
- Press ON/OFF (1), on the DISPLAY (5) the central segments will light up, indicating that the machine is powered.
4.11 Resin regeneration (*optional)
When rEG flashes on the display in appliances with internal softener, you need to run a regeneration cycle to restore proper function of the internal softener. Proceed as follows (Fig. 11):
- Empty and clean the dishwasher.
- Remove the integral filter and open the salt container in the tub.
- Pour in 250-300 g of regeneration salt (1 or 2 mm grain size kitchen salt with no additives).
-
Close the container firmly.
-
Make sure the overflow has been removed.
- Close the door and switch the dishwasher on.
- Press the PROGRAMME SELECTION button (3) for the resin regeneration cycle; rEG will appear on the display.
- Press the START button (4) to start a cycle.
- The regeneration cycle lasts around 20 minutes.
- The dishwasher will switch off when the cycle has completed.
N.B. Do not switch off the machine if a regeneration cycle is underway
4.12 Displaying information
- By holding the START button (4) pressed for a few seconds you can display in sequence the Boiler temperature, the Tub temperature and the number of cycles performed by the machine. This information can be displayed both before and during the wash cycle and will only be visible temporarily.
- By holding the PROGRAMME SELECTION button (3) pressed for a few seconds you can display in sequence the Boiler temperature, the Tub temperature and the number of cycles performed by the machine.
- The function can be activated by holding the PROGRAMME SELECTION button (3) pressed for a few seconds.
4.13 List of viewable messages
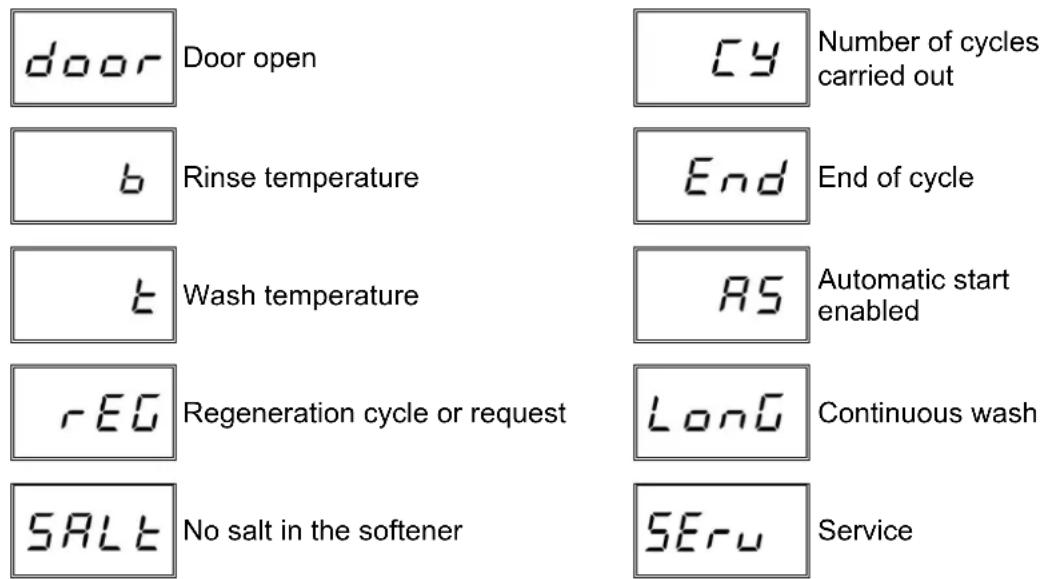
4.14 End of shift
- At the end of the day always drain the machine as described in the section Machine draining.
- Disconnect the power supply by means of the main switch and close the external water cock.
- Perform routine maintenance and clean the machine as described in the section Maintenance.
- If possible, leave the door ajar to prevent bad odours building up inside the machine.
Chap 5 MAINTENANCE
5.1 General rules

Before doing any maintenance, completely drain out all water, shut off the power supply and close the water supply cock.
Do not use water under pressure - it can damage the electrical equipment.
Only wash the body panelling when it is cold, using only product specifically designed for steel.
If there is a risk of ice forming, drain the water from the boiler and wash pump.
5.2 Cleaning
To keep the machine in good working order, it must be maintained regularly as explained below. We recommend periodically running a sanitising treatment with suitable non-corrosive commercial products.
5.3 Cleaning the filter unit
Run this procedure at the end of the day or when you see the filters are dirty:
- Remove and clean the baskets.
- Empty out the tub as explained in "Machine draining".
- Remove and carefully clean all the filters.
- Do not use abrasive products to clean the tub.
- Restore all removed parts when finished.
5.4 Cleaning the arms
The wash and rinse arms are easily removed in order to clean their nozzles and prevent blockage/encrustations.
Proceed as follows (Fig.10):
- Remove the spray arms by unscrewing the retaining nuts or by unclipping the quick-fit attachments on machines so equipped.
- Wash all parts under a jet of running water and clean the nozzles thoroughly, using a toothpick or pointed tool if necessary.
Clean the arm rotation pins inside the machine and the wash and rinse water drainage area. - Restore the arms and check that they rotate freely.
Chap 6 SELF DIAGNOSTICS
The machine is equipped with a self-diagnosis system that registers and warns of a number of malfunctions.
| Fault Description and possible remedies | |
| Er01 No rinsing. The rinsing cycle was not completed correctly. Make sure that the rinsing nozzles are clean. | |
| Er02 No drainage. The water was not drained or drained incorrectly. Check that the drain pipe is not bent or crushed and that the siphon and filters are not blocked. In machines fitted with an overflow pipe, remove this before starting the drainage cycle. | |
| Er03 Rinsing temperature reset fault. The boiler temperature did not reset in the set time during the washing cycle. Switch the machine off and then on and run a new cycle. | |
| SAFE | Er04 Water filling in tank fault. Make sure the pipes are connected correctly, and that the water tap is open. Where foreseen, check the presence of the overflow. Switch dishwasher off and then on and fill again. |
| Er05 Tank thermometer fault. (Probe open) The machine does not read the tank temperature value. Switch the dishwasher off and then on. | |
| Er06 Tank thermometer fault. (Probe short circuited) The machine does not read the tank temperature value. Switch the dishwasher off and then on. | |
| Er07 Boiler thermometer fault. (Probe open) The machine does not read the boiler temperature value. Switch the dishwasher off and then on. | |
| Er08 Boiler thermometer fault. (Probe short circuited) The machine does not read the boiler temperature value. Switch the dishwasher off and then on. | |
| Er09 Boiler loading time out: boiler not filled. Impossible to carry out rinse cycle. Check that the water tap is open. Switch the dishwasher off and then on and run a new cycle. | |
| Er21 Insufficient rinse: the right amount of rinsing did not take place; make sure the rinse nozzles are clean. The error does not stop machine operation. | |
| Er22 Tank temperature reset fault: The tank temperature did not reset in the set time during the washing cycle. Switch the machine off and then on and run a new cycle. | |
| SAFE | Er5F Electro-mechanical safety device: the boiler or tub safety thermostats have cut in, or the tub safety pressure switch has been triggered. |
| SAFE | Er5L Level safety switch: Incorrect water level in the tank. |
| drte Dirty filter: incorrect water level in tank due to dirty filter or overflow fitted incorrectly. | |
| WARNING! Switching the dishwasher off and then on again "resets" the signals, if after carrying out the instructions given the problem persists, contact an Authorised Service Centre. | |
Chap 7 SETTINGS

The following settings should only be configured by a qualified technician.
The parameters listed below can be set during installation of afterwards, accessing the settings menu as follows:
Machine in standby with door open.
- Press buttons 1 and 2 together (ON/OFF and SPECIAL PROGRAMME SELECTION) for 5 seconds and enter the key CH 12 (buttons 3 and 4 to change the parameter, 1 to confirm).
- Then press button 1 (ON/OFF) repeatedly to scroll through the following headings, enabling and/or changing them using buttons 3 and 4 (the modified parameter is memorised without being confirmed). The list of parameters may vary according to the type of dishwasher.
| Language | Language selection | |
| b | Boiler Temperature | Boiler temperature settings for programmes. In the versions with atmospheric boiler (rinse pump) there are different settings for each programme (b1 - b2 - b3) |
| t | Tank Temperature | Tub temperature regulation for programmes. Rinse pump versions have different settings for each programme (t1 - t2 - t3) |
| tH | Thermo - Stop | Enabling the Thermostop function, which guarantees the correct rinse temperature. |
| ES | Energy Saving | Enabling the Energy Saving function, which guarantees energy savings when the dishwasher is on but not in use. |
| dn | Detergent Pump | Manual operation of detergent doser |
| bn | Rinse Aid Pump | Manual operation of rinse aid doser |
| rn | Manual Rinse | Manual operation of the rinse pump |
| dt | Dosage Detergent | Detergent dosing time |
| bl | Dosage Rinse Aid | Rinse aid dosing time |
| dH | Water Hardness | Setting the supply water hardness (dishwashers with water softener): enter the values given in the table below |
| cc | Set Number Service Cycles | Cycle counter setting and activation to enable the Service alert for an external water softener. The Service alert can be cancelled by holding pressed all 4 buttons with the machine off and the door open. |
| RA | Autostart Autoenabling | Automatic enabling of automatic starting |
| dr | Manual Drain | Manual operation of the drain pump |
Once all necessary parameters have been set, to exit and memorise any changes simply press and hold button 1 for a few seconds until the on-line dashes appear.
7.1 Hardness settings for the incorporated water softener
Set the hardness level of the water supply dH in the settings menu following the instructions given in the following table:
| Measured hardness | dH | Measured hardness | dH | ||
| °fr | dGH | n° | °fr | dGH | n° |
| 0 ÷ 20 0 | ÷ 11 | 1 | 41 ÷ 45 2 | 3 ÷ 25 | 6 |
| 21 ÷ 25 | 12 ÷ 14 | 2 | 46 ÷ 50 | 26 ÷ 28 | 7 |
| 26 ÷ 30 | 15 ÷ 17 | 3 | 51 ÷ 55 | 29 ÷ 31 | 8 |
| 31 ÷ 35 | 17 ÷ 20 | 4 | 56 ÷ 60 | 31 ÷ 34 | 9 |
| 36 ÷ 40 | 20 ÷ 22 | 5 | |||
Chap 8 SCRAPPING
Our machines do not contain materials requiring special handling.

(Applicable in the EU and countries with sorted waste disposal)
The mark applied to the product or its documentation indicates that it must not be
scrapped with domestic
waste when it reaches the end of its service life. To prevent damage to the environment or health risks
due to improper scrapping, keep this product separate from other waste and recycle it so as to promote sustainable use of materials.
Domestic users are requested to contact their reseller or local authority for information on sorted waste disposal and recycling for this type of product.
Corporate users are requested to contact their supplier and check the terms and conditions of the purchase contract.
The product may not be scrapped together with other commercial waste.
| Recyclable directly | Symbols | Object Material | % | |
| 40 FE | Sheet | Steel | ||
| 20 PAP | Cardboard packaging | PAP | ||
| 50 FOR | Wooden pallet | ISPM15 | ||
| 05 PP | Plastic parts | PP, PP+FV | ||
| Compounds | W E E | Motors | Assemblies | |
| Electric parts | ||||
| Electronic parts | ||||
| Rubber parts | EPDM | |||
Chap 9 ENVIRONMENT
RESPECT FOR THE ENVIRONMENT
Proper use of the dishwasher can improve its environmental footprint, if the following simple rules are observed:
Only wash full baskets.
Switch the dishwasher off when not using it.
Keep the machine closed when it is in standby.
Use wash programmes suited to the amount of soiling.
Supply the machine with hot water, if gas heated.
Make sure the drains flow into a suitable sewer.
Do not exceed the recommended dose of detergent.
The manufacturer reserves the right to modify the electrical, technical and aesthetic features of this appliance and replace any of its parts without notice, as he deems necessary to offer a reliable product with a long service life and advanced technology.
HFDST8 AFVALVERWERKING 14
HFDST 9 MILIEU 14
HANDLEIDING VOOR AFWASMACHINES

Hfdst 8 AFVALVERWERKING
1.1 NORMALE DRIFTSFORHOLD 3
KAP 2 FORORD 4
KAP 3 INSTALLATION 4
3.1 UDPAKNING 4
3.2 P LACERING 4
3.3 E LTILSLUTNING 5
3.4 H YDRAULISK TILSLUTNING 6
3.5 T ILSLUTNING TIL AFLØB 6
3.6 A FSP/ENDINGSMIDDEL OG VASKEMIDDEL 6
KAP 4 BRUG AF MASKINEN 7
4.1 OVERSIGT OG SYMBOLER 7
4.2 T AENDING 7
4.3 F ORBEREDELSEFKURVEN 7
4.4 V ALG OG START AF CYKLUS 7
4.5 S TANDARDPROGRAMMER 8
4.6 S PECIALPROGRAMMER (^*E K S T R A U D S T Y R) 8
4.7 S TART AF AUTOMATISK CYKLUS 9
4.8 F JERN INTEGRERET FILTER 9
4.9 T 9
4.9.1 Maskiner Eden aflobspumpe 9
4.9.2 Maskiner med tomningscyklus (*ekstraudstyr) 9
4.10 SLUKNING AF MASKINEN 9
4.11 R EGENERERING AF HARPIKS (^* EKSTRAUDSTYR) 9
4.12 V ISNING AF INFORMATIONER 10
4.13 L ISTE OVER MEDDELELSER, DER KAN VISES 10
4.14 S LUT PÄ DRIFT 10
KAP 5 VEDLIGEHOLDELSE 11
5.1 GENERELLE REGLER 11
5.2 R ENGORING 11
5.3 R ENSNING AF FILTERAGGREGAT 11
5.4 R ENGORING AF ARME 11
KAP 6 SEVLDIAGNOSE 12
KAP 7 JUSTERINGER OG INDSTALLINGER 13
7.1 INDSTILLING AF HARDHEDEN AF DET INTEGREREDE BLDGORINGSANLAEG 14
KAP 8 BORTSKAFFELSE 14
KAP 9 MILJ0 14
INNEHALLSFÖRTECKNING
KAP 1 RISKER OCH VIKTIGA VARNINGAR 2
1.1 N ORMALA ANVÄNDNINGSVILLKOR 3
KAP 2 FORD 4
KAP 3 INSTALLATION 4
3.1 U PPACKING 4
3.2 U PPSTÄLLNING 4
3.3 E LEKTRISK ANSLUTNING 5
3.4 V ATTENANSLUTNING 6
3.5 A NSLUTNING TILL AVLOPPET 6
3.6 G LANSMEDEL OCH DISKMEDEL 6
KAP 4 ATT ANVANDA MASKINEN 7
4.1 T ECKENFÖRKLARING OCH SYMBOLER 7
4.2 P ÅSLAGNING 7
4.3 A TT LASTA DISKKORGEN 7
4.4 V AL OCH START AV PROGRAM 7
4.5 S TANDARDPROGRAM 8
4.6 S PECIALPROGRAM (*TILLVAL) 8
4.7 A UTOMATISK PROGRAMSTART 9
4.8 A TT TA LOSS INTEGRALFILTRET 9
4.9 T ÖMNING AV MASKINEN 9
4.9.1 Maskinerutan tomningspump 9
4.9.2 Maskiner med tomningspump (*tillval) 9
4.10 A VSTANGNING AV MASKINEN 9
4.11 R EGENERERING AV HARTSER (*TILLVAL) 9
4.12 V ISNING AV INFORMATION 10
4.13 L ISTA OVER MEDDELANDEN SOM KAN VISAS 10
4.14 V ID ARBETSDAGENS SLUT 10
KAP 5 UNDERHALL 11
5.1 A LLMÄNNA REGLER 11
5.2 R ENGORING 11
5.3 R ENGORING AV FILTERENHETEN 11
5.4 R ENGORING AV DISK- OCH SKOLJARMARNA 11
KAP 6 SJALVDIAGNOS 12
KAP 7 INSTÄLLNINGAR OCH JUSTERINGAR 13
7.1 I NSTALLNING AV VATTENHARDHET MED INBYGGD AVHARDARE 14
KAP 8 AVFALLSHANTERING 14
KAP 9 MILJÖ 14
TJABA1 PNCKN IN BAXHbIE MEPbI IPEIOCTOPOXHOCTN 2
1.1 YCIOBNA HOPMAJIbHOI 3KcPIYATAUIN 3
TJABA2 BBEDEHNE 4
TJABA3 YCTAHOBKA 4
3.1 PACNAKOBKA 4
3.2 PA3MEUJHNE 4
3.3 IODKJIIOUeHHe 3JIeKTPoNTAHnI 5
3.4 IOOKJIIOUeHNE K CNTEME BOIOCHABXEHN 6
3.5 IOdkJIIOUeHNE K CNTCTEME KAHAIN3AUIN 6
3.6 OIOJIACKIBATEJIb IMOIOJIeE CPEICTBO 6
TJABA4 3KcJIyATAUmaHbI
4.1 YCIOBHBIE OBO3HAUHINI CIMBOJIbI 7
4.2 BkHouEHE 7
4.3 3ANJHEHNE KOP3INHbI
4.4 BbIbOPN3ANyCKUKNJIa 7
4.5 PPOPAMMBI 8
4.6 CneluaIbHbIE PPOrPAMMbI (^*O IUR) 8
4.7 ABTOMATUHECKNI 3APYCK LUKKA 9
4.8 DEMOHTAK DOIOJHINTEJIbHOrO FOJIbTPA 9
4.9 OIOPOXKHEHIE MAUINHbI 9
4.9.1 Maunhbi 6e3 cHbHO 9
4.9.2 MauunbI c uKlom pa3apy3ku (*onu) 9
4.10 BbIKJIIOUeHHe MAuINHbI 9
4.11 PEREHEPAUCA MOnI (^*O 因 10
4.12 OTOBPAXHEHNE INHOPMALUN 10
4.13 Cnncok OTOBPAKAEMbIX COObueHn 10
4.14 OKOHUAHNE PABOTbI 11
TJABA5 TEXHnueCKOE OBCJyKINBAHNE 11
5.1 Obiue IPRABILA 11
5.2 11
5.3 YIcTKAΦNJIbTPOB 11
5.4 YNCTKA JIONACTEIN 11
TJABA6 CAMOINAGHOCTNKA. 12
TJABA7 PEGYUNPOBKN HACTPOIKN 13
7.1 3AADHNE XECTKOCTN BOdI HA BCTPOEHHom YMnHTENE 14
TJABA8 YTNIN3AUH 14
TJABA9 OKPYKAIOUIA CPEA 14
B cooemcmeu c 3aokohodambebcmeom npou3eodumbe coxpanre 3a cobou npaeoc6cmbeHHocmu Ha hacmouddokymeh. 3anpeuaemc oepnou3eodumb cam dokymehm unu pa3aanaawb e0 codepkaHue IIObIMU cpeCMeAMu 6e3 npedeapumelhzo nucbMHeO papeweHua.
Pou38oumenb ocmaenem 3a cobou npaeo EHocumb Heobxodumbue u3MeHeu e ueJx ycoepueHcmeoeaHua ceoe npodykuu 6e3 npedapumelhno yeeomneu.

BnmaTeNbNo npoHTaIte pykoBOdCTBO NO 3KcNpyaTuCNnepeD TeM, KaBKnIOuATb MaunHy. B HEM cOePxAcTcBaxHbIe yKa3aHnA OTHocNTeNbHO 6e3OnaChOCTn pa3NNUHBIX 3TaNOB yCTaHOBKN, 3KcNpyaTuCNm ITexo6CnyXnBaHnMaunHbI. HecobIoJeHne IHCTpyKcuN, pINBeDeHHbIX BCOPOBODTeNbHO JOKUMeHTaCUH, MOKeT HeRaTNBHO NOBNIaTb Ha 6e3OnaCHOCtB yCTpOcTBA n PnVBecTN K HeMeJNeHHo NOTepe rapaHTnHBIX npab.
ГЛABA 1 ПИСКИ ВАЖHBIE MEPbl ПЕДОCTОPOXHOCTN
-Данна Машина Должна И сплььовся NСКИЧИТЕЛБНО NO TOMY HA3HAчEHNO, Дд КOTOPО OHa 6bla cnpoeKtupobaHa.Зкпnyataцma Maшины B Лобix Dpyrnx Zeilex ChITaeTc HeHaJNeXaUeHn, CneIDOBaTeNbHO, onaCHOI.
CneuannctbI, ocuieCTBJIIOUe MOHTax, 63aHbI DaTb NOb3OBaTeIHO Heo6xOIMbIe yka3aHnI No pa6ote C MaunHO n paccka3aTb O npabnJax TexHnK 6e3OpacHOCTN, KOtOpBIE OH DoJIKeH CO6JIIODaTb, B TOM YNCJIe, C demOHCTpaUnei CBONX peKOMeHdaUH Na pKaTnke.
Bce pa60tbi Ha MaunHe, B TOM YncIe N B Cnyae NOJOMKn, DOJXHbI npOn3BOIDITbcra NCKIOUHTeJIbHO 3aBODOM-N3ROTOBNTeJIeM, IINo KBaIIuΦnIupOBaHHbIMN CneuaJINCtAmN JInueH3npOBaHHORO cepBnCHORO ueHTpa C INcNoJIb3OBaHHem PnI 3TOM TOJIbKO ΦIpMeHHbIX 3aIyacteI.
- Перд Тхнческ imm obcnyxnbHnem, npOBeHnem peMOHTbIX pa6OT nIN ChTkn, Bcerda OTcoeHHaIte INN IN3OInpyIte MaunHy OT 3JneKTpocetN IN BOdONpOBoDa.
MaunHa HE donkha nCnoJb3OBaTbcra HenoDrotOBneHHbIM nepcoHaIOM.
MaunHa MoKeT nCNoIb3OBAtbcr DeTbMn He MnaIe 8 Jet N IuCaMn C OrpaHnueHHbIMN cHcOpHbIMN NIN MeHTaIbHbIMN CnOCo6HOCTaMn NIN He IMeIOUIMN Heo6XODMbIX 3HaHn TOJbKO B Tex CnyaAx, KOrDa OHN HaxOJaTcR NOd PrncmOTpOM Lnca, OTBETCTBeHHoro 3a INx 6e3OnaCHOCTb, NIN NOnyHInN OT Hero yka3aHn rno ee 6e3OnaCHOKcnpyatauHn.
He no3BOJnTe DeTm nIgPaTb C MaunHOH.
Pa60tbl no YnCTKe MaunHbI nn yxOdy 3a Hei, nOpJexKaUne BblIOJIHeHIO NOIb3OBaTeIeM, MoryT OcyuEcTBJrTbCra DeTbMn TOnbKO B TOM Cnyae, ecNI OHN HaxoJATcI NOI npICMOTpOM.
MaunHa HE donxHa haoiNbCn noHnpanjKeHnem, KOrDa OHa He nCnoJb3yETc.
- EcIn MaunHa He OchaueHa BnIKo INI IN dpYrM yCTpoiCTBOM, ObecneuBaIOUIM NOHoe OTcoeINHeHne BCEX KOHTaKTOB OT NCTOCHNka 3JIeKTPoNTaHnA, COOTBeTCTByUOuine yCTPOJCTBa DOJXHbI 6bITb yCTaHOBJeHbI B cENI 3JIeKTPoNTaHnA CORlaCHO DeIcTByUOuIm CTAHdApTaM.
B clyae noBpeKdHnKa6eIaHTAHn BO n36exaHne BO3MOxHbIX pNCKOB erO 3ameHa doJXHa 6bITb BblIOJIHeHa n3rotobTeJeM IIN erO cepBnCHoCnyk60n IIN, B IIObOM clyae, CneuaNCTOM, IMeIoUm aHaIOrHyU KBaInΦkaUHO.
- YctaHOBJIeHHbI Ha MaUNHe BnHT, 6o3HaueHHbI CmMBOJOM 5021 cTaHApTa IEC 60417, JBnEeTcra ToUKoN NOkJIIOUeHnK 3KBnInoteHuaJbHomy KOHTpy.
- HNKOДA He OTKpbIbaiTe pe3ko MaunHy Do OKOHaHna pa6oeryo zHKna.
- HNKOДA He ИСпОЛьЗУЛТe МaшиHy 6e3 пpeДуСМOTpeHHbIx ИЗROTOВИTeJIeM 3aцИTHbIx yCTpoIcTB.
HnKoIa He nCnoB3yTe MaunHy dJa MoKn IpEmdetOB, He noDxOJaXnX No Tnny, fOpMe, pa3Mepam nn MaTePnaJAm dJa MaunHHoN MoKn, Jn6o
PpeMeTOB C HApUeHHoI cIIOCTHOCTbIO.
- HNKOgA He nCNoB3yIe MaunHy nn ee qactn B KaueCTBe JeCTHnCbI nn onopbl IJIpei, XNBOTbIX nn npedMeTOB.
- HNKOgA He neperpykaTe OTKpbItyo DBepuy MaunHbI c fpoHTaJbHOJ 3arpy3KoJ, NOCKoJIbKy OHa paCCHTaHa Ha BEc TOJIbKO KOp3INbI C NocydoJ.
- HNKOgA He norgykaTe o6haxeHHbIe pyKn B MOIoIu paCTBOp.
- HNKOrDA He nepeBopaUbaIte MaunHy nocJe ee ycTaHOBKn.
- Пи обнаружени Нсправно Илу утуки Хдков� с HeMeДлeно OTKПОЧТЕ зелКТрОПТаHne И поеду ВОдbl.
He pa3meaTe nocydomoeyHy MaunHy pAOM c NCTOCHKAMN TePna C TemnepaTypoi Bbiwe 50^
HnKoIa He octabTne NocyDOMoeHyu MaunHy NOd BO3deiCTBnem aTMocepHBix areHTOB (doxdb, coNHue n T.d.) - IocydomoeHna MaunHa He DoJnxHa yCTaHaBnBaTbCBA BHe NOMEeHn BOTcYtCTBn HndIexKaUero yKpbITnA.
- Hikorda He 3anyckaite nporpammy MOIKN B OTCyTCTBNE CNTEmbl CNIBa-nepeniba, ecn OH a npeducMOrpeHa.
- HnKoIa He npi6JIxKaIte HaMaHnUeHHbI nepeMTeBk MaIInHe.
He nCnoJb3yIe BepXHIOU qAcTb MaunHbI B KaueCTBe ONOpHOI NOBepXHOCTN. - CnepaJIncT no MOHTaxy o6raH npOBepuTB 3eKTHBHOCTb CNTEmbl 3a3emHeHJ.
- OkoHuaHH TcTnpOBaHH CNeuJnCT-MoHTaxHnK 063aH COCTaBntb NcBMeHHoe 3aBHeHne O npabNbHOY yCTAHOBKe MaunHbI n pObeDeHN ee NCbITAHn CORNaCHO BcEM DeiCTByIOUHM HopMaM n npabUNam.
HE IN3MeHЯITe IIOJoxHe NcOMnOHeHTOB MaUNHbI IN He BHOCITe IN3MeHEnB INX KOHCTpyKUHO, T.K. TaKne DeIcTBnA MOryT NOCTaBnTb IOD yrpo3y 6e3OnaCHOCTb ee 3KcNPyatauIN. - YpOBeHb 3ByKOBoRo DaBJeHnA corIacHo EN ISO 4871
LpAMax=55D5Kpa=2,5D5ДЯВСТРANBAeMbIXMaшИн
LpAMax = 65 dB Kpa = 2,5 dB nJyKynOJIbHbIX MaunH
LpAMax=76dBKpa=1,5dBJnKaTlOMoeHbIXMaunH
- Makc. TempepaTypa noJaBaEmoB BoJb: 50^
MaKc. daBHeHne noDaBaemo BOdbi: 46ap (400 KPa)
KoHCTpykCnMaunHbI npEynCmATpNBAeT ee 0HKcnpOBaHHoe NOcOeINHeHne K BOOpPBOADHO CETN
3anpeaetc8ocuieCTBnTb YnCTky MaunHbIC NcnoJb3OBaHnem CtpyB ODbI NOd DaBHeHem nI npa.
MaKcImaJIbHaBbICota CJIbBa
Ha ypoBHe noJra IcnoJHHeN C yCTpoIcTBOM nepeJIbBa
MaKcImaJIbHaB BbICota 1 M dIy IcNoJIHeHn, OChaUeHHbIX HaCOCOM cIIBa
1.1 YcnoBna HopMaIbHOJ 3KcNlyaTaunn
Okpykaioa TaemepaTypa:MaKc.40°C/MnH.4°C(BcpeDHeM:30°C)
BbICota Hau yPOBHeM MOpR:do 2000 MeTpOB
OTHOCHTeBHaB BJIaXHoCTb: MaKc. 30% npn 40 °C / MaKc. 90% npn 20 °C
ГЛABA2 BBEDEHNE
PpeynpexkdeHne:
XpaHNTe BcIO DOKymeHTaCIOB HHeNOCpeDCTBeHHoB 6JIn3OCTn OT npnbopa; oBeceNeYbTe DOKyMeHTaCneI CNEuAInCTOB I OepaTOpOB, KOToPbIM NOpUyeHa erO 3KcnPyataunia, IN PpIMTe Mepbl, YTObI OHa XOpOio COxpaHJaLacb C TeueHHeM BpeMeHN, XpaHnIacb B HADEXHOM MeCTe BMeCTe C DoONlHTeJIbHbIM KOnnIMn JIy qactbIX KOHCyJbTaun.
Ipejde yem BbINOHrTb KaKne-Jn6o onepaun Ha np6ope onepaTop DoJxeh npOHTaTb, NOHrTb N YCBONTb HactoJIeepyKOBOdCTBO.
Pnp6op npedHa3NaueH nckIouHTeNbHO nI npoepccnHaNbHO nCNoIb3OBAHn Iocydomoeyhbx Maunc BbICOKo Harpy3Ko, NOaTOMy eTO yCTaHOBka, 3KcIpyaTaunr N TexHnueeCKoe o6CnykNBaHne DOJXHBi OcyuceTBnTbcra TOnbKO KBaINΦnUPOBaHHbIMn CneunaJIncTaMn B COOTBeTCTBm C INHCTpyKUNMn pON3BODITeJI.
TapaHTn:
Ipon3BOIDTeJIb He Hecet OTBeTCTBeHHocTN 3a IIO6bIe NOBpeKdEHNr NIN TpaBMbl, BO3HKNWIn B pe3yIbTaTe HecobJHODeEHN rHCTpykCn NIN HeHaDNeXaUero NcNoB3OBAHn MaunHbl.
HecoblodeHne HnctpyKu, coepkauxcB npnilaraemO JOKMeHTaU, MoKeT OtpuateIbHo cKa3aTbCra Ha 6e3oNaChocTn npibopa N BeTe K HeMeJNeHHoI OTMeHe 3aBOdcko rapaHTn.
CJyuaN yCTaHOBKn N pEmoHTa MaunHbI HeynolHOMOeHHbIMn TexHnueCKMn CneunaJIInCTamN IIN NCNoJIb3OBaHnA HeOpuHaJIbHbIX 3aNaChbIX YacTei BeDyT K HemeJeHHoI OTMeHe 3aBOdCKoI rapaHTn.
XpaHeHne:
TpaHcnpTnpoBka n xpaHeHne: oT -10 ^ C do 55 ^ C , kpaTKOBpeMeHHo - do 70 ^ C (MaKcIMym 24 yaca)
ΓJIABA 3 YCTAHOBKA
IpaBnBna yCTaHObKa nMeET nepBOcTepeHHoe 3NaueHne dJa 6e3OTka3HO np6oTb np6bopa. HeKOTOpBie daHHbie, Heo6xOIMMbie dJa yCTaHOBKn np6bopa, yka3aHb B nacnOpTHo TabnUke H naHeJI KOpNyca C npaBoi cTOpOHbl, a KOINr Ta6nUKN NOMEuHa Ha TInTyJbHOM JnCTe HactOraero pyKOBOdCTBa.

Pn6op MoKeT 6bITb yCTaHOBJIeH TOJIbKO yNOLHOMOyeHHbIMN KBaIINΦuNpOBaHHbIMN cneuaanCTam.
3.1 PacnaKOBka
IpoBepbTe COCTOAHnE ynaKOBKn,OTMeTIN NIO6bIe O6HApXeHHbIe NOBpeXdEHnB B OTrpy3oHOM DOKyMeHTe.CHMInTe ynaKOBky uYbeInTEcb,yTO np6OpB xOPOwEM COCTOAHN;HEMeDJIeHNO COo6uInTe o IIO6bIX IOBpeXdEHnX dIIepy n 3KcpeINTOpy nO paKcy nIN 3aKa3hBIM nCsbMOM C yBeDOMLeHNEM O BPueHn. PpI O6HApXeHn NOBpeXdEHnA,CTABJeero nOJ yRpo3y 6e3OnacHOCTb np6Opa,3aPpeUaeTcY cTaHaBnBaTb INcNoIb30BaTb np6Op,poka OH He 6ydet IpOBepen KBaIINΦuNUPoBAHbIM CneuaJIinCTom.

3JIeMeHbI ynaKOBKn (noJn3TnJHeHOBbie naKeTbI, neHONOJIncTHnpO,I rBO3n I T.d.) npEcdTabJrOT noteHcuaNbHyIO onaCHOCTb N DOJXHbI XpaHHTbcra BHe DoCRAeMOCTn DnA DeTei N DOMaUHnx KINBOTbIX.
3.2 Pa3meeHne

- y6eIntecb, yTO B 3OHe yCTaHOBKn Het npEIMeTOB INn MaTePnaIOB, KOTOpblc MOryt 6bITb NOBpeXdEhbl napOM, BbIXoJzIM n3 npi6opa BO Bpemra pa6Otbl; B Cnyae nx HAIuHry, y6eIntecb, yTO OHN 3aUuIeHbl DoJxHbIM o6pa3OM.
- Ppepa3meueHem np6opa oecneyte noKIOUeHne K nCTOHNky 3JIeKTPoPNTaHn, BOOcHa6KeHnIO n KaHaIIN3aun.
B cnyae BCTpaunBaHnmaHH C OINHapHO CTeHKo OCTaBbTe 3a3Opbl BeJInuHoi He MeHee 10 MM MExdy CTeHKamMaHHbI IN PpNJerAIOUIMN IOBepxHOCTaMn. -
IOnI INN BCTPOeHHbIM MOyJb DOJIxHbI 6bITb paccuHTaHb Ha Bec npn6opa.
-
Дя обесенья устоньости BBIPOBHЯITE npnbop c nomоьу chebipex HOKEK.
- Pnp6op npedHa3HaeH Toblko DJIa CTAuHOAPHO yCTaHOBKn; IIO6bIe dpyrHe BapnAHbI DOJXHbI 6bITb CORNaCObAHbI uYTBepKdEhbl pOn3BODntEnM.
- Pered nCnoJIb3OBAHnEM nocydoMoeyHO mAsHHbI CHNIMTe 3aunTHyIO nJeHKy c naHeJei Kopnyca.
3.3 NooknIOUeHne 3JIeKTPoNtHaHn

- ICTOCHNK ПИТАнЯ ДОЛЖЕН 6ытБ OСHAUCEH MHOROПОПСНЧМ ABTOMATUHECKIM BыКПЮЧATELEМ (главьн ВьКПЮЧATEЛВ ПИТАнЯ) Дп ра3MbИКаня BCEX KOHTAKTOB, ВКПЮЧА HeITpaJIb, C 3a3OPOM МExДу pa3OMKHytbIMN KOHTaKTAMN He MeHee 3 MM, И ТерMOВБИКПЮЧATEЛМ NII ПЯВКIMN ПpeOxpaHITeJIМN, KOTOpbie DOLJXHbI 6ытБ HaCTPoEHbI NII paccHTaHbI Ha MOUHOCtB, yKa3aHHYOB B NaCnOPTHOI Ta6JIuKe MaunHbI.
- I naBhIy BbIKHouaTeIb NITAHn yOJIKeH 6blTb yCTaHOBHeH Ha IINHn 3NeKtpoNtAHn B HEnOCpeDCTBeHHoB 6n3OCTn OT np6opA, n MoXeT 6blTI NOkJIIOUeH OJHOBpeMeHHO TOJbKO K OJHOuMaINHe.
- Hanpajxehne n yactota Toka B 3neKtpocetn DOJXhbl COOTBeTCTBOBaTb npametpaM, yka3aHHbIM B nacnopTHoT Ta6nue np6opa.
- YctaHOBka DoJXHb BkJIIOyATb CnCTeMy 3a3eMneHn B COOTBeTCTBm C
- YcTaHOBJIeHHbIMn HopMaMn 3NeKTPo6e3ONaCHocTn DnA 3aIITbI OepaTopa N
- camoro npnbopa.
-Данная Машина COOTBETCTBYET NOLOжehняМ ceptnФИКATA EN/IEC 61000-3-11,ecn Импедас cnCTemblZsys Mehbwe nIpaBeH Z max B TOUKe COnpЯжehna CnCTembl 3JIeKTPoNTaHnI NOJb3OBaTeJI n O6üeROpOДСКОc CETN 3JIeKTPoCHa6ЖeHnI. O6ja3AHHOCTbIO MOHTaXHnIka n NOJb3OBaTeJI MaSHINbI YBnAeTcnpocNeIDt b 3a Tem,чTOБbl MaShIna 6blNa NODKnIOUcheHa NCKIQUHTeJIbHO K CETN 3JIeKTPoNTaHnI C IMNPeDAhCOM Zsys,MeHBsIM nIpaBHBIM Zmax
-5x2,5MM^2do 20A
-5x4MM^2do30A
-5x6 MM^2 10 38 A
-5x10MM^2do54A
- Ondhoza3Ha MaunHa
-3x1,5MM^2do16A
-3x2,5MM^2do 25A
- Ka6eB nIaHnHe IdoJxH epeXmAtbCnIype3MepHo pactrNBaTbCBO Bpem HOpMaIbHO np60tbl MaunHbI nn BO BpeM ee PnaHOBO 6cJyKuBaHn.
MaunHa DOnJxHa 6bIb NIOKJIHOeHa K 3KBHnOteHuaJIbHOIN CNTeMe C NOMOuBO BnHTa, NOMeHHoro CNMBOJom 5021, PpeDyCMOTpeHHbIM CTaHdApTOM IEC 60417.
3KBHNTeHcuaJIbHbI Ka6eJIb DOJIKeH IMMeTb ceYeHne 10 MM2.
Co6HnDaIte nOJaepHoB, 06o3HaueHHyU Ha 3JeKtpuYeckO CXeMe.
3a donoJIHnTeIbHOINHOpMaUeI ObaIaIteB K 3JeKtpuYeckO CXeMe.

3anpeaetcna nCnoB3OBaTb TpoHnKn, nepexoHnKn, ka6eHn HeHaJnxaIero ceueHn nn Tnna nn Ka6eHn C yDnHHTeNbHbIMn CnaKamn, He COOTBeTCTByUOuNe DeiCTByUOuM npabnAm ycTpoiCTBa 3neKTpoyctAHOBOk.
3.4ПоdkлioуehneксnteMeBODoHa6keHn
IopKnHoueHne np6opa K BOOpOBoHOc cTe N DOJXHO BbIOJIHTbcn NOMoUIO r6Koro 7aHaRa. Mexy IINHeN IOaCh BObl N 3JeKTpOMaHHTbIM KJIaNaHOM np6opa DoJxKeH 6bITb yCTaHOJIeH 3aOpHbIK JanaH (KpaH). KpaH DoJxKeH pacNoJaTaBcra PdOM C np6obom.
PacxO BOnbl, ee TemnepaTpya n daBneHne DOJXHbI COOTBeTCTBOBaTb yKa3aHHbIM Ha Ta6NueKe TexHNueCKNX DaHHbIX MaunHbl.
- Y6eIITecb, yTO paCXoI B0IbI COCTaJIaET He MeHee 20 n/MnH.
B cnyuae, ecn JxcctKocTb BOdbI npebbiwaeT 14 ^ (8 ^ ), pekomehdyeTcNcnoJIb3ObaTb MaunHy c BHyTpeneHHy yMaHTeJEM BOdbI. B cnyuae, ecn JxcctKocTb BOdbI npebbiwaeT 35 ^ (19,5 ^ ), pekomehdyeTcYCTaHOBNTB BHeuHHy yMaHTeJb BOdbI B JInHH nepeD 3JeKTpOMarHHTbIM KlaNaHOM
-Дя MaunH, He ochaueHHbIX yMraHTeJem, ecn JecTKocTb BObl npeBbIaet 14 f (8 ^) peKomeHdyETcR yCTaHOBtB BHeuHm yMaHTeJIb BObl B IINHn NepeD 3JNEKTpOMaHTHBIM KlaNaHOM.
B cnyae ouheb BbICOKO KOHcHTpaunn B BOe MNHepaIbHbIX OCAkOB C NOBblEHHo npBOIDMOCTbIO peKomeHdyETcYCTaHOBNTb CNTEmy demHepaIN3aUN.
Ha MaunHb, npeHa3NaeHHBie dIy IcNoJb3ObaHnC onpeChEHHo BOoN nn, B JIO6om Cnyae, C BOOcKoKo KOHcHTpaueH eXIoPnDa HATPN, cJeDyET OcyuecTBnTb CneuaNbHbI 3aKa3, T.K. DnI IN N3rTOBHeHn Tpe6yOTcraOCoble MaTePnaNbl
He nodaBaIte demHepaun3oBaHHyO Body Ha MaunHbI, OchaueHHbIe peKynepaTOpOM TeNla C MeHbIMn peKynepaunOHbIMn 6ataperaMn. B 3tnx cnyaX 3anpaunBaIte nCnonHeHne c 6atapeaMn, NMeIOUIMn Tpy6Kn n3 HepKaBeIOUe nCTaII.
Cbo6oHbI cJIb
3.5 PoiKJIIOUeHHe K CnCTeMe KaHaJIIN3aIIM
- Линя слова дожнога сочьт b3 сбобдого дренихого колда ссфоном, COOTBETCTBYUIM nponyckho CnOCOBHCTN CINBHORO shaHa, noctabЯemoro c npibopom.Дин ha JlnaHra dOnxHa obecneuBaTb BO3MOXHOCTb ero NOdcoeINHeHЯ K OTCTOHNY 6e3 HaTЯжehnia, orpaHueHЯ, crnaHЯ, cmrTna, cdaBnBaHЯ Ипн ппкlaadbIBAHЯ уcInnллюбим cnOCOBOM.
CINB BOIbI n3 6aKa npOcXoDnT caMOTeKOM, NO3OMy DpeHaxHbIKOLOdeUdoJKeH paONaratbcra Hxke OCHOBaHnMaunHbl. - Ecnn CnNB HaxoNTcBblwe OCHOBAHNA np6opa, MoXHO nCNOb3OBaTb BepCNIO CO CNBHBIM HAcOCOM (npedocTabnEeTcno 3anpocy).
B 3TOM cIyae IpeHaxHbI NaTppy60K MoXeT HAXOITbcra Ha BbICOTE He 6oJee 1 M.
Bcerda npoBepaIe npabunbHoctb pa60tbi cInBa n He donyckaTe erO 6loKupoBaHnA. - JIo6oe npyroe peSeHne DoJxHo 6bItb 3a6NaorOBpeMeHHo yTBepxKeHO npOn3BOIDnteJeM.
3.6 OnolacknBaTeIb MIOouee CpeDCTBO
- OnonacknBaTeIb mOIOUeCpeICTBO IOnaIOTcC NOMOUsB BCTPOEHHbIX INCINHCEpOB (B3aBNCIMOCTn OT MOnJI).
-Дозировку onpeдягет мОТахнik OБорудогань B COOTBETCTBIM C JECTKOCTbIO BOДы, КРOME TOrO, OHcamпюзбдтКалбровк DiNCHeHCEPOB. - Ipepeix KaIIb6pOBKo 3aIOnHnTe HAnOpHbte Tpy6Kn DInCneHcepoB COOTBeTCTByIOUm IpOdykTom.
KanibpoBka yctpoicTB ocyueCTBnraTc c nOMoIbIO peyIINpOBOHyBX BnHTOB nIN HENOCpeDCTBeHHO C naHEn ynpabHeHna (ecnn npImeHmO). - YpOBeHb JxIKoCTn B KOHTeHHepe DoJXeH 6bITb DOCTaOHTbIM DnA3aONHeHn DaNCHeCepOB; He DONYcKaIte NOJHO OncyTOUeHnKoHTeHepa H He NOnOJIHrTe erO arpeCCNBbIM ININ 3aRpy3HeHHbIM pOdykTOM.
KATEROPUHECKN 3APPEUCAETCnNoJb3OBaTb MoOuNe CpeIcTBA Ha OCHOBe XIOPA nnnrINOXLOPNTA.
PekomeHnyeTcYyTaHOBnTB aBTOMaTHueckn DmCneHceMPOUJero CpeIcTBA.
KAP.5 VEDLIKEHOLD 11
5.1 G ENERELLE REGLER 11
5.2 R ENGJØRING 11
5.3 R ENGJORING AV FILTERENHETEN 11
5.4 R ENGJORING AV ARMENE 11
KAP.6 SELVDIAGNOSE 12
KAP.7 JUSTERINGER OG INNSTILLINGER 13
7.1 I NNSTILLING AV VANNHARDHET PÄ INNEBYGGET BLØTGJØRINGSANLEGG 14
KAP.8 SKROTING 14
KAP.9 MILJ0ET 14
4.2 Sla oppvaskmakin pa

- TRANSLATION FROM THE ORIGINAL INSTRUCTIONS
- CONTENTS
- CHAP 1 RISKS AND IMPORTANT WARNINGS 2
- CHAP 2 PREFACE 4
- CHAP 3 INSTALLATION 4
- CHAP 4 USING THE MACHINE 7
- CHAP 5 MAINTENANCE 11
- CHAP 6 SELF DIAGNOSTICS 12
- CHAP 7 SETTINGS 13
- CHAP 8 SCRAPPING 14
- CHAP 9 ENVIRONMENT 14
- Chap 1 RISKS AND IMPORTANT WARNINGS
- Normal operating conditions
- Warnings:
- Warranty:
- Storage:
- Chap 3 INSTALLATION
- Unpacking
- Positioning
- Electrical connection
- Water circuit hookup
- Connection to the drain line
- Rinse aid and detergent
- Chap 4 USING THE MACHINE
- Switching the dishwasher on
- Referring to Fig.2:
- Filling the rack
- Cycle selection and start-up
- Automatic cycle start-up
- Removing the integral filter
- Emptying the dishwasher
- Appliances with no drain pump
- Appliances with drain cycle (*optional)
- Turning the dishwasher off
- Resin regeneration (*optional)
- N.B. Do not switch off the machine if a regeneration cycle is underway
- Displaying information
- List of viewable messages
- End of shift
- Chap 5 MAINTENANCE
- General rules
- Cleaning
- Cleaning the filter unit
- Cleaning the arms
- Chap 6 SELF DIAGNOSTICS
- The following settings should only be configured by a qualified technician.
- Hardness settings for the incorporated water softener
- Chap 8 SCRAPPING
- Chap 9 ENVIRONMENT
- RESPECT FOR THE ENVIRONMENT
- HFDST8 AFVALVERWERKING 14
- HFDST 9 MILIEU 14
- HANDLEIDING VOOR AFWASMACHINES
- Hfdst 8 AFVALVERWERKING
- KAP 2 FORORD 4
- KAP 3 INSTALLATION 4
- KAP 4 BRUG AF MASKINEN 7
- Maskiner Eden aflobspumpe 9
- Maskiner med tomningscyklus (*ekstraudstyr) 9
- KAP 5 VEDLIGEHOLDELSE 11
- KAP 6 SEVLDIAGNOSE 12
- KAP 7 JUSTERINGER OG INDSTALLINGER 13
- KAP 8 BORTSKAFFELSE 14
- KAP 9 MILJ0 14
- INNEHALLSFÖRTECKNING
- KAP 1 RISKER OCH VIKTIGA VARNINGAR 2
- KAP 2 FORD 4
- KAP 4 ATT ANVANDA MASKINEN 7
- KAP 5 UNDERHALL 11
- KAP 6 SJALVDIAGNOS 12
- KAP 7 INSTÄLLNINGAR OCH JUSTERINGAR 13
- KAP 8 AVFALLSHANTERING 14
- KAP 9 MILJÖ 14
- TJABA1 PNCKN IN BAXHbIE MEPbI IPEIOCTOPOXHOCTN 2
- ГЛABA 1 ПИСКИ ВАЖHBIE MEPbl ПЕДОCTОPOXHOCTN
- YcnoBna HopMaIbHOJ 3KcNlyaTaunn
- ГЛABA2 BBEDEHNE
- PpeynpexkdeHne:
- TapaHTn:
- XpaHeHne:
- ΓJIABA 3 YCTAHOBKA
- PacnaKOBka
- Pa3meeHne
- NooknIOUeHne 3JIeKTPoNtHaHn
- 3.4ПоdkлioуehneксnteMeBODoHa6keHn
- PoiKJIIOUeHHe K CnCTeMe KaHaJIIN3aIIM
- OnolacknBaTeIb MIOouee CpeDCTBO
- KATEROPUHECKN 3APPEUCAETCnNoJb3OBaTb MoOuNe CpeIcTBA Ha OCHOBe XIOPA nnnrINOXLOPNTA.
- KAP.5 VEDLIKEHOLD 11
- KAP.6 SELVDIAGNOSE 12
- KAP.7 JUSTERINGER OG INNSTILLINGER 13
- KAP.8 SKROTING 14
- KAP.9 MILJ0ET 14
- Sla oppvaskmakin pa
Brand : Colged
Model : Isytech 33
Category : Dishwasher