Zen Premium - Baby monitors BEABA - Free user manual and instructions
Find the device manual for free Zen Premium BEABA in PDF.
| Product type | Video baby monitor |
| Brand | BEABA |
| Model | Zen Premium |
| Baby unit power | Mains via adapter 5V DC / 1A (non-rechargeable) |
| Parent unit power | Rechargeable lithium battery (up to 8 hours battery life) or mains via adapter 5V DC / 1A |
| Parent unit screen | Color LCD screen with brightness adjustment |
| Night vision | Yes, built-in (red flashing light for connection) |
| Two-way communication | Yes, microphone and speaker |
| VOX function (smart detection) | Motion, noise and cry detection with sensitivity adjustment |
| Lullaby playback | Yes, several built-in soft melodies |
| Connectivity | WiFi 2.4 GHz (for access via BEABA ZEN CONNECT mobile app) and wireless link with parent unit |
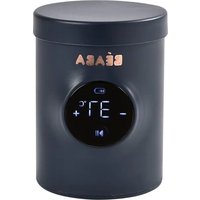
| Temperature and humidity | Display and alarm when values deviate from set range |
| Storage | micro SD card (max 128 GB, not included) in parent unit and/or camera |
| Range without obstacles | Varies depending on walls; up to tens of meters in open field |
| Feeding reminders | Up to 4 reminders per day |
| Zoom | Zoom in/out 1x, 2x, 4x |
| Maintenance and cleaning | Clean with a damp cloth only; do not use chemicals |
| Safety | Power cable more than 1 meter away from baby; do not immerse; do not place inside the crib |
| Spare parts and repairability | Mains adapter, wall mount, tilt bracket, specific battery (factory) |
| Warranty | 2 years from purchase date |
| Certifications | Compliant with CE directives (EMC, RED), standards EN 55032, EN 62368-1, etc. |
Frequently Asked Questions - Zen Premium BEABA
User questions about Zen Premium BEABA
0 question about this device. Answer the ones you know or ask your own.
Ask a new question about this device
Download the instructions for your Baby monitors in PDF format for free! Find your manual Zen Premium - BEABA and take your electronic device back in hand. On this page are published all the documents necessary for the use of your device. Zen Premium by BEABA.
USER MANUAL Zen Premium BEABA
natural_image
Black-and-white photo of a BiASA mobile phone and a smartphone displaying a sleeping baby (no text or symbols visible on device)EN Instructions for use
natural_image
Simple line drawing of a webcam with a circular head and button (no text or symbols)Caméra Récepteur
B

natural_image
Line drawing of a handheld electronic device with a screen and antenna (no text or symbols)C

natural_image
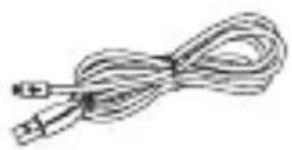
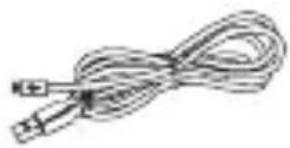
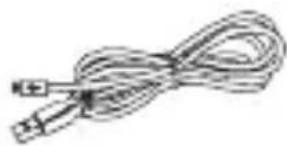
Simple line drawing of a coiled cable or wire with a connector (no text or symbols)Câbles USB x 2
natural_image
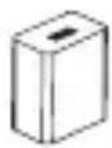
Simple line drawing of a box with three vertical bars and two dots inside (no text or symbols)Vis
F

natural_image
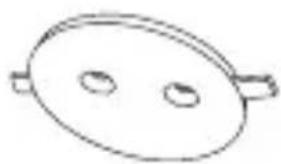
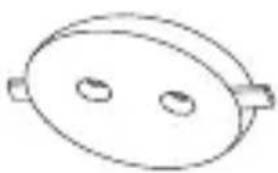
Simple line drawing of an oval-shaped object with two circular holes, no text or symbols present.Support
G

natural_image
Simple line drawing of an oval-shaped object with two circular holes, no text or symbols present.natural_image
Blank rectangular sheet or panel with no visible text, symbols, or markings|

natural_image
Line drawing of a handheld electronic device with a screen and control buttons (no text or symbols)natural_image
Simple line drawing of a mechanical device with concentric circles and a downward arrow, no text or symbols present.natural_image
Simple line drawing of a ceiling-mounted lamp with two ovals and a base, no text or symbols present.
natural_image
Pure mechanical diagram showing a rotating component with no text or symbols
natural_image
Pure mechanical diagram showing two circular components with a central hub and a small circle labeled '5' (no text or symbols beyond basic geometry)natural_image
Simple line drawing of a circular object with two circular holes and a flat base, no text or symbols present.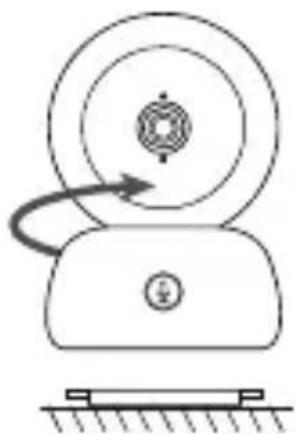
natural_image
Simple line drawing of a mechanical device with a rotating wheel and base mount (no text or symbols)
natural_image
Simple line drawing of a mechanical component with concentric circles and a base (no text or symbols)VII. PARAMETRES GENERAUX
flowchart
graph TD
    A["Patient icon"] --> B{Device is bound}
    B --> C["Long-term delay to release the timing"]
    style A fill:#f9f,stroke:#333
    style B fill:#ccf,stroke:#333
    style C fill:#cfc,stroke:#333
text_image
Device is not bound E Long press the camera pacing button until you hear the prompt load; E Trap the OK button on the display to start coming.text_image
QR code image with a central logo, likely for digital scanning and linking to online content.
text_image
QR code image containing encoded data, no visible human-readable text
natural_image
Black-and-white photo of a smiling baby sitting on a bed, no visible text or symbolsPhoto & Vidéo\*
natural_image
Black-and-white photo of a smiling baby sitting on a bed, surrounded by icons and a camera interface (no readable text or symbols)Rappel des repas
text_image
Pending reminder Show your value in regular dim.X. DÉTECTION DE L'HUMIDITÉ
text_image
Humidity monitoring New time monitoring of baby oven temperature and humidity change Temperature range 3.6 - 7.2 °C Humidity range 4.0 - 7.0 RH Out of range reminder ON MTRXI. FONCTION VOX (alarmes intelligentes)
NULLITE DE LA GARANTIE
natural_image
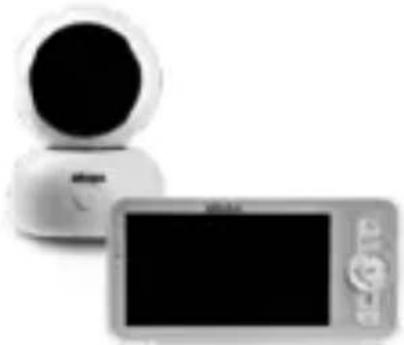
Two electronic devices: a black-and-white spherical device and a gray rectangular device with a logo (no visible text or symbols on the devices themselves)Thank you for buying our ZEN Premium baby video monitor. You will soon be able to see and hear your baby remotely. But firstly, we invite you to read these instructions carefully in order to use our product in the best possible conditions and keep it for as long as possible.
I. WARNINGS AND PRECAUTIONS FOR USE
Read and keep these instructions. Take account of all the warnings.
1. WARNINGS
TO AVOID THE RISK OF STRANGULATION, IT IS

ESSENTIAL TO CHECK THAT BABY CANNOT REACH THE ADAPTOR'S WIRE. PLACE THE
ADAPTOR AT LEAST 1 METRE FROM THE CHILD.

ATTENTION: to avoid the risk of explosion, electric shocks, short-circuits, and overheating:
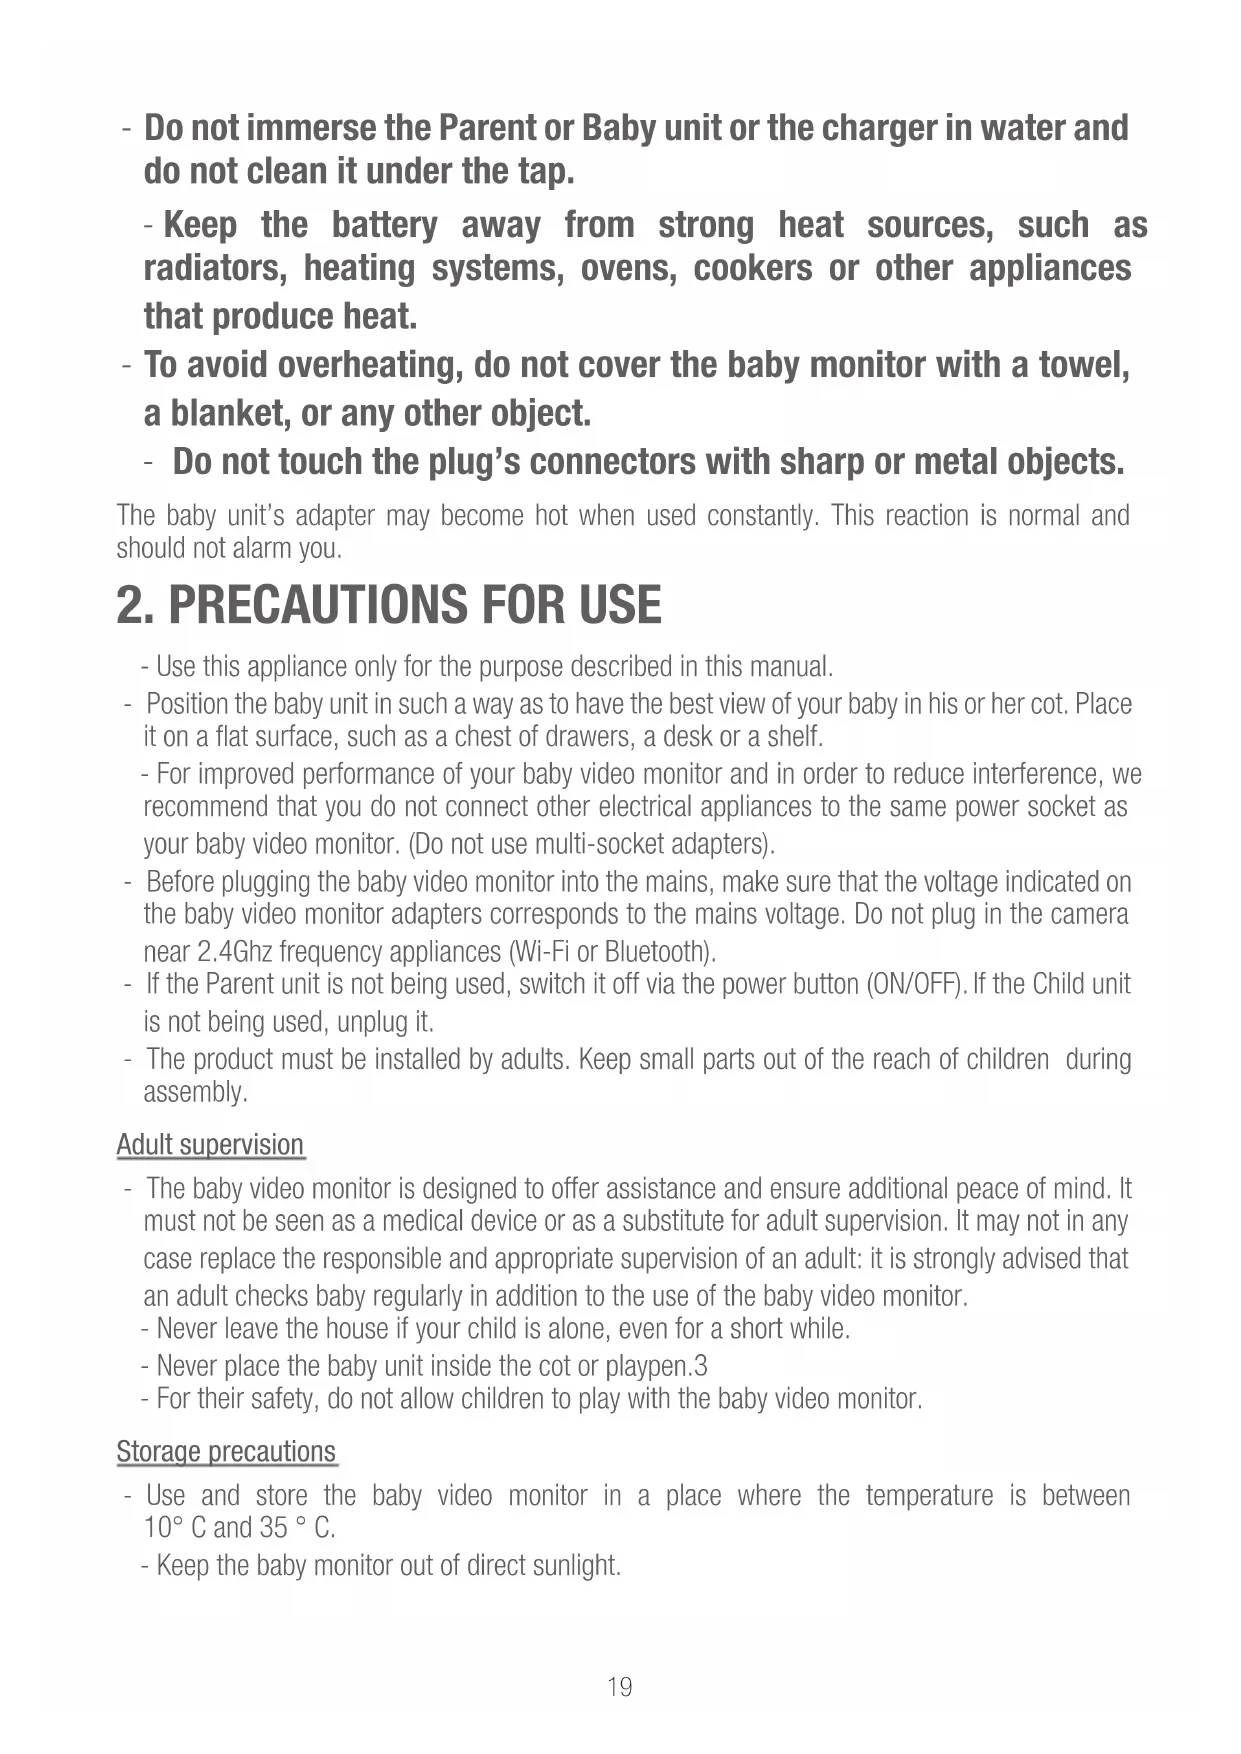
- Do not immerse the Parent or Baby unit or the charger in water and do not clean it under the tap.
- Keep the battery away from strong heat sources, such as radiators, heating systems, ovens, cookers or other appliances that produce heat.
- To avoid overheating, do not cover the baby monitor with a towel, a blanket, or any other object.
- Do not touch the plug's connectors with sharp or metal objects.
The baby unit's adapter may become hot when used constantly. This reaction is normal and should not alarm you.
2. PRECAUTIONS FOR USE
- Use this appliance only for the purpose described in this manual.
- Position the baby unit in such a way as to have the best view of your baby in his or her cot. Place it on a flat surface, such as a chest of drawers, a desk or a shelf.
- For improved performance of your baby video monitor and in order to reduce interference, we recommend that you do not connect other electrical appliances to the same power socket as your baby video monitor. (Do not use multi-socket adapters).
- Before plugging the baby video monitor into the mains, make sure that the voltage indicated on the baby video monitor adapters corresponds to the mains voltage. Do not plug in the camera near 2.4Ghz frequency appliances (Wi-Fi or Bluetooth).
- If the Parent unit is not being used, switch it off via the power button (ON/OFF). If the Child unit is not being used, unplug it.
- The product must be installed by adults. Keep small parts out of the reach of children during assembly.
Adult supervision
- The baby video monitor is designed to offer assistance and ensure additional peace of mind. It must not be seen as a medical device or as a substitute for adult supervision. It may not in any case replace the responsible and appropriate supervision of an adult: it is strongly advised that an adult checks baby regularly in addition to the use of the baby video monitor.
- Never leave the house if your child is alone, even for a short while.
- Never place the baby unit inside the cot or playpen.3
- For their safety, do not allow children to play with the baby video monitor.
Storage precautions
- Use and store the baby video monitor in a place where the temperature is between 10^ C and 35^ C.
- Keep the baby monitor out of direct sunlight.
- If you think that the battery is damaged, stop using the product.
Contact BEABA's aftersales service for assistance. Never use a product with a damaged battery.
- Do not store the adapter cable in a place where it might wear quickly (humidity/heat, etc.).
Replacing equipment
- Use the battery supplied for the parent unit. Only use the accessories supplied by the
- manufacturer.
- If needed, you can use the same type of adapter supplied.
II. PRODUCT VIEW
A
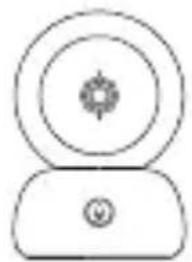
natural_image
Simple line drawing of a webcam with a circular head and base (no text or symbols)Camera Receiver
B
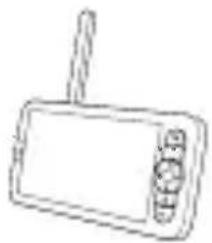
natural_image
Line drawing of a handheld electronic device with a screen and antenna (no text or symbols)C

natural_image
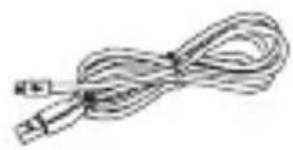
Simple line drawing of a coiled cable or wire with a connector (no text or symbols)USB cables x 2
D
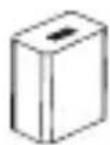
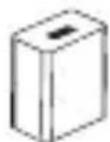
Mains adapters x 2 SupportScrews
E

natural_image
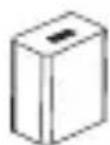
Simple line drawing of a box with two vertical bars and three dots inside (no text or symbols)F

natural_image
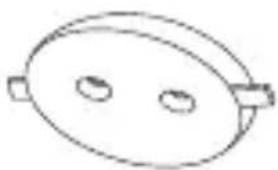
Simple line drawing of an oval-shaped object with two circular holes, no text or symbols present.G
natural_image
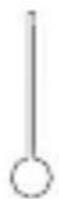
Simple line drawing of an oval-shaped object with two circular holes, no text or symbols present.Tilting accessory Manual Reset pin
H

natural_image
Blank rectangular sheet or panel with no visible text, symbols, or markings|

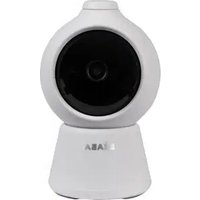
A. Camera (Baby unit)
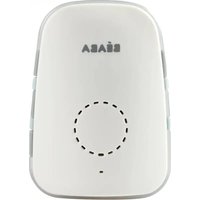
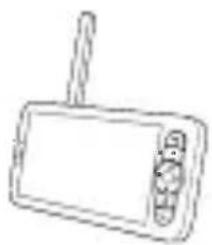
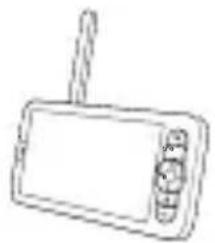
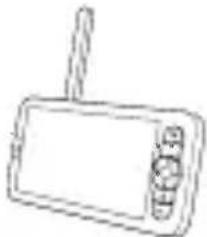
B. Receiver (Parent unit)
C. USB cables x 2
D. 5V DC / 1A mains adapters (one for the parent unit, one for the child unit)
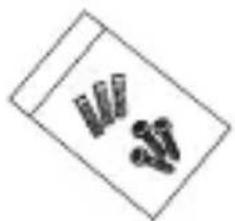
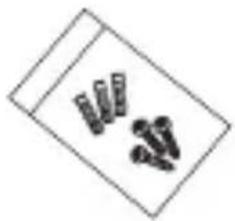
E. Screws
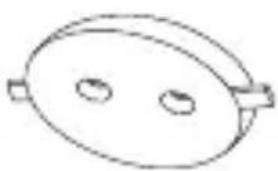
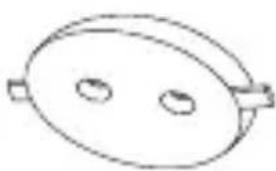
F. Support
G. Tilting accessory
H. Manual
I. Reset pin
III. BEFORE USE
a Baby unit
Plug the baby unit (camera) into the mains placing it at least 1 metre from your baby's head and up to 2.5 metres from baby in order to enjoy good picture quality. The baby unit must be plugged into the mains to work since it does not have a battery.
b. Parent unit
If you are switching on the parent unit for the first time, it must first be plugged into the mains for 8 hours using the adapter supplied (5V DC/1 A USB) to charge it. If the parent unit is already changed, you can switch it on and use it without plugging it in and benefit from 8 hours of autonomy thanks to the Lithium battery.

natural_image
Line drawing of a handheld electronic device with a screen and control buttons (no text or symbols)c. Connecting the two units and distance of use
When the Parent and Baby units are switched on, they connect automatically and the two units are paired immediately. The connection light on the Parent unit is symbolised by the «network signal» pictogram on the top left of the screen. When the Parent unit and the Baby unit are paired, the signal strength indicator shows the maximum number of bars, namely 4. The connection is established. Otherwise, the signal strength indicator does not show any bars and the message «No Link» is displayed.
text_image
Light Microphone Pairing & call button
text_image
Loudspeakers Slot for SD card* Reset button Micro USB power port| Slot for SD* card | 5V/ 1A DC |
| Microphone | Capture sound from your video |
| Slot for SD* card | Compatible with a SD* card (max 128 Go) |
| Light | Continuous red light: the network is not working properlyFlashing red light: wait for the camera to connect (flashes slowly)Continuous blue light: the camera is working normally |
| Call/Pair | Press the button to call (notification on mobile app); long press to pair |
| Reset | Press and hold for 5 seconds with the reset pin to reset the camera (if you have modified the settings, the default settings will be restored) |
V. DESCRIPTION RECEIVER – PARENT UNIT

text_image
Charging light Microphone ON/OFF light Display screen Zoom in/out Menu Direction buttons OK Call Return button Antenna ON/OFF button Slot for SD card* Reset Micro USB power port Loudspeakers Screen support Battery cover plateName Description
| Power Supply DC 5V/2A | |
| Usage Status Indicator | Yellow light: Monitor onNo light: Monitor off |
| Charging Status Indicator | Orange light: ChargingGreen light: Fully charged |
| Call Button Make a call after pressing the button | |
| Return Button Press to go back; Long press to stop music playback | |
| Zoom In/Out Button Adjust image magnification to 1X, 2X or 4X | |
| Menu Button Access settings and options | |
| Direction Buttons Navigate and select options | |
| OK Button Confirm selections or wake up the screen | |
| SD Card Slot Storage on SD card (up to 128 GB) | |
| RESET Button Press with a pin to reset the monitor | |
| Antenna Adjust angle for better reception | |
| ON/OFF Button Long press for five seconds to turn monitor on/off | |
| Battery Cover | Cannot be removed for individual charging; used for battery maintenance and environmental requirements (factory-specific batteries required) |
VI. INSTALLING
1 Install the camera on a flat surface

natural_image
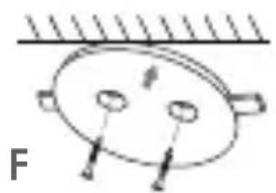
Simple line drawing of a mechanical device with concentric circles and a downward arrow, no text or symbols present.2 If necessary, use the support (F) supplied to install the camera.
natural_image
Simple line drawing of a ceiling-mounted lamp with two circular components and a pointer, labeled 'F' (no text or symbols on the diagram itself)
natural_image
Pure mechanical diagram showing a rotating component with a curved arrow indicating rotation (no text or symbols)
natural_image
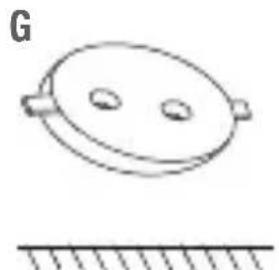
Pure mechanical diagram showing two circular components with concentric rings and a central hub (no text or symbols)Or use the tilting accessory (G) for a better angle. This small raised base will allow you to enjoy a better angle when the camera is tilted downwards.
natural_image
Simple line drawing of a circular object with two small oval features and a flat base (no text or symbols)
natural_image
Simple line drawing of a mechanical device with a rotating wheel and base, no text or symbols present.
natural_image
Simple line drawing of a mechanical device with concentric circles and a base (no text or symbols)VII. GENERAL SETTINGS
- Adjusting the brightness:
- Press the Menu button on the display screen, select

- Press the up and down buttons to adjust the brightness.
- Set the time: :
- Press the Menu button on the display screen, then select ⚙ > Date and Time.
- Press the direction buttons to change the date, time and time display mode.
- Set the language:
- Press the Menu button on the display screen, then select ⚙ > Language.
- Select the language of your choice.
- Adjust the sound
- You can set the sound to mute the parent unit. Press the Menu button and select then > with the direction buttons turn the sound down to maximum. You will only receive visual alarms if there are crying and movement detections.
- Set sleep mode:
You can set sleep mode to increase autonomy.
- Press the Menu button on the display screen and select 🧑 > Sleep mode.
- Select the sleep mode: 1 minute, 5 minutes, 10 minutes, 30 minutes, 60 minutes or press «off» to deactivate it.
- SD card*:
- SD card* may be inserted into the receiver and/or the camera. The SD card* in the receiver will allow you to record photos and videos on the receiver - see the PARENT UNIT INTERFACE (RECEIVER) section and the following points in the section «SD Card*» section for further details.
- The SD card* in the camera enables automatic recording when motion or noise is detected. You will receive a notification on your phone and can view the alert history. To explore the features of the application in further details, you can refer to the FAQ section of the Zen connect app.
- Press the Menu button on the display screen, then select ⚙ > Manage the SD card* You will be able to view the total capacity and the remaining capacity of your SD card*.
- You can format the SD card* according to your needs but make sure that you have saved any important data.
- If no SD card* is inserted, you will see the following message «No SD card* detected». *(SD card not supplied)
- Updating:
Make sure that your camera is connected to a 2.4 Ghz Wi-Fi network.
You can update your camera when the «Update» notification appears. Or press Menu on the display screen, then select ⚙ > Version information to check whether an update is available
- Low battery alarm:
When the screen's battery is low, the low battery alarm is displayed on the screen.
Please recharge the screen as soon as possible.
VIII. CONNECTING
Plug in the camera and switch on the receiver, By default the camera is paired with the receiver, if the camera does not appear, follow the procedure described below. The operating distance of the monitor is limited and depends on the nature of the walls in the house as well as the distance. If the range is insufficient in some rooms, use the application on a smartphone to access the camera from anywhere.
- Reconnect the camera to the receiver
- Press the Menu button on the display screen, then select > Manage cameras.
- Press and hold the pairing & call button 📋 until you hear a short sound.
- Press the OK button on the receiver to start pairing.

text_image
Careers management The device is bound Long press OK to release the binding• To disconnect the camera from the receiver:
- Press the Menu button on the display screen, then select ⚙ > Manage cameras
- Press and hold the OK button on the display screen to stop the connection.

text_image
Device is not bound 1. Long press the customer printing button until you hear the prompt loose, 2. Tap the OR button on the display to start making.Connect the camera to the telephone

Open the BEABA ZEN CONNECT app and select "REGISTER". Enter a valid email address and accept the general terms and conditions of use. Then press "NEXT".


Enter a username and a password that will be used for your connection on the app then press "CONFIRM".
Pairing the camera
Some notifications before adding the device:
- This device only supports a 2.4 GHz Wi-Fi router, check that you have a Wi-Fi router and a 2.4 GHz band connection.
- Follow the instructions and check that the password has been entered correctly.
- Only one device at a time can be added to the app's account. If the device has already been added to another account, it cannot be added to another account.
Step 1:
Open the BEABA ZEN CONNECT app and select "+" to add a camera.
Step 2:
Follow the different camera pairing steps on the app. Check that the light indicator is flashing red and that the tone can be heard when scanning the QR code
Step 3:
If the device is detected by the app, just add it and press fi nish to see it appear in the "MY DEVICES" category. Just select the device in question to see the video appear on your screen.
Note:
If you experience diffi culties with pairing, refer to the FAQ available on the app (My account > Help and comments > Help).
To explore the features of the application in further details you can refer to the FAQ of the application.
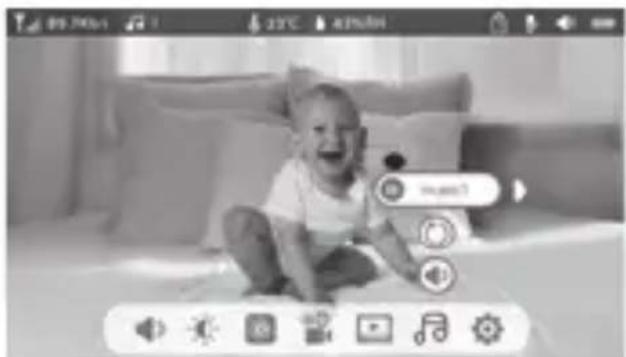
IX. PARENT UNIT INTERFACE (RECEIVER)
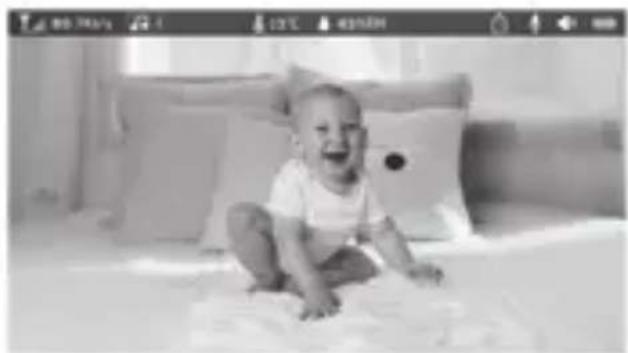
You can adjust the camera's position using the receiver or the mobile app. On the receiver using the direction buttons, on the mobile app with the «Rotation» button.
natural_image
Black-and-white photo of a baby sitting on a bed, laughing with arms outstretched (no text or symbols visible)Photo & Video\*
• Take a photo:
You can take a photo when you want to keep a picture of your baby.
Press the Menu button on the display screen, then select 🔒 and press OK to take a photo.
Record a video:
• You can record a video when you want to save a special moment of your baby.
Press the Menu button on the display screen, then select 🎨 and press OK to record a video.
View the photos and videos taken:
-
Press the Menu button on the display screen, then select ▶ and press OK to enter the interface. (function only available with a SD* card)
-
Select the camera and the date, then the photo or video you want to view, and press OK to enter the viewing mode.
For a video, press OK to read it or pause it in viewing mode.
Press the back button to quit viewing mode and return to the main menu.
* These options are available only if you insert a SD* card in the slot on the receiver provided for this purpose. Micro SD* card not supplied.

text_image
Child's life photos/videos Case1 Case2 Case3 Case4 2000/02/01 2000/02/01 2000/02/01 6787326673.png 6787326673.png 6787326673.mcd 6787326673.png 6787326673.png 6787326673.png 6787326673.png Mn = 2.5mlPlay music
You can play music to soothe your baby.
Several pieces of gentle music are available.
Press the Menu button on the display screen, then select 🎨 and press OK to enter the interface.
You can select different music, change music, the music cycle and adjust the music's volume
natural_image
Black-and-white photo of a smiling baby sitting on a couch, surrounded by a camera interface (no readable text or symbols)Feeding Reminder
You can add meal reminders.
- Press the Menu button on the display screen and select ⚙ > Feeding Reminder
- Press the direction buttons and select one of the 4 time options. Press OK to start setting the time.
- To set meal reminders, press the left and right and up and down buttons to update the hours, minutes and seconds.
- Press OK to save the settings.
- You can activate or deactivate meal reminders. You can also defi ne up to 4 meal reminders a day. When the programmed time is over, an notifi cation is displayed on the screen.

text_image
Feeding reminder One user Date: August 08 1 8 : 0 5 : 0 8 on 1 2 : 0 3 : 0 0 off 0 0 : -0 0 : 0 0 off 0 0 : 0 0 : 0 0 offX. DETECTION OF HUMIDITY
You can monitor the temperature and humidity of your baby's bedroom in real time. When the temperature and humidity differs from those you have defi ned, you will receive a notifi cation.
- Press the Menu button on the display screen, then select detection.
- Press the up and down buttons to select the desired temperature and humidity.
- When you start to configure an option, press the left and right buttons to change option and press the up and down buttons to change the values and units.
- Press OK to save the settings.
- Beyond standard values notifi cation: please activate it if you want to receive a notifi cation when the temperature and humidity are not conform to the values you have chosen.


text_image
Humidifier-infiltrating Non-dwg: Monitoring activity on temperature and humidity range Temperature range 3.6 - 7.2 °C Humidity range 4.0 - 7.0 RH Out of range reminder < img>XI. VOX FUNCTION (smart alarms)
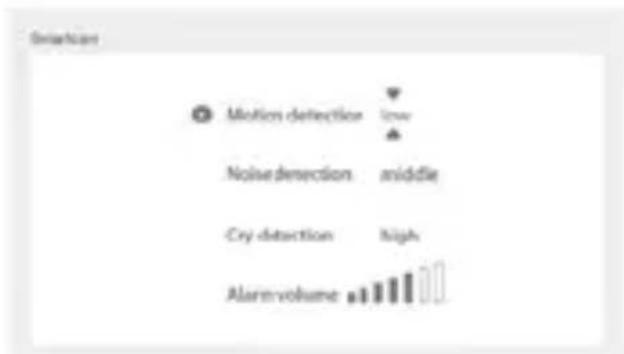
You can activate the VOX FUNCTION to detect your baby's movements, sounds and crying.
- Press the Menu button on the display screen and select
Smart care.
- Press the up and down buttons to choose between movement detection, sound detection, crying detection and volume, then select OK to start adjusting.
- When you start to configure a detection mode, press the left and right buttons to change option and press the up down buttons to adjust the sensitivity.
- To adjust the volume of the alarm, press the left and right buttons.
- Press OK to save the settings.
- An alarm is triggered when detection is activated. Press OK to stop the alarm. It is possible to set the volume to zero, the alarms will only be visual and the unit will automatically wake up from standby in case of an alarm.

text_image
Smartscan Motion detection low Noise detection middle Cry detection high AlarmvolumeXII. TROUBLESHOOTING - FAQ
| Problems Possible causes Solutions | ||
| If the signal is not stable: (loss of signal) | Interferences disturb the signal or the receiver is too far from the camera | Move the camera and receivers away from devices operating in Wifi that may interfere with the signal / use the application to access the camera from the smartphone |
| The image filmed by the camera is not displayed on the receiver's screen | Check that the receiver is connected to the camera.  | If this is not the case, start by pairing the camera and the receiver. |
| Unable to find the pairing button | The pairing button is the button on the front part of the camera. | Press and hold the button for 3 seconds, then follow the instructions on the screen. (To access the screen's pairing screen, press the Menu button on the display screen and select  anage cameras. anage cameras. |
| What to do if the screen is blocked and does not work when you press a button? | You must reset your display screen. | Press the reset button on your screen with a pin, then press and hold the power button on your screen to restart it. |
| Why is the camera or the screen unable to identify the SD* card? | Check that the SD* card is inserted correctly | The format must be FAT32 |
| Why am I unable to receive notifications with my mobile phone app when I connect the camera to the screen? | Notifications are probably deactivated on the phone. | Please check that the app is running on the phone and that the corresponding notifications have been activated. |
XIII. CLEANING AND MAINTENANCE
Warning Never use chemical cleaners, sprays or liquid detergents. - Before cleaning, all the mains adapters must be unplugged - Make sure that your hands are dry before inserting or replacing the battery - Clean the baby video monitor only with a damp cloth.
13. ENVIRONMENT AND RECYCLING -
This device has been designed and manufactured with high-quality materials and components such as Lithium batteries that can be recycled and reused. - Do not dispose of this product with ordinary household waste. Seek information about the provisions in force in your region concerning the separate collection of electrical and electronic appliances. Take this product to a collection point for the recycling of electrical and electronic equipment.
14. WARRANTY
The BEABA ZEN PREMIUM baby video monitor benefits from a 24-month warranty from the date purchase. During this period, we guarantee the free repair of any defect resulting from a material defect or a manufacturing defect. This warranty is subject to the final evaluation of the importer. If you require assistance or additional information, consult the Beaba website or contact the Beaba consumer service.
- If you notice a fault, start by consulting the user manual.
- In the absence of a clear answer in the manual, contact this baby video monitor's supplier via the website www.beaba.com.
INVALIDATION OF THE WARRANTY
- In the case of inappropriate use, a connection error, the use of non-original parts or accessories, negligence, and in the case of faults caused by humidity, re,oods, lightning, or natural disasters;
- In the case of unauthorised modifications and/or repairs by third parties;
- In the case of the unsuitable transport of the device without appropriate packaging, as well as in the case of this warranty card or proof of purchase being absent. The warranty does not cover connection cables and batteries. All other responsibility, in particular in terms of indirect damages, is excluded. For further information, download the Beaba & Moi app on the App Store or Google Play
EU DECLARATION OF CONFORMITY
We:
Business Name: BEABA
Address: 37 rue de Lège, 75008 PARIS
Country: FRANCE
declare under our sole responsibility for the equipment:
Equipment name: Zen Premium
Model or type: Zen premium (1M/2S)
Object :
natural_image
Two electronic devices: a white humanoid robot and a gray digital camera with a black screen (no visible text or symbols)To which this declaration relates is in conformity with the following harmonized standards
EN 55032:2015+A1:2020
EN 55035:2017+A11:2020
EN IEC 61000-3-2:2019+A1:2021
EN 61000-3-3: 2013+A1:2019
EN 50130-4:2011+A1:2014
EN IEC 62311:2020
EN 62368-1
ETSI EN 301 489-1 V2.2.3
ETSI EN 301 489 3 V2.1.2
ETSI EN 301 489-17 V3.2.4
ETSI EN 300 328 V2.2.2
ETSI EN 300 220-1 V3.1.1
ETSI EN 300 220-2 V3.2.1
Following the provisions of
Directive 2014/53/EU
EMC Directive 2014/30/EU
Place and date of issue (of this DoC): Bellignat, 30th July 2021
Name: Alicia Ganeval
Function: Product Certification Manager

text_image
BEABA 21 rue du Moutin 01100 BELLIGNAT Tel: 04 74 12 09 10 - Fax: 04 74 12 09 11 RCS10 352 684 377 - Code NUE 208 M Code TVA. FIR. 89 5852 684 377www.bedbe.com
natural_image
Simple line drawing of a stylized camera or remote control unit (no text or symbols)Kamera Empfänger
B
natural_image
Simple line drawing of a handheld electronic device with a screen and antenna (no text or symbols)C

natural_image
Coiled cable with a USB port, no text or symbols visibleUSB-Kabel x 2
D
natural_image
Simple line drawing of a box with two small objects inside (no text or symbols)F

natural_image
Simple line drawing of an oval-shaped object with two circular holes, no text or symbols present.G
natural_image
Simple line drawing of an oval-shaped object with two circular holes, no text or symbols present.natural_image
Blank rectangular sheet or panel with no visible text, symbols, or markings|
natural_image
Line drawing of a handheld electronic device with a screen and control buttons (no text or symbols)natural_image
Simple line drawing of a mechanical device with concentric circles and a downward arrow, no text or symbols present.natural_image
Simple line drawing of a circular object with two internal holes and two labeled points, above a hatched surface (no text or symbols)
natural_image
Diagram of a mechanical device with rotating components and a curved arrow indicating motion (no text or symbols)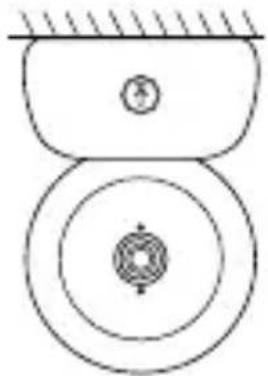
natural_image
Pure mechanical diagram showing two circular components with a central hub and hatched top surface (no text or symbols)natural_image
Simple line drawing of a circular object with two holes and a horizontal surface below (no text or symbols)
natural_image
Simple line drawing of a mechanical device with a rotating wheel and base, no text or symbols present.
natural_image
Simple line drawing of a mechanical component with concentric circles and a base (no text or symbols)text_image
Carketa management The device is bound Long passes OK to release the bindingtext_image
Camera management Device is not sound 1. Long press the cameras joining button until you have the prompt tone. 2. Tap the OK button on the display to start closing.text_image
Two QR codes with Apple logo embedded in the center of each.
natural_image
Black-and-white photo of a smiling baby sitting on a bed, no visible text or symbolsFoto & Video\*
natural_image
Black-and-white photo of a smiling baby sitting on a bed, with no visible text or symbols in the main image area.text_image
Humidity-monitoring Not true, identifying of the heat over temperature and humidity ranges. Temperature range 3.6 - 7.2 °C Humidity range 4.0 - 7.0 RH Out of range reminder on offXI. VOX-FUNKTION
natural_image
Simple line drawing of a webcam with a circular head and button (no text or symbols)Camera Ontvanger
B

natural_image
Line drawing of a handheld electronic device with a screen and antenna (no text or symbols)C

natural_image
Simple line drawing of a coiled cable or wire with a connector (no text or symbols)USB-kabel x 2
D

Netstroomadapter x 2 SteunSchroef
E
natural_image
Simple line drawing of a box with three vertical bars, no text or symbols presentF

natural_image
Simple line drawing of an oval-shaped object with two circular holes, no text or symbols present.G

natural_image
Simple line drawing of an oval-shaped object with two circular holes, no text or symbols present.Kantelaccessoire Handleiding Resetpen
H

natural_image
Blank rectangular sheet or panel with no visible text, symbols, or markings|

natural_image
Line drawing of a handheld electronic device with a screen and control buttons (no text or symbols)natural_image
Simple line drawing of a mechanical device with concentric circles and a downward arrow, no text or symbols present.natural_image
Simple line drawing of a ceiling-mounted lamp with two circular components and a pointer, labeled 'F' (no text or symbols on the diagram itself)
natural_image
Pure mechanical diagram showing a rotating component with no text or symbols
natural_image
Pure mechanical diagram showing two circular components with concentric rings and a central hub (no text or symbols)natural_image
Simple line drawing of a circular object with two circular holes and a flat base, no text or symbols present.
natural_image
Simple line drawing of a mechanical device with a rotating wheel and base mount (no text or symbols)
natural_image
Simple line drawing of a mechanical component with concentric circles and a base (no text or symbols)VII. ALGEMENE INSTELLINGEN
text_image
Camera management The device is bound Long access OK to remove title bindingtext_image
Device is not bound 1. Long press the camera pacing button until you have the prompt font, 2. Tap the OK button on the display to start coming.text_image
QR code image with central logo, likely for digital scanning and linking to online content
text_image
QR code image containing encoded data, no visible human-readable text
natural_image
Black-and-white photo of a smiling baby sitting on a bed, no visible text or symbolsFoto en Video\*
- Een foto nemen:
natural_image
Black-and-white photo of a smiling baby sitting on a couch, with no visible text or symbols in the main image area.Maaltijd reminder
text_image
Humilyshev monitoring Price line: 0.0000 at 30°C or 100% or 25°C or 40°C Temperature range 3.6 - 7.2 °C Humidity range 4.0 - 7.0 RH Out-of-range reminder on offXI. VOX FUNCTIE
text_image
Sineficus Motion detection low Noise detection: middle Cry detection high AlarmvolumeXII. STORINGEN EN OPLOSSINGEN – FAQ
natural_image
Line drawing of a handheld electronic device with a screen and antenna (no text or symbols)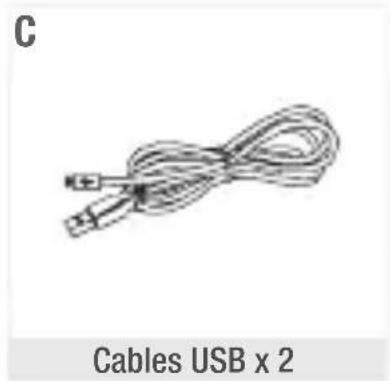
natural_image
Illustration of a coiled cable with connectors, labeled 'C' and 'Cables USB x 2' (no other text or symbols)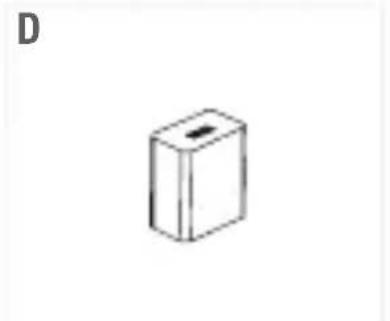
natural_image
Simple line drawing of a rectangular box with a slot, labeled 'D' in the top-left corner (no other text or symbols)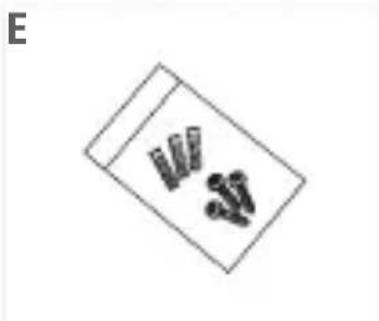
natural_image
Simple line drawing of a box with three small objects inside, no text or symbols present.
natural_image
Simple line drawing of an oval-shaped object with two circular holes, labeled 'F' in the top-left corner (no other text or symbols)natural_image
Simple line drawing of an oval-shaped object with two circular holes, labeled 'G' in the top-left corner (no other text or symbols)
natural_image
Simple 3D rectangular shape with no text or symbols
natural_image
Simple vertical line with a circular end, no text or symbols presentnatural_image
Line drawing of a handheld electronic device with a screen and control buttons (no text or symbols)natural_image
Simple line drawing of a mechanical device with concentric circles and a downward arrow, no text or symbols present.natural_image
Simple line drawing of a ceiling-mounted lamp with two ovals and a base, no text or symbols present.
natural_image
Pure mechanical diagram showing a rotating component with no text or symbols
natural_image
Pure mechanical diagram showing two circular components with concentric rings and a central hub (no text or symbols)natural_image
Simple line drawing of a circular object with two circular holes and a flat base, no text or symbols present.
natural_image
Simple line drawing of a mechanical device with a rotating wheel and base, no text or symbols present.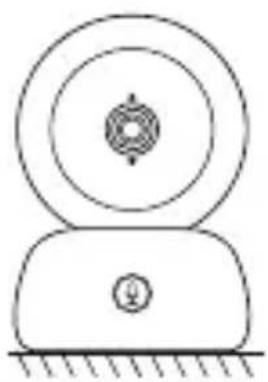
natural_image
Simple line drawing of a mechanical device with concentric circles and a base (no text or symbols)text_image
Camers inngement The device is bound Long press OK to release the bindingtext_image
Camera Management Device is not bound 1. Long press the camera picking button until you hear the prompt time, 2. Top the OK button on the display to start coming.text_image
Two QR codes side by side, one with an Apple logo and the other with a clover and star symbol in the center.
natural_image
Black-and-white photo of a baby sitting on a bed, smiling with arms outstretched (no text or symbols visible)Foto & Vídeo\*
- Sacar una foto:
natural_image
Black-and-white photo of a baby sitting on a bed with a smartphone app interface overlay (no readable text or symbols)text_image
Humidity monitoring New time, monitoring of body over temperature and humidity changes Temperature range 3.6 - 7.2 °C Humidity range 4.0 - 7.0 R·K Out of range reminder on exitXI. FUNCIÓN VOX
natural_image
Simple line drawing of a webcam with a circular head and base (no text or symbols)Kamera Odbiornik
B

natural_image
Line drawing of a handheld electronic device with a screen and antenna (no text or symbols)C

natural_image
Illustration of a coiled cable with a USB port (no text or symbols)2 przewody USB
D

natural_image
Simple line drawing of a rectangular object with three vertical cylindrical objects inside (no text or symbols)F
natural_image
Simple line drawing of an oval-shaped object with two circular holes, no text or symbols present.G
natural_image
Simple line drawing of an oval-shaped object with two circular holes, no text or symbols present.natural_image
Simple 3D rectangular shape with no text or symbols1

natural_image
Line drawing of a handheld electronic device with a screen and control buttons (no text or symbols)natural_image
Simple line drawing of a mechanical device with concentric circles and a downward arrow, no text or symbols present.natural_image
Simple line drawing of a ceiling-mounted lamp with two ovals and a base, no text or symbols present.
natural_image
Pure mechanical diagram showing a rotating component with no text or symbols
natural_image
Pure mechanical diagram showing two circular components with a central hub and a small circular feature, no text or symbols present.natural_image
Simple line drawing of a circular object with two small holes and a horizontal surface below (no text or symbols)
natural_image
Simple line drawing of a mechanical device with a rotating knob and base, no text or symbols present.
natural_image
Simple line drawing of a mechanical component with concentric circles and a base (no text or symbols)VII. PARAMETRY OGÓLNE
flowchart
graph TD
    A["Camera Management"] --> B{The device is bound}
    B --> C["Long press, OK to release this binding"]
text_image
Cathely-end Management Device is not bound 1. Long press the cement printing button until you have the prompt pulse, 2. Tap the Off button on the display to start calling.text_image
Two QR codes with Apple logo embedded in the center, likely for scanning to access digital content.
natural_image
Black-and-white photo of a smiling baby sitting on a bed, no visible text or symbolsZdjęcia i fi lmy\*
- Robienie zdjęć:
natural_image
Black-and-white photo of a baby sitting on a couch with a smartphone app interface overlay (no readable text or symbols in the scene)text_image
Hypothesis monitoring Real-time monitoring of daily time temperature/humidity changes. Temperature range 3.6 - 7.2 °C Humidity range 4.0 - 7.0 RH Out of range reminder mm offXI. FUNKCJA GŁOSU
natural_image
Simple line drawing of a webcam with a circular head and central button (no text or symbols)Камера Приемник
B
natural_image
Line drawing of a handheld electronic device with a screen and antenna (no text or symbols)C
natural_image
Simple line drawing of a coiled cable or wire with no text or symbolsUSB-кабели, 2 шт.
D
natural_image
Simple line drawing of a box with two cylindrical objects inside (no text or symbols)F

natural_image
Simple line drawing of an oval-shaped object with two circular holes, no text or symbols present.G

natural_image
Simple line drawing of an oval-shaped object with two circular holes, no text or symbols present.Наклонное крепление
H

natural_image
Simple 3D rectangular shape with no text or symbolsnatural_image
Line drawing of a handheld electronic device with a screen and control buttons (no text or symbols)natural_image
Simple line drawing of a mechanical device with concentric circles and a downward arrow, no text or symbols present.natural_image
Simple line drawing of a circular object with two circular features and two labeled points, under a hatched ceiling (no text or symbols)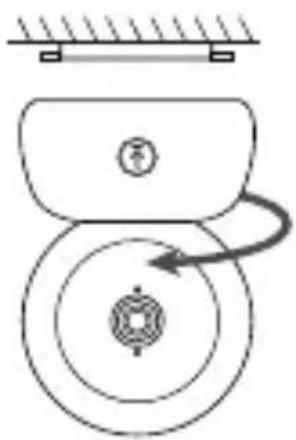
natural_image
Pure mechanical diagram showing a pulley system with rotational arrow (no text or symbols)
natural_image
Pure mechanical diagram showing concentric circles and a shaft, without any text, numbers, or symbols.natural_image
Simple line drawing of a circular object with two small holes and a horizontal surface below (no text or symbols)
natural_image
Simple line drawing of a mechanical device with a circular component and an arrow indicating rotation (no text or symbols)
natural_image
Simple line drawing of a mechanical component with concentric circles and a base (no text or symbols)VII. ОБЩИЕ ПАРАМЕТРЫ
- Настройка яркости
text_image
Camera management The device is bound Long press, OK to release the timingtext_image
Camera management Device is not bound 1. Long press the camera pinning button until you have the prompt time. 2. Tap the On button on the display to start closing.text_image
QR code image containing a central Apple logo, likely for digital scanning and linking to online content.
text_image
QR code image containing encoded data, no visible human-readable text
natural_image
Black-and-white photo of a smiling baby sitting on a bed, no visible text or symbolsФото и видео\*
natural_image
Black-and-white photo of a baby sitting on a couch with a smartphone app interface overlay (no readable text or symbols in the scene)text_image
Huefture-supplating Reactive humidity affects non-temperature and humidity during Temperature range 3.6 - 7.2 °C Humidity range 4.0 - 7.0 RH Out of range reminder on exitXI. ФУНКЦИЯ VOХ
text_image
Motion detections low Noise-detection: middle Cry detection: high Alarm volumenatural_image
Simple line drawing of a webcam with a circular head and button (no text or symbols)natural_image
Line drawing of a handheld electronic device with a screen and antenna (no text or symbols)C
natural_image
Simple line drawing of a coiled cable or wire with a connector (no text or symbols)Cavi USB x 2
D

natural_image
Simple line drawing of a box with three vertically aligned cylindrical objects (no text or symbols)F

natural_image
Simple line drawing of an oval-shaped object with two circular holes, no text or symbols present.G
natural_image
Simple line drawing of an oval-shaped object with two circular holes, no text or symbols present.natural_image
Blank rectangular sheet or panel with no visible text, symbols, or markings|

natural_image
Line drawing of a handheld electronic device with a screen and control buttons (no text or symbols)natural_image
Simple line drawing of a mechanical device with concentric circles and a downward arrow, no text or symbols present.natural_image
Simple line drawing of a ceiling-mounted lamp with two ovals and a base, no text or symbols present.
natural_image
Pure mechanical diagram showing a rotating component with a curved arrow indicating rotation (no text or symbols)
natural_image
Pure mechanical diagram showing two circular components with a central hub and a numbered circle (no text or symbols)natural_image
Simple line drawing of a circular object with two circular holes and two side handles, above a hatched baseline (no text or symbols)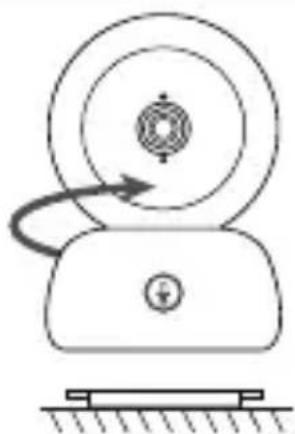
natural_image
Simple line drawing of a mechanical device with a rotating knob and base, no text or symbols present.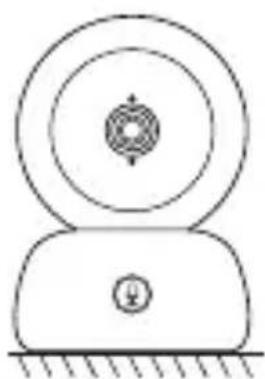
natural_image
Simple line drawing of a mechanical component with concentric circles and a base (no text or symbols)VII. PARAMETRI GENERALI
text_image
Careers management The device is bound Long press OK to release the blindingtext_image
Device is not sound 1. Long price the camera-picking button until you hear the prompt time, 2. Tap the OK button on the display to start closing.text_image
Two QR codes side by side, one with an Apple logo in the center, the other with a central logo and cross symbol.
natural_image
Black-and-white photo of a smiling baby sitting on a bed, no visible text or symbolsFoto & Video\*
• Scattare una foto:
natural_image
Black-and-white photo of a baby sitting on a bed, surrounded by icons and a camera interface (no readable text or symbols)Promemoria pasti
text_image
Humidity monitoring Now time, demonstrating of today's temperature and humidity changes Temperature range 3.6 - 7.2 °C Humidity range 4.0 - 7.0 R+4 Out of range reminder on exitXI. FUNZIONE VOX
natural_image
Simple line drawing of a stylized camera with no text or symbolsCâmara Recetor
B
natural_image
Line drawing of a handheld electronic device with a screen and antenna (no text or symbols)C
natural_image
Simple line drawing of a coiled cable or wire with no text or symbolsCabos USB x 2
D

Adaptadores de corrente x 2
E

natural_image
Simple line drawing of a box with three small cylindrical objects inside (no text or symbols)F

natural_image
Simple line drawing of an oval-shaped object with two circular holes, no text or symbols present.SuporteParafusos
G

natural_image
Simple line drawing of an oval-shaped object with two circular holes, no text or symbols present.natural_image
Blank rectangular sheet or panel with no visible text, symbols, or markings
natural_image
Line drawing of a handheld electronic device with a screen and control buttons (no text or symbols)natural_image
Simple line drawing of a mechanical device with concentric circles and a downward arrow, no text or symbols present.natural_image
Simple line drawing of a ceiling-mounted device with two circular components and a pointer, labeled 'F' (no text or symbols on the diagram itself)
natural_image
Pure mechanical diagram showing a rotating component with no text or symbols
natural_image
Pure mechanical diagram showing two circular components with a central hub and a small circular feature, no text or symbols present.natural_image
Simple line drawing of a circular object with two circular holes and a flat base, no text or symbols present.
natural_image
Simple line drawing of a mechanical device with a rotating wheel and base mount (no text or symbols)
natural_image
Simple line drawing of a mechanical component with concentric circles and a base (no text or symbols)VII. DEFINIÇÕES GERAIS
text_image
Catalytic management The devices bound Long press OK to release the bindingtext_image
Cement management Device is not bound 1. Long press the camera pinning button until you have the prompt phone, 2. Too the OK button on the display to start using.text_image
QR code image containing encoded data, with a central logo or watermark.
text_image
QR code image containing encoded data, no visible human-readable text
natural_image
Black-and-white photo of a baby sitting on a bed, smiling with arms outstretched (no text or symbols visible)Foto e vídeo\*
- Tirar uma foto:
natural_image
Black-and-white photo of a smiling baby sitting on a bed, with no visible text or symbols in the main image area.text_image
Humidity monitoring Now time, monitoring of today over temperature and moisture changes. Temperature range 3.6 - 7.2 °C Humidity range 4.0 - 7.0 RH Out of range reminder on exitXI. FUNÇÃO VOX
natural_image
Simple line drawing of a stylized camera with no text or symbols摄像头 接收器
B

natural_image
Simple line drawing of a handheld electronic device with a screen and antenna (no text or symbols)C

natural_image
Simple line drawing of a coiled cable or wire with no text or symbolsUSB连接线 × 2
D

电源适配器×2 支架螺钉
E

natural_image
Simple line drawing of a rectangular box with four vertical cylindrical objects inside (no text or symbols)F
natural_image
Simple line drawing of a round object with two circular holes (no text or symbols)G
natural_image
Simple line drawing of an oval-shaped object with two circular holes, no text or symbols present.倾斜配件 使用手册
H

natural_image
Blank rectangular sheet or panel with no visible text, symbols, or markings复位针
|

A. 摄像头(婴儿终端)
E. 螺钉
B. 接收器(父母终端)
F. 支架
C. USB连接线×2
G. 倾斜配件
natural_image
Line drawing of a handheld electronic device with a screen and control buttons (no text or symbols)c. 两个终端的连接和使用距离
natural_image
Line drawing of a portable electronic device with a circular top and front panel (no text or symbols)natural_image
Simple line drawing of a mechanical device with concentric circles and a downward arrow, no text or symbols present.natural_image
Simple line drawing of an oval object with two circular features and a horizontal line above, labeled 'F' (no text or symbols on the object itself)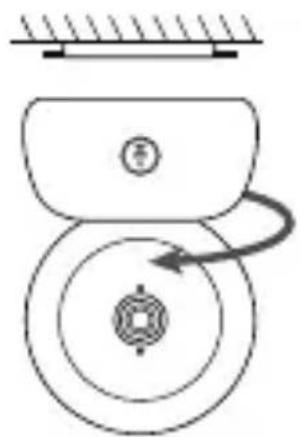
natural_image
Pure mechanical diagram showing a rotating component with no text or symbols
natural_image
Pure mechanical diagram showing two circular components with a central hub and a small circular feature, no text or symbols present.natural_image
Simple line drawing of a circular object with two holes and a horizontal surface below (no text or symbols)
natural_image
Mechanical device with circular components and a curved arrow indicating motion (no text or symbols)
natural_image
Simple line drawing of a mechanical device with concentric circles and a base (no text or symbols)VII. 七.一般参数
· 调整亮度:
text_image
Camera management The device is bound Long access OK to release file binding· 断开摄像头与接收器的连接:
text_image
Camera management Device is not boundt 1. Long press the zooms joining button until you have the prompt time, 2. Flip the Off button on the display to start setting.将摄像头连接到手机

text_image
QR code image containing encoded data, no visible human-readable text
text_image
QR code image containing encoded data, no visible human-readable text
natural_image
Black-and-white photo of a baby sitting on a bed, smiling with arms outstretched (no text or symbols visible)照片和视频\*
- 拍照:
natural_image
Black-and-white photo of a smiling baby sitting on a bed, surrounded by camera app icons (no readable text or symbols)喂食提醒
您可设置喂食提醒。
text_image
Padding reminder Close (check) Next is up to 100 ● 1 8 : 0 5 : 0 8 on 1 2 : 0 3 : 0 9 off 0 0 : 0 0 : 0 0 off 0 0 : 0 0 : 0 0 offX. 十.湿度探测
text_image
Humidity monitoring Non-line monitoring of data on temperature and humidity range Temperature range 3.6 - 7.2 Humidity range 4.0 - 7.0 RH Out of range reminder am mltext_image
Motion detection low Noise detection :middle Cry detection :high Alarm volumenatural_image
Simple line drawing of a webcam with concentric circles and a central circular pattern (no text or symbols)攝影機 接收器
B

natural_image
Simple line drawing of a handheld electronic device with a screen and antenna (no text or symbols)C
natural_image
Coiled cable or wire with a connector, no visible text or symbolsUSB傳輸線×2
D
電源適配器×2 支架螺釘
E
natural_image
Simple line drawing of a box with three vertical cylindrical objects inside (no text or symbols)F
natural_image
Simple line drawing of an oval-shaped object with two circular holes, no text or symbols present.G

natural_image
Simple line drawing of an oval-shaped object with two circular holes, no text or symbols present.傾斜配件 使用手冊
H

natural_image
Blank rectangular sheet or panel with no visible text, symbols, or markings重設針
|

A. 攝影機(嬰兒終端)
E. 螺釘
B. 接收器(父母終端)
F. 傾斜配件
C. USB傳輸線×2
G. 重設針
natural_image
Line drawing of a handheld electronic device with a screen and control buttons (no text or symbols)c.兩個終端的連線與使用距離
natural_image
Simple line drawing of a mechanical device with concentric circles and a downward arrow, no text or symbols present.natural_image
Simple line drawing of an oval object with two circular features and a horizontal line above, labeled 'F' (no text or symbols on the object itself)
natural_image
Pure mechanical diagram showing a rotating component with no text or symbols
natural_image
Pure mechanical diagram showing two circular components with a central hub and a small circular feature, no text or symbols present.natural_image
Simple line drawing of a circular object with two holes and a horizontal surface below (no text or symbols)
natural_image
Simple line drawing of a mechanical device with a rotating wheel and base, no text or symbols present.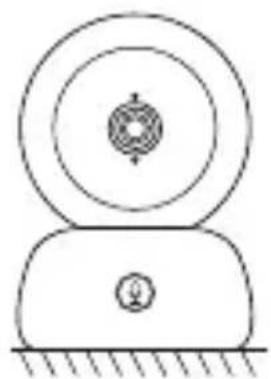
natural_image
Simple line drawing of a mechanical device with concentric circles and a base (no text or symbols)VII. 七、一般參數
· 調整亮度:
- 請按下顯示螢幕上的功能表按鈕,選取

- 按下上下方向按鈕以便調整亮度。
· 設定時間:
text_image
Centers management The device is bound Long press OK to release the closing· 斷開攝影機與接收器的連線:
text_image
Camera management Device is not boundt 1. Long press the camera pinning button until you hear the prompt time, 2. Top the OK button on the display to start setting.將攝影機連線到電話

text_image
Two QR codes side by side, one with an Apple logo in the center, the other with a central logo and cross.
natural_image
Black-and-white photo of a baby sitting on a bed, smiling with arms outstretched (no text or symbols visible)相片與視訊\*
- 拍攝相片:
natural_image
Black-and-white photo of a smiling baby sitting on a bed, surrounded by app icons (no readable text or symbols)餵食提醒
您可增加餵食提醒。
text_image
Humidity monitoring Non-Step: Observing activity with temperature and humidity change Temperature range 3.6 - 7.2 Humidity range 4.0 - 7.0 RH Out of range reminder OK OKtext_image
Motion detection low Noise detection middle Cry detection high Alarm volumeXII. 十二、故障解決 - 常見問題
natural_image
Simple line drawing of a stylized camera or remote device with no text or symbolsnatural_image
Simple line drawing of a handheld electronic device with a screen and keypad (no text or symbols)natural_image
Coiled cable or wire with a small connector at the end (no text or symbols visible)natural_image
Simple line drawing of a rectangular object with three vertical cylindrical objects inside (no text or symbols)ز. داعم و. برغي
F
natural_image
Simple line drawing of an oval-shaped object with two circular holes, no text or symbols present.G
natural_image
Simple line drawing of an oval-shaped object with two circular holes, no text or symbols present.H

natural_image
Simple 3D rectangular shape with no text or symbols|

natural_image
Line drawing of a handheld electronic device with a screen and control buttons (no text or symbols)ب- وحدة الوالدين
natural_image
Line drawing of a portable electronic device with a circular top and front panel (no text or symbols)natural_image
Simple line drawing of a mechanical device with concentric circles and a downward arrow, no text or symbols present.natural_image
Simple line drawing of a lamp or lamp with two legs and a central screen, no text or symbols present.
natural_image
Pure mechanical diagram showing a rotating component with no text or symbols
natural_image
Pure mechanical diagram showing two circular components with a central hub and a small circular feature, no text or symbols present.natural_image
Simple line drawing of a circular object with two circular holes and a flat base, no text or symbols present.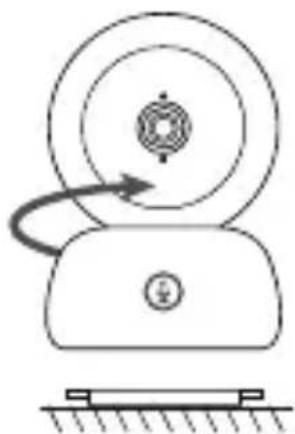
natural_image
Simple line drawing of a mechanical device with a rotating wheel and base mount (no text or symbols)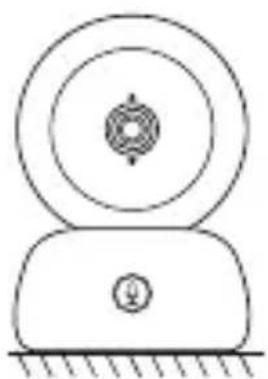
natural_image
Simple line drawing of a mechanical component with concentric circles and a base (no text or symbols)flowchart
graph TD
    A["Camera Management"] --> B["The devices bound"]
    B --> C["Long press (OK, No), please the binding"]
text_image
Cathena Management Device is not bound 1. Long press the center pinning button until you lose the prompt tone, 2. Tap the OK button in the display-to-start pinning.text_image
Two QR codes side by side, one with an Apple logo in the center, the other with a heart-shaped logo in the center.
natural_image
Black-and-white photo of a baby sitting on a bed, smiling with arms outstretched (no text or symbols visible)صور وفیديو:
ال Fineط صورة:
natural_image
Black-and-white photo of a smiling baby sitting on a bed, with no visible text or symbols in the main image area.تدكير بالوجبات
text_image
Humidity monitoring Now time, monitoring of climate heat temperature and humidity change Temperature range 3.6 - 7.2 °C Humidity range 4.0 - 7.0 R·H Out of range reminder on exittext_image
Diamatic Motion detections low Noise detection middle Cry detection high Alarm volumetext_image
QR code image containing encoded data, no visible human-readable texttext_image
QR code image containing encoded data, no visible human-readable textConnect your camera to the mobile app

text_image
QR code image containing encoded data, no visible human-readable texttext_image
QR code image containing encoded data, no visible human-readable textConnect your camera to the monitor
Other tutorial videos are available.
Check them out on our YouTube channel @BEABAvideos.
MADE IN CHINA


BÉABA
21 Rue du Moulin
01100 Bellignat - FRANCE
www.beaba.com
contact@beaba.com