GMS-E-45EV - Saw Gardol - Free user manual and instructions
Find the device manual for free GMS-E-45EV Gardol in PDF.
| Product type | Petrol chainsaw |
| Brand | Gardol |
| Model | GMS-E-45EV |
| Engine displacement | 50,4 cm³ |
| Maximum engine power | 2 kW |
| Cutting length | 44,5 cm |
| Guide bar length | 18" (45 cm) |
| Chain pitch | 0,325" (8,255 mm) |
| Chain gauge | 0,058" (1,5 mm) |
| Idle speed | 3000 ± 300 tr/min |
| Maximum speed | 11500 tr/min |
| Maximum chain speed | 21 m/s |
| Fuel tank capacity | 540 cm³ |
| Oil tank capacity | 240 cm³ |
| Net weight (without chain and bar) | 5,75 kg |
| Sound pressure level (L_PA) | 103 dB(A) |
| Guaranteed sound power level (L_WA) | 115 dB(A) |
| Vibration front handle (a_hv) | max. 7,21 m/s² |
| Vibration rear handle (a_hv) | max. 6,53 m/s² |
| Spark plug | TORCH L7RTC |
| Electrode gap | 0,6 mm |
| Chain type | Oregon 21LPX072X |
| Anti-vibration system | Yes |
| Chain brake | Yes, with hand guard |
| Automatic chain lubrication | Yes, adjustable |
| Air filter cleaning | Every 20 hours of service |
| Spark plug replacement | Every 20 hours of service |
Frequently Asked Questions - GMS-E-45EV Gardol
User questions about GMS-E-45EV Gardol
0 question about this device. Answer the ones you know or ask your own.
Ask a new question about this device
Download the instructions for your Saw in PDF format for free! Find your manual GMS-E-45EV - Gardol and take your electronic device back in hand. On this page are published all the documents necessary for the use of your device. GMS-E-45EV by Gardol.
USER MANUAL GMS-E-45EV Gardol
GB Original operating instructions Petrol Chainsaw
Recycling-Alternative zur Rücksendeaff ordering:
- Safety regulations
- Layout and items supplied
- Proper use
- Technical data
- Before starting the equipment
- Operation
- Cleaning, maintenance, storage and ordering of spare parts
- Disposal and recycling
- Troubleshooting guide
GB
Danger!
When using the equipment, a few safety precautions must be observed to avoid injuries and damage. Please read the complete operating instructions and safety regulations with due care. Keep this manual in a safe place, so that the information is available at all times. If you give the equipment to any other person, hand over these operating instructions and safety regulations as well. We cannot accept any liability for damage or accidents which arise due to a failure to follow these instructions and the safety instructions.
1. Safety regulations
The corresponding safety information can be found in the enclosed booklet.
Danger!
Read all safety regulations and instructions. Any errors made in following the safety regulations and instructions may result in an electric shock, fire and/or serious injury.
Keep all safety regulations and instructions in a safe place for future use.
2. Layout and items supplied
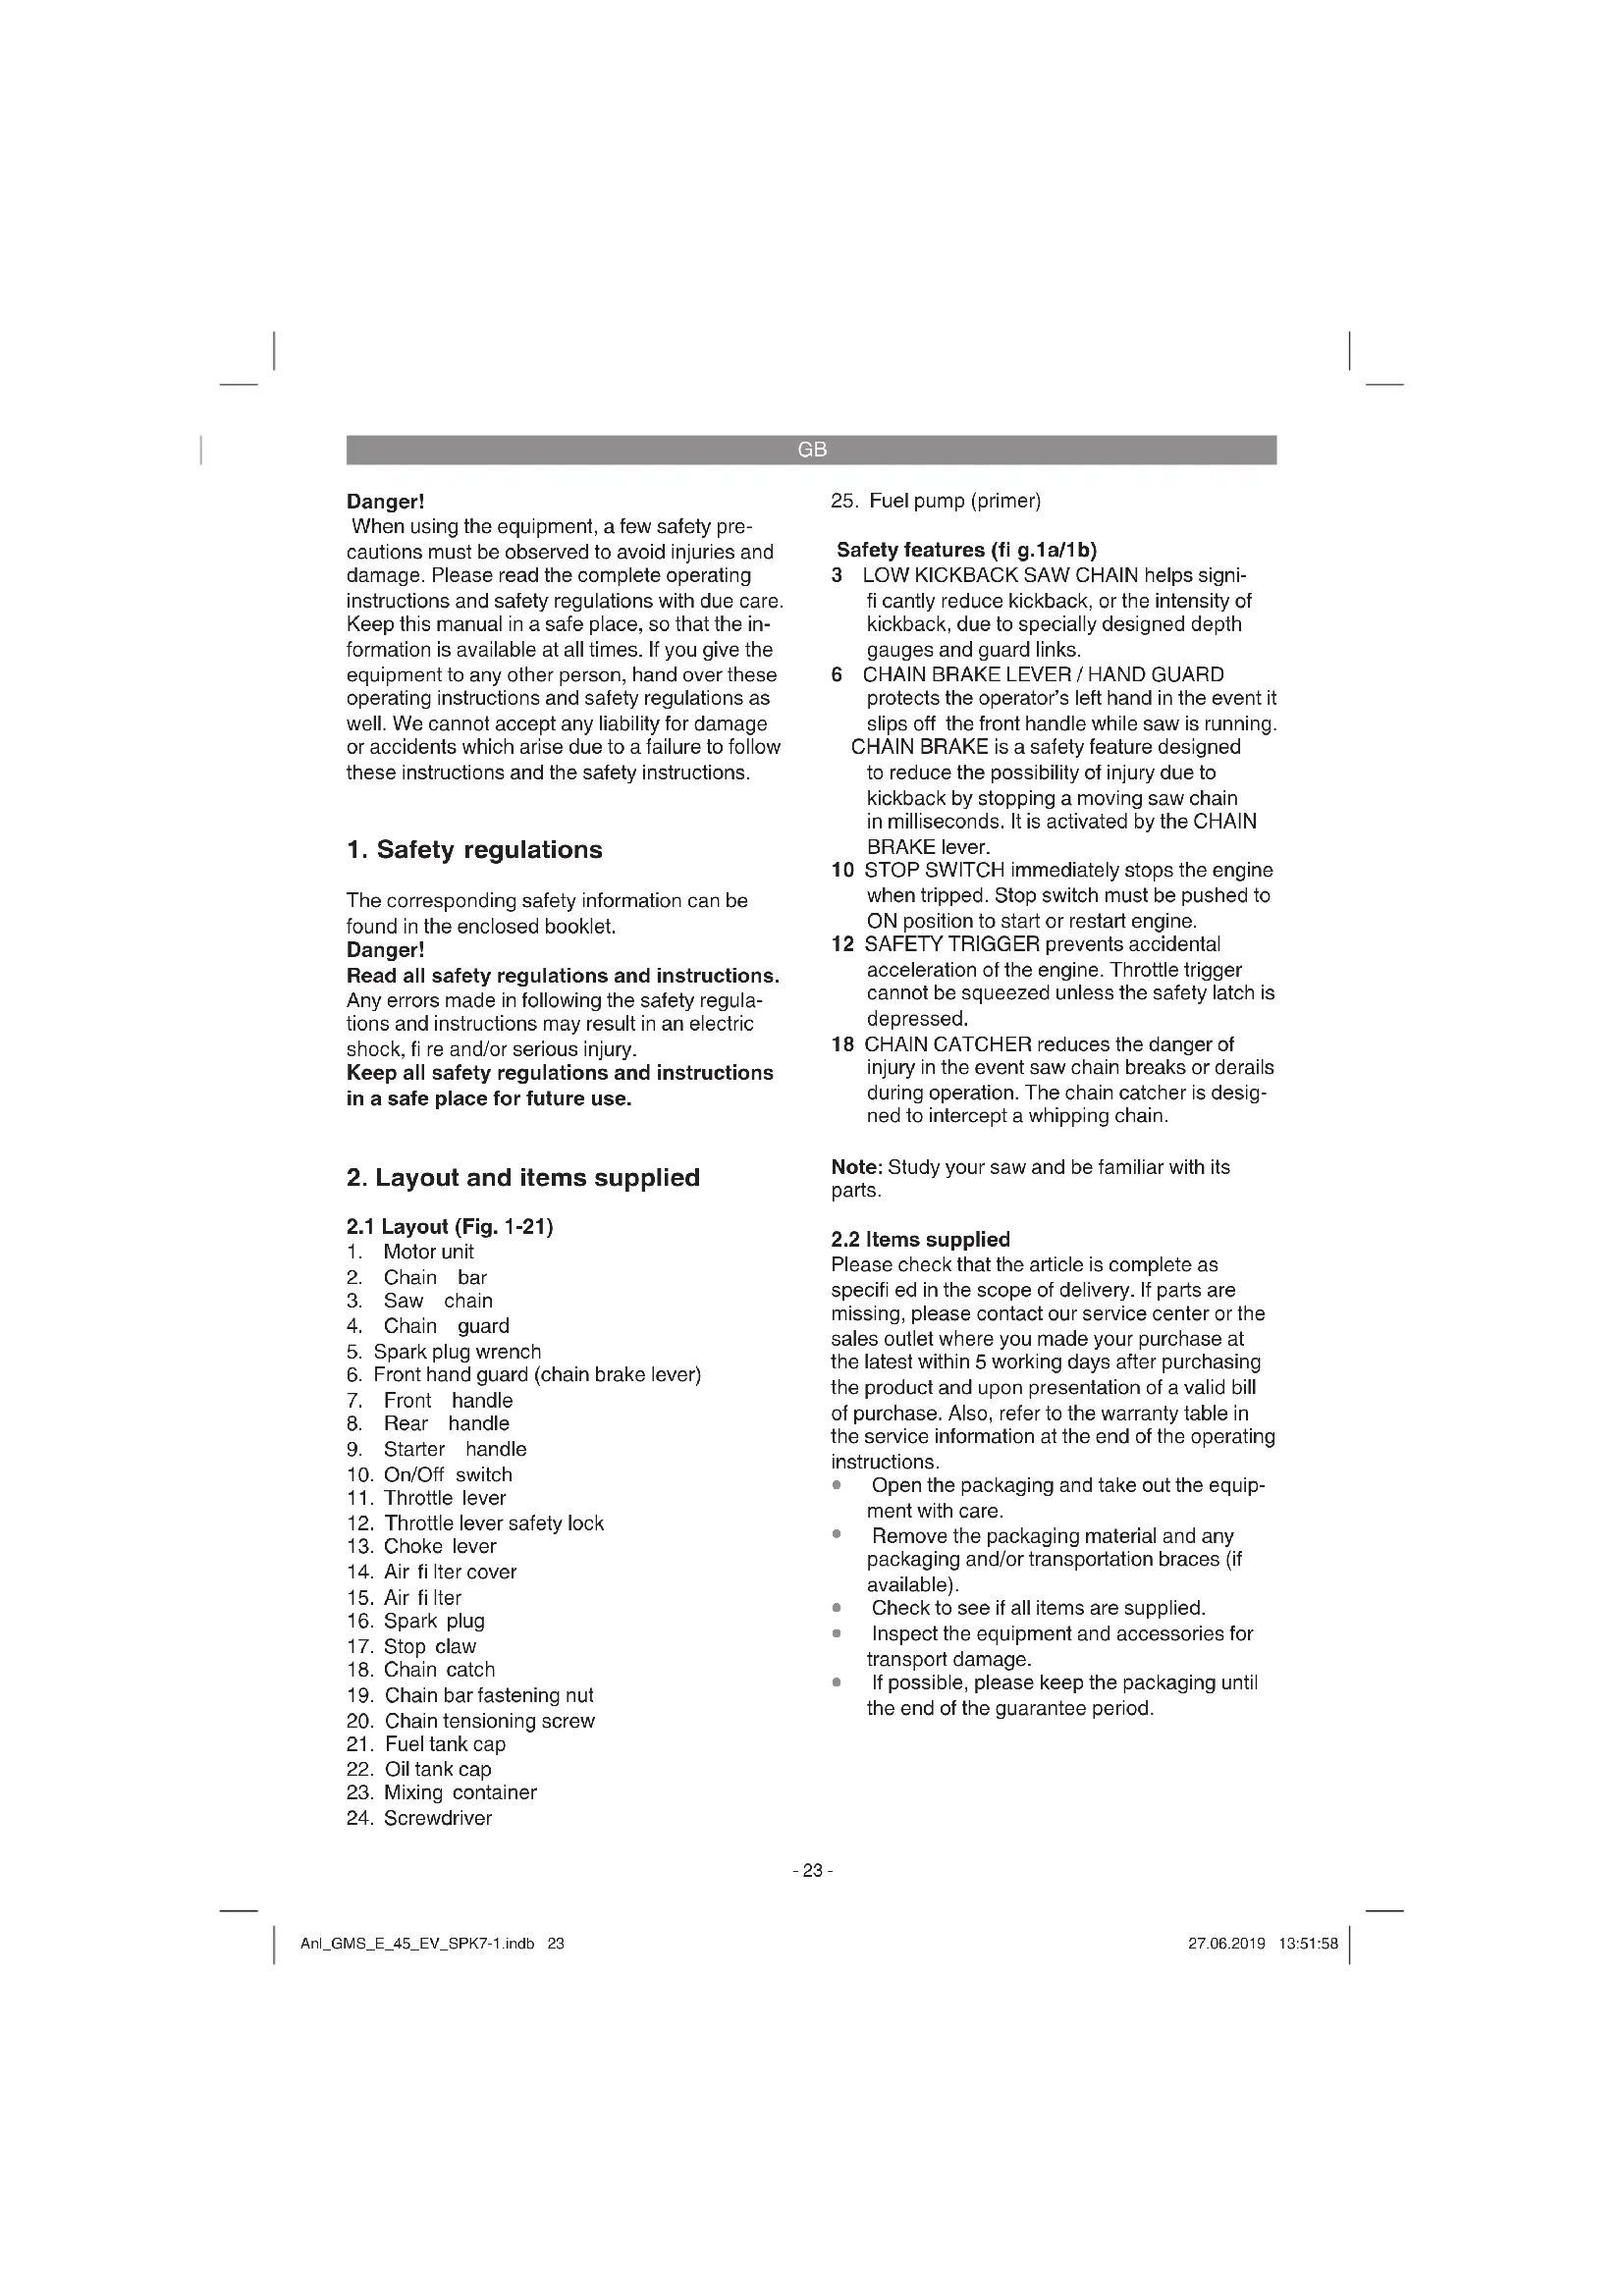
2.1 Layout (Fig. 1-21)
- Motor unit
- Chain bar
- Saw chain
- Chain guard
- Spark plug wrench
- Front hand guard (chain brake lever)
- Front handle
- Rear handle
- Starter handle
- On/Off switch
- Throttle lever
- Throttle lever safety lock
- Choke lever
- Air filter cover
- Air filter
- Spark plug
- Stop claw
- Chain catch
- Chain bar fastening nut
- Chain tensioning screw
- Fuel tank cap
- Oil tank cap
- Mixing container
-
Screwdriver
-
Fuel pump (primer)
Safety features (fi g.1a/1b)
3 LOW KICKBACK SAW CHAIN helps significantly reduce kickback, or the intensity of kickback, due to specially designed depth gauges and guard links.
6 CHAIN BRAKE LEVER / HAND GUARD protects the operator's left hand in the event it slips off the front handle while saw is running. CHAIN BRAKE is a safety feature designed to reduce the possibility of injury due to kickback by stopping a moving saw chain in milliseconds. It is activated by the CHAIN BRAKE lever.
10 STOP SWITCH immediately stops the engine when tripped. Stop switch must be pushed to ON position to start or restart engine.
12 SAFETY TRIGGER prevents accidental acceleration of the engine. Throttle trigger cannot be squeezed unless the safety latch is depressed.
18 CHAIN CATCHER reduces the danger of injury in the event saw chain breaks or details during operation. The chain catcher is designed to intercept a whipping chain.
Note: Study your saw and be familiar with its parts.
2.2 Items supplied
Please check that the article is complete as specified in the scope of delivery. If parts are missing, please contact our service center or the sales outlet where you made your purchase at the latest within 5 working days after purchasing the product and upon presentation of a valid bill of purchase. Also, refer to the warranty table in the service information at the end of the operating instructions.
- Open the packaging and take out the equipment with care.
- Remove the packaging material and any packaging and/or transportation braces (if available).
Check to see if all items are supplied. - Inspect the equipment and accessories for transport damage.
If possible, please keep the packaging until the end of the guarantee period.
GB
Danger!
The equipment and packaging material are not toys. Do not let children play with plastic bags, foils or small parts. There is a danger of swallowing or suffocating!
- Original operating instructions
- Safetyinstructions
3. Proper use
The chain is designed exclusively for sawing wood. You may only fell trees if you have received the appropriate training. The manufacturer cannot be held liable for damage caused by improper or incorrect usage.
The equipment is to be used only for its prescribed purpose. Any other use is deemed to be a case of misuse. The user / operator and not the manufacturer will be liable for any damage or injuries of any kind caused as a result of this.
Please note that our equipment has not been designed for use in commercial, trade or industrial applications. Our warranty will be voided if the machine is used in commercial, trade or industrial businesses or for equivalent purposes.
Caution! Residual risks
Even if you use the equipment in accordance with the instructions, certain residual risks cannot be eliminated. The following hazards may arise in connection with the equipment's construction and layout:
- Injuries through cutting in case of contact with the unguarded or rotating saw chain.
- Injuries through cutting in case of kickback or other accidental movements of the guide rail.
- Injuries due to parts of the saw chain being catapulted away.
- Injuries due to parts of the cut material being catapulted away.
- Damage to hearing if the compulsory hearing protection is not used.
- Breathing problems due to the inhaling of harmful fumes and skin injuries due to contact with pertol.
4. Technical data
Engine displacement 50.4 cm³
Maximum engine capacity 2 kW
Cutting length 44.5 cm
Chain bar length 184 (45 cm)
Chain pitch (0.325) 8.255 mm
Chain thickness (0.058) 1.5 mm
ldling speed 3.000 ± 300 min
Maximum speed with
cutting equipment 11,500 min
Max. chain speed 21 m/s
Tank capacity 540 cm
Oil tank capacity 240 cm³
Anti-vibration function Yes
Sprocket teeth 6 teeth x 8.255 mm
Net weight without chain and chain bar ....5.75 kg
L_PA sound pressure level (ISO 22868)
at the operator's position 103 dB(A)
K_PA uncertainty 2.5 dB(A)
L_w sound power level measured
(ISO 22868) 111.9 dB(A)
K_WA uncertainty 2.5 dB(A)
L_WA sound power level guaranteed
(ISO 2000/14/EC) 115 dB(A)
Vibration a_w (front handle)
(ISO 22867) max. 7.21m / s^2
Uncertainty K_hy 1.5 m/s²
Vibration a_rw (rear handle)
(ISO 22867) max. 6.53m / s^2
Uncertainty K_hy 1.5 m/s²
Spark plug .TORCH L7RTC
Electrode gap 0.6 mm
Chain type Oregon 21LPX072X
Bar type Oregon 188PXBK095
Keep the noise emissions and vibrations to a minimum.
- Only use appliances which are in perfect working order.
Service and clean the appliance regularly.
Adapt your working style to suit the appliance.
Do not overload the appliance. - Have the appliance serviced whenever necessary.
- Switch the appliance off when it is not in use.
Wear protective gloves.
GB
5. Before starting the equipment
Danger: Do not start the engine until the saw is fully assembled.
Caution: Wear protective gloves at all times when handling the chain.
5.1 Installing the guide rail and saw chain (Fig. 2A-2G)
- Disengage the chain brake by pushing the front hand guard (6) towards the front handle (7). (Fig. 2A)
- Remove the guide rail cover (A) by loosening the two nuts (19) (Fig. 2B).
- Place the guide rail (2) into the mounting on the chainsaw (Fig. 2C).
- Place the chain (3) around the drive wheel (C) (Fig. 2E). Check that the direction of rotation of the chain (3) is correct. The cutter links (B) must be aligned as shown in Fig. 2D.
- Place the chain around the chain bar. (Fig. 2E)
- The chain drive links (3) must slide fully into the groove which runs around the cutter bar (D) and also between the teeth on the drive wheel (C). (Fig. 2E)
- Turn the chain tensioning screw (20) counterclockwise until the bolt (E) is at the end of its travel. (Fig. 1B/2F)
- Install the bar cover (A).
Important! The bolt (E) on the chain tensioning mechanism must snap into place in the hole (G) in the guide rail. (Fig. 2G)
To ensure that happens, slide the guide rail (2) forwards and backwards slightly when you mount the bar cover (A). Hand tighten the nut (19).
5.2 Adjusting the chain tension (3A/3B)
Before adjusting the chain tension, make sure that the engine is switched off.
- Push the tip of the guide rail (2) upwards slightly and adjust the chain tension using the chain tensioning screw (20). (Fig. 3A) The chain is set to the optimal tension when the chain (3) on the underside at the middle of the guide rail (2) is as shown in Fig. 3B (B).
- Tighten the nut (19) while applying slight pressure to the tip of the bar.
- Carry out a functional check. Pull the chain (3) by hand once all the way around the guide rail (2). If the chain (3) is hard to pull around the guide rail (2) or if it jams, the tension is too tight.
If that is the case, make the following slight adjustment:
- Loosen the nut (19) and hand tighten it again.
- Reduce the chain tension by turning the chain tensioning screw (20) counterclockwise. Only make small adjustments at a time and always pull the chain (3) backwards and forwards on the guide rail (2) to see if the chain (3) moves smoothly but still fits tightly.
Note: If the chain (3) is too loose, turn the chain tensioning screw (20) clockwise.
- If the chain tension is adjusted to the optimal setting, tighten the nut (19) while applying slight pressure to the tip of the bar.
A new saw chain will stretch, so it is important to readjust the chain at short intervals (around 5 cuts) when you first start using it. The intervals get longer as operating time increases.
Note: If the saw chain (3) is TOO LOOSE or TOO TAUT, the drive wheel, chain bar, chain and crank shaft bearing will suffer premature wear. Fig. 3B shows the correct tension A (when cold) and tension B (when warm). Fig. C shows a chain that is too loose.
5.3 Fuel and lubrication
Fuel
Use regular grade unleaded gasoline mixed with 1:40 custom 2-cycle engine oil for best results.
Mixing fuel
Mix fuel with 2 cycle oil in an approved container. Shake container to ensure thorough mix.
Note: Never use straight gasoline in your unit. This will cause permanent engine damage and void the manufacturer's warranty for that product. Never use a fuel mixture that has been stored for over 90 days.
Note: If 2-cycle lubricant is to be used, it must be a premium grade oil for 2-cycle air cooled engines mixed at a 1:40 ratio. Do not use any 2-cycle oil product with a recommended mixing ratio of 1:100. If insufficient lubrication is the cause of engine damage, it voids the manufacturer's engine warranty for that occurrence.
GB
Recommended fuels
Some conventional gasolines are being blended with oxygenates such as alcohol or an ether compound to meet clean air standards. Your engine is designed to operate satisfactorily on any gasoline intended for automotive use including oxygenated gasolines. It is recommended to use unleaded petrol as fuel.
Lubrication of chain and chain bar
Whenever you refill the fuel tank with petrol you must also top up the level of chain oil in the chain oil tank. It is recommended to use standard chain oil.
Engine oil and gasoline I Saw chain

Mixture 1:40 Oil Only
Engine pre-start checks
Danger: Never start or operate the saw unless the bar and chain are properly installed.
- Fill the fuel tank (21) with correct fuel mixture (Fig. 4).
- Fill the oil tank (22) with chain oil (Fig. 4).
Once you have filled the chain and oil tank, tighten the tank cover securely by hand. Do not use any tools to do so.
6. Operation
Before you use the saw, check it for damage. If you discover any damage, do not use it. The chainsaw may be started only when the chain brake is engaged. The chain brake is engaged when the brake lever (6) is pushed forward.
Explanation of how it works: refer to Checking the chain brake - Static check.
6.1 Chain brake
The chainsaw is fitted with a chain brake which reduces the risk of injury caused by the danger of kickback. The brake is engaged when pressure is applied to the hand guard (6), e.g. when the hand of the person operating the chainsaw strikes the hand guard (6) if kickback occurs. When the brake is engaged, the chain (3) stops abruptly.
Warning: The chain brake is intended to reduce the risk of injury due to kickback; however, it is unable to provide adequate protection if the saw is used carelessly. You must check the operation of the chain brake on a regular basis. Test the chain brake before the first cut, after several cuts, after maintenance is done on the chainsaw and if the chainsaw has been subjected to strong impact or if it has been dropped.
6.1.1 Checking the chain brake (Fig. 5A/5B/6)
Static check (engine switched off)
Chain brake disengaged (chain (3) is free to move)
- Pull the front hand guard (6) towards the front handle (7). The front hand guard (6) must make an audible click when it snaps into place. (Fig. 5A)
- It must be possible to move the chain (3) on the guide rail (2).
Chain brake engaged (chain (3) is blocked)
- Push the front hand guard (6) towards the guide rail (2). The front hand guard (6) must make an audible click when it snaps into place. (Fig. 5B)
- It must not be possible to move the chain (3) on the guide rail (2).
Note: The front hand guard (6) must snap into place in both positions. If you feel strong resistance or if the front hand guard (6) does not snap into place, do not use the chainsaw. Take your chainsaw to an authorized service center for repair.
Dynamic check (engine is started)
- Place the saw on a firm and level surface.
- Hold the front handle (7) with your left hand.
- Start the chain saw by following the starting instructions. (refer to 6.2 and 6.3)
- Disengage the chain brake (pull the front hand guard (6) towards the front handle (7)). (Fig. 5A)
- Grasp the rear handle (8) with your right hand.
GB
- After a brief warmup period, run the engine at full speed. With the back of your left hand, push the front hand guard (6) towards the guide rail (2). This will engage the chain brake. (Fig. 6)
Danger: Engage the chain brake slowly and carefully. Hold the saw firmly with both hands, and make sure you have a good grip. The saw must not touch any objects.
- The chain (3) must stop abruptly. Immediately release the throttle lever (11) when the chain (3) has come to a stop.
Danger: If the chain (3) does not stop, shut off the engine and take the saw to an authorized service center for repair.
6.1.2 Checking the clutch
Carry out a functional check on the clutch on a regular basis. Test the clutch before the first cut, after several cuts, after maintenance is done on the chainsaw and if the chainsaw has been subjected to strong impact or if it has been dropped.
- Start the chain saw by following the starting instructions. (refer to 6.2 and 6.3)
- Briefly actuate the throttle lever (11) and release it to ensure that the throttle valve has been released and the engine is idling.
- The chain (3) must stop when the engine is idling.
The clutch has been designed so that when the idling speed is increased by a factor of 1.25 no chain movement can be detected.
Danger: If the chain (3) does not stop, shut off the engine and take the saw to an authorized service center for repair.
Danger: Always engage the chain brake (6) before you start the engine.
6.2 Starting a cold engine (Fig. 7A-7D)
Fill the tank with an adequate amount of gasoline/ oil mix. (refer to Paragraph 5.3)
- Set the equipment down on a hard, level surface.
- Move the On/Off switch (10) to the "l" position. (Fig. 7A)
- Press the fuel pump (primer) (Fig. 6/Item 25) ten times.
- Pull out the choke lever (13) (Fig. 7B)
Note: Pulling out the choke lever (13) opens the throttle valve slightly and locks it in that position. This increases the idle speed, and the saw starts faster.
- Hold the saw firmly and pull out the starter handle (9) until you feel it start to resist. Then sharply pull the starter handle (9) 3 times. (Fig. 7C/7D)
- Push in the choke lever (13).
- Hold the saw firmly and pull out the starter handle (9) until you feel it start to resist. Then quickly pull the starter handle (9) several times until the engine starts. (Fig. 7D)
Note: Do not allow the starter handle (9) to snap back. This may result in damage. Once the engine has started, allow the saw to warm up for 10 seconds.
Warning: Since the throttle lever is slightly open, the cutter starts to operate when the engine is started. Briefly actuate the throttle lever (11). This releases the throttle valve and the engine returns to idle mode. (Fig. 7C)
8. If the engine does not start up after the starter handle is pulled 8 times, repeat steps 1-7.
Please note: If the engine does not start up even after several attempts, read the Engine troubleshooting section.
Please note: Always pull the starter handle out straight. If it is pulled out at an angle, friction will occur on the eyelet. As a result of this friction, the cable will become frayed and will wear faster. Always hold onto the starter handle when the cable retracts. Never allow the starter handle to snap back when it has been pulled out.
6.3 Starting a warm engine (Fig. 7A-7D)
(The chainsaw has been idle for less than 15-20 min.)
- Set the equipment down on a hard, level surface.
- Move the On/Off switch (10) to the "l" position. (Fig. 7A)
- Hold the saw firmly and pull out the starter handle (9) until you feel it start to resist. Then quickly pull the starter handle (9) several times until the engine starts. The equipment should start after 1-2 tugs. If the saw does not start after 6 pulls, repeat steps 1 - 7 of Paragraph 6.2. (Fig. 7D)
GB
6.4 To stop engine
- Release trigger and allow engine to return to idle speed.
- Move STOP switch down to stop engine.
Note: To stop the engine in an emergency, activate the chain brake and switch the ON/OFF switch to "Stop (0)".
6.5 General cutting instructions
Danger: Felling trees is prohibited without the necessary training!
Felling
Felling is the term for cutting down a tree. Small trees up to 6-7 inches (15-18cm) in diameter are usually cut in a single cut. Larger trees require notch cuts. Notch cuts determine the direction the tree will fall.
A retreat path (A) should be planned and cleared as necessary before cuts are started. The retreat path should extend back and diagonally to the rear of the expected line of fall, as illustrated in Fig. 8.
If felling a tree on sloping ground, the chain saw operator should keep on the uphill side of the terrain, as the tree is likely to roll or slide downhill after it is felled.
- Direction of fall (B) is controlled by the notching cut. Before any cuts are made, consider the location of larger branches and natural lean of the tree to determine the way the tree will fall (Fig. 8).
- Do not cut down a tree during high or changing winds or if there is a danger to property. Consult a tree professional. Do not cut down a tree if there is a danger of striking utility wires; notify the utility company before making any cuts.
General guidelines for felling trees (Fig. 9)
Normally felling consists of 2 main cutting operations,notching (C) and making the felling cut (D).
- Start making the upper notch cut (C) on the side of the tree facing the felling direction (E). Be sure you don't make the lower cut too deep into the trunk. The notch (C) should be deep enough to create a hinge (F) of sufficient width and strength. The notch should be wide enough to direct the fall of the tree for as long as possible.
- Never walk in front of a tree that has been notched. Make the felling cut (D) from the other side of the tree and 1.5 - 2.0 inches
(3-5 cm) above the edge of the notch (C). Never saw completely through the trunk. Always leave a hinge. The hinge guides (F) the tree. If the trunk is completely cut through, control over the felling direction is lost. Insert a wedge or felling lever in the cut well before the tree becomes unstable and starts to move. This will prevent the guidebar from binding in the felling cut if you have misjudged the falling direction. Make sure no bystanders have entered the range of the falling tree before you push it over.
Before making the final cut, always recheck the area for bystanders, animals or obstacles.
Felling cut
Use wooden or plastic wedges (A) to prevent binding the bar or chain (B) in the cut. Wedges also control felling (Fig. 10).
- When diameter of wood being cut is greater than the bar length, make 2 cuts as shown (Fig. 11).
- As the felling cut gets close to the hinge, the tree should begin to fall. When tree begins to fall, remove saw from cut, stop engine, put chain saw down, and leave area along retreat path (Fig. 8).
Limbing
- Limbing a tree is the process of removing the branches from a fallen tree. Do not remove supporting limbs (A) until after the log is bucked (cut) into lengths (Fig. 12). Branches under tension should be cut from the bottom up to avoid binding the chain saw.
- Never cut tree limbs while standing on tree trunk.
Bucking
- Bucking is cutting a fallen log into lengths. Make sure you have a good footing and stand uphill of the log when cutting on sloping ground. If possible, the log should be supported so that the end to be cut off is not resting on the ground. If the log is supported at both ends and you must cut in the middle, make a downward cut halfway through the log and then make the undercut. This will prevent the log from pinching the bar and chain. Be careful that the chain does not cut into the ground when bucking as this causes rapid dulling of the chain. When bucking on a slope, always stand on the uphill side.
GB
- Log supported along entire length: Cut from top (overbuck), being careful to avoid cutting into the ground (Fig. 13A).
- Log supported on 1 end: First, cut from bottom (underbuck) 1/3 diameter of log to avoid splintering. Second, cut from above (overbuck) to meet first cut and avoid pinching (Fig. 13B).
- Log supported on both ends: First, overbuck 1/3 diameter of log to avoid splintering. Second, underbuck to meet first cut and avoid pinching (Fig. 13C).
The best way to hold a log while bucking is to use a sawhorse. When this is not possible, the log should be raised and supported by the limb stumps or by using supporting logs. Be sure the log being cut is securely supported.
Bucking using a sawhorse (Fig. 14)
For personal safety and ease of cutting, the correct position for vertical bucking is essential.
A. Hold the saw firmly with both hands and keep the saw to the right of your body while cutting.
B. Keep the left arm as straight as possible.
C. Keep weight on both feet.
Caution: When working with the saw, always make sure that the saw chain and chain bar are sufficiently lubricated.
7. Cleaning, maintenance, storage and ordering of spare parts
Disconnect the spark plug boot before doing any cleaning and maintenance work!
7.1 Cleaning
- Keep all safety devices, air vents and the motor housing free of dirt and dust as far as possible. Wipe the equipment with a clean cloth or blow it with compressed air at low pressure.
We recommend that you clean the device immediately each time you have finished using it.
Clean the equipment regularly with a moist cloth and some soft soap. Do not use cleaning agents or solvents; these could attack the plastic parts of the equipment. Ensure that no water can seep into the device.
7.2 Maintenance
Warning: All maintenance work on the chainsaw apart from the work described in this manual may only be carried out by authorized after-sales service personnel.
7.2.1 Air filter
Note: Never operate saw without the air filter. Dust and dirt will be drawn into engine and damage it. Keep the air filter clean! The air filter must be cleaned or replaced after every 20 hours of service.
Cleaning the air fiiter (Fig. 15A/15B)
- Remove the top cover (14) by undoing the cover fastening screw (A) on the cover. You can then remove the cover (Fig. 15A).
- Lift out the air filter (15) (Fig. 15B).
- Clean air filter. Wash filter in clean, warm, soapy water. Rinse in clear, cool water. Air dry completely.
Note: It is advisable to have a supply of spare filters.
4. Insert the air filter. Install the air filter cover (14). Make sure that the cover fits perfectly when you do so. Tighten the cover fastening screw.
7.2.2 Fuel filter
Note:Never use the saw without a fuel filter. After 100 hours in operation the fuel fi liter should be cleaned or, in case of damage, replaced. Be sure to empty the fuel tank before changing the fi liter.
- Remove the fuel tank cap.
- Bend a piece of soft wire.
- Reach into fuel tank opening and hook fuel line. Carefully pull the fuel line toward the opening until you can reach it with your fingers.
Note: Do not pull hose completely out of tank.
- Lift filter out of tank
- Pull off the filter with a twist and clean it; if the filter is damaged, dispose of it.
- Insert a new filter. Place one end of the filter into the tank opening. Make sure that the fi liter is seated in the lower corner of the tank. If necessary, use a long screwdriver to move the fi liter to its correct position, taking care not to damage in the process.
- Fill tank with fresh fuel / oil mixture. See Section Fuel and Lubrication. Install fuel cap.
GB
7.2.3 Spark plug (Fig. 15A-15C)
Note: To ensure that the saw's engine retains its power, the spark plug must be clean and have the correct electrode gap (0.6 mm). The spark plug must be cleaned or replaced after every 20 hours of service.
- Set the On/Off switch to Stop (0)".
- Remove the top cover (14) by undoing the cover fastening screw (A) on the cover. You can then remove the cover (Fig. 15A).
- Lift out the air filter (15) (Fig. 15B).
- Disconnect the ignition cable (C) from the spark plug by pulling and twisting it simultaneously (Fig. 15C).
- Remove the spark plug using a spark plug wrench.
- Clean the spark plug with a copper wire brush or fit a new one.
7.2.4 Carburetor setting
The carburetor has been set to its perfect adjustment at the factory. If it requires adjusting, take the saw to your nearest authorized after-sales service outlet.
7.2.5 Chain bar
Grease the guide rail starwheel after every 10 hours of operation. This is necessary to get the best performance from your chainsaw. (Fig. 16) Clean the lube hole, then place the lube gun (not included) at the hole and pump grease into the bearing until grease is forced out.
Clean the groove which the chain runs in as well as the oil entry hole on a regular basis using a commercially available cleaning tool. (Fig. 17A) This is important to ensure optimal lubrication of the guide rail and chain during operation.
- Remove burrs and sharp edges on the guide rail (2) by carefully filing them down with a flat file. (Fig. 17B)
- Turn the guide rail (2) around after every 8 hours of operation so that it wears evenly on the top and bottom.
Oil passages
Oil passages on the bar should be cleaned to ensure proper lubrication of the bar and chain during operation.
Note: The condition of the oil passages can be easily checked. If the passages are clear, the chain will automatically give off a spray of oil within seconds of starting the saw. Your saw is equipped with an automatic oiler system.
Automatic chain lubrication.
The chain saw is equipped with an automatic oil lubrication system with a toothed wheel drive. It automatically supplies the bar and the chain with the right quantity of oil. The moment the engine is accelerated, the oil also starts to flow through the bar plate more quickly as well.
The chain lubrication system has been set to its perfect adjustment at the factory. If it requires adjusting, take the saw to your nearest authorized after-sales service outlet.
On the underside of the chainsaw you will find the setting screw (A) for the chain lubrication system (Fig. 21). Turning the screw counter-clockwise increases the chain lubrication, turning it clockwise decreases the chain lubrication.
To check the chain lubrication, hold the chain saw, with the chain, over a piece of paper and run it at full speed for a few seconds. You will be able to judge the set amount of oil from the paper.
On a regular basis, check that the chain lubrication is working correctly. Test chain lubrication before the first cut, after several cuts and always after any maintenance.
Chain lubrication
Always make sure the automatic oiler system is working properly. Keep the oil tank flled with Chain, Bar and Sprocket Oil.
Adequate lubrication of the bar and chain during cutting operations is essential to minimize friction with the guide bar.
Never starve the bar and chain of lubricating oil. Running the saw dry or with too little oil will decrease cutting efficiency, shorten saw chain life, cause rapid dulling of chain, and lead to excessive wear of bar from overheating. Too little oil is evidenced by smoke or bar discoloration.
GB
7.2.6 Chain maintenance
Chain sharpening
Note: A sharp chain produces well-defined chips. When your chain starts to produce sawdust, it is time to sharpen.
Chain sharpening requires special tools to ensure that cutters are sharpened at the correct angle and depth. For the inexperienced chain saw user, we recommend that the saw chain be professionally sharpened by the nearest professional Service Center. If you feel comfortable sharpening your own saw chain, special tools are available from the professional Service Center.
Chain sharpening (Fig. 18)
Sharpen the chain using protective gloves and a round fi le of.
Always sharpen the cutters only with outward strokes (Fig. 19) observing the values given in Fig. 18.
After sharpening, the cutting links must all have the same width and length.
After the blades have been sharpened 3-4 times, check the height of the depth limiter and if necessary lower it with a flat file and then round off the front corner (Fig. 20).
Round off the front edges with a file.
7.3 Storage and transportation
Install the chain guard (4) before transporting or storing the chainsaw.
Note: Never put a chain saw into storage for longer than 30 days without carrying out the following steps.
Storing a chain saw
Storing a chain saw for longer than 30 days requires storage maintenance. Unless the storage instructions are followed, fuel remaining in the carburetor will evaporate, leaving gum-like deposits. This could lead to difficult starting and result in costly repairs.
- Remove the fuel tank cap slowly to release any pressure in tank. Carefully drain the fuel tank.
- Start the engine and let it run until the unit stops to remove fuel from carburetor.
- Allow the engine to cool (approx. 5 minutes).
- Thoroughly clean the saw.
Note: Store the unit in a dry place and away from possible sources of ignition such as a furnace, gas hot water heater, gas dryer, etc.
After the saw has been in storage, perform the steps listed in Paragraph 5 before starting the chainsaw.
Transportation
- Engage the chain brake.
Make sure the chainsaw cannot shift position in order to prevent fuel loss, damage or injury.
7.4 Ordering replacement parts:
Please quote the following data when ordering replacement parts:
Type of machine
Article number of the machine
Identification number of the machine
- Replacement part number of the part required
For our latest prices and information please go to www.isc-gmbh.info
8. Disposal and recycling
The equipment is supplied in packaging to prevent it from being damaged in transit. The raw materials in this packaging can be reused or recycled. The equipment and its accessories are made of various types of material, such as metal and plastic. Never place defective equipment in your household refuse. The equipment should be taken to a suitable collection center for proper disposal. If you do not know the whereabouts of such a collection point, you should ask in your local council offices.
9. Troubleshooting guide
| Problem Probable cause Corrective Action | |
| Unit won't start or starts but will not run. | -Incorrectstartingprocedures.- Too much fuel in the combustion chamber following failed attempts to start the saw.- Incorrect carburetor mixture adjustment setting.- Fouled spark plug.- Fuel fi liter plugged. |
| Unit starts, but engine has low power. | - Incorrect lever position on choke.- Dirtyairfi liter.- Incorrect carburetor mixture adjustment setting. |
| Engine hesitates. - | Incorrect carburetor mixture adjustment setting. |
| No power under load. | - Incorrectly gapped spark plug.- Clean / gap or replace plug. |
| Runs erratically. | - Incorrect carburetor mixture adjustment setting. |
| Smokesexcessively. | - Incorrect fuel mixture. |
| Poorperformance when operated | - Bluntchain- Loose chain |
| Engine dies | - Empty petrol tank- Fuel fi liter in the wrong position in the tank |
| Insufficient chain lubrication (the cutter rail and chain get hot) | - Empty oil tank for the chain- Oil lubrication openings moved |
The reprinting or reproduction by any other means, in whole or in part, of documentation and papers accompanying products is permitted only with the express consent of the iSC GmbH.
Subject to technical changes
GB
Service information
We have competent service partners in all countries named on the guarantee certificate whose contact details can also be found on the guarantee certificate. These partners will help you with all service requests such as repairs, spare and wearing part orders or the purchase of consumables.
Please note that the following parts of this product are subject to normal or natural wear and that the following parts are therefore also required for use as consumables.
| Category Example | |
| Wear parts* | Cutter bar, spark plug, air filter, petrol filter |
| Consumables* Saw chain | |
| Missing parts |
- Not necessarily included in the scope of delivery!
In the effect of defects or faults, please register the problem on the internet at www.isc-gmbh.info. Please ensure that you provide a precise description of the problem and answer the following questions in all cases:
Did the equipment work at all or was it defective from the beginning?
Did you notice anything (symptom or defect) prior to the failure?
- What malfunction does the equipment have in your opinion (main symptom)?
Describe this malfunction.
GB
Warranty certificate
Dear Customer,
All of our products undergo strict quality checks to ensure that they reach you in perfect condition. In the unlikely event that your device develops a fault, please contact our service department at the address shown on this guarantee card or the sales outlet from where you bought the device. Please note the following terms under which guarantee claims can be made:
- These guarantee terms apply to consumers only, i.e. natural persons intending to use this product neither for their commercial activities nor for any other self-employed activities. These warranty terms regulate additional warranty services, which the manufacturer mentioned below promises to buyers of its new products in addition to their statutory rights of guarantee. Your statutory guarantee claims are not affected by this guarantee. Our guarantee is free of charge to you.
- The warranty services cover only defects due to material or manufacturing faults on a product which you have bought from the manufacturer mentioned below and are limited to either the rectification of said defects on the product or the replacement of the product, whichever we prefer. Please note that our devices are not designed for use in commercial, trade or professional applications. A guarantee contract will not be created if the device has been used by commercial, trade or industrial business or has been exposed to similar stresses during the guarantee period.
-
The following are not covered by our guarantee:
-
Damage to the device caused by a failure to follow the assembly instructions or due to incorrect installation, a failure to follow the operating instructions (for example connecting it to an incorrect mains voltage or current type) or a failure to follow the maintenance and safety instructions or by exposing the device to abnormal environmental conditions or by lack of care and maintenance.
- Damage to the device caused by abuse or incorrect use (for example overloading the device or the use or unapproved tools or accessories), ingress of foreign bodies into the device (such as sand, stones or dust, transport damage), the use of force or damage caused by external forces (for example by dropping it).
-
Damage to the device or parts of the device caused by normal or natural wear or tear or by normal use of the device.
-
The guarantee is valid for a period of 60 months starting from the purchase date of the device. Guarantee claims should be submitted before the end of the guarantee period within two weeks of the defect being noticed. No guarantee claims will be accepted after the end of the guarantee period. The original guarantee period remains applicable to the device even if repairs are carried out or parts are replaced. In such cases, the work performed or parts fitted will not result in an extension of the guarantee period, and no new guarantee will become active for the work performed or parts fitted. This also applies if an on-site service is used.
-
To make a claim under the guarantee, please register the defective device at: www.isc-gmbh.info. Please keep your bill of purchase or other proof of purchase for the new device. Devices that are returned without proof of purchase or without a rating plate shall not be covered by the guarantee, because appropriate identification will not be possible. If the defect is covered by our guarantee, then the item in question will either be repaired immediately and returned to you or we will send you a new replacement.
Also refer to the restrictions of this warranty concerning wear parts, consumables and missing parts as set out in the service information in these operating instructions.
FR
Sommaire
Type lame Oregon 188PXBK095
FR
Carburants recommendations
Chere cliente, cher client,
7.3 Ulozeni a transport
Prid transportem a ulozenim nasad'te na retezovou pilu ochranu retezu (4).
Upozorneni!Neukladeje tilu na vice nez 30 dni bez toto, abyste provedli nasledujici kroky.
ULOZENI RETEZOVE PILY
A LANCNAK AZ ELESITESE:
SIGURNOSNE FUNKCIJE (sl. 1a/1b)
3 LANAC PILE S MALIM POVRATNIM UDARCEM pomaze Vam sa specjalno razvjenim sigurnosnim napravama da uhvitatte povratni udarac il njihovu silu.
6 POLUGA ZAKOCENJE LANCA/ZASTITA RUKE stiti lijevu ruku korsnika u slucejau da tijekom rada pile sklizne s prednej rucke. KOCNICA LANACA prestavla sigurnosnu funkciju za smanjene ozljeda zbog povratnih udaraca, pri cemu se lanac pile koji radi zaustavlja u milsekundama. Aktivira je POLUGA ZAKOCNICU LANCA.
10 SKLOPKA ZA ZAUSTAVLJANE odmah zaustavlia motor kad se on iskluči. Da bist (ponovno)Pokrenuli motor, sklopu za zaustavlianje morate staviti u položaj UKLJUCENO.
12 SIGURNOSNI OKIDAC sprečava slučajno ubrzavanje motora. Poluga gasa moze se pritisnuti samo kad je pritisnut sigurnosni okidač.
18 HVATAc LANCA smanjue opasnost od ozljeda u slucaju da se lanac pile tjekom rada motora potrga ili sklizne. Hvatac lanca treba uhvatiti lanac koji se okrece oko sebe.
NAPOMENA! Upoznajte se spilom i njenim dijelovima.
2.2 Sadrzaj isporuke
Molimo vas da pomoću opisanog sadržaja
isporuke provjerite cjelovitost artikla. Ako su neki dijelovi neispravni, nakon kupnjé articla obratite se našem servisnom centru ili prodajnom mestreu najkasnje u roku od 5 radnih dana uz predočanje važće potvrde o kupnji. Molimo vas da u vezi s tim obratite pozornost na tablicu o jamstvu u informacijama o servisu na kraju uputa.
1. INHctpyKuIN 3a 6e3onacHOCT
CbOTBeTHnTe HNCTpyKuun 3a 6e3oNaHocT ue Hamepnte B npJIOKeHaTa 6poWypa.
Onachoct!
Ipooyete BCnHN yHa3aHn 3a 6e0anachOCT n HcTpyKn. Ipnyncknt npn cna3baHTo Ha yKa3aHnraTa 3a 6e0anachOCT n HcTpyKnTe MORAT da NmAT KATO nocleDua eJeKTPnueChn yap, noKap N/nn TeKKn hapaHbAHn. CbXpahete 3a B 6bdee BCnHN yHa3aHn 3a 6e0anachOCT n HcTpyKn.
2.ОпсанеHaуретаиобemHadoctabka
2.1 OnncanHe Na ypeDa (ФИг. 1-21)
1.Блokндвигателя
2.Boeua HnHa
3. Pekea Bepira
4.Ппебаин На ВсригаТа
5. KIIOU 3a 3anaJIteJIHaTa CBeU
6. Ппебен пбдпаител за рькатa (спираунocт ha веригатata)
7. NpeHa pBkoXBaTHa
8.3aHa pBkoXbaTa
9. PbKOXBaTKa Ha CTapTepa
10. PpeKbcBau 3a BkIOUOBAHe Nn3KIOUOBAHe
11. JIoCT 3a ra3Ta
12.БлOKИРОВКаHa loCTa 3a ra3Ta
13. Ioc7 3a HacTpoHkaHa KaPbypaTopa
14. Kanak Ha Bb3dywnn HnnTbp
15. Bb3dyweHnTbp
16.3anaHTeHa CBeu
17.3b6at orpaHnHTeN
- YIobNTeJI Ha Bepurata
- 2x FaiKa 3a 3aKpeBnBaHe Ha uHaTa
20.БолтзаобъганеHaВеригагаТa - Kanak ha pe3epboapa 3a ronpbo
- Kanayka ha maclenen peepboap
- CmecnteHa 6yTnHa
- OTBepTKa
- TOpBHa nomna (Primer)
3AUHTH NΦYHKUHN (N3o6p.1A/1B)
3 BEPNHHNRTTPNOHCMALbKOTKH Bn nomara daOBnAraBate OTKaTHe nn BaWata cNlca nOMoTaHa CneuaHpo pa3BHTNaunTHnCbOpBeHHe.
6 CINPAUHINTLOCT HA BEPNIATATA/3AUHTATA HA PbLETE npedna3ba JIbatapbKa Ha 06cnykBaIoTO IInce, B clyuay,Ye npa paoTeu TpnoH Ta Ce NoXb3He OtnpehdHa DpbKka.
BEPHHHATA CnHPAHA e 3aunHa
fynkna 3a hamaJbAhe Ha hapaHbAHH
nopadn OTKaTH, npn KOeTO paOBeu
BepKHe TpOH Cnpa da pOTo
3a MInncEHyD. Ta ce AKTNbPAOT
CnHPAHHJIOCT HA BEPHIATA.
10 CTOn-ⅢAJITEPbT BeHara cnnpa DBInratae, ako Toi 6bJe nKluoyen. CToN-ⅢAnTePbT Tp6Ba Da ce HacTpOHa H BHNIOH (EIN), 3a Da cTApTnpa (OTHOBO) DBInratoJt.
12 PPEIINA3HNIYN3KIIIOYBATEJI pEIDOTBpTaBA BHE3aIHNOyCKOpRABaHe Ha DBIRATJI. FA3OBNIYTIOCTMOJE Da CE HAITNCHE CAMO TORABA, KORATo PpeIa3HNIYI HKNIOUYBATEJ E HAITNCAT.
18 XBAUaYbT HA BEPnIgATA HamaJIraBa onachocTta OT hapaHraBaHna, aKo npi pa6oteu DniratEn Beprata Ha TpHOHa ce Cckbca nHn I3ne3e OpeLcN. XBaauybt Ha BePnIra TpRbda Da XbaHe BePnIra, KOrTo CEyBnBa OKoLo Ce6e Ch.
PpeynpeHnHa 6eHnHa! 3ano3NaTe ce
C TpnoHa HrOBeTte qACTn.
BG
2.2 06em Ha doCTaBHa
Molna, npOBepete OOKmJIeHToBaHOCTTa Ha apTKnUa c NOMOuTa Ha ONcAHn OBem Ha DoCTBa. PnI IINCbauN qACTn, MoJ, oBpHete ce Hau-KbCHO BpaMKITE Ha 5 pa6OTHN DnCneD NOKyNkHa ApTknJa KbM HauNcEHTbp 3a OScNyKBAHe NII KbM nyHKTa HnpOdaHbKa, KATO ppeCTaBnTE BaIaNHa pa3NcCKa 3a NOKyNkPeCn. NlAteKeHek DOKymEt, MoJ, ObPheTe BHHMaHHe 3a CElta Ha rapaHIOHnTa TabNiua B INHΦOpMaqYrta OTHOCHO BCnyKBaHETo B Kpar Ha YtTBaHETO.
OTbopete onaKbKaTn BHNMaTeJIHO 3BaJeTe ypeTa OT onaKbKaTaN
- OtctpaHete onaKOBbUHnMaTepePnA KaKTo n onaKOBbUHnTe/H TpaHCnOpTHN OCNrypOBKn (ako Nma TaKnBa).
- PpOBepTe daHn obembT ha doCTabKa e TbJeH.
- PpOBepTe daniynyeBt n npHaJdIeXHocHTne HMaT noBpeNi OT TpaHCnOpTnpaHe.
IIOBb3MOXHOCT3ana3eTe ONaKOBkata doN3TnHaHe Ha rapaHnOHHnCpOK.
Onachoct!
YpeBt N OAnOBbUHNr MATEpHnA H Ce aTeTCHN IRPAuH! Dea He 6HbA Da IRpaT C nIaCTMACOB TOp6bHKn, FOJHo MaJIKn TEaHTN! CbSeCTByBa OAnHOCT Da rH rBThAT N da ce3aDyWAT!
OpunnaHNOyTbTaBe3aynoTpe6a
- Yka3aHnHa 3a TEXHnKa Ha 6e3OnaCHOCT
3. Ynotpe6a no npedHa3HaueHne
UpeBt Tpa6Ba da ce n3no13Ba no
npedHa3nueHHe n ednHCTBeHo 3a pr3aHe Ha
dbpbceHa. CeueHTo ha dbpBetra moKe da ce
n3BpBsa cAmo aE npemHaTO cbOTbETHO
ObyeHne 3a cTeHa. IpOn3BOntelT He Hocn
OTROBPOHcct 3a uTn, KOtTO ca Bb3HNKnaJIN
BCneDCTBe Na HeueneCbO6pa3Ha ynotpe6a nn
HenpaNlHO n3No13BaHe Ha ypeA.
MaunHaTa Tp6Ba Da ce N3no3Ba camo no npedHa3NaHaeHieto BcKaNo-hataBua HnTOBA yNtpe6a He e nO npedHa3HaYeHe. 3a nped3bKahn OToBA uETn Hn HapaRaBHn OT BCKaKbB BnD OTOBOPHOCT Hocn Notpe6nteJIr/TobcIyXbaIoTO IInCe, a He npOn3BOOnTeJIr.
Molna, nmaTe npedBnD, ye haunTe ypeDi cblnacHo npedHa3HaueHHeTo cn He ca npou3BeHn 3a npomuIeHa, 3aHaTcuNcKa IInn HndctpnaHn yNoTp6a. Hne He noeMaMe OTROBOPHOCT, aKO YpeBT Ce n3noI3Ba B npomuIeHn, 3aHaTcuNckn IInn HndctpnaHn npedprnTn, KaTO n pnp paBHocToHn DeHOCTH.
BHMMaHHe! Dpyr npCKOBe
Iopn n ako n3no13BaTe ypeDa cbo6pa3Ho npedncaHnTa, BnHaN cBueCTByBat pncKOBe. BbB Bp3Ka CycTpoCTBOTo N BnDa Ha ypeDa MoRat Da Bb3HNKHAT CneDnHTe pncKOBe:
- Nopra3BaHe npn KOHTaKT C He3aUHTeHa, DBNKeuCa cepeKeuBa Bepira.
2.Порязваши побратenv yapиндугн Heпредидени DBИХЕНЯHaHаразвявацашина. - HapaHbAHnO n3XbPJIeHn HacTpaHn 华CTn Ha peKeuata Bepira.
- HapaHbAHNA OT n3XbPJIeHN HaCTpaHn 华ACTN OT MaTePnaIa, KOITo peKeTe.
- YbpeKdHaHe Ha cnyxa, aKO He n3no3BaTe noDxOJaun cpeCTBa 3a 3auNTa Ha cnyxa.
- 3aTpPydHeNo DmHaNe nopaDn BmHbAne HaBpeDn raOBe n yBpeKdHaHa KOKaTa npN KOHTaKT C 6eH3HH.
BG
4. TexHHueeHN daHHN
Pa60TeH o6eM Ha MOTopa. 50,4 cm3
MaKcIMaJIHa MoUHOCT Ha MOTopa .2 KbAT
DbJIxHa Ha p3aHe 44,5cm
DbJIxHa Ha HOKa 18" (45 cm)
Ctbnka Ha Bepira .(0,325"),8,255 MM
Cnla Ha Bepira .(0,058"),1,5 MM
O6opOTn npa3eH xo.. 3000 ± 300 MNH-1
MaKcIMaJIHn O6opOTn
c KOMIIeKT 3a pr3aHe 11500 MHN-1
BepHXHa CKOpCT MaKc. 21 M/ceK
CbIbprkAnHe Ha pe3epBoapa 540 m
CbIbprkAnHe Ha pe3epBoapc c MaNo ... 240 MM
ANTINb6pnpa7aФyHK7a... Da
3b6uBepHHo KOJIeLo .. 6 3b6uX 8,255 MM
HeTHo TELNO 6e3 Bepira
Hn HApabJIBa7a peLca 5,75 Kt
HnBO Ha 3ByKOBO HaJIrahe LpA 103 dB(A)
HecrHyPocCT KpA 2,5 Deu6eLa(A)
HnBO Ha 3ByKOBA MoUHOCT Lw HA3MepeHo
(ISO 22868) 111.9 Deu6eLa dB(A)
HecrHyPocCT KwA 2,5 Deu6eLa(A)
HnBO Ha 3ByKOBA MoUHOCT Lw rapaHTnpaHO
(ISO 2001/14/EC) 115 Deu6eLa dB(A)
Bn6pa7a ahy
(pneHa pbKoXBtKa). MaHC.7,21 M/ceK2
HecrHyPocCT Khy 1,5 M/ceK
Bn6pa7a ahy
(3aHa pbKoXBtKa). MaHC.6,53 M/ceK2
KoJIeBaHne Khy 1,5 M/ceK2
3anaJIteHa CBeU .TORCH L7RTC
Pa3ctOAHHe Ha eJeEKeTPOdInTe 0,6 mm
TinBepira . Oregon 21LPX072X
TinHOJ . Oregon 188PXBK095
OrpaHnHTe 6pa3yBaHTo Ha yM n Bn6paunrTa do MmHHmym!
I3noI3BaIte cAmo 6e3ynpueHNo fynkuioHpaun ypeu.
- PndbpaKaIte n nouchTaBte ypea peoBHO.
- PnrodeTe hauHa cHa ha paBota cnPraMo ypeDa.
He npetobapbaYte ypea.
Hocete ypea npn Heo6xOImocT 3a npoBepka.
- N3KIOUyBaIeYpeJa, aHO He ce H3NOJ3Ba.
Hocete pKaBn.
5.ПпсдпynсанeВ excnnoaataua
Onachoct!IpycheteMOTopaeBaKorato TpnoHObTe roTOB MOHTnpaH.
Onachoct!Hocete BnHaTn 3aunTHn pKaBUN np6opabeHe c Bepnrata.
5.1 MoHTnpaHe HABOeIaTa WnHa npeHecata Bepura (Hr.2A-2G)
- De6IoKnpaIte cInpaKaTaHa BePurata, 3a ceIta HaTNCHeTe ppeHnna3nte3a pKaTa (6) B nocKa Ha npEHaTa pbKoXBtKa S (7) (fNr.2A).
- OTePAnHeTe KanaKa Ha BoDeIaTa 1nHa (A) KaTo pa3BnEeDBeTe raiKu (19) (fnr. 2B).
- NocTaBeTe BOeUaTa IINHa (2) BbB BoDaHa HbepnKnHr TpnoH (ΦnR. 2C).
- NocTaBete BepnraTata (3) OKoIOn 3aDInKBaUTo KOJIeO (C) (ΦIr.2E). BHIMaBaIte 3a NocKaTahA Ha BpTeHe Ha BepnraTata (3). 3BeHata (B) Tpr6Ba da ca opHeHTnpaHn KaKTo Ha ΦIr. 2D.
- NocTaBete BepnraTAtOKoIbOBeeUaTAtuHa (ФИг.2E).
- 3aDbNKBaunTe 3BeHa Ha BepnraTa (3) Tpa6Ba HAnbHIO Da ce nIb3raT B nepnΦepeHna KaHAn(D),KaKTo N MeKdy 3b6nTe Ha 3aDbNKBaunO To KOJIeNo (C) (ФИг. 2E).
- 3aBbptete6oJtTa 3a oBtIaHa BepnraTa (20)B nocoka cpeu yacobnKOBata CTpeHa DOKato 6oTbT (E) 3aCTaHe CBOeTO KpaHNoNoIOXKeHne (Φur.1B/2F).
- MoHTpaIaTe KaIaKa Ha IINHaTa (A).
Yha3aHHe! BontbT (E) Ha npncnoc06lenHeTo 3a o6TtareHa HBePrtata Tp6Ba da ce fNcHcpa B OTBopa (G) Ha BOeUaTa WInHa (fHg.2G).3a CEHTA NtB3Hete BOeUaTa WInHa (2) MaIHO Hanpei Ha3ad DOkato Bne NOCTABITE KanaKa HA WInHATA (A).3aterHete Ha pbKa raHata (19).
5.2 HactpoBbHe Ha o6TgRaHTo Ha BepnraTa (3A/3B)
HactpoBaIte 06TgAHeTo Ha Bepurata cAmO npn H3JIIOUeH DBrarTeJ.
- HaTnCHete Bbpxa Ha Bodeuata Shna (2) JeKO HArOpE NHaCTpoIe OBtRaHTo Ha BePurata CnOmoUta Ha 6oTa 3a OBtRaHe Ha BePurata (20) (Phr.3A).ObTraHTo Ha BePurata e ONTmAmHO, Ako BePurata (3) OT DOJNHTa cTpaHa, B cpeDaHa BaODeuata Shna (2) E b noLoKeHne KaKTo e NOKa3aHo
BG
HaΦIr.3B(B).
- 3aπpθKTe Bbpxa Ha uHnHaTa JIeKO HATuCHat n 3aTeHHe TBeTe raHKn (19).
- HanpaBte ΦyHKnOHaHa npOBepka.
N3dpbnaTe Beprata (3) Ha pbHa 1x OKOHO BodeaTa WHa (2). Ako Beprata (3) ce BbPTN Tpydno OKOHO BodeaTa WHa (2) mN6loKnpa, e MHOro o6TeHaTa.
AHO TOBa e Taha, HAnpaBete CJIeHata MaHaHa NaCTpoHa:
- Pa3BnTe DBeTe rAkn (19) n rN 3aterheTe OTHOBO Ha p6ka.
- HamaTe oToRaHeTo Ha Beprata, KaTo BbPTnte 60Ia 3a 6oTgAne Ha Beprata (20)B nocOHa 6oPaTHa Ha YacOBHnHOBaTa CTpeNka.HactpoBnBaTe Ha MaIKn CTbKn DbpnaTe Beprata (3)OTHOBO Bpxy BOeUaTa WIna (2) HanpeN Ha 3a Da npobeprTe, daIb Beprata (3) Ce Bbptn 6e3 npo6lemn HO BCE NaK e CTeHata. YkaaHne: AHO Beprata (3) EMHOro Xla6aba BbPteTe 60Ia 3a 6oTgAne Ha Beprata (20) no nocOHa Ha YacOBHnHOBaTa CTpeNka.
3.AKoObTaHaTeHaBepuTa e ONTImaHnHO HAcTpOeHo,HaTNCHeTeJeKO BbpXHa HInHataN3aterHeTe Do6pe DBeTe raKn(19).
Hobata Bepra ce pa3Tra, npaDn TOBa e BaHNO pnpbBPO BbBeKaDaHe B yNoTp6a Da DOHaCTpoBate Beprata Ha KpaTHN HInTePBAH ON BPMe (OH.5 CpA3BaHna). Te3e Ce yblnKabATc yBvElnuBaHne npoDbIHHTeHOCCTHa pa6Ota.
IpeynpeinteHa 6eKHa! Ako BepnKHNAT TpnoH (3) e TBbPDE XIA5AB nIN CTERHAT, no-6bp30 ce n3HocBAT 3aDbNKBaTO KOJIeNo, HappaIbIbAaTa peIca, Beprata n Iaerept Ha KOnIHOBnBaI. N3o6p. 3B INHΦOpMnpa 3a npabInHTo HanpeKeHHe A (CTyede No cTcTOnHe) and HappeKeHBe (TOnIO CcTcTOnHe). N3o6p. C noka3Ba eHa TBbPde Xla6aba Bepra.
5.3 TOPHBO IMACJIO
TOPHBO
3a onTImaIepe3yIaTnI3noI3BaIte HOpMaIIHO,6e3oIOBHO TOpINBO CMeCeHO CbC CneuaIHO 2-TaKTOBO MOTOPHO MaIIO.
HANPABA HA TOPUBHA CMEC
Cmecete roPBOTo C 2-TaKTOBO MOTOPHO
maclo B noDxOJaU pe3epBoap. Pa3HnateTe
pe3epBoapa, 3a da CmeCHTe CTapaTeHNO BCNUHO.
Ipeynpeintenha 6eJekHa! HnKora He n3no3BaTte NCT 6eHsHn 3a To3n TpOH. TaKa dBnraTeTJe 3e ce NobpeuN Bue 3e 3ary6nte npaBoTo ha rapaunzna 3a To3n npOdyHT. He n3no3BaTte RopnBa CmEc, KoTO e 6nla cnlaDnpaHa NOBeye O90 dnH.
PpeynpeinteHa 6eKka! Tpa6Ba da ce n3no3Ba CneuHaHO 2-TaKTOBo MToPOH MacNo, 3a 2-TaKTOBn DBrAteN C Bb3duWHO oxJaDahe CbC CbTOHOWeHHe Ha pRmecnte OT 1:40. He n3no3BaTe 2-TaKTOB MacNeH npOyKT CbC CbTOHOWeHHe Na Pmecnte OT 1:100. HedocTaTbHOTO KOInueCTBO MacNo Ze nobpein DBrHrAteJI, N Bne B To3n Cnyaun rGbntep npaboto Ha rapaHua 3a DbrAteJI.
INPENOPbYHTEJIHNTOPNBA
HraKoIbuaHn BIDOBe 6EH3HH Ce CMECBaT C pInmecn KaTo aIKOXOJIHN- NIN eTEPHN CbeINHeHn, 3a Da cB0TBcTcBAT Ha HOpMHTe 3a YnCTNoTPa6OteHrA3OBe. DIBrTaTeJAT pa6OTn 3aDobOIHTeHNO CBCNUH BIDOBe 6EH3HH 3a 3aDBHXBaHETo Cn, CbTOc H cHaCtHeHc KncLOpOd 6EH3HH.Na-Ho6pe n3no3BaYte HOpMaJIeH 6e3OIOBEH 6EH3HH.
Cma3BaHe Ha BepnraTa HnnpabIbIaTaPeIca
BceHn nT, KOraTo pe3epBoapbT 3a roPBO ce HnblHn C 6eH3nH, Tpr6Ba CbIoo npE3epBoapbT 3a MacIoTO 3a Bepurata Da Ce DonblHn. 3a cIeta Ce npenopbYBa Da ce I3noI3Ba CTaHdApTHo MaIcNo 3a Bepira.
Motopno maclo n 6eH3nH I peKeua Bepnra

CboTHoWeHHe Ha cMecBaHe 1:40 I Camo MacNo
BG
PPOBEPNI PPEIN BHJIIOYBAHETO HA DBNIGATEJIA
BHMHHe: HnKora He nyckaTe nIbO6cLyKBaIte TpnoHa, KOrato WnHaTa N Bepurata He ca NoCTaBeHN npabNlHO.
- HanbHHe roPnBnpe3epBoap (21) c noXoJuaTa rOpNBa Cmec (Φnr.4).
- HanbHHepe3epBoapa 3a MacNo (22) c BepnHNO macNo (N3o6p.4).
CneHnBbHaHeTo Ha pe3epBoapa Ha Bepurata
Hpe3epBoapa 3a MacNo, 3dpaBO 3aterHeTe
c pbKa kanaka Ha pe3epBoapa. 3a ceta He
H3noI3BaIte HNCTpyMeHT.
6.06cnyHbAHe
Ipeyn ynoTpe6a npObepeTe ypeda 3a EBHTyAHHNOBpeDN HneHnIOJI3BaITe, aKo IMa noBpeDN. YpeDbT MoKeJa 6bJe cTApTnpaH cAmO c AHTNbIpaHa CnIpaKaHa bEeprata. CnIpaKaTa Ha Beprata e aHTNbIpaHa, aKo IocTbT Ha CnIpaKaTa (6) nHaTncHat HanpeD.
06cHHe Ha HauHnHa 4yHKuHOpHApHe, BnK -PpOBePka Ha cnpuKaHa BePnRaTa - CtaTnHa npOBePka.
CbXPAEHHE HA BEPNKHHN TPOH
Ako cIbxaHbATEBepnHeTprHO3aNoBceOT30dNToTp6BaDa ce cbxpaHbRa no nOdoJHauchn. B npotbeHcnyaehce H3napBaHAMnpaTOe CBapbypatopa octaHaIO rOpBOIOCTABNaNO6Ha Ha rymaytka.Toba SNMOIgOdayTeHNyCkAHeTOINaIMKaTOnOcNeDncaCKbNp pa6oNno pEmoHTa.
- MaxheTe 6abHo KaNaKa Ha pe3epBoapa 3a TropnBO, 3a Da OCbo6oJnte eBHTyAINHO HAnraHe B pe3epBoapa. N3npa3Hete BHIMATEJHO pe3epBoapa.
2.ПуснeteДигateЯиrooctaBeTe da pa6oTndoKATO TPhOHbT cnpe,3a Da OTcTaHHTeropNBOTOOT Kap6ypatopa. - OcTaBete DnIraTeJIa ce oxlaJn (okono 5 MNHyTu).
- Noc Tete OCHOBMOaHHata.
IpeynpeinteHa 6eKa! CbxaPnBaTe TpnoHa Ha cyxo MRCTO MHORO daJeH OT eBENTaJIHN H3OTUHNI HA 3anaIbAHe, HAp. neKa, BOHOHaRpaIbAaS BoJlep Ha ra3, ra3OB aBTOMa 3a CySeHe N dp.
CnecbxpanBaHe BBeDeTe BeknloatauHa KaKTo e OncaHO B pa3eJ,5.PpeHn BBeKDaHe B EKnloatauHa.
TpaHcnOpTnpaHe
3aDcTBAeTe CnnpaKaTa Ha BepnRaTa.
OcnppeTBePnHnTpnoH cpeuy nIb3raHe,3a da npedotBpaNTe 3ary6aHa ropnBO, uETN Hn HapaHbAHNA.
9.ПланзаOTKрИВанеHa HeH3правhoeTn
GB explains the following conformity according to EU directives and norms for the following product
GR 5nAovI Tny aokAoOn anopOApwn OoMva He Tny Oonyla EK KA ta npotetua yia to poioe
Subject to change without notice
Archive-File/Record: NAPR021325
Documents registrar: Markus Jehl
Wiesenweg 22, D-94405 Landau/Isar

EH 06/2019 (01)