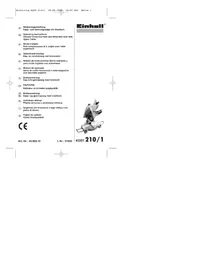
KGST 210 - Electric saw EINHELL - Free user manual and instructions
Find the device manual for free KGST 210 EINHELL in PDF.


| Brand | Einhell |
| Model | KGST 210 |
| Product type | Chop and mitre saw with upper table (multifunction saw) |
| Power supply | 230 V ~ 50 Hz, 1200 W, fuse protection 10 A |
| No-load speed | 4600 rpm |
| Saw blade | Hard metal, Ø 210 x 30 x 2.5 mm, 24 teeth |
| Saw table dimensions (table mode) | 360 x 250 mm |
| Support surface dimensions (chop saw mode) | 390 x 140 mm |
| Max. cutting height (table mode) | 0 to 33 mm |
| Max. cutting width (90°) | 120 x 55 mm |
| Max. cutting width (45°) | 65 x 55 mm |
| Head tilt range | -45° / 0° / +45° (to the left) |
| Turntable rotation range | -45° to +45° |
| Dust extraction connection | 35 mm |
| Main functions | Table saw, chop saw, single and double mitre cut, rip and cross cut |
| Maintenance and cleaning | Clean ventilation slots regularly, use compressed air or cloth, grease moving parts, avoid caustic agents |
| Safety | Tilting protective cover, riving knife, overload switch, anti-kickback device, requires safety glasses and ear protection |
| Spare parts | Available via after-sales service (type reference, article no., identification no., part no.) at www.lsc-gmbh.info |
| Warranty | 2 years (according to legal conditions) |
Frequently Asked Questions - KGST 210 EINHELL
User questions about KGST 210 EINHELL
0 question about this device. Answer the ones you know or ask your own.
Ask a new question about this device
Download the instructions for your Electric saw in PDF format for free! Find your manual KGST 210 - EINHELL and take your electronic device back in hand. On this page are published all the documents necessary for the use of your device. KGST 210 by EINHELL.
USER MANUAL KGST 210 EINHELL
Operating Instructions
Circular Cross-Cut Saw and Mitre Box Saw with Upper Table
F Mode d'emploi
-
Release button
-
Handle
-
On/Off switch for
mitre box saw mode
- On/Off switch for
bench-type circular saw mode
5.Sawblade
6.Saw blade guard, binged
-
Stop rail
-
Rotary table
-
Lower saw table
-
Lock screw for turntable
-
Scale
-
Table insert, bottom
13.Saw blade fixture
-
Lower saw blade cover
-
Locking nut
16.5a
-
Upper saw blade guard
-
Parallel stor
-
Hexagon wrench
-
Workpiece supports
-
Face wrench
-
Clamping screw
23Retaining price
24.Lacking fuel
- Locking fork
-
Knudsen score for miter settings
-
Kugledary
27.101
-
517
-
Lock screw for cutting width
-
PUSH SICK
-
Sphtter
31.Extractor socket
-
Allen screw
-
Recessed head screw
-
Table insert, top
-
Other figures
-
Lock screw for workpiece support
2. Items supplied
Crosscut and miter hox saw with upper table
Carbide-tipped saw blade
Cross/parallel stop
Push stick
Workpiece support
Face wrench, hexagon wrench
machine's size. It is not suitable for cutting fire wood.
A special jig is required to cut roundwood.
The machine is to be used only for its prescribed
purpose.
Any use other than that mentioned is considered to
be a case of misuse. The user/operator and not the
manufacturer shall be liable for any damage or injury
resulting from such cases of misuse. The machine is
to be operated only with suitable saw blades. It is
prohibited to use any type of cutting-off wheel.
To use the machine properly you must also observe
the safety regulations, the assembly instructions and the operating instructions to be found in this manual.
All persons who use and service the machine h
to be acquainted with this manual and must be
informed about its potential hazards.
It is also imperative to observe the accident
prevention regulations in force in your area. The
same applies for the general rules of occupational
health and safety.
The manufacturer shall not be liable for any changes
made to the machine nor for any damage resulting
from such changes.
Even when the machine is used as prescribed it is
still impossible to eliminate certain residual risk
factors. The following hazards may arise in
connection with the machine's construction and
design:
Contact with the saw blade in the uncovered saw
ZONE:
Reaching into the running saw blade (cut
injuries
Kick-back of workpieces and parts of workpieces
due to improper handling
Saw blade fracturing.
Catanlting of faulty carbide tips from the saw
blade.
Damage to hearing if essential car-muffs are not
XUN
Harmful emissions of wood dust when the
machine is used in closed rooms.
4. Important notes
Please read this manual carefully and pay attention to the information provided. Use this manual to
familiarize yourself with the machine, its correct use and safety regulations.
Safety regulations
Important: Whenever you use electric tools it is imperative to take basic safety precautions in order to reduce the risk of fire, electric shock and personal injury. Essential safety precautions include:
GB
Follow all these instructions before and while you are working with the saw.
-Keep these instructions in a safe place.
Avold body contact with earthed components.
- When equipment is not being used it should be
kept in a dry, closed place out of children's reach.
- You will work better and more safely if you keep your tools sharp and clean. Check the power cable regularly and have it replaced by an authorized specialist at the first sign of any damage.
Check your extension cables regularly and replace them if damaged.
- When working outdoors, use only extension cables that are approved for outdoor use and which are marked accordingly.
Concentrate on what you are doing. Take a sensible attitude to your work. Never use it when you are tired.
- Never use a tool with a switch that cannot be turned on and off.
Caution! The use of plug-in tools and accessories, other than those intended may put you at risk of injury.
- The machine is equipped with a safety switch (4) to prevent it being switched on again accidentally after a power failure (in bench-type circular saw mode).
Never use the saw to cross-cut round timber.
- Check the power cable. Never use a faulty or damaged power cable.
Do not use the cable to pull the plug out of the socket-outlet. Protect the cable from heat, oil and sharp edges.
We recommend that you wear non-slip shoes when working outdoors.
- Keep long hair in a hair net.
- Avoid abnormal working postures.
An untidy work area may result in accidents.
Do not allow other persons, particularly children, to touch the tool or the power cable. Keep them away from your workplace.
The splitter is an important safety device. Not only does it guide the workpiece, it also prevents the kerf closing behind the blade so that there is no kickback from the workpiece. Note the thickness of the splitter. The splitter should never be thinner than the saw blade body or thicker than the width of its kerf.
The guard hood (17) has to be lowered over the workpiece for each cut.
- Be sure to use a push stick when slitting narrow workpieces smaller than 120mm in width or a push block when slitting narrow workpieces smaller than 30mm in width.
- IMPORTANT! Never use this saw to make plunge cuts.
Always stand to the side of the saw blade when working with the saw.
Make sure that off-cuts do not catch on the saw blade crown or they may be catapulted into the surrounding area. - If the sawing gap is worn, replace the table insert.
- Pull out the power plug! -
To prevent injury from flying sawdust and chips, use the saw only with a suitable vacuum extraction system or standard industrial vacuum cleaner.
Always pull the plug out of the power socket before adjusting or servicing the machine.
Give these safety regulations to all persons who work on the machine.
Do not use this saw to cut fire wood.
Caution! Hands and fingers may be injured on the rotating saw blade.
Before you use the machine for the first time, check that the voltage marked on the rating plate is the same as your mains voltage. - If you need to use an extension cable, make sure its conductor cross-section is big enough for the saw's power consumption. Minimum cross-section: 1.0 ~mm^2 .
- If you use a cable reel, the complete cable has to be pulled off the reel.
Never carry the saw by its cable.
Do not leave the saw in the rain and never use it. In damp or wet conditions. - Provide good lighting
- Never saw near combustible liquids or gases.
Wear suitable work clothes! Loose garments or jewellery may become caught up in the rotating saw blade.
Operators have to be at least 18 years of age. Trainees of at least 16 years of age are allowed to use the machine only under supervision. - Keep children away from the machine when it is connected to the power supply.
- Check the power cable. Never use a faulty or damaged power cable.
- Keep your workplace clean of wood scrap and any unnecessary objects.
Persons working on the machine should not be distracted.
Note the direction of rotation of the motor and saw blade.
After you have switched off the motor, never slow down the saw blade by applying pressure to its side. - Fit only blades which are well sharpened and have no cracks or deformations.
GB
The machine is to be operated only with tools which conform with EN 847-1: 1997.
- Faulty saw blades have to be replaced immediately.
- Never use saw blades which do not comply with the data specified in this manual.
Make sure that the arrow on the saw blade complies with the arrow marked on the machine.
Make certain that the saw blade does not touch the rotary table in any setting. To do so, pull out the power plug and tilt the saw blade by hand into the 45^ position and the 90^ position. If necessary, re-adjust the saw head as described in Section C/F.
It is imperative to make sure that all the devices used to cover the saw blade are in good working order.
- Never wedge the hinged guard hood in open position.
- Never dismantle the machine's safety devices or put them out of operation.
Damaged or faulty safety devices have to be replaced immediately.
- Never cut workpieces which are too small to hold securely in your hand.
Do not place your hands in awkward positions where one or both may slip suddenly and touch the saw blade.
- When working with long workpieces, use an additional support (table, stand, etc.) to prevent the machine from tipping over.
Always clamp round workpieces such as dowel rods etc. with suitable devices.
- There must be no nails or other foreign bodies in that part of the workpiece you want to cut.
Always stand to the side of the saw blade when working with the saw.
- Never load the machine so much that it cuts out.
- Always press the workpiece firmly against the table and the stop rail to prevent it from wobb or twisting.
Make sure that off-cuts can be removed from the side of the saw blade. If not, they may catch on the saw blade crown and be catapulted into the surrounding area.
- Never saw several workpieces simultaneously.
- Never remove loose splinters, chips or jammed pieces of wood when the saw blade is running
To rectify faults or remove jammed pieces of wood, always switch off the machine first. - Pull out the power plug!
Conversions, adjustments, measurements and cleaning jobs are to be performed only when the motor is switched off. - Pull out the power plug!
Before you switch on the machine, check that all wrenches and adjustment tools have been removed.
- When you leave your workplace, switch off the motor and pull out the power plug.
Electric installation work, repairs and
maintenance are to be carried out only by specialists.
All guards and safety devices have to be refitted immediately after completion of any repairs or maintenance.
It is imperative to observe the manufacturer's safety, operating and maintenance instructions as well as the dimensions quoted in the technical data.
It is imperative to observe the accident prevention regulations in force in your area as well as all other generally recognized rules of safety.
Note the information published by your professional associations.
- Switch on the dust extraction system each time you use the machine.
The machine may be used in closed rooms only in conjunction with a suitable vacuum extraction system.
The cross-cut saw must be connected to a 230 V socket-outlet with a minimum 10 A fuse.
- Never use light-duty machines for heavy-duty work.
- Never use the cable for any purpose other than that for which it is intended
- Adopt a firm standing position and keep your balance at all times.
Check the tool for signs of damage!
Before you carry on using the tool it is imperative to check that its safety devices and any slightly damaged parts are working properly and in the way intended.
-Check that the moving parts work properly and do not jam or whether any of the parts are damaged. All parts must be fitted correctly and satisfy all conditions for the tool to work properly
Unless otherwise stated in these instructions, damaged safety devices and parts must be repaired or replaced by experts in an approved specialist workshop.
- Have damaged switches replaced by a customer service workshop.
This tool complies with the portant safety regulations. Repairs are to be carried out only by qualified electricians using original replacement parts. The user may suffer an accident if this condition is not observed.
-Be careful when working in vertical mode
GB
Caution! Special care is required when making double mite cuts.
Do not overload your tool!
Wear safety goggles.
Wear a breathing mask on dusty jobs.
-Examine the power cable / extension cable for damage.
To prevent the saw from toppling backwards, fasten both supporting feet (a) to the left and right on the rear side of the saw with 2 screws each, as illustrated in Fig. 11.

Wear goggles

Wear ear-muffs

Wear a breathing mask
Noise emission values
The saw's noise is measured in accordance with DIN EN ISO 3744; 11/95, E DIN EN 31201; 6/93, ISO 7960 Annex A; 2/95. The machine may exceed 85 dB(A) at the workplace. In this case, noise protection measures need to be introduced for the user (ear-muffs).
Cutting Idling
Sound pressure level LPA 92,4 dB(A) 93,3 dB(A)
Sound power level LWA 105,4 dB(A) 106,3 dB(A)
The quoted values are emission values and not necessarily reliable workplace values. Although there is a correlation between emission and immission levels it is impossible to draw any certain conclusions as to the need for additional precautions. Factors with a potential influence on the actual immission level at the workplace include the duration of impact, the type of room, and other sources of noise etc., e.g. the number of machines and other neighbouring operations. Reliable workplace values may also vary from country to country. With this information the
user should at least be able to make a better assessment of the dangers and risks involved."
- Technical data
| Asynchronous motor 230 V 50 Hz | |
| Power rating 1200 W | |
| Operating mode S1 | |
| Idle speed n0 4600 rpm | |
| Carbide saw bladeø 210 xø 30 x 2.5 mm | |
| Number of teeth 24 | |
| Connector for dust extractorø 35 mm | |
| Standing area 400 x 285 | |
| As bench-type circular saw: | |
| Saw table 360 x 250 mm | |
| Cutting height 0 - 33 mm | |
| Parallel stop swinging range | -30° to +30° |
| As mitre box saw: | |
| Tilting range | -45° / 0° / +45° |
| Mitre cuts | 0° to 45° to the left |
| Saw bed support | 390 x 140 mm |
| Sawing width at 90° | 120 x 55 mm |
| Sawing width at 45° | 65 x 55 mm |
| Sawing width at 2 x 45°(double mitre cuts) | 40 x 23 mm |
6. Before putting the machine into operation (Abb. 1-3)
6.1 General information
The machine has to be set up where it can stand firmly, e.g. bolt it to a work bench, a universal base or similar.
All the covers and safety devices have to be properly fitted before the machine is switched on.
It must be possible for the saw blade to run freely.
- When working with wood that has been processed before, watch out for foreign bodies such as nails or screws etc.
Before you actuate the On/Off switch, make sure that the saw blade is correctly fitted and that the machine's moving parts run smoothly.
Before you connect the machine to the power supply, make sure the data on the rating plate is the same as that for your mains.
To prevent the saw from toppling backwards, fasten both supporting feet (a) to the left and right
GB
on the rear side of the saw with 2 screws each, as illustrated in Fig. 11.
6.2 Converting the combination saw
The saw has two working positions:
A: Bench-type circular saw (Fig. 1)
B: Cross-cut and litre box saw (Fig. 2)
To convert the saw from one working position to another, proceed step by step exactly as described below or you may damage components.
Caution: Pull out the power plug each time before you convert the saw!
The saw is delivered in working position A (bench-type circular saw).
6.2.1 Converting the saw to mitre box mode
-First slacken the locking nut (15).
- Raise the saw table (16) with the one hand while pressing down the machine head by the handle (2) with the other. The blade (5) must disappear completely in the slot of the saw table (16).
Re-tighten the locking nut (15)
-
The locking fork (24) has lifted as the result and released the retaining pin (23).
-
Press down the machine head by the handle (2) and pull out the retaining pin (23). This disconnects the power supply to the switch (4) for bench-type circular saw mode and connects it to the switch (3) for mille box saw mode.
-
Caution! A return spring causes the machine head to rise automatically at the end of the cut. Do not let go of the handle (2) as soon as the cut is completed but steady the machine head and allow it to rise slowly.
-
Remove the saw blade cover (14).
- The saw is now ready for use in metre box saw mode.
6.2.2 Converting the saw to bench-type circular saw mode
- Set the machine head in vertical position and the rotary table (8) to 0^ .
Fix the locking screws (10) and the clamping screw (22). - Place the lower saw blade cover (14) on the rotary table (8), making sure that the two rear feet of the cover latch securely behind the stop rail(7).
Press the release button (1) and lower the
machine head by the handle (2) until the lower saw blade guard (14) completely covers the blade.
- Insert the retaining pin (23) in order to fix the saw in the lower position. This also redirects the power supply from switch (3) to switch (4).
- Undo the locking nut (15) and lower the saw table (16) to the required cutting depth.
Re-fix the locking nut (15).
When the saw table (16) is lowered it blocks the retaining pin (23) with the locking fork (24) so that the pin cannot be pulled out.
- The saw is now ready for use again in bench-type circular saw mode.
7. Operation (Fig. 1-9)
After every change of setting we recommend that you make a test cut in order to check the new dimensions.
Important: Your machine is equipped with an overload switch (b) (Fig. 17). The machine shuts down automatically when overloaded. You must wait a few minutes for the machine to cool before restarting. Then press the overload switch (b) again and the machine is ready for use.
7.1 Using as a bench-type circular saw
Convert the saw to bench-type circular saw mode (see 6.2.2.). Be careful when starting the cut.
7.1.1 On/Off switch (Fig. 4)
To switch on the saw, press the green button (a). Wait for the blade to reach its maximum speed before starting the cut.
To switch off the saw, press the red button (b).
7.1.2 Adjusting the cutting depth (Fig. 2)
-Slacken the locking nut (15) and move the saw table (16) to the required sawing depth. The blade (5) should project a few mm out of workpiece.
Re-fix the locking nut (15).
7.1.3 Making longitudinal cuts (slitting) (Fig. 4)
- Undo the knurled screw (25) and set the cross and parallel stop (18) to 90^ . Re-fix the screw (25).
Insert the parallel stop (18) from the right into the front slot of the saw table (16). - Undo the two knurled screws (26). Slide the stop rail (27) forward to a pint above the middle of the blade (5) and fix in place.
GB
Using the scale (c) on the saw table (16), set the parallel stop (18) to the required dimension and clamp in place with the locking screw (28).
- Switch on the saw by pressing the green button (a).
Slowly and precisely slide the workpiece forward along the parallel stop (18) to the blade (5).
The upper blade guard (17) opens automatically when you slide the workpiece forward.
Caution:
For workpieces of less than 120mm in width it is imperative to use the supplied push stick (29) in the area of the blade (5) (see Fig. 5). For workpieces of less than 30mm in width it is imperative to use a push block (d) to move the workpiece forward. (see Fig. 6)
There is no push block supplied with your
saw! Ask your specialized dealer
Always push the workpiece through as far as the end of the (30) splitter. (Fig. 7)
- When the cut is completed, the guard hood (17) closes again automatically and covers the blade (5).
Switch off the saw.
Important: Secure long workpieces from sagging at the end of the cut (e.g. with a roller table etc.).
7.1.4 Making cross cuts (Fig. 8/9)
Inset the cross and parallel stop (18) from the right into the lateral slot of the saw table (18)
Tighten the locking screw (28) until the cross stop (18) can be moved in the slot of the saw table (16) with little play.
- Slacken the knurled screw (25), move the cross stop (18) to the required angular setting and fix in position.
- Slacken the two knurled screws (26) and slide the stop rail (27) to the left until it no longer touches the blade guard (17) when moved forward. Re-tighten the screws (26).
Switch on the saw.
- Press the workpiece firmly against the stop rail (27) and slowly slide it together with the cross stop (18) against the blade (5) in order to make the cut.
- When the cut is completed, switch off the saw.
7.2 Using as a litre box saw
Convert the saw to litre-box saw mode (see 6.2.1).
7.2.1 Settings (Fig. 2/3)
The machine head can be tilted a max. 45^ to the left by undoing the clamping screw (22) with the hex wrench (19).
The rotary table (8) can be adjusted from -45^ to
+45° by undoing the locking screws (10).
7.2.2 On/Off switch (Fig. 2)
The saw is started by pressing the On/Off switch (3). The switch has to be kept pressed while making the cut.
7.2.3 90^ cross-cuts and 0^ rotary table (Fig. 2)
- Convert the saw from bench-type circular saw mode to miltre box saw mode.
Press the main switch (3) to turn on the saw.
Wait for the blade to reach its maximum speed before starting the cut. - Place the workpiece on the lower saw table (9) and press it against the stop rail with your left hand. Always position the material firmly on the machine bed so that it cannot move about while it is being cut.
With the other hand, press the release button (1) and lower the machine head by its handle (2) smoothly and with slight pressure down through the workpiece to make the cut. - When the cut is completed, return the machine to its top parking position and let go of the On/Off switch.
Caution! A return spring causes the machine head to rise automatically at the end of the cut. Do not let go of the handle (2) as soon as the cut is completed but steady the machine head and allow it to rise slowly.
7.2.4 90^ cross-cuts and 0^ - 45^ rotary table (Fig.10)
The KGST 210/1 can be used to make angled cuts of 0^ - 45^ relative to the stop rail on the left and right side.
- Undo the rotary table (8) by slackening the two locking screws (10) on the step rail (7).
Turn the rotary table (8) by its handle (2) to the angle you want, i.e. the mark (a) on the rotary table has to comply with the required angle dimension (11) on the stationary base plate (9). - Re-tighten the lock screw (10) to fasten the turntable (8).
Make the cut as described in Section 7.2.3.
7.2.5 Mitre cuts 0^ - 45^ and rotary table 0^ (Fig.11/12)
The KGST 210/1 can be used to make metre cuts of 0^ - 45^ relative to the machine bed on the left side.
- Lift the machine head to its top position.
Fix the rotary table (8) in 0^ position
- Use the hexagon wrench (19) to undo the clamping screw (22) and tilt the machine head by
GB
its handle (2) to the left until the mark (a) on the machine head points to the required angle dimension (b).
- Re-tighten the clamping screw (22) and make the cut as described in Section 7.2.3.
7.2.6 Mitre cuts 0^ - 45^ and rotary table 0^ - 45^ (Fig.11/13)
The KGST 210/1 can be used to make mitre cuts on the left at an angle of 0^ - 45^ relative to the work top and 0^ - 45^ relative to the stop rail (double mitre cuts).
- Lift the machine head to its top position.
Release the tumtable (8) by slackening the lock screw (10) on the stop rail (7).
Adjust the rotary table (8) by its handle (2) to the required angle (see also Section 7.2.4). - Re-tighten the lock screw (10) to faster the turntable.
-Undo the clamping screw (22) and tilt the machine head (4) by its handle (2) to the left to the required angle dimension (see also Section 7.2.5).
Re-lighten the clamping screw (22).
Make the cut as described in Section 7.2.3.
7.2.7 Chip extractor (Fig. 12)
The saw is equipped with a chip extraction socket (31).
It is easy therefore to connect the machine to a chip extraction system.
8. Replacing the saw blade (Fig. 14/15)
Pull out the power plug. The blade must stop moving completely.
Convert the saw to mitre box saw mode (see also Section 6.2.1).
- Slacken the two Allion screws (32) and take off the splitter (30) together with the blade guard (17).
Remove the recessed head screws (33) and the table insert (34).
- Use the supplied face wrench (21) to lock the outer flange in place and use the socket wrench (19) to unscrew the hex screw (Important: left-hand thread. Unscrew clockwise).
- Take the saw blade (5) off the inner flange and lift up and out through the slot in the saw table (16).
- Thoroughly clean the outer and inner flange and the motor shaft before inserting and securing the new blade. Important! The cutting bevel of the teeth, i.e. the direction of rotation of the saw blade, has to
conform with the direction of the arrow marked on the housing.
- Re-mount the table insert(3), the spiltter (30) and the blade guard (17) and secure in place.
- When fastening the splitter (30) make sure that the distance between the teeth of the blade and the splitter is a minimum 2 mm and a maximum 5 mm (Fig. 07).
Before using the saw again, check that the safety devices are in good working order.
9. Maintenance
- Keep the machine's air vents unclogged and clean at all times.
- Remove dust and dirt regularly from the machine. Cleaning is best done with compressed air or a rag.
- Re-lubricate all moving parts in regular intervals.
- Never use caustic agents to clean plastic parts.
10. Ordering replacement parts
Please quote the following data when ordering replacement parts:
-Type of machine
Article number of the machine
Identification number of the machine
Replacement part number of the part required
For our latest prices and information please go to www.isc-gmbh.info
F
1.Description de la machine (fig. 1-4)
Cle a ergots, cle a fourche
Utsugningsanslutting 35 mm
svangbart-30°till+30°
Kapsag
Saggsupport 390x140mm
Innities in hsket shitdyde.
Sagliadet (5) bor rage hoen millimeter utover
arbeitstdytkket.
Uniuchromic shrby nastawcze (10) i shrube mucjcaja (22).
X 89/336/EWG_93/68/EEC
□95/54/EG:
□90/396/EWG
□97/68/EG:
89/686/EWG
EN 55014-1:2000+A1+A2; EN 61000-3-2:2000; EN 61000-3-3:1995+A1; EN 61029-1:2000+A1+1A1; EN 61029-2-11:2003; EN 55014-2:1997+A1; TUV Rheinland Product Safety; BM 60011421 0001
The product classified in those instructions comes with a 2 year universityrescognition diploma . This 2 year warranty period height will be starting at this time . The
For warranty claims to be accepted, the product has to receive the co-payment of the insurance and be put as its proper use as described in its operating instructions.
Your statutory rights of warranty are naturally unaffected during these 2
This warranty applies in Germany, or in the republic of country of the manufacturer's main regional sales partner, as a supplement to local regulations. Please note the details for contacting the customer service center responsible for your region or the services addressed below.
GARANTIE
- d'mnus 2 bis a priori ab production sem be cemlui bivacuier zuovnong. Die nere iurum in ane iurum in ane in ane in ane in ane in ane in ane in ane in ane in ane in ane in ane in ane in ane in ane in ane in ane in ane in ane in ane in ane in ane in ane in ane in ane in ane in ane in ane in ane in ane in ane in ane in ane in ane in ane
Givetvls gisel forfarande of lagstadgade rittigthetema tilli garant under denna 2-ars-period.
Ganitin gait eascaf for Icbundoparencoi Tyspedl al tde and der rom
negneus mehndihilutnupesmenbefirst am umsampellum Il tse
lagataqide fainkafor m aig lareal. Land Kontakis d n kortakpemov did
den regala kundkntefer al vild dti fivrncadkoseim osang mered
GARANTIBEVIS
- If there is at least one product available, the product will be supplied by a retailer (or by a local government) to the manufacturer of the product.
- If there are more than one products available, the product will be supplied by a retailer (or by a local government) to the manufacturer of the product.
- If there are more than one products available, the product will be supplied by a retailer (or by a local government) to the manufacturer of the product.
- If there are more than one products available, the product will be supplied by a retailer (or by a local government) to the manufacturer of the product.
Lodmaese forbrugerettighed er naturilgvs stadigvzek geldende under fornaticiterioden na de 2A.
Bananishan garam is suppum 15 kut kugandha besamnusri 13 ber dedi, hwer den ranee neohocothandhar has at sada. Vhenvakud edudidir 3i din kentbaldpsos hos derlqalr anravilr kansovsider ol ther ndenstondre servicecrosccere.
GARANTIE
to the end of this article . No further distribution is
Suarrn en aerio poa-
CERTIFICATO DI GARANZIA
Broscaia otofoxa, n. imbricata in Bambusa Funcheng jian hou-tai, imbricata gaozhi pashanizcuk, hou-tai, imbricata in Bambusa Funcheng jian hou-tai, imbricata pashanizcuk, hou-tai, imbricata in Bambusa Funcheng jian hou-tai, imbricata in Bambusa Funcheng jian hou-tai, imbricata in Bambusa Funcheng jian hou-tai, imbricata in Bambusa Funcheng jian hou-tai, imbricata in Bambusa Funcheng jian hou-tai, imbricata in Bambusa Funcheng jian hou-tai, imbricata imbricata in Bambusa Funcheng jian hou-tai, imbricata in Bambusa Funcheng jian hou-tai, imbricata in Bambusa Funcheng jian hou-tai, imbricata in Bambusa Funcheng jian hou-tai, imbricata in Bambusa Funcheng jian hou-tai, imbricata in Bambusa Foucheng jian hou-tai, imbricata in Bambusa Funcheng jian hou-tai, imbricata in Bambusa Funcheng jian hou-tai, imbricata in Bambusa Funcheng jian hou-tai, imbricata in Bambusa Funcheng jian hou-tai, imbricata in Bambusa Funcheng jian hou-tai, imembrata in Bambusa Funcheng jian hou-tai, imembrata in Bambusa Funcheng jian hou-tai, imembrata in Bambusa Funcheng jian hou-tai, imembrata in Bambusa Funcheng jian hou-tai, imembrata in Bambusa Funcheng jian hou-tai, imembrata in Bambusa Funcheng jian hou-tai
Garanciaokmány
Liberia et c. dubiabnabne prevenunti kozukzii 2 pojostan; nyubk, an zu.
10000000000000000000000000000000000000000000000000000000000000000000000000000000000
A. Ⅱ. Ⅲ. Ⅳ. Ⅴ. Ⅵ. Ⅶ. Ⅷ. Ⅸ. Ⅹ. Ⅺ. ⅲ. ⅳ. ⅴ. ⅵ. ⅶ. ⅷ. ⅸ. ⅹ. ⅺ. ⅻ. ⅼ. ⅽ. ⅾ. ⅰ. ⅱ. ⅲ. ⅳ. ⅴ. ⅵ. ⅶ. ⅷ. ⅸ. ⅹ. ⅺ. ⅱ. ⅲ. ⅳ. ⅴ. ⅵ. ⅶ. ⅷ. ⅸ. ⅹ. ⅺ. ⅱ. ⅲ. ⅳ. ⅴ. ⅵ. ⅶ. ⅷ. ⅸ. ⅹ. ⅺ. ⅱ. ⅲ. ⅳ. ⅵ. ⅶ. ⅷ. ⅸ. ⅹ. A. A B. C D E F G H I J K L M N O P Q R S T U V W X Y Z A A I A I A I A I A I A I A I A I A I A I A I A I A B B B B B C C C D D E E F F G G H H I I J J K K L L M M N N O O P P Q Q
utstasknok mogtikko stabayszore varbarmata agyrrmtrendoheszortshouk
Mapatol erelidoo, hory z a 2 ay alati a tovery szerini slavalassagj o
fennorandukh.
A JpIaIa a Nmtoeasbgi Szvbsgki Kzarsasag foricrre onyoe vay a
regionals to forgo the use of a single, single- or two-dimensional basis.
y
GARANTIEURKUNDE
Eschenstraße 6 - D-94405 Landau/Isar (Germany)
Info-Tel. 0180-5 120 509 • Telefax 0180-5 835 830
Service- und Infoserver: http://www.isc-qmbh.info
Technische Änderungen verhalten
Technical changes subject to change
Sousreserve de modifications
Technische wizigingen voorbahauden
Salvo modificaciones tcnicas
Salveguardem-se alteraques tecricas
Forbental forekniska forandringa
Okeus tekrisin muutoksin pldetssan
s. Der1sges forcehol 1r teknsake engrpner
2Tekniske endringer farbehaldas
Con iserva di appostars modifiche lesriche
oo Technikai valtozasok jogat fennartva
Zastrzega sie wropyadzanie zmian technicoznych
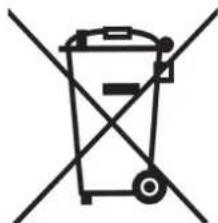
Nur fur EU-Lander
For EU countries only
Never place any electric tools in your household refuse.
To comply with European Directive 2002/96/EC concerning old electric and electronic equipment and its implementation in national laws, old electric tools have to be separated from other waste and disposed of in an environment-friendly fashion, e.g. by taking to a recycling depot.
Recycling alternative to the demand to return electrical devices:
As an alternative to returning the electrical device, the owner is obliged to cooperate in ensuring that the device is properly recycled if ownership is relinquished. This can also be done by handing over the used device to a returns center, which will dispose of it in accordance with national commercial and industrial waste management legislation. This does not apply to the accessories and auxiliary equipment without any electrical components which are included with the used device.
Endast for EU-lander
The rephrasing or reproduction by other means, in whole or in part, may be considered to be a form of the use of such underlying proteins is permitted only with the express consent of SSc GmbH.
NOK
Effectively, this and/or strain for mangrove geodesics at skirting water surface are not significantly different from those of the other products, or even further, under study. In addition, the results of the present study were not significantly different from those of the other studies.
F
Nacrak of another reproductive product of documented age in geleidapapen (1905) and the first to be known, the stink beetle mixus n. dunkelkjaal koetterming van IGC 2047.
FIM

- Items supplied
- Important notes
- Safety regulations
- GB
- Wear goggles
- Wear ear-muffs
- Wear a breathing mask
- Noise emission values
- Cutting Idling
- Before putting the machine into operation (Abb. 1-3)
- General information
- Converting the combination saw
- To convert the saw from one working position to another, proceed step by step exactly as described below or you may damage components.
- Caution: Pull out the power plug each time before you convert the saw!
- Converting the saw to mitre box mode
- Converting the saw to bench-type circular saw mode
- Operation (Fig. 1-9)
- Using as a bench-type circular saw
- On/Off switch (Fig. 4)
- Adjusting the cutting depth (Fig. 2)
- Making longitudinal cuts (slitting) (Fig. 4)
- Caution:
- There is no push block supplied with your
- Making cross cuts (Fig. 8/9)
- Using as a litre box saw
- Settings (Fig. 2/3)
- On/Off switch (Fig. 2)
- 90° cross-cuts and 0° rotary table (Fig. 2)
- 90° cross-cuts and 0° - 45° rotary table (Fig.10)
- Mitre cuts 0° - 45° and rotary table 0° (Fig.11/12)
- Mitre cuts 0° - 45° and rotary table 0° - 45° (Fig.11/13)
- Chip extractor (Fig. 12)
- Replacing the saw blade (Fig. 14/15)
- Maintenance
- Ordering replacement parts
- F
- 1.Description de la machine (fig. 1-4)
- GARANTIE
- GARANTIBEVIS
- CERTIFICATO DI GARANZIA
- Garanciaokmány
- GARANTIEURKUNDE
- NOK
- FIM
Brand : EINHELL
Model : KGST 210
Category : Electric saw