E5080 - Weather Station Emos - Free user manual and instructions
Find the device manual for free E5080 Emos in PDF.
| Product type | Wireless weather station |
| Brand | Emos |
| Model | E5080 |
| Sensor dimensions | 21 × 60 × 100 mm |
| Sensor weight (without batteries) | 54 g |
| Station power supply | 3 AA 1.5 V alkaline batteries |
| Sensor power supply | 2 AAA 1.5 V alkaline batteries |
| Indoor temperature range | -10 °C to +50 °C |
| Outdoor temperature range | -40 °C to +70 °C |
| Temperature accuracy | ±1 °C |
| Indoor humidity range | 1% to 99% RH |
| Outdoor humidity range | 20% to 95% RH |
| Humidity accuracy | ±2% RH (20-80%), ±4% RH (other ranges) |
| Barometric pressure range | 300 hPa to 1,200 hPa |
| Wireless sensor frequency | 433 MHz |
| Radio signal range | Up to 30 m in open air |
| Maximum number of connectable sensors | 3 |
| Radio-controlled clock | DCF77 |
| Backlit display | Yes (10 seconds on demand) |
| Main functions | Indoor/outdoor temperature, humidity, pressure, weather forecast, dew point, mold index, feels-like temperature, dual alarm with snooze, trends |
| Maintenance and cleaning | Soft slightly damp cloth; do not use solvents |
| Safety | Do not expose to weather (except splash-resistant sensor), do not open, use alkaline batteries only |
| Repairability | Do not repair yourself; contact the retailer |
Frequently Asked Questions - E5080 Emos
User questions about E5080 Emos
0 question about this device. Answer the ones you know or ask your own.
Ask a new question about this device
Download the instructions for your Weather Station in PDF format for free! Find your manual E5080 - Emos and take your electronic device back in hand. On this page are published all the documents necessary for the use of your device. E5080 by Emos.
USER MANUAL E5080 Emos
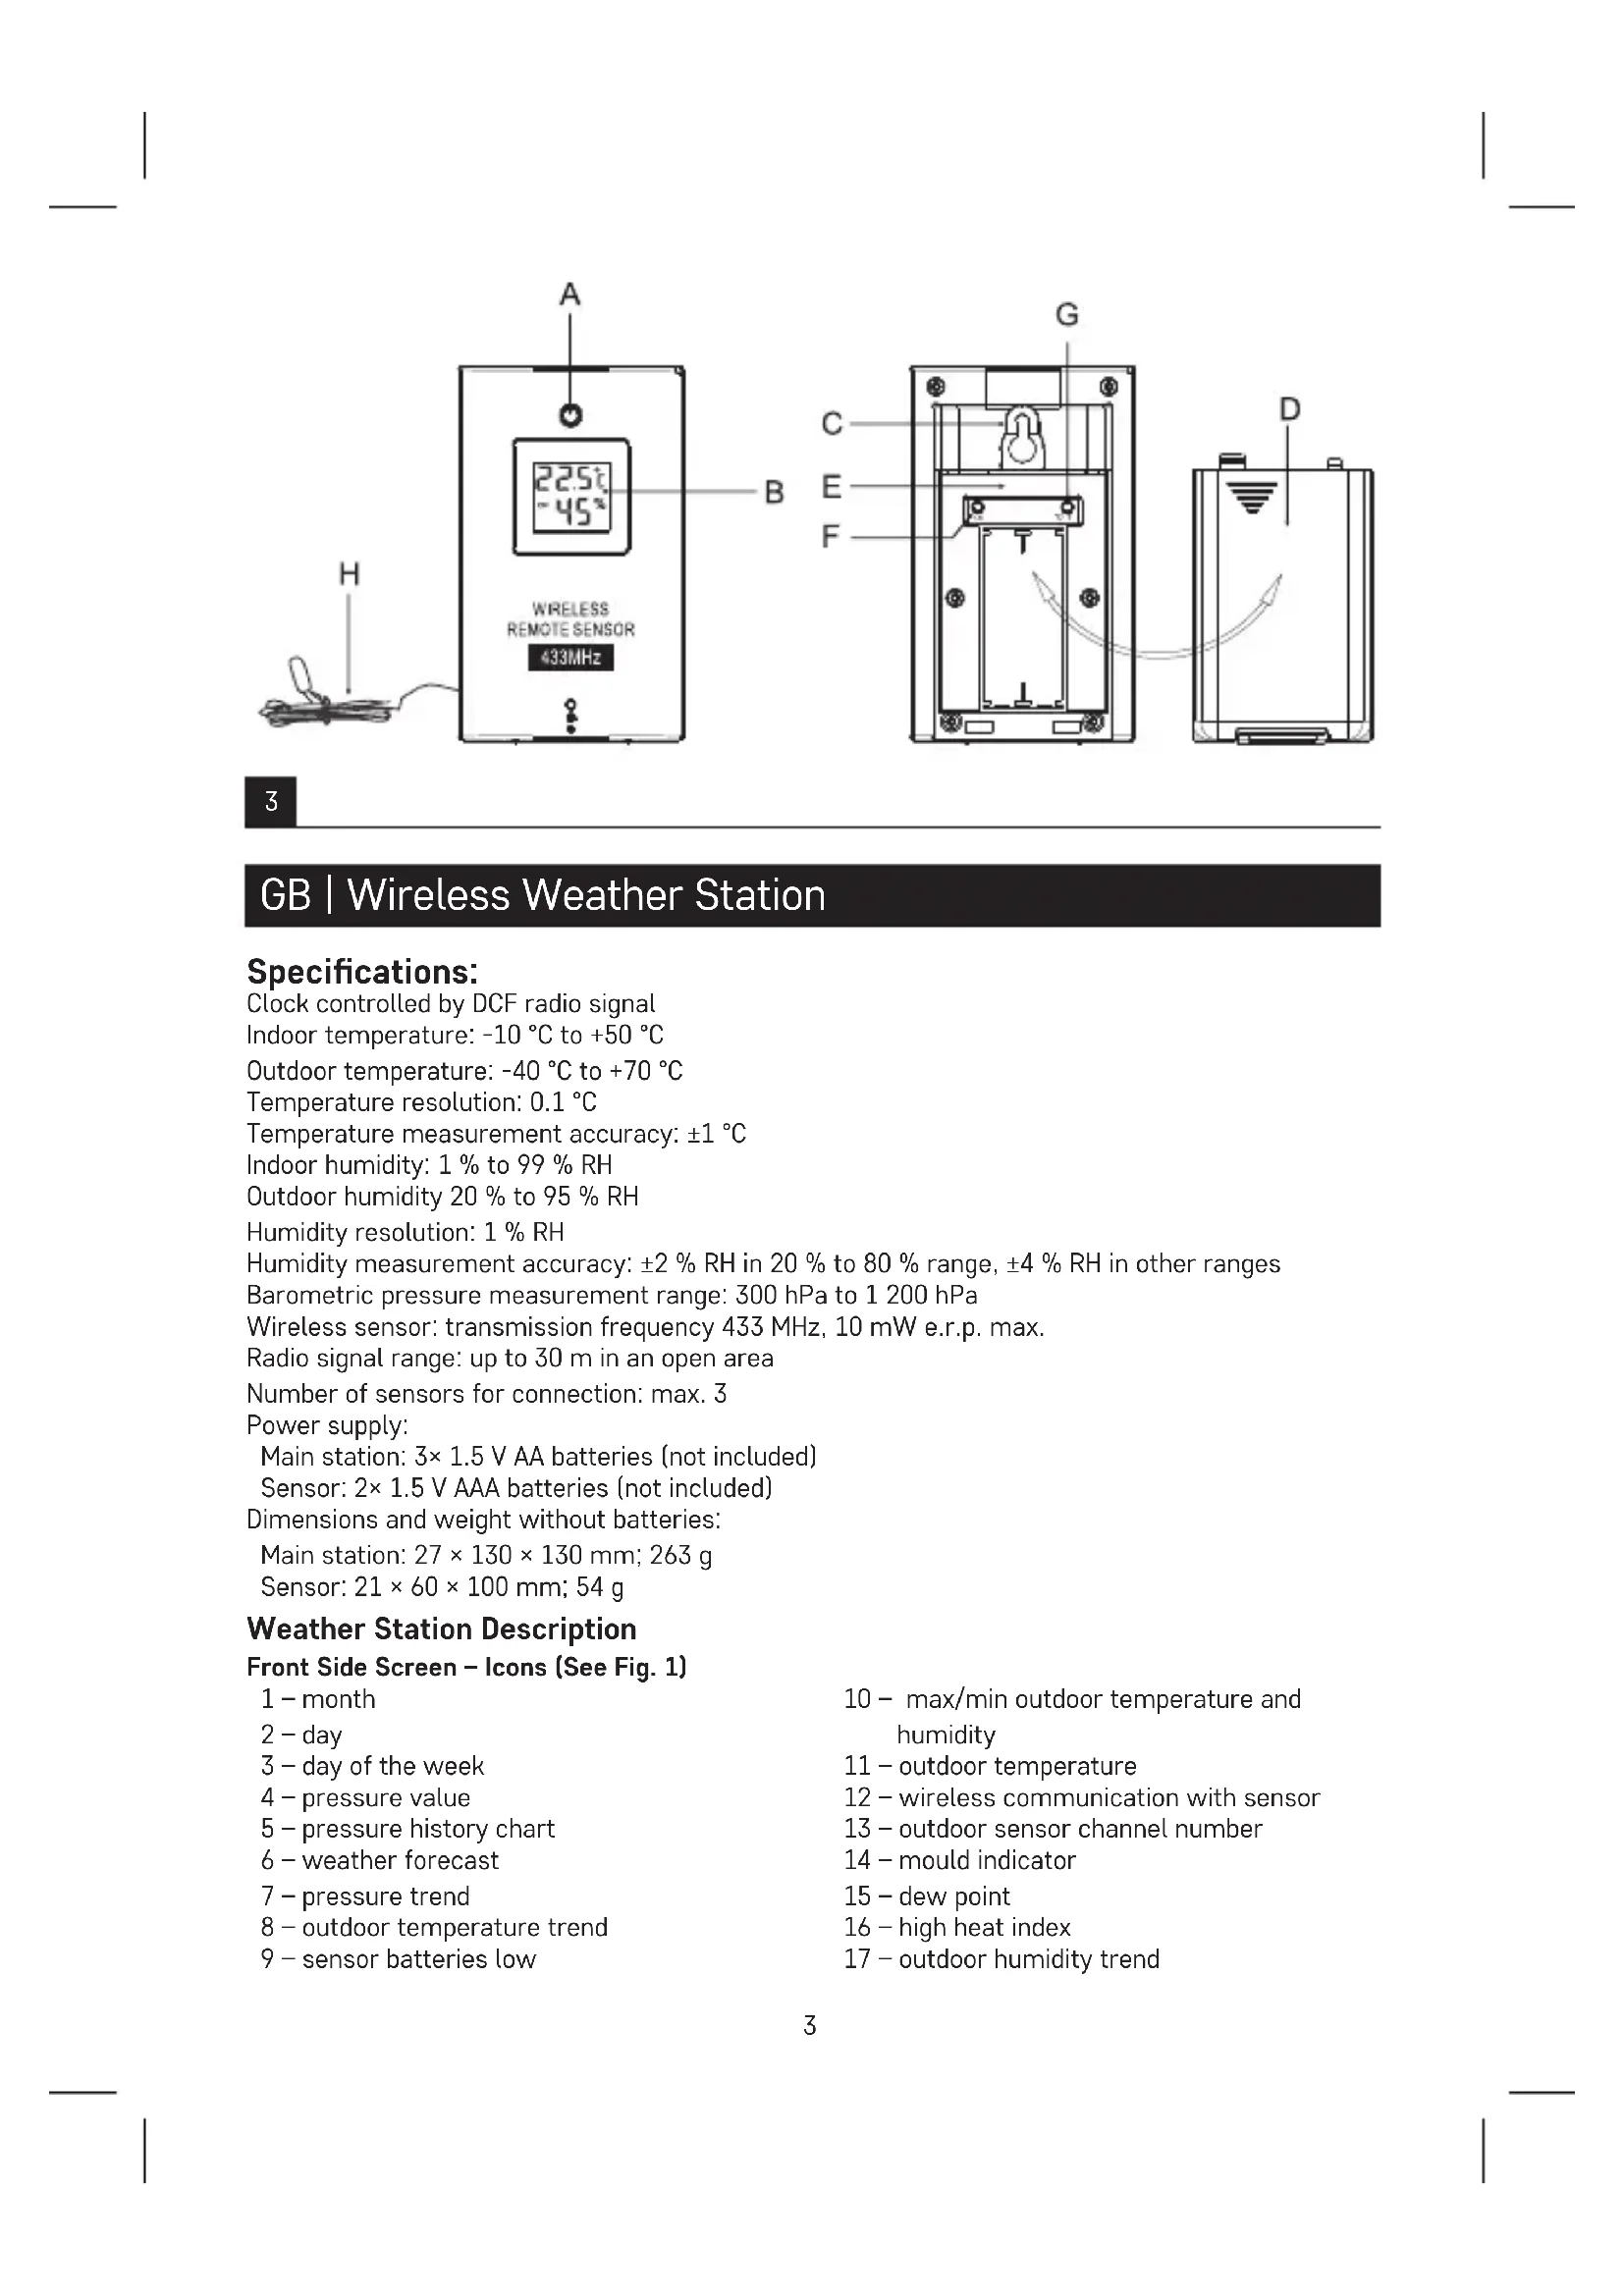
GB | Wireless Weather Station
Specifications:
Clock controlled by DCF radio signal
Indoor temperature: -10 °C to +50 °C
Outdoor temperature: -40 °C to +70 °C
Temperature resolution: 0.1 °C
Temperature measurement accuracy: ±1 °C
Indoor humidity: 1 % to 99 % RH
Outdoor humidity 20 % to 95 % RH
Humidity resolution: 1 % RH
Humidity measurement accuracy: ±2 % RH in 20 % to 80 % range, ±4 % RH in other ranges
Barometric pressure measurement range: 300 hPa to 1 200 hPa
Wireless sensor: transmission frequency 433 MHz, 10 mW e.r.p. max.
Radio signal range: up to 30 m in an open area
Number of sensors for connection: max. 3
Power supply:
Main station: 3× 1.5 V AA batteries (not included)
Sensor: 2× 1.5 V AAA batteries (not included)
Dimensions and weight without batteries:
Main station: 27 × 130 × 130 mm; 263 g
Sensor: 21 × 60 × 100 mm; 54 g
Weather Station Description
Front Side Screen – Icons (See Fig. 1)
1 - month
2-day
3-day of the week
4 - pressure value
5 - pressure history chart
6 - weather forecast
7 - pressure trend
8 - outdoor temperature trend
9 - sensor batteries low
10 - max/min outdoor temperature and humidity
11 - outdoor temperature
12 - wireless communication with sensor
13 - outdoor sensor channel number
14 - mould indicator
15 - dew point
16 - high heat index
17 - outdoor humidity trend
| 18 – outdoor humidity | 24 – indoor temperature trend |
| 19 – outdoor clothing index | 25 – indoor temperature |
| 20 – max/min indoor temperature and humidity | 26 – summer time |
| 27 – alarm no.1, 2 activation | |
| 21 – station batteries low | 28 – time |
| 22 – indoor humidity trend | 29 – DCF signal reception |
| 23 – indoor humidity |
Rear and Sides of the Weather Station (See Fig. 2)
| 1 – SNOOZE/LIGHT button | 8 – AL 1 button |
| 2 – hole for hanging | 9 – AL 2 button |
| 3 – battery compartment | 10 – MODE button |
| 4 – RESET button | 11 – + button |
| 5 – stand | 12 – - button |
| 6 – ALARM button | 13 – CH button |
| 7 – AM/PM button |
Sensor Description (See Fig. 3)
| A – LED of signal transmission from the sensor | E – battery compartment |
| F – CH button (sensor channel number setting - 1/2/3) | |
| B – sensor screen | |
| C – hole for hanging | G – °C/°F button |
| D – battery cover | H – wired temperature probe (1 m) |
Attention
Only use 1.5 V alkaline batteries of the same type; do not use rechargeable 1.2 V batteries.
Lower voltage may cause both of the units to not function.
Getting Started
- First insert batteries (3× 1.5 V AA) into the weather station, then into the wireless sensor (2× 1.5 V AAA). Make sure the polarity is correct when inserting the batteries to avoid damaging the weather station or sensor.
- Once batteries have been inserted into the weather station, the screen will briefly light up and the pressure unit icon will start flashing – set it using the +/- buttons, confirm by pressing SNOOZE/LIGHT.
- The pressure value will start flashing – set it using the +/- buttons, confirm by pressing SNOOZE/LIGHT.
- The forecast icon will start flashing – set it using the +/- buttons and confirm by pressing SNOOZE/LIGHT. The setting process will be automatically interrupted if you do not press any button for 20 seconds.
- The icon for wireless communication with sensor 🐘) will start flashing, indicating that the weather station is searching for signal from the outdoor sensor. Place the two units next to each other. If outdoor temperature does not appear within 3 minutes, the weather station will stop searching for signal, the icon for wireless communication with sensor will stop flashing and outdoor temperature/humidity will be displayed as ---. If signal from the sensor is not detected, repeat the process from step 1.
We recommend placing the sensor on the north side of the house. The range of the sensor may decrease substantially in areas with a large number of obstacles. The sensor is resistant to dripping water; however, it should not be exposed to sustained rain. Do not place the sensor on metal objects as these would reduce transmission range.
The sensor can be placed vertically or hung on a wall.
A sensor with a wired probe can be placed in 2 ways:
- The sensor is located in a room and the wired probe is led to the outside through a gap in the window. In that case, the sensor measures outdoor temperature and indoor humidity.
- The sensor and the wired probe are located outside. In that case, the sensor measures outdoor temperature and humidity.
If the weather station screen shows the low battery icon in field no. 9, replace the batteries in the sensor.
If the weather station screen shows the low battery icon in field no. 21, replace the batteries in the station.
Note: It may take up to 30 minutes since the insertion of batteries into the units before the station begins correctly displaying all measured data and loads DCF time.
Weather Station RESET
If the weather station displays incorrect data or does not respond to button presses, use a thin tool (e.g. a pencil, paper clip) to press the RESET button on the back of the weather station. This will erase all data; you will need to set the weather station again.
Changing Sensor Channel and Connecting Additional Sensors
The station can be paired with up to 3 wireless sensors.
- Long-press the CH button on the station; the icon will start flashing.
- Remove the battery cover on the back of the sensor and insert alkaline batteries (2× 1.5 V AAA).
- Set the sensor channel number (1, 2, 3) of your choice by repeatedly pressing the CH button. The channel number will be displayed on the sensor's screen next to the humidity value. Data from the sensor will be loaded into the station within 3 minutes. Repeat the whole process if the sensor's signal is not detected.
Choose the sensor channel number (1, 2, or 3) by repeatedly pressing the CH button.
The number will be displayed on the station's screen in field no. 13.
Setting the Station to Display Data from Multiple Sensors
Press the CH button on the weather station repeatedly to view data from each connected sensor one by one.
Radio-Controlled Clock (DCF77)
After registering the wireless sensor, the weather station will automatically search for DCF77 signal (hereinafter referred to as DCF) for 7 minutes; the ▲ icon will flash depending on the strength of DCF signal.
During the search, no other data on the screen will be updated and buttons will be disabled (except SNOOZE/LIGHT).
Pressing and holding the AM/PM button for 3 seconds cancels the search for DCF signal.
Signal detected – the icon stops flashing and the current time and date will be displayed with the icon.
Signal not detected – the DCF icon will not be displayed.
To repeat the search for DCF signal for 7 minutes, press and hold the AM/PM button for 3 seconds.
To cancel the search for DCF signal, press and hold the AM/PM button again for 3 seconds.
DCF signal will be synchronised regularly every day between 01:00 and 05:00.
During summer time, the disan will be displayed below the time value.
In standard conditions (at safe distance from sources of interference, such as TV sets or computer monitors), the reception of time signal takes several minutes.
If the weather station does not detect the signal, follow these steps:
- Move the weather station to another location and try to detect the DCF signal again.
- Check the distance of the device from sources of interference (computer monitors or television sets). It should be at least 1.5 to 2 m during the reception of signal.
- When receiving DCF signal, do not place the weather station in the proximity of metal doors, window frames and other metal structures or objects (washing machines, dryers, refrigerators etc.).
- DCF signal reception is weaker in reinforced concrete structures (cellars, high-rise buildings etc.), depending on the conditions. In extreme cases, place the weather station close to a window in the direction of a transmitter.
The reception of DCF radio signal is affected by the following factors:
- Thick walls and insulation, basements and cellars.
- Inadequate local geographical conditions (these are difficult to assess in advance).
- Atmospheric disturbances, thunderstorms, electrical appliances with no interference elimination, television sets and computers located near the DCF receiver.
If the weather station cannot detect the DCF signal, time and date must be set manually.
Note: If the weather station detects the DCF signal but the current time on the display is incorrect (e.g. shifted ±1 hour), you must set the correct time zone for the country where you are using the station, see Manual Setting of Time and Date. The current time will be shown with the appropriate time zone difference.
Manual Setting of Time and Date
- Press and hold the MODE button for 3 seconds.
- Use + or - to set the following parameters: time zone - year - month - day - calendar language (GER, FRE, SPA, ITA, DAN, DUT, ENG) - date display format - hours - minutes.
12/24 Hour Time Format
Set the time format to 12 or 24 h by repeatedly pressing the AM/PM button.
Setting an Alarm
The weather station allows you to set 2 separate alarm times. Press the ALARM button repeatedly to view the alarm time for alarm no. 1 (A1) or 2 (A2). Then long-press the ALARM button; the time value will start flashing.
Set the time by repeatedly pressing the + or - button; to navigate in the menu, press the ALARM button again.
You can set the time for both alarms this way. To activate alarm no. 1 move the AL 1 button to the ON position.
The icon will be displayed. To activate alarm no. 2 move the AL 2 button to the ON position.
The icon will be displayed. The alarm will then trigger at the set time. To deactivate the alarm, move the AL 1/AL 2 button to the OFF position.
Snooze Function
Alarm ringing can be postponed by 5 minutes using the SNOOZE/LIGHT button located on the top of the weather station.
Press the button when the alarm starts ringing. The alarm icon and Zz icon will be flashing.
To cancel SNOOZE mode, press any other button except SNOOZE/LIGHT – the icon will stop flashing and will remain on the screen.
The alarm will be re-activated the next day.
If you do not press any button while the alarm is ringing, the ringing will stop automatically after 2 minutes.
The alarm will trigger again the next day.
Screen Illumination
Press the SNOOZE/LIGHT button to activate screen illumination for 10 seconds.
Setting °C/°F Temperature Unit
Repeatedly press the MODE button to set the temperature unit (°C/°F).
Displaying Maximum and Minimum Temperature and Humidity Readings
Repeatedly pressing the + button will gradually display the maximum (MAX icon) and minimum (MIN icon) temperature and humidity readings.
To manually erase the memory of measured values, long press the + button.
The memory of measured values is automatically erased every day at 00:00.
Atmospheric Pressure/History
The station displays atmospheric pressure in hPa/inHg in field no. 4 and also shows a pressure history in the last 12 hours in field no. 5. When the station is moved to a new location, the measured values will be affected. Measurement will stabilise within 12 hours of battery insertion or station relocation.
Setting the Pressure Unit/Pressure Value/Weather Forecast Icon
Long-press the SNOOZE/LIGHT button.
Set the pressure unit (hPa, inHg) using the + and - buttons.
Confirm by pressing SNOOZE/LIGHT.
You can then set the pressure value using the + and - buttons.
This value is used to make pressure calculation more accurate.
You can find the pressure value at your location on the Internet, for example.
Confirm the value by pressing SNOOZE/LIGHT.
The weather forecast icon will start flashing.
Set the icon based on the current weather using the + and - buttons.
This is used to make the forecast calculation more accurate.
Confirm by pressing SNOOZE/LIGHT.
Mould/Dew Point/Heat Indication
1. Press the - button
An indicator of the risk of indoor mould will appear on the screen:
0 - no risk
LOW - low risk
MED - medium risk
HI - high risk
2. Press the - button 2×
An indicator of the risk of outdoor mould (MOLD) will appear on the screen:
0 - no risk
LOW - low risk
MED - medium risk
HI - high risk
3. Press the - button 3×
The outdoor drew point (DEW) value will appear on the screen.
Dew point is the temperature at which air becomes fully saturated with water vapour, which then start condensing in the form of water droplets.
4. Press the - button 4×
The outdoor heat index (HEAT) will appear on the screen.
The value is only displayed if outdoor temperature is over 28 °C.
Outdoor Clothing Index
The icon for recommended clothes changes based on outdoor temperature.
It is displayed in field no. 19.
It is displayed separately for each connected sensor.
COLD | COMFORT[5KxH] | HOT | |
| Outdoor temperature <18 °C 18 °C to 28 °C >28 °C | |||
Temperature/Humidity/Pressure (Weather) Trend
The icon for outdoor temperature and humidity trend is shown in field no. 8 and 17.
The icon for indoor temperature and humidity trend is shown in field no. 24 and 22.
The pressure trend icon is shown in field no. 7.
| Temperature, humidity and pressure trend indicator | ▼ | ▶ | ▲ |
| falling constant rising | |||
Weather Forecast
The station uses changes in atmospheric pressure to forecast weather for the next 12–24 hours for an area within the radius of 15–20 km.
The accuracy of weather forecast is approximately 70 %. As the weather forecast may not be 100 % accurate, neither the manufacturer nor the seller can be held responsible for any loss caused by an incorrect forecast. When you first set or reset the weather station, it takes approximately 12 hours before the weather station begins forecasting correctly. The weather station shows 7 weather forecast icons.
Note: The currently displayed icon indicates a forecast for the next 12–24 hours. It may not reflect the current state of the weather.
 |  |  |  |  | 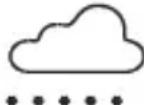 | 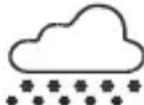 |
| Sunny | Slightly cloudy | Cloudy Rain Heavy rain Storm | Heavy storm | |||
Safety Instructions and Warnings

Read the user manual before using the device.

Follow the safety instructions stated in the manual.
The product is designed to serve reliably for many years if used properly.
- Read the manual carefully before using the product.
- Do not expose the product to direct sunlight, extreme cold and humidity and sudden changes in temperature.
- Do not place the product in locations prone to vibration and shocks – may cause damage.
- Do not subject the product to excessive force, impacts, dust, high temperatures or humidity – doing so may cause malfunction, shorten battery life, damage batteries and deform plastic parts.
- Do not expose the product to rain or moisture if it is not designed for outdoor use.
- Do not place any open flame sources on the product, e.g. a lit candle, etc.
- Do not place the product in places with inadequate air flow.
- Do not insert any objects into the product's vents.
- Do not tamper with the internal electrical circuits of the product – doing so may damage the product and will automatically void the warranty.
- To clean the product, use a slightly moistened soft cloth. Do not use solvents or cleaning agents – they could scratch the plastic parts and cause corrosion of the electric circuits.
- Do not submerse the product in water or other liquids or expose it to dripping or splashing water.
- If the product becomes damaged or defective, do not perform any repairs yourself; bring it for repair to the store where you bought it.
- This device is not intended for use by persons (including children) whose physical, sensory or mental disability or whose lack of experience or knowledge prevents them from using it safely. Such persons should be instructed in how to use the device and should be supervised by a person responsible for their safety.

Do not dispose with domestic waste. Use special collection points for sorted waste. Contact local authorities for information about collection points. If the electronic devices would be disposed on landfill, dangerous substances may reach groundwater and subsequently food, where it could affect human health.
Hereby, EMOS spol. s r. o. declares that the radio equipment type E5080 is in compliance with Directive 2014/53/EU. The full text of the EU declaration of conformity is available at the following internet address: http://www.emos.eu/download.
LOW - geringes Potential
MED - mittleres Potential
HI – hohes Potential
LOW - geringes Potential
MED - mittleres Potential
HI - hohes Potential
Station principale: 3× pile de 1,5 V de type AA (pas fournies)
Station principale: 27 × 130 × 130 mm; 263 g