
E3070 - Weather Station Emos - Free user manual and instructions
Find the device manual for free E3070 Emos in PDF.


| Product Type | Digital Weather Station |
| Brand | Emos |
| Model | E3070 |
| Display | Backlit LCD |
| Dimensions (main unit) | 155 x 95 x 25 mm |
| Weight | 180 g (without batteries) |
| Power supply | 2 AAA batteries (1.5 V) or AC adapter (not included) |
| Outdoor sensor | Wireless, range up to 100 m in open field |
| Outdoor temperature | Measurement from -20 °C to +60 °C |
| Outdoor humidity | Measurement from 1% to 99% RH |
| Indoor temperature | Measurement from 0 °C to +50 °C |
| Indoor humidity | Measurement from 1% to 99% RH |
| Atmospheric pressure | Display in hPa with trend |
| Weather forecast | Forecast icons (sun, clouds, rain, snow) |
| Alarm function | Daily alarm with snooze |
| Clock | 12/24 h display, manual or automatic setting (DCF) |
| Calendar | Date and day of the week |
| Moon phases | Display of moon phases |
| Extreme memory | Recording of min/max temperature and humidity values |
| Care and cleaning | Clean with a soft, dry cloth. Do not use solvents. |
| Safety | Do not expose to water or excessive moisture. Keep out of reach of children. |
| Spare parts and repairability | Sensors can be replaced. Contact customer service for batteries and adapter. |
| General information | 78-page manual available for download. |
Frequently Asked Questions - E3070 Emos
User questions about E3070 Emos
0 question about this device. Answer the ones you know or ask your own.
Ask a new question about this device
Download the instructions for your Weather Station in PDF format for free! Find your manual E3070 - Emos and take your electronic device back in hand. On this page are published all the documents necessary for the use of your device. E3070 by Emos.
USER MANUAL E3070 Emos
GB | Wireless Weather Station
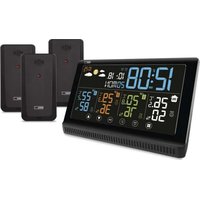
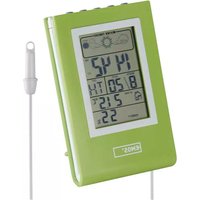
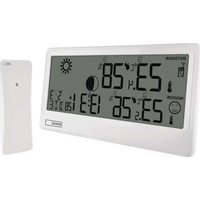
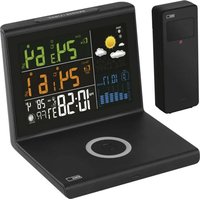
The wireless weather station displays time, date, alarm clock with snooze, the weather forecast, the information about the indoor and outdoor temperature, indoor humidity and the moon phase. Before you start using the product, please read the user manual carefully.
Specification
Radio controlled clock (DCF)
Indoor/outdoor temperature: from 0 °C to +50 °C (precision ±1.5 °C); from -30 °C to +60 °C (precision ±2 °C)
Temperature differentiation: 0.1 °C
Wireless sensor: transmission frequency 433 MHz, 10 mW e.r.p. max.
Transmission distance: up to 30 m in an opened area
Number of sensors: max. 3
Relative humidity: 20% – 90%
Differentiation: 1 %
Accuracy: ±5 %
Power:
Main unit: 3× AAA batteries (not included)
Sensor: 2× AAA batteries (not included)
Dimensions and weight:
Main unit: 139 × 100 × 52 mm; 187 g (without batteries)
Sensor: 64 × 84 × 25 mm; 55 g (without batteries)
Layout of icons and buttons:
Weather station
A - Icon of weather forecast
F – DCF 77 Radio Signal reception Icon
B - Icon of comfort
G - Displays the time
C – Indoor temperature and humidity
H – Displays the date, day in a week
D - Number of the remote sensor
I - Icon of the moon phase
E - Outdoor temperature
| If the button is pressed If holding | the button (3 seconds) | |
| Set changing the time and date setting | setting the time, date, language, calendar, time zone | |
| Alarm | alarm switch off/switch on, change possible during alarm clock setting | alarm clock setting |
| + setting the time format 12/24 h day/year display | ||
| -/Wave changing between °C/°F capturing the DCF 77 signal | ||
| Ch displaying the values from sensors 1, 2, 3 searching the sensor | ||
Remote sensor:
Front side: LED
Rear side: J – setting the channel number 1, 2, 3 for communication with the weather station
Putting into operation
-
Insert the batteries into the station (3× AAA) and then into the remote sensor (2× AAA). When inserting the batteries observe the right polarity of the batteries to avoid the weather station or sensor damage. Use the alkaline batteries of the same kind only, do not use the rechargeable batteries.
-
Place the both units next to each other. The weather station captures the signal from the sensor within 3 minutes. In case the signal from the sensor has not been found, hold the CH button on the weather station to repeat the operation.
-
We recommend to place the sensor to the Northern side of the house. In the built-up areas the transmission distance may rapidly decrease.
-
The sensor is resistant to the dropping water, however do not dispose it to the persistent rain.
-
Do not place the sensor on the metal platforms, this may disturb the signal transmission.
-
If the low batteries icon appears ☐ when displaying the value of humidity, change the batteries in the weather station.
If the low batteries icon appears when displaying the value of the outdoor temperature, change the batteries in the sensor.
Changing the channel and attaching additional sensors
-
By pressing shortly the CH button on the weather station choose the required sensor's channel - 1, 2 or 3. Then hold the CH button, the icon will start flashing.
-
Remove the battery cover at the rear side of the sensor and insert the batteries (2× AAA).
-
Set the required channel No. of the sensor 1, 2, 3 by moving the sliding button.
The information from the sensor will be retrieved within 3 minutes.
- In case the signal from the sensor has not been found, remove the batteries from the weather station and repeat all the steps again.
Radio Controlled Clock (DCF77)
The radio signal is spread by the radio waves (77.5 kHz) to the places in the range of 1 500 km from Frankfurt am Main in Germany. This radio clock signal automatically takes into the account the daylight saving time (DST), leap-years and the date changes.
After registration of the remote sensor, the weather station automatically starts capturing the DCF77 signal. This lasts for 7 minutes and this icon is flashing ▲. During capturing the signal no information on the display will be updated and the button will not be working (except the SNOOZE button). When the signal will be captured – the icon will stop flashing, the current time will be displayed and the following icon will be displayed 🎉. Under this icon the DST icon is displayed – DST.
The signal has not been found – the icon disappeared.
To initiate the DCF77 signal capturing process again, hold the -/Wave button. To cancel the DCF77 signal capturing process, press the -/Wave button again.
DCF77 signal will be synchronized daily from 2.00 a.m. till 5.00 a.m. o'clock. To capture the signal under the normal circumstances (in the save distance from the sources of interference such as TV sets, PC screens) it lasts several minutes. In case the clock does not capture this signal, proceed the following steps:
-
Relocate the weather station into another place and repeat the DCF77 signal capture steps.
-
Check the distance of the clock from the sources of interference such as PC screens TV sets. The distance should be kept at least from 1.5 to 2 meters.
-
Do not put the weather station when capturing the signal close to the metal doors, window frames or any other metal constructions, objects (washing machines, laundry dryers, refrigerators, etc.)
-
Within the iron-reinforced concrete construction premises (basements, high building, etc.) depending on the conditions, the DCF77 signal reception is weaker. In the extreme cases place the weather station close to the window into the direction towards the transmitter.
The quality of the DCF77 radio signal is influenced by the following factors:
- thick walls and insulation, basement and underground premises,
- inappropriate local geographic conditions (difficult to estimate),
• atmospheric disorders, storms, radio interference not suppressed electrical appliances, TV sets and PCs placed close to the radio receiver DCF77.
Manual time and date setting
- Hold the Set button at the rear side of the weather station.
-
With buttons +/- set year - month - day - calendar language (EN - English, GE - German, IT - Italian, FR - French, NE - Dutch, ES - Spanish, DA - Danish) - hour - minutes - time zone.
-
To move from one to another value use the Set button.
- For faster value setting hold the +/- button.
- To set the time format 12/24 press the + button.
Indoor and outdoor temperature and humidity, temperature unit
The indoor temperature and humidity is displayed in the C field.
The outdoor temperature is displayed in the E field.
Press the -/Wave button to choose the temperature unit °C/°F.
Indoor and outdoor temperature trend
Next to the outdoor and indoor temperature the icon of arrow is displayed.
Shows the temperature trend for the next development period.
| indication on display | |||
| temperature trend ascending constant descending | |||
Moon phases
The moon phases are displayed in the I field.
 |  |  |  |  |  |  |  |
| New Moon | Leaving New Moon | First Quarter | Waxing Moon Full moon | moon Waning Moon | Last Quarter | Approaching New moon |
Setting the alarm clock time
Press the Alarm button repeatedly to display either alarm no.1 (A1) or no.2 (A2).
Then long-press the Alarm button and use the +/- buttons to set the alarm time.
Press and hold the buttons to proceed faster.
Confirm the set value by pressing Alarm.
When you are done with setting, press +; the alarm activation icon will be displayed.
Pressing the + button again deactivates the alarm; the icon will not be displayed.
Note: activation applies to both alarms at the same time.
Alarm snooze and the backlight
You can postpone the alarm sound about 5 minutes by pressing the SNOOZE button when the alarm sounds. The "Zz" icon will be displayed. To cancel the snooze function, press any button except the SNOOZE button. If you do not wish to use the snooze function, press the ALARM button when the alarm clock sounds. When pressing the LIGHT button the display backlight will be activated for 5 seconds.
Weather forecast
Based on the atmospheric pressure changes, the weather station forecasts the weather for next 12–24 hours for around 15–20 km radius. The accuracy of the weather forecast is 70–75 %.
Because the weather forecast may not always be 100% exact, the manufacturer or the seller cannot be responsible for any loss caused due to the incorrect forecast.
When you first set or reset the weather station it takes about 12 hours to the station to start correctly predict the weather forecast.
The weather station shows 4 icons of the weather forecast:
 |   |   |   |
| Sunny Clouds | Overcast Rain |
The icon of forecast is in the A field.
Icon of comfort – Smiley
The weather station displays the current level of comfort via 3 icons.
If the humidity is between 40 and 70 % RV and the temperature between 20–26 °C, the icon of comfortable environment appears:
If the humidity is lower than 40 % RV, the icon of dry environment appears: 😊
If the humidity is more than 70 % RV, the icon of moist environment appears: 😊
If the temperature is not in range of 20–28 °C and 40–70 % RV, no icon will be displayed.
Troubleshooting
If the weather station displays wrong or incomplete data, remove the batteries from the device and insert them again.
Care and maintenance
The product has been designed to reliably work for many years when treating it correctly. Here are some tips for proper operation:
- Before using this product carefully read the user manual.
- Do not expose the product to the direct sunlight, extreme coldness, humidity and sudden temperature changes. It would harm the accuracy of perception.
- Do not place the product to locations predisposed to vibration and shock – it can cause damage.
- Do not expose the product to excessive force, shock, dust, high temperature or moisture – this may cause product's incorrect functioning, shorter energetic life span, battery damage and deformation of plastic parts.
- Do not expose the product to rain or moisture, unless is designed for the outdoor use.
- Do not place on the product any sources of fire/flame, e. g. burning candle, etc.
- Do not place the product into the area where there is not available a sufficient air flow.
- Do not insert into the ventilating holes of the product any objects.
- Do not tamper with internal electrical circuits – you can damage it and it will automatically terminate the product's warranty.
- Only the qualified expert is entitled to repair the product.
- To clean the product, use a slightly damp soft cloth. Do not use solvents or cleaning agents – they could scratch the plastic parts and corrode the electronic circuits.
- Do not immerse the product into water or other liquids.
- The product must not be exposed to dropping or splashing water.
- In case of damage or defect of the product do not make any repairs yourself. Pass it to the store where you purchased it.
- This device is not intended to be used by persons (including children) with reduced physical, sensory or mental capabilities, or the lack of experience and knowledge prevents the safe use, unless they are supervised or have been instructed on the use of the device by a person responsible for their safety. It is necessary to supervise the children to make sure they do not play with the device.
Warning
- The manufacturer reserves the right to change the technical parameters of the product.
- The manufacturer and supplier are not responsible for the incorrect operation within the area where the signal interference occurs.
- The product is not intended to be used for the medical or commercial purposes.
- The product contains small parts, hence place it out of reach of children.
- No part of the user manual may be reproduced without the written permission of the manufacturer. Hereby, EMOS spol. s r.o. declares that the radio equipment type E3070 is in compliance with Directive 2014/53/EU. The full text of the EU declaration of conformity is available at the following internet address: http://www.emos.eu/download.
Icona comfort – smiley

- GB | Wireless Weather Station
- Specification
- Layout of icons and buttons:
- Weather station
- Remote sensor:
- Putting into operation
- Changing the channel and attaching additional sensors
- Radio Controlled Clock (DCF77)
- The quality of the DCF77 radio signal is influenced by the following factors:
- Manual time and date setting
- Indoor and outdoor temperature and humidity, temperature unit
- Indoor and outdoor temperature trend
- Moon phases
- Setting the alarm clock time
- Alarm snooze and the backlight
- Weather forecast
- Icon of comfort – Smiley
- Troubleshooting
- Care and maintenance
- Warning
- Icona comfort – smiley
Brand : Emos
Model : E3070
Category : Weather Station