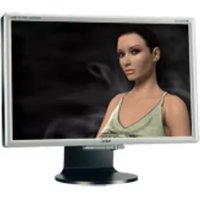
MultiSync V521 - Monitor NEC - Free user manual and instructions
Find the device manual for free MultiSync V521 NEC in PDF.
Questions des utilisateurs sur MultiSync V521 NEC
0 question sur cet appareil. Repondez a celles que vous connaissez ou posez la votre.
Poser une nouvelle question sur cet appareil
Download the instructions for your Monitor in PDF format for free! Find your manual MultiSync V521 - NEC and take your electronic device back in hand. On this page are published all the documents necessary for the use of your device. MultiSync V521 by NEC.
USER MANUAL MultiSync V521 NEC
1. Use the attached specified cables with the N0501/N0701/N9902
color monitor so as not to interfere with radio and television reception. (1) Please use the supplied power cable or equivalent to ensure FCC compliance. (2) Shielded captive type signal cable. Use of other cables may cause interference with radio and television reception.
2. This equipment has been tested and found to comply with the limits
for a Class B digital device, pursuant to part 15 of the FCC Rules. These limits are designed to provide reasonable protection against harmful interference in a residential installation. This equipment generates, uses, and can radiate radio frequency energy, and, if not installed and used in accordance with the instructions, may cause harmful interference to radio communications. However, there is no guarantee that interference will not occur in a particular installation. If this equipment does cause harmful interference to radio or television reception, which can be determined by turning the equipment off and on, the user is encouraged to try to correct the interference by one or more of the following measures:
- Reorient or relocate the receiving antenna.
- Increase the separation between the equipment and receiver.
- Connect the equipment into an outlet on a circuit different from that to which the receiver is connected.
- Consult your dealer or an experienced radio/TV technician for help. If necessary, the user should contact the dealer or an experienced radio/ television technician for additional suggestions. The user may find the following booklet, prepared by the Federal Communications Commission, helpful: “How to Identify and Resolve Radio-TV Interference Problems”. This booklet is available from the U.S. Government Printing Office, Washington, D.C., 20402, Stock No. 004-000-00345-4. 00Cover_all.p65 03.11.2000, 14:39 Uhr2English âesky Deutsch
01b_english 01.11.2000, 11:48 Uhr1English-2 Safety Instruction Caution: When operating the MultiSync V521/V721/V921 with a 220-240V AC power source in Europe except UK, use the power cord provided with the monitor. In UK, a BS approved power cord with moulded plug has a Black (five Amps) fuse installed for use with this equipment. If a power cord is not supplied with this equipment please contact your supplier. When operating the MultiSync V521/V721/V921 with a 220-240V AC power source in Australia, use the power cord provided with the monitor. For all other cases, use a power cord that matches the AC voltage of the power outlet and has been approved by and complies with the safety standard of your particular country. ENERGY STAR
Product As an ENERGY STAR Partner, NEC-Mitsubishi Electronics Display of America Inc. has determined that this product meets the ENERGY STA R guidelines for energy efficiency. The ENERGY STA R emblem does not represent EPA endorsement of any product or service. IBM is registered trademark of International Business Machines CorporationApple and Macintosh are registered trademarks of Apple Computer Inc.Microsoft and Windows are registered trademarks of the Microsoft Corporation. ENERGY STA R is a U.S. registered mark. NEC is a registered trademark of NEC Corporation.All other trademarks or registered trademarks are property of their respective owners.01b_english 01.11.2000, 11:48 Uhr2English-3 English Contents V Series monitor box* should contain the following:
- Captive Signal Cable
- CD-ROM includes complete User‘s Manual in PDF format and Windows related files (Inf file and color profile). To see the complete User‘s Manual, Acrobat Reader 4.0 must be installed on your PC.
- Remember to save your original box and packing material to transport or ship the monitor. 01b_english 01.11.2000, 11:48 Uhr3English-4 Tilt / swivel base fixing, removing Fixing This product consists of the MultiSync monitor and the tilt / swivel base. When fixing the tilt / swivel base to the MultiSync monitor, please follow the steps below.
- Push the six hooks of the tilt / swivel base into the six holes at the bottom of the MultiSync monitor.
- Then slide the tilt /swivel base forward.
- Then the latch above the tilt / swivel base engages it is secure. Removing Please removing the tilt / swivel base when transporting for repair.
- Push down the latch of the MultiSync monitor and pull out the tilt / swivel base.
- Slide backward the tilt / swivel base from the front of the MultiSync monitor.
- Pull out the tilt / swivel base from the holes of the MultiSync monitor. 01b_english 01.11.2000, 11:48 Uhr4English-5 English Quick Start To attach the MultiSync V Series monitor to your system, follow these instruction:
1. Turn off the power to your computer and MultiSync monitor.
2. If necessary, install the display card. For more information, refer to the
cable to the connector of the display card in your system (Figure A.1) Tighten all screws. For the Mac: Connect the Macintosh Cable Adapter (not included) to the monitor connector on the Macintosh (Figure B.1). Attach the 15-pin mini D-SUB end of the captive signal cable to the Macintosh cable adapter on the computer (Figure B.1). Tighten all screws.
4. Connect one end of the power cord to the MultiSync V Series monitor
and the other end to the power outlet (Figure C.1).
5. Turn on the monitor (Figure D.1) and the computer.
6. This completes the installation.
NOTE: If you have any problems, please refer to the Troubleshooting section of this User‘s Manual. Captive Signal Cable 15-pin-mini-D-SUB Figure A.1 01b_english 01.11.2000, 11:48 Uhr5English-6 Figure B.1 Figure C.1 Figure D.1 Computer Mac Adapter (not included) 15-pin mini D-SUB Captive Signal Cable Power Outlet Power cord 01b_english 01.11.2000, 11:48 Uhr6English-7 English Controls OSM (On-screen Manager) control buttons on the front of the monitor function as follows: SELECT Enters and exits the OSM menu. CONTROL-/+ Selects one of the controls and decreases or increases the adjustment. RESET Resets the highlighted control to the factory setting. Press -/+ button at the same time for approximately 1 sec. BRIGHTNESS: Adjusts the overall image and background screen brightness. CONTRAST: Adjusts the image brightness in relation to the background. (Contrast control is also effective with “-,+” button even though OSM window is not visible.) R Red Color Control: Adjust the red contrast of the display. G Green Color Control: Adjust the green contrast of the display. B Blue Color Control: Adjust the blue contrast of the display. Horizontal: Moves the image horizontally left or right. Vertical position: Moves the image vertically up or down. Horizontal size: Decreases or increases the horizontal size of the image. Vertical size: Decreases or increases the vertical size of the image. The Geometry controls allow you to adjust the curvature or angle of the sides of your display. Pincushion/Barrel: Decreases or increases the curvature of the sides either inward or outward. Trapezoid: Decreases or increases the bottom of the screen to be the same as the top. 01b_english 01.11.2000, 11:49 Uhr7English-8 Parallelogram: Decreases or increases the tilt of the sides either to the left or right. Bow (Pincushion Balance): Decreases or increases the curvature of the sides either to the left or right. Rotates: Rotates the image. Degauss: Select the degauss icon on “Icon select window” and push “SELECT” button. It will eliminate the stray magnetic field and correct the scan of the electron beam, which affect the purity, focus and convergence. Note: Allow a minimum interval of 20 minutes to elapse between uses of the degauss function. Color Temperature: Select the Color Temperature icon on “Icon Select Window” and push “SELECT” button. It can be switched to change the color Temperature. (9300K, 7550K, 6550K, user) OSD: There are 3 background colours (Blue, Black, and white). These can be selected by “SELECT” button after the selection of “OSD” on “Icon select window”. EXIT: To exit OSM window. Select EXIT on “Icon select window”, then push “SELECT” button. MultiSync V921 EXIT: To exit OSM window. Select ESC on “Icon select window”, then push “SELECT” button. Horizontal Moiré Canceler: Reduces horizontal moiré levels. Vertical Moiré Canceler: Reduces vertical moiré levels. Note: If you do not push buttons within 10 seconds in OSM condition, the window will automatically disappear. exit (V521/V721)
- DO NOT OPEN THE MONITOR. There are no user serviceable parts inside and opening or removing covers may expose you to dangerous shock hazards or other risks. Refer all servicing to qualified service personnel.
- Use the monitor in a clean, dry area.
- Do not spill any liquids into the cabinet or use your monitor near water.
- Do not insert objects of any kind into the cabinet slots, as the may touch dangerous voltage points, which can be harmful or fatal or may cause electric shock, fire or equipment failure.
- Do not place any heavy objects on the power cord. Damage to the cord may cause shock or fire.
- Do not place this product on a sloping or unstable cart, stand or table, as the monitor may fall, causing serious damage to the monitor.
- Keep the monitor away from high capacity transformers, electric monitors and other devices such as external speakers or fans, which may create strong magnetic fields.
- If possible, position the monitor so that it is facing the east to minimize the effects of the earth‘s magnetic field.
- Changing the direction of the monitor while it is powered on may cause image discoloration. To correct this, turn the monitor off for 20 minutes before powering it back on.
- To separate the equipment from the power source you have to remove the plug from the inlet socket.
- When operating the MultiSync V Series with it is AC 220-240V worldwide power supply, use a power supply cord that matches the power supply voltage of the AC power outlet being used. The power supply cord you use must have been approved by and comply with the safety standards of your country. (Type H05VV-F should be used except in UK) 01b_english 01.11.2000, 11:49 Uhr9English-10
- In UK, use a BS-approved power cord with molded plug having a black (5A) fuse installed for use with this monitor. If a power cord is not supplied with this monitor, please contact you supplier. Immediately unplug your monitor from the wall outlet and refer servicing to qualified service personnel under the following conditions:
- When the power supply cord or plug is damaged.
- If liquit has been spilled, or objects have fallen into the monitor.
- If the monitor has been exposed to rain or water.
- If the monitor has been dropped or the cabinet damaged.
- If the monitor does not operate normally by following operating instructions.
- Allow adequate ventilation around the monitor so that heat can properly dissipate. Do not block ventilated openings or place them monitor near a radiator or other heat sources. Do not put an thing on top of monitor.
- The power cable connector is the primary means of detaching the system from the power supply. The monitor should be installed close to a power outlet which is easily accessible.
- Handle with care when transporting. Save packaging for transporting.
CORRECT PLACEMENT AND ADJUSTMENT OF
- Adjust the monitor height so that the top of the screen is at or slightly below eye level. Your eyes should look slightly downward when viewing the middle of the screen.
- Position your monitor no closer than 30 cm and no further away than 70 cm from your eyes. The optimal distance is 45 cm.
- Rest your eyes periodically by focusing on an object at least 6 m away. Blink often.
- Position the monitor at a 90° Xangle to windows and other light sources to minimize glare and reflections. Adjust the monitor tilt so that ceiling lights do not reflect on your screen.
- If reflected light makes it hard for you to see your screen, use an anti- glare filter.
- Clean your monitor regularly. Use a lint-free, non-abrasive cloth and a non-alcohol, neutral, non-abrasive cleaning solution or glass cleaner to minimize dust.
- Adjust the monitorís brightness and contrast controls to enhance readability.
- Use a document holder placed close to the screen.
- Position whatever you are looking at most of the time (the screen or reference material) directly in front of you to minimize turning your head while you are typing.
- Get regular eye checkups. Ergonomics To realize the maximum ergonomics benefits, we recommend the following:
- Adjust the brightness until the background raster disappears.
- Do not position the contrast controls to its maximum setting.
- Use the preset size and position controls with standard signals.
- Use the preset color setting and sides Left/Right controls.
- Use non-interlaced signals with a vertical refresh rate between 75-120Hz (V521/V721) and 75-160 Hz (V921).