HS20R - Lamp ANSMANN - Free user manual and instructions
Find the device manual for free HS20R ANSMANN in PDF.
| Product Type | Rechargeable portable lamp |
| Model | HS20R |
| Brand | ANSMANN |
| Dimensions (H x W x D) | 214 x 104 x 81 mm |
| Weight | 755 g |
| Battery type | Lithium-ion (Li-Ion) |
| Battery capacity | 10400 mAh / 38.48 Wh |
| Power supply | USB, 5 V / 1.5 A |
| Charging time | Up to 12 h |
| Light source | LED 10 W CREE + 2 x LED 5 W CREE |
| Maximum luminous flux | 1700 lm (100%) |
| Lighting duration (100%) | 7 h (all LEDs) |
| Lighting duration (8%) | 43 h (all LEDs) |
| Flashing alert mode | 210 h (all LEDs) |
| Protection rating | IP20 (indoor charging only) |
| Operating temperature | -10 to 25 °C |
| Charging temperature | 0 to 25 °C |
| Storage temperature | -10 to 60 °C |
| Mounting | Wall mount with charging, magnets |
| Functions | Dimming (8-100%), flashing mode, color filter |
| Maintenance | Soft, dry or slightly damp cloth |
| Warranty | 3 years |
| Protection class | III |
Frequently Asked Questions - HS20R ANSMANN
User questions about HS20R ANSMANN
0 question about this device. Answer the ones you know or ask your own.
Ask a new question about this device
Download the instructions for your Lamp in PDF format for free! Find your manual HS20R - ANSMANN and take your electronic device back in hand. On this page are published all the documents necessary for the use of your device. HS20R by ANSMANN.
USER MANUAL HS20R ANSMANN
Delivery includes. 3
Proper intended use 3
Safety instructions 4
Product description. 5
Mounting. 5
Charging 6
Operation 7
Care and maintenance 8
Technical data 8
Disposal 9
Liability disclaimer 9
Warranty information. 9
DELIVERY INCLUDES
1x Handheld spotlight 1x Orange coloured filter
1x Wall mount 2x Screws
1x USB charge cable 2x Wall plugs
First unpack all parts and check that everything is there and that nothing is damaged. Do not use damaged products. If you find damage to the product, contact your dealer.
PROPER INTENDED USE
The device serves as a mobile light source. It has an integrated rechargeable battery, which can be charged via a Micro-USB connection. The wall mount with charge function provides a secure storage place with quick-release function.
The product is intended exclusively for private household use and not for commercial use.
The close range LED is not suitable for accent lighting.
If the lamp is not held in the hand, it should only be set down on stable and non-slip surfaces that are as close to horizontal as possible.
SAFETY INSTRUCTIONS
Read through the complete operating instructions carefully before using the product for the first time. They contain important information for handling the product. If you pass on the t to third parties, pass on these operating instructions as well.
-
Keep the product and the packaging away from children. This product is not a toy. Children should be supervised in order to ensure that they do not play with the product.
-
This product is not to be used by persons (including children) who have restricted physical, sensory or mental capabilities or who do not have adequate experience or knowledge in handling this product. Such persons must be instructed beforehand by a supervisory person who is responsible for their safety or must be supervised during the use of the product!
-
Risk of death due to electric shock! When drilling the holes, ensure that you do not damage water pipes, electrical wiring or telephone lines. Use a wire/pipe detector.
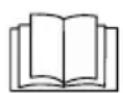
Do not look directly into the light beam.
Do not shine the light in other people's faces. If this occurs for too long, the blue light portion of the beam can cause retinal damage.

The product is categorised as protective class III and thus operates with a non-hazardous voltage range.
Minimum distance from lighted objects to the lamp.
- The light source of this lamp cannot be replaced. If the light source has reached the end of its service life, the whole light must be replaced.
- Do not open or modify the product! Repair work and replacement of the rechargeable battery pack shall only be carried out by the manufacturer or by a service technician appointed by the manufacturer or a similarly qualified person.
- The light shall be used indoors exclusively.
- The USB source to which the product is connected must be able to provide an output current of at least 1.5 A (1500 mA).
- The operating instructions for all other devices to be connected to the product must also be read.
Always keep the product dry
Note:
- This product contains a non-replaceable lithium-ion rechargeable battery. Do not throw the product into a fire.
- Always charge the product in an open and spacious area, away from flammable materials and liquids.
- Disregard can result in burns and fires.
- Never try to open, crush or heat a rechargeable battery or set it on fire.
- Do not use or charge the rechargeable battery if the product appears to be damaged.
- Always dispose of used batteries & rechargeable batteries in accordance with the local regulations and requirements.
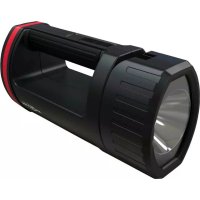
PRODUCT DESCRIPTION (SEE PAGE 2)
1 Joint
10 Micro-USB connection
2 Mode button
11 Strain relief
3 LED selection button
12 USB cable
4 Status LED display
13 Colour filter
5 Mounting magnets
14 Screws
6 Charge contacts
15 Wall plugs
7 Micro-USB connection with rubber cap
16 LED for close range
8 Fastening holes
17 LED for medium range
9 Charge contacts
18 LED for long range
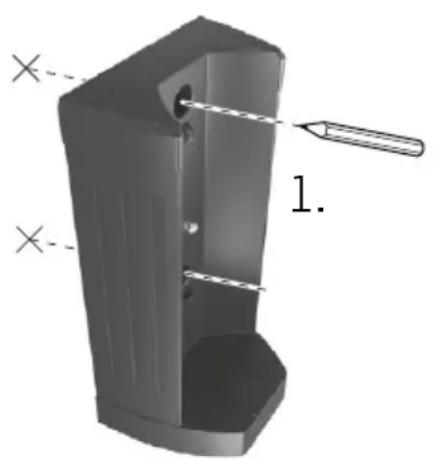
MOUNTING
Note: Mounting only permitted in dry indoor rooms.
1 Use the fastening holes to mark the position of the holes to be drilled.
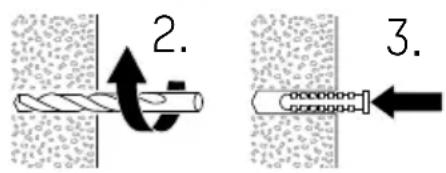
2 Drill the holes.
3 Insert the wall plugs.
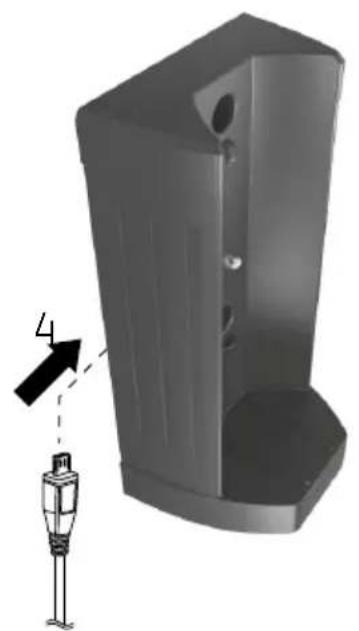
4 Connect the USB cable to the Micro-USB connection on the wall mount.
5 Press the USB cable firmly into the strain relief.
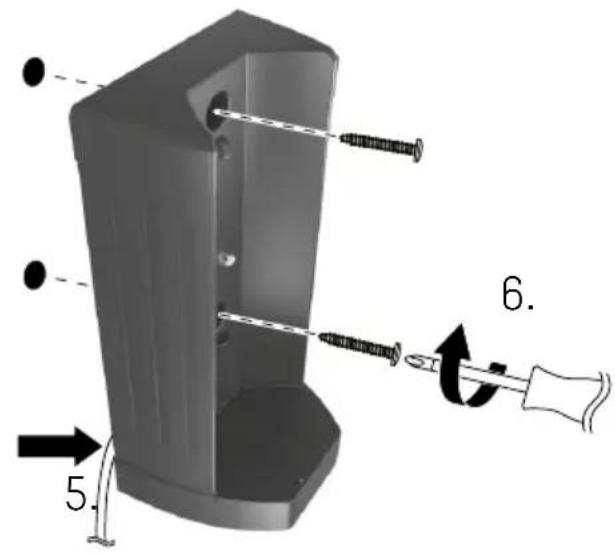
6 Screw the wall mount into place.
7 Connect the USB cable to a USB power source with at least 1.5 A output current.
CHARGING
Option A: Insert the product into the wall mount.
Option B: Charge the product via the integrated Micro-USB connection.
1 Open the rubber cap of the Micro-USB connection.
2 Connect a USB power source with at least 1.5A output current via the USB cable provided.
3 After charging, remove the USB cable and close the rubber cap.
Mains failure electronics
- Start the charge process whilst the product is switched on.
- As soon as the product is supplied with power, it switches off.
- If the power supply is interrupted, the product will switch on automatically with ca. 20% lighting power.
- If the power supply is restored, the product will switch off again.
LED display (charge process)
| Display Rechargeable battery status |
| 3 LEDs (continuously illuminated) Approx. 100 % |
| 3 LEDs (flashing) Approx. 67-99% |
| 2 LEDs (flashing) Approx. 34-66 % |
| 1 LED (flashing) Approx. 0-33 % |
Note: If the product is switched on during the charging process, the lighting power will be reduced to 15% .
OPERATION
| Button Function |
| Mode button Short button press: Switch on/off Press and hold whilst switched off: Soft-start dimming 8-100% Double-click: Warning flashing mode Press and hold whilst switched on: Dimming |
LED selection button LED for close range LED for medium range LED for long range All LEDs simultaneously
- The spotlight can be tilted up to 90^ using the joint.
- The magnets on the bottom of the lamp enable the product to be mounted on most magnetisable surfaces.
- The coloured filter can be fitted to the spotlight if required.
LED display (lighting mode)
| Display Rechargeable battery status |
| 3 LEDs (continuous) Approx. 100-67 % |
| 2 LEDs (continuous) Approx. 66-34 % |
| 1 LEDs (continuous) Approx. 33-11 % |
| 1 LED (flashing) Approx. 10-0 % |
Note: Just before the rechargeable battery is empty, the spotlight flickers 3x every 15 seconds. Approx. 2 minutes of lighting remains at this point. Immediate charging is recommended.
CARE AND MAINTENANCE
Cleaning
- Disconnect the power supply from the product before any cleaning.
- Use only a soft, dry or slightly moist cloth (with a little mild washing-up liquid if required). Do not use abrasive agents or solvents for cleaning.
Maintenance
If the product will not be used for 6 months, the rechargeable battery should be charged in order to preserve its service life.
TECHNICAL DATA
Illuminant. 1x 10 W CREE LED 2x5W CREELED
Risk group 2
Power supply. USB, 5 V=1, 1500 mA
Protection class..
Rechargeable battery............Li-ion, 3.7 V | 10,400mAh | 38.48Wh
Charge time Up to 12 h
Luminous flux............All LEDs: 1700 lm (100%)
Long distance: 950 lm (100%)
Medium distance: 450 lm (100%)
Short distance: 360 lm (100%)
Battery life (100%) .......All LEDs: 7 h
Long distance: 7 h 15 min
Medium distance: 10 h
Short distance: 10 h
Battery life (8 %). All LEDs: 43 h
Long distance: 70 h
Medium distance: 119 h
Short distance: 119 h
Battery life
(warning flashing mode) .......All LEDs: 210 h
Long distance: 325 h
Medium distance: 496 h
Short distance: 496 h
Protection class.....IP20 (charge only in indoor areas)
Storage temperature. -10 to 60^
Operating temperature-10 to 25^
Charge temperature 0 to 25^
USB cable length.Approx. 1.5 m
Weight of light. 755 g
Dimensions (H x W x D)............Lamp 214 x 104 x 81mm
incl. wall mounting 238 × 126 × 91 ~mm
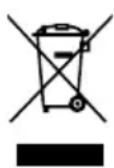
DISPOSAL
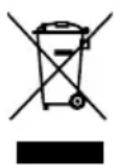
Dispose of unserviceable lights in accordance with legal provisions.
The "waste bin" symbol indicates that, in the EU, it is not permitted to dispose of electrical equipment in household waste.
Use the return and collection systems in your area or contact the dealer from whom you purchased the product.
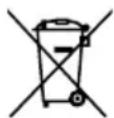
For disposal, pass the device on to a specialist disposal point for old equipment. Do not dispose of the device via household waste as the device contains batteries / rechargeable
batteries. In this way you will fulfil your legal obligations and contribute to environmental protection.
LIMITATION OF LIABILITY
The information contained within these operating instructions can be changed without prior notification. We accept no liability for direct, indirect, incidental or other damage or consequential damage arising though improper handling or through disregard of the information contained within these operating instructions. We accept no liability or warranty claims or guarantee claims in the event of incorrect use of the product.
Your statutory warranty rights are not affected by this.
WARRANTY INFORMATION
The device has a three-year guarantee. The guarantee does not apply to damage to the device arising through a failure to comply with the operating instructions.
Your statutory warranty rights are not affected by this. You can find our warranty terms online at www.ansmann.de.
TRADUCTION DU MODE D'EMPLOI ORIGINAL
PROJECTEUR PORTATIF HS20RPRO
SOMMAIRE
Support mural compris 238 x 126 x 91mm
ÉLIMINATION
REFLECTOR MANUAL HS20RPRO
ÍNDCIDE CONTENIDOS
LANTERNA MANUAL HS20RPRO
INDICE
Volume de fornicamento 3
lantera .1x 10 W CREE LED
2x5W CREE LED
Grupo de risco 2
INDICACAO RELATIVA A GARANTIA
Lunga distance: 950 lm (100%)
Media distance: 450 lm (100%)
Brevendistan:360lm(100%)
Autonomia (100 %)............Tutti i LED: 7 h
Lunga distance: 7 h 15 min
Media distance: 10 h
Brevdistanza:10h
Lunga distance: 70 h
Media distance: 119 h
Brevdistanza:119h
Lunga distance: 325 h
Media distance: 496 h
Brevdistanza:496h
Lamp 1x 10 W CREE LED
2x5W CREE LED
Risicogroep 2
Voeding.. USB, 5V = - 1.500mA
INNHOLDSFORTEGNEALSE
Lang distance: 325 t
Middels distance: 496 t
Kort distance: 496 t
Kapslingsgrad IP20 (skal kun lades innendørs)
97959 Assamstadt | Germany
Hotline: +49 (0) 6294 / 4204 3400
E-Mail: hotline@ansmann.de | www.ansmann.de