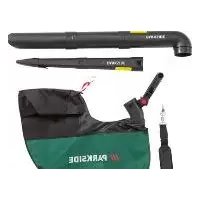
PLSA 40Li C2 - Electric leaf blower PARKSIDE - Free user manual and instructions
Find the device manual for free PLSA 40Li C2 PARKSIDE in PDF.


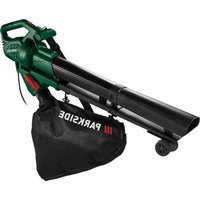
| Product type | Cordless 40 V vacuum blower shredder |
| Brand | Parkside |
| Model | PLSA 40Li C2 |
| Motor voltage | 40 V (2 × 20 V) |
| Max nominal power | 580 W |
| Nominal speed | 6,000 – 19,000 min⁻¹ |
| Max air speed (blowing) | 320 km/h |
| Max suction volume | 576 m³/h |
| Shredding ratio | 8:1 |
| Collection bag capacity | 45 L |
| Sound pressure level | 78.1 dB(A) |
| Guaranteed sound power level | 100 dB(A) |
| Weight (blowing, without battery) | 2.78 kg |
| Weight (suction, without battery) | 3.63 kg |
| Protection rating | IPX0 |
| Compatible battery | Parkside X 20 V TEAM (ex. PAP 20 A1, A2, A3, B1, B3, Smart PAPS 204 A1) |
| Compatible charger | Parkside X 20 V TEAM (ex. PLG 20 A1, A2, A3, A4, C1, C2, C3, PDSLG 20 A1, Smart PLGS 2012 A1) |
| Turbo mode | Yes (max. 15 seconds) |
| Operating modes | Blowing, suction, shredding |
| Warranty | 3 years |
| Maintenance | Clean with a damp cloth; do not immerse or spray with water |
| Safety | Safety contact, automatic shut-off in case of overload, cover lock |
| Spare parts | Available at grizzlytools.shop and from customer service |
Frequently Asked Questions - PLSA 40Li C2 PARKSIDE
User questions about PLSA 40Li C2 PARKSIDE
0 question about this device. Answer the ones you know or ask your own.
Ask a new question about this device
Download the instructions for your Electric leaf blower in PDF format for free! Find your manual PLSA 40Li C2 - PARKSIDE and take your electronic device back in hand. On this page are published all the documents necessary for the use of your device. PLSA 40Li C2 by PARKSIDE.
USER MANUAL PLSA 40Li C2 PARKSIDE

natural_image
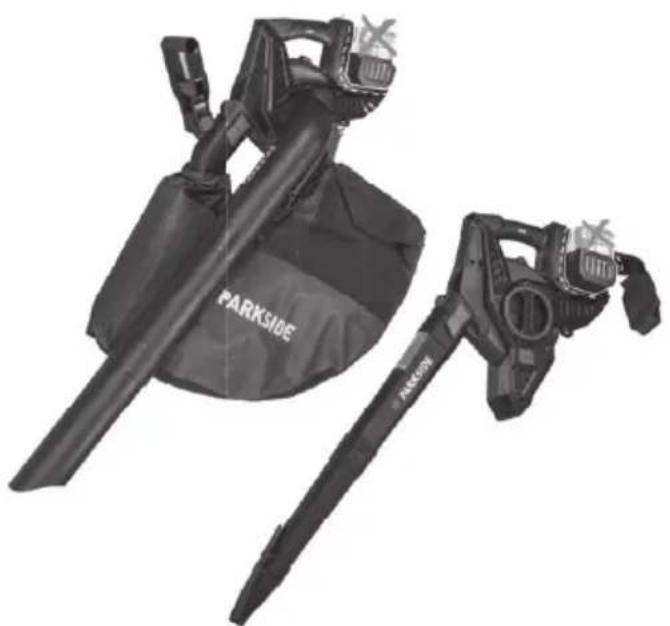
Two black outdoor gear shifters with visible brand logos (PARKSIDE and ARION) and no text or symbols on the main body.Cordless Leaf Blower/Vacuum 40V
Translation of the original instructions
NL BE
Accu-bladzuiger/-blazer 40 V
Before reading, unfold the page containing the illustrations and familiarise yourself with all functions of the device.
FR BE
Service-Center......26
Importeur 26
Original-
General description......28
Scope of delivery - Parts list......28
Function description.... 28
Overview....29
Technical data 29
Safety instructions......30
Symbols and icons 30
General notes on safety 31
Residual risk 37
Initial start-up 37
Charging the battery 37
Remove/insert battery 38
Assembling/dismantling the
blowpipe 38
Assembling/dismantling the
three-piece suction pipe 38
Installing/removing the collection
bag....39
Putting on the carrying strap....39
Operation 39
Switching on and off 40
Turbo mode....40
Checking the charge status of the battery....40
Working with the leaf blower ..... 40
Cleaning and maintenance......42
Cleaning....42
General maintenance 42
Removal of clogging and blockage......42
Storage....43
Disposal and protection of the environment ....43
Trouble shooting ....44
Spare parts/Accessories......45
Guarantee 45
Repair Service......46
Service-Center......46
Importer 46
Translation of the original EC declaration of conformity......260
Exploded Drawing ......271
Introduction
Congratulations on the purchase of your new device. With it, you have chosen a high quality product.
During production, this equipment has been checked for quality and subjected to a final inspection. The functionality of your equipment is therefore guaranteed.

The operating instructions constitute part of this product. They contain
important information on safety, use and disposal. Before using the product, familiarise yourself with all of the operating and safety instructions. Use the product only as described and for the applications specified. Keep this manual safely and in the event that the product is passed on, hand over all documents to the third party.
Intended use
The cordless leaf vacuum and blower is used exclusively in the following two ways:
- As a leaf vacuum, it serves the function of suctioning dry foliage
- It is constructed to collect and remove dry leaves, such as from hard to reach areas. (e.g. under vehicles).
This equipment is not suitable for commercial use. Commercial use will invalidate the guarantee. Any other use that is not specifically approved in these Instructions can result in damage to the blower and give rise to serious danger for the user.
The device must not be employed in areas where there is health endangering dusts or as a wet suction device.
The equipment is designed for use by adults. Adolescents over the age of 16 may use the device only under supervision. The use of the device in the rain or in a humid environment is forbidden.
The user or operator is responsible for accidents causing injury to other people or damage to property.
The manufacturer cannot be held liable for damage when the blower is not used in conformity with its intended purpose or due to incorrect operation.
The device is part of the Parkside X 20 V TEAM series and can be operated using X 20 V TEAM series batteries. The batteries may only be charged using chargers from the Parkside X 20 V TEAM series.
A leaf vacuum is not intended for wet conditions! Avoid wet materials such as leaves and dirt, twigs, branches, pine needles, grass, earth, sand, mulch, cuttings, etc. Do not use on wet lawns, grass areas or fields. Misuse may lead to congestion in the shredding unit and lead to reduced functionality. The machine may need to be completely dismantled and cleaned.
This work should be carried out by a qualified service technician and is not covered by guarantee.
General description
The illustration of the principal functioning parts can be found on the front and back foldout pages.
Scope of delivery - Parts list
Unpack the device and check for completeness. Dispose of the packaging material properly.
- Cordless leaf blower/vacuum
- Blower pipe (three-part)
- Suction pipe (three-part)
- Carrying strap
- Collection bag
- Instructions for use

Battery and charger are not included.
Function description
The cordless leaf vacuum and blower has a leaf aspirator or a fan for suction and blowing.
In blowing mode, you can quickly blow together fallen leaves or blown them out of places that are difficult to reach. In suction mode, the leaves are shredded to save space, and blown out of the ejector outlet into the collection bag.
Refer to the following descriptions for a functional description of the controls.
Overview

1 Motor housing
2 Handle
3 Volume control
3.1 Turbo button
4 On/Off switch
5 Rechargeable battery
5.1 Release button
6 Charger
7 Protective cover, suction aperture
7.1 Marking, protective cover for suction aperture
7.2 Marking, motor housing
8 Locking button for suction aperture
9 Blowpipe (three-part)
10 Locking button for blowing aperture
11 Additional handle
12 Fastening eyelets for carrying strap
13 Carrying strap
14 Collection bag carabiner
15 Collection bag
16 Suction pipe (three-part)
17 Angle adjuster for additional handle
18 Battery charge level indicator
19 Collection bag eyelets
20 Ventilation opening of collection bag
21 Push-fit lock

22 Turbo nozzle
Technical data
Cordless leaf
blower/vacuum .....PLSA 40-Li C2
Motor voltage
40 V = (DC)
(2× 20 V)
Current strength 22 A
Rated power.....max. 580 W
Rated speed n .....6 000 - 19 000 min ^-1
Air speed "Blowing"
operating mode ....max. 320 km/h
vacuum volume: ....max 576 m³/h
Shredding rate....8:1
Collection bag.... 45 l
Protection type....IPXO
Weight (without battery)
Blow function 2,78 kg
Suction function 3,63 kg
Sound pressure level
(L_pA) 78,1 dB (A), K_pA = 3 dB
Sound power level (L _WA )
guaranteed 100 dB(A)
Blowing operating mode:
L measured = 98,1 dB; K = 2,0 dB
Suction operating mode:
L_wa measured = 98,4 dB; K_wa = 1,98 dB
Vibration (a)
handle....1,30 m/s ^2 ; K= 1,5 m/s ^2
additional handle.1,16 m/s ^2 ; K= 1,5 m/s ^3
Noise and vibration values have been determined according to the standards and regulations mentioned in the declaration of conformity.
The stated vibration emission value was measured in accordance with a standard testing procedure and may be used to compare one power tool to another. The stated vibration emission value may also be used for a preliminary exposure assessment.

Warning: The vibration emission
of the power tool from the stated value depending on the manner in which the power tool is used.
Try to keep the exposure to vibrations as low as possible. Examples of measures to reduce vibration exposure are the wearing of gloves when using the tool and limiting the working hours. For this purpose all parts of the operating cycle have to be considered (for example, times when the electric
GB MT
tool is switched off and times when it is switched on but running without any load).
Charging time
The device is part of the Parkside X 20 V TEAM series and can be operated with batteries of the Parkside X 20 V TEAM series. Batteries of the Parkside X 20 V TEAM series may only be charged using chargers of the Parkside X 20 V TEAM series.
We recommend that you operate this appliance with the following batteries only: PAP 20 A1, PAP 20 A2, PAP 20 A3
PAP 20 B1, PAP 20 B3, Smart PAPS 204 A1
We recommend charging these batteries with the following chargers:
PLG 20 A1, PLG 20 A2, PLG 20 A3,
PLG 20 A4, PLG 20 C1, PLG 20 C2,
PLG 20 C3, PDSLG 20 A1,
Smart PLGS 2012 A1
An up-to-date list of battery compatibility can be found at: www.lidl.de/akku
| Charging time (min.) | PAP 20 A1 PAP 20 B1 | PAP 20 A2 | PAP 20 A3 PAP 20 B3 | Smart PAPS 204 A1 | Smart PAPS 208 A1 |
| PLG 20 A1 PLG 20 A4 PLG 20 C1 | 60 90 120 120 210 | ||||
| PLG 20 A2 45 60 | 80 80 165 | ||||
| PLG 20 A3 PLG 20 C3 | 35 45 60 50 | 120 | |||
| PDSLG 20 A1 35 | 45 60 50 120 | ||||
| Smart PLGS 2012 A1 | 35 40 40 40 | 50 | |||
Safety instructions
This section describes the basic safety rules when working with the device.
Symbols and icons
Symbols on the appliance:

Warning!
Read the manual.

For saftey reasons, make sure that the safety cover over the suction opening is securely mounted!

For safety reasons all three suction pipe sections must be correctly mounted before you can start the device. Make sure to use the collection bag in suction mode.

Danger due to materials blown out of machine! Remove persons in the vicinity from the danger area.
Caution.
ting impeller wheel.
o hands away.
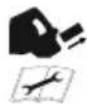
Remove the battery before maintenance work.

Wear eye protection.

Wear ear protection.

Wear breathing protection.

Wear anti-slip safety shoes.
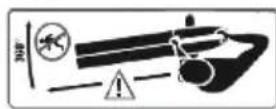
Keep a safety distance of at least 5 m from bystanders.

Do not leave the device in wet conditions. Do not work in the rain

Do not wear long hair uncovered. Use a hair net.
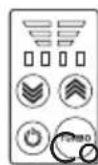
Battery charge level indicator
ntrol panel

Guaranteed sound power level
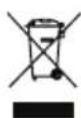
Electrical appliances must not be disposed of with the domestic waste.
The device is part of the Parkside X 20 V TEAM series.
Symbols used in the instructions

Hazard symbol with in- formation on prevention of personal injury and property damage

Hazard symbol with in- formation on the preve- tion of personal injury caused by electric shock

Precaution symbol with information on prevention of harm / damage

Notice symbol with information on how to handle the device properly
General notes on safety
IMPORTANT READ THROUGH CAREFULLY BEFORE USE KEEP IN YOUR FILES
Read the instructions carefully.

Caution! When using power tools, observe the following basic safety measures for the prevention of electric shocks and the risk of injury and fire:
Instruction:

Familiarise yourself with all the unit's parts and correct operation of the unit before you start working with it. Make sure that you can immediately switch off the unit
GB MT
in an emergency. Improper use of the unit may lead to serious injury.
Children, individuals with limited physical, sensory or mental capabilities, as well as those who have insufficient experience or knowledge or are not familiar with the instructions must never be permitted to use the device. Local regulations may specify an age restriction for the user.
Children must be supervised to ensure that they do not play with the device. Cleaning and maintenance must not be carried out by children.
The machine must not be used at altitudes over 2000 m.
Preparation:
- Read the instructions carefully. Familiarise yourself with the controls and how to use the machine correctly.
- Never let children or persons who are not familiar with these instructions use the machine. Local regulations may restrict the age of the operator.
- Never operate the machine if there are people, particularly children or animals, nearby.
- The personal protective equipment protects your own health and the health of others and ensures the smooth operation of the device:
- Wear suitable work clothing, such as sturdy shoes with non-
slip soles, long, robust trousers, gloves, safety goggles and ear protection. Wear these at all times while operating the machine. Never use the device barefooted or wearing open sandals. Wear respiratory protection to protect against dust. - Do not wear loose hanging clothing or jewellery that could be sucked into the air intake. Wear protective headwear to contain long hair. Keep long hair away from the suction apertures.
- Pay attention to people, especially children, pets, open windows, etc. The blown material can be thrown in their direction. Stop working if they are in close proximity. Keep a safety distance of 5 m around you.
- Be familiar with your surroundings and pay attention to potential dangers that may be overlooked when working.
- Carefully inspect the surface to be cleaned and remove all wires, stones, cans and other foreign bodies.
- Use a rake or broom to remove foreign bodies before beginning the blowing/suction process.
- Use both parts of the blowpipe so that the airflow can work close to the ground.
- In very dry conditions, lightly moisten the surface or use a sprayer to reduce the build-up of dust.
- Do not work with a damaged or incomplete device or one which has been converted without the
permission of the manufacturer. Before use, check the safety status of the device, in particular the switch..
- Only use the device when fully assembled.
- Only use the device in suction mode if the collection bag is attached.
Check the collection bag regularly for wear or damage.
- Never operate the device with defective protection equipment or faulty protection covers or without any protection equipment.
- Please be aware that the operator or user is responsible for accidents or injuries to other people or their property.
- Avoid wearing loose clothing, clothing with hanging laces or ties.
- Operate the machine in a recommended position and only when standing on a solid, flat surface.
- Do not operate the machine on a paved surface or a gravel surface where the ejected material could cause injury.
- Always perform a visual inspection prior to use to make sure that the shredding machine (including its bolts) and other fastening equipment are secured, and that the housing is undamaged and the protective equipment and shields are present. Replace worn or damaged components in sets to ensure balance. Replace damaged or illegible markings.
Operation:
- Avoid an abnormal work posture. Always maintain your balance to ensure secure footing on slopes. Walk, do not run.
- Do not switch on the device if it is held upside down or is not in operating position.
Avoid starting the device unintentionally. Make sure that the device is switched off before you pick it up or carry it.
Having your finger on the switch of the device while carrying it can cause accidents.
- Never point the device at others, and in particular, do not point the air jet at the eyes and ears during operation.
- Always ensure secure positioning, particularly on slopes, when working. Always hold the device tightly with both hands and only work with a correctly adjusted carrying strap.
- Do not stretch too far and do not lose your balance.
- Keep fingers and feet away from the suction pipe aperture and impeller. There is a risk of injury.
- If you are tired or lacking in concentration or have consumed alcohol or tablets, do not work with the device. Always have a break on time. Work using common sense. Move slowly, do not run.
- Prolonged use of the device can lead to blood circulation disorders in the hands caused by vibration. You can however
GB MT
extend your machine use time by wearing appropriate gloves or by taking regular breaks.
- Avoid operating the machine in poor weather conditions, especially when there is a lightning hazard. Only work in daylight or where there is good artificial illumination.
- Do not vacuum burning, glowing or smoking materials (e.g. cigarettes, embers etc.), vapours or highly flammable, toxic or explosive substances.
- Stop the machine and remove the batteries from the device. Ensure that all moving parts are at a full standstill:
- when you are not using the device or when you are transporting or leaving it unattended;
- before removing any obstruction or blocked channels,
- before checking, cleaning or carrying out other work on the machine.
- after contact with foreign bodies or if abnormal vibration occurs.
- Do not use the device in a closed or poorly ventilated area.
- Do not use the device near flammable liquids or gases. There is a risk of fire or explosion if this advice is not heeded.
- In the case of an accident or malfunction during operation, the device must be switched off immediately and the batteries removed. Read the "Troubleshooting" section to correct any malfunctions or contact our Service Centre.
- Walk at a steady pace, do not run.
- Ensure that the in-feed is empty prior to starting the machine.
- Keep your face and body away from the in-feed aperture.
- Do not allow hands or other body parts or clothing to enter the in-feed or discharge chute, or to be in the vicinity of moving parts.
- Do not allow processed material to accumulate in the discharge zone, as this can prevent proper discharge and cause the material to be brought back through the in-feed opening.
- When feeding material into the machine, pay special attention not to feed in any metal parts, stones, bottles, cans or other foreign bodies.
- Do not tilt the machine while the power source is running.
- Ensure you are standing securely and do not lose your balance. Avoid an abnormal work posture. When material is being taken in by the machine, never stand on a higher level than the base of the machine.
- Do not stand within the ejection zone while operating the machine.
• Take extreme care when feeding material into the machine to ensure no metallic objects, stones, bottles, canisters or other foreign objects are taken in.
- Do not allow processed material to accumulate in the ejection zone since this can prevent proper ejection and cause the material to be brought back into the
machine via the in-feed aperture.
- If the machine becomes clogged, turn off the power source and disconnect the machine from the mains supply or remove the batteries before freeing any refuse.
- Never operate the machine with defective protective equipment or shields, or without safety equipment, e.g. without the collection bag being connected.
- Keep the power source free of refuse or other accumulated material to prevent it from becoming damaged and to avoid a potential fire.
- Do not transport the machine while the power source is running.
- If the cutting mechanism comes into contact with a foreign object or the machine starts to emit unusual noises or vibrate, immediately turn off the power source and wait for the machine to come to a standstill. Disconnect the machine from the mains supply or remove the batteries and perform the following steps before re-starting and operating the machine:
- investigate for damage;
- replace or repair damaged parts;
- check for loose parts and tighten as necessary.
- Ensure that you do not touch any of the dangerous moving parts before you have unplugged the machine from the mains supply or removed the batteries from the machine, and that the dangerous moving parts have come
to a complete standstill.
- In the case of an accident or malfunction during operation, the device must be switched off immediately. Injuries must be properly treated or medical assistance sought. Read the "Troubleshooting" section to correct any malfunctions or contact our Service Centre.
Maintenance and storage:
- Regularly check the functionality and integrity of the device to avoid danger to the operator.
- Replace worn or damaged parts in the interests of safety. Only use original replacement parts and accessories.
- Do not try to repair the device yourself, unless you have professional training. All work not mentioned in these instructions may only be performed by authorised service representatives commissioned by us.
- Store the device in a dry place and out of reach of children.
- Treat your device with care. Clean the ventilation slits regularly and follow the maintenance instructions.
- Keep all inlets for the cooling air free of debris.
- Do not use the device if the switch cannot be turned on and off. Damaged switches must be replaced at a customer service workshop. Do not overload your device. Only work within the power range indicated. Do not
GB MT
use low-performance machines for heavy work. Do not use the device for purposes for which it is not intended.
- If you stop the machine for maintenance, inspection, storage or to change accessories, switch off the power source, disconnect the machine from the mains supply or remove the batteries, and ensure that all moving parts have come to a standstill. Allow the machine to cool down before inspection, changing settings etc. Maintain the machine with care and keep it clean.
• Always allow the machine to cool down before storage. - Be aware that the shredding machine can always still move even if the power source is switched off by the locking function of the protective equipment. Be aware of this when maintaining the shredding machine.
- Never try to circumvent the locking function of the protective equipment.
Additional safety instructions:
- After they have been joined together, the blowpipes cannot be taken apart again!
- Remove the batteries before installing or removing the collection bag.
- Do not use any accessories that are not recommended by PARKSIDE. This can result in electric shock or fire.
Additional safety instructions for batteries
- Do not recharge non-rechargeable batteries.
- Rechargeable batteries have to be removed from the device before they are charged.
- Do not use different battery types or new and used batteries together.
- Insert the batteries with the correct polarity.
- Remove dead batteries from the device and dispose of them safely.
- If the device is stored for a longer period of time without being used, the batteries should be removed.
!
Observe the safety information and notes on charging and proper use as shown in the instruction manual for your battery and charger from the Parkside X 20 V Team series. A detailed description of the charging process and further information can be found in the separate operating instructions.
Recommendation:
- Avoid operating the machine in poor weather conditions, especially when there is a lightning hazard.
RESIDUAL RISK
Even if properly operating and handling this electric tool, some residual risks will remain. Due to its construction and build, this electric tool may present the following hazards:
a) Ear damage if working without ear protection.
b) Damage to your health caused by swinging your hands and arms when operating the appliance for longer periods of time or if the unit is not held or maintained properly.
c) Lung damage, if suitable respiratory protection is not worn.
d) Eye injuries if no suitable eye protection is worn.

Warning! During operation, this electric tool generates an electromagnetic field which, under certain circumstances, may impair the functionality of active or passive medical implants. In order to reduce the danger of serious or fatal injuries, users who wear medical implants must consult their doctor and the manufacturer of the implant before operating the machine.
Initial start-up
Before operating the device, you must
- insert both rechargeable batteries,
- install the blower or suction pipes,
- install the collection bag for suctioning leaves,
- insert the protective cover for leaf blowing.

The cordless leaf vacuum/blower has a safety contact, which is located in the motor housing
(A 1), where the protective cover (A 7) or the suction pipe (A 6) is mounted. If these contacts are not activated, the device cannot be started!
Pay attention to the correct assembly
- protective cover (7) for blowing mode;
- suction pipe (16) for vacuum mode.

Caution! Risk of injury! During the assembly or disassembly of the blowpipe, suction pipe, protective cover or collection bag, the device must be turned off and all moving parts must have come to a standstill. Remove the batteries before carrying out any work!
Charging the battery

Ensure that the ambient temperature does not exceed 40 °C or fall below 4 °C during the charging process.

If warm, allow the battery to cool before charging.

Do not expose the battery to direct sunlight for long periods and do not place it on a radiator (max. 50°C).
-
Remove the rechargeable batteries (5) from the device, if necessary.
-
Slide the rechargeable batteries (5)
GB MT
onto the charger (6) up to the stop.
- Plug the charger (6) into a socket.
- Once charging is complete, disconnect the charger (6) from the mains supply.
- Remove the battery (5) from the charger (6).
Remove/insert battery
- To remove the battery (5) from the device, press the release button (5.1) on the battery (5) and pull the battery out.
- To insert the battery (5), push the battery (5) along the guide rail into the device. You will hear it click into place.

Only insert the battery once the battery-operated tool is fully ready for use.

Assembling/dismantling the blowpipe

Never use the leaf blower with only one blowpipe section attached. There is a risk of personal injury!

Pay attention to the correct assembly of the protective cover (7), otherwise the leaf blower will not start.
- Assemble the blowpipe (9) as illustrated. The parts click into place. The turbo nozzle (22) can be used optionally (see "Working with the device"). To do this, push the tab of the turbo nozzle (22) onto the lug on the centre blowpipe (9).
- Now push the blowpipe (9) on to the blowing aperture of the motor housing (1) until the blowpipe (9) latches into place.
- Put the protective cover (7) on the suc-
tion aperture. The marking on the protective cover (7.1) and the marking on the motor housing (7.2) must overlap. Push the protective cover (7) into the motor housing (1) until it clicks into place.
- Dismantle the blowpipe (9) by pressing the locking button (10) and pulling off the blowpipe (9).

Assembling/dismantling the three-piece suction pipe

Never use the leaf vacuum with only one suction pipe section attached. There is a risk of personal injury!

After the three-part suction pipe has been assembled, it must not be divided up again into three parts!

Pay attention to the correct assembly of the suction pipe (7), otherwise the leaf blower will not start.
- Open the protective cover (7) of the suction aperture by pushing the lock of the suction aperture (8) in the direction of the suction aperture, lifting the protective cover and pulling the lock (8) away from the suction aperture. You can now remove the protective cover (7).
- Assemble the three suction pipes (16) as illustrated.
When assembling, pay attention to the guide grooves on the suction pipe parts. - Place the suction pipe (16) on the suction aperture in the working direction. The suction pipe (16) can only be
mounted in the correct working direction. Push the suction pipe (16) into the motor housing (1) until it clicks into place.
- Dismantle the suction pipe (16) by pressing the lock of the suction aperture (8) in the direction of the suction aperture, lifting the suction pipe (16) and then pulling the lock away from the suction aperture (8). You can now remove the suction pipe (16).

Installing/removing the collection bag

In suction mode the device must only be operated with the collection bag mounted.
The ventilation opening on the collection bag (20) serves for an improved air circulation.
- If necessary, remove the blowpipe (A 9) (see "Assembling/dismantling the blowpipe").
- Now push the collection bag (15) on to the blowing aperture of the motor housing (1) until it latches with the locking button (10).
- Hook the carabiner (14) of the collection bag into the eyelets (19) provided on the motor housing (1).
Adjusting the additional handle
The additional handle (11) can be locked in various positions.
- Press the angle adjuster (17) on the additional handle (11).
- Adjust the additional handle (11) to the desired position.
- Release the angle adjuster (17).

Putting on the carrying strap

Never wear the carrying strap diagonally across your shoulders and chest: only wear it on one shoulder to ensure you can detach the device quickly from your body in the event of danger.

Pulling the push-fit lock (21) releases the device quickly from the carrying strap. To open the push-fit lock, press the two clamps together.
- Place the carrying strap (13) on one shoulder.
- Adjust the strap length so that the snap hook is approximately 10 cm below your hip.
- Attach the snap hook on the eyelet (12) to insert the strap.
Operation

Caution! Risk of injury!
ays wear appropriate protective equipment and work gloves while working with the device. Prior to each use, ensure that the device is working correctly. Ensure that the device has been mounted properly.
Stop using the device if the On/Off button is damaged.
Personal protective equipment and a fully functional device reduce the risk of injuries and accidents.
GB MT

After the device has been switched off, the impeller continues moving for some time. Injury hazard caused by rotating tool!

Observe noise protection rules and other local regulations.

Switching on and off

The cordless leaf vacuum/blower may only be used with two batteries of the Parkside X 20 V Team series.

Before switching the device on, make sure that it is not touching any objects. Ensure secure positioning.
-
Press and hold the on/off switch (4) to start the device.
-
In order to regulate the suction/blowing power, press the volume control (3).
Pressing ⏻ = one level higher
Pressing Ⓥ = one level lower
The 4 LEDs below the charge level indicator (18) indicate the level of the suction/blowing power.
- To switch off, briefly press the on/off switch (4).
Turbo mode
-
Press and hold the turbo button (3.1) to turn the suction/blowing power to turbo power for a maximum of 15 seconds.
-
Release the turbo button to exit turbo mode.
Checking the charge status of the battery
The charge level indicator (18) shows the charge status of the batteries (5) during operation.
The charge level of the battery is indicated by illumination of the corresponding LED lights.
3 LEDs illuminated (red, orange and green): Battery charged
2 LEDs illuminated (red and orange): Battery partially charged
1 LED illuminated (red): Battery needs to be charged
Working with the leaf blower

The leaf vacuum/blower may only be used for the following purposes:
- As a blower to pile up dry leaf material or to blow material out of places that are hard to access (e.g. under cars)
- As a suction device to suck up dry leaf material. The device also functions as a shredder in the suction function. The dry leaves are shredded and their volume is reduced, preparing the material for later composting if desired. The shredding intensity depends on the size of the leaf material and its residual moisture. Uses other than those described here may damage the machine and put the operator at risk.
During work, ensure that the device is not struck against hard objects, which can cause damage. Do not suck up any solid bodies such as stones, branches or pieces of branch, fir cones or similar, since these can damage the device, in particular the shredding mechanism.
Repairs of this type are not covered by the guarantee.
Blowing operating mode:

For safety reasons, make sure that the protective cover (A 7) is inserted onto the suction aperture.
- You get optimal results when you use the blower with a separation distance to the ground of 5 -10 cm.
- Begin work with the highest blowing power, in order to rapidly pile up the leaves lying around. Select a lower blowing power to compact the previously piled up leaves.
- Before blowing, loosen leaves adhering to the ground with a broom or rake.
- The guide rollers at the end of the tube make it easier to work on flat surfaces.
- Hold the device by the handle (2) when working.
- B Working with two/three blowpipe sections: With two blowpipe sections mounted, you can collect leaves over a wider area. The third, smallest, blowpipe section functions as a turbo nozzle (22). This blowpipe section offers the highest air speed.
Suction operating mode:

For safety reasons, all pipe sections must be correctly mounted before you can start the device.
- Always hold the device tight with both hands during operation: use the handle (A 2) and the additional handle (A 8) for this.
- Make sure the volumes of leaf material sucked in at one time are not too large. This will avoid clogging of the suction tube (A 16) and blockage of the impeller wheel.

To reduce wear on the collection bag, do not drag it along the ground while working.

Overload protection: The motor will cut out immediately if overloaded.
Switch off the leaf vacuum and remove the batteries from the device. Then check whether the impeller is blocked or the collection bag clogged and remove the obstacles if they are.
The tool cannot be used until it has completely cooled down again.

Emptying the collection bag:
With full collection bag, the suction pumping capacity decreases considerably and the collection bag must be emptied when the bag is full or interferes with the suction capacity of the device.
-
Turn off the device and wait until the impeller has stopped.
-
Remove the batteries (A 5) from the device (see "Removing/inserting the battery").
GB MT
- Remove the carabiner (14) from the eyelets (19). Release the collection bag (15) by pressing the lock button (10) and pulling the collection bag (15) off the blowing aperture.
- Open the zip-fastener on the collection bag (15) and empty it completely.
- Mount the emptied collection bag (15) again.

Composting material does not belong with domestic waste!
Cleaning and maintenance

Warning! Risk of injury by dangerous moving parts!
Always clean the device immediately after working with it, as otherwise dirt will become hardened and firmly attached with leaf residues and might prove impossible to remove without dismantling the motor housing. Such cleaning work is not covered by the warranty.

Switch off the device and remove the battery from the device before working with or transporting it.
You should have any repair and maintenance work that is not described in this instruction manual carried out by our Service Centre. Only use original parts.

Do not use any cleaning agents or solvents. Chemical substances may attack the plastic parts of the device.
The following cleaning and servicing should be done regularly. This will ensure a long and reliable service life.
Cleaning

Do not spray the appliance with water and do not immerse it in water. Electric shock hazard!
- Keep clean the ventilation slots, motor housing and handles of the appliance. Use a damp cloth or a brush.
Do not use cleaning agents or solvents. You may otherwise irreparably damage the appliance.
- Clean the collection bag (A 15) using a brush and, if needed, compressed air.
General maintenance
- Prior to every use, check the appliance for obvious defects such as loose, worn or damaged parts.
- Check covers and safety devices for damages and correct installation. Replace as necessary.
Removal of clogging and blockage
Leaf material and fresh plant parts may clog / block the device.
Cleaning the impeller wheel:

Remove the batteries from the device! Risk of injury!
- Open the protective cover (A 7) or remove the suction pipe (A 16). See section "Assembling/dismantling the three-piece suction pipe" and/or "Assembling/dismantling the blowpipe".
- Carefully remove residues or clogging materials from the impeller wheel.
- Check to make sure the impeller wheel
is easier to turn and is in undamaged condition. Have our Service Centre replace a defective impeller wheel.
- Close the protective cover (A 7) or screw the suction pipe (A 16) back into place.
See section "Assembling/dismantling the three-piece suction pipe" and/or "Assembling/dismantling the blow-pipe".

If the protective cover (7) and/or the suction pipe (A 16) is not correctly screwed into place, it is not possible to operate the device.
Storage
- For storage purposes you can remove the blow tube (A 9) and/or the suction tube (A 16) and the catcher (15) from the motor housing (A 1) (see the corresponding installation instructions in the „Start-up“ section).
- Store the device in a dry place well out of reach of children.
Disposal and protection of the environment
Remove the battery from the device and recycle the device, battery, accessories and packaging in an environmentally-friendly manner.
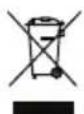
Machines do not belong with domestic waste.
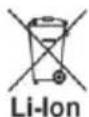
Do not throw batteries into domestic waste, fire (risk of explosion) or water. Damaged batteries can harm the environment and your health if poisonous fumes or liquids escape.
Directive 2012/19/EU on waste electrical and electronic equipment: Used electrical devices must be collected separately for disposal and recycled in an environmentally sound manner.
Depending on the implementation in national law, you may have the following options:
- Return to a shop: Food retailers with a total sales area of at least 800 square metres that offer electric and electronic devices multiple times a year or permanently and distribute them on the market are obligated to take back old electric and electronic devices at no charge. When handing a new electric or electronic device to an end user, they have to take back an old device of the same kind from the end user that essentially ful-fils the same functions as the new device at the site of handover or in the immediate vicinity at no charge as well as take back up to three old devices per device type with external dimensions no larger than 25 centimetres in the retail shop or the immediate vicinity at no charge without the purchase of an electric or electronic device at the request of the end customer.
- Hand over to an official collection point: Take the device to a recycling plant. The plastic and metal parts used on your device can be properly sorted according to materials and grades and efficiently recycled. Please contact our service centre for more information.
- Return to the manufacturer/distributor: We will dispose of any defective devices that you send to us free of charge. Please contact our service centre for more information.
This does not affect accessories enclosed with the old devices or tools without any electrical components.
Dispose of the batteries according to local standards. Defective or used batteries must be recycled in accordance with Directive 2006/66/EC. Hand in the batteries at a used battery collection point where they are recycled in an environmentally friendly manner. For more information, please contact your local waste management provider or our service centre. Dispose of batteries in a discharged state. We recommend covering the contacts with an adhesive strip to protect against short circuits. Do not open the battery.
Feed clippings to composting and do not throw them into the refuse bin.

Trouble shooting
| Problem Possible cause Corrective action | ||
| Device does not start | Battery discharged (5) | Charge the battery(see "Charging the battery") |
| Battery (5) not inserted | Insert the battery (see "Inserting/ removing the battery") | |
| On/off switch (4) is defective | Repair by Service Centre | |
| Defective motor | ||
| Suction pipes (16) and collection bag (15) or blowpipe (9) and protective cover (7) not installed correctly | See the section on "Initial use" | |
| Device works with interruptions | Internal loose contact | Repair by Customer Care |
| On/off switch (4) is defective | ||
| Weak or no suction/blowing power | Low battery power | Charge battery (5)(see "Charging the battery") |
| Collection bag (15) is full | Empty collection bag | |
| Collection bag (15) is dirty | Clean collection bag | |
| Impeller or blowpipe (9) and/or suction pipe (16) is clogged or blocked | see chapter "Removing obstructions and blockages" | |
| Impeller does not move | Foreign body blocking the impeller | Remove the blockage (see "Removing obstructions and blockages") |

Spare parts/Accessories
Spare parts and accessories can be obtained at www.grizzlytools.shop
If you have issues ordering, please use the contact form.
If you have any other questions, contact the "Service-Center" (see page 46).
7 Protective cover for suction aperture 91107000
15+11 Collection bag + additional handle....91105417
9 Blowpipe 91107004
16 Suction pipe 91107003
Guarantee
Dear Customer,
This equipment is provided with a 3-year guarantee from the date of purchase.
In case of defects, you have statutory rights against the seller of the product. These statutory rights are not restricted by our guarantee presented below.
Terms of Guarantee
The term of the guarantee begins on the date of purchase. Please retain the original receipt. This document is required as proof of purchase.
If a material or manufacturing defect occurs within three years of the date of purchase of this product, we will repair or replace – at our choice – the product for you free of charge. This guarantee requires the defective equipment and proof of purchase to be presented within the three-year period with a brief written description of what constitutes the defect and when it occurred.
If the defect is covered by our guarantee, you will receive either the repaired product or a new product. No new guarantee period begins on repair or replacement of the product.
Guarantee Period and Statutory Claims for Defects
The guarantee period is not extended by the guarantee service. This also applies for replaced or repaired parts. Any damages and defects already present at the time of purchase must be reported immediately after unpacking. Repairs arising after expiry of the guarantee period are chargeable.
Guarantee Cover
The equipment has been carefully produced in accordance with strict quality guidelines and conscientiously checked prior to delivery.
The guarantee applies for all material and manufacturing defects. This guarantee does not extend to cover product parts that are subject to normal wear and may therefore be considered as wearing parts (e.g. tubes, collection bag, impeller wheel) or to cover damage to breakable parts (e.g. switches).
This guarantee shall be invalid if the product has been damaged, used incorrectly or not maintained. Precise adherence to all of the instructions specified in the operating
manual is required for proper use of the product. Intended uses and actions against which the operating manual advises or warns must be categorically avoided. The product is designed only for private and not commercial use. The guarantee will be invalidated in case of misuse or improper handling, use of force, or interventions not undertaken by our authorised service branch.
Processing in Case of Guarantee
To ensure quick handling of you issue, please follow the following directions:
- Please have the receipt and identification number (IAN 380756_2110) ready as proof of purchase for all enquiries.
- Please find the item number on the rating plate.
- Should functional errors or other defects occur, please initially contact the service department specified below by telephone or by e-mail. You will then receive further information on the processing of your complaint.
- After consultation with our customer service, a product recorded as defective can be sent postage paid to the service address communicated to you, with the proof of purchase (receipt) and specification of what constitutes the defect and when it occurred. In order to avoid acceptance problems and additional costs, please be sure to use only the address communicated to you. Ensure that the consignment is not sent carriage forward or by bulky goods, express or other special freight. Please send the equipment inc. all accessories supplied at the time of purchase and ensure adequate, safe transport packaging.
Repair Service
For a charge, repairs not covered by the guarantee can be carried out by our service branch, which will be happy to issue a cost estimate for you.
We can handle only equipment that has been sent with adequate packaging and postage.
Attention: Please send your equipment to our service branch in clean condition and with an indication of the defect.
Equipment sent carriage forward or by bulky goods, express or other special freight will not be accepted.
We will dispose of your defective devices free of charge when you send them to us.
Service-Center
GB Service Great Britain Tel.: 0800 404 7657
E-Mail: grizzly@lidl.co.uk
IAN 380756_2110
MT Service Malta Tel.: 80062230
E-Mail: grizzly@lidl.com.mt
IAN 380756_2110
Importer
Please note that the following address is not a service address. Please initially contact the service centre specified above.
Service-Center....70
Importateur 70
Protection anti-surcharge:
Service-Center....90
Importeur....90
Reserveonderdelen/ Accessoires ....91
A 15+11 Vangzak + hulphandgreep....91105417
A 9 Blaaspijp 91107004
Service-Center......112
Importer 112
Service-Center....133
Dovozce....133
PAP 20 B1, PAP 20 B3,
Smart PAPS 204 A1
Service-Center....153
Dovozca....153
Service-Center....173
Importør 173
Service-Center......217
Pooblaščeni serviser:
Tel.: 080080917
E-Mail: grizzly@lidl.si
(Birotehnika, Hodošček Renata s.p., Lendavska ULICA 23, 9000 Murska Sobota)
Garancijski list
| GBMT | Translation of the original EC declaration of conformity | |
| We hereby confirm that the Cordless Leaf Blower/Vacuum 40V model PLSA 40-Li C2 serial number 000001 - 065000 conforms with the following applicable relevant version of the EU guidelines: | ||
| 2006/42/EC • 2014/30/EU • 2000/14/EC & 2005/88/EC 2011/65/EU* & (EU)2015/863 | ||
| In order to guarantee consistency, the following harmonised standards as well as national standards and stipulations have been applied: | ||
| EN 60335-1:2012/A15:2021 • EN 50636-2-100:2014 EN 62233:2008 • EN ISO 12100:2010 EN 55014-1:2017/A11:2020 • EN 55014-2:2015 EN IEC 55014-1:2021 • EN IEC 55014-2:2021 EN IEC 63000:2018 | ||
| We confirm the following in accordance with the 2000/14/EC emissions guideline: Sound power level: guaranteed: 100 dB(A) Blowing operating mode measured: 98,1 dB(A) Suction operating mode: measured: 98,4 dB(A) Compliance evaluation process carried out in accordance with Appendix V/ 2000/14/EC | ||
| This declaration of conformity is issued under the sole responsibility of the manufacturer: | ||
 | Grizzly Tools GmbH & Co. KG Stockstädter Straße 20 D-63762 Großostheim Germany 30.05.2022 |  Christian Frank Documentation Representative Christian Frank Documentation Representative |
* The object of the declaration described above satisfies the provisions of Directive 2011/65/EU of the European Parliament and the Council of 8 June 2011 on limiting the use of certain harmful substances in electrical and electronic appliances.
IAN 380756_2110

| GBMT | Translation of the original EC declaration of conformity | |
| We hereby confi rm that the Cordless Leaf Blower/Vacuum 40V model PLSA 40-Li C2, serial number 000001 - 065000 conforms with the following applicable relevant version of the EU guidelines: | ||
| 2006/42/EC • 2014/53/EU • 2000/14/EC & 2005/88/EC 2011/65/EU* & (EU)2015/863 | ||
| In order to guarantee consistency, the following harmonised standards as well as national standards and stipulations have been applied: | ||
| EN 60335-1:2012/A15:2021 • EN 50636-2-100:2014 EN ISO 12100:2010 • EN 62233:2008 EN 55014-1:2017/A11:2020 • EN 55014-2:1997/A2:2008 EN IEC 55014-1:2021 • EN IEC 55014-2:2021 EN 301 489-1 V2.2.3:2019 • EN 301 489-17 V3.2.4:2020 EN 300 328 V2.2.2:2019 • EN 50663:2017 • EN IEC 63000:2018 | ||
| We confi rm the following in accordance with the 2000/14/EC emissions guideline: Sound power level: guaranteed: 100 dB(A) Blowing operating mode measured: 98,1 dB(A) Suction operating mode: measured: 98,4 dB(A) Compliance evaluation process carried out in accordance with Appendix V/ 2000/14/EC | ||
| This declaration of conformity is issued under the sole responsibility of the manufacturer: | ||
 | Grizzly Tools GmbH & Co. KG Stockstädter Straße 20 D-63762 Großostheim Germany, 30.05.2022 |  Christian Frank Documentation Representative Christian Frank Documentation Representative |
* The object of the declaration described above satisfies the provisions of Directive 2011/65/EU of the European Parliament and the Council of 8 June 2011 on limiting the use of certain harmful substances in electrical and electronic appliances.
Technical data
with Smart battery frequency band .....2400 - 2483,5 MHz max. radio-frequency power...≤20dBm
- FR BE
- Introduction
- Intended use
- General description
- Scope of delivery - Parts list
- Function description
- Overview
- Technical data
- Cordless leaf
- blower/vacuum .....PLSA 40-Li C2
- Warning: The vibration emission
- GB MT
- Charging time
- Safety instructions
- Symbols and icons
- Symbols on the appliance:
- Symbols used in the instructions
- General notes on safety
- Instruction:
- Preparation:
- Operation:
- Maintenance and storage:
- Additional safety instructions:
- Additional safety instructions for batteries
- !
- Recommendation:
- RESIDUAL RISK
- Initial start-up
- Charging the battery
- Remove/insert battery
- Installing/removing the collection bag
- In suction mode the device must only be operated with the collection bag mounted.
- Adjusting the additional handle
- Putting on the carrying strap
- Operation
- Switching on and off
- Turbo mode
- Checking the charge status of the battery
- Working with the leaf blower
- Repairs of this type are not covered by the guarantee.
- Blowing operating mode:
- For safety reasons, make sure that the protective cover (A 7) is inserted onto the suction aperture.
- Suction operating mode:
- For safety reasons, all pipe sections must be correctly mounted before you can start the device.
- Emptying the collection bag:
- Cleaning and maintenance
- Cleaning
- General maintenance
- Removal of clogging and blockage
- Cleaning the impeller wheel:
- Storage
- Disposal and protection of the environment
- Spare parts/Accessories
- Spare parts and accessories can be obtained at www.grizzlytools.shop
- Guarantee
- Terms of Guarantee
- Guarantee Period and Statutory Claims for Defects
- Guarantee Cover
- Processing in Case of Guarantee
- Repair Service
- Service-Center
- Importer
- Protection anti-surcharge:
- Garancijski list
Brand : PARKSIDE
Model : PLSA 40Li C2
Category : Electric leaf blower