PCDR 3093 - Steam cleaner ProfiCare - Free user manual and instructions
Find the device manual for free PCDR 3093 ProfiCare in PDF.
| Product type | Floor steam cleaner |
| Brand | ProfiCare |
| Model | PCDR 3093 |
| Power supply | 220-240 V~, 50 Hz |
| Power | 1500 W |
| Protection class | I |
| Water tank capacity | 450 ml |
| Maximum steam output | 45 g/min |
| Net weight | Approximately 2.65 kg |
| Recommended water type | Distilled water only |
| Included accessories | Cleaning cloth with Velcro (x2), measuring cup, carpet accessory, fixing screws |
| Steam regulator | Yes, adjustable |
| Power indicator light | Yes |
| Foldable handle | Yes, for transport and storage |
| Power cord length | Not specified (common estimate: approx. 5 m) |
| Compatible surfaces | Tile, marble, laminate, vinyl, linoleum, parquet, carpet (with accessory) |
| Safety | Automatic shutdown and unplugging when filling water; burn protection (do not touch hot parts) |
| Cloth maintenance | Machine washable at 60 °C, do not tumble dry |
| Warranty | 2 years (according to law) |
Frequently Asked Questions - PCDR 3093 ProfiCare
User questions about PCDR 3093 ProfiCare
0 question about this device. Answer the ones you know or ask your own.
Ask a new question about this device
Download the instructions for your Steam cleaner in PDF format for free! Find your manual PCDR 3093 - ProfiCare and take your electronic device back in hand. On this page are published all the documents necessary for the use of your device. PCDR 3093 by ProfiCare.
USER MANUAL PCDR 3093 ProfiCare
natural_image
White electric vacuum cleaner with black handle and red control knob (no visible text or symbols)Dampfmop PC-DR 3093
Stoomreiniger • Nettoyeur vapeur • Mopa con vapor
Pulitore a vapore • Steam Cleaner • Mop parowy
Göztisztító készülék • Пароочиститель • منظف بال lbخار
CE
Bedienungsanleitung......Seite 5
Gebruiksaanwijzing......Pagina 12
Mode d'emploi.... Page 18
Manual de instrucciones ...... Página 24
Istruzioni per l'uso....Pagina 30
Instruction Manual...... Page 36
Instrukcja obsługi......Strona 41
Használati utasítás .... Oldal 47
Руководство по эксплуатации ...... стр. 53
63 صفحة دليل التعليمات
text_image
Labeled diagram of a vacuum cleaner with numbered parts for identification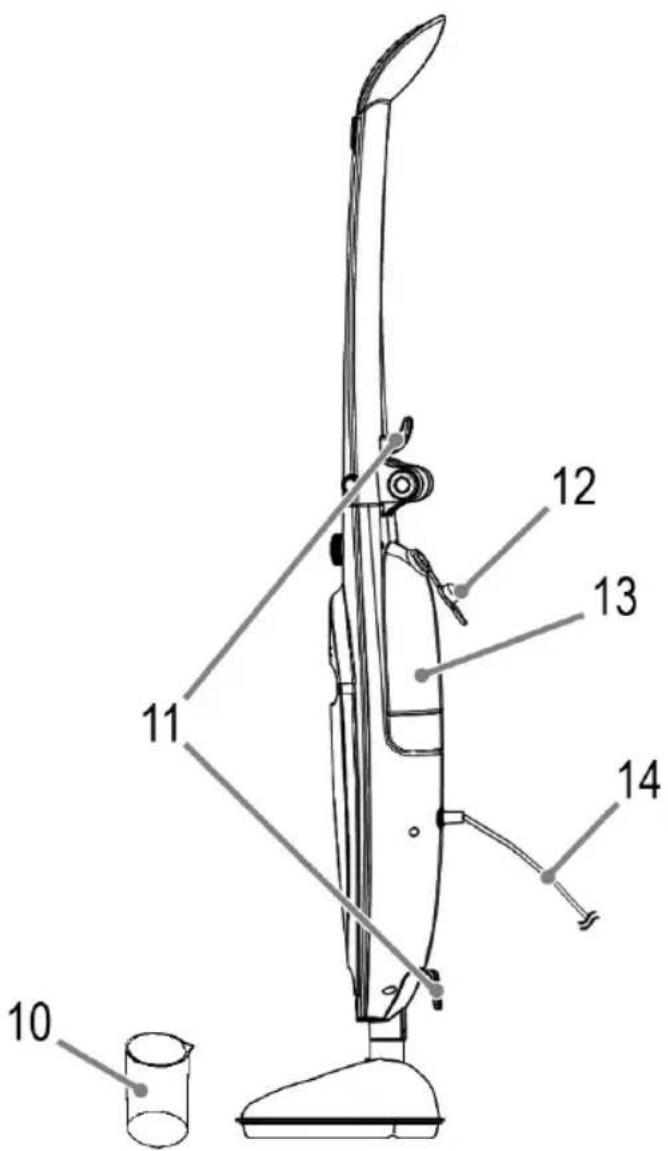
text_image
Technical diagram of a vacuum cleaner with numbered parts labeled 10 to 14Abbildungen
natural_image
Diagram showing two stages of a dental implant or implant device, with an arrow indicating the process (no text or symbols present)
natural_image
Diagram showing two stages of a dental implant or implant procedure, with an arrow indicating the process (no text or symbols present)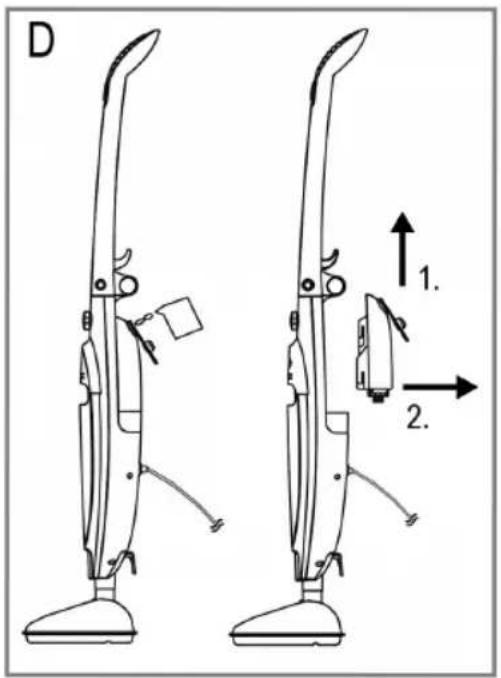
text_image
D 1. 2.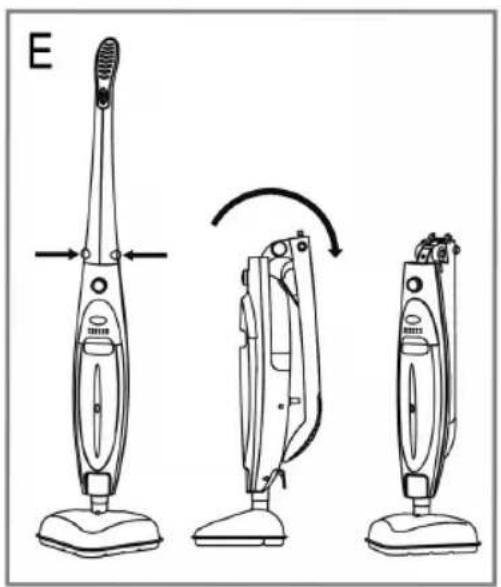
text_image
EBedienungsanleitung
WAARSCHUWING: Verbrandingsgevaar!
⚠ WAARSCHUWING: Risico op letsel!
Thank you for choosing our product. We hope you will enjoy using the appliance.
Symbols in this Instruction Manual
Important information for your safety is specially marked. It is essential to comply with these instructions in order to avoid accidents and prevent damage to the appliance:

WARNING:
This warns you of dangers to your health and indicates possible injury risks.

CAUTION:
This refers to possible hazards to the appliance or other objects.

NOTE:
This highlights tips and information.
Contents
Overview of the Components....3
Illustrations....4
General Notes......36
Special Safety Precautions for this Appliance....36
Unpacking the Appliance....38
Overview of the Components/Scope of Delivery......38
Notes for Use....38
Connected Wattage 38
Initial Operation....38
Assembling the Appliance Base (Fig. A)....38
Fastening the Cleaning Cloth (Fig. B) 38
Unfastening the Cleaning Cloth....38
Fill in Water (Fig. D) 38
Electric Connection 39
Using the Appliance 39
Filling the Water Tank during Operation 39
End of Operation....39
Cleaning 39
Storage....40
Troubleshooting....40
Technical Data....40
Disposal 40
Meaning of the "Dustbin" Symbol ....40
General Notes
Read the operating instructions carefully before putting the appliance into operation and keep the instructions including the warranty, the receipt and, if possible, the box with the internal packing. If you give this appliance to other people, please also pass on the operating instructions.
- The appliance is designed exclusively for private use and for the envisaged purpose. This appliance is not fit for commercial use.
- Do not use it outdoors. Keep it away from sources of heat, direct sunlight, humidity (never dip it into any liquid) and sharp edges. Do not use the appliance with wet hands. If the appliance is humid or wet, unplug it immediately.
- When cleaning or putting it away, switch off the appliance and always pull out the plug from the socket (pull the plug itself, not the lead) if the appliance is not being used and remove the attached accessories.
- Do not operate the appliance without supervision. If you leave the room you should always turn the appliance off. Remove the plug from the socket.
- The appliance and the mains lead have to be checked regularly for signs of damage. If damage is found the appliance must not be used.
- Use only original spare parts.
- In order to ensure your children's safety, please keep all packaging (plastic bags, boxes, polystyrene etc.) out of their reach.

WARNING:
Do not allow small children to play with the plastic foil.
There is a danger of suffocation!
Special Safety Precautions for this Appliance
You will find the following symbol with warning character on the appliance:
WARNING:
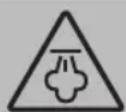
Danger of scalding due to escaping steam!
Take care when using the appliance.

WARNING: Danger of burns!
Do not touch the hot surfaces. If you would like to change the accessories, please wait until the appliance has cooled down.
- The appliance must not be left unattended when connected to the mains.
- Keep the appliance out of reach of children when switched on or cooling down.
• Children shall not play with the appliance. - This appliance can be used by persons with reduced physical, sensory or mental capabilities or lack of experience and knowledge if they have been given supervision or instruction concerning use of the appliance in a safe way and understand the hazards involved.
- Never point the steam jet at persons or animals!
- The steam jet must not be pointed at electric devices and equipment containing electric components (e. g. interior of ovens).
- Always disconnect the mains plug after use and before filling in water. Refer to the instructions in chapter “Fill in Water”.
- Do not overfill! Do not exceed the maximum filling level for the water!
- Only operate the appliance with water in the tank.
- Do not repair the appliance by yourself. Always contact an authorized technician. If the supply cord is damaged, it must be replaced by the manufacturer, its service agent or similarly qualified persons in order to avoid a hazard.
- Cleaning and user maintenance shall not be made by children without supervision.

CAUTION:
Do not immerse the appliance into water for cleaning. Please follow the instructions as stipulated in the chapter "Cleaning".
Unpacking the Appliance
- Remove the appliance from the package.
- Remove all packaging material such as films, filler, cable holders and cardboard.
- Check the delivery contents for completeness.
- Should the package contents be incomplete or damages be found, do not take the appliance into operation. Take it immediately back to the dealer.
- Unfold the handle (1) until it clicks audibly into place.

NOTE:
The handle can be folded up again for transport (Fig. E). To do this, press both release buttons (3). The appliance can be easily lifted using the carrying handle (5).
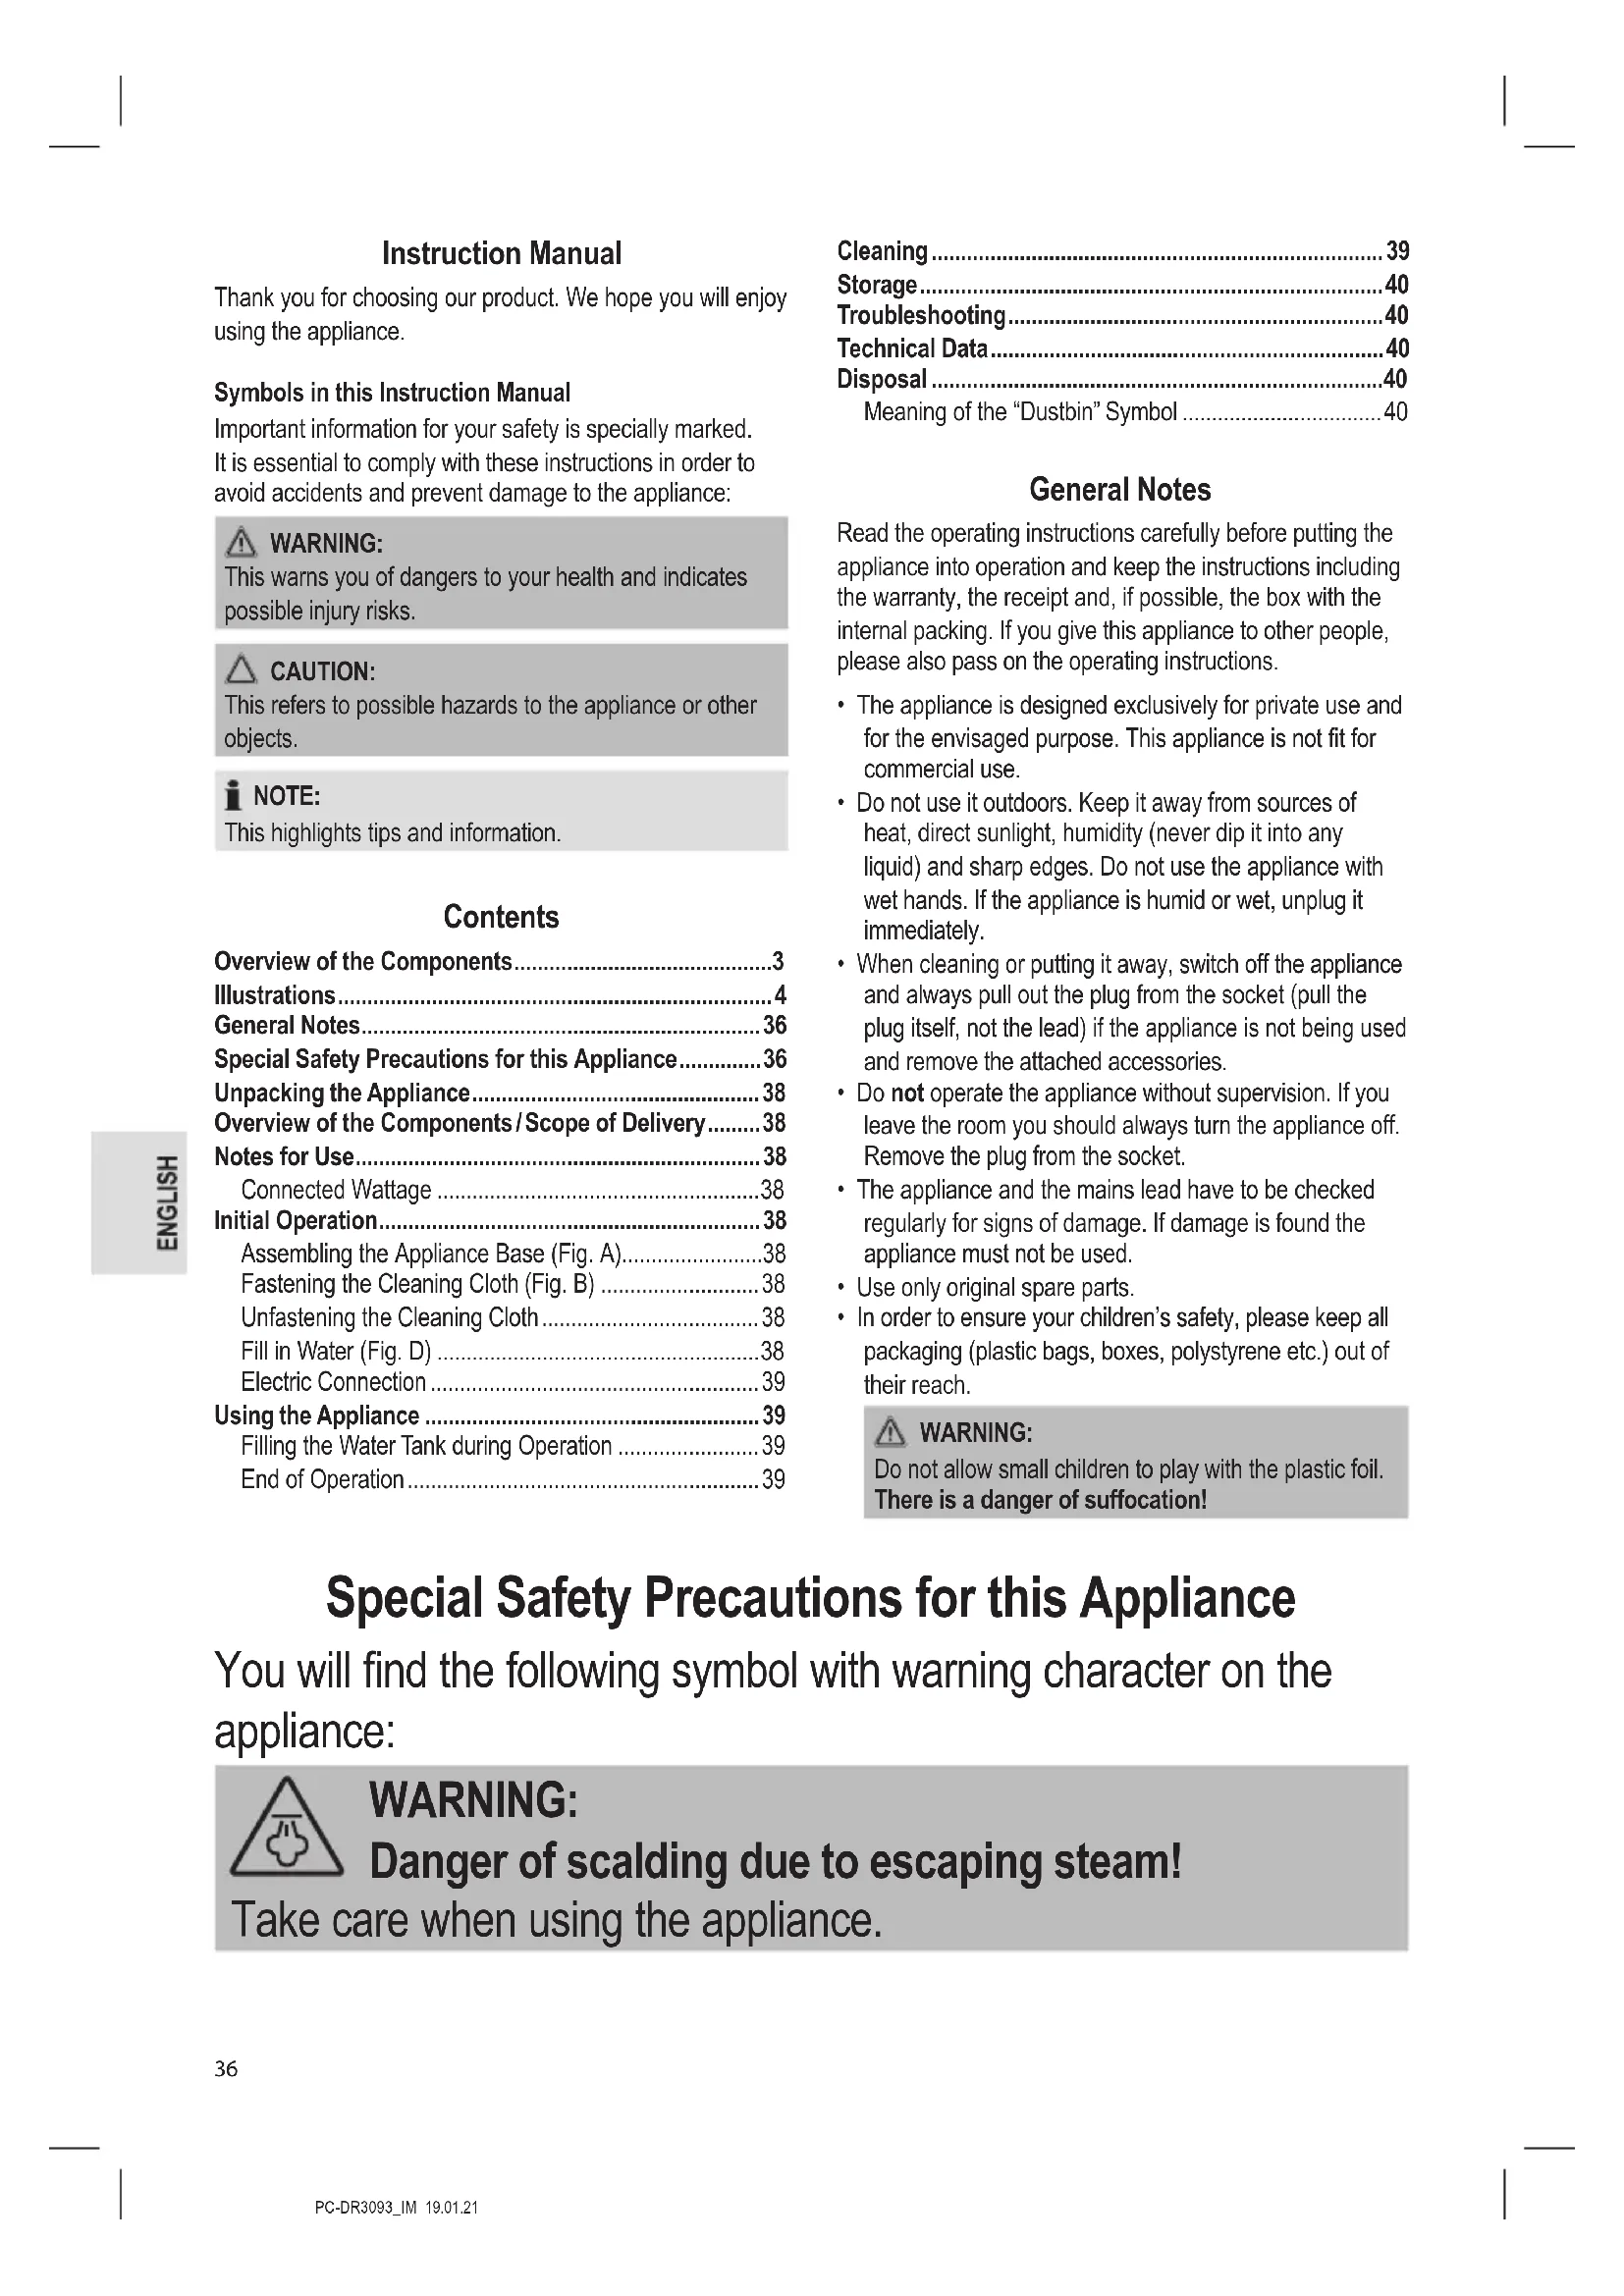
Overview of the Components / Scope of Delivery
1 Handle
2 On / off switch (①)
3 Release buttons
4 Steam quantity regulator ( )
5 Carrying handle
6 Operation control light
7 Foot
8 Cleaning cloth with velcro fasteners
9 Carpet attachment
10 Measuring jug
11 Cord wrap
12 Lock for the water tank
13 Water tank
14 Power cable
Not Shown
Fastening screw for the appliance base Spare cleaning cloth with velcro fasteners
Notes for Use
- The appliance is intended for the thorough cleaning of floor coverings, such as laminate, marble, ceramic, vinyl, linoleum, sealed wooden floors, and parquet.
- CAUTION: On surfaces which have been treated with wax, the wax can be removed using heat and steam.
- Do not use it on unsealed wooden floors. The appliance must not be left standing on a wooden floor for an extended period of time under any circumstances. This can cause the wood to swell.
- Use particular caution when cleaning laminate, vinyl, linoleum, or other heat-sensitive floors. Too much heat could cause the glue in the floor to melt or become discoloured. Do a test-cleaning on a non-visible portion first!
- We also recommend that you check the manufacturer's maintenance instructions for the surfaces to be cleaned for steam cleaning.
Connected Wattage
The maximum power consumption of the appliance is 1500 W.

CAUTION: Overload!
- If you use extension leads, these should have a cable cross-section of at least 1.5 ~mm^2 .
- Do not use any multiple sockets, as this appliance is too powerful.
Initial Operation
The illustrations can be found on page 4.
Assembling the Appliance Base (Fig. A)

NOTE:
Note the guide rails on the appliance base and the recess on the appliance.
- Push the appliance onto the appliance base as far as it will go.
- Fasten the appliance base by inserting the screw into the hole for the foot mount. Now screw the screw in by hand with a suitable screwdriver until it is tight.
Fastening the Cleaning Cloth (Fig. B)
- Note the velcro fasteners on the cleaning cloth and on the appliance base.
- Fasten the cleaning cloth to the appliance base with the velcro fasteners.
Unfastening the Cleaning Cloth

WARNING: Risk of injury!
Wait until the appliance has cooled down before removing the cleaning cloth.
- Simply pull the cleaning cloth off of the appliance base.
Fill in Water (Fig. D)

NOTE:
- Use only distilled water.
- The maximum filling capacity is 450 ml. Use the measuring jug provided.
- You can also remove the water tank from the appliance in order to fill it.

CAUTION:
Battery water, water from the dryer, or water containing additives, such as cleaning agents, alcohol, fabric softener, or other chemicals must not be poured into the water tank. This may result in damage to the appliance.

WARNING: Risk of injury!
- Remove the mains plug from the socket.
-
If the appliance is still warm, wait approx. 5 minutes until removing the lid.
-
Open the lock on the water tank.
-
Either use the measuring jug included in the delivery or remove the water tank in order to fill it. Pour water in until it reaches the MAX mark.
-
Close the water tank again with the lock.
-
If you have removed the water tank first, then place it back in the appliance. Push it downwards until it snaps into place.
Electric Connection
- Before inserting the power plug into the outlet, check that the mains voltage to be used matches that of the appliance. You can find the required information on the nameplate.
- Connect the appliance to a properly installed earthed socket.
Using the Appliance

CAUTION:
- Do a test-cleaning on a non-visible portion first!
- Do not operate the appliance without the cleaning cloth attached, in order to avoid scratching the floor covering.

NOTE:
We recommend vacuuming before using the appliance.
- To clean carpets, place the appliance on the sole of the carpet glider (Fig. C).
-
Unwind the entire power cord from the cord wrap.
-
Turn the steam quantity regulator clockwise until it stops at the maximum setting.

NOTE:
If the steam quantity regulator is not set to the maximum setting the first time it is used, then there is not enough steam.
- Press the switch ☐ to turn on the appliance. The power indicator light will come on.
- The appliance will be ready to operate after approximately 30 seconds. The pump will start working.
- Use the steam quantity regulator to adjust the desired steam quantity.
- Move the appliance slowly over the surfaces to be cleaned. To clean thoroughly, the appliance should be used on a particular spot for at least 8 seconds, but not for longer than 15 seconds.

CAUTION:
Make sure there is still enough water left in the tank. Refill the tank with fresh water in good time (see "Filling the Water Tank during Operation").
Filling the Water Tank during Operation
No steam will be discharged if the water tank is empty. The pump will continue to operate and the heating element will cause the thermostat to switch on and off periodically.
The water has to be filled up as follows:
- Press the switch ⓘ
- Remove the mains plug from the socket!
- Fill water up to the maximum mark.
- Connect the plug to the socket again and switch the appliance on to continue operation.
End of Operation
- Press the switch Ⓓ
- Remove the mains plug from the socket!
- Let the appliance cool down completely.
- Remove the cleaning cloth from the appliance base.
- Empty the water tank.
Cleaning

WARNING:
• Always pull the plug before cleaning and maintenance.
- Wait until the appliance has cooled down.
- Under no circumstances should you immerse the appliance in water for cleaning purposes. Otherwise this might result in an electric shock or fire.

CAUTION:
- Do not use a wire brush or any abrasive items.
- Do not use any acidic or abrasive detergents.
- Before the appliance is put away or cleaned it must have completely cooled down.
- Empty the water tank.
- Clean the appliance and accessories with a slightly damp cloth.
- The cloths can be washed at 60 °C in the washing machine. Do not dry the cloths in the tumble dryer.
Storage
- Clean the appliance as described. Let everything dry completely.
- Do not store the appliance with the water tank full.
• We recommend that you store the appliance in its original packaging when it is not to be used for a longer period.
• Always store the appliance at a well ventilated and dry place outside the reach of children. - The handle can be folded up for space-saving storage (see Fig. E).
Troubleshooting
| Problem Possible Cause Remedy | ||
| The appli-ance is not working. | The appliance has no power supply. | Check the socket with another appli-ance. |
| Plug in the mains plug correctly. | ||
| Check the main circuit breaker. | ||
| The appliance is defective. | Contact our service or a repair centre. | |
| The appli-ance does not emit any steam. | The water tank is empty. | Fill the water tank with water. |
| The water tank has not been inserted properly. | Insert the water tank properly. Push it downwards until it snaps into place. | |
| The seals on the appliance base have not been po-sitioned correctly or they have been damaged. | Contact our service or a specialist. | |
Technical Data
Model: PC-DR 3093
Power supply: 220 - 240 V\~, 50 Hz
Power consumption: 1500 W
Protection class:....I
Max. steam capacity: 45 g / min
Tank capacity:: 450 ml
Net weight: .... approx. 2.65 kg
The right to make technical and design modifications in the course of continuous product development remains reserved.
This appliance has been tested according to all relevant current CE guidelines, such as electromagnetic compatibility and low voltage directives, and is manufactured according to the latest safety regulations.
Disposal
Meaning of the "Dustbin" Symbol
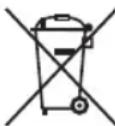
Protect our environment: do not dispose of electrical equipment in the domestic waste.
Please return any electrical equipment that you will no longer use to the collection points provided for their disposal.
This helps avoid the potential effects of incorrect disposal on the environment and human health.
This will contribute to the recycling and other forms of re-utilisation of electrical and electronic equipment.
Information concerning where the equipment can be disposed of can be obtained from your local authority.
Instrukcja obsługi
CTC Clatronic Sp. z o.o
Ul. Brzeska 1
45-960 Opole