PC-TVL3152 - Fan ProfiCare - Free user manual and instructions
Find the device manual for free PC-TVL3152 ProfiCare in PDF.

| Product Type | Tower Fan |
| Power Supply | 220–240 V~, 50–60 Hz |
| Power Consumption | 50 W |
| Standby Consumption | ≤ 0.5 W |
| Protection Class | II |
| Net Weight | Approximately 3.2 kg |
| Speed Levels | 3 (LOW, MEDIUM, HIGH) |
| Oscillation Function | Yes, 45° tilt |
| Electronic Timer | 1 to 12 hours |
| Nature Mode | Yes (natural wind simulation) |
| Display | Room temperature in °C |
| Screen Brightness Reduction | Automatic after 5 minutes |
| Remote Control | Yes, 2 AAA 1.5V batteries (not included) |
| Remote Control Range | Limited, requires clear line of sight |
| Cleaning | Slightly damp cloth and mild detergent |
| Storage | In its packaging, dry and ventilated place |
| Repairability | Contact customer service in case of defect |
Frequently Asked Questions - PC-TVL3152 ProfiCare
User questions about PC-TVL3152 ProfiCare
0 question about this device. Answer the ones you know or ask your own.
Ask a new question about this device
Download the instructions for your Fan in PDF format for free! Find your manual PC-TVL3152 - ProfiCare and take your electronic device back in hand. On this page are published all the documents necessary for the use of your device. PC-TVL3152 by ProfiCare.
USER MANUAL PC-TVL3152 ProfiCare
natural_image
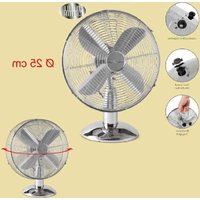
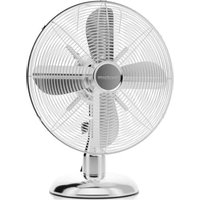
Modern electric fan with a black handle and digital display, no visible text or symbols on the device itself.Tower-Ventilator PC-TVL 3152
Torenventilator • Ventilateur tour • Ventilador de torre
Be sure to read the separately enclosed safety instructions first.
Instruction Manual
Thank you for choosing our product. We hope you will enjoy using the appliance.
Read the instruction manual and the separately enclosed safety instructions very carefully before using this appliance. Keep these documents, including the warranty certificate, receipt and, if possible, the box with the inner packaging in a safe place. If you pass the appliance on to a third party, always include all the relevant documents.
Symbols in this Instruction Manual
Important information for your safety is specially marked. It is essential to comply with these instructions in order to avoid accidents and prevent damage to the appliance:

WARNING:
This warns you of dangers to your health and indicates possible injury risks.

CAUTION:
This refers to possible hazards to the appliance or other objects.
Content
Overview of the Components ....3
Unpacking the Appliance 8
Overview of the Components/Scope of Delivery 8
Remote Control....8
Putting Into Operation....9
Operation 9
Cleaning....10
Storage....10
Troubleshooting 10
Technical Data....11
Disposal....11
Unpacking the Appliance
- Remove the appliance from its packaging.
- Remove all packaging material, such as foils, filling material, cable ties and cardboard packaging.
- Check the scope of delivery for completeness.
- If the contents of the packaging are incomplete or if damage can be detected, do not operate the appliance. Return it to the dealer immediately.
Overview of the Components / Scope of Delivery
Tower-Fan
1 Air vent opening
2 Air inlet opening
3 Room temperature display in °C
4 Timer control lamp in hours
5 Button ⏻ ON / OFF
6 Button Ⓞ TIMER (electronic timer)
7 Button ⚙ LIGHT (darkening of the display)
8 Button 📋 SPEED (speed)
9 Button Ⓞ SWING (swivelling function)
10 Control lamps ⚙, (speed levels)
11 Control lamp (swivelling function)
12 Control lamp ⬆NATURE (natural)
Remote Control
13 ON / OFF button
14 NATURE button
15 TIMER button
16 SWING button
17 SPEED button
18 LIGHT button
Remote Control
The remote control has a limited range. Make sure you have a clear view between the remote control and the sensor on the appliance when operating it.
Insert Batteries Into the Remote Control
(Batteries not included in the scope of delivery)
- Open the battery compartment cover on the back of the remote control.
- Insert 2 R03 "AAA" 1.5 V batteries. Ensure that the polarity is correct. You will find information on this in the battery compartment.
- Close the battery compartment.
If the range of the remote control decreases, replace the batteries as described above.
Handling Batteries

Observe polarity (+ / -)!

Keep away from children!

Non-rechargeable batteries are not to be recharged!

Do not disassemble batteries!

Do not short-circuit batteries!

Danger of explosion!
Do not expose batteries to intense heat, such as sunshine, fire or similar.
- Batteries can leak battery acid. If the remote control will not be used for a longer period of time, remove the batteries.
- If a battery leaks, do not rub the liquid into the eyes or mucous membranes. In case of contact, wash hands, rinse eyes with clean water. Seek medical attention if any discomfort persists.
- Different battery types and new and used batteries must not be used together.
- Exhausted batteries are to be removed from the appliance and safely disposed of. Batteries are not to be disposed of together with domestic wastes. Return used batteries to the responsible collection points or to the dealer.
- Rechargeable batteries are to be removed from the appliance before being charged.
Putting Into Operation
Location
- Ensure that the appliance is placed on a level, non-slip surface.
- Do not place the appliance in the direct vicinity of heaters or electrical appliances.
Electrical Connection
- Before inserting the mains plug into the socket, check that the mains voltage you wish to use matches that of the appliance. You will find the relevant information on the label.
- Connect the appliance to a properly installed earthed socket. A signal will sound and all symbols on the display will light up briefly.
Operation
Explanation of Buttons and Symbols
The buttons on the appliance are touch buttons. Touch the Buttons lightly with one finger to execute the function. Each press of a button is confirmed with an acoustic signal.
| Control panel | Remote control | Function |
 ON / OFF ON / OFF | ON / OFF | Switch appliance on / off |
 SPEED SPEED | SPEED | Speed |
 SWING SWING | SWING | Swivelling function |
| [WOZZC]TIMER | TIMER | Electronic timer |
| [A0AZ]LIGHT | LIGHT | Dimming the display |
| NATURE | Wind change functions |
Switching the Appliance On/Off
Press the ON/OFF, button to switch the appliance on or off. The appliance always starts at the LOW speed level.
Speed
Press the ⚫SPEED, button to select one of the 3 speed levels:
| Symbol Level | |
| [XC72] | Lowest speed (LOW) |
 | Medium speed (MEDIUM) |
 | Maximum speed (HIGH) |
Swivelling Function
Press the button Ⓞ SWING to switch on the swivel function. The corresponding control lamp lights up in the display. The appliance swings automatically within a range of approx. 45 degrees.
Wind Change Function
Press the NATURE button to switch this function on. The control lamp ⚠ lights up on the display.
- In this mode, a natural wind movement is simulated. You can still change the speed level using the 🕒 SPEED button.
Electronic Timer
You can switch the appliance off on a timed basis.
- Use the Ⓞ TIMER button to select a time setting between 1 and 12 hours.
- Once the timer has expired, the appliance switches off automatically.
Dimming the Display
• To darken the display, press the Ⓤ LIGHT button.
• After approx. 5 minutes, the display darkens automatically and the current room temperature is displayed.
• To lighten the display again, press any button.
Cleaning

WARNING:
- Always disconnect the mains plug from the socket before cleaning and maintenance.
- Never immerse the appliance in water for cleaning. It could cause an electric shock or fire.

CAUTION:
- Do not use a wire brush or other abrasive objects.
- Do not use harsh or abrasive cleaning agents.
- Clean the outside of the appliance with a slightly damp cloth using a neutral detergent.
• Dry the appliance with a dry cloth. - Only use the appliance when it is completely dry.
Storage
- Clean the appliance as described and allow it to dry completely.
• We recommend storing the appliance in its original packaging if you do not intend to use it for a longer period of time.
• Always store the appliance out of the reach of children in a well-ventilated and dry place.
Troubleshooting
| Problem Possible Cause Remedy | ||
| The appliance has no function. The appliance has no power supply. Check the | power socket with another appliance. | |
| Insert the mains plug correctly. | ||
| Check the house fuse. | ||
| The appliance is defective. Contact our service or a specialist. | ||
| The appliance does not respond to the remote control. | The distance to the appliance is too far. Move closer to the appliance. | |
| You are not holding the remote control in the direction of the sensor. | Hold the remote control so that it is pointing towards the sensor. Make sure you have a clear view between the remote control and the sensor. | |
| The batteries in the remote control are flat. | Replace the batteries. | |
| The remote control is defective. Contact our service department or a specialist. | ||
Technical Data
Model: PC-TVL 3152
Power supply: 220–240 V\~, 50–60 Hz
Power consumption: 50 W
Power consumption in standby mode: ....≤0.5W
Protection class: II
Net weight: .... approx. 3.2 kg
The right to make technical and design modifications in the course of continuous product development remains reserved.
This appliance has been tested according to all applicable, current CE directives and built according to the latest safety regulations.
Disposal
Battery Disposal
As a consumer you are obliged by law to return old batteries / accumulators.
Your appliance contains batteries. If these batteries are spent, follow the instructions below:

CAUTION:
Batteries / rechargeable batteries must not be disposed of with household waste!
- Remove the battery (batteries) from the remote control before disposing of the appliance.
• Take spent batteries to the appropriate collection point or to a dealer. - Your town or local authority can provide information about public collection points.
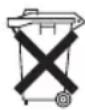
Meaning of the "Dustbin" Symbol
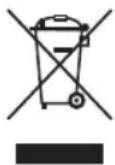
Protect our environment: do not dispose of electrical equipment in the domestic waste.
Please return any electrical equipment that you will no longer use to the collection points provided for their disposal.
This helps avoid the potential effects of incorrect disposal on the environment and human health.
This will contribute to the recycling and other forms of re-utilisation of electrical and electronic equipment.
Information concerning where the equipment can be disposed of can be obtained from your local authority. Your dealer and contractual partner is also obliged to take back the old appliance free of charge.
BELANGRIJK:
CTC Clatronic Sp. z o.o
Ul. Brzeska 1
45-960 Opole
Usuwanie
Usuwanie baterii