PC-DBS 3127 - Steam plant ProfiCare - Free user manual and instructions
Find the device manual for free PC-DBS 3127 ProfiCare in PDF.

User questions about PC-DBS 3127 ProfiCare
0 question about this device. Answer the ones you know or ask your own.
Ask a new question about this device
Download the instructions for your Steam plant in PDF format for free! Find your manual PC-DBS 3127 - ProfiCare and take your electronic device back in hand. On this page are published all the documents necessary for the use of your device. PC-DBS 3127 by ProfiCare.
USER MANUAL PC-DBS 3127 ProfiCare
natural_image
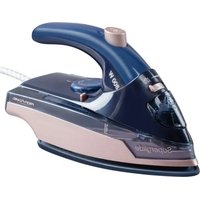
Black steam iron with a glossy finish, placed on a white surface (no visible text or symbols)Be sure to read the separately enclosed safety instructions first.
Instruction Manual
Thank you for choosing our product. We hope you will enjoy using the appliance.
Read the instruction manual and the separately enclosed safety instructions very carefully before using this appliance. Keep these documents, including the warranty certificate, receipt and, if possible, the box with the inner packaging in a safe place. If you pass the appliance on to a third party, always include all the relevant documents.
Symbols in this Instruction Manual
Important information for your safety is specially marked. It is essential to comply with these instructions in order to avoid accidents and prevent damage to the appliance:

WARNING:
This warns you of dangers to your health and indicates possible injury risks.

CAUTION:
This refers to possible hazards to the appliance or other objects.
Content
Overview of the Components....3
Unpacking the Appliance....9
Overview of the Components / Scope of Delivery......9
Warnings for the Use of the Appliance 9
Connected Load....10
Notes for Use....10
Unpacking ....10
Switching On and Off....10
Infinitely variable temperature control....10
Water Tank 10
Water....10
Electrical Connection 10
Before First Use ....10
Operation 10
Ironing without Steam 10
Ironing with Steam 11
- Vertical Steam Function.... 11
- How Do I Top Up Water During Operation? 11
Ending Operation 11
Cleaning....11
Self-cleaning Function (button) 12
Storage....12
Troubleshooting....12
Technical Data....12
Disposal 12
Meaning of the "Dustbin" Symbol 12
Unpacking the Appliance
- Remove the appliance from its packaging.
- Remove all packaging material, such as foils, filling material, cable ties and cardboard packaging.
- Check the appliance for possible transport damage to avoid hazards. Do not operate a damaged appliance. Return it to the dealer immediately.
Overview of the Components / Scope of Delivery
1 button (self-cleaning function)
2 Steam jet button
3 Temperature control
4 Connecting hose
5 Base
6 Cable compartment
7 Shelf for the iron
8 Suction hose
9 Recessed grip of the water tank
10 Water tank
11 Transport lock
12 "Temperature" control lamp
Warnings for the Use of the Appliance

WARNING: Risk of Burns!
- The sole plate heats up quickly and takes a long time to cool down. Do not touch!
• The surfaces are liable to get hot during use. - When ironing with steam, the iron ejects a lot of hot steam! Never aim the steam jet at people.
- The steam ironing station must be used and placed on a flat, stable surface.
- When not in use, place the iron on the base! The surface on which the base is placed must be stable and level. The stability must be checked.
- Do not kink the connecting hose.
- The iron must not be left unattended while it is connected to the supply mains.
- Only use distilled water!
- Only fill the water tank to the maximum mark. Do not overfill!
Connected Load
The appliance has a total power consumption of 2400 W. With this connected load, a separate supply line with a 16 A household circuit breaker is recommended.

CAUTION: Overload!
- If you use extension leads, these should have a cable cross-section of at least 1.5 ~mm^2 .
- Do not use a multiple socket as this appliance is too powerful.
Notes for Use
Unpacking
- Remove any protective film and stickers from the soleplate.
- Remove the cable from the cable compartment.
Switching On and Off
Switch on: Ensure that the temperature control is in the Min position. Connect the mains plug to a properly installed earthed socket. The appliance is immediately in operating mode.
Switch off: Set the temperature control to the Min position. Disconnect the mains plug from the socket.
Infinitely variable temperature control
The symbols on the control correspond to the following settings:
| Min | off |
| 0(synthetic fibres, artificial silk, silk) | low temperature(ironing without steam) |
| 00(wool) medium temperature | |
| 000(cotton, linen) | high temperature(ironing with steam) |
| Max | highest temperature |
- To avoid shiny spots when steam ironing pure woollen fabrics, turn the garment over and iron it on the "inside out". Also place a thin cotton cloth on the fabric.
- Fabrics with an additional surface treatment are best ironed inside out and only at a low temperature.
- The iron heats up faster than it cools down. Therefore, start ironing the laundry at the lowest temperature.
Water Tank
- The water tank has a recessed grip so that you can remove it.
- When you push the water tank back into the base, you should hear it click into place.
- The water tank is labelled MAX. Do not fill the water tank beyond this mark. The water tank has a capacity of 1.2 litres.
Water

CAUTION: Calcification of the appliance!
- Only use distilled water!
Failure to observe this important note may result in the appliance becoming defective.
- A defective appliance due to calcification is excluded from free warranty services.
Battery water, water from the tumble dryer and water with additives (such as starch, perfume, fabric softener or other chemicals) should not be poured into the water tank.
This could damage the appliance as residues could form in the steam chamber. These residues can contaminate the ironed items when they fall out through the steam outlet openings.
Electrical Connection
- Make sure that the appliance voltage (see rating plate) and the mains voltage match.
- Only connect the mains plug with a correctly installed earthed socket.
Before First Use
- Clean the soleplate with a slightly damp cloth.
- To remove all residues before first use, iron a few times over an old, clean cloth.
Operation
The appliance can be used with or without steam.
Ironing without Steam
- Sort the laundry by ironing temperature.
- Place the iron on the shelf.
- Always set the temperature control to Min before connecting the appliance to the socket or disconnecting it from the mains.
- Insert the mains plug into a correctly installed earthed socket.
- Set the temperature using the temperature control (3). If you are ironing delicate laundry, start at the lowest temperature.
- The control lamp shows the heating process. As soon as this goes out, the operating temperature has been reached. You can now start ironing.
Ironing with Steam

WARNING: Risk of Burns!
The iron emits a large amount of hot steam.

CAUTION:
When steam ironing, make sure that the water tank is always sufficiently full.
- Steam ironing requires a high temperature. Set the temperature control to at least the 00 symbol. Otherwise the pump switches off and ironing with steam is not possible.
-
If the temperature is too low, water often escapes from the soleplate.
-
Remove the water tank.
- Fill the water tank with distilled water. Only fill the water tank to the maximum mark. Do not overfill!
- Push the water tank back into the base. You should hear it click into place.
- Insert the mains plug into a correctly installed earthed socket.
- Set the desired temperature in the range 00 to 000. The control lamp on the iron lights up.
- Wait until the soleplate has heated up. Once the temperature has been reached, the control lamp goes out.
- Now press the steam boost button for at least 15 seconds or until steam comes out of the soleplate. This time is required for the steam to reach the iron. It is normal for the pump to make a slightly louder noise.
- Vertical Steam Function
This function enables a vertical steam jet. This function is used to remove creases from hanging clothing or curtains.

WARNING: Risk of Burns!
Never aim the steam jet at people.
- Hang the laundry on a hanger.
- Bring the iron as close to the laundry as the fabric allows.
– How Do I Top Up Water During Operation?
Top up the water before the water tank is completely empty. If the pump makes a loud noise during operation, the water level is too low.
- Place the iron on the shelf.
- Switch off the appliance by setting the temperature control to the Min position.
- Disconnect the mains plug from the socket.
- Remove the water tank.
- Fill the water tank with distilled water. Only fill the water tank to the maximum mark. Do not overfill!
- Push the water tank back into the base. You should hear it click into place.
- Continue ironing.
Ending Operation
- After use, always set the temperature control to Min and unplug the appliance.
- Allow the appliance to cool down. Secure the appliance with the transport lock before transporting it or putting it away.
- Stow the cable back in the cable compartment.
Cleaning

WARNING:
- Always disconnect the mains plug from the socket before cleaning.
- Wait until the appliance has cooled down completely!
- Never immerse the appliance in water for cleaning. This could lead to an electric shock or fire.

CAUTION:
- Do not use a wire brush or other abrasive objects.
- Do not use harsh or abrasive cleaning agents.
- Clean the housing with a dry cloth.
- Clean the soleplate and the ironing surface with a slightly damp cloth.
- Residual water can remain in the water tank, but should be poured out if it has been in the water tank for a longer period of time.
Self-cleaning Function (button)
The appliance is equipped with a self-cleaning function:
- Fill the water tank halfway with water.
- Hold the iron over a suitable container.
- WARNING: Risk of Burns! The water coming out of the iron is hot!
To start cleaning, press the button for at least 4 seconds. During cleaning, the button flashes red and a beep sounds.
- To end cleaning, press and hold the button again for 4 seconds.
- Place the iron back on the work surface and heat it up. Now iron over a clean cotton cloth to clean the soleplate.
Storage
- Clean the appliance as described.
• We recommend storing the appliance in its original packaging if you do not intend to use it for a longer period of time.
• Always store the appliance out of the reach of children in a well-ventilated and dry place.
Troubleshooting
| Problem Possible Cause Remedy | ||
| The appliance has no function. | The appliance has no power supply. Check the | power socket with another appliance. |
| Insert the mains plug correctly. | ||
| Check the house fuse. | ||
| The appliance is defective. Contact our service or a specialist. | ||
| The appliance suddenly stops working during operation. | Is the electrical circuit overloaded? Check the | house fuse. |
| No steam is generated. The water | tank has not been installed correctly. | Press the water tank firmly into the base.You should hear it click into place. |
| The temperature is set too low. | Select a temperature between 00 and 000. | |
| Loud noises during steam operation. | The water tank is empty. | Check the water tank. Top up with water. |
| First use or after a long period of non-use. | These pump noises are normal. | |
Technical Data
Model: PC-DBS 3127
Power supply: 220–240V\~, 50–60 Hz
Power consumption: 2000–2400W
Protection class: I
Maximum filling quantity of the water tank: 1.2 litres
Net weight: .... approx. 3.6 kg
The right to make technical and design modifications in the course of continuous product development remains reserved.
This appliance has been tested according to all applicable, current CE directives and built according to the latest safety regulations.
Disposal
Meaning of the "Dustbin" Symbol
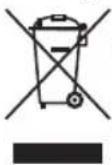
Protect our environment: do not dispose of electrical equipment in the domestic waste.
Please return any electrical equipment that you will no longer use to the collection points provided for their disposal.
This helps avoid the potential effects of incorrect disposal on the environment and human health.
This will contribute to the recycling and other forms of re-utilisation of electrical and electronic equipment.
Information concerning where the equipment can be disposed of can be obtained from your local authority. Your dealer and contractual partner is also obliged to take back the old appliance free of charge.
BELANGRIJK:
CTC Clatronic Sp. z o.o
Ul. Brzeska 1
45-960 Opole