ORD 130 - Radio OK - Free user manual and instructions
Find the device manual for free ORD 130 OK in PDF.

| Product Type | DAB+ / FM / Bluetooth Radio |
| Brand | OK |
| Model | ORD 130 |
| Dimensions (W × H × D) | 161 × 110 × 58 mm |
| Weight | 0.35 kg |
| Mains Power Supply | Adapter 100-240 V~, 50/60 Hz, output 5 V / 1 A |
| Built-in Battery | Rechargeable lithium-ion, 3.7 V, 2000 mAh |
| Reception Bands | DAB: 174.9 – 239.2 MHz; FM: 87.5 – 108 MHz |
| Bluetooth | Version 5.0, range up to 8 m |
| Main Functions | DAB/DAB+ radio, FM RDS, Bluetooth, alarm, sleep, 20 presets per band |
| Display | LCD screen with adjustable backlight |
| Antenna | Telescopic antenna |
| Headphone Jack | Yes, 3.5 mm jack |
| Care and Cleaning | Unplug before cleaning; use a slightly damp cloth, no harsh chemicals |
| Safety | Class II adapter, double insulation; do not expose to moisture; high volume risk to hearing |
| Batteries / Cells | Do not mix used and new batteries; observe polarity; do not short-circuit |
| Operating Temperature | 0 °C to 40 °C |
| Warranty | See manufacturer's conditions |
Frequently Asked Questions - ORD 130 OK
User questions about ORD 130 OK
0 question about this device. Answer the ones you know or ask your own.
Ask a new question about this device
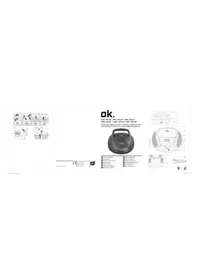
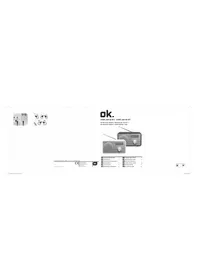
Download the instructions for your Radio in PDF format for free! Find your manual ORD 130 - OK and take your electronic device back in hand. On this page are published all the documents necessary for the use of your device. ORD 130 by OK.
USER MANUAL ORD 130 OK
Schlummerfungtion (sleep)
A2DP (Advanced Audio Distribution Profile)
Thank you for your purchase of an ok. product. Please read this manual carefully and keep it for future reference.
IMPORTANT SAFETY INSTRUCTIONS. READ CAREFULLY AND KEEP FOR FUTURE REFERENCE.
- The lightning flash with arrow head within

an equilateral triangle is intended to alert the user to the presence of uninsulated "dangerousvoltage" within the product's enclosure that may be of sufficient magnitude to constitute a risk of electric shock to persons and animals.
- The exclamation point within an equilateral
triangle is intended to alert the user to the presence of important operating and maintenance instructions in the literature accompanying the device.
- For safety reasons, this class II product is
provided with double or reinforced insulation as indicated by this symbol.
- Danger! Excessive sound pressure from
earphones and headphones can cause hearing loss. If you listen to loud music for a long time, your hearing may be impaired. Set to a moderate volume.
- This product is only intended for audio entertainment.
Do not use the product for any other purpose than described in this manual in order to avoid any hazardous situation. Improper use is dangerous and will void any warranty claim.
- If you would like to connect an external device with this
product, a good quality shielded cable must be used,
which ensures the electromagnetic compatibility of the
product and the used cable as a whole.
EN
24
- For household use only. Do not use outdoors.
- Danger of suffocation! Keep all packaging material away from children.
- Only use under normal room temperature and humidity conditions.
- The product is only suitable for use at moderate degrees of latitude. Do not use in the tropics or in particularly humid climates.
- Do not move the product from cold into warm places and vice versa. Condensation can cause damage to the product and electrical parts.
- Do not use attachments or accessories other than recommended by the manufacturer or sold with this product. Install in accordance with this user manual.
- When installing the product, leave sufficient space for ventilation (minimum 10 cm around the product). Do not install in bookcases, built-in cabinets or the like.
- Do not impede ventilation by covering the ventilation openings with items, such as newspapers, table-cloths, curtains, etc. Do not insert any objects.
- Do not install near any heat sources such as radiators, heat registers, stoves or other products (including amplifiers) that produce heat.
- Do not shift or move the product when connected to the mains.
- Do not touch, push or rub the surface of the product with any sharp or hard objects.
- Danger! To reduce the risk of fire or electric shock, do not expose this product to rain or moisture.
- The product shall not be exposed to dripping or splashing and no objects filled with liquids, such as vases, shall be placed on the product.
- Care should be taken so that no objects or liquids enter the enclosure through openings.
-
No naked flame sources, such as lit candles, should be placed on the product.
-
Refer all servicing to an authorised service agent. Do not attempt to repair the product yourself. Servicing is required when the product has been damaged in any way, such as if the supply cord or plug are damaged, liquid has been spilled, objects have fallen into the product, the enclosure is damaged, the product has been exposed to rain or moisture, does not operate normally, or has been dropped.
- Before connecting the product to a socket outlet, make sure the voltage indicated on the product corresponds to your local mains.
- Only use the provided adaptor.
- The adaptor power plug is used as the disconnect device; the disconnect device shall remain readily operable. To completely disconnect the power input, disconnect the adaptor power plug.
- The product may not function properly or not react to the operation of any control due to electrostatic discharge. Switch off and disconnect the appliance; reconnect after a few seconds.
- Protect the supply cord from being walked on or pinched particularly at the plug, convenience receptacles and the point where it exits from the product.
- Disconnect the adaptor power plug in case of faults during use, during lightening storms, before cleaning and when not using the product for a longer period of time.
- Danger! Before cleaning, switch the product off and disconnect the adaptor power plug from the socket.
- When the product has reached the end of its service life, make it defective by disconnecting the adaptor power plug from the socket and cutting the cord in two.
- Caution! There is danger of explosion from improper replacement of the batteries. Replace batteries only with the same or equivalent type of battery.
- Always change the entire battery pack. Do not mix old and new batteries, or batteries with different charge state.
EN
26
- Make sure the batteries are correctly inserted. Observe the polarity (+) plus / (-) negative on the battery and the housing. Improperly inserted batteries can lead to leakage or, in extreme cases, a fire or an explosion.
- Remove used batteries. Remove the batteries if you know that the product will not be used for a longer period of time. Otherwise, the batteries could leak and cause damage.
- Non-rechargeable batteries must not be recharged.
- The connections must not be short-circuited.
- Remove the batteries from the product before disposal.
- Never expose batteries to excessive heat (e.g. bright sun, fire), and never throw them into fire. The batteries could explode.
- Keep batteries out of reach of small children. If batteries have been swallowed, seek immediate medical attention.
- If the batteries leak, remove them with a cloth and dispose of them accordingly. Prevent battery acid from coming into contact with skin and eyes. If you do get battery acid in your eyes, flush them thoroughly with lots of water and consult a physician immediately. If battery acid comes into contact with your skin, wash the affected area with lots of water and soap.
INTENDED USE
This product is intended for audio playback via DAB-Radio, FM-Radio or Bluetooth. Any other use may result in damage to product or injuries. This product is designed for household use only and not intended for commercial use. The Imtron GmbH assumes no liability for damage to the product, for property damage or for personal injury due to careless or improper usage of the product, or usage of the product which does not meet the manufacturer's specified purpose.
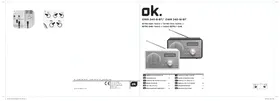
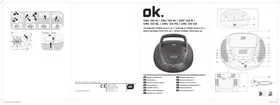
CONTROLS AND COMPONENTS
A. Telescope antenna
B. Standby/Mode button
C. Preset 1
D. Scan button
E. Preset 2
F. Menu / Info button
G. Preset 3
H. Alarm button
I. Prev button
J. Preset button
K. Next button
L. Vol / Select button
M. Display
N. ON/OFF switch
O. Ear phone jack
P. DC input socket DC 5V
Q. Charging power supply
DELIVERY CONTENTS
1 x Charging power supply
1xUsermanual
EN
28
BEFORE FIRST USE
Remove the product and accessories carefully from the original packaging. Inspect the delivery contents for completeness and damages. Should the delivery contents be incomplete or damaged, contact your sales outlet immediately.
LANGUAGE
The default language of your radio is English. You change the language under SYSTEM SETTING.
POWER SUPPLY
If operation by mains power is not possible the radio can be powered by built-in rechargeable batteries.
Fig. 1
1. Operation by mains
Insert the DC plug of the charging power supply into the DC input socket DC 5 V. Then plug the power supply into a mains socket.
2. Operation by batteries
Disconnect the charging power supply from the DC 5V socket.
OPERATION
Fig. 2
Adjusting the antenna
For optimal reception, extend the antenna, move to fully extend and adjust it.
Turning the unit on/off (standby)
Push the on/off switch to ON.
Press the standby button for approx. 1 second to turn on/off the unit.
Adjusting the volume
The volume can be adjusted during playback with the volume control Vol.
DAB RADIO
Fig. 3 Press Mode to select DAB mode.
When the radio is switched on for the first time, it will automatically do a full scan of DAB/DAB+ stations. The list of stations is then stored, eliminating the need for another full scan when the radio is turned on next time.
When the scan is complete, the stations are stored in alphabetical order. The first available station will be played back.
Note
If there is no DAB reception at any time, change the position of the unit or adjust the antenna.
CHANGING DAB/DAB+ STATIONS
-
Press the buttons Prev or Next in DAB mode to navigate available DAB/DAB+ stations.
-
Press Select to confirm.
DAB MODE-AUTO SCAN
Long press the button Menu in DAB mode and then the buttons Prev or Next buttons until
The unit scans all available DAB/DAB+ stations and plays the first available station. Alternative, you can activate the auto scan function by pressing Scan.
Note
New stations and services are added to the stored DAB/ DAB+ stations. In order to make new DAB/DAB+ stations and services available on your radio, run a full scan at regular intervals.
EN
30
DISPLAYING STATION INFORMATION
- Select a DAB station.
-
During DAB/DAB+ radio playback, press Menu repeatedly to display the following information (if available):
-
Ensemble
Frequency - Signal frequency error
Audio state and bit rate
Time - Date
Radio text - Signal strength
Programme type - Power status (Mains or battery)
MANUAL STORING DAB STATIONS
You can store up to 20 preset DAB/DAB+ stations.
- Select the desired station.
- Press and hold Preset for one second and then confirm by pushing Select so that
appears on the display. - Repeat steps 1 to 2 to store more DAB/DAB+ stations.
- Or you can fast preset the favorite top 3 stations by press and hold the 1-2-3 button for approximately 2 seconds until 'Save to Preset' and the numbered preset list is displayed.
Note: If there is already an existing DAB station stored under a preset, it will be over written when you store the new station.
SELECTING PRESET DAB STATIONS
- Press Mode to select the DAB/DAB+ mode.
- Press Preset to access the Preset menu "Preset Recall" <#: stored station name>.
- Use the buttons Prev or Next to select a preset number and confirm your selection by pressing Select.
USING THE DAB/DAB+ MENU
In DAB mode press and hold Menu for approx. 1 second and the display shows the menu. Use the buttons Prev or Next to browse the menu options. To confirm your selection press Select each time.
Searches for all available DAB/DAB+ stations.
DRC>
Dynamic Range Control setting boosts the volume of quieter sounds in a noisy environments.
Off / low / high
Bass and Treble can be adjusted separately.
FM RADIO
Selecting FM Stations
Fig. 4
- Press the Mode button to select FM stations.
- The radio plays the last station selected.
Selecting FM station frequencies
- Select a FM station.
- Manual frequency selection
Press the buttons Prev or Next to change the frequency at intervals of 0.05 MHz.
- Automatic frequency selection
Press the buttons Prev or Next for 1-2 seconds and the radio will stop searching once an active station has been found.
- If you can press the Scan button, the unit will quick search and play the next received station.
EN
32
Storing FM stations
You can store up to 20 preset FM stations.
- Select the desired FM station.
- Press and hold the Preset button for one second and then confirm by pushing Select so that
appears on the display. - Repeat steps 1 to 2 to store more FM stations.
- Or you can fast preset the favorite top 3 stations by press and hold the 1-2-3 button for approximately 2 seconds until
is displayed.
Note: If there is already an existing FM station stored under a preset, it will be over written when you store the new station.
Selecting a preset FM station
- Press Preset to access the Preset menu.
- Use the buttons Prev or Next to select a preset number and confirm your selection by pressing Select.
Using the FM menu
- Press and hold Menu in FM mode and select a menu option with the buttons Prev or Next:
- Confirm selection with Select.
AMS setting
- In FM mode, press the Menu button for approx. 1 second and use the Prev or Next buttons to select
. -
Press the Select button to confirm the selection.
-
Select Yes/No with the buttons Prev or Next and confirm with Select.
Yes
Scans for stations with strong signals and auto memory store.
SCAN setting
- Press and hold Menu in FM mode and select with the buttons Prev or Next
. - Press Select to confirm the selection.
-
Select a menu option with the buttons Prev or Next and confirm with Select.
-
Scans for stations with strong signals
Scans all available stations
AUDIO SETTING
- In FM mode, press the Menu button for approx. 1 second and use the Prev or Next buttons to select
- Press the Select button to confirm the selection.
-
Use the Prev or Next buttons to select a menu option and confirm by pressing the Select button.
-
EN
34
SYSTEM SETTING
Fig. 5 Long press Menu in any mode and select
Sleep Setting
- Select menu option
with the buttons Prev or Next and confirm with the button Select. - Press the buttons Prev or Next repeatedly until you have set the desired time, between 15 to 90 minutes and off. The selected sleep time minutes will be displayed in the radio display e. g. 15, and will countdown until the radio power off.
Setting the time
- Select menu option
-
Use the buttons Prev or Next to select the desired submenu:
-
manual time and date setting Choice of DAB Update, FM Update, Any Update or No Update Choice of 12 or 24 hour format Choice of DD-MM-YYYY or MM-DD-YYYY.
35
EN
Display lighting (backlight)
Select the menu option
Select the following options with the keys Prev or Next and press the Select key to confirm the entry and return to the display illumination menu.
Set language
-
Use the Prev or Next buttons to select the
menu option and confirm using the Select button. -
Select the desired language with the Prev or Next button and press the Select button to confirm the selection.
Factory settings
Select menu option
Displaying the software version
Select menu option
Sound setting
-
Use the Prev or Next buttons to select the
menu option and confirm using the Select button. -
Use the Prev or Next buttons to select
or and press the Select button to confirm your selection. -
Select the treble and bass with the Prev or Next button and confirm with the Select button.
EN
36
SET ALARM
Note:
Make sure the time is set correctly.
-
Press the Alarm button to access the following options:
-
[Alarm 1]
-
[Alarm 2]
-
Press Select to enter the Alarm Wizard.
- With the [alarm] menu item selected, press the Select key to activate (On) or deactivate (Off) the alarm.
: Alarm On time. Set the hours and minutes with Prev or Next and confirm with Select. - Set the alarm duration [Duration] with Prev or Next and confirm with Select.
[15] The alarm sounds for 15 minutes.
[30] The alarm sounds for 30 minutes.
[45] The alarm sounds for 45 minutes.
[60] The alarm sounds for 60 minutes.
[90] The alarm sounds for 90 minutes.
[120] The alarm sounds for 120 minutes.
-
Set the alarm tone [Source] with Prev or Next and confirm with Select.
-
[Buzzer] Select the buzzer as the alarm tone.
- [DAB] Select the last played DAB + radio station as the alarm sound.
-
[FM] Select the last played FM radio station as the alarm sound.
-
Select menu point [Frequency] with Prev or Next buttons to set the alarm plan and confirm with Select.
-
[Daily] The alarm is activated daily.
- [Weekends] The alarm is activated on Saturdays and Sundays.
- [Weekdays] The alarm is activated from Monday to Friday.
-
[Once] The alarm is activated only once.
-
Use the Prev or Next button to select the [Source] item to set the alarm source and confirm with Select. Use the Prev or Next buttons to select [Digital Radio] (DAB radio), [FM] or [Buzzer] and confirm with Select. If DAB radio or FM radio is selected, the currently selected station is adopted. The menu item [Preset] therefore shows [Last listened].
-
Use the Prev or Next button to select the [Volume] item to set the alarm volume and confirm with Select. Select the volume with the Prev or Next button and confirm with Select.
-
When you have made all the settings, press the Menu/ Info button to exit the alarm menu. The alarm menu is also left automatically 10 seconds after the last setting was done.
ALARM REPEAT
When the alarm sounds, press Select to select the 10 minutes snooze period.
SWITCHING OFF THE ALARM TONE
When the alarm sounds, press the Alarm button and the alarm will turn off.
BLUETOOTH®
This mode allows you to use the radio as a speaker for an external device (e.g. mobile phone or MP3 player). The signal is transmitted wirelessly via Bluetooth®.
Note
Before playback, you must pair the radio (in this case the Bluetooth receiver) and the device (transmitter).
EN
38
Compatibility
This product is compatible with Bluetooth® enabled mobile phones and music devices. It features Bluetooth® version 5.0. It also works with devices featuring other Bluetooth® versions that support e.g.
Wireless stereo listening
A2DP (Advanced Audio Distribution Profile)
Wireless music control
AVRCP (Audio/Video Remote Control Profile)
Note
- Keep the range of 8 meters when pairing.
- Before pairing a Bluetooth® AV source, refer to the AV source user guide regarding safety instructions and use with other devices.
Pairing
- Press the Mode button until
appears on the display. The product is in Bluetooth mode. - Activate the Bluetooth® function on the playback device. If necessary make a search for Bluetooth® devices. Pair your playback device with ORD 130. The devices are now connected, and "connected" will sound.
-
To end the Bluetooth connection:
-
Turn off the Bluetooth® function on the playback device or long press Select button, "disconnected" will sound.
- Change the Mode.
Bluetooth®-Playback
- Start the music playback on the audio device.
- Press the Prev or Next button shortly to skip title forward or backward.
- Adjust the volume with Vol dial.
GENERAL SETTING
Sender information
Briefly press the Menu/Info button each time to display various information such as radio text, station name, time, etc.
CLEANING AND CARE
- Unplug the adaptor from the socket before cleaning the unit.
- Attention! Do not let water penetrate into the unit.
- Clean the housing with a lightly dampened cloth.
- Do not use sharp, scouring or aggressive cleaners.
- Do not use chemicals (such as gasoline or alcohol) to clean the housing.
TROUBLESHOOTING
If there are any problems during operation, please refer to the following table. If problems cannot be solved as indicated under Solution, please contact your manufacturer.
| Problem Possible causes Solution | ||
| Product does not function | Interrupted power supply | Check the power supply or change batteries |
| No sound Volume is set to 0 Adjust the volume | ||
| Poor radio reception quality | Poor radio reception | Place the product to another place and adjust the antenna again. |
EN
40
TECHNICAL DATA
Adaptor
Manufacturer: DongGuan Obelieve
Electronic Co. Ltd.
Huashaoxin Industrial Park
B-4/F, Golden Phoenix
Industrial Zone,
Fenggan Town, Dongguan,
GuangDong Province,
P. R. China
Business license : 91441900050747698U
Imported by : Imtron GmbH
Wankelstraße 5,
85046 Ingolstadt,
Germany
Commercial registration no.: HRB 4580
Model : OBL-0501000E
Input voltage: 100 - 240 V~
Input AC frequency : 50/60 Hz
Output voltage : 5.0 V
Output current : 1 A
Output power: 5.0 W
Average active efficiency : 76.5 %
Efficiency at low load (10%) : --
No-load power consumption: 0.08 W
Rechargeable battery : 3.7 V, 2000 mAh
Tuning range (Tuner DAB) : 174.9 - 239.2 MHz
Tuning range (Tuner FM) : 87.5 - 108 MHz
Tuning Grid (Tuner FM) : 0.05 MHz
Bluetooth®
Frequency range : 2402 MHz - 2480 MHz
Max. RF power : -4.535 dBm
Operation conditions : 0^ - 40^
Dimensions (W× H× D) :161X110X58mm
Weight : Approx. 0.35 kg
DECLARATION OF CONFORMITY
Hereby, Imtron GmbH declares that the radio equipment type ORD 130 is in compliance with Directive 2014/53/EU. The full text of the EU declaration of conformity is available at the following internet address: http://de.ok-online.com/nc/de/suche.html
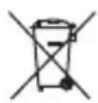
DISPOSAL

The crossed-out wheeled bin logo requires the separate collection of waste electric and electronic equipment (WEEE). Electric and electronic equipment may contain dangerous and hazardous substances. Do
not dispose of this appliance as unsorted municipal waste. Return it to a designated collection point for the recycling of WEEE. By doing so, you will help to conserve resources and protect the environment. Contact your retailer or local authorities for more information.
Please dispose of batteries in an environmentally friendly manner. Do not put batteries into the household waste. Please use the return and collection
systems in your community or contact the dealer where you purchased the product.

42
ENHORABUENA
- Confirm selection with Select.
ES
52
AMS setting
Huashaoxin Industrial Park
B-4/F, Golden Phoenix
Industrial Zone,
Fenggan Town, Dongguan,
GuangDong Province,
P. R. China
Número de registrar comercial : 91441900050747698U
Fabricant: DongGuan Obelieve
Electronic Co. Ltd.
Huashaoxin Industrial
Park B-4/F, Golden
Phoenix Industrial
Zone, Fenggan Town,
Dongguan,
GuangDong Province,
P. R. China
Next kal 1e13e1a1wote 1e To nKtpo Select.
GR
92
KavTe Tc EInc Eniloyec Me Ta PAnktpa Prev n Next Kai PAnoTe To PAnktpo Select yia va ePiBepaiwoTe Tny kataxwpion Kai EpiotpeTc OTo Mevou WTIOOu OOvnc.
Bluetooth®-Avanapaywyn
Tensione in uscita : 5,0 V
Potenza in uscita : 5,0 W
Dimensioni (L x A x P) : 161 X 110 X 58 mm
Peso : Circa 0,35 kg
HANDMATIG DAB STATIONS OPSLAAN
A2DP (Advanced Audio Distribution Profile)
Producent: DongGuan Obelieve
Electronic Co. Ltd.
Huashaoxin Industrial
Park B-4/F, Golden
Phoenix Industrial
Zone, Fenggan Town,
Dongguan,
GuangDong Province,
P. R. China
SPARA DAB-STATIONER MANUELLT
Electronic Co. Ltd.
Huashaoxin Industrial Park B-4/F, Golden Phoenix Industrial Zone, Fenggan Town, Dongguan, GuangDong Province, P.R.China
Utgående spanning : 5,0 V
Utgäende ström : 1 A
Utgäende effekt : 5,0 W
Phoenix Industrial Zone,
Fenggan Town, Dongguan,
GuangDong Province,
P. R. China
Ticaret sicil numarası: 91441900050747698U