
SKS700 - Slicer GRAEF - Free user manual and instructions
Find the device manual for free SKS700 GRAEF in PDF.

User questions about SKS700 GRAEF
0 question about this device. Answer the ones you know or ask your own.
Ask a new question about this device
Download the instructions for your Slicer in PDF format for free! Find your manual SKS700 - GRAEF and take your electronic device back in hand. On this page are published all the documents necessary for the use of your device. SKS700 by GRAEF.
USER MANUAL SKS700 GRAEF
natural_image
Exterior view of a modern office building (no signage)EN Operating Instructions
[Non-Text]
[Non-Text]
[Non-Text]
[Non-Text]
[Non-Text]
[Non-Text]
[Non-Text]
[Non-Text]
[Non-Text]
[Non-Text]
[Non-Text]
[Non-Text]
[Non-Text]
[Non-Text]
[Non-Text]
[Non-Text]
[Non-Text]
[Non-Text]
[Non-Text]
[Non-Text]
[Non-Text]
[Non-Text]
[Non-Text]
[Non-Text]
[Non-Text]
[Non-Text]
[Non-Text]
[Non-Text]
[Non-Text]
[Non-Text]
[Non-Text]
[Non-Text]
[Non-Text]
[Non-Text]
[Non-Text]
[Non-Text]
[Non-Text]
[Non-Text]
[Non-Text]
[Non-Text]
[Non-Text]
2
2
[Non-Text]
[Non-Text]
2
2
[Non-Text]
[Non-Text]
[Non-Text]
[Non-Text]
[Non-Text]
[Non-Text]
[Non-Text]
[Non-Text]
[Non-Text]
[Non-Text]
[Non-Text]
[Non-Text]
[Non-Text]
[Non-Text]
[Non-Text]
[Non-Text]
[Non-Text]
[Non-Text]
Inhalt
Sicherheit 5
Produktbeschreibung
natural_image
Close-up of a fresh lettuce salad with lettuce, lettuce, tomato, and cheese pieces in a bowl (no text or symbols visible)
natural_image
Close-up of a fish fillet being cut with flour, served on a white plate with a fork (no text or symbols visible)Für den Teig:
1 Bund Rosmarin
1 Bund Thymian
2-3 Eiweiß
3-4 EL Mehl
2 kg grobes Meersalz
natural_image
Two food dishes: one showing sliced meat and the other a colorful salad with tomatoes, cherry tomatoes, and lettuce (no text or symbols visible)Für Steaks:
natural_image
Plate of salad with lettuce, shredded cheese, and garnishes (no text or symbols visible)Für das Carpaccio:
natural_image
Dish of a salmon fillet with lettuce, pineapple, and radish on a black plate (no text or symbols visible)Für den Saibling:
natural_image
Plated dish of red meat garnished with parsley and white strips, served on a white plate with fork and side table items (no text or symbols visible)Für das Carpaccio:
General safety instructions.... 30
Danger caused by electric current 31
Safety instructions for the electrical connections.... 31
Product overview....33
Product description....34
Accessories....34
General aspects....35
Information on these operating instructions....35
Intended use 35
Limitation of liability 36
Warning messages and symbols....36
Unpacking the unit....37
Requirements on the installation location 37
Prior to first use 37
Basic cleaning....37
Initial operation and use 38
Child safety lock (switch-on guard) 38
Use MiniSlice attachment „2 in one“ as a remnant holder......38
MiniSlice attachment „2 in one“ 39
Cleaning and maintenance 40
Cleaning the cutter on the outside 40
Removal and cleaning of the slide 40
Blade removal unit 41
Greasing the unit on the inside 42
Screwing on the blade cover plate....42
Ensure value preservation of the blade 42
Sharpen blade 43
After-sales service 43
Accessories 43
Disposal 44
Disposal of the packaging.... 44
Disposal of the unit 44
Guarantee 44
5-year guarantee 44
Troubleshooting 45
Recipes (for 4 persons) ....47
Gilthead in salt crust with romaine lettuce 47
Grilled rump steaks with mixed tomato salad 48
Potato carpaccio with ham and bitter salads ....49
Fried sea trout with beetroot carpaccio, mandarins, pecan nuts and lamb's lettuce 50
Graef's Carpaccio à la Cipriani....51
Safety
General safety instructions
This device conforms to the relevant safety regulations. For safe handling of this unit, please observe the following safety instructions:
• However, incorrect handling may lead to injury and damage.
- Before using this device for the first time, check it for visible outer damages on the housing, connection cable and plug. Do not operate a damaged unit.
- If the connection cable is damaged, it must be replaced by the manufacturer, the after-sales service or a similarly qualified person in order to prevent danger.
- Repairs may be carried out only by an expert or by Graef after-sales service. Incorrect repairs may cause considerable hazards for the user. In addition, any claim under guarantee is forfeited.
- Defective parts must be replaced by original spare parts only. It is only with these parts that the safety requirements are met.
• This unit must not be used by children.
- Keep the unit and its connection cable away from children.
- This unit may be used by persons with reduced physical, sensory or mental abilities or deficiencies in experience and knowledge, if they are supervised or have been instructed in the safe use of the unit, and in addition understand the resulting dangers.
• Children must not play with this unit.
- The unit is not intended to be used with an external timer or a separate remove control.
- Always disconnect the connection cable by using plug; do not pull the connecting cable.
- Be careful not to let the power cord hang freely, this could cause the fall of the appliance.
- Packaging materials must not be used for playing. There is a danger of suffocation.
- In the absence of supervision and prior to assembly, disassembly or during cleaning, always disconnect the unit from the mains.
• After a continuous operation of 10 minutes, let the motor cool down for an hour. - This appliance must be used with the carriage and MiniSlice attachment "2 in one" in the position of use, unless the size and shape of the food does not allow their use.
- Clean the appliance, the MiniSlice attachment "2 in one" and the carriage with a damp cloth or mild detergent.
- Clean the Blade with a damp cloth. Caution: risk of injury!
- KEEP THE OPERATING INSTRUCTIONS.
Danger caused by electric current
Mortal danger is caused by contact with energised cables or components!
Please observe the following safety instructions in order to prevent an exposure to electric current:
- Do not use the unit if the mains cable or plug are damaged.
- In this case, you should let the Graef Customer Service install a new connection cable before using the appliance again. This may be done also by an authorised specialist.
- Do not open the housing under any circumstances. If live connections are touched or the electrical and mechanical construction are modified, there is the danger of electric shock.
- Never touch live parts. This can cause an electric shock and may cause even death.
Safety instructions for the electrical connections
For safe and fault-free operation of the unit, the following require-
ments have to be met during the electrical connection:
- Before connecting the unit, compare the connecting data (voltage and frequency) on the type plate with those of your energy network. These details must correspond so that no damage occurs to the unit. In case of doubt ask your trained electrician.
- The socket has to be protected at least by a 10 amps circuit breaker.
- Make sure that the power cable is not damaged and is not laid across hot surfaces or sharp edges.
- The connecting cable must not be stretched tightly.
- The electric safety of the unit is ensured only when it is connected to a socket with protective conductor installed correctly. Operation on a socket without protective conductor is forbidden. If in doubt, let the house installation checked by a trained electrician. The manufacturer shall not assume responsibility for damage which has been caused by absent or interrupted protective conductor.
Product overview
Product description
1 Motor body
2 Blade protecting ring
3 Blade
4 Stop plate
5 Dial illumination
6 Setting of cutting thickness
7 Scraper
8 Base plate
9 MiniSlice-attachment "2 in one"
10 Blade cover plate
11 Blade illumination
12 Stop illumination
13 Slide with stainless steel support
14 Continuous switch
15 Slide unlocking
16 Child safety lock (switch-on guard)
17 Intermittent switch
Accessories
Stainless steel tray
Blade sharpener
MiniSlice attachment
Blade removal unit
General aspects
Dear Customer,
You have made a good choice by buying the professional universal cutter. You have purchased a recognised quality product. Thank you very much for buying our product. We wish you a lot pleasure with your new universal cutter.
Information on these operating instructions
These operating instructions provide important information on putting into operation, safety, intended use and the care of the universal cutter (hereinafter referred to as unit). The operating instructions shall have to be available at the unit at all times. The instructions have to be read and applied by every person who deals with
- initial operation,
- operation,
- fault correction and/or
• or is instructed to clean the unit.
Keep these operating instructions and pass them on to the next owner along with the unit. These operating instructions cannot take into consideration every conceivable use. For further information or in case of problems which are not dealt with or not dealt with sufficiently in these instructions, please get in touch with Graef customer service or your specialist dealers.
Intended use
This unit is not intended for commercial use. Use the universal cutter in closed-up rooms only. It can be used to cut bread, ham, sausage, cheese, carrots, cucumber, fruit, vegetables, et cetera. By no means cut hard matter, such as frozen foodl, bones, wood, sheet metal, or the like. Another or any exceeding use shall not be considered intended. This unit is intended for use in a household.
The appliance can cause dangers, if is not used as intended.
- Use the unit exclusively as intended.
- Observe the procedures described in these operating instructions.
Claims of any kind caused by damage by unintended use shall be excluded. The risk shall be borne sole by the operator.
Limitation of liability
All technical information, data and notes on the installation, the operation and the care contained in these operating instructions correspond to the last status before printing, and are rendered under consideration of our previous experience and to the best of knowledge. No claims may be derived from the particulars, illustrations and descriptions in these instructions.
The manufacturer shall not assume any liability for damage caused by:
• Non-observation of the instructions,
- unintended use,
- incorrect repairs,
- technical modifications,
• use of unapproved spare parts.
Translations shall be carried out to the best of knowledge. We shall not assume any liability for translation mistakes. The original German text only shall be binding.
Warning messages and symbols
In these operating instructions, the following warning messages, signal words and symbols are used:

WARNING!
This signal symbol / word indicates a hazard with average risk level which, if not prevented, may result in death or a severe injury.

CAUTION!
This signal symbol / word indicates a hazard with low risk level which, if not prevented, may results in slight to moderate injury.
NOTE!
This signal work warns against potential material damage.

This symbol provides additional information on operation.
Unpacking the unit
When unpacking the unit, proceed as follows:
- Remove the unit from the box.
- Remove the packaging parts.

CAUTION!
Danger of injury!
The very sharp blade can cause injuries.
- Remove any stickers on the unit (do not remove the type plate).
Requirements on the installation location
For safe and fault free operation of the unit, the following requirements of the installation location have to be met:
- The unit has to be placed on a solid, flat, horizontal, and non-slipping surface with a sufficient weight-carrying capacity.
• Make sure that the unit cannot topple over. - Choose the location in such a way that children cannot reach the blade of the unit or the supply lines.
- Never use the appliance outdoors, and always keep it in a dry place.
- The unit is not designed for installation in a wall or a built-in cupboard.
- Do not set up the unit in a hot, wet or moist environment.
- The socket has to be easily accessible so that the power cable can be removed easily in case of emergency.
- Should the connection line be too long, you can simply slide it into the cable compartment integrated in the housing.
Prior to first use

CAUTION!
Danger of injury!
The very sharp blade can cause injuries.
• Proceed with caution when wiping the blade.
Basic cleaning
Prior to first use, the blade of the unit must be wiped off using a moist cloth in
order to remove any possible production residue. See chapter "Cleaning and maintenance".
Initial operation and use

Danger of injury!
The very sharp blade can cut off body parts. Your fingers and thumbs especially are at risk.
- Do not reach into the space between the stop plate and Blade as long as the stop plate has not been completely closed.
- Do not touch the blade with your fingers.
Child safety lock (switch-on guard)
To secure the unit against unauthorized use it is equipped with a switch-on guard. This is located under the slide in the form of a small slider. To activate, push the switch-on guard into the unit until it engages perceptibly in place. During the process, neither the intermittent switch nor the continuous switch may have been operated. Now the unit cannot be switched on any more. To deactivate, pull the switch-on guard out of the unit until the final position.
Use MiniSlice attachment „2 in one“ as a remnant holder
NOTE!
This appliance must be used with the carriage and MiniSlice attachment "2 in one" in the position of use, unless the size and shape of the food does not allow their use.
- Insert the mains plug into the socket.
- Place the food on the carriage.
- Place the MiniSlice attachment "2 in one" on the rear wall of the carriage against the product to be cut.
-
Set the requested cutting thickness. The scale of the cutting thickness adjustment illuminates discreetly, thus clearly showing the set value, even with low ambient light.
-
Place the stainless steel tray below the unit.
- Press the slicing material lightly against the stop.
- Either press the intermittent switch or set the continuous switch by turning it clockwise to the end stop (1/4 turn).
• Evenly move the slide towards the blade. - After completion of the cutting process, either release the intermittent switch or turn the continuous switch back to its original position.
- Close the stop.

The lighting in the stop signalises that the stop is open. If the stop is opened for a long time, the colour changes from blue to red thus indicating to close the stop. The lighting will go out once the stop has been closed.
TIP
- Soft slicing material (such as cheese or ham) can be cut best when chilled.
- Soft slicing material can be cut better when moved forward slowly.

After a continuous operation of 10 minutes, let the motor cool down for an hour.
MiniSlice attachment „2 in one“
- Place the MiniSlice attachment "2 in one" on the back of the slide.
- Tighten the locking lever.
- Place the food to be sliced, e.g. cucumber, carrots, mushrooms, cocktail tomatoes, in the filling chute.
- If necessary, place the insert in the filling chute. It slides down automatically. Do not press.
- Set the desired cutting thickness.
- Place a tray, chopping board or plate under the blade.
- Switch on the continuous switch or use the momentary switch.
- Guide the carriage evenly against the blade.
- When the cutting process is finished, release the lock of the MiniSlice attachment "2 in one".
- After use, clean the MiniSlice attachment "2 in one". Frequent cleaning in the dishwasher can lead to discolouration. Cleaning under running water by hand is recommended.
Cleaning and maintenance

Danger of injury!
Inexpert cleaning may lead to injuries.
- Switch the unit off before cleaning and pull the power cord from the electric socket.
- Let the unit cool down before cleaning.
- Check whether the stop has been closed (the blade edge must be covered).
• Proceed with caution when wiping the blade.
Cleaning the cutter on the outside
- Use a soft and moist cloth to clean the outer surfaces of the unit. Use a mild detergent in case of heavy soiling.
NOTE!
Risk of damage!
Improper handling of the cutter can lead to damages of the unit.
- Do not use any aggressive or abrasive detergents and no solvents.
- Do not scratch off stubborn soiling with hard objects.
- Do not immerse the unit in water.
- Do not put the unit in the dishwasher and do not use it under running water.
• Never put the slide into the dishwasher. - Never put the blade into the dishwasher which may affect the sharpness and the corrosion resistance (salt attacks the blade). Handling the blade when loading and unloading from the dishwasher is another danger point.
Removal and cleaning of the slide
In order to clean the slide better, it can be removed from the unit.
- Press the unlock button upwards and keep holding it.
-
Remove the slide.
-
Clean the slide using a damp cloth or under running water. Use a mild detergent in case of heavy soiling.
- Once a month, add some drops of resin-free oil or petroleum jelly to the slideway.
- Use a soft cotton wool cloth to remove excessive oil / petroleum jelly.
- After completion of the cleaning process, put the slide back onto the guide profile.
Blade removal unit

CAUTION!
Sharp blade!
Proceed with caution when wiping the blade.

The blade removal unit combines the possibility of easily loosening the blade cover plate and safe removal of the Blade in a practical tool.
- Remove the plug from the socket.
• Pull the slide right up to yourself. - Set the cutting thickness to "closed", the stop must be completely closed.
- Turn the blade cover plate clockwise. To do so, take the blade removal unit as a help. Put the blade removal unit onto the blade and press it against the blade cover plate while turning the blade removal unit clockwise.
- Remove the blade cover plate.
- Put the blade removal unit onto the blade and turn it until the star knob screw is congruently aligned with the threaded hole in the blade. Turn the star knob screw clockwise into the thread of the blade until the stop.
- The blade removal unit is attached to the blade.
• Pull of the blade removal device with the blade. - Undo the blade from the machine.
- Clean the inside of the blade using a damp cloth.
- Remove the black scraper from the unit.
- Clean the scraper using a damp cloth.
-
Remove the slide ring.
-
Clean the inside of the unit using a damp cloth.
- Clean the slide ring and insert it back again.
- Insert the scrape back again.
- Insert the blade back again in reverse order.
Greasing the unit on the inside
Regular greasing will increase the service life of your unit. For this purpose, exclusively use Graef petroleum jelly which is matched to our units. You can obtain them in our online shop at www.graef.de under item No. 141852.

Regularly grease the unit:
• In case of frequent use, every two to three days.
- When the unit runs for 10 minutes every day, every fortnight.
When greasing the blade, proceed with utmost care as follows:
- Remove the blade.
- Grease the gearwheel with petroleum jelly.
- Grease the blade bolt with petroleum jelly.
- Also grease the blade screw with petroleum jelly.
- Grease the slide ring using petroleum jelly.
- Place the blade back in again.
Screwing on the blade cover plate
- Place the blade cover plate back in again by means of the blade removal device.
- To fasten, turn the blade cover plate anti-clockwise.

CAUTION!
Before starting the machine again, ensure that the blade cover plate has been screwed on correctly.
Switch on the machine only when the blade cover plate has been mounted. Without the blade cover plate the blade has not been fastened. The blade can come loose and damage the device as well as cause severe injuries.
Ensure value preservation of the blade
For long-lasting sharpness and value retention of your Graef blade, were recommend to clean it in regular intervals, especially after cutting up salted meat
and/or ham. These foodstuffs contain salts, when they stay on the surface of the blade for a longer period of time, may even form a rust film (even on "stainless" steel). When cutting up slicing material which contains a lot of water, such as tomatoes or cucumbers, lacking or wrong (too "wet") cleaning may also lead to a rust film on the blade surface. For this reason we recommend to use a moist cloth, and if necessary some washing-up liquid, to clean the blade directly after use. Remove the blade from time to time and clean the unit inside. especially, when "juicy" slicing material (vegetables, fruit, roasts, et cetera) have been cut. Treat the blade with the upmost of care.
Sharpen blade
As soon as you notice the blade becoming blunt, you can re-sharpen it using the enclosed Blade sharpener. The diamond-coated grinding disc quickly restores the original sharpness of your food slicer guaranteeing you the best cutting results.
- Put the blade sharpener onto the slide.
- Open the limit stop to 15 mm slicing thickness.
- Slide the Blade sharpener against the limit stop.
- Move the slide with the sharpener to the blade.
- Turn on the machine and let it run for about 10 seconds.
- Then press the lever with your index finger so that the scraper element lies on the blade edge (let it run for about 2 seconds).
- Pull back the carriage, turn off the machine.
- The scraper element sets the burr created during the sharpening upright again. This guarantees an extremely sharp blade edge.
- Repeat the process if the cutting result does not meet your expectations.
After-sales service
If your unit is defective, please contact your specialist dealer or the Graef customer service on +49 (2932) 9703677 or write an e-mail to service@graef.de
Accessories
You can order other accessories in our online shop www.graef.de or from your specialist dealer.
Disposal
Disposal of the packaging

The packaging protects the unit against transport damage. The packaging materials are selected according to the environmental compatibility and disposal-related aspects and can therefore be recycled. The return of packaging into the material cycle saves raw material and reduces the waste volume. Dispose of the packaging material no longer needed at collection points for the "Green Dot" recycling system (in Germany).

If possible, keep the original packaging during the guarantee period of the unit in order to be able to pack the unit correctly in case of guarantee.
Disposal of the unit

At the end of its service life, this product cannot be disposed of in normal domestic waste. The symbol on the product and in the operating instructions point out to this fact. Reuse the materials according to their marking. With the reuse, recycling or other forms of recycling of old equipment, you make an important contribution to the protection of our environment. Please ask your municipal administration for the disposal point.
Guarantee
5-year guarantee
For this product, we undertake a guarantee of 60 months, starting from the date of sale. Your legal warranty claim in conformity with Section 439 et seq. of the German Civil Code (BGB) shall remain unaffected by this regulation. The guarantee does not cover any damage which is caused by incorrect handling or use as well as defects which only slightly influence the function or the value of the unit. Moreover, transport damage provided we are not responsible shall be excluded from the claims under guarantee. Guarantee shall be ruled out for damage, the repair of which has not been carried out by us or one of our represenations. In case of justified complaints, we shall repair the defective product or replace it by a product without defects at our discretion.
Troubleshooting
| Problem Cause Solution | ||
| Unit cannot be switched on. | Switch-on guard activated. | Unlock switch-on guard |
| Slide is sluggish. Slide guide is soiled. Clean and grease the sliding guide | ||
| Grinding noises on the blade. | Food residues on the blade. | Remove the blade. Clean the scraper, slide ring and blade, grease, if necessary. |
| Blade is sluggish or stops under load. | Blade gear not sufficiently greased, or soiled. | Remove the blade, clean it and grease the inside of the blade, including the blade gear using petroleum jelly. |
| Operating noise increases with rising use. | Gear is not sufficiently greased. | Remove the blade. Clean and grease the blade gear and motor screw. |
| Blade is loose, swings and strikes against the housing. | Slide ring not inserted. Make sure that the slide ring is correctly inserted | |
| Blade cover plate not mounted. | Please ensure that the blade cover plate is always correctly mounted. | |
| The cut slicing material is pulled behind the blade. | The slicing material is not correctly scraped off. | Make sure that the scraper is correctly inserted and undamaged. |
| The Blade does not cut well any more. | The blade is dull and must be sharpened. | Re-sharpen the blade using the blade sharpener contained in the scope of delivery. |
| The stop illumination lights red. | Safety instruction - the stop stands open for a long time. | Check to see that the stop is completely closed after using the machine. The stop illumination goes out. |
| The stop illumination pulsates red and the illumination of the blade and the scaler go out. | Safety instruction - the stop has already stood open for a long time. | Check to see that the stop is completely closed after using the machine. The stop illumination goes out. |
| The unit slips on the work top while cutting. | The installation surface or the rubber feet of the unit are soiled. | Make sure that the installation surface and the rubber feet of the machine are clean and free from grease. Select a suitable installation surface, if necessary |
| Blade blocks while cutting. | The unit is overloaded. | Interrupt the cutting process and cautiously remove the slicing material. Make sure to use only suitable goods to be cut and adjust the cut width accordingly, if necessary. |
| The connection line cannot be pushed into the cable compartment. | The connection line is blocked in the cable compartment. | Pull the connection line a bit out of the cable compartment and push it in again. While doing so, check to see that a short length as possible of the connection line is grasped. |
Recipes (for 4 persons)
Gilthead in salt crust with romaine lettuce

natural_image
Close-up of a fresh salad with lettuce, lettuce leafy greens, tomato slices, and cheese (no text or symbols visible)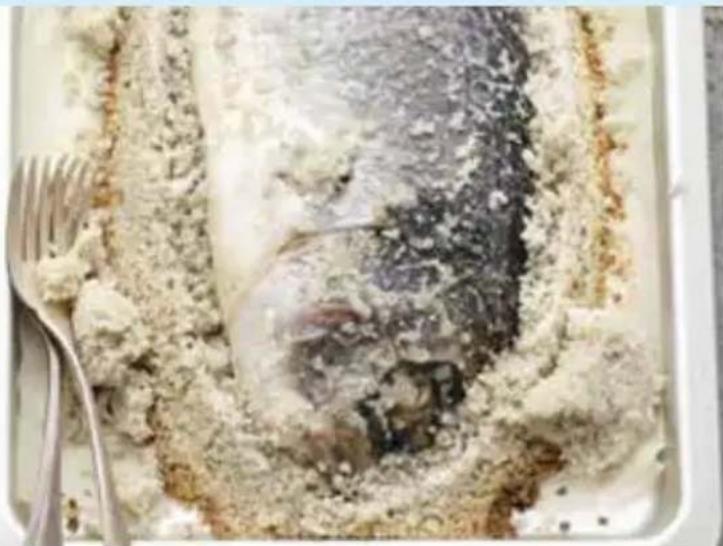
natural_image
Close-up of a fish fillet being cut with flour and a fork, no visible text or symbolsFor the dough:
1 bunch of rosemary
1 bunch of thyme
2 - 3 egg whites
3 - 4 tablespoons of flour
2 kg coarse sea salt
For the gilthead:
1 gilthead rose
approximately 1-1.5 kg
1 lemon
1 red pepper
3 - 4 young cloves of garlic
4 thyme sprigs
2 rosemary sprigs
4 leaf parsley sprigs
Salt from the mill
Pepper from the mill
For the salad:
2 romaine lettuce hearts
50 g parmesan
2 cloves of garlic
2 anchovies
3 egg yolks
1 tablespoon of Worcestershire sauce
Juice from 1 organic lemon
150 ml olive oil
100 ml vegetable stock
100 g cocktail tomatoes
30 g grated parmesan
- For the salt dough, pluck thyme, rosemary from the stems. Slightly beat egg white, process flour and salt with each other to become a soft dough.
- Scale the gilthead and cut off the fins. Thoroughly pat dry and season the stomach area with salt, pepper. Cut lemons into pieces, deseed red peppers and cut into pieces. Fill remaining ingredients into the stomach area.
- Prepare the barbecue for medium, indirect heat (with cover approximately 180°C).
- Spread 1/3 of the salt on a ovenproof baking pan or grill form, put the gilthead on it and cover it completely in the salt dough.
- Grill the fish for about 35 minutes with the cover closed. Finally, let the fish rest without heat for 5 - 10 minutes.
- For the salad, pluck the outer leaves, divide in half, remove the stem and cut into slices. Divide tomatoes in half.
- Plane Parmesan cheese for the dressing. Peel garlic. Stir together garlic, filets, egg yolks, Worcestershire sauce, lemon juice, and mix oil first drop by drop and then fluently by means of the Graef hand-held blender. After that, add stock, season and refine with Parmesan. Put the dressing onto the salad and sprinkle with tomatoes as well as the Parmesan.
Grilled rump steaks with mixed tomato salad

natural_image
Two food dishes: one showing sliced meat and another a plated dish featuring cherry tomatoes, lettuce, and herbs (no visible text or symbols)For steaks:
4 rump steaks about 250 g each
Salt from the mill
Pepper from the mill
Vegetable oil for greasing the
cooking grid
For the salad:
400 g mixed tomatoes
2 shallots
25 ml tomato vinegar
2 tablespoon of honey
25 ml vegetable stock
25 ml olive oil
Some basil sprigs as garnishment
- Prepare the barbecue for medium, high direct heat (with cover approximately 200^ C- 220^ C).
- Season the steaks with salt, grease the cooking grid with oil and grill both sides for 2 - 3 minutes in closed condition until a pattern emerges. Then change to indirect heat and keep on grilling for approx. 5 minutes. Finally, let rest for a further 5 minutes and season with pepper.
- Clean and wash the tomatoes depending on their nature, remove the stem and slice them using the Graef universal cutter and the MiniSlice attachment at level 2. Peel shallots and cut into fine cubes. Mix up all other ingredients with each other and season with salt, pepper.
- For serving, mix up the tomatoes with vinaigrette, cut the steaks into tranches and serve in addition. Garnish the tomato salad with basil.
Potato carpaccio with ham and bitter salads

natural_image
Plate of salad with lettuce, shredded cheese, and garnishes on a dark surface (no text or symbols visible)For the carpaccio:
4 medium-sized, solid-boiled potatoes
4 thyme sprigs
4 tablespoons of olive oil
1 handful of mixed bitter salads
(e.g. radicchio, frisée, rocket)
For the vinaigrette:
3 tablespoon of white Balsamic vinegar
1 tablespoon of honey
1 tablespoon of sweeter
mustard
25 ml vegetable stock
3 tablespoons of olive oil
Salt from the mill
Pepper from the mill
8 - 12 slices of air-dried ham
- Prepare the baking oven for 180^ C top/bottom heat.
- Peel the potatoes peeling and cut into thin slices by means of the Graef universal cutter at level 1. Pluck thyme from the stems and cut finely.
- The size of a starter plate, apply the potato slices in a slightly brick and circular form onto a baking paper. Then brush with oil, sprinkle thyme and season with salt, pepper. Repeat the whole thing three times so that four carpaccios of the same size emerge.
- Bake the carpaccios for 15 - 17 minutes in the oven.
- In the meantime, read out the salad, mix up the ingredients for the vinaigrette and season with salt, pepper. This goes particularly well using the Graef milk frother with the setting "cold stirring".
- Turn out the finished carpaccio onto the plates, mix up the salad with the vinaigrette and distribute onto the carpaccio. Serve with the remaining vinaigrette and 2-3 slices of ham each.
Fried sea trout with beetroot carpaccio, mandarins, pecan nuts and lamb's lettuce

natural_image
Top-down view of a colorful salad with sliced fish, lettuce, and garnishes on a dark plate (no text or symbols visible)For the arctic char:
1 arctic char filet with skin, without bones, approx. 800 g
1 tablespoon of clarified butter
1 tablespoon of butter
Salt, pepper
For the beetroot:
3 tubers of mixed beetroot (yellow-red and ring beet-root)
80 g lamb's lettuce
2 mandarins
3-4 tablespoons of roasted pecan nuts
2 tablespoon of honey
40 ml almond oil
- Wash the filet, pat dry and cut into eight tranches. Season with salt. Heat up the clarified butter in the pan and fry the tranches for 2 - 3 minutes on the skin side. Then turn, season with pepper and add the butter. Wet the fish with butter for a further 2 - 3 minutes let shortly simmer in the pan without heat.
- Peel the beetroot and cut into thin slices by means of the Graef universal cutter and the MiniSlice attachment at level 0.5. Lay out the plates alternately with the beetroot.
- Read out the lamb's lettuce. Squeeze out a mandarin, peel the second one, cut out the filets and mince. Coarsely chop the nuts. Make a vinaigrette from mandarin juice, honey, oil and season with salt, pepper. This can be done very well in a Graef milk frother by selecting the setting "cold stirring".
- Apply 1/3 of the vinaigrette to the carpaccio. Mix up the remaining ingredients of the beetroot with each other and distribute them on it. Finally, add two tranches of fish each and serve quickly.
natural_image
Plated dish of red and white meat garnished with parsley and cheese, served on a white plate with fork and side table items (no text or symbols visible)For the carpaccio:
200 g beef fillet without fat and tendons
(Middle piece)
2 tablespoons of olive oil
For the mayonnaise:
2 egg yolks
1 trace of mustard powder
1 tablespoon of Worcestershire sauce
Juice from 12 organic lemon
50 ml olive oil
125 ml vegetable oil
25 ml milk (3.5)
Salt from the mill
Pepper from the mill
Some caper berries
Some parmesan shavings
Chervil flake for
garnishment
- Rub the fillet with 1 tbsp oil, wrap tightly with cling film and twist the ends in. Then freeze for approx. 1 hour.
- In the meantime, put the egg yolks, mustard powder, Worecester and lemon juice in the blender jug and season with salt and pepper. Then, using the Graef hand blender, pour both oils into the egg, first drop by drop, then smoothly, and blend to a mayonnaise. Finally, add the milk and season again.
- Now brush a large plate with oil. Remove the fillet from the foil and, using the Graef universal slicer on speed 0.5, cut into thin slices and line the plate with the wafer-thin slices.
- Season the carpaccio with salt and pepper and spread the mayonnaise over the carpaccio using a piping bag. Finally, garnish with capers, parmesan and chervil.
Table des matières
Sécurité 54
natural_image
3D mechanical component diagram showing a lever with a labeled part 'GRAEF' and a numbered circle (9), no readable text or symbols beyond the label.Généralités
Chère cliente, cher client,
natural_image
Close-up of a fresh salad with lettuce, lettuce cabbage, tomato, and shrimp arranged in a bowl (no text or symbols visible)
natural_image
Close-up of a fish fillet in a tray with flour and fork, no visible text or symbolsPour la pâte :
natural_image
Two food dishes: one cut with sliced meat on a wooden board, the other a plated salad featuring cherry tomatoes and lettuce garnish (no text or symbols visible)Pour les steaks :
4 romsteaks d'env. 250 g
Sel au moulin
Poivre au moulin
natural_image
Top-down view of a plated salad with lettuce, cheese, garnished with herbs and cheese slices (no text or symbols visible)Pour le carpaccio :
natural_image
Top-down view of a plated dish featuring a large fish fillet, sliced fruit, and garnishes (no visible text or symbols)Pour l'omble :
natural_image
Plate of red and white meat strips garnished with parsley and cheese, served on a white surface with fork and plate nearby (no text or symbols visible)Pour le carpaccio :
Productbeschrijving
natural_image
Close-up of a fresh salad with lettuce, lettuce cabbage, tomato, and shrimp arranged in a circular pattern (no text or symbols visible)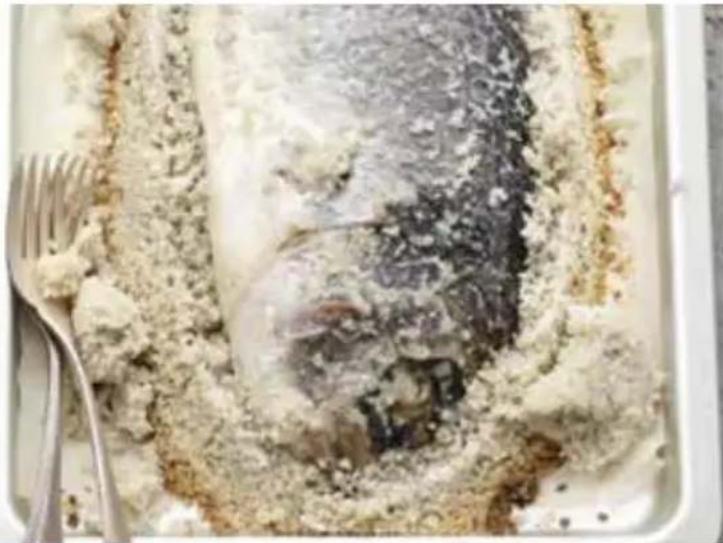
natural_image
Close-up of a fish fillet in a rectangular dish, covered with powdered sugar and a fork (no text or symbols visible)Voor de deeg:
natural_image
Two food dishes: one showing sliced meat and another a plated dish featuring cherry tomatoes, lettuce, and herbs (no text or symbols visible)natural_image
Plate of salad with lettuce, shredded cheese, and garnish on a dark surface (no text or symbols visible)Voor de carpaccio:
4 middelgrote, vastkokende aardappelen
4 takjes tijm
4 el olijfolie
natural_image
Dish of a fish fillet with vegetables and lettuce on a plate, served on a dark metal plate (no text or symbols visible)Voor de beekridder:
natural_image
Plated dish of red meat garnished with parsley and white strips, served on a white plate with fork and side table items (no text or symbols visible)Voor de carpaccio:
natural_image
3D mechanical component diagram with labeled section 'GRAEF' and number 9 (no readable text or symbols beyond labels)Generalità
Gentile Cliente,
natural_image
Close-up of a fresh lettuce salad with lettuce, lettuce, tomato, and cheese pieces in a bowl (no text or symbols visible)
natural_image
Close-up of a fish fillet in a rectangular dish, covered with powdered sugar and a fork (no text or symbols visible)natural_image
Two food dishes: one showing sliced meat on a cutting board, the other a colorful salad with cherry tomatoes and lettuce garnish (no text or symbols visible)Per le bistecche:
natural_image
Top-down view of a salad with lettuce, pickled meat, and garnishes on a dark plate (no text or symbols visible)Per il carpaccio:
natural_image
Dish of a fish fillet with vegetables and lettuce on a black plate, garnished with herbs and nuts (no text or symbols visible)Per il salmerino:
natural_image
Plated dish of red and white meat garnished with parsley and cheese, served on a white plate with fork and side table items (no text or symbols visible)Per il carpaccio:
natural_image
Close-up of a fresh salad with lettuce, lettuce leafy greens, and cherry tomatoes (no text or symbols visible)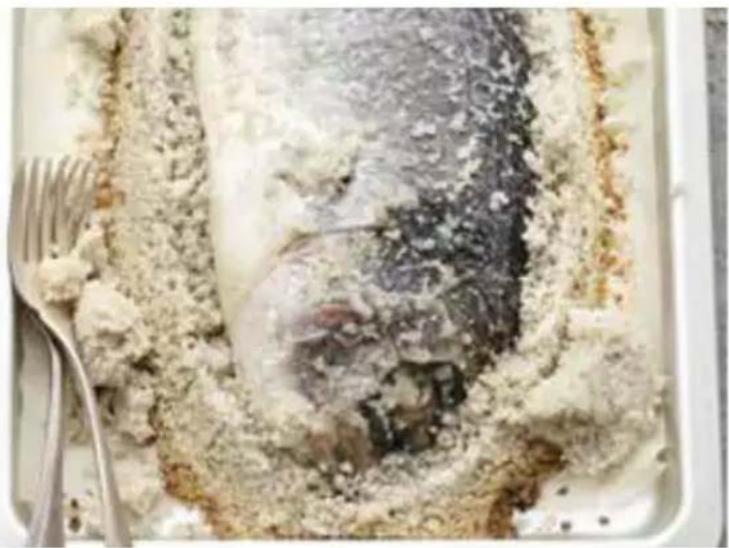
natural_image
Close-up of a fish fillet being cut with flour and a fork, no visible text or symbolsPara la masa:
natural_image
Two food dishes: one showing sliced meat on a cutting board, the other showing a colorful salad with tomatoes, cherry tomatoes, and lettuce garnish (no text or symbols visible)Para los filetes:
4 filetes de cadera de aprox. 250 g
Sal recién molida
natural_image
Plated dish featuring sliced meat, garnished with herbs and cheese, served on a dark plate (no text or symbols visible)Para el carpacho:
natural_image
Top-down view of a plated dish featuring a large fish fillet, sliced fruit, and garnished with herbs and lettuce (no text or symbols visible)Para el salvelino:
natural_image
Plate of red and white meat strips garnished with parsley and cheese, served on a white plate with fork and side table items (no text or symbols visible)Para el carpacho:
Produktbeskrivelse
natural_image
Close-up of a fresh lettuce salad with lettuce, lettuce, tomato, and shrimp pieces in a bowl (no text or symbols visible)
natural_image
Cooked fish fillet in a baking tray with fork and fork (no text or symbols visible)Til saltlagent:
1 bundt rosmarin
1 bundt timian
2-3 æggehvider
3-4 spsk. mel
2 kg groft salt
3-4 hvidløgsfed
4 stilke timian
2 stilke rosmarin
4 stilke bladpersille
Salt
Peber
2 ansjosfilet
3 æggeblommer
1 tsk. Worcestershire sauce
Saften fra en økologisk citron
150 ml olivenolie
100 ml grøntsagsbouillon
100 g cocktailtomater
30 g revet parmesan
Til guldbrasen:
natural_image
Two food dishes: one cut with sliced meat and one plated with fresh tomatoes, cherry tomatoes, and lettuce (no visible text or labels)Til steaks:
natural_image
Plate of fresh salad with lettuce, cheese, and garnishes on a dark surface (no text or symbols visible)Til carpaccio:
4 mellemstore voksagtige kartofler
4 stilke timian
4 spsk. olivenolie
1 håndfuld blandet bittersalat (F.eks. radicchio, frisée,
rucola)
Til vinaigrette:
3 spsk. hvid balsamico
1 spsk. honning
1 tsk. sød sennep
25 ml grøntsagsbouillon
3 spsk. olivenolie
Salt
Peber
natural_image
Top-down view of a plated dish featuring a large fish fillet, sliced fruit, and garnished with herbs and lettuce (no text or symbols visible)Til fjældørred:
natural_image
Plate of red and white striped meat garnished with parsley and cheese, served on a white surface with a fork and plate nearby (no text or symbols visible)Til carpaccio:
200 g oksefilet uden fedt eller sener (mellemstykke) 2 spsk. olivenolie
Til mayonnaise:
Produktbeskrivelse
1 Motordel
2 Knivvernering
3 Kniver
4 Anslagsplate
5 Skålbelysning
6 Snittykkelsesinnstilling
7 Avstryker
8 Gulvplate
9 MiniSlice-påsetting „2 in one“
10 Knivdekselplate
11 Knivbelysning
12 Anslagsbelysning
13 Sleider med opplegg i rustfritt stål
14 Varig bryter
15 Sleideopplåsing
16 Barnesikring (innkoblingssikring)
17 Momentbryter
Tilbehør
Brett i rustfritt stål
Knivsliper
MiniSlice-påsetting
natural_image
3D mechanical part diagram showing a lever and bracket with no visible text or symbolsGenerelt
Kjære kunde,
Fare for personskader!
natural_image
Close-up of a fresh salad with lettuce, lettuce leafy greens, and cherry tomatoes (no text or symbols visible)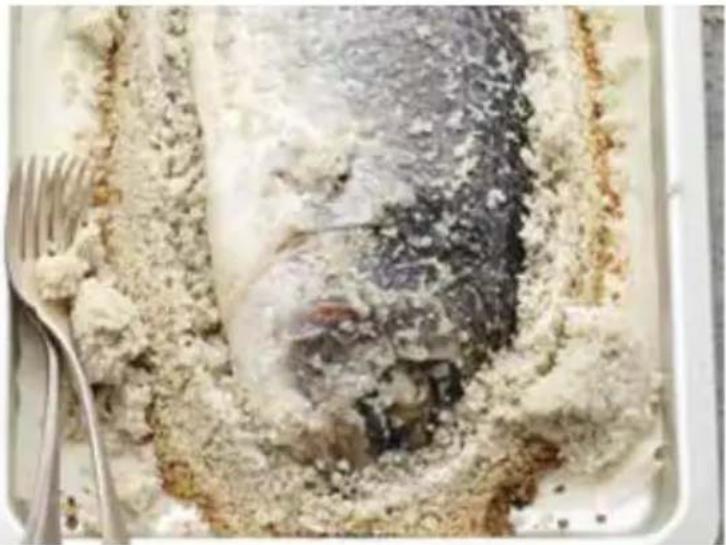
natural_image
Cooked fish fillet with visible shell and meat, served on a tray with fork (no text or symbols)Til deigen:
1 bunt rosmarin
1 bunt tymian
2 - 3 eggehviter
3 - 4 ss mel
2 kg grovt havsalt
natural_image
Two food dishes: one cut with meat and sliced, the other a plated salad featuring cherry tomatoes, lettuce, and herbs (no text or symbols visible)Til steik:
natural_image
Top-down view of a plated dish featuring lettuce, shredded cheese, and garnish on a dark plate (no text or symbols visible)Til carpaccio:
4 middels store, fastkokende poteter
4 grener tymian
4 ss olivenolje
1 håndfull blandede bitter-
salater
(f.eks. radicchio, frisée, ruccola)
Til vinaigretten:
3 ss hvit balsameddik
1 ss honning
1 ts søt sennep
natural_image
Top-down view of a plated dish featuring a large fish fillet, sliced fruit, and garnished with herbs and lettuce (no text or symbols visible)For ørreten:
natural_image
Plate of red and white meat strips garnished with parsley and cheese, served on a white plate with fork and side table items (no text or symbols visible)Til carpaccio:
Produktbeskrivning
natural_image
Close-up of a fresh lettuce salad with lettuce, lettuce, tomato, and shrimp arranged in a circular pattern (no text or symbols visible)
natural_image
Cooked fish fillet in a tray with fork and flour, no visible text or symbolsTill degen:
1 knippe rosmarin
1 knippe timjan
2 - 3 äggvitor
3 - 4 msk mjöl
2 kg grovt havssalt
natural_image
Two food dishes: one cut with meat and sliced, the other a plated salad featuring cherry tomatoes, lettuce, and herbs (no text or symbols visible)Till stekarna:
natural_image
Top-down view of a plated dish featuring saucan, lettuce, and garnishes on a dark plate (no text or symbols visible)Till carpaccion:
4 medelstora fasta potatisar
4 kvistar timjan
4 msk olivolja
1 handfull blandade bitter-sallader
(t.ex. radicchio, frisée, ruc-
cola)
Till vinägretten:
3 msk vit balsamvinäger
1 msk honung
1 tsk söt senap
0,25 dl grönsaksfond
3 msk olivolja
Nymalet salt
Nymalen peppar
8-12 skivor lufttorkad skinka
natural_image
Top-down view of a plated dish featuring a large fish fillet, sliced fruit, and garnished with herbs and lettuce (no text or symbols visible)Till rödingen:
1 rödingfilé med skinn, utan ben ca 800 g
1 msk klarat smör
1 msk smör
Salt peppar
Till betorna:
natural_image
Plate of raw salmon wedges garnished with parsley and cheese, served on a white plate with fork and side table items (no text or symbols visible)Till carpaccion:
200 g nötfilé utan fett eller senor (mittstycke)
2 msk olivolja
Till majonnäsen:
2 äggulor
1 msk senapspulver
1 tsk Worecestershiresås
Opis produktu
natural_image
Close-up of a fresh salad with lettuce, lettuce leafy greens, and cherry tomatoes (no text or symbols visible)
natural_image
Close-up of a fish fillet in a tray with flour and fork, no visible text or symbolsDo ciasta:
natural_image
Two food dishes: one showing sliced meat and another a plated dish featuring cherry tomatoes, tomato slices, and lettuce (no text or symbols visible)Do steków:
natural_image
Top-down view of a plated dish featuring saucan, lettuce, and garnish on a dark plate (no text or symbols visible)Do Carpaccio:
natural_image
Top-down view of a plated dish featuring a large fish fillet, sliced fruit, and garnishes (no visible text or symbols)Do palii:
natural_image
Plate of red and white striped meat garnished with parsley and cheese, served on a table with fork and plate nearby (no text or symbols visible)Do Carpaccio:
Termékleírás
natural_image
Close-up of a fresh salad with lettuce, lettuce leafy greens, tomato slices, and cheese (no text or symbols visible)
natural_image
Close-up of a fish fillet in a tray with flour and fork, no visible text or symbolsA tésztához:
natural_image
Two food dishes: one showing sliced meat on a cutting board, the other a colorful salad with tomatoes, cherry tomatoes, and lettuce garnish (no text or symbols visible)A steakekhez:
natural_image
Top-down view of a plated dish featuring sliced ham, lettuce, shredded cheese, and garnish on a dark plate (no text or symbols visible)A carpacciohoz:
natural_image
Dish of a salmon fillet with lettuce, peaches, and greens on a black plate (no text or symbols visible)A szajblinghoz:
natural_image
Plate of red and white saucers with garnishes, served on a white plate with fork and leafy greens (no text or symbols visible)A carpacciohoz:
Опис продукції
natural_image
3D mechanical component diagram with labeled part 'GRAEF' and number 9 (no readable text or symbols beyond labels)Загальні відомості
Шановний клієнт,
natural_image
Two food dishes: one cut with sliced meat and another with a colorful salad featuring tomatoes, cherry tomatoes, and lettuce (no text or symbols visible)Для стейків:
natural_image
Top-down view of a salad with ham, lettuce, and garnish on a dark plate (no text or symbols visible)Для карпаччо:
natural_image
Top-down view of a seafood salad with shrimp, lettuce, and greens on a dark plate (no text or symbols visible)natural_image
Plate of raw salmon wedges garnished with parsley and cheese, served on a white plate with fork and side table items (no text or symbols visible)Для карпаччо:
natural_image
Dish of a fish fillet on a plate with lettuce, orange slices, and herbs (no text or symbols visible)Рыба:
natural_image
Plate of red meat garnished with parsley and white cheese strips, served on a white plate with fork and side table items (no text or symbols visible)Для карпаччо:


- Inhalt
- Sicherheit 5
- Produktbeschreibung
- Für den Teig:
- Für Steaks:
- Für das Carpaccio:
- Für den Saibling:
- Product overview....33
- General aspects....35
- Warning messages and symbols....36
- Unpacking the unit....37
- Requirements on the installation location 37
- Prior to first use 37
- Initial operation and use 38
- Cleaning and maintenance 40
- Sharpen blade 43
- After-sales service 43
- Accessories 43
- Disposal 44
- Guarantee 44
- Troubleshooting 45
- Recipes (for 4 persons) ....47
- Safety
- General safety instructions
- Danger caused by electric current
- Safety instructions for the electrical connections
- Product overview
- Product description
- Accessories
- General aspects
- Information on these operating instructions
- Intended use
- Limitation of liability
- Warning messages and symbols
- WARNING!
- CAUTION!
- NOTE!
- Unpacking the unit
- Danger of injury!
- Requirements on the installation location
- Prior to first use
- Basic cleaning
- Initial operation and use
- Child safety lock (switch-on guard)
- Use MiniSlice attachment „2 in one“ as a remnant holder
- TIP
- MiniSlice attachment „2 in one“
- Cleaning and maintenance
- Cleaning the cutter on the outside
- Risk of damage!
- Removal and cleaning of the slide
- Blade removal unit
- Sharp blade!
- Proceed with caution when wiping the blade.
- Greasing the unit on the inside
- Screwing on the blade cover plate
- Ensure value preservation of the blade
- Sharpen blade
- After-sales service
- Disposal
- Disposal of the packaging
- Disposal of the unit
- Guarantee
- 5-year guarantee
- Recipes (for 4 persons)
- Gilthead in salt crust with romaine lettuce
- For the dough:
- For the gilthead:
- For the salad:
- Grilled rump steaks with mixed tomato salad
- For steaks:
- Potato carpaccio with ham and bitter salads
- For the carpaccio:
- For the vinaigrette:
- Fried sea trout with beetroot carpaccio, mandarins, pecan nuts and lamb's lettuce
- For the arctic char:
- Salt, pepper
- For the beetroot:
- mandarins
- For the mayonnaise:
- Table des matières
- Sécurité 54
- Généralités
- Pour la pâte :
- Pour les steaks :
- Pour le carpaccio :
- Pour l'omble :
- Productbeschrijving
- Voor de deeg:
- Voor de carpaccio:
- Voor de beekridder:
- Generalità
- Per le bistecche:
- Per il carpaccio:
- Per il salmerino:
- Para la masa:
- Para los filetes:
- Para el carpacho:
- Para el salvelino:
- Produktbeskrivelse
- Til saltlagent:
- Til guldbrasen:
- Til steaks:
- Til carpaccio:
- Til vinaigrette:
- Til fjældørred:
- Til mayonnaise:
- Tilbehør
- Generelt
- Fare for personskader!
- Til deigen:
- Til steik:
- Til vinaigretten:
- For ørreten:
- Produktbeskrivning
- Till degen:
- Till stekarna:
- Till carpaccion:
- Till vinägretten:
- Till rödingen:
- Till betorna:
- Till majonnäsen:
- Opis produktu
- Do ciasta:
- Do steków:
- Do Carpaccio:
- Do palii:
- Termékleírás
- A tésztához:
- A steakekhez:
- A carpacciohoz:
- A szajblinghoz:
- Опис продукції
- Загальні відомості
- Для стейків:
- Для карпаччо:
- Рыба:
Brand : GRAEF
Model : SKS700
Category : Slicer