Foodi DT200EU - Oven NINJA - Free user manual and instructions
Find the device manual for free Foodi DT200EU NINJA in PDF.
| Product type | Mini multifunction oven 10-in-1 |
| Brand | Ninja |
| Model | Foodi DT200EU |
| Power supply | 220-240 V~, 50-60 Hz |
| Power | Approximately 1800 W (estimated) |
| Dimensions (approx.) | Width: 40 cm, Depth: 35 cm, Height: 25 cm (estimated) |
| Weight (approx.) | Approximately 8 kg (estimated) |
| Capacity | Up to 9 slices of bread, whole chicken up to 2.25 kg, 2 cooking levels |
| Cooking modes | Grill, Air Fry, Whole Roast, Roast, Bake, Pizza, Toast, Bagel, Reheat, Dehydrate |
| Temperature range | 30 °C to 250 °C depending on mode |
| Timer | Up to 24 hours (dehydrate), 4 hours (other modes) |
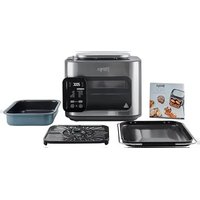
| Included accessories | Air fry basket, roasting pan, baking sheet, 2 cooking racks, removable crumb tray |
| Material | Stainless steel, tempered glass door |
| Controls | Touch panel with digital display, interior light button |
| Preheating | Automatic for Air Fry, Whole Roast, Roast, Bake, Pizza; not required for Grill, Toast, Bagel, Reheat, Dehydrate |
| Special features | Dual-level cooking, air frying technology, rack position indicator, auto shut-off |
| Cleaning and maintenance | Baking sheet, roasting pan, and crumb tray hand washable; basket and racks dishwasher safe (accelerated wear) |
| Safety | Auto shut-off after 10 minutes of inactivity, tempered glass door, cooling ventilation, fire protection (tips) |
| Warranty | 2-year legal warranty + 2-year Ninja commercial warranty |
| Spare parts and repairability | Available at ninjakitchen.eu; repairs by Ninja or authorized agents |
| Serial number and model | On the QR code label under the appliance |
Frequently Asked Questions - Foodi DT200EU NINJA
User questions about Foodi DT200EU NINJA
0 question about this device. Answer the ones you know or ask your own.
Ask a new question about this device
Download the instructions for your Oven in PDF format for free! Find your manual Foodi DT200EU - NINJA and take your electronic device back in hand. On this page are published all the documents necessary for the use of your device. Foodi DT200EU by NINJA.
USER MANUAL Foodi DT200EU NINJA
Puisance:2000W-2400W
Whole Roast (Rotir XL) 31
Roast (Rotir). 31
Rotlr XL (Whole Roast)
Deshydrater (Dehydrate)
for purchasing the Ninja Foodi 10-in-1 Multifunction Oven

REGISTER YOUR PURCHASE

akichen.eu/rosgistorguarantoo/

an QR code using mobile device
RECORD THIS INFORMATION
Model Number:
Serial Number:
Date of Purchase:
(Keep receipt)
Store of Purchase:
TECHNICAL SPECIFICATIONS
Voltage: 220-240V-50-60Hz
Watts: 2000W-2100W
TIP: You can find the model and serial numbers on the QR code label on the base of the unit.

This marking indicates
this product should not
be disposed of with other
household waste. To
environment or human health from uncontrolled waste disposal, recycle it responsibly to promote the sustainable reuse of material sources. To return your used device, please use the return and collection systems or contact the retailer where this product was purchased. They can take this product for environmentally safe recycling.
CONTENTS
Important Safeguards. 42
Parts 44
Accessory Placement 45
Before First Use 45
Using the Control Panel 46
Functions 46
Control Panel Display & Operating Buttons 47
Using Your Ninja Food Oven 48
When to Use the Roast Tray. 48
Using the Cooking Functions with Rack Levels. 48
How to Reduce Smoke 49
Using the Cooking Functions. 50
Grill 50
Air Fry 50
Whole Roast 51
Roast 51
Bake 52
Pizza 52
Toast 52
Bagel 53
Reheat 53
Dehydrate 53
Cleaning & Maintenance. 54
Everyday Cleaning 54
Deep Cleaning. 54
Troubleshooting & FAQ 55
Replacement Parts 56
Accessories for Purchase 57
Product Registration. 58
IMPORTANT SAFEGUARDS
HOUSEHOLD USE ONLY · READ ALL INSTRUCTIONS BEFORE USE
When using electrical appliances, basic safety precautions should always be followed, including the following:
AWARNING
1 Read all instructions prior to using the oven and its accessories.
This appliance can be used by persons with reduced physical, sensory or mental capabilities or lack of experience and knowledge if they have been given supervision or instruction concerning use of the appliance in a safe way and understand the hazards involved.
3 If food contents catch fire during cooking, DO NOT open the oven door.
If you can safely do so, unplug the oven immediately.
DO NOT throw water on to the fire. Food contents may contain grease and water may cause fire growth.
If fire emits from the oven door, call the fire service immediately.
DO NOT use the oven after it has experienced a fire. It may have been damaged and present a risk of fire or shock.
To eliminate a choking hazard for young children, discard all packaging materials immediately upon unpacking.
Take an inventory of all contents to ensure you have all parts needed to properly and safely operate your oven
6DONOT use an extension cord. A short power-supply cord is used to reduce the risk of children grabbing the cord or becoming entangled and to reduce the risk of people tripping over a longer cord.
7 NEVER connect this appliance to an external timer switch or separate remote-control system.
NEVER use electrical socket below worktop level.
9 Keep the appliance and its cord out of reach of children. DO NOT allow the appliance to be used by children. Close supervision is necessary when used near children.
10 DO NOT let cord hang over edges of tables or worktops or touch hot surfaces, including stoves and other heating ovens.
TI NEVER leave the oven unattended while in use.
12 DO NOT place any object directly onto the heating elements and DO NOT cover crumb tray or any part of the oven with aluminum foil. This will cause the oven to overheat or cause a fire.
13 DO NOT use the oven with crumb tray incorrectly installed. Crumb tray MUST be placed below lower heating elements.
14 To protect against electrical shock DO NOT immerse cord, plugs or main unit housing in water or other liquid.
15 DO NOT use the oven with damage to the power cord or plug. Regularly inspect the oven and power cord, if the oven malfunctions or has been damaged in any way, immediately stop use and call Customer Service.
16 DO NOT cover the air intake vents or air socket vents while unit is operating. Doing so will prevent even cooking and may damage the unit or cause it to overheat.
17 DO NOT insert anything in the ventilation slots and do not obstruct them.
18 DO NOT place items on top of surface while unit is operating. Placing items on top of the oven may mark or scratch the surface.
19 Before placing any accessories into the oven ensure they are clean and dry.
20 Intended for worktop use only. DO NOT place the oven near the edge of a worktop on or near a hot gas or electric burner. Ensure the surface is level, clean and dry.
21 This oven is for household use only. DO NOT use this oven for anything other than its intended use. Misuse may cause injury.
22 DO NOT store any materials, other than supplied accessories, in this oven when not in use.
23 DO NOT use outdoors. DO NOT use in moving vehicles or boats.
24 DO NOT use accessories and attachments not recommended or sold by SnarkNinja.
25 When using this oven, provide adequate space for air circulation.
26 DO NOT allow oven to be covered or touch flammable material including curtains, draperies, walls or the like when in operation as a fire may occur.
27 This oven has a tempered glass door and is resistant to breakage. Avoid scratching door surface or nicking edges.
28 DO NOT place anything directly on heating elements and DO NOT use the oven without a wire rack or air fry basket, installed.
29 DO NOT spray any type of aerosol spray or flavouring inside the oven while cooking.
30 Use caution when inserting and removing anything from the oven, especially when hot.
31 Socket voltages can vary, affecting the performance of your product. To prevent possible illness, use a thermometer to check that your food is cooked to the temperatures recommended.
32 Prevent food contact with heating elements. Excessive food loads may cause personal injury or property damage or affect the safe use of the oven.
33 Oversize foods or metal utensils must not be inserted into the oven as they may create a fire or risk of electric shock.
34 With the exception of parchment paper, DO NOT place any of the following materials in the oven: paper, cardboard, plastic, roasting bags and the like.
35 Extreme caution should be exercised when using containers constructed of any materials other than metal or glass.
36 DO NOT touch hot surfaces. Oven surfaces and glass door are hot during and after operation. To prevent burns or personal injury, ALWAYS use protective hot pads or insulated oven mitts and use available handles.
37 Spoiled food can cause serious burns. Extreme caution must be used when the oven contains hot food. Improper use may result in personal injury.
38 Please refer to the Cleaning & Maintenance section for regular maintenance of the oven.
39 Cleaning and user maintenance should not be done by children.
40 Allow to cool completely before cleaning and moving for storage.
41 When not in use, turn any control to 'off', then unplug. Grasp the plug by the body and pull from the socket. Never unplug by grasping and pulling flexible cord.
42 DO NOT clean with metal scouring pads. Pieces can break off the pad and touch electrical parts, causing a risk of electrical shock.
43 DO NOT use the oven as a source of heat or for drying.
44 The supply cord is not suitable for replacement. If damaged, please contact SharkNinja for service.
45 NEVER connect this appliance to an external timer switch or separate remote-control system.

Indicates to read and review instructions to understand operation and use of product.

Indicates the presence of a hazard that can cause personal injury, death or substantial property damage if the warning included with this symbol is ignored.

Take care to avoid contact with hot surface. Always use hand protection to avoid burns.

For indoor and household use only.
SAVE THESE INSTRUCTIONS
ninjakitchen.eu
PARTS
A Main Unit
(attached power cord not shown)
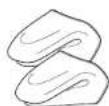
Air Fry Basket
Install when using the air fry function. Hand-wash recommended.
Roast Tray
Fits on top of the oven tray to catch grease below roasted or air fried foods to reduce smoke and grease spatter. Hand-wash only.
Oven Tray
Place on top of the wire rack. Hand-wash only.
E 2 Wire Racks
Use on its own or place the oven tray on top. Hand-wash recommended.
Removable Crumax Tray (already installed in unit).
Must remain installed when the oven is in use. Hand-wash only.


IMPORTANT: Place crumb tray below lower hoisting elements. DO NOT slide into any rack positions.
COMMON-SENSE PRACTICES/GOOD HABITS:
- DO NOT leave your oven unattended while making food. If possible, unplug the oven while not in use to eliminate the possibility of accidents occurring.
- Have a fire extinguisher or fire containment blanket handy in a safe, known location. If you don't have a fire extinguisher, douse the flames with bicarbonates of soda until they are put out.
- If a fire occurs and the food in the oven is not greasy, immediately unplug the unit and douse the flames with water until the fire is extinguished. DO NOT use water if grease is present, since it could make the fire worse. Use bicarbonate of soda instead.
ACCESSORY PLACEMENT


The oven has 4 available rack positions where your accessories can slide into the unit (see image above). When you select a function, the corresponding rack number(s) will illuminate on the control panel. The numbers on the control panel (see Fig.1) will coincide with those on the interior of the unit. See the chart on page 8 for further details.
BEFORE FIRST USE
1 Remove and discard any packaging material, promotional labels and tape from the unit. 2 Remove all accessories from the package and read this manual carefully. Please pay.
- Remove all accessions from the package and report its medical center. Please pay particular attention to operational instructions, warnings and important safegueros to avoid any injury or property damage.
3 Wash the air fry basket, oven tray, wire rack, roasting rack and removable crumb tray in warm, soapy water, then rinse and dry thoroughly. DO NOT put oven tray, roasting rack or removable crumb tray in the dishwasher. Finishes may degrade. NEVER submerge the main unit in water.
We recommend placing all accessories inside the oven and running it on ROAST at 230^ for 20 minutes without adding food. This removes any residues. This is completely safe and not detrimental to the performance of the oven.
NOTE: The accessories are hand-wash recommended. The air fry basket and wire racks can be put in the dishwasher, but may wear more quickly over time.
USING THE CONTROL PANEL

FUNCTIONS
Once you've selected a function below, you can change temperature/shade and time/slices.
GRILL: evenly grill meats, fish and brown the tops of casseroics.
AIR FRY: Foods that would traditionally be fried—such as chicken wings, French fries and chicken nuggets—with little to no added oil.
WHOLE ROAST: Simultaneously roast large proteins, like a 2.25kg chicken and sides, for a complete meal. Or cook a larger protein, like a 8.4kg turkey, on its own.
ROAST: Achieve a crispy outside and perfectly cooked inside for full-sized oven tray meals, thicker proteins and roasted veggies.
BAKE: Everly bake everything from your favourite cookies to cakes.
NOTE: The oven's technology leads to faster cooking. Always monitor food to prevent overcooking. Refer to cook charts in the Recipe Guide for more guidance on cook times and temperatures.

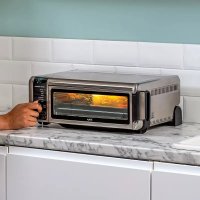
CONTROL PANEL DISPLAY & OPERATING BUTTONS
1 (Power) button: Press to turn the unit on and off.
2Timedisplay:Shows the cook time. The time will count down when cooking is in progress.
3PREHEAT: Flashes when the unit is preheating. If the oven is already up to temperature from using a previous cooking function, the unit will skip preheating.
4SLICES: Illuminates when using the Toast or Bagel function to designate number of slices.
5Temperaturesplay:Shows the cook temperature.
NOTE: Time and temperature will always return to the settings used the last time the oven was in operation.
6RACKLEVEL: Depending on the function you choose, the illuminated rack level(s) will indicate where your accessory should be placed in the unit.
72LEVELFor functions that allow you to cook on 2 levels, press the button to select 2-level cooking and neck levels will update.
8 FUNCTION +/- buttons: To select a cooking function, press the FUNCTION +/- buttons.
NOTE: As you move through functions, you'll notice the rack level recommendations change for best results.
9TIME/SLICES+/-buttons: To select a cook time, press the TIME +/- buttons. When using the Toast or Bagel function, these buttons will adjust the number of slices/bagel halves instead of the time. If cooking for 1 hour or less, the clock will count down by minutes and seconds. If cooking for more than 1 hour, the clock will count down by hours and minutes. Hold the +/- buttons for 2 seconds to activate faster scrolling in 5-minute increments.
10 TEMP/SHADE +/- buttons: To adjust temperature, press the TEMP +/- buttons. When using the Toast or Bagel function, these buttons will adjust the shade level (1, lightest - 7, darkest) instead of the temperature. Temperature will increase in 5-degree increments. Hold the +/- buttons for 2 seconds to activate faster scrolling in 10-degree increments.
NOTE: The cook time and temperature may be adjusted at any time during the cooking cycle.
11 START/STOP button: Press to start or stop cooking.
12SHADE: Illuminates when using the Toast or Bagel function to designate desired shade.
13 (Light) button: Press to turn the oven's interior light on and off.
NOTE: The light will automatically turn on when I minute of cook time remains and when door is open while cooking.
USING YOUR FOODI® 10-IN-1 MULTIFUNCTION OVEN
WHEN TO USE THE ROAST TRAY
Use Roast Tray or Oven Tray when cooking on convection functions (such as Whole Roast, Roast and Air Fry) or with greasy foods like: whole chicken, chicken wings, bacon, marinated meats or oiled vegetables.

Recommended for

Whole Chicken

Chicken Wings or Thighs

Bacon

Marinated Meats

Oiled Vegetables
HOW TO REDUCE SMOKE
We recommend using vegetable, sunflower, refined coconut, avocado, rapeseed or grapeseed oil instead of olive oil.


Recommended:
Vegetable
Sunflower
Refined coconut
Avocado
Rapeseed
Grapeseed

Not recommended:
Olive oil
Butter
Margarine
The unit may produce smoke when cooking on a hotter setting than recommended.
NOTE: For more cooking charts, refer to your recipe guide.
USING THE COOKING FUNCTIONS WITH RACK LEVELS
When you select a cooking function, the control panel will illuminate the recommended rack height(s). The chart below outlines these recommendations along with the suggested accessories. For best results, use only the recommended accessories for a given function and remove others from the oven.
| WHOLE ROAST ROAST AIR FRY BAKE | ||||||||
| 1 Layer 2 Layers 1 Layer | 2 Layers 1 Layer | 3 Layers 1 Layer | 4 Layer 2 Layers | 5 Layer 2 Layers | ||||
| LEVEL 4 | Air Fry Basket | Air Fry Basket | ||||||
| LEVEL 3 | Roast Tray on Oven Tray | Air Fry Basket | Air Fry Basket | Oven Tray on Wire Rack | Accessory on Wire Rack | |||
| LEVEL 2 | Roast Tray on Oven Tray | |||||||
| LEVEL 1 | Roast Tray on Oven Tray on Oven Tray | Roast Tray on Oven Tray | Roast Tray on Oven Tray | Accessory on Wire Rack | ||||
NOTE: When cooking greasy, drippy foods on one level, place the Oven Tray on the Wire Rack below to catch the drippings. Alternatively, use the Roast Tray on top of the Oven Tray.
| DEHYDRATE | GRILL | TOAST | BAGEL | REHEAT | PIZZA | ||
| 1 Layer | 2 Layers | 1 Layer | 1 Layer | 1 Layer | 1 Layer | 1 Layer | 2 Layers |
| Air Fry Basket | |||||||
| Air Fry Basket | Roast Tray on Oven Tray | Wire Rack | Wire Rack | Wire Rack | Wire Rack | Wire Rack | |
| Oven Tray | |||||||
| Wire Rack | |||||||
NOTE: Always place Oven Tray on Wire Rack, DO NOT place directly on heating elements.
USING YOUR FOODI® 10-IN-1 MULTIFUNCTION OVEN - CONT.
USING THE COOKING FUNCTIONS
To turn on the unit, plug the power cord into an electrical socket and press the button. The unit will automatically shut off after 10 minutes of inactivity.
Grill
NOTE: The unit does not preheat in Grill mode.
1 To select the function, press the function +/- buttons until GRILL brightly illuminates. The default time and temperature settings will display.
2 Press the TIME/SI ICFS +/- buttons to select a cook time up to 50 minutes.
3 Press the TEMP/SHADE -button select either HI or LO.
4 Place ingredients on the oven tray. Place the oven tray on the wire rack and close the oven door, press START/STOP to start cooking.
5 When cook time is complete, the unti will beep and "FND" will appear on the display.
Air Fry
1 To select the function, press the function 1- buttons until AIR FRY brightly illuminates. The default time and temperature settings will display. When cooking 2 layers, select the 2 LEVEL button so that "2 LEVEL" appears on the display.
2 Press the TIME/SLICES +/- buttons to select a cook time up to 4 hours.
3 Then press the TEMP/SHADE +/- buttons to select a temperature between 120°C and 250°C.
4 Press START/STOP to begin preheating.
NOTE: Food cooks faster when using the Air Fry function. Refer to Air Fry Chart in the Recipe Guide for more guidance on cook times and temperatures.
5 Place ingredients in the air fry basket and roast tray with oven tray. If ingredients are fatty, oily or marinated, place the basket on the oven tray. Use air fry basket for dry ingredients.
6 When the unit beeps to signify it has preheated, immediately slide the basket into the rack level(s) designated on the control panel. If also using the oven tray, slide both into the oven at the same time, with the basket in the upper rack and the pan on the wire rack beneath the basket. Close oven door.
7 When cook time is complete, the unit will be open and "FEND" will appear on the display.
NOTE: The timer will start counting down as soon as the unit has preheated. If ingredients are not ready to go into the oven, simply press the TIME +/- buttons to add more time.
Whole Roast
1 To select the function, press the function +/- buttons until WHOLE ROAST brightly illuminates. The default time and temperature settings will display. When cooking 2 layers, select the 2 LEVEL button so that "2 LEVEL" appears on the display.
2 Press the TIME/Slices + - buttons to select a cook time up to 4 hours.
NOTE: If cooking for 1 hour or less, the clock will count down in minutes and seconds. If cooking for more than 1 hour, the clock will count down in hours and minutes.
3 Press the TEMP/SHADE +/- buttons to select a temperature between 120^ and 230^ .
4 Press START/STOP to begin preheating
NOTE: Food cooks faster when using the Whole Roast function so refer to cook charts in the Recipe Guide for more guidance on cook times and temperatures.
5 Place ingredients on the roast tray or directly on oven tray. When the unit beeps to signify it has preheated, immediately place roast tray on the oven tray on the wire rack on Level 1. Close oven door. When cooking on 2 levels, place the oven tray on Level 1 and use the air fry basket as the second layer on Level 4.
NOTE: The timer will start counting down as soon as the unit has preheated. If ingredients are not ready to go into the oven, simply press the TIME +/- buttons to add more time.
6 When cook time is complete, the unit will crop and "END" will appear on the display.
Roast
1 To select the function, press the function +/- buttons until ROAST brightly illuminates. The default time and temperature settings will display. When cooking 2 layers, select the 2 LEVEL button so that "2 LEVEL" appears on the display.
2 Press the TIME/SLICES +/- buttons to select a cook time up to 4 hours.
NOTE: If cooking for 1 hour or less, the clock will count down in minutes and seconds. If cooking for more than 1 hour, the clock will count down in hours and minutes.
3 Press the TEMP/SHADE +/- buttons to select a temperature between 120^ and 230^ .
4 Press START/STOP to begin preheating.
NOTE: Food cooks faster when using the Roast function, so refer to cook charts in the Recipe Guide for more guidance on cook times and temperatures.
5 Place ingredients on the oven tray. When the unit beeps to signify it has preheated, immediately place the roast tray on oven tray on the wire rack on Level 1. Close oven door. When cooking on 2 levels, place the oven tray on Level 1 and use the air fry basket as the second layer on Level 3.
NOTE: The timer will start counting down as soon as the unit has preheated. If ingredients are not ready to go into the oven, simply press TIME +/- buttons to acid more time.
6 When cook time is complete, the unit will beep and "END" will appear on the display.
USING YOUR FOODI: 10-IN-1 MULTIFUNCTION OVEN - CONT.
Bake
1 To select the function press the function + / - buttons until BAKR brigity illuminates. The default time and temporaluro settings will display. When cooking 2 layers, select the 2 LEVEL button so that "2 LEVEL" appears on the display.
2 Press the TIME/SI ICFS +/− buttons to select a cook time up to 4 hours.
NOTE: If cooking for 1 hour or less, the clock will count down in minutes and seconds. If cooking for more than 1 hour, the clock will count down in hours and minutes.
3 Press the TEMP/SHADE - / - buttons to select a temperature between 80^ and 230^
4 Press START/STOP to begin preheating.
5 Place ingredients on the oven tray. Other baking tins can be used instead of the oven tray if preferred. When the unit beeps to signity it has preheated, immediately place the oven tray on the wire rack. Close oven door.
NOTE: The timer will start counting down as soon as the unit has preheated. If ingredients are not ready to go into the oven, simply press the TIME /buttons to add more time.
6 During cooking, you can turn on the light to check on progress.
When cook time is complete, the unit will be and "END" will appear on the display.
NOTE: For best results with baked goods such as cookies, line the oven tray with baking paper.
Pizza
1 To select the function, press The function +/- buttons until PIZZA brightness illuminates. The default time and temperature setting will display.
2 Press the TIME/SLICES +/- buttons to select a cook time up to 4 hours.
3 Press the TEMP +/- buttons to select a temperature between 80^ and 230^ .
Place pizza on the oven tray or directly on the wire rack. Close oven door and press START/STOP to begin cooking.
5 When cook time is complete, the unit will beep and "END" will appear on the display.
Toast
NOTE: The unit does not preheat in Toast mode.
1 To select the function, press the function +/- buttons until TOAST brightly illuminates. The default amount of slices and darkness level will display.
2 Press the TIME/SLICES +/- buttons to select the number of bread slices. You may toast up to 9 slices at once.
Press the TEMP/SHADE +/- buttons to select a darkness level.
NOTE: There is no temperature adjustment available for the Toast function and the unit does not preheat in Toast mode. It is very important to select the exact number of slices to avoid over- or under-toasting.
Place bread slices on the wire rack. Close oven door and press START/STOP to begin cooking.
5 When cook time is complete, the unit will be open and "END" will appear on the display.
NOTE: You can also manually adjust the time once cooking has started to better choose your preferred shade.
Bagel
NOTE: The unit does not preheat in Bagel mode.
1 To select the function, press the function +/- buttons until BAGEL pringly illuminates. The default number of slices and darkness level will display.
2 Press the TIME/SLICES +/- buttons to select the number of slices. You may toast up to 9 bagels slices at once.
Press the TEMP +/- buttons to select a darkness level.
NOTE: There is no temperature adjustment available for the Bagel function and the unit does not preheat in Bagel mode. It is very important to select the exact number of slices to avoid over- or under-bias;ng.
Place bagel slices, cut side up, in the middle of the wire rack. Close oven door and press START/STOP to begin cooking.
When cook time is complete, the unit will beep and "FND" will appear on the display.
NOTE: You can also manually adjust the time once cooking has started to better choose your preferred shade.
Reheat
NOTE: The unit does not preheat in Reheat mode.
1 To select the function, press the function +/- buttons until REHEAT brightly illuminates.
2 Pross the TIME/SLICES +/- buttons to select a reheat time up to 4 hours.
3 Press the TEMP/SHADE +/- buttons to select a temperature between 40^ and 230^ .
4 Place food on the oven tray or in an oven-safe container and place the pan or container on the wire rack. Close oven door and press START/STOP to begin warming.
When cook time is complete, the unit will beep and "END" will appear on the display.
Dehydrate
NOTE: The unit does not preheat in Dehydrate mode.
1 To select the function, press the function +/- buttons until DEHYDRATE brightly illuminates. The default time and temperature settings will display. When dehydrating 2 layers, select the 2 LEVFI button so that "2 LEVFI" appears on the display.
2 Press the TIME/SLICES +/- buttons to select a dehydrate time up to 24 hours.
Press the TEMP/SHADE +/- buttons to select a temperature between 30^ and 90^ .
Place ingredients in the air fry basket and place basket in oven. Close oven door and press START/STOP to begin cooking.
NOTE: For best results, lay ingredients flat on each layer; do not stack food.
5 When cook time is complete, the unit will beep and "END" will appear on the display.
CLEANING & MAINTENANCE
EVERYDAY CLEANING
The unit should be cleaned thoroughly after every use.
1 Unplug the unit from the socket and allow it to cool down before cleaning
2 Emoty crumb tray by sliding it out of the oven.
NOTE: Empty crumb tray frequently Hand-wash when necessary.

After every use, wOw away any food splatter on the interior walls and glass door of the unit with a soft, damp sponge.
4 To clean the exterior of the main unit and the control panel, wipe them clean with a damp cloth. A non-abrasive liquid cleanser or mild spray solution may be used. Apply the cleanser to the sponge, not the oven surface, before cleaning.
5 When using accessories, we recommend greasing them with recommended cooking oil or covering them with parchment paper or aluminum foil before placing food on top. DO NOT cover roast tray holes with parchment paper or aluminum foil.
DEEP CLEANING
1 Unplug the unit from the socket and allow it to cool down before cleaning.
2 Remove all accessories from the unit, including the crumb tray and wash separately. Use a non-abrasive cleaning brush to more thoroughly wash the air fry basket. Accessories are hand-wash recommended. The air fry basket and wire racks can be put in the dishwasher, but may wear more quickly over time. DO NOT place roast tray, oven tray or crumb tray in dishwasher.
3 Use warm, soapy water and a soft cloth to wash the oven's interior and glass door. DO NOT use abrasive cleaners, scrubbing brushes or chemical cleaners, as they will damage the oven.
CAUTION:NEVER put the main unit in the dishwasher or immerse it in water or any other liquid.
4 To remove tough grease, let oven tray and roast tray soak overnight in warm. Soapy water, then wash with a non-abrasive sponge or brush.
5 Thoroughly dry all parts before placing them back in the oven.

IMPORTANT: Place crumb tray below lower heating elements. DO NOT slide into any rack positions.
TROUBLESHOOTING & FAQ.
ERRORMESSAGE
"CALL CUST SrVC" followed by "Er0," "Er1," "Er2," "Er3," "Er4," "Er5," or "Er6"
Turn off the unit and call Customer Service at 0800 000 9063. So we may better assist you, please register your product online at ninjakitchen.eu/registrationguarantee and have the product on hand when you call.
FAQ
Why won't the oven turn on?
- Make sure the power cord is securely plugged into the socket.
- Insert the power cord into a different socket.
- Reset the circuit breaker if necessary
- Press the power button.
Can I use the oven tray instead of the air fry basket with Air Fry function?
Yes, but crispiness results may vary
Do I need to adjust the cook times and temperatures of traditional oven recipes?
- For best results, keep an eye out on your food while cooking. Refer to cook charts in the Recipe Guide for more guidance on cook times and temperatures.
Can I restore the unit to its default settings?
- The oven will remember the last setting used for each function, even if you unplug it. To restore the oven's default settings for each function, press the Light and 2 LEVEL buttons simultaneously for 5 seconds.
Why do the heating elements appear to be turning on and off?
This is normal. The oven is designed to control temperature precisely for every function by adjusting the heating elements' power levels.
Why does the oven have a different temperature reading with an external thermometer?
- Convection ovens circulate air differently than traditional ovens, so when the door is opened, more heat will escape. This may affect any external temperature reading of the unit's interior temperature.
Since this is a convection oven, it can cook more quickly than a traditional oven. Convection cooking includes a fan that helps speed up cook time by circulating hot air and can affect temperatures within the cavity. The time it takes the unit to heat up to the set temperature will vary based on the amount of food being cooked, the function being used and the cook temperature and time. The oven features an algorithm that ensures temperature and time settings work with most traditional oven recipes. As a result, the temperature inside the oven may differ from the set temperature. This does not impact cooking quality. Refer to the Recipe Guide to learn more about recommended cook times and temperatures.
Why Is my unit not fully preheated when the preheat cycle is completed?
- During preheating, the unit will not reach the intended cook temperature, but it will preheat to a level that will start cooking your ingredients. As the cook cycle continues, the oven will continue to heat up and cook your food to cloneness. It may take up to 10 minutes for the unit to reach the intended cook temperature. This does not affect the cooking quality of most recipes.
Why Is steam coming out from the oven door?
This is normal. Foods with a high moisture content may release steam around the door.
Why Is water dripping onto the worktop from under the door?
- This is normal. The condensation created by foods with a high moisture content (such as frozen breads) may run down the inside of the door and drillo onto the worktop.
TROUBLESHOOTING & FAQ - CONT.
Why is the unit generating smoke?
- Ensure you are using the roast tray on the oven tray when cooking all greasy foods or when using Air Fry, Roast or Whole Roast functions.
- If problem persists, run a Toast cycle on shade 7 with accessories removed; this will burn off any additional grease on the heating elements that are causing smoke.
How can I clean the oven tray?
For stuck-on food, let the oven tray soak before cleaning.
- Line the oven tray with aluminum foil or parchment paper when cooking to make clean-up easier.
Why does the unit sound like It is still running even though the power is off?
The cooling fan may continue to run even after the unit has been turned off. This is a normal function and should not be a source of concern. The cooling fan will stop after the temperature of the unit reaches below 35^
REPLACEMENT PARTS
To order additional parts and accessories, visit ninjaklchen.eu or contact
Customer Service at 0800 000 9063.
ACCESSORIES FOR PURCHASE
We offer range of accessories ' for your Ninja® Food® 10-in-1 Multifunction Oven . VisitninjaKitchenechen.eu to expand your capabilities and take your cooking to the next level .

Silicone Mills

LoefTin

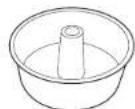
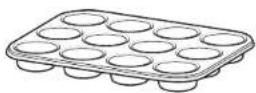
12-Cup Muffin Tin Tube Pan
PRODUCT REGISTRATIONPRODUCT REGISTRATIO
TWO (2) YEAR LIMITED GUARANTEE
When you buy a product in Europe as a consumer, you get the benefit of legal rights relating to the quality of the product (your "statutory rights"). You can enforce these statutory rights against your retailer. However, at Ninja we are so confident about the quality of our products (the "Products") that we give you a manufacturer's guarantee of two years. This guarantee only applies to the Product if it is bought in new and unused condition. These terms and conditions relate to our guarantees only - your statutory rights as a buyer are unaffected. Please note that the 2 year guarantee is available in all EU countries.
The conditions below describe the prerequisites and scope of our guarantees which are issued by SharkNinja Germany GmbH, c/o Regus Management GmbH, Excellent Business Center 10. +1/ Stock, Westfalenplatz 1, 60327 Frankfurt am Main (Germany) ("us", "our" or "we"). They do not affect your statutory rights or the obligations of your retailer and your contract with them. The same applies if you have purchased the product directly from Ninja.
Ninja Guarantees
A household kitchen appliance constitutes a sizeable investment. Your new machine needs to work properly for as long as possible. The guarantee it comes with is an important consideration - and reflects how much confidence the manufacturer has in its product and manufacturing quality.
Our customer service helpline (0800 000 9063) is open from 9.00am to 6.00pm Monday Friday. It's free to call, and you'll be put straight through to a Ninja representative. You'll also find online support at www.ninjakitchen.eu.
How do I register my guarantee?
You can register your guarantee online within 28 days of purchase. To save time, you'll need the following information about your machine:
Model no.
- Serial Number (only if available)
- Date of purchase of the Product (receipt or delivery note)
To register online, please visit www.ninjakitchen.eu
IMPORTANT
The guarantee covers your Product for 2 years starting on the date of purchase.
Please keep the receipt at all times. Should you need to use your guarantee we will need the receipt to verify the information supplied to us is correct. The inability to produce a valid receipt will invalidate your guarantee.
What are the benefits of registering my guarantee?
When you register your guarantee, you can choose to receive our newsletter containing tips, advice and competitions. Hear the latest news about new Ninja technology and launches. If you register your guarantee online, you'll get instant confirmation that we've received your details.
For details of our privacy policy please visit www.ninjaikitchen.eu
How long are our Products guaranteed for?
Our confidence in our design and quality control means that your Product is guaranteed for two years.
What Is covered by the guarantee?
Repair or replacement (st Ninja's discretion) of your Product, including all parts and labour in case of any defect in design, materials and workmanship (including transport and shipping costs). Our guarantee is in addition to your legal rights as a consumer.
What is not covered by the guarantee?
Normal wear and tear.
- Accidental damage, faults caused by negligent use or care, misuse, neglect, careless operation or handling of the kitchen appliance which is not in accordance with the Ninja® Instruction Manual supplied with your machine.
- Use of the kitchen appliance for anything other than normal domestic household purposes.
- Use of parts not assembled or installed in accordance with the operating instructions.
- Use of parts and accessories which are not Ninja® Genuine Components.
- Faulty installation (except where installed by Ninja®).
- Repairs or alterations carried out by parties other than Ninja or its agents, Repairs or alterations carried out by parties other than Ninja or its agents, unless you can show that the repairs or alterations carried out by others are not related to the defect for which you exercise the guarantee.
What happens when my guarantee runs out?
Ninja does not design products to last for a limited time. We do appreciate that there may be a desire for our customers to want to repair their kitchen appliance after the guarantee has elapsed. In this case please contact our free phone customer service help line and ask about our guarantee program, on 0800 000 9063.
Where can I buy genuine Ninja spares and accessories?
Ninja spares and accessories are developed by the same engineers who developed your Ninja kitchen appliance. You'll find a full range of Ninja speres, replacement parts and accessories for all Ninja machines at www.njakitchen.eu
Please remember that using non-Ninja spares may invalidate your manufacturer's guarantee. However, your statutory rights are unaffected.
TAK for dlt kob af Ninja+ Food! 10-1-1 Multifunktionel Own

REGISTRDTKOB
ninjakitchen.eu/registration.harantee/
Scan QR-koden med en mobilenhed
GEM DISSE OPLYSNINGER
70
Whole roast (Steeging XL). 71
Roast (Steeging) 71
Bake (Bagning) 72
Pizza 72
Biegel 73
heat (Genopvarming) 73
hydrate (Dehydrering) 73
Air fry (Luftfriture)
For at vaelge fonctionen, skal du trykke pa knappemc fonktion + indil LUTFRITU RE lyser op. Standardindstillingere for tid og temperatur vises. Nar du tillbereder i 2 lag, skal du vaelge 2 NIVFAU knappen, sE "2 NIVAU" vises sa ksaeren.
2 Try kpa knapperme TID/SKIVER +/- for st vaelge in tiberedinsingstpd ooo ti 4 timer.
Tryk derfter pankapponne TEMP/NUANCE +/- for at vaeige en temperatur mellem 120°C og 230 °C.
4 Tryk pã START/STOP for at beygnde forvarming.
BEMARK: Apparatus for warmer like.
Toast-tilstand.
For at veige funcken, skal du trykke ple knapperne funck ± - indill TOAST lyser op. Standardinstilling gorno for antsl skiver ogar vane fises.
2 Tryk pa knappone TID/SKIVER +/- for a. valse antaier af bradsiver. Du kian riste op ti 9 skiver ad gangen.
3 Tryk p knapoe rrrrmpNNUANCE +/for at vaegle farnv.
"CALL CUST SrVC" afterfulgt at "Er0," "Er1," "Er2," "Er3," "Er4," "Er5," eller "Er6"
Sluk for apparatuset og ring til kundeservice pa 0800 862 0453. Register dit produkt online pa ninjaninjakitchen.eu/registerguarantee og hav det foran dig, nár du ringer, sa vi bedre kan hjaelje dig.
Dehydrate (Deshidratar)
Guantd a for no in silicone
ninjakitchen.eu/registeguarantee/

Deoxydctre (Droen) 133
"CALL CUST SrVC" gevolgd door "Er0," "Er1," "Er2," "Er3," "Er4," "Er5," of "Er6"
Reheat (Reaquecer) 53
Denhydrate (Desidratar) 153
Whole Roast (Assar XL)
Dehydrate (Desidratar)
Reheat (Oppvarming) 173
Dehydrate (dehydrere) 173
Dehydrate (dehydrere)
MERK: rhelen forvarmer Iike I Dehydrate (Dehydrere)-modus.
For e velge funksiən, trykə p fusksjon +/z knoppene inti DEHYDRATE (DEHYDRERE) lyser klart opp. Sendarledtemperature nises pa dislayct. Nar du dehydnerer 2 teg, velg 2 NIVARknappen, sik at «2 NIVAER» vises pa dislayct.
2 Trykk pa TID/SK/VER + / - xnappene for a velge en dehydroerngstio pa opptl 24 Umer.
Trykk pa TEMF/FARGE +/- knapoene for a velge en temperatur mellem 30 °C og 90 °C.
4 Plasser ingredensene i luftfritykurven og plasser kurven i ovnen. Lukk oynsdaren og trykk pa START/STOPP for a starte tilbereding.
MERK: For best result, legg ingredienser flatt pahvert lag, stable icke mat.
5 När bilberearingstiden er fullfert, piper ennenen og «END» («FERDIC») vises pa displayet.
MERK: Kopytterigedehydreringsilberfora dehydrereoppti 4 niver smtig.
RENGJØRING OG VEDLIKEHOLD
DAGLIG RENGJØRING
TILLBEHÖRENS PLACERING

Ugren har fya (2) molge galapositiondar da cina tiblenan kan placoras Lennet (se bilden ovan). Nar du valjare en funktion kommer motsvanrno galernnmer att lysa uopappa kontrlopanienol. Numron se kontrlopanen (se figura 1): kommor att stamma overns mod numren intui enthen. Se tabellen pa sica S for utlifngere information.
FÖRE FÖRSTA ANVÄNDNING
NAR DU ANVANDER STEKPLATEN
OBS! Enhoton forvams into Torka-lagot (Dehydrate).
Bakform for 12 st. muffins Tubform

PRODUKTREGISTRERINGPRODUKTREGISTRERING
TVA (2) ARS BEGRANSD GARANTI
© 2021 SharkNinja Operating LLC. GEDRUCKT IN CHINA
FRANCAIS
© 2021 SharkNinja Operating LLC. IMPRIMPÉ EN CHINE
ENGLISH
Illustrations may differ from actual product. We are constantly striving to improve our products, therefore the specifications contained herein are subject to change without notice.
FOODI and NINJA are registered trademarks of SharkNinja Operating LLC.
© 2021 SharkNinja Operating LLC. PRINTED IN CHINA
DANSK
© 2021 SharkNinja Operating LLC. TRYKT I KINA
ESPANOL
© 2021 SharkNinja Operating LLC. IMPRESO EN CHINA
ITALIANO
© 2021 SharkNinja Operating LLC. STAMPATO IN CINA
SharkNinja Europe Limited
3150 Century Way
Thorpe Park
Leeds
LS15 8ZB UK
ninjakitchen.eu
NEDERLANDS
© 2021 SharkNinja Operating LLC.
GEDRUKT IN CHINA
NORSK
© 2021 SharkNinja Operating LLC. TRYKKET I KINA
PORTUGUESE
© 2021 SharkNinja Operating LLC. IMPRESSO NA CHINA
SUOMI
© 2021 SharkNinja Operating LLC. PAINETTU KINASSA
SVENSKA
© 2021 SharkNinja Operating LLC. TRYCKT I KINA
SharkNinja Germany GmbH,
Excellent Business Center 10