
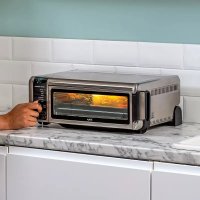
SFP700EU - Oven NINJA - Free user manual and instructions
Find the device manual for free SFP700EU NINJA in PDF.

| Product type | Multifunction combined oven (cooker, air fryer, oven) |
| Brand | Ninja |
| Model | SFP700EU |
| Power supply | 220-240 V~, 50-60 Hz |
| Power | 1780 W |
| Dimensions (estimated) | Approximately 35 x 35 x 35 cm |
| Weight (estimated) | Approximately 8 kg |
| Basket capacity | Not specified, suitable for 2-4 people |
| Number of cooking modes | 12 modes (Combi Meals, Combi Crisp, Combi Bake, Steam, Rice/Pasta, Prove, Grill, Air Fry, Bake, Reheat, Sear/Sauté, Slow Cook) |
| Smart Switch | Switches between Combi Cooker and Air Fry/Cooker modes |
| Control panel | Digital with function buttons, temperature, time, start/stop, light |
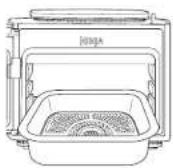
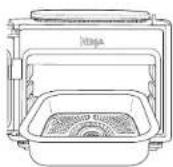
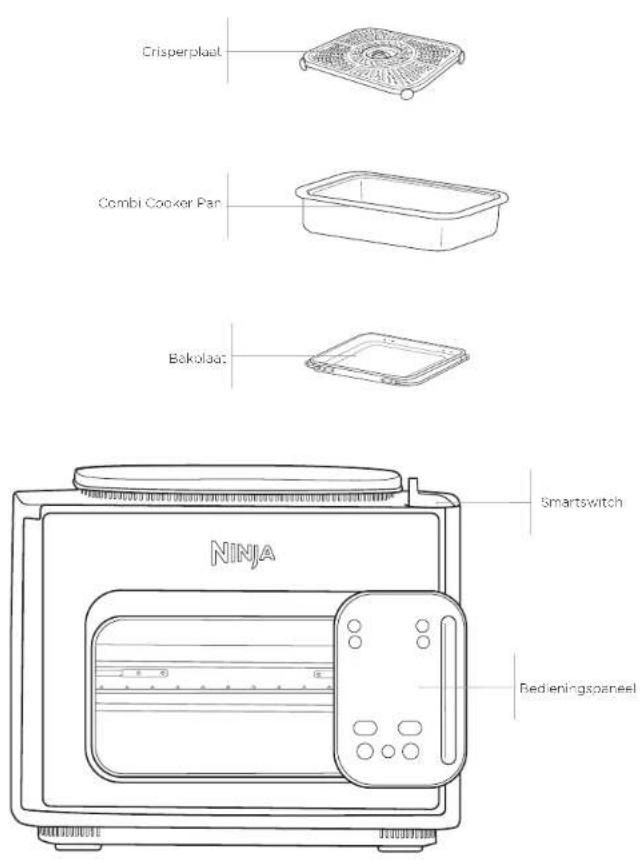
| Included accessories | Combi Cooker basket, Cook & Crisp plate, baking tray |
| Accessory material | Non-stick coating, dishwasher safe |
| Cleaning and maintenance | Accessories dishwasher safe; wipe body with damp cloth; steam cleaning possible |
| Safety | Do not immerse; do not use extension cord; 15 cm clearance around; do not touch hot surfaces; use gloves |
| Spare parts | Available at ninjakitchen.eu; contact customer service +33 800 908874 |
| Commercial warranty | 2 years (subject to registration within 28 days) |
| Use | Indoor domestic use only |
Frequently Asked Questions - SFP700EU NINJA
User questions about SFP700EU NINJA
0 question about this device. Answer the ones you know or ask your own.
Ask a new question about this device
Download the instructions for your Oven in PDF format for free! Find your manual SFP700EU - NINJA and take your electronic device back in hand. On this page are published all the documents necessary for the use of your device. SFP700EU by NINJA.
USER MANUAL SFP700EU NINJA
natural_image
Ninja Ninja 1000 air fryer with digital display and control buttons (no visible text or symbols on device body)BES∅G OS ONLINE PÅ:
ninjakitchen.eu
akitchen.eu/registerguarantee

VED HJÆLP AF SMARTSWITCH'EN
SmartSwitch giver dig muligned for at skifter mellem de to ti berechnings tilstande, som er markeret på kontakten som reference.
- Combl Cooker - Air Fry/Cooke
natural_image
Pure mechanical diagram showing a curved component with rotational arrow, no text or symbols presentSÅDAN ÅBNER OG LUKKER DU LÅGEN
natural_image
Line drawing of a toaster oven with no text or symbolsakitchen.eu/registerguarantee

natural_image
Pure mechanical diagram showing a lever mechanism with no text or symbolsnatural_image
Line drawing of a NIJA toaster oven with control panel and side buttons (no text or symbols)natural_image
Line drawing of a kitchen appliance with a hand holding the lid (no text or symbols)Or follow us on any of our social media pages:


REGISTER YOUR PURCHASE

kitchen.eu/registerguarantee

QR code using mobile device
TECHNICAL SPECIFICATIONS
Voltage: 220-240V - 50-60Hz
Watts: 17BOW
NOTE: Save these instructions. Keep for future reference.


This marking indicates this product should not be disposed of with other household waste. To prevent possible harm to the environment or human health from uncontrolled waste disposal, recycle it responsibly to promote the sustainable reuse of material resources. To return your used device, please use the return and collection systems or contact the retailer where this product was purchased. They can take this product for environmentally safe recycling.

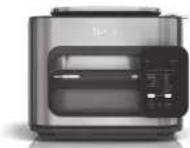
NINJA
NINJA COMBI ALL-IN-ONE
MULTI-COOKER, OVEN, AND AIR FRYER
SFP700 Series | Instruction booklet

IMPORTANT SAFETY INSTRUCTIONS
INDOOR HOUSEHOLD USE ONLY. READ ALL INSTRUCTIONS BEFORE USE

Read and review instructions to understand operation and use of product.

Indicates the presence of a hazard that can cause personal injury, death or substantial property damage if the warning included with this symbol is ignored.

Avoid contact with hot surface. Always use hand protection to avoid burns.

For indoor and household use only
⚠ WARNING
Failure to follow these instructions could result in electric shock, fire or burn hazard which could cause property damage, personal injury, or death. When using electrical appliances, basic safety precautions should always be followed, including the following:
1 To eliminate a choking hazard for young children, discard all packaging materials immediately upon unpacking.
2 This appliance can be used by persons with reduced physical, sensory, or mental capabilities or lack of experience or knowledge if they have been given supervision and instruction concerning use of the appliance in a safe way and understand the hazards involved.
3 Keep the appliance and its cord out of reach of children. DO NOT allow children to play with or use the appliance. Close supervision is necessary when used near children.
4 Spilled food can cause serious burns. DO NOT let cord hang over edges of tables.
5 To prevent fire, DO NOT place appliance on or near a gas or electric cooker, or in a healed oven.
6 Before placing removable complete meal pot in the cooker base, ensure pot and cooker base are clean and dry by wiping with a soft cloth.
7 When removable complete meal pot is empty, DO NOT heal it for more than 10 minutes. Doing so may damage the cooking surface.
8 DO NOT use this appliance for deep-frying.
9 Caution should be used when searing meats and sautéing. Keep hands and face away from the removable Combi Pot, especially when adding new ingredients, as hot oil may splatter.
10 This appliance is for household use only. DO NOT use this appliance for anything other than its intended use. DO NOT use in moving vehicle or boats. DO NOT use outdoors. Misuse may cause injury.
11 Intended for worktop use only. Ensure the surface is level, clean, and dry. DO NOT place the appliance near the edge of a worktop during operation.
12 To protect against electrical shock DO NOT immerse cord, plugs, or main unit housing in water or other liquid. Cook only in the accessories provided.
13 DO NOT use an extension cord. A short power-supply cord is used to reduce the risk of children grabbing the cord or becoming entangled and to reduce the risk of people tripping over a longer cord.
14 DO NOT use the appliance if there is damage to the power cord or plug. Regularly inspect the appliance and power cord. If the appliance malfunctions or has been damaged in any way, immediately stop use and call Customer Service.
15 ALWAYS ensure the appliance is properly assembled before use.
16 DO NOT cover the side air socket vent or rear air socket vent while lid is closed. Doing so will prevent even cooking and may damage the unit or cause it to overheat.
IMPORTANT SAFETY INSTRUCTIONS
INDOOR HOUSEHOLD USE ONLY. READ ALL INSTRUCTIONS BEFORE USE
WARNING
Failure to follow these instructions could result in electric shock, fire or burn hazard which could cause properly damage, personal injury, or death. When using electrical appliances, basicsafety precautions should always be followed, including the following:
17 DO NOT use accessory attachments not recommended or sold by SharkNinja. DO NOT place accessories in a microwave, toaster oven, convection oven, or conventional oven, or on a ceramic cooktop, electrical coil, gas burner range, or outdoor grill. The use of accessory attachments not recommended by SharkNinja may cause fire, electric shock, or injuries.
18 When using this appliance, provide at least 15cm of space above and on all sides for adequate air circulation.
19 ALWAYS follow the maximum and minimum quantities of liquid as stated in instructions and recipes.
20 To avoid possible steam damage, DO NOT use under cabinets.
21 NEVER use COMBI COOKER functions without adding water and or ingredients to bottom of removable cooking pot.
22 NEVER use SLOW COOK setting without food and liquids in the removable Combi Pot.
23 DO NOT move the appliance when in use.
24 Prevent food contact with heating elements. DO HOT overfill or exceed the MAX fill level of the pot. Overfilling may cause personal injury or property damage or affect safe use of the appliance.
25 DO NOT use this unit to cook instant rice.
26 Electrical socket voltages can vary, affecting the performance and heat output of your product. To prevent possible illness, use a thermometer to check that your food is cooked to the temperatures recommended.
27 Should the unit emit black smoke, unplug immediately and wait for smoking to stop before removing the cooking pot and crisper tray.
28 DO NOT touch hot surfaces. Appliance surfaces are hot during and after operation. To prevent burns or personal injury, ALWAYS use protective hot pads or insulated oven mitts and use available handles and knobs.
29 Extreme caution must be used when moving an appliance containing hot oil or other hot liquids. Improper use, including moving the cooker, may result in personal injury such as serious burns.
30 When unit is in operation, hot steam is released through the air socket vent. Place unit so vent is not directed toward the power cord, electrical sockets, cabinets or other appliances. Keep your hands and face at a safe distance from vent.
31 When using SLOW COOK setting, ALWAYS keep the door closed.
32 Serious burns can result from the steam and hot foods inside the inner pot. ALWAYS keep hands, face, and other body parts away from the release valve prior to or during release and when opening the door after cooking.
33 The cooking pot, crisper tray, and bake tray become extremely hot during the cooking process. Avoid hot steam and air while removing the cooking pot and crisper tray from the appliance, and ALWAYS place them on a heat-resistant surface after removing. DO NOT touch accessories during or immediately after cooking.
34 Removable cooking pot, crisper tray, and bake tray can be extremely heavy when full of ingredients. CARE SHOULD BE TAKEN WHEN LIFTING POT FROM COOKER BASE.
35 DO NOT touch accessories during or immediately after cooking, as they become extremely hot during the cooking process. To prevent burns or personal injury, ALWAYS use care when handling the product. Use long-handed utensils and protective hot pads or insulated oven mitts.
36 Cleaning and user maintenance shall not be done by children.
57 Allow unit to cool before cleaning, disassembly, putting in or taking off parts and storage.
38 When not in use and before cleaning, turn the unit off and unplug from socket to disconnect.
39 DO NOT clean with metal scouring pads. Pieces can break off the pad and touch electrical parts, creating a risk of electric shock.
40 Please refer to the Cleaning & Maintenance section for regular maintenance of the appliance.
SAVE THESE INSTRUCTIONS
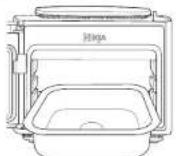
ACCESSORY ASSEMBLY & USING THE DOOR
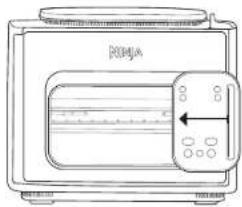
USING THE SMARTSWITCH
The SmartSwitch allows you to charge between the two cook modes, which are labeled on the switch for your reference.
- Combi Cooker - Air Fry/Cooker
The SmartSwitch's position will determine which cooking functions are available for selection.
natural_image
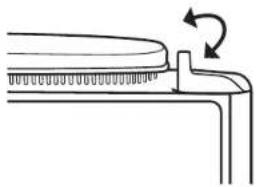
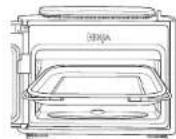
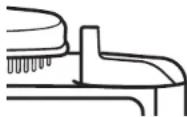
Pure technical line drawing of a mechanical component with no text or symbolsHOW TO OPEN & CLOSE THE DOOR
To open or close the door, pull from the right side of the handle. The door will click when it is fully opened. Likewise, it will click when it closes into place.
natural_image
Line drawing of a toaster oven with no text or symbolsYou can open or close the door when the SmartSwitch is in either the COMBI COOKER or AIR FRY/Cooker position.
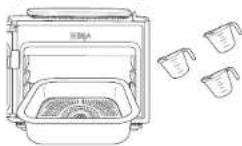
PARTS & ACCESSORIES
Accessories Included
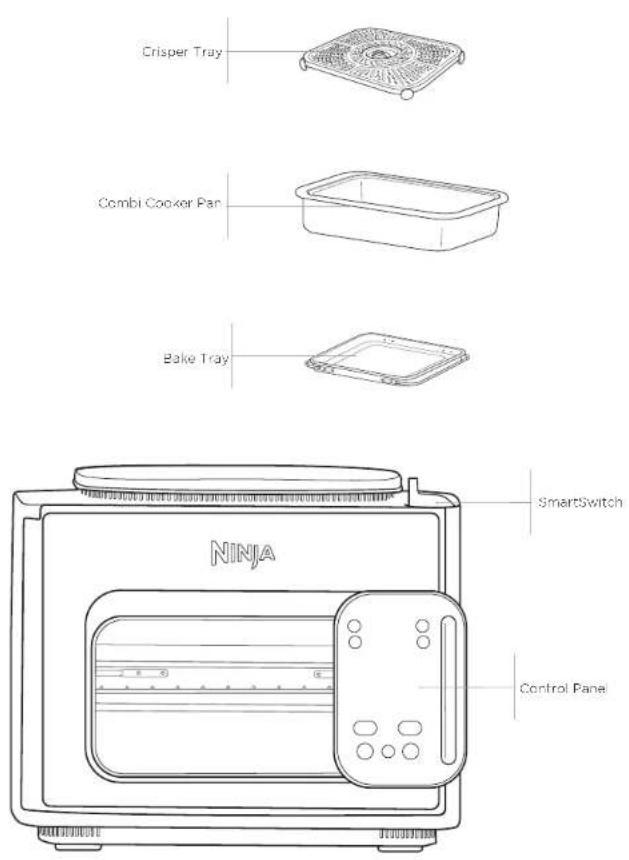
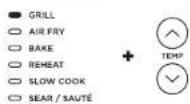
USING THE CONTROL PANEL
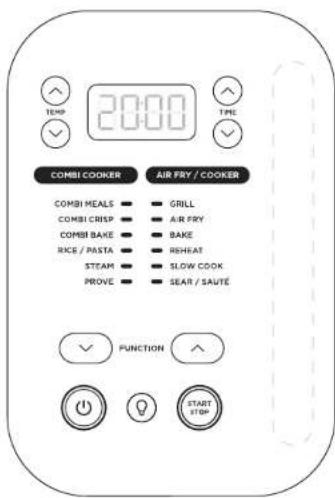
NOTE: Not all models include all functions.
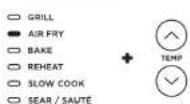
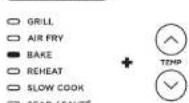
COOKING FUNCTIONS
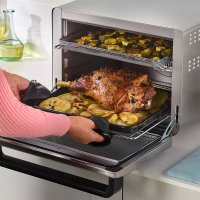
COMBI MEALS: Make easy 3-part meals e.g. chicken, rice and broccoli all at once.
COMBI CRISP: Ideal for roo, vegetables and proteins for juicy interior and crispy exterior.
COMBI BAKE: Bake fluffy cakes and breads quickly and with less fat.
STEAM: Genly cook delicate foods at a high temperature.
RICE/PASTA: Choose between cooking no drain rice or pasta.
GRILL: Use high heat from above to caramelize and brown the tops of your food.
AIR FRY: Give food crisis and crunch with little to no oil.
BAKE: Use the unit like an oven for traditional baked treats and more.
PROVE: Create an environment for dough to rest and use
SEAR/SAUTÉ: Use the unit as a cooker for browning meats, sautéing veggies, simmering sauces, and more.
SLOW COOK: Cock your food at a lower temperature for a longer period of time.
OPERATING BUTTONS
SMARTSWITCH: Move up and down to switch between COMBI COOKER and A R FRY/COOKER mode. Available functions for each mode will illuminate.
NOTE: The position of the SmartSwitch will determine which options are available for selection.
FUNCTION arrows: Once you've chosen a mode using the SmartSwitch, use the center arrows to scroll through the options until your desired function is highlighted.
TEMP (left-hand) arrows: Use the up/down arrows to the left of the display to adjust the cooking temperature.
TIME (right-hand) arrows: Use the up/down arrows to the right of the display to adjust the cooking time or the number of slices of bread when toasting.
START/STOP button: Press to start cooking. Pressing the button while the unit is cooking will stop the current cooking function.
(POWER) button: This button turns the unit on and off and stops all cooking functions.
(VIGHT) button: Use this button to turn the unit's interior light on and off. The light will automatically illuminate in the last 30 seconds of the cook cycle.
BEFORE FIRST USE
BEFORE FIRST USE
1 Remove and discard any packaging material, stickers, and tape from the unit.
2 Pay particular attention to operational instructions, warnings, and important safeguards to avoid any injury or property damage.
3 Wash the Comol Pan, oako tray, and crisper tray in warm, soapy water. Then rinse and dry thoroughly.
WARNING: When using this appliance, provide at least 15cm of space above and on all sides for adequate air circulation.
USING YOUR NINJA COMBI
USING THE COMBI COOKER FUNCTIONS
To turn on the unit, plug the power cord into a wall socket, then press the ⏻ button.
Combi Meals
1 Reference the Inspiration Guide for direction on how to assemble ingredients and accessories based on recipes/charts. Be sure to add water to the Combl Cooker Pan.
2 Add ingredients to the bake tray.
3 Slice the Combi Cooker Pan into level 1 (bottom position) and the bake tray into level 2 (top position).
4 Move the SmartSwitch up to COMBICOOKER then use the FUNCTION arrows to select COMBIMFALS. The default setting will display. Use up and down arrows to the left of the display to choose a temperature from 150°C to 240°C.
COMBI COOKER
COMBI MEALS COMBI CRISP COMBI BAKE RICE / PASTA STEAM PROVE

5 Use the arrows to the right of the display to adjust the cook time in 1 minute increments up to 60 minutes
NOTE: Temperatures over 200°C only extend to 30 minutes
6 Press START/STOP to begin cooking.
7 The display will show progress bars, indicating the unit is building steam. When the unit reaches the appropriate steam eye, the timer will begin counting down.

8 When cook time reaches zero, the unit will beep and display "End". If your food requires more time, use the up arrows to the right of the display to add additional time. The unit will skip preheating.
Combl Crisp
1 Reference the Inspiration Guide for direction on how to assemble ingredients and accessories based on recipes/charts. Be sure to add water to the Combi Cooker Pan.
2 Move SmartSwitch to COMBI COOKER. Use the FUNCTION arrows to select Combi Crisp. The default setting will display. Use the up and down arrows to the left of the display to choose a temperature from 150°C to 240°C.
3 Use the up and down arrows to the right of the display to adjust the cook time from 1 to 45 minutes, in 1 minute increments.
COMBI COOKER
COMBI MEALS COMBI CRISP COMBI BAKE RICE / PASTA STEAM PROVE

4 Press START/STOP to begin cooking.
5 The display will show progress bars, indicating the unit is building steam.

6 When the unit reaches the appropriate steam level, the timer will begin counting down.
7 When cook time reaches zero, the unit will be open and display "End". If your food requires more time, use the up arrow to the right of the display to add additional time. The unit will skip prehealing.
Combi Bake
1 Reference the Inspiration Guide for direction on how to assemble ingredients and accessories based on recipes/charts. Be sure to add water to the Combi Cooker Pan.
2 Move SmartSwitch to COMBI COOKER, then use the FUNCTION arrows to select COMBI BAKE. The default temperature setting will display. Use the up and down arrows to the left of the display to choose from 105°C to 210°C.
COMBI COOKER
COMBI MEALS COMBI CRISP COMBI BAKE RICE / PASTA STEAM PROVE

3 Use the up and down arrows to the right of the display to adjust the cock time from 1 minute to 1 hour and 15 minutes, in 1 minute increments in 1 minute increments up to 1 hour.
4 Press START/STOP to begin cooking.
5 The display will show progress oars indicating the unit is building steam. This will take about 20 minutes.
6 When preheating has completed, the timer will begin counting down.

7 When cook time reaches zero, the unit will beep and display "End". If your food requires more time, use the up arrow to the right of the display to add additional time. The unit will skip preheating, beep and display "End"
Steam
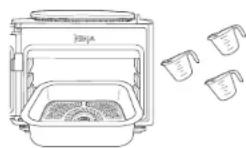
1 To get started, add water to the Combi Cooker Pan and add the crisper tray. Add ingredients on top of the crisper tray and insert into level 1
2 Move SmartSwitch to COMBI COOKER, then use the FUNCTION arrows to select STEAM.
COMBI COOKER
COMBI MEALS COMBI CRISP COMBI BAKE RICE / PASTA STEAM PROVE

3 Use the up and down arrows to the right of the display to adjust the cook time.
4 Press START/STOP to begin cooking.
NOTE: There is no temperature adjustment when using the STEAM function.
5 The unit will begin preheating to bring the liquid to a bell. The display will show progress bars indicating the unit is building steam. When preheating has completed, the timer will begin counting down.
6 When cook time reaches zero, the unit will beop and display "End".
NOTE: After cycle is complete, remove ALL food and accessories, then close the door and press the START/STOP button to begin the dry cycle. This will help to remove excess water.
USING YOUR NINJA COMBI - CONT.
Rice/Pasta
1 To get started, and liquid and rice or pasta into the Combi Cooker Pan. Insert Combi Cooker Pan into Level 1.
2 Move the SmartSwitch to COMBI COOKER, then use the center front arrows to select RICE/PASTA.
3 The function will default to rice. Push either the left or right UP arrows to select PASTA. Push either the left or right DOWN arrows to go back to RICE.
COMBI COOKER
COMBI MEALS □ COMBI CRISP □ COMBI BAKE □ RICE / PASTA ● STEAM □ PROVE □

4 Push the START/STOP button to begin cooking. The display will show circulating bars while cooking
5 When the rice or pasta is fully cooked, the unit will beep and start a count up timer. This will help to keep ingredients warm until ready for serving.
Prove
1 Be sure to place the Crisper tray in the Comoi Cooker Pan.
2 Move SmartSwitch to COMBI COOKER, then use the FUNCTION arrows to select PROVE. The default temperature setting will display. Use the up and down arrows to the left of the display to choose a temperature from 20°C to 35°C, in 5 degree increments.
COMBI COOKER
COMBI MEALS COMBI CRISP COMBI BAKE RICE / PASTA STEAM PROVE

3 Use the up and down arrows to the right of the display to adjust the proof time from 15 minutes to 4 hours, in 5 minute increments.
4 Press START/STOP to begin cooking.
5 When cook time reaches zero, the unit will beep and display "End."
USING THE AIR FRY/Cooker FUNCTIONS
To turn on the unit, plug the power cord into a wall socket, then press the button.
Grill
1 Add ingredients to the bake tray and install on Level 2.
2 Move SmartSwitch to AIR FRY/Cooker, then use the FUNCTION arrows to select GRILL. The default temperature setting will display. Use the up and down arrows to the left of the display to choose a temperature.
AIR FRY / COOKER
3 Use the up and down arrows to the right of the display to adjust the cook time up to 30 minutes in 1 minute increments.
4 Press START/STOP to begin cooking.
5 When cook time reaches zero, the unit will beep and display "End".
Air Fry
1 Place the Crisper Tray in the Combi Cooker Pan. Slide the Combi Cooker Fan into the designated rail.
2 Add ingredients on the crisper Tray and install in love 1.
3 Move SmartSwitch to AIR FRY/Cooker, the unit will default to AIR FRY. The default temperature setting will display. Use the up and down arrows to the left of the display to choose a temperature from 150°C to 240°C.
AIR FRY / COOKER
4 Use the up and down arrows to the right of the display to adjust the cook time in minute increments up to 1 hour.
5 Press START/STOP to begin cooking.
6 When cook time reaches zero, the unit will keep and display 'End'.
NOTE: For best results, it is recommended to periodically shake ingredients during air frying. You can open the door and loss ingredients with silicone tipped tongs for oven browning. When done, slide the Comb Cooker Pan back into the rails, and close the door.
NOTE: When using Air Fry, add 5 minutes to the suggested cook time for the unit to preheat before you add ingredients.
USING YOUR NINJA COMBI - CONT.
Bake
1 Reference the Inspiration Guide for direction on how to assemble ingredients and accessories based on recipes/charls.
2 Move Smart Switch to AIR FRY/Cocker, then use the FUNCTION arrows to select BAKE. The default temperature setting will display. Use the up and down arrows to the left of the display to choose a temperature from 120°C to 210°C.
AIR FRY / COOKER
3 Use the up and down arrows to the right of the display to adjust the cook time up to 4 hours in 1 minute increments.
4 Press START/STOP to begin cooking.
NOTE: The unit will preheat for 3 minutes before the timer starts.
5 When cook time reaches zero, the unit will beep and "End".
Reheat
1 Be sure to position the Cook & Crisp tray in the bottom of the pot.
2 Move SmartSwitch to AIR FRY/Cooker, then use the centre arrows to select REHEAT. Use the up and down arrows to the loft of the display to choose a temperature.
AIR FRY / COOKER
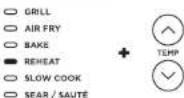
3 Use the up and down arrows to the right of the display to adjust the reheat time.
4 Press START/STOP to begin cooking.
5 When cook time reaches zero, the unit will beep and "End".
Sear/Sauté
1 Begin by adding ingredients to the Combi Cooker Pan and inserting into the Level 1 position.
2 Move SmartSwitch to AIR FRY/Cooker then use the FUNCTION arrows to select SEAR/SAUTE. Use the up and down arrows to the left of the display to select "Lo1," "2," "3," "4."
AIR FRY / COOKER
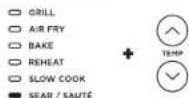
NOTE: There is no time adjustment available when using the Scar/Sauté function.
or "H5."
3 Press START/STOP to begin cooking. The timer will begin counting up.
4 Press START/STOP to turn off the SEAR/SAUTE function. To switch to a different cooking function, press START/STOP to end the cooking function then use the SmartSwitch and center front arrows to select your desired function.
NOTE: You can only use this function with the door open.
NOTE: ALWAYS use nonslick utensils in the Combl Cooker Pan. DO NOT use metal utensils, as they will scratch the nonslick coating on the pot.
NOTE: SEAR/SAUTE will automatically turn off after 1 hour for "4" and "Hi5" and 4 hours for "LO1," "2," and "3."
Slow Cook
1 Before getting started, ensure that you are only using the Combi Cooker Pan without the Crisper Tray.
2 Move SmartSwitch to AIR FRY/Cooker, then use the FUNCTION arrows select SLOW COOK. The default temperature setting will display. Use the up and down arrows to the left of the display to select "Hi," "Lo."
AIR FRY / COOKER

3 Use the up and down arrows to the right of the display to adjust the cook time.
4 Press START/STOP to begin cooking.
NOTE: The SLOW COO×LO time setting may be adjusted between 6 and 12 hours. The SLOW COO×HI time setting may be adjusted between 4 and 12 hours.
5 When cook time reaches zero, the unit will beep, automatically switch to Keep Warm mode, and begin counting up.
CLEANING & MAINTENANCE
EVERYDAY CLEANING INSTRUCTIONS:
The unit should be cleaned thoroughly after every use.
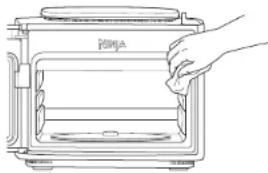
natural_image
Line drawing of a hand cleaning a microwave oven with a cloth (no text or symbols)1 Unplug the unit from the wall socket and ensure the unit is fully cool before washing.
2 To clean the internal unit and the control panel, wipe them clean with a damp cloth. DO NOT use abrasive scouring pads.
3 The Combl Cooker Pan, crisper tray, and bake tray can be washed in the dishwasher.
4 If the food residue is stuck on the pct, crisper tray, fill the pct with water and allow to soak before cleaning. DO NOT use scouring pads. If scrubbing is necessary, use a non-abrasive cleanser or liquid dish soap with a nylon pad or brush.
NOTE: NEVER put the cooker base in the dishwasher, or immerse it in water or any other liquid.
5 Air-dry all parts after each use.
DEEP CLEANING INSTRUCTIONS:
1 Fill Combi Cooker Pan with 3 cups of water.
2 Move Smart Switch to COMBI COOKER.
3 Select STEAM and set time to 10 minutes. Close door and press START/STOP.
4 When time reaches zero and the unit has cooled down, use a wet cloth or sponge to wipe down the interior of the unit.
CAUTION: When cleaning the interior of the unit, do not touch the fan.
5 Remove water from pot and be sure to rinse both the cooking pot and crisper tray to ensure all residue has been removed.
NOTE: The Combi Cooker Pan and bottom heater of the unit will be very hot. Clean the sides of the interior with caution.
TROUBLESHOOTING GUIDE
Progress bars are shown on the display screen when using COMBI COOKER functions.
- This indicates the unit is building steam. When the unit has finished, your set cook time will begin counting down.
There is a lot of steam coming from the unit when using the Steam function.
- It's normal for steam to release through the vent during cooking.
The unit is counting up rather than down.
- The cooking cycle is complete and the unit is in Keep Warm mode.
"ADD POT" error message appears on display screen.
- Complete Combi Cooker Pan is not inside the cooking base. The Combi Cooker Pan's required for all COMBI COOKER functions.
"ERR" message appears.
- The unit is not functioning properly. So we may better assist you, please register your product online at ninjakitchen.eu and have the product on hand when you call.
HELPFUL TIPS
1 When referencing our Meal Charts, for larger cuts of meat add 3 to 5 minutes to the cook time (but please note this may overcock grains). We recommend sticking to suggested height and weight of meats.
2 For consistent browning, make sure ingredients are arranged in an even layer on the bottom of the pot with no overlapping. If ingredients are overlapping, make sure to shake halfway through the set cook time.
REPLACEMENT PARTS
To order additional parts and accessories, visit ninjakitchen.eu. We ask that you register your product online at ninjakitchen.eu/registerguarantee and have the product on hand when you call, so we may better assist you.
TWO (2) YEAR LIMITED GUARANTEE
When a consumer buys a product in Europe, they get the benefit of legal rights relating to the quality of the product (your statutory rights). You can enforce these rights against your retailer. However, at Ninja ^1 we are so confident about the quality of our products that we give you an additional manufacturer's guarantee of two years. These terms and conditions relate to our manufacturer's guarantee only - your statutory rights are unaffected.
The conditions below describe the prerequisites and scope of our guarantee. They do not affect your statutory rights or the obligations of your retailer and your contract with them.
Ninja® Guarantees
Your Ninja unit constitutes a sizeable investment. Your new product needs to work properly for as long as possible. The guarantee it comes with is an important consideration - and reflects how much confidence the manufacturer has in its product and manufacturing quality.
Every Ninja product comes with a free parts and labour guarantee. You'll also find online support at ninjakitchen.eu
How do I register my Ninja guarantee?
You can register your guarantee online within 28 days of purchase. To save time, you'll need the following information about your product:
- Date you purchased the unit (receipt or delivery note).
To register online, please visit ninjakitchen.eu
IMPORTANT:
- The guarantee will only cover your product from the date of purchase.
- Please keep your receipt at all times. Should you need to use your guarantee we will need your receipt to verify the information you have supplied to us is correct. The inability to produce a valid receipt may invalidate your guarantee.
What are the benefits of registering my free Ninja guarantee?
When you register your guarantee we'll have your details to hand if we ever need to get in touch. You can also receive tips and advice on how to get the best out of your Ninja unit and hear the latest news about new Ninja® technology and launches. If you register your guarantee online, you'll get instant confirmation that we've received your details.
How long are new Ninja products guaranteed for?
Our confidence in our design and quality control means that your new Ninja products are guaranteed for a total of two years.
What is covered by the free Ninja guarantee?
Repair or replacement of your Ninja machine (at Ninja's discretion), including all parts and labour. A Ninja guarantee is in addition to your legal rights as a consumer.
What is not covered by the free Ninja guarantee?
1 Normal wear and tear of wearable parts (such as accessories). Replacement parts are available for purchase at ninjakitchen.eu
2 Damage caused by misuse, abuse, negligent handling, failure to perform required maintenance or damage due to mishandling in transit.
3 Damage caused by maintenance not authorised by Ninja.
Where can I buy genuine Ninja spares and accessories?
Ninja spares and accessories are developed by the same engineers who developed your Ninja product. You'll find a full range of Ninja spares and replacement parts/accessories for all Ninja machines at ninjakitchen.eu
Please remember that damage caused by the use of non-Ninja spares may not be covered under your guarantee.
NOTES
kitchen.eu/registerguarantee

- Combi Cooker - Air Fry/Cooke
natural_image
Pure mechanical diagram showing a lever mechanism with no text or symbolsnatural_image
Line drawing of a toaster oven with front panel and side buttons (no text or symbols)natural_image
Line drawing of a hand cleaning a portable toaster oven (no text or symbols)kitchen.eu/registerguarantee

natural_image
Pure mechanical diagram showing a curved component with rotational arrow, no text or symbols presentOUVERTURE ET FERMETURE DE LA PORTE
natural_image
Line drawing of a toaster oven with no text or symbolsnatural_image
Line drawing of a hand opening a rectangular oven with lid, showing interior and exterior shelves (no text or symbols)natural_image
Pure mechanical diagram showing a lever mechanism with no text or symbolsCOME APRIRE E CHIUDERE LO SPORTELLO
natural_image
Line drawing of a portable toaster with front panel and side buttons (no text or symbols)natural_image
Line drawing of a hand holding a tray with a food item inside a microwave oven (no text or symbols)natural_image
Pure mechanical diagram showing a lever mechanism with no text or symbolsHOE DE DEUR MOET WORDEN GEOPEND EN GESLOTEN
natural_image
Line drawing of a traditional Japanese microwave oven with a side panel and front panel (no text or symbols)U kunt de deur openen of s'ulter wanneer de SmartSwitch zich in de stand COMBI COOKER of AIR FRY/Cooker bevindt.
ONDERDELEN EN ACCESSOIRES
Accessoires inbegrepen
natural_image
Line drawing of a hand cleaning a kitchen appliance with a cloth (no text or symbols)BES∅K OSS PÅ NETT PÅ:
ninjakitchen.eu
natural_image
Pure mechanical diagram showing a lever mechanism with no text or symbolsHVORDAN ÅPNE OG LUKKE D∅REN
natural_image
Line drawing of a traditional Japanese microwave oven with a side panel and control buttons (no text or symbols)Rice/Pasta (Rls/Pasta)
Sear/Sauté (Bruning/sautéring)
natural_image
Line drawing of a hand cleaning a portable stove with a lid (no text or symbols)kitchen.eu/registerguarantee

natural_image
Pure technical line drawing of a mechanical component with no text or symbolsCOMO ABRIR E FECHAR A PORTA
natural_image
Line drawing of a microwave oven with a right-handled handle and control panel (no text or symbols)natural_image
Line drawing of a hand opening a rectangular oven with lid, showing interior and exterior shelves (no text or symbols)kitchen.eu/registerguarantee

natural_image
Pure mechanical diagram showing a lever mechanism with no text or symbolsLUUKUN AVAAMINEN JA SULKEMINEN
natural_image
Line drawing of a traditional KINJA toaster oven with control panel and side buttons (no text or symbols)natural_image
Line drawing of a hand opening a rectangular oven with lid, showing interior and exterior shelves (no text or symbols)kitchen.eu/registerguarantee

na QR-koden med en mobiltelefon
TEKNISKA SPECIFICATIONER
Spörning: 220-240 V - 50-60 Hz
Watt: 1780 W
natural_image
Pure mechanical diagram showing a lever mechanism with no text or symbolsHUR DU ÖPPNAR OCH STÄNGER LUCKAN
natural_image
Line drawing of a NIJA toaster oven with control panel and indicator lights (no text or symbols)natural_image
Line drawing of a hand cleaning a microwave oven with a cloth (no text or symbols)© 2024 SharkNinja Operating LLC. TRYKT I KINA.
DEUTSCH
© 2024 SharkNinja Operating LLC. GEDRUCKT IN CHINA.
ENGLISH
Illustrations may differ from actual product. We are constantly striving to improve our products, therefore the specifications contained herein are subject to change without notice.
NINJA is a registered trademark in the United Kingdom of SharkNinja Operating LLC. NINJA COMBI is a pending trademark application in the United Kingdom of Sharkninja Operating LLC.
© 2024 SharkNinja Operating LLC. PRINTED IN CHINA.
ESPAÑOL
© 2024 SharkNinja Operating LLC. IMPRESO EN CHINA
FRANÇAIS
© 2024 SharkNinja Operating LLC. IMPRIMÉ EN CHINE.
ITALIANO
© 2024 SharkNinja Operating LLC. STAMPATO IN CINA.
NEDERLANDS
© 2024 SharkNinja Operating LLC. GEDRUKT IN CHINA.
NORSK
© 2024 SharkNinja Operating LLC. TRYKKET | KINA.
PORTUGUESE
© 2024 SharkNinja Operating LLC. IMPRESSO NA CHINA.
SUOMI
© 2024 SharkNinja Operating LLC. PAINETTU KIINASSA.
SVENSKA
© 2024 SharkNinja Operating LLC. TRYCKT | KINA.
SharkNinja Europe Ltd, 1st/2nd Floor Building 3150, Thorpe Park,
Century Way, Leeds, England, LS15 8ZB
ninjakitchen.eu
SharkNinja Germany GmbH, Rotfeder-Ring 9,
60327 Frankfurt am Main, Germany
www.ninjakitchen.eu

- VED HJÆLP AF SMARTSWITCH'EN
- SÅDAN ÅBNER OG LUKKER DU LÅGEN
- REGISTER YOUR PURCHASE
- TECHNICAL SPECIFICATIONS
- NINJA
- IMPORTANT SAFETY INSTRUCTIONS
- ⚠ WARNING
- WARNING
- SAVE THESE INSTRUCTIONS
- ACCESSORY ASSEMBLY & USING THE DOOR
- USING THE SMARTSWITCH
- HOW TO OPEN & CLOSE THE DOOR
- PARTS & ACCESSORIES
- USING THE CONTROL PANEL
- COOKING FUNCTIONS
- OPERATING BUTTONS
- BEFORE FIRST USE
- USING YOUR NINJA COMBI
- USING THE COMBI COOKER FUNCTIONS
- Combi Meals
- Combl Crisp
- Combi Bake
- Steam
- USING YOUR NINJA COMBI - CONT.
- Rice/Pasta
- Prove
- USING THE AIR FRY/Cooker FUNCTIONS
- Grill
- Air Fry
- Bake
- Reheat
- Sear/Sauté
- Slow Cook
- CLEANING & MAINTENANCE
- EVERYDAY CLEANING INSTRUCTIONS:
- DEEP CLEANING INSTRUCTIONS:
- TROUBLESHOOTING GUIDE
- Progress bars are shown on the display screen when using COMBI COOKER functions.
- There is a lot of steam coming from the unit when using the Steam function.
- The unit is counting up rather than down.
- "ADD POT" error message appears on display screen.
- "ERR" message appears.
- HELPFUL TIPS
- REPLACEMENT PARTS
- TWO (2) YEAR LIMITED GUARANTEE
- Ninja® Guarantees
- How do I register my Ninja guarantee?
- IMPORTANT:
- What are the benefits of registering my free Ninja guarantee?
- How long are new Ninja products guaranteed for?
- What is covered by the free Ninja guarantee?
- What is not covered by the free Ninja guarantee?
- Where can I buy genuine Ninja spares and accessories?
- NOTES
- OUVERTURE ET FERMETURE DE LA PORTE
- COME APRIRE E CHIUDERE LO SPORTELLO
- HOE DE DEUR MOET WORDEN GEOPEND EN GESLOTEN
- ONDERDELEN EN ACCESSOIRES
- HVORDAN ÅPNE OG LUKKE D∅REN
- Rice/Pasta (Rls/Pasta)
- Sear/Sauté (Bruning/sautéring)
- COMO ABRIR E FECHAR A PORTA
- LUUKUN AVAAMINEN JA SULKEMINEN
- TEKNISKA SPECIFICATIONER
- HUR DU ÖPPNAR OCH STÄNGER LUCKAN
- DEUTSCH
- ENGLISH
- ESPAÑOL
- FRANÇAIS
- ITALIANO
- NEDERLANDS
- NORSK
- PORTUGUESE
- SUOMI
- SVENSKA
Brand : NINJA
Model : SFP700EU
Category : Oven