
Foodi SP101ANZ - Oven NINJA - Free user manual and instructions
Find the device manual for free Foodi SP101ANZ NINJA in PDF.


| Type de produit | Countertop Oven with Air Fry |
| Marque | Ninja |
| Modele | Foodi SP101ANZ |
| Capacite | 10 slices of toast or 4.5 kg chicken |
| Dimensions (L x P x H) | 41.9 x 37.6 x 24.1 cm |
| Poids | 8.6 kg |
| Alimentation | AC 220-240 V, 50/60 Hz, 1750 W |
| Fonctions principales | Air Fry, Roast, Bake, Broil, Toast, Dehydrate |
| Plage de temperature | 40°C - 220°C |
| Minuterie | Up to 12 hours |
| Affichage | Digital LED display |
| Materiau | Stainless steel and nonstick interior |
| Entretien et nettoyage | Removable crumb tray and nonstick baskets; hand wash recommended |
| Securite | Cool-touch handle, automatic shut-off |
| Pieces detachees et reparabilite | Spare parts available from Ninja; consult manual for accessories |
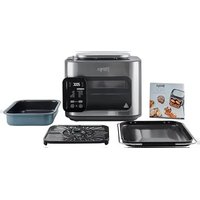
| Informations generales | Includes air fry basket, sheet pan, wire rack, and crumb tray |
Frequently Asked Questions - Foodi SP101ANZ NINJA
User questions about Foodi SP101ANZ NINJA
0 question about this device. Answer the ones you know or ask your own.
Ask a new question about this device
Download the instructions for your Oven in PDF format for free! Find your manual Foodi SP101ANZ - NINJA and take your electronic device back in hand. On this page are published all the documents necessary for the use of your device. Foodi SP101ANZ by NINJA.
USER MANUAL Foodi SP101ANZ NINJA
for purchasing the Ninja* Foodi* Flip Air Fry Oven
REGISTER YOUR PURCHASE

AUninjakitchen.com.au
NZ ninjakitchen.co.nz
RECORD THIS INFORMATION
Model Number: ____
Serial Number: ____
Date of Purchase: ____
(Keep receipt)
Store of Purchase: ____
THIS BOOK COVERS
MODEL NUMBER:
SP101ANZ
TECHNICAL SPECIFICATIONS
Voltage: 220-240V-, 50-60Hz
Power: 2400 Watts
CONTENTS
Important Safeguards....2
Parts 4
Accessory Placement 5
Before First Use 5
Using the Control Panel 6
Functions 7
Control Panel Display & Operating Buttons....7
Using Your Foodi® Flip Air Fry Oven 8
Using the Cooking Functions....8
Air Fry 8
Roast 9
Grill....9
Bake....10
Toast 10
Bagel 11
Dehydrate....1
Keep Warm 11
Cleaning, Maintenance & Storage....12
Everyday Cleaning 12
Deep Cleaning....12
Flip-Up-And-Away Storage 13
Power Cord Management....14
Accessories for Purchase.... 14
Troubleshooting 15
FAQ 15
Warranty 16
IMPORTANT SAFEGUARDS
HOUSEHOLD USE ONLY • READ ALL INSTRUCTIONS BEFORE USE
When using electrical appliances, basic safety precautions should always be followed, including the following:
⚠ WARNING
1 This appliance can be used by persons with reduced physical, sensory or mental capabilities or lack of experience and knowledge if they have been given supervision or instruction concerning use of the appliance in a safe way and understand the hazards involved.
2 To eliminate a choking hazard for young children, discard all packaging materials immediately upon unpacking.
3 Take inventory of all contents to ensure you have all parts needed to properly and safely operate your oven.
4DONOT use an extension cord. A short power-supply cord is used to reduce the risk of children grabbing the cord or becoming entangled and to reduce the risk of people tripping over a longer cord.
5NEVER use socket below worktop.
6 Keep the appliance and its cord out of reach of children. Do not allow the appliance to be used by children. Close supervision is necessary when used near children.
7DONOT let cord hang over edges of tables or counters or touch hot surfaces, including stoves and other heating ovens.
8NEVER leave the oven unattended while in use.
9DONOT cover crumb tray or any part of the oven with metal foil. This will cause the oven to overheat or cause a fire.
10NEVER place aluminum foil on top of the oven tray or wire rack. This traps grease and can cause a fire.
11 To protect against electrical shock DO NOT immerse cord, plugs or main unit housing in water or other liquid.
12 DO NOT use the oven with damage to the power cord or plug. Regularly inspect the oven and power cord. If the oven malfunctions or has been damaged in any way, immediately stop use and call Customer Service.
13 DO NOT cover the air intake vents or air socket vents while unit is operating. Doing so will prevent even cooking and may damage the unit or cause it to overheat.
14 DO NOT insert anything in the ventilation slots and do not obstruct them.
15 DO NOT place items on top of surface while unit is operating except for authorised recommended Ninja accessories.
16 Before placing any accessories into the oven ensure they are clean and dry.
17 Intended for worktop use only. DO NOT place the oven near the edge of a worktop. Ensure the surface is level, clean and dry.
18 This oven is for household use only. DO NOT use this oven for anything other than its intended use. Misuse may cause injury.
19 DO NOT store any materials, other than supplied accessories, in this oven when not in use.
20 DO NOT use outdoors. DO NOT use in moving vehicles or boats.
21 DO NOT use accessory and attachments not recommended or sold by SharkNinja.
22 When using this oven, provide adequate space above and on all sides for air circulation.
23 A fire may occur if the oven is covered or touching flammable material, including curtains, draperies, walls, or the like when in operation. DO NOT place anything on the oven during operation.
24 This oven has a tempered glass door and is more resistant to breakage. Avoid scratching door surface or nicking edges.
25 DO NOT use the oven without the wire rack installed, except when using Air Fry Basket.
26 DO NOT spray any type of aerosol spray or flavoring inside the oven while cooking.
27 Use caution when inserting and removing anything from the oven, especially when hot.
28 Socket voltages can vary, affecting the performance of your product. To prevent possible illness, use a thermometer to check that your food is cooked to the temperatures recommended.
29 Prevent food contact with heating elements. Excessive food loads may cause personal injury or property damage or affect the safe use of the oven.
30 DO NOT place any of the following materials in the oven: paper, cardboard, plastic, roasting bags and the like.
31 Extreme caution should be exercised when using containers constructed of any materials other than metal or glass.
32 DO NOT touch hot surfaces. Oven surfaces are hot during and after operation. To prevent burns or personal injury, ALWAYS use protective hot pads or insulated oven mitts and use available handles and knobs.
33 Soiled food can cause serious burns. Extreme caution must be used when the oven contains hot food. Improper use may result in personal injury.
34 Please refer to the Cleaning & Maintenance section for regular maintenance of the oven.
35 Cleaning and user maintenance shall not be made by children.
36 Press the power button to turn oven off and allow to cool completely before cleaning, moving and flipping for storage.
37 Unplug from socket when not in use. To unplug, grasp the plug by the body and pull from the socket. Never unplug by grasping and pulling the flexible cord.
38 DO NOT clean with metal scouring pads. Pieces can break off the pad and touch electrical parts, causing a risk of electrical shock.
39 DO NOT use the oven as a source of heat or for drying.

Indicates to read and review instructions to understand operation and use of product.

Indicates the presence of a hazard that can cause personal injury, death or substantial property damage if the warning included with this symbol is ignored.

Take care to avoid contact with hot surface. Always use hand protection to avoid burns.

For indoor and household use only.
SAVE THESE INSTRUCTIONS
PARTS
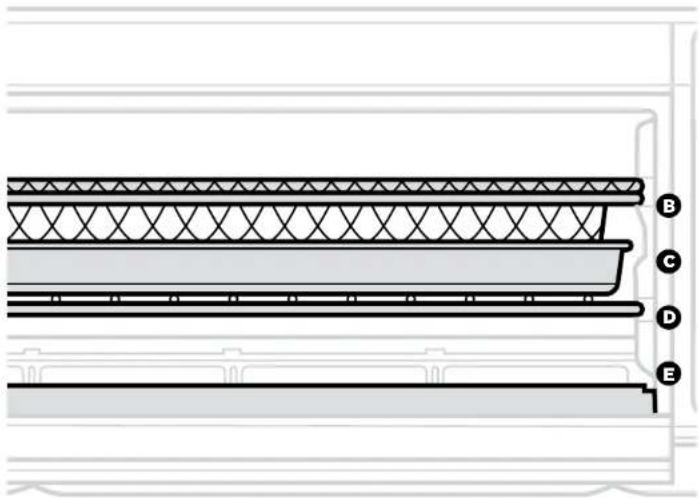
A Main Unit
(attached power cord not shown)
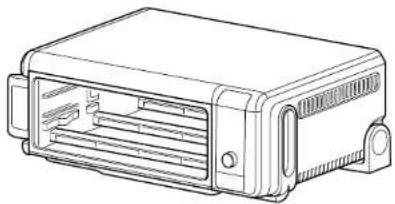
natural_image
Line drawing of a rectangular electronic device with ventilation slots and ports (no text or symbols)B Air Fry Basket
(use in the too rail position)
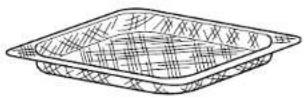
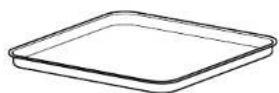
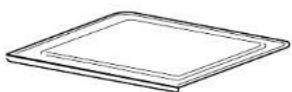
© Oven Tray
(always layer on top of the wire rack)
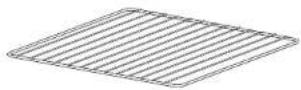
D Wire Rack
(keep in the bottom rail position)
E Removable Crumb Tray
(always place below the bottom heating element)
ACCESSORY PLACEMENT
BEFORE FIRST USE
1 Remove and discard any packaging material, promotional labels and tape from the unit.
2 Remove all accessories from the package and read this manual carefully. Please pay particular attention to operational instructions, warnings and important safeguards to avoid any injury or property damage.
3 Wash the air fry basket, oven tray, wire rack and removable crumb tray in warm, soapy water, then rinse and dry thoroughly. NEVER clean the main unit in the dishwasher.
4 We recommend placing all accessories inside the oven and running it on Air Fry at 200°C for 20 minutes without adding food. Make sure the area is well ventilated. This removes any packaging residue and odour traces that may be present. This is completely safe and not detrimental to the performance of the oven.
NOTE: For longevity, we recommend hand-washing the accessories.
USING THE CONTROL PANEL
FUNCTIONS
AIR FRY: Make foods that would traditionally be fried—such as chicken wings, French fries and chicken nuggets—with little to no added oil.
ROAST: Achieve a crispy outside and perfectly cooked inside for full-sized oven tray meals, chunkier proteins and roasted vegetables.
GRILL: Grills meat and fish and evenly browns the tops of casseroles.
BAKE: Evenly bakes everything from your favourite cookies to homemade pizzas.
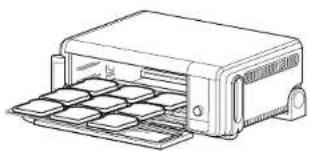
TOAST: Evenly toasts up to 6 slices of bread to your perfect level of darkness.
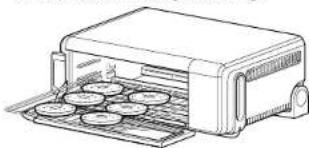
BAGEL: Perfectly toast up to 6 bagel halves when they're placed out-side up on the wire rack.
DEHYDRATE: Dehydrates meats, fruits and vegetables for healthy snacks.
KEEP WARM: Keeps food warm up to 2 hours.
CONTROL PANEL DISPLAY & OPERATING BUTTONS
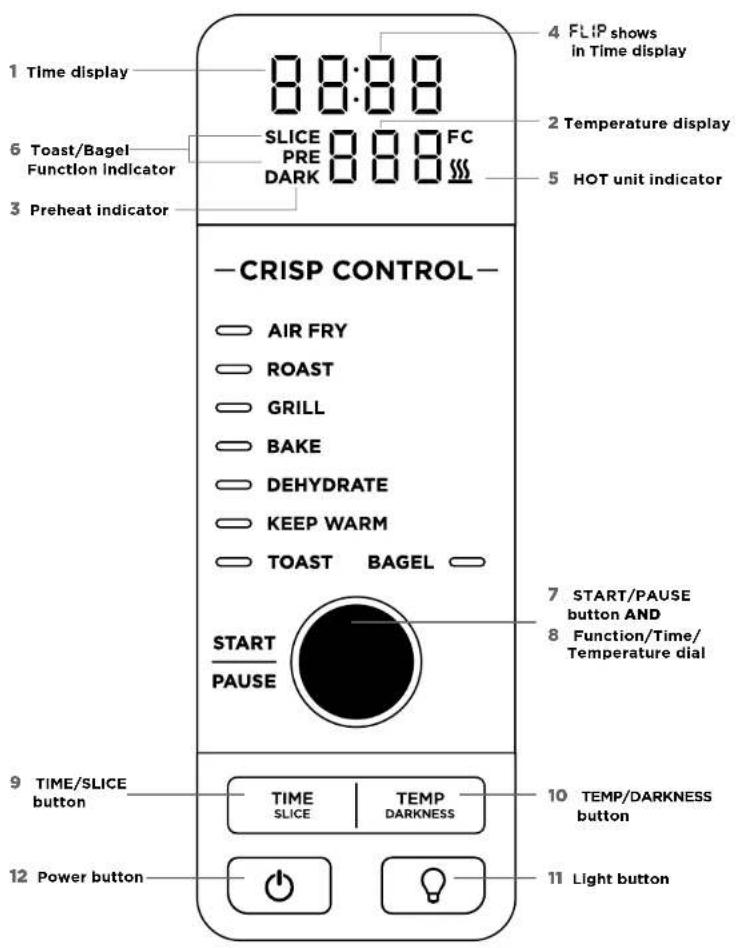
1 Time display: Shows the cook time. The time will count down when cooking is in progress.
2 Temperature display: Shows the cook temperature.
NOTE: Time and temperature will always return to the cook time and temperature that was set the last time the oven was in use.
3 PRE flashes when the unit is preheating.
4 FLIP appear on the time display when the unit is cool enough to flip up for storage or cleaning.
5 Illuminates when the unit is hot and will turn off when the oven is cool enough to be flipped up for storage or clearing.
6 SLICE and DARK will illuminate when using the Toast or Bagel function.
7 START/PAUSE button: Press to start or pause cooking.
8 Function/Time/Temperature dial: Turn to select a cocking function or adjust time and temperature (or number of slices and darkness level when using the Toast and Bagel functions).
NOTE: Press and hold the START/PAUSE button for 3 seconds to return to the function selection.
9 TIME/SLICE button: To select a cook time, press the TIME button, then use the dial to adjust the time. When using the Toast or Bagel function, this button will adjust the number of slices instead of the time.
10 TEMP/DARKNESS button: To adjust temperature, press the TEMP button and use the dial to adjust the temperature. When using the Toast or Bagel function, this button will adjust the darkness level instead of the temperature.
NOTE: The cook time and temperature may be adjusted at any time during the cooking cycle.
11 ⚙ (Light) button: Press to turn the oven's interior light on and off.
NOTE: The light will automatically turn on when there are 30 seconds of cook time remaining.
12 ⏻ (Power) button: Press to turn the unit on and off.
USING YOUR FOODI® FLIP AIR FRY OVEN
USING THE COOKING FUNCTIONS
To turn on the unit, plug the power cord into the wall, flip oven down into cooking position, and press the ⏻ button.
NOTE: The unit preheats quickly, so we recommend prepping all ingredients before turning on the over.
Air Fry
1 To select the function, turn the dial until AIR TRY illuminates. The default time and temperature settings will display.
2 Press the TIME/SLICE button and use the dial to select your time up to 1 hour. To set the time, press the TIME/SLICE button again.
3 Then press the TEMP/DARKNESS button and use the dial to select a temperature between 120°C-205°C. To set the temperature, press the TEMP/DARKNESS button again.
4 Press START/PAUSE to begin preheating.
5 Place ingredients in the air fry basket. If ingredients are fatty, oily or marinated, place the basket on the oven tray.
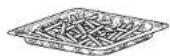
Use air fry basket for dry ingredients
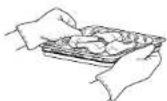
Use air fry basket with oven tray underneath for fatty, oily or marinated ingredients.
6 Slide the basket into the upper rails of the oven. If also using the oven tray, slide both into the oven at the same time, with the basket in the upper rails and the pan on the wire rack beneath the basket. Close oven door,
NOTE: The timer will start counting down as soon as the unit has preheated. If ingredients are not ready to go into the oven, simply turn the dial to add more time.
7 For more even browning and crispiness, toss ingredients or turn the basket 180° halfway through cooking cycle.
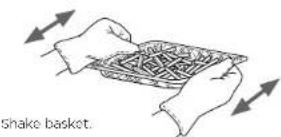
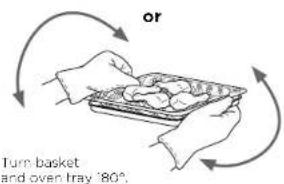
8 When cook time is complete, the unit will beep.
Roast
1 To select the function, turn the dial until ROAST illuminates. The default time and temperature settings will display.
2 Press the TIME/SLICE button and use the dial to select your time up to 2 hours. To set the time, press TIME/SLICE button again.
NOTE: If cooking for less than 1 hour the clock will count down by minutes and seconds. If cooking for more than 1 hour, the clock will count down by hours and minutes.
3 Press the TEMP/DARKNESS button and use the dial to select a temperature between 120°C-230°C. To set the temperature, press the TEMP/DARKNESS button again.
4 Press START/PAUSE to begin preheating.
NOTE: Food cooks faster when using the ROAST function than when using the BAKE function, so for traditional oven recipes, lower the cook time 30% and lower the temperature 10°C.
5 Place ingredients on the oven tray. When the unit beeps to signify it has preheated, immediately place the oven tray on the wire rack. Close oven door.
NOTE: The timer will start counting down as soon as the unit has preheated. If ingredients are not ready to go into the oven, simply turn the dial to add more time.
6 During cooking, you can open the oven door to check on or flip ingredients.
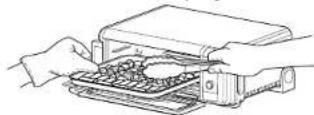
7 When cook time is complete, the unit will beep.
Grill
1 To select the function, turn the dial until GRILL illuminates. The default time and temperature settings will display.
2 Press the TIME/SLICE button and use the dial to select your time up to 30 minutes. To set the time, press the TIME/SLICE button again.
3 Press the TEMP/DARKNESS button and use the dial to select either HI or LO. To set the temperature, press the TEMP/DARKNESS button again.
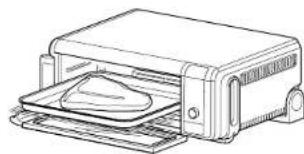
4 Place ingredients on the oven tray. Place the sheet pan on the wire rack and close the oven door, press START/PAUSE to start cooking.
natural_image
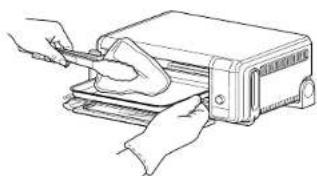
Line drawing of a printer with a cloth placed inside, no text or symbols present5 During cooking, you can open the oven door to check on or flip ingredients.
natural_image
Line drawing of hands using a tool to press or install a device into a tray (no text or symbols)6 When cook time is complete, the unit will beep
USING YOUR FOODI® FLIP AIR FRY OVEN - CONT.
Bake
1 To select the function, turn the dial until BAKE illuminates. The default time and temperature settings will display.
2 Press the TIME/SLICE button and use the dial to select your time up to 2 hours. To set the time, press the TIME/SLICE button again.
NOTE: If cooking for less than 1 hour, the clock will count down by minutes and seconds. If cooking for more than 1 hour, the clock will count down by hours and minutes.
3 Press the TEMP/DARKNESS button and use the dial to select a temperature between 120°C-230°C. To set the temperature, press the TEMP/DARKNESS button again.
4 Press START/PAUSE to begin or cheating.
5 Place ingredients on the oven tray. When the unit beeps to signify it has preheated, immediately place the oven tray on the wire rack. Close oven door.
NOTE: The timer will start counting down as soon as the unit has preheated. If ingredients are not ready to go into the oven, simply turn the dial to add more time.
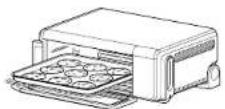
6 During cooking, you can open the oven door to check on or flip ingredients.
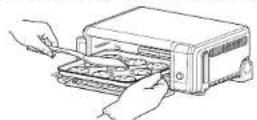
7 When cook time is complete, the unit will beep.
NOTE: For best results with baked goods such as cookies, line the oven tray with baking parchment paper.
Toast
1 To select the function, turn the dial until TOAST illuminates. The default amount of slices and darkness will be displayed.
2 Press the TIME/SLICE button and use the dial to select the number of bread slices. You may toast up to 9 slices at once. To set the number of slices, press the TIME/SLICE button again.
3 Press the TEMP/DARKNESS button and use the dial to select a darkness level. To set the darkness level, press the TEMP/DARKNESS button again.
NOTE: There is no temperature adjustment, available for the TOAST function, and the unit does not preheat in Toast mode. It is very important to select the exact number of slices to avoid over- or under-toasting.
4 Place bread slices on the wire rack. Close oven door and press START/PAUSE to begin cooking
natural_image
Line drawing of a portable electronic device with multiple compartments (no text or symbols)5 You do not need to flip the slices during cooking. When cook time is complete, the unit will beep.
Bagel
1 To select the function, turn the dial until BAGEL illuminates. The default number of slices and darkness level will display.
2 Press the TIME/SLICE button and use the dial to select the number of slices. You may toast up to 6 bagel slices at once. To set the number of slices, press the TIME/SLICE button again.
3 Press the TEMP/DARKNESS button and use the dial to select a darkness level. To set the darkness level, press the TEMP/DARKNESS button again.
NOTE: There is no temperature adjustment available for the BAGEL function, and the unit does not preheat in BAGEL mode. It is very important to select the exact number of slices to avoid over- or under-toasting.
4 Place bag slices, cut-side up, on the wire rack. Close oven door and press START/PAUSE to begin cooking.
natural_image
Line drawing of a toaster oven with multiple round blades (no text or symbols)5 You do not need to flip the slices during cooking. When cook time is complete, the unit will beep.
Dehydrate
1 To select the function, turn the dial until DEHYDRATE illuminates. The default time and temperature settings will display.
2 Press the TIME/SLICE button and use the dial to select a time up to 12 hours. To set the time, press the TIME/SLICE button again.
3 Press the TEMP/DARKNESS button and use the dial to select a temperature between 40°C-90°C. To set the temperature, press the TEMP/DARKNESS button again.
4 Place ingredients in the air fry basket and place basket in oven. Close oven door and press START/PAUSE to begin cooking.
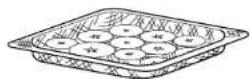
5 During cooking, you can open the oven door to check on or flip ingredients.
6 When cook time is complete, the unit will beep.
Keep Warm
NOTE: The KEEP WARM function is not included on all models.
1 To select the function, turn the dial until KEEP WARM illuminates. The default time setting will display.
2 Press the TIME/SLICE button and use the dial to select a time up to 2 hours. To set the time, press the TIME/SLICE button again.
NOTE: There is no temperature selection available for the KEEP WARM function.
3 Place food on the oven tray or in an oven-safe container and place the pan or container on the wire rack. Close oven door and press START/PAUSE to begin warming.
NOTE: The unit does not preheat in Keep Warm mode.
4 When warming time is complete, the unit will beep.
CLEANING, MAINTENANCE & STORAGE
EVERYDAY CLEANING
The unit should be cleaned thoroughly after every use.
1 Unplug the unit from the socket and allow it to cool down before cleaning
2 Empty crumb tray by sliding it out of the oven when the oven is in the flipped-down position.
NOTE: Empty crumb tray frequently. Hand-wash when necessary.
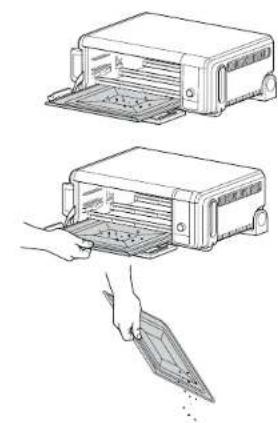
3 To clean any food splatter on the interior walls of the unit, wipe them with a soft, damp sponge.
4 To clean the exterior of the main unit and the control panel, wipe them clean with a damp cloth. A non-abrasive liquid cleanser or mild spray solution may be used. Apply the cleanser to the sponge, not the oven surface, before cleaning.
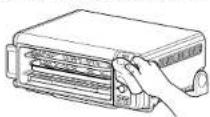
DEEP CLEANING
1 Unplug the unit from the socket and allow it to cool down before cleaning.
2 Remove all accessories from the unit, including the crumb tray and wash separately. Use a non-abrasive cleaning brush to more thoroughly wash the air fry basket.
3 Flip up the oven into the storage position.
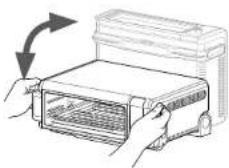
4 Press the push button to release the back door to access the oven's interior.
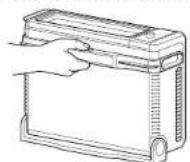
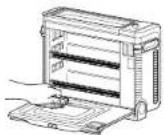
5 Use warm, soapy water and a soft cloth to wash the oven's interior. DO NOT use abrasive cleaners, scrubbing brushes or chemical cleaners, as they will damage the oven.
CAUTION: NEVER put the main unit in the dishwasher or immerse it in water or any other liquid.
CLEANING, MAINTENANCE & STORAGE - CONT.
6 To prolong use of accessories, hand-wash with warm, soapy water.
7 Thoroughly dry all parts before placing them back in the oven.
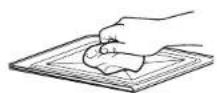
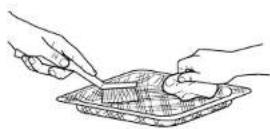
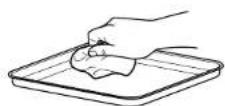
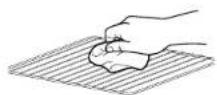
TIP: For stuck on food residue, leave accessories to soak in soapy water overnight.
FLIP-UP-AND-AWAY STORAGE
1 DO NOT flip oven up when illuminated. Wait for oven to cool down before handling. Hold handles on each side of the unit.
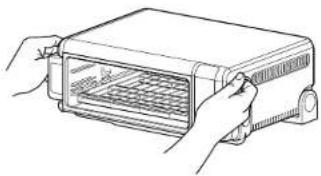
natural_image
Line drawing of hands operating a portable electronic device (no text or symbols visible)2 Lift and flip unit upward.
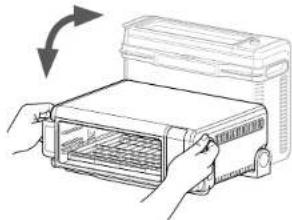
natural_image
Illustration of hands installing or adjusting a device into a tray (no text or symbols visible)3 Leave the unit in the upright position when storing or for deep cleaning.
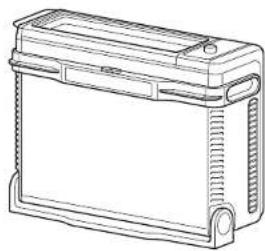
natural_image
Line drawing of a rectangular battery housing with side panels and mounting brackets (no text or symbols)POWER CORD MANAGEMENT
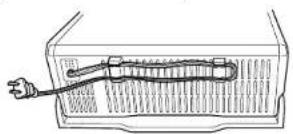
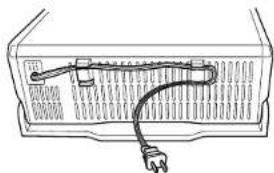
Our cord-management system is designed so it will not interfere with the oven's flip-away functionality.
Option 1 Socket on the left
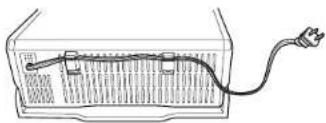
natural_image
Simple line drawing of a battery cell with an external power outlet (no text or symbols)Option 2 Socket on the right
Option 3 Socket behind the oven
natural_image
Line drawing of a rectangular electronic device with internal components and a curved cable (no text or symbols)ACCESSORIES FOR PURCHASE
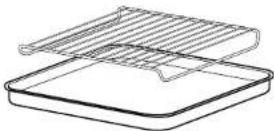
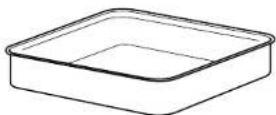
We offer a range of accessories custom made for your Ninja® Fooci® Flip Oven. Visit ninjakitchen.au or ninjakitchen.nz to expand your capabilities and take your cooking to the next level.
- Grilling Rack
• Casserole Dish/Baking Pan (5cm deep)
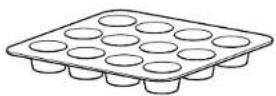
- Egg Bite/Muffin Tray
TROUBLESHOOTING
ERROR MESSAGES
"CALL CUSt SrVC" followed by "Er1" - "Er7"
Power off the unit and call Customer Service at AU 02 8801 7666 or NZ 0800 112 660. So we may better assist you, please register your product online at nininjakitchen.au or ninjakitchen.nz and have the product on hand when you call.
FAQ
Why won't the oven turn on?
- Oven needs to be in flipped-down position in order to power it on.
- Make sure the power cord is securely plugged into the socket.
- Insert the power cord into a different socket.
- Reset the circuit breaker if necessary.
- Press the power button.
Can I use the oven tray instead of the air fry basket with air fry function?
• Yes, but crispiness results may vary.
Do I need to adjust the cook times and temperatures of traditional oven recipes?
- When preparing traditional oven recipes using the Roast function, lower cook time by 30% and temperature by 10°C.
Can I restore the unit to its default settings?
- The oven will remember the last setting used for each function, even if you unplug it. To restore the oven's default settings for each function, press the TIME/SLICE and TEMP/DARKNESS buttons simultaneously for 5 seconds.
Why do the heating elements appear to be turning on and off?
- This is normal. The oven is designed to control temperature precisely for every function by adjusting the heating elements' power levels.
Why is steam coming out from the oven door?
- This is normal. The door is vented to release steam created by foods with a high moisture content.
Why is water dripping onto the counter from under the door?
- This is normal. The condensation created by foods with a high moisture content (such as frozen breads) may run down the inside of the door and drip onto the counter
Why is there noise coming from the control panel?
- When the oven is hot, a fan turns on to cool down the control panel.
Can foil or baking paper be used?
- Aluminium foil should not be used. However, baking paper or greaseproof paper is recommended for when baking or for generally keeping the tray clean.
Are the accessories dishwasher safe?
- For longevity we recommend hand washing accessories. For stuck-on residue, leave to soak before cleaning.
Shark|NINJA
ONE (1) YEAR LIMITED
REPLACEMENT WARRANTY
For guarantee claims, you will need to submit a proof of purchase in the form of a valid receipt that displays date and place of purchase. This warranty does not replace but is in addition to your statutory rights.
If your product becomes defective due to faulty material or workmanship within a period of 1 year from the date of purchase, we warrant to do the following:
- For New Zealand Consumers: We will replace the defective/faulty part with a new product, free of charge, or if the unit is deemed defective/faulty we replace the unit with an equivalent or upgraded model, at our discretion.
- For Australian Consumers: Our goods come with guarantees that cannot be excluded under the Australian Consumer Law. You are entitled to a replacement or refund for a major failure and for compensation for any other reasonably foreseeable loss or damage.
Replacement items will be covered by the limited warranty for the balance of the warranty period from the date of the original purchase. Please note:
Your warranty is subject to the following conditions
- DO NOT operate the appliance with a damaged plug or cord, or if the unit has been dropped, damaged or dropped in water.
- To avoid the risk of electric shock, do not disassemble or attempt to repair the appliance on your own. If the supply cord is damaged, it must be replaced by a qualified electrician to avoid a hazard. Incorrect re-assembly or repair can cause a risk of electric shock or injury to persons when the appliance is used.
• The item has not been misused, abused, neglected, altered, modified or repaired by anyone.
• The item has been subjected to fair wear and tear.
• The item has not been used for trade, professional or hire purposes.
• The item has not sustained damage through foreign objects, substances or accident.
What is not covered?
• Accessories supplied with the item.
- Components that are subject to natural wear and tear caused by normal use in accordance with operating instructions.
- Unauthorised/improper maintenance/handling or overload is excluded from this warranty.
Customer costs within warranty
The customer is responsible for any inwards freight charge to return a product for warranty if requested, and outward freight charge for warranty parts and or replacement unit.
NOTES
Mann&Noble
Proudly distributed by
Mann&Noble Pty Ltd
Building D, 33 Quarry Road
Erskine Park NSW, 2759
Sydney, Australia
AU: 02 8801 7666
NZ: 0800 112 660
ninjakitchen.com.au
ninjakitchen.co.nz
Illustrations may differ from actual product. We are constantly striving to improve our products,
therefore the specifications contained herein are subject to change without notice.
FOODI and NINJA are registered trademarks of SharkNinja Operating LLC.
© 2021 SharkNinja Operating LLC
PRINTED IN CHINA
- REGISTER YOUR PURCHASE
- RECORD THIS INFORMATION
- THIS BOOK COVERS
- MODEL NUMBER:
- TECHNICAL SPECIFICATIONS
- CONTENTS
- IMPORTANT SAFEGUARDS
- HOUSEHOLD USE ONLY • READ ALL INSTRUCTIONS BEFORE USE
- ⚠ WARNING
- SAVE THESE INSTRUCTIONS
- PARTS
- A Main Unit
- B Air Fry Basket
- © Oven Tray
- D Wire Rack
- E Removable Crumb Tray
- ACCESSORY PLACEMENT
- BEFORE FIRST USE
- FUNCTIONS
- CONTROL PANEL DISPLAY & OPERATING BUTTONS
- USING YOUR FOODI® FLIP AIR FRY OVEN
- USING THE COOKING FUNCTIONS
- Air Fry
- Roast
- Grill
- USING YOUR FOODI® FLIP AIR FRY OVEN - CONT.
- Bake
- Toast
- Bagel
- Dehydrate
- Keep Warm
- CLEANING, MAINTENANCE & STORAGE
- EVERYDAY CLEANING
- DEEP CLEANING
- CLEANING, MAINTENANCE & STORAGE - CONT.
- FLIP-UP-AND-AWAY STORAGE
- POWER CORD MANAGEMENT
- ACCESSORIES FOR PURCHASE
- TROUBLESHOOTING
- ERROR MESSAGES
- "CALL CUSt SrVC" followed by "Er1" - "Er7"
- FAQ
- Why won't the oven turn on?
- Do I need to adjust the cook times and temperatures of traditional oven recipes?
- Can I restore the unit to its default settings?
- Why do the heating elements appear to be turning on and off?
- Why is steam coming out from the oven door?
- Why is water dripping onto the counter from under the door?
- Why is there noise coming from the control panel?
- Can foil or baking paper be used?
- Are the accessories dishwasher safe?
- Shark|NINJA
- ONE (1) YEAR LIMITED
- REPLACEMENT WARRANTY
- If your product becomes defective due to faulty material or workmanship within a period of 1 year from the date of purchase, we warrant to do the following:
- Your warranty is subject to the following conditions
- What is not covered?
- Customer costs within warranty
- NOTES
- Mann&Noble
- Proudly distributed by
Brand : NINJA
Model : Foodi SP101ANZ
Category : Oven